
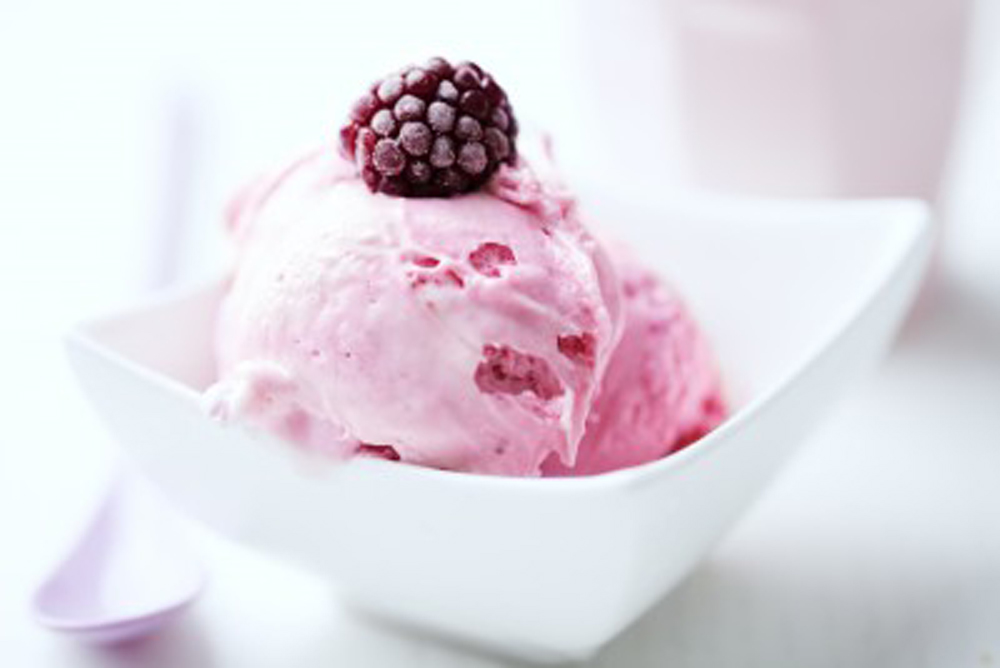
Raspberry Cream
Plan Z Phase: This is a Z3 (ZReboot) recipe.
Servings: Serves 4
Ingredients:
- 8 oz of cream cheese
- ½ pint of raspberries + extra for garnish
- ½ cup coconut milk or whipping cream
- 1 tsp of organic vanilla
- 2 tsp of Truvia
Instructions:
Put all ingredients in a bowl and whip until the cream cheese is smooth. There will still be some lumps from the bits of raspberry. The dessert will be a pretty pink. Divide into 4 portions. I put them in ramekins. Put back in the refrigerator for at least 2 hours so the cream chills and thickens. This is not a big dessert but it is very satisfying.
Serving Suggestions:
Garnish with other raspberries and enjoy!
Enjoy!
Cheers,

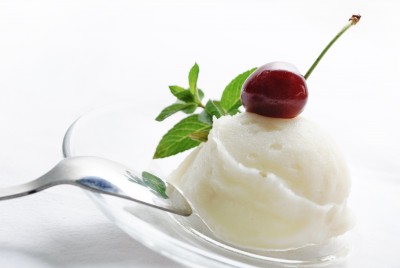
Vanilla Ice Cream
Plan Z Phase: This is a Z3 (ZReboot) recipe.
Ingredients:
- 1 cup of whole milk
- 4 tsp of Truvia
- Pinch of sea salt grated
- 2 cups of heavy cream
- 1 Tbl of organic vanilla
Instructions:
In a medium bowl put in the ingredients. Stir with a whisk for a few minutes until the Truvia gets well blended and dissolves. (If you want to speed this up you can also do this with a mixer).
Pour the mixture into your ice cream maker and follow the manufacturer’s instructions for the freezing process.
If you have the same Cuisinart ice cream maker that I do, you can ignore those instructions about putting the mixture in the refrigerator to chill. It works the same if you freeze it right away. With this ice cream maker in 15 – 20 minutes you have ice cream ready to eat.
Enjoy!
Cheers,
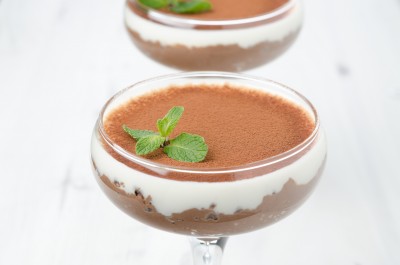
Tiramisu Cream
Plan Z Phase: This is a Z3 (ZReboot) recipe.
Servings: Serves 2, can be doubled easily
Ingredients:
- 3 skinny breadsticks ground to thin crumbs
- ¼ cup of brewed coffee (cold, leftover coffee) or to be really official use cold espresso
- 1 tsp of Truvia (divided)
- 3 ounces of crème fraiche
- 2 Tbl of unsweetened cocoa
Instructions:
In a small bowl add the crumbs, coffee and half of the Truvia. Mix in to a mush.
In another bowl mix the crème fraiche (or you can use whipped cream cheese or whipped mascarpone), cocoa and the last half of the Truvia.
In pretty dessert dishes, you can either layer the chocolate mixture and the crumb/coffee mixture, or just put the chocolate mixture on the bottom and the crumb mixture on the top.
The crumbs substitute pretty well for the usual wafers soaked in coffee. Close your eyes and you get pretty much the same sensation. This is more like a traditional tiramisu in case you are accustomed to one of the Americanized versions that are made with things like angel food cake.
This is MUCH faster to make than soaking the Italian cookies over night. This gives you instant satisfaction.
Also: I am allergic to caffeine but I can eat this and not get a buzz. It’s such a small amount of coffee.
Enjoy!
Cheers,
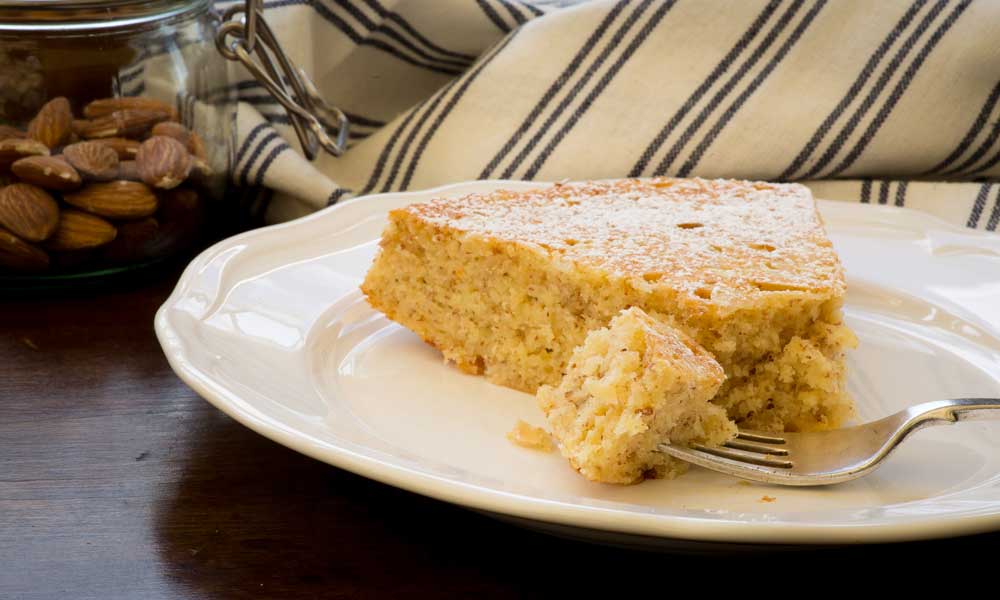
Almond Flour Pound Cake
Plan Z Phase: This is a Z3 (ZReboot) recipe submitted by Plan Z dieter Amy.
Amy says, "I found this recipe on a message board on the internet – didn’t have a regular name attached to it – just a screen name. I made two changes to it but nothing major. It was delicious and smells so good baking!"
Servings: 12 servings
Ingredients:
- ½ cup butter, softened
- ½ cup cream cheese
- 18 tsp Truvia or Purevia
- 5 eggs, room temperature
- 2 cups super fine ground almond flour
- 1 tsp baking powder
- 2 tsp vanilla extract
Instructions:
Preheat oven to 350 degrees.
Cream butter, cream cheese, and Truvia well. Add eggs, one at a time, beating well after each one. Mix almond flour and baking powder. Add almond mixture to egg mixture a little at a time beating well after each addition. Add vanilla extract and beat. Pour into a greased spring form pan, ring pan or a 9” round pan. Bake at 350 degrees for 50-55 minutes.
Serving Suggestions:
I had mine plain with just a little butter spread on it but you could easily make a sugar-free cream cheese frosting or serve with whipped cream. You could also change the flavor by using extracts other than vanilla like lemon or orange or maple. It’s amazing how cake-like the texture is – you’ll feel like you are cheating!

Enjoy!
Cheers,
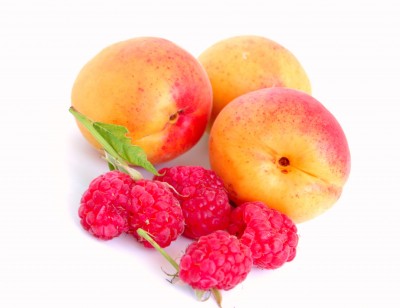
Vanilla Scented Apricots and Raspberries
Plan Z Phase: This is a Z3 (ZReboot) recipe.
Serves: 2 servings
Ingredients:
- 6 fresh apricots, pits removed, cut into chunks (no need to peel). Or in winter you can use canned apricots. Rinse the sugary juice off and then cut into chunks.
- ¼ cup of Triple Sec or Grand Marnier
- 2 tsp of butter
- 1 tsp vanilla extract
- 1 cup of fresh raspberries
Instructions:
Cook the butter, apricots and Triple Sec in a small sauce pan on medium heat until the apricots are soft. Remove from heat. Add the vanilla extract and mix slowly.
Let the mixture cool.
Add the raspberries. Mix gently.
You can serve this dish plain or you can serve it with the Almond Dessert Sauce (here is the recipe for the sauce)
Enjoy!
Cheers,
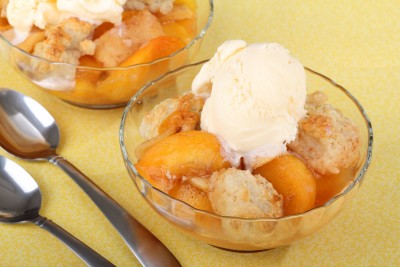
Southern Peaches and Cream
Plan Z Phase: This is a Z3 (ZReboot) recipe.
Servings: Serves 2 (can be doubled)
Ingredients:
For the Peaches:
- 1 large ripe peach cut into large dice (no need to peel it)
- 2 tsp of ghee or butter
- 1 tsp of Truvia or to taste
- 1 Tbl of pecan bits
For the Topping:
- ½ cup of crème fraiche (you’ll find it in the cheese section of the store)
- ½ tsp of Truvia
- Sprinkle of nutmeg
Instructions:
In a small sauce pan, add the butter, the peach bits and the Truvia. Cook on medium until peach is soft and hot. Add the pecan bits.
While the peaches are cooking, mix the crème fraiche and Truvia together.
To serve, put the warm peaches in a small bowl and pour the cream over the top. Then dust lightly with the nutmeg.
Serving Suggestions:
To get really fancy serve with a bit of bourbon or port on the side. You’ll feel like you stepped out in New Orleans.
Enjoy!
Cheers,
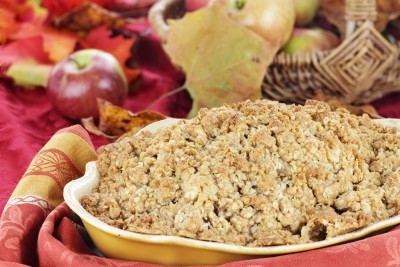
Apple Crisp
Plan Z Phase: This is a Z3 (ZReboot) recipe. Anytime October rolls around I miss my mother. There’s something about smelling apples baking with cinnamon and nutmeg that conjures up fond memories of my mother in the kitchen. She taught me as a small girl to make apple crisp so I did it often. This year I converted my mother’s apple crisp recipe to one that has no sugar and few carbs. Truvia won’t caramelize like sugar will but this recipe sure hit the spot. I hope you enjoy it, too. We can have our dessert and eat it too.
Servings: Serves 4-6
Ingredients:
- 3 large apples peeled and cut into thin wedges (I used Honeycrisp. Granny Smith works great too)
- ½ cup of Super Fine Ground almond flour (Bob's Redmill is the most popular brand)
- 1/3 cup of quick cooking oats (I use John McCann steel cut oats)
- Pinch of salt
- 6 Tbl of butter cut into bites
- Pumpkin pie spice (to taste)
- Truvia (stevia) to taste
Instructions:
Grease the bottom of a 9" x 9" ovenproof pan. Spread in your apple wedges. I like to sprinkle them with pumpkin pie spice because it has nutmeg and cinnamon in it. I also sprinkle on one tsp of Truvia. This is enough for me as far as adding sugar.
In a bowl add the almond flour, oats, salt and butter. With a fork mix the dry goods and break up the butter to distribute. I then add another teaspoon of pumpkin pie spice (the amounts are to your taste. If you need it sweeter you can add a bit more Truvia).
Pour the mixture over your apples. Spread it around so it covers as much of the apples as possible.
Bake at 375 degrees for 45 minutes or until lightly browned on top.
Serving Suggestions:
Serve warm or at room temp. Because of the butter make sure to store leftovers in the refrigerator. I love it cold too.
Enjoy!
Cheers,
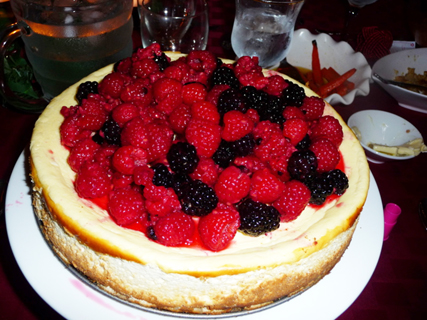
Low Carb Cheesecake with Macadamia Crust & Fresh Berries
Plan Z Phase: This is a Z3 (ZReboot) recipe. This year for my New Year’s Resolutions I think I’m up for setting up some more FIRSTS. Maybe my first trip to Brussels. That would be fun. Or a first dip in a lake I’ve never swam in. Or a first time to try a certain beer. Or a first time to shop in a particular store. I don’t know. I just sounds like “firsts” could be a fun way to set some goals that help me break out of my normal routine. But first….
For your FIRST recipe of the year I’m offering up a cheesecake that you can eat while on Plan Z during the ZReboot phase. It’s yummy and feeds 12 if you are having a party. Everyone at our party cleaned their plates.
Servings: Serves 12
Ingredients:
- 1 cup of macadamia nuts crushed (you can use other nuts too, like walnuts or pecans)
- 3 (8oz) packages of full fat cream cheese (room temperature)
- 3 whole eggs
- 17 packets of stevia (natural sweetener that subs for sugar)
- 1 Tbl of vanilla extract
- 1 tsp of almond extract
For the topping:
- 3 half pints of raspberries
- 1 half pint of blackberries
- 1 packets of stevia
Instructions:
Preheat oven to 350 degrees.
When you crush your macadamia nuts be careful not to turn them into “nut butter.” You can use a food processor but do it with gentle pulses. You can even have a few bigger bits for texture if you want.
Spread the crushed nuts in the bottom of a 10” springform pan. No oiling necessary.
In a mixer add the cream cheese and the eggs. Blend until good and mixed. Add the stevia and the two extracts. Whip this on med- high until the whole mixture is very smooth. Pour it over the nuts.
Bake at 350 for 35 – 45 minutes. You’ll look for the edges to get a nice golden color. The cheesecake can still have a bit of a jiggle to it but it should not be sloppy. Turn off the oven. Leave the door cracked a bit and let the cheesecake cool for 15 – 20 minutes before removing completely.
The trick with cheesecakes is cracking. Don’t worry if this one cracks on top because you are going to cover the cracks with a mound of berries so no one will know. Some theories say cool the cheesecake completely in the oven to prevent cracks. Doesn’t always work. Some say after the open oven door cooling method, take it out and let it finish cooling to room temp before putting it in the refrigerator. Sometimes this works. Sometimes, not so much.
I try to do both but then sometimes it cracks in the refrigerator cuz it got too cold too fast. So I always have a plan for covering cracks. This time it’s the berries.
Store the cheesecake in the refrigerator until ready to serve.
About 30 minutes before serving, take it out of the refrigerator to take the big cold out of it. You’ll taste your cheesecake MORE if it’s not so cold. Run a knife around the edge of the cheesecake and unmold and place on a large platter or cake stand. At the same time put your berries in a big bowl. Sprinkle the two packets of stevia on top and gently stir to mix the berries and stevia. This will mascerate them so they will give up juice and become shiny. Let the berries sit at room temperature to do their magic while the cheesecake is warming up a bit on the counter.
When ready to show off your cheesecake, mound the berry mixture on top. The berries look best piled high in the center. The berries can sit like that for awhile before serving. If you leave it too long they will get all juicy and sink more into the cheesecake or juice will run down the side, but that’s not all bad either!
Enjoy!
Cheers,
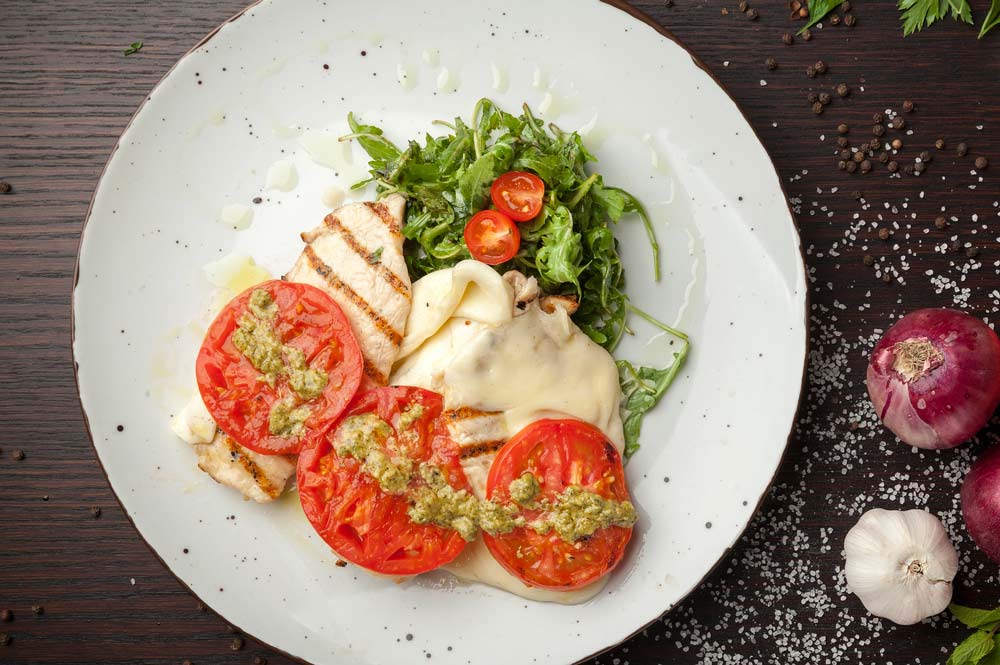
Grilled Chicken Parmesan
Plan Z Phase: This is a Z3 (ZReboot) recipe. Today’s recipe is a really easy version of a summer, grilled chicken parmesan; only I changed it. Everyone talks about de-constructing recipes these days. Chicken parmesan is traditionally fried, then baked, smothered in tomato sauce and then coated in a thick layer or two of cheese. Nothing wrong with that. It’s just in the summer, and for the sake of health, I thought I’d do a leaner version that tastes light in the summer. Chefs talks about de-constructing. In this case it’s taken apart, lightened up and put back together.
Enjoy! It’s an easy grill item that’s fit for a party. Or even a party of two.
Servings: Serves 2. Can be doubled or even tripled and even expanded for a big party.
Ingredients:
- 2 chicken breast pieces, boneless and skinless (option: you can also do this dish with veal)
- olive oil spray
- Italian spice blend to taste
- salt and pepper to taste
- ½ cup of grated Romano cheese
- 4 slices of a big, ripe tomato
- 2 deli slices of mozzarella cheese
Instructions:
Preheat your grill to medium high.
Put your chicken breast piece (one at a time) in a large zip-lock bag. Don’t close the bag. Use a meat mallet and pound the chicken breast until it’s flat. Should end up about 1/3 – 1/2" thick when you’re done. Pounding it thin just makes it cook faster. Set this piece aside and keep doing this activity until you have pounded all of the chicken.
Spray each piece on both sides with olive oil. On the smooth side (top) sprinkle on Italian spice blend and grate a little salt and pepper. Now you are ready to grill.
Place the chicken, top down on your grill. Grill for 3 – 4 minutes; until you get some nice grill marks on that side of your chicken and then gently turn it over. Grill 2 minutes more or until you can slice a bit of chicken at the thickest point and you don’t see pink anymore. This is a guess on the time because everyone’s grill cooks differently and before you proceed to the next point you want to make sure your chicken is completely free of pink.
While the chicken is still on the grill, sprinkle on the Romano cheese, place the slices of tomato (just enough to cover the chicken) and then put on a slice of mozzarella. Grill just a minute more until the mozzarella is warm and begins to wilt.
Chicken is ready and you’re ready to serve!
Enjoy,
Cheers!
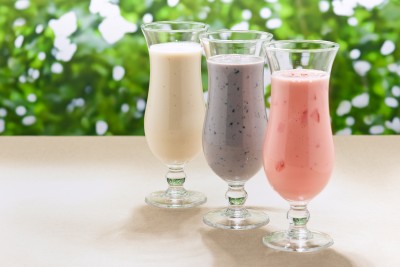
Smoothies
Plan Z Phase: This is a Z3 (ZReboot) recipe submitted by Plan Z Dieter, Steve.
It’s a great way to get your flaxseed oil on ZReboot.
"I really like it because it gives the smoothie a more earthy taste...which really works for me as I like earthy red wines and peaty, smoky Scotch!" - Steve
Servings: Serves 2
Ingredients:
- 2 cups whole milk yogurt
- 1 cup berries of your choice
- 3 Tbl flaxseed oil
- 1 packet stevia
Instructions:
Blend in your electric blender.
Serving Suggestions:
Enjoy!
Cheers,
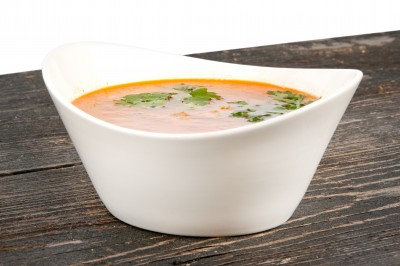
Pepper Soup
Plan Z Phase: This is a Z2 (ZReduction) and Zola To Go! recipe that was contributed by Plan Z dieter, Pam.
Servings: Serving size 1-1/2 cups
Ingredients:
- 28 oz can of crushed tomatoes
- 15 oz can of diced tomatoes
- 1 large onion, chopped
- 2 large bell peppers (red, yellow or orange)
- 1 tsp of Italian seasoning
- 4 shakes of cumin (or to taste)
- 1 tsp of Truvia
- 2 shakes of crushed red pepper (or to taste)
- fresh parsley
Instructions:
Put a quarter inch of water in your pan. Grate some sea salt into the water. Add the peppers and onion and sauté till loosened. Add both cans of tomatoes. Add the spices. Bring to a simmer, stirring frequently. Add 1 cup of water (or more if it seems too thick).
Let flavors blend on low for 15 minutes. Then you can eat chunky or whiz it in your blender. If you blend it be sure to hold the top down tight. Hot food and a blender don’t always get along. You can use a hand blender and blend in the pan too.
Pam’s comment: You’ll never eat Campbell’s Tomato Soup again! This is so EASY!
Serving Suggestions:
Garnish with parsley. Serve in mugs or interesting looking bowls for a change of pace. You can also have a protein and salad on the side.
Enjoy!
Cheers,
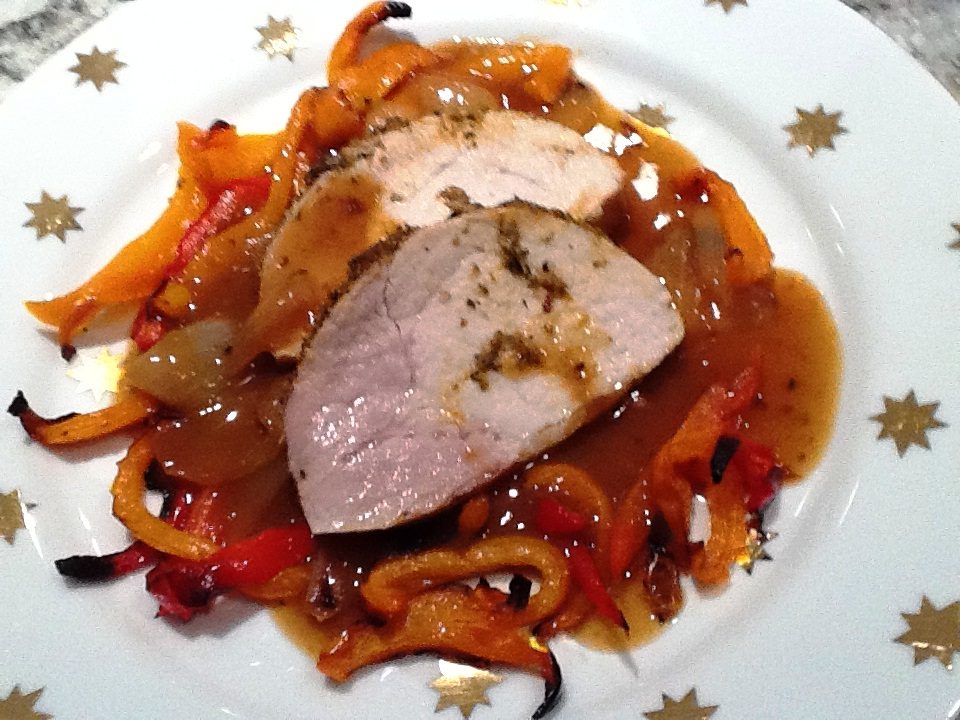
Southern Pork Loin Roast with Amazing Onion Gravy
Plan Z Phase: This is a Z2 (ZReduction) Recipe. This super easy comfort meal is a cinch to make. Even novice cooks can handle this one! And it’s so yummy. People in my family fought over the onion gravy; it was such a hit.
Serving Size: Serves 6
Ingredients:
- 3 lb pork loin roast (you’ll have one pound of leftovers if all diners are on Plan Z)
- Olive oil spray
- ¼ tsp of cayenne (or to taste)
- 1 tsp of dried oregano
- ½ tsp of Italian seasoning
- 1 tsp of dried mustard
- 1 tsp of garlic powder
- Sea salt to taste
- 1 large onion cut into 8 wedges
- 1 Tbl of cornstarch
- 2 cups of organic chicken broth
- 3 red bell peppers cut into strips
- 2 orange bell pepper cut into strips
Instructions:
Preheat oven to 375 degrees. If you have convection you can use it on this roast. I’ll list 2 cooking times.
Spray an ovenproof pan with a light spray of olive oil and put in the roast. Lightly spray the roast, too. To make this easier I just measure out each spice element and sprinkle them on the roast. If you like your food flavorful but not spicy the amount of cayenne can be what I have listed here. You can leave it off altogether if you have diners who don’t want cayenne or increase for a hotter dish. Sprinkle on the cayenne, oregano, Italian seasoning, mustard, garlic powder and sea salt.
On the area surrounding the roast, add the onions. Scatter them around.
Put in the oven to roast. Your cooking time for convection will be about an hour. Cooking time for regular oven will be about 15 minutes more. Check it with a meat thermometer. When the pork roast reaches 155-160 degrees take out of the oven, put it in a different pan, tent it with foil and let it rest. It will cook a bit more while it rests.
Leave the onions and the drippings in the pan. Add the 2 cups of chicken broth and begin heating to a low boil. Scrape all the good bits off the bottom of the pan and stir the onions around. You’ll have a brown broth. As it’s cooking take about ¼ cup of the broth out of the pan and put in a small bowl. Add your cornstarch and stir to dissolve it. Then add this all back into the pan. As the gravy boils the cornstarch will thicken it. Stop cooking when you feel you have enough thickness to the gravy.
20 minutes before dinner put the pepper strips in another oven-proof pan. Spray with olive oil and dust with sea salt. Roast them at the same temperature until wilted. They might even brown a bit on the edges. This is a good brown.
Serving Suggestions:
Serve 6 oz slices. If you're slicing thinly, you'll be able to have three pieces or you can have one thicker piece if you prefer.
3 Tbl of gravy with a few bits of onions drizzled on is great. Gauge your onions and peppers to max out at one cup.
Enjoy!
Cheers,
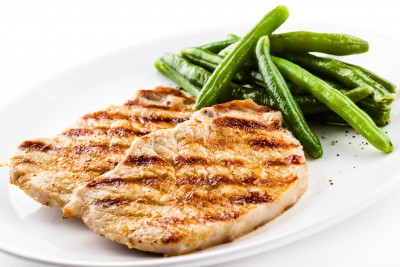
French Baked Pork Loin Chops
Plan Z Phase: This is a Z2 (ZReduction) recipe.
Servings: Serves 4
- 4 pork loin chops (6-8 oz ea). Make SURE you get loin chops (cut from the pork loin) and NOT rib chops. The rib chops will be too fatty and may stall your weight loss.
- ¼ cup of Dijon mustard
- 1 Tbl of minced fresh tarragon
- ¼ - ½ tsp of Truvia. This is just to take the bite out of the mustard. If you like tangy mustard you might not need this.
Instructions:
Preheat oven to 375 degrees F.
Take out an ovenproof pan. Lightly spray with olive oil spray. Lightly spray the tops of the chops.
Sprinkle with sea salt and pepper to taste.
In a small bowl mix the mustard, tarragon and Truvia.
Spread it evenly across the tops of the chops.
Put in your oven to roast for 20 – 30 minutes or until the chops are 160 degrees or no pink remains (as you choose). Some like pork cooked until there is NO pink. The more contemporary way to cook it is to have some pink left. All of the dangerous germs are gone when the pork reaches 135 degrees so 160 is perfectly safe for consumption.
Serving Suggestions:
I serve these with simple roasted green beans or roasted asparagus. To make life super simple you can put your lightly sprayed and salted beans or asparagus in another oven proof pan and they can roast right alongside each other. The veggie of choice will cook in about 15 minutes so just put them in a few minutes after the pork goes in. Most chops will be done in 20 minutes.
Enjoy!
Cheers,
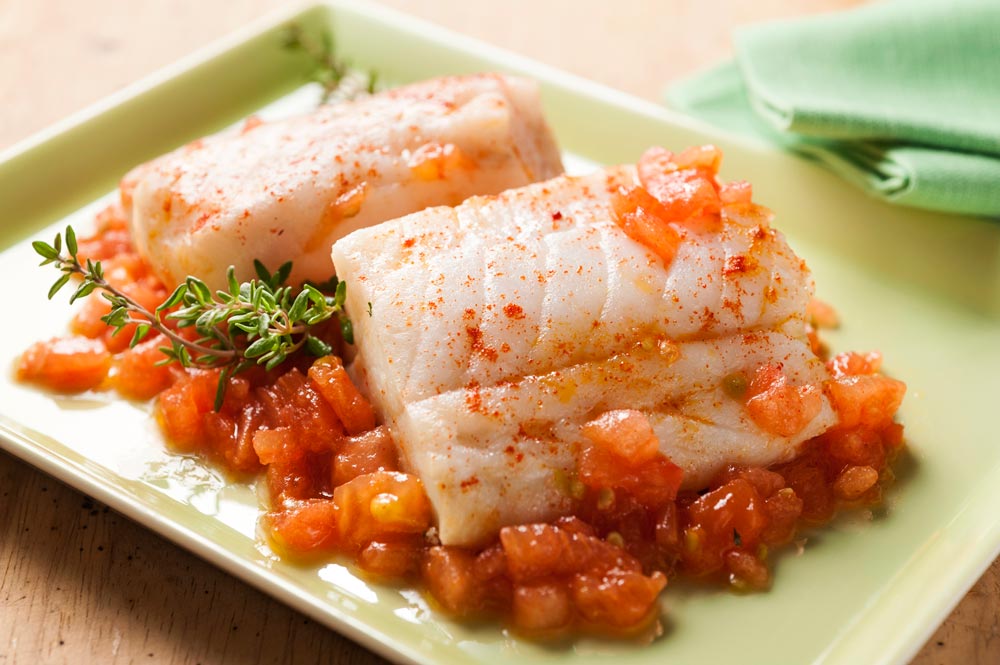
Baked Fish Fillets Italian Style
Plan Z Phase: This is a Z2 (ZReduction) recipe.
Anyone with an oven can make this dish. It takes just a few minutes to assemble and 30 minutes in the oven and dinner is ready to roll. The taste is Italian country-style. You can also make this for a crowd but multiplying the recipe. This will transport well in a container and reheat marvelously in a microwave. You could even eat it cold on a summer day.
Servings: Serves 4 and can be doubled easily
Ingredients:
- Olive oil spray
- 1-1/2 cups of chopped onion
- 2 tsp of Italian seasoning
- 2 cloves of garlic, minced (jar garlic will work for this one)
- 8 oz of tomato sauce (Hunts or another brand with no sugar in the ingredient list)
- 4 fish filets*
* Halibut is my first choice but it can be expensive. Cod will cook at about the same pace. Tilapia and whitefish will cook a bit faster so cook them only about 20 minutes instead of 30. You can even do it with sole and it would be tasty. Sole will only take about 15 minutes. Just gauge it based on how thin your fish is. This can even be done with things like mahi mahi, salmon and tuna. Your choice. I have the fishmonger take off the skin from both sides for this dish to make it extra easy to serve and eat.
Instructions:
Preheat oven to 375 degrees.
Spray a medium sauce pan with a light spritz of olive oil. Add your onion and the Italian seasoning. Saute on medium about five minutes until the onions loosen. Stir often. Add the garlic and the tomato sauce. Stir to blend and heat.
Put the fish filets in a 9" X 9" ovenproof pan that has been sprayed with a bit more olive oil. Pour the sauce on top and bake the required time.
If you have a convection oven you can adjust the cooking time accordingly. Usually that will mean a reduction in cooking time of 25-30%.
Enjoy!
Cheers,
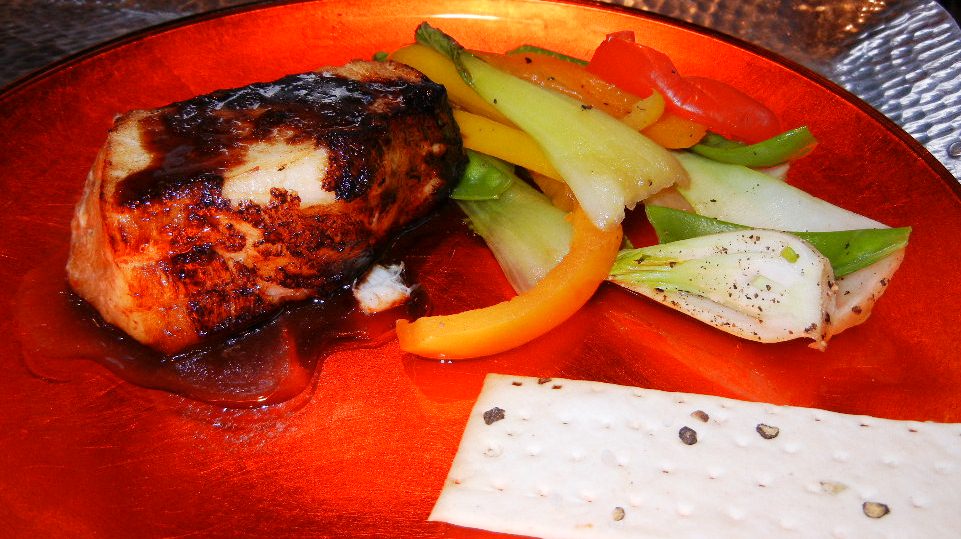
Sweet Asian Glazed Sea Bass
Plan Z Phase: This is a Z2 (ZReduction) recipe.
Servings: Serves 2
Ingredients:
- 2, 6-8 oz pieces of sea bass. You can use any other meaty white fish too. Mahi mahi, cod, halibut, haddock and more. Follow the roasting times below for a fish 2” thick. For a thinner fish like tilapia cut your cooking times way back.
- 1 tsp of Truvia
- 3 Tbl of Bragg’s Aminos
- 3 Tbl of balsamic vinegar
- 1-1/2 tsp of fresh ginger root, grated (use a fine grater like a rasp/microplaner)
- 1 tsp of garlic (jar garlic will do fine)
- olive oil spray
- salt and pepper to taste
Instructions:
Preheat oven to 375 degrees.
In a small, shallow dish add the Truvia, Braggs, vinegar, ginger and garlic. Stir to combine.
Lightly spray the sea bass with olive oil spray. Season with salt and pepper.
If this fish has a skin side, put the fish in the marinade skin-side down. Put it in the refrigerator and plan to cook 20 minutes later. Don’t marinate too long. DO NOT THROW OUT THE MARINADE.
Heat an oven-proof sauté pan to medium high. Lightly spray with olive oil and put the fish in skin-side down. If your fish has no skin, put it in NON-marinade side down. This way you won’t scorch your marinated side.
Cook on medium high for 4 minutes (for the thinner fish make it 2-3 minutes). You want to get a nice brownish crust.
Then turn over and put into an oven and roast until done. If you don’t have ovenproof sauté pans you’ll have to transfer it to a Pyrex pan or other ovenproof model.
Most thicker fishes will take about 15 -20 minutes. Thinner fishes less. Think 7- 8 minutes per inch of thickness. Check to make sure it’s done. You want it cooked through and flaky but still moist. If you use sea bass it will be very moist.
While the fish is roasting you can gently heat the marinade just until it barely boils. Turn off. You don’t want to cook it long or the Truvia can get a tinny taste but you have to kill any bacteria left in the marinade.
When fish comes out of the oven you can serve it with a drizzle of the marinade.
On the side I did a simple sauté of baby bok choy, bell peppers and snow peas (pea pods). I sauteed this in a bit of vegetable broth and then added some Bragg's. You can also serve Sriracha sauce on the side so your guests can drizzle a bit on. This sauce is HOT and has a bit of sugar in it so keep it small on dieter portions. My husband loves Sriracha sauce. I just left it off and used salt and pepper. I was not in the mood for spicy.
The sweet flavor of the fish will come through and you’ll feel very happy.
Enjoy!
Cheers,
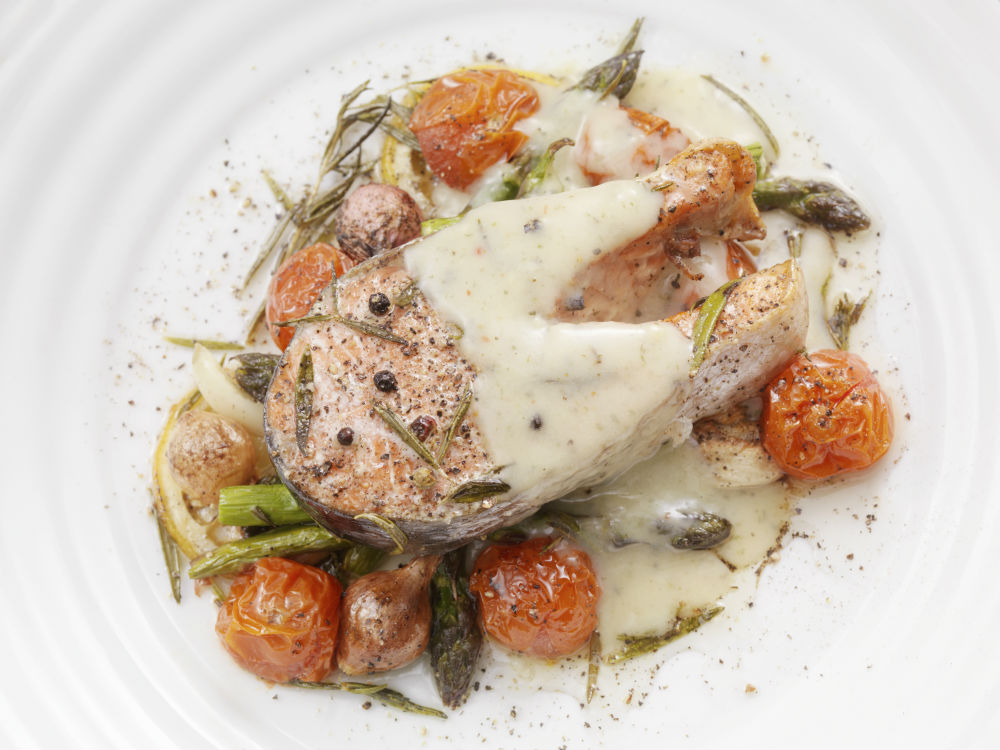
Baked Salmon with a Louisiana Cream Sauce
Plan Z Phase: This is a Z2 (ZReduction) recipe.
This recipe is very similar to one that was in Bon Appetit in 1994. I had to do a considerable amount of Zola-fying to get it so we can have it on the diet. The sauce will make you feel so gourmet and it’s very easy to make. You don’t have to spend a lot of time in the kitchen, either. Make the sauce and then pop the salmon in the oven and walk away til the buzzer tells you it’s ready.
Serving Size: Serves 4
For the sauce
- ½ cup of whipping cream
- 1/3 cup of Creole mustard or any grainy mustard will work (no sugar)
- 4 tsp of Worcestershire sauce
- 1 Tbl of Dijon mustard
- ¼ tsp of ground pepper
- ½ tsp of dried basil or Italian seasoning
- ¼ tsp of cayenne (optional)
- ¼ cup of sour cream (Z3 ONLY)
For the fish
- 4 salmon steaks or fillets
- 4 Tbl of Braggs Aminos
- 4 tsp of lemon juice
Instructions:
Preheat oven to 400 degrees.
In a small sauté pan add all of the ingredients for the sauce. Bring to a bubble and cook, stirring often on medium til it starts to thicken. This will only be maybe five minutes maximum. Turn off.
In an ovenproof dish add the fish, skin side down. Drizzle on the Bragg's Aminos and the lemon juice.
Bake in your oven for approximately 18 – 20 minutes or until it’s done to your liking. I like mine cooked through but still moist. That would be closer to the 18 minutes.
Just gently reheat the sauce and serve 2 Tbl of sauce over each piece of fish. You’ll likely have a bit of leftover sauce.
If you are making this in Z3 (ZReboot) you can add 1/4 of sour cream to the sauce, stir and reheat to serve.
This sauce tastes great either way. The one with the sour cream in it is just fluffier.
Enjoy!
Cheers,
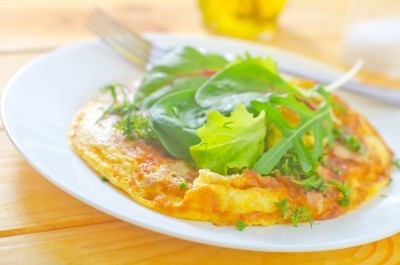
Spring Oven-Baked Omelet
Plan Z Phase: This is a Z2 (ZReduction) recipe. Daniel Boulud is one of my favorite chefs on the planet. I celebrated my 40th birthday at his restaurant Daniel in New York City. This is a Plan Z diet version of his spring omelet.
Servings: Serves 4
Ingredients:
For the omelet
- 8 large eggs
- 1/4 cup of heavy whipping cream
- 2-3 large shallots, minced
- 1 cup of pencil-thin asparagus, trimmed and cut into 2-inch pieces
- 1 cup of red bell pepper pieces, diced
- fresh herbs (whatever you like - parsley, cilantro, basil)
For the salad
- 4 cups of arugula
- Lemon juice (optional)
- Grated sea salt and pepper
Instructions:
Preheat oven to 450 degrees.
Spray an 8 to 10-inch OVENPROOF skillet lightly with olive oil spray. The skillet needs to be made of cast iron so it can handle the heat of the oven. Put in the minced shallot, red pepper and asparagus pieces. Sauté on medium until the veggies are crisp and tender. This should take about five minutes. Stir often. Add a little bit of salt and pepper and the fresh herbs. While this is sauteing, whisk the eggs and cream together in a bowl until the mixture is smooth.
If using a cast iron skillet:
When the veggies are tender, spray the pan again with more olive oil spray (leaving veggies in there). Add the egg mixture. The eggs will begin to cook on the bottom. Tilt the pan and put your spatula under the eggs mixture to open up a little room so the runny egg can distribute. Once the eggs look half-cooked, turn off the heat. Sprinkle with sea salt and pepper. Put the cast iron pan in the oven and let it cook for three to five minutes until the omelet is baked and a light golden brown.
If you don’t have a cast iron (ovenproof) skillet:
Transfer the veggies into a lightly oiled 9" x 9" Pyrex Pan and then pour the egg mixture over the veggies and bake it. This will take longer, approximately 15 minutes. Keep an eye on it since the oven is so hot!
Serving Suggestions:
When the omelet is a light golden brown, remove the pan from the oven and cut it into four sections. Serve each section on a plate with the arugula salad. The salad can be dressed with a bit of lemon juice and grated sea salt and pepper.
Enjoy!
Cheers,
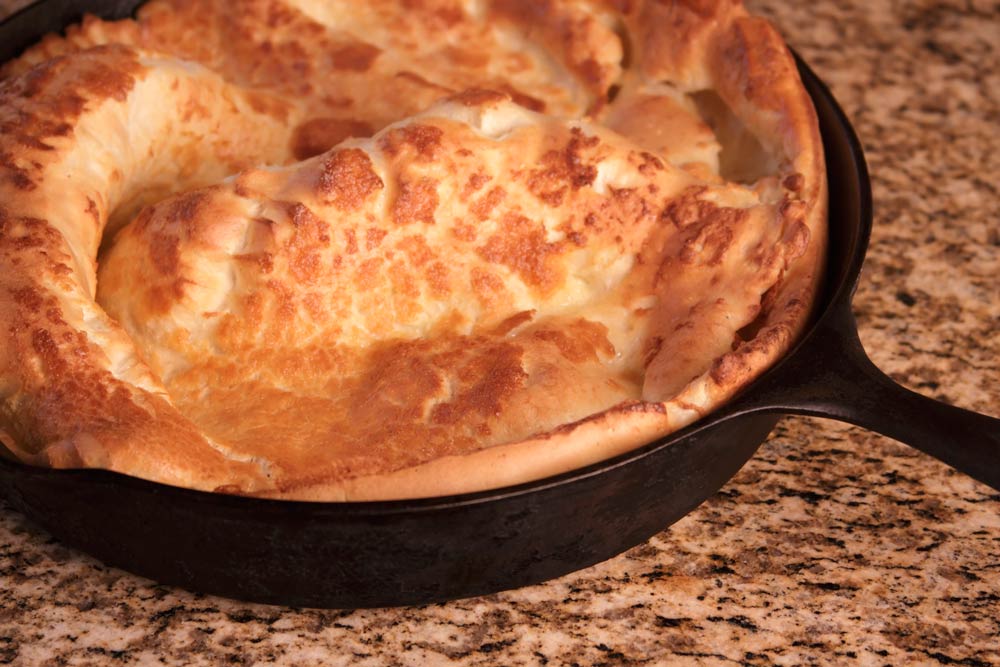
Breakfast Fruit Soufflé
Plan Z Phase: This is a Z2 (ZReduction) recipe. This recipe was submitted by Plan Z administrator, Jen. “I thought this dish would be difficult to make, but it was actually very straightforward and easy to do. Zola is right, if you can read, you can cook. And this soufflé was great. For those of you who are like me and are new to cooking – be brave and give it a try!” – Jen
Servings Size: Serves 2
Ingredients:
- 4 eggs, separated
- 3 tsp Truvia
- 2 apples peeled, cored and very thinly sliced (I used Pink Ladies)
- ½ tsp cinnamon (I used more, probably closer to 1 tsp)
- ½ tsp lemon zest – don’t leave this out or you’ll be sorry
- ½ tsp vanilla extract – I actually forgot to add this the first time I made it but it was still awesome
- olive oil spray, or butter spray if you have it. YUM.
Instructions:
Preheat your oven to 375 degrees.
Toss your apple slices in a bowl with Truvia and cinnamon.
Spray a small pan with olive oil spray. You’re going to sauté your cinnamon/Truvia coated apple slices over a medium heat until the apples are nice and soft, about 5 minutes. They are sliced really thin so this shouldn’t take long. Taste them – if you want more cinnamon or Truvia, now’s the time to add it. Remove from heat and set aside.
Beat your egg whites with an electric mixer until stiff peaks form; this took me about 5-6 minutes. I had never done this before, but it is easier than it sounds. First the egg whites got all bubbly. I kept mixing. Then they started to turn white. I kept mixing. Then they got bigger! I kept mixing. Then, the bubbles went away and they started to feel lighter in the bowl. I kept mixing. Then I could see little peaks in the egg whites. I thought they were done. Zola said, “Keep mixing.” The peaks got larger. I kept mixing. Then the peaks got stiffer. I could mold them into whatever shape I wanted. They were ten times bigger than they were when I started. The egg whites were ready. Take a moment to ooh and aah and then set those aside.
In a separate big bowl, mix the egg yolks with your electric mixer for 30 seconds. Add a tsp of Truvia, the vanilla extract and the lemon zest and mix for another minute until the yolks are nice and fluffy. Then with a big spoon, fold the egg whites into the egg yolks a little at a time. Stir them as little as possible, you want everything mixed together, but you want it to remain fluffy.
Now, get a small, oven proof skillet (I used a 7-inch cast iron pan) and spray it down with olive oil spray. Spray the sides of the pan too so the eggs won’t stick to the pan. Fan your apple slices along the bottom of the pan on medium heat and pour in the egg mixture to cover the fruit. Cook it like this for a minute and a half. Don’t mix it. Pop it into your oven for about 10 minutes or until the omelet is puffed and golden.
When you take it out of the oven, it will look like it does in the picture. YEAH! This is actually the bottom of the soufflé – when you serve it, you will invert it onto a serving plate so the apples are on the top. I don’t have a beautiful picture of it on a platter because I was too energetic when I flipped it over and I missed the serving plate and part of the soufflé fell off the side. I had to piece it together on the serving platter. It wasn't beautiful, but it tasted great! Dust with cinnamon or serve it plain. Super yummy breakfast food!
Once you get the hang of it, you can use any type of fruit you want. Try it with raspberries – this is super delicious.
In ZReboot, you can use pears or peaches. Heck, in ZReboot you could even make it with butter.
This dish made me feel super special. It is a great brunch alternative on a Sunday morning and because it puffs up so much, it looks like you’re eating a lot of food. ½ of this this soufflé would count as your protein and fruit for one meal, so you still get to eat a cup of cooked vegetables, unlimited salad greens and your breadsticks.
Ready – Set – Eat!
Jen
ZMaven
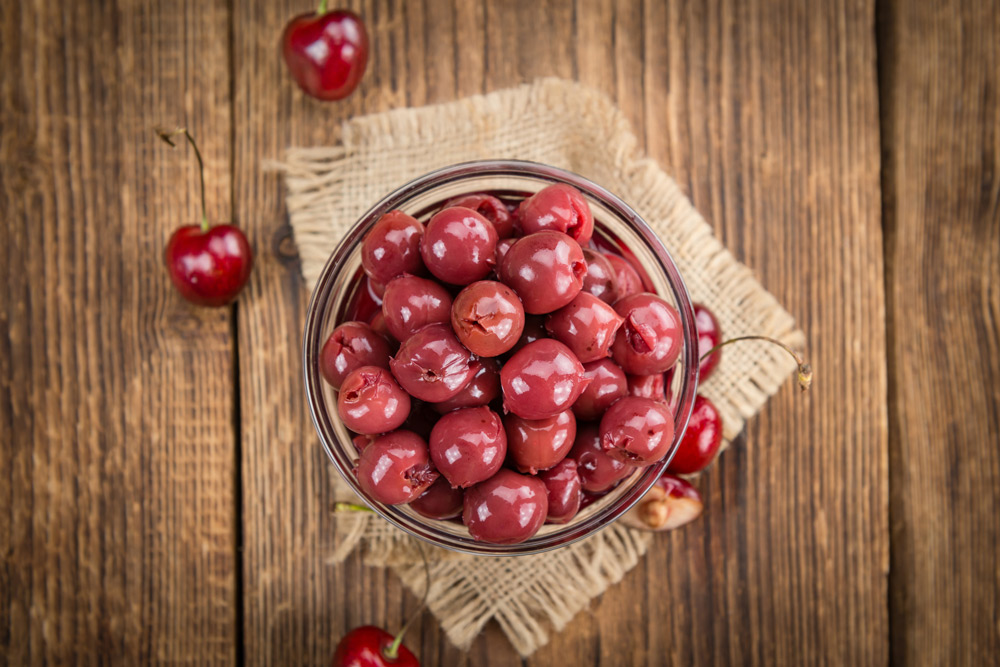
Jubilant Cherries
Plan Z Phase: This is a Z2 (ZReduction) recipe.
VERY IMPORTANT!
Cherries that are a YES/Caution are Montmorency cherries. They are the same ones used in pies. If you buy a can of them, they will say “TART” on the can and packed in WATER. DO NOT use ones packed in heavy syrup.
Bing cherries AND Queen Anne Cherries are a HUGE NO! They are very high carb. Twice as high as Montmorency cherries.
If you think you might get confused err on the side of caution and do NOT eat cherries.
Servings: Serving size 1/3 cup, cooked
Ingredients:
- 2 cans of TART (Montmorency) cherries packed in WATER only (You can also use fresh or frozen Montmorency cherries. These are the ones sold in Door County, WI for example.)
- 2 Tbl of cornstarch dissolved in ¼ cup of water
- 4 tsp Truvia
- 2 tsp of organic vanilla
- ½ - 1 tsp of almond flavoring
Instructions:
Put the ingredients in a pan and bring to a low boil, stirring often. If you use fresh cherries you’ll need to add a cup of water to make up for the liquid in the can. Boil at a slow bubble until the cornstarch kicks in and you get a thick sauce. Just like pie filling in a can. Tastes just like the pie filling. The color will be more pale because you will not be pouring in a bunch of red dye. You don’t need those chemicals in your system.
Enjoy!
Cheers,
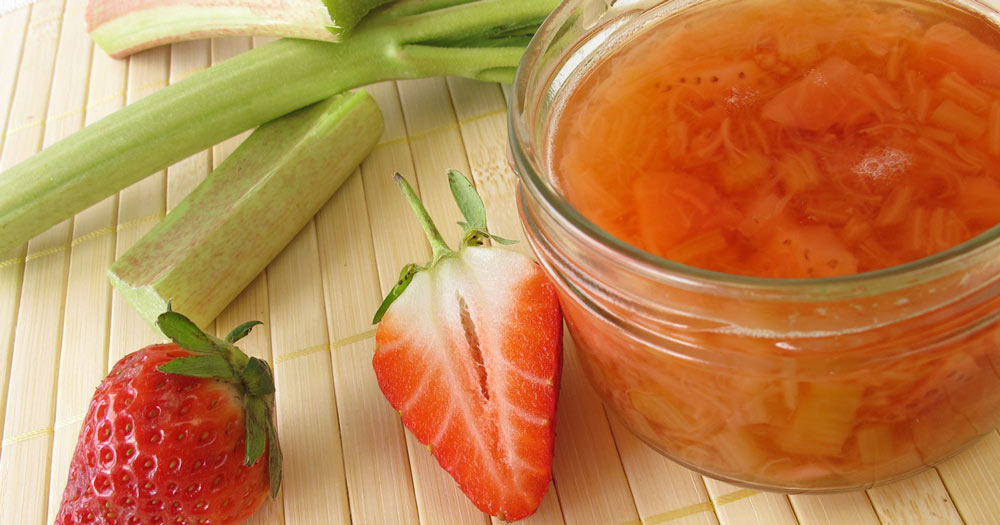
Rhubarb-Strawberry Almost Pie
Plan Z Phase: This is a Z2 (ZReduction) recipe.
Servings: Serving size – 1/3 cup
Ingredients:
- 1 pound of fresh rhubarb, chopped. Frozen would work, too. Make sure there is no sugar added.
- 1 cup of water
- 2 tsp of Truvia
- 3 tsp of organic vanilla
- 3 cups of fresh strawberry slices
Instructions:
Put all ingredients except the strawberries in a medium sauce pan. Cook on medium until it gets to the texture you like. You can cook it til it’s soft and chunky or keep right on going until it dissolves to mush. I like mine to turn to mush. Then add the sliced, raw strawberries to give it back some lumpy texture. Big YUM!
Enjoy!
Cheers,