
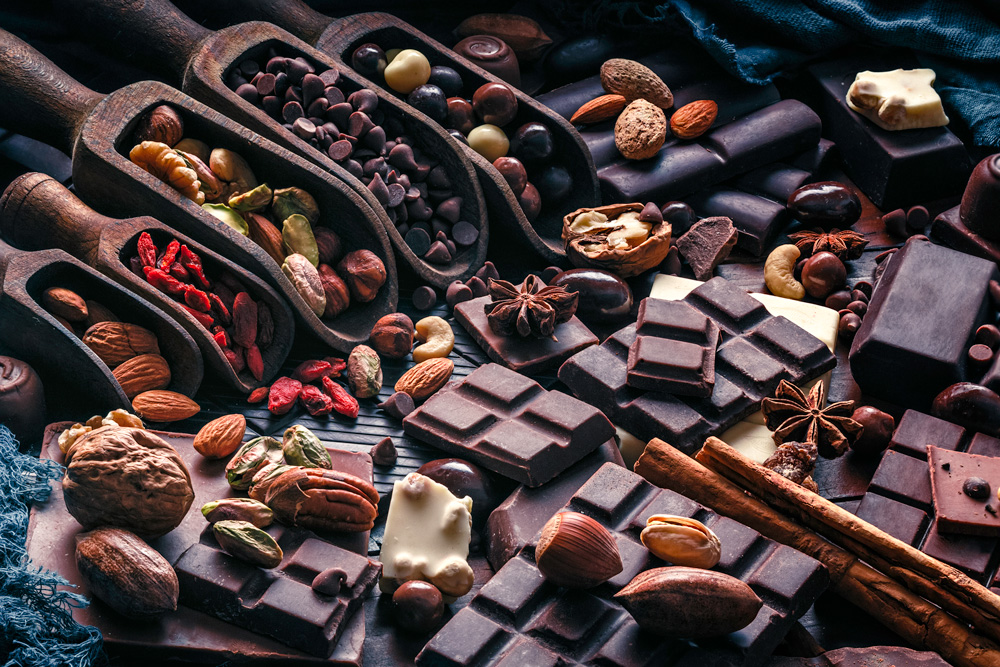
Good For You Chocolate
Can chocolate possibly be good for you?
YES. A resounding yes.
Here’s what you have to remember, though:
- You need to eat GOOD Chocolate. That means DARK chocolate that is 72% cacao or higher. Good news is the number is front and center now on many packaged chocolate bars.
- You need to eat it in moderation. You don’t buy one of those big bars and chow it down. You must limit yourself to 3 oz or less per day. That might be as little as 3 of those little squares. So eat it slowly and enjoy it.
Here are a host of medically-backed reasons to enjoy chocolate:
- It’s good for your heart and your circulation. The latest research suggests that eating chocolate helps keep your arteries flexible. That helps you keep from clogging your arteries.
- Eating chocolate helps your brain function. Eating chocolate in moderation is shown to help you keep your brain functioning at a higher level all the way into old age.
- Cocoa can help you reduce your cholesterol. It helps reduce “BAD” cholesterol (LDL) and can help raise levels of “GOOD” cholesterol (HDL).
- Did you know chocolate can help protect your skin against sun damage? Yep. That doesn’t mean skip the sunscreen and just eat chocolate. You’ll still need the sunscreen but every little bit helps when you want to keep the wrinkles at bay.
- Neuroscientist Will Clower says if you melt a small square of chocolate on your tongue 20 minutes before you eat, it triggers your “I’m full” hormone and you’re less likely then to overeat. If you’re on a diet I would not count on that but it’s a nice theory.
- A study from Finland suggests that expectant mothers experience less stress if they eat a little chocolate and that their babies smiled more. How cute.
- Chocolate contains phenylethlamine (PEA) which is the same chemical that your brain creates when you feel like you’re falling in love. See, chocolate really can be an aphrodisiac!
Buy only the best chocolate. Eat it in moderation and enjoy the benefits.
Cheers,


Chocolate Dipped Pears
Who needs candy apples?


Dinner for Your Honey
Let’s just assume for the moment that you’re not the greatest cook. In fact, let’s assume you don’t make any of the meals in your house, but just this once, you want to surprise your honey by making dinner for Valentine’s Day.
Here are my 7 top tips to make that dinner a success.
1. Buy fresh food. Nothing from a box. You’re going to make a real meal with food you didn’t order in and didn’t pick up in the freezer section.
2. Pick something easy. I’m going to help you with that. If your honey is on the foodie side I’d go French. The Chicken with a French Pan Sauce is easy to make and will make you feel like you’re in the French countryside. If your honey leans toward basic comfort food, I’d make meatloaf. This one will surprise you. It tastes just like a Burger King Whopper, only this is healthy.
3. Make it colorful. This is where I tell you to eat your veggies. Pick one or two that you think will go well with your dish. I’m giving you a straightforward pepper recipe because bell peppers can be found in yellow, red, orange, green and purple.
4. Use a sharp knife. There’s nothing more dangerous in the kitchen than a dull knife. My father taught me that, and when I worked in restaurants our knives were sharpened weekly. A sharp knife makes meal prep faster, easier and even prettier because you’re slicing cleanly through your food and not hacking away at it. One nasty slip and dinner is ruined by a trip to the emergency room.
5. Match a beverage. You might be a club soda or filtered water person. You can fancy it up with a slice of cucumber, a slice of ginger, lemon, lime or even an orange slice. Make it pretty. All it takes is one slice. If you indulge in wine, a chardonnay or white burgundy will go well with the chicken and a pinot noir or malbec will do well for your meatloaf. Beer drinker? My friends tell me a Stella Artois makes a great beer to go with chicken and choose a British bitter, a brown ale or even a porter for your meatloaf.
6. Wash up. Even if your honey doesn’t volunteer to clean up with you, do it by yourself. The recipes I’m giving you don’t require a lot of pots and pans, so even if you don’t have a dishwasher, this will go fast. Any honey will appreciate the effort and reward you kindly.
7. Have a simple dessert. I’m going to make this one super easy for you. Choose fruit and chocolate. I’d pick a package of raspberries or blackberries. Then choose a chocolate bar that is 72% cacao or higher. You can’t miss the numbers. They are shown really large on the packages now. Choose a good brand. Scharfenberger, Ghirardelli, Green and Black and more. You can Google “top 10 chocolate bars” and you’ll find all kinds of exotic brands. To keep it healthy, choose one with the high cacao point (even 85% is perfect) and suck on bits of it together as you finish up your beverage. The lower the number the more sugar. That’s not good. Don’t go to 100% though; that one will taste like pavement.
Plan on about an hour of prep time (not including your time in the grocery store). For an experienced cook it won’t take that long but I'd recommend you leave yourself enough time to pore over the recipes.
Remember, if your veggies are done before the meatloaf (for example), you can just turn them off and let them sit. You can reheat them when the entrée is done.
I want you to enjoy the gesture you’re expressing by making dinner. And have a Happy Valentine’s Day!
Make your honey a romantic Valentine's day dinner with this luxurious yet healthy--Tarragon Mustard Shrimp.
Tarragon Mustard Shirmp
This is a delicious recipe that anyone can make well. Try it as an appetizer or an entrée; it can be served, hot, room temp or cold.
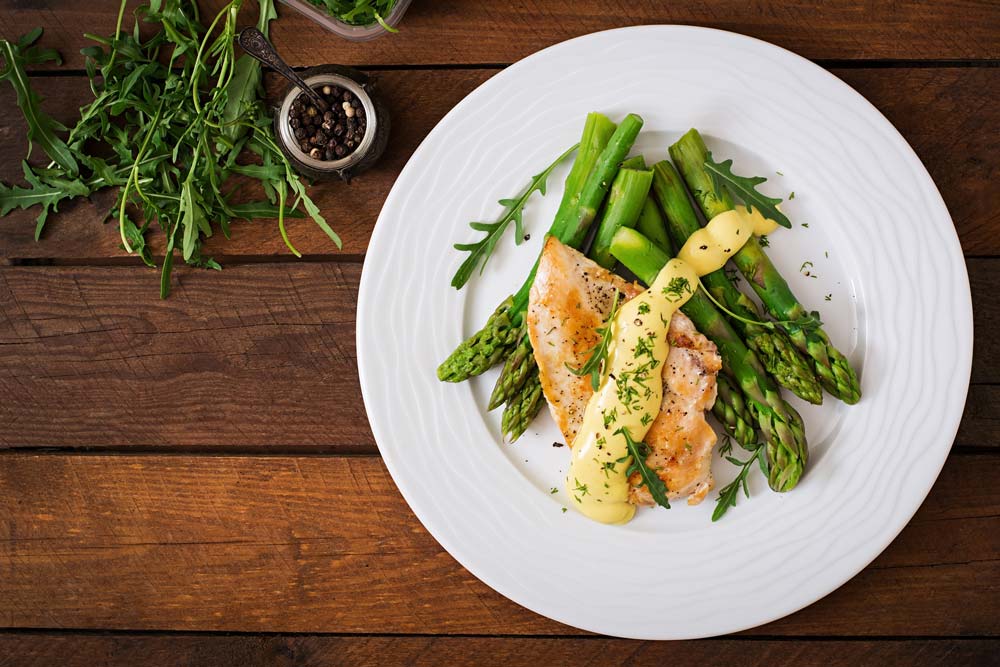
Chicken Breasts with Zola’s French Pan Sauce
Plan Z Phase: This is a Z2 (ZReduction) recipe. This is my favorite new creation. I think I have made this three times in the last two weeks and that’s pretty much a record for me. This dish is easy and it tastes fancy!
Servings: Serves 2. Can be doubled easily.
Ingredients:
- 2 skinless chicken breast halves
- ¼ tsp of grated sea salt (or to taste)
- ¼ tsp of grated black pepper (or to taste)
- ½ cup of organic chicken broth or stock
- 4 tsp of Dijon mustard
- ¼ tsp of dry tarragon (you can add more tarragon for a stronger flavor but tarragon is pretty strong in small quantities so factor that in)
- ¼ cup of heavy cream
Instructions:
Preheat oven to 375 degrees.
Spray your chicken breasts lightly with olive oil spray and then grate on salt and pepper. Heat a sauté pan and put them in top down. Saute on medium for 3 minutes or until you get a light brown crust forming.
Now you are going to put them in the oven to roast. Make SURE YOU HAVE THEM IN A HEAT PROOF PAN. I use cast iron so I can go right from the stove top to the oven. If you don’t have the old-fashioned cast iron make sure you transfer them from your stove top pan to Pyrex or some other heatproof pan. By finishing the cooking in the oven you end up with a much juicier piece of chicken. This is the way fine restaurants do it. Roast for approximately 20 minutes or until no pink remains in the chicken. Cut it open to check if you are not sure.
While the chicken is cooking, you can get out that sauté pan. Add the chicken stock and begin to boil it. Turn down to medium so it just continues to bubble and reduce. Add the Dijon and the tarragon. Cook for 3 minutes for the flavors to blend. If the stock starts to run down too low just add a bit more. About 10 minutes before the chicken is done, add the cream. Continue to bubble the sauce. Don’t over-boil it but if you keep it bubbling the cream will thicken the sauce naturally. This won’t be a gloppy cream sauce because you’re on Plan Z and are limited in your cream amount but it will thicken enough that you’ll swear you’re eating in France. If the sauce looks done early just turn it off and wait for the chicken.
When the chicken is done, plate it and pour cream sauce over the top. This will eat up ½ of your cream allotment per day so keep that in mind.
Serve with roasted asparagus. You can put the asparagus in the oven with the chicken and roast them. Top with grated sea salt and you’ll be amazed at how special this can taste. You can do the same thing with green beans instead if you prefer.
Enjoy!
Cheers,

P Is for Party
I was reading a design magazine recently and saw a party planning feature. The woman was talking about how you don’t need to know how to cook (even a lick), but you can still have a cocktail party.
She said all you need are the 3 Ps.
Parmesan, potato chips and Prosecco.
That’s it.
Her idea was that you go out and buy a really fine piece of Parmesan-Reggiano.
Put it on a nice platter. Cut some bits off of it with a cheese cutter. And leave the cheese cutter next to it so people can serve themselves.
Get out some pretty, small bowls and stack them with potato chips. Her idea was to prop the potato chips upright. Then sprinkle something on them. One idea might be a grating of pepper. Another idea could be Italian herbs or even a rub mixture.
Then serve Prosecco in some pretty flutes and there you have it. Cocktail party.
I “borrowed” that idea and expanded on it.
At my party, I served the Parmesan. Truth be told I’ve done that before. I love to nibble on bits of Parmesan and drink wine. It’s a perfectly simple opener to a dinner party. You just have to make sure you buy the good Parmesan.
I served the potato chips, too. I sprinkled a meat rub on them that is one of my favorites.
I also served Prosecco but I turned it into party punch. All I did was make up some cranberry apple iced tea and served half iced tea and half Prosecco in some pretty flutes.
Then I kept going. I did a marinated party salad of veggies soaked overnight in Italian dressing. I had a vegan in attendance at my party and wanted to make sure there were a few things that fit her diet. This was one.
Prosciutto on a platter with olives and nuts provided a nice antipasti platter. The accompaniments also provided more vegan options.
I served pork sliders with bread and butter pickles. I bought pulled pork at the grocer and found a fairly healthy barbecue sauce. All I had to do was mix them together and put it in a crock-pot to heat. Tiny buns on the side.
For dessert, I served my peanut clusters. Dark chocolate wonders.
And I broke all out and served gourmet caramel corn, but I took it up a notch and served it with mixed nuts scattered throughout. The caramel corn is a carbohydrate nightmare but if you put in the mixed nuts and people just eat a handful, the nuts make it less carby and take down the glycemic uptake.
Did you notice everything on my menu started with a P? I’ve never done a theme like that before. It was really fun designing the menu and it all worked out great. I hardly had to do any cooking either. This made for a super-easy weekday cocktail party for 15.
Cheers,
Enjoy!
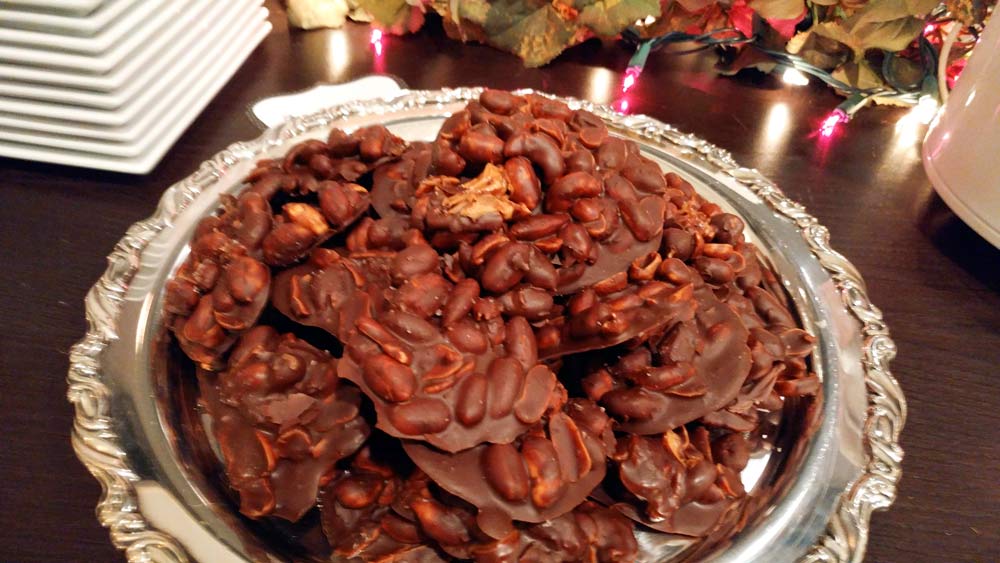
Dark Chocolate Peanut Clusters
These are delightfully decadent treats. CAUTION: Treat them like candy!

Pumpkin Pancakes with Pumpkin Spiced Whipped Cream
Plan Z Phase: This is a Z3.5 (ZReboot 3.5) recipe. Hot off the Griddle. “Zolafied” pancakes. Dieter Joan sent me her family recipe for pumpkin pancakes. They are a favorite with her family. She asked me if I could do a “healthy version” of pumpkin pancakes that she can serve at the holidays and keep her family full and satisfied as well as healthy. So here it is!
Servings: This makes 12, 4” pancakes. The carbohydrate count will be very low on these cakes. They fill you up too. If you want your kids “full and focused” before school give them these instead of cereal.
Ingredients:
- 2 cups of Super Fine Ground almond flour (Bob's Redmill is the most popular brand)
- 4 eggs
- ½ cup of water
- ¼ tsp of grated sea salt
- 3 tsp of Truvia (stevia)
- 3 tsp of pumpkin pie spice
- 2 tsp of baking powder
- 1 tsp of baking soda
- 1 cup of pumpkin pie puree (the stuff from the can works great)
- coconut oil or butter for cooking
Instructions:
Put all of the ingredients in a large bowl. Mix with your electric mixer on medium high for a full 30 seconds. Scrape the bowl and mix a bit again.
Many pancake experts recommend you let the pancake mix sit for 15 minutes before you make the pancakes. This allows the active ingredients to do their job. I let this batter sit too.
Then just before grilling the pancakes I gave it one more 5 second swirl with my electric mixer.
You have a couple of options for grilling. I used my electric fry pan. That’s my favorite or you can do them on your stove. Electric fry pan temp should be 400 degrees. On the stove medium-medium high.
For oils. First batch I did with coconut oil. Works great. Second batch I did with butter. Works equally as well. Your choice.
The batter with be a bit thicker than regular pancake batter. When I put the batter on the surface I had to nudge it around a little to help it spread. You could add a bit more water if you want your batter thinner.
The pancakes will not bubble like normal ones so just watch for them to be golden brown on the bottom and then gently flip them. They do puff up like regular pancakes.
Leftovers can keep in zipper bags in the refrigerator and re-heated.
Serve with Pumpkin Spiced Whipped Cream
Ingredients:
- 1 cup of whipping cream
- 2 tsp of vanilla
- 1 tsp of pumpkin pie spice
Instructions:
Mix with your mixer until still peaks form; just like regular whipped cream. Serve this on your pancakes instead of syrup. Or if you want some syrup just do a teeny bit; like a capful. And use REAL maple syrup. No diet syrup. A bit of the real stuff is better for you. I served mine with the whipped cream and a very teeny drizzle of syrup. It was WAY YUMMY!
Enjoy!
Cheers,
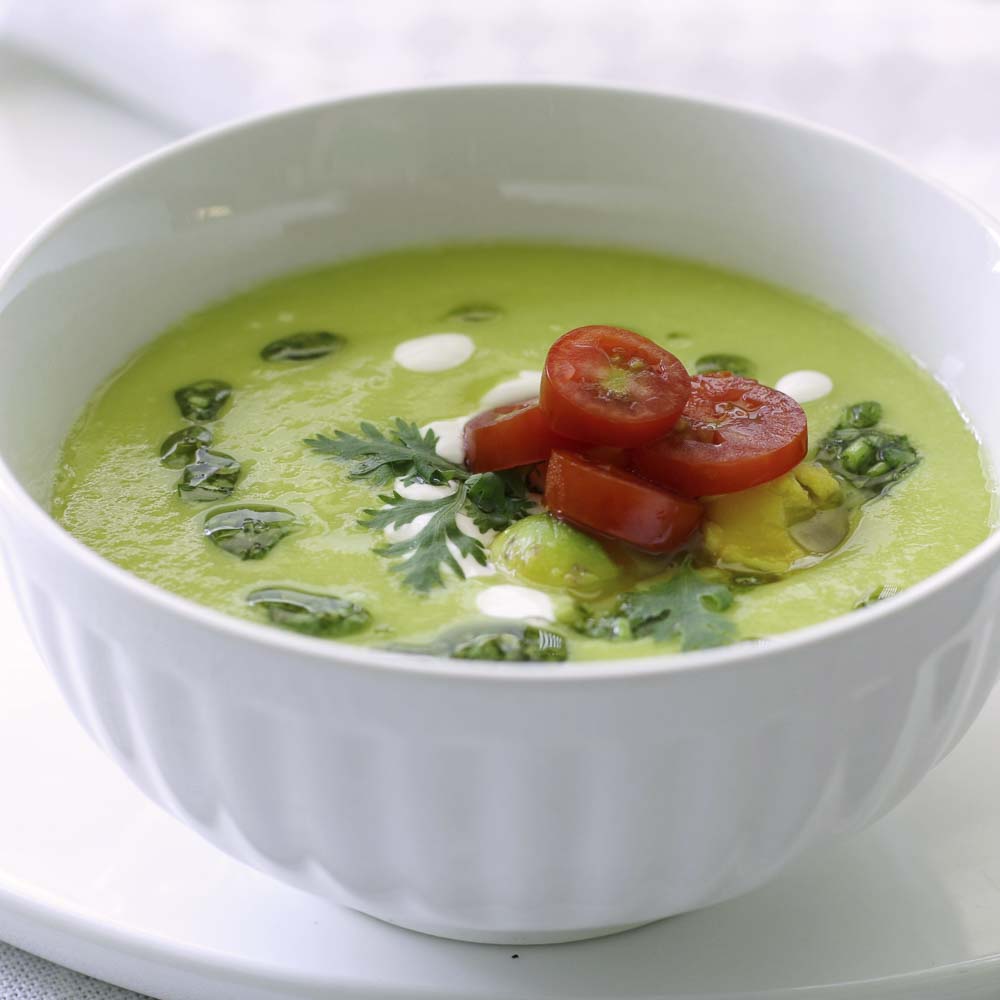
Mexican Avocado Soup with Chicken or Turkey
Plan Z Phase: This is a Z3 (ZReboot) recipe. I love this soup. This and a salad or a piece of low carb bread can make a meal. It’s also colorful, so I am including it in my Happy Healthy Holiday menu options. You can make this with leftover turkey and have a colorful way to use your extras.
Servings: Serves 3-4 as an entrée (each serving is 1-1/2 cups). Serves 4-6 as a smaller appetizer portion.
Ingredients:
- 4 ripe avocados
- juice of one lime
- 1 cup of chopped onion
- ¾ cup of heavy cream
- ½ cup of chopped cilantro leaves
- 2 cups of chicken stock (organic if you can get it)
- ¼ – ½ tsp of hot pepper flakes
- salt and pepper to taste
- 2 chicken breasts or 4 cups of leftover turkey, shredded
Optional:
- garnish with roasted pistachio kernels, quartered cherry tomatoes, and cilantro
Instructions:
The first thing to do is poach the chicken breasts if you are using chicken. In a sauté pan put the chicken breasts in with enough water to cover them. Bring to a low boil and poach them for approximately 15 minutes or until when you cut into them there’s no pink visible. Let them cool a bit and then take two forks and pull at the meat to shred it.
While the chicken is poaching you can prepare the rest of your soup. This is so easy!
Get out your blender. Into the blender jar, add the following:
Cut your avocados in half and take out the pit. Then scoop out the flesh with a spoon. Work around any brown bits if there are any bruises. Put the avocado flesh in the blender. Add the lime juice, cilantro, onion, cream, chicken stock and chili flakes along with a good grind of sea salt and pepper. Whiz until smooth.
When you are ready to finish your soup, put the blended ingredients in a large saucepan and begin to heat on medium. Add the meat (either the shredded chicken or leftover turkey shreds). Heat until the soup is hot. Taste it. You can always add more chili flakes if you want it spicier. You can add a bit more lime juice or even add more salt. When you taste it you can decide.
When I served it I tossed on a few pistachio kernels, the chopped tomato, and the cilantro. I served it with one slice of low carb toast slathered in butter. Or you can serve with a few low carb taco chips. My husband also added some liquid hot sauce to his soup. The guy can never get enough zip.
Enjoy!
Cheers,
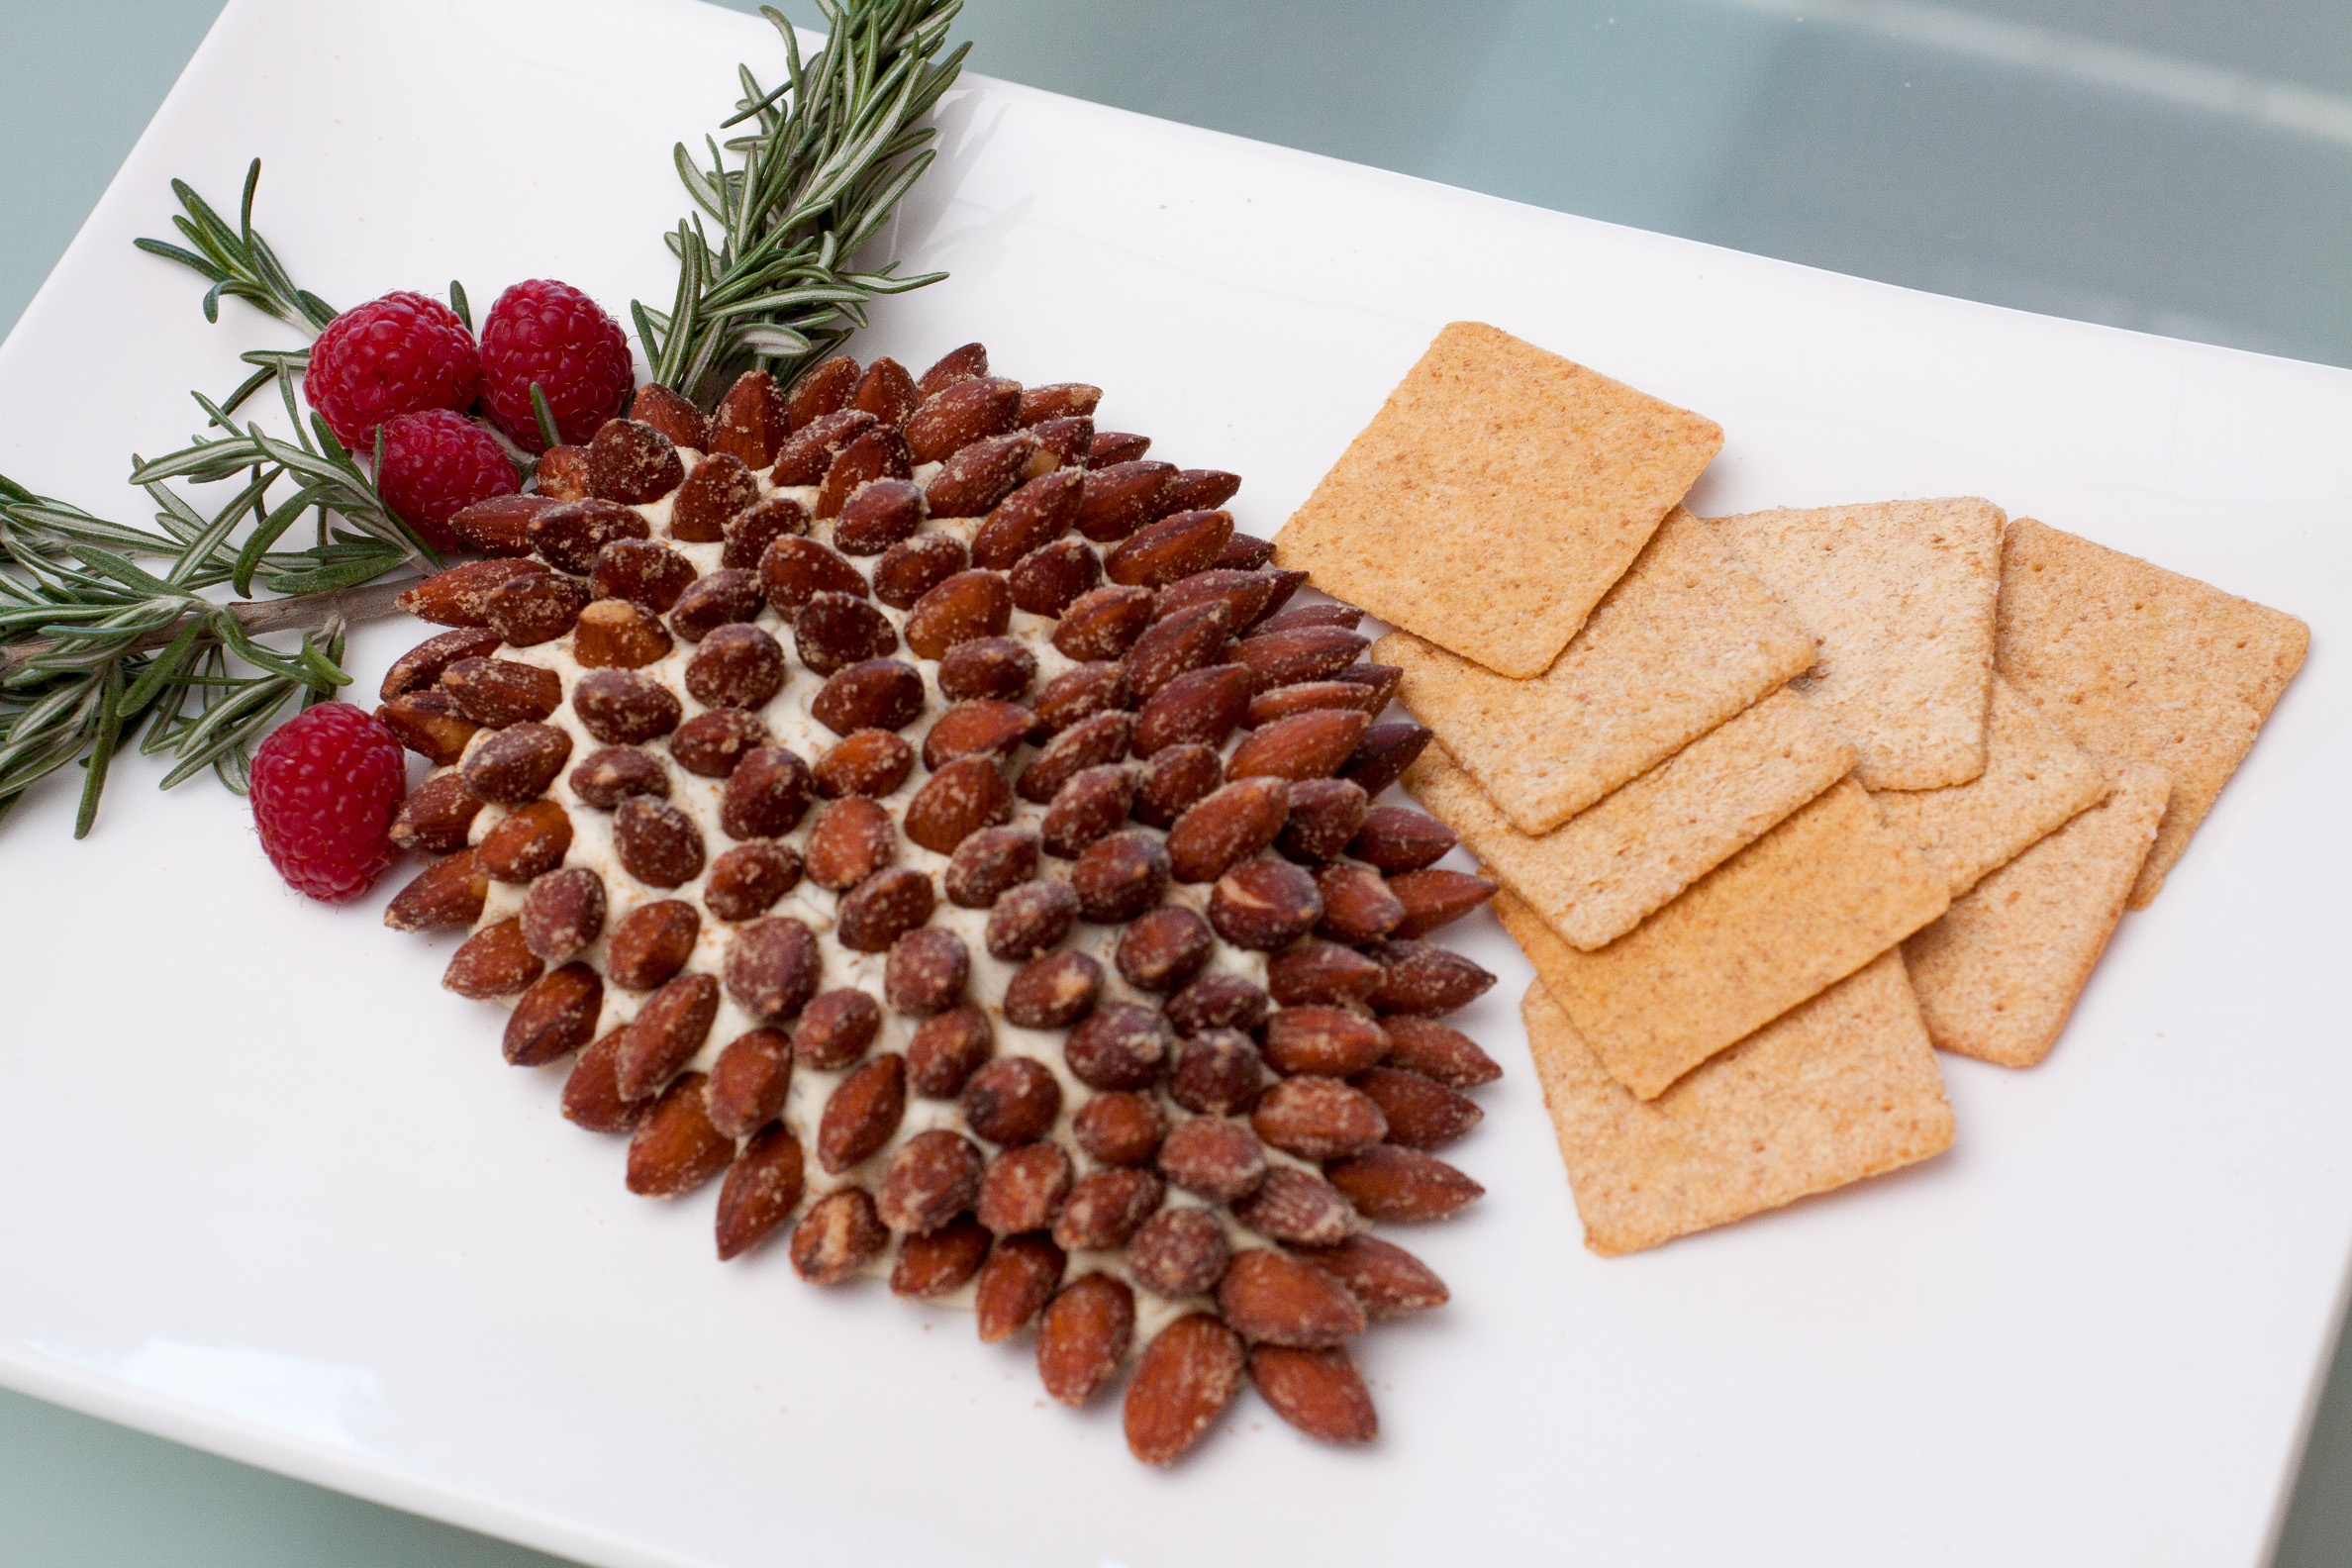
Pinecone Cheese Ball
Plan Z Phase: This is a Z3 (ZReboot) recipe.
I have to admit that this is not an original idea of mine. I saw a video another guy did and I changed it up to make my own recipe. The pinecone idea was his and I thought it was unique and festive. This can be done several ways. I am going to lay out a simple version and then give you suggestions for variations.
Ingredients:
- 1 tub of Alouette garlic and herb cheese spread
- ½ tsp of onion powder
- a whisper of cayenne or to your taste. I sprinkle fairly liberally because I like the extra zip.
- 1 can of almonds. I use the Planters Smokehouse almonds. You choose your favorite.
- a couple sprigs of fresh rosemary
- a few raspberries (optional)
Instructions:
In a medium bowl, put in your cheese spread, onion powder and cayenne (if you choose to make variations, add those to the bowl, too). Stir to mix. Take out your chosen serving platter. Mound the cheese in the middle. Take a knife or spatula and form it into the shape of a pinecone. It’s really easy. Just round it at one end and bring it to a point at the other.
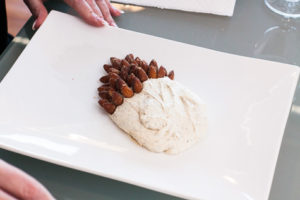
Then begin inserting your almonds. Take the first one, pointy tip out and poke it into the end of the pinecone. Then begin layering the almonds in rows (see picture). This part takes the longest. It might take you about 10 minutes to cover the whole pinecone.
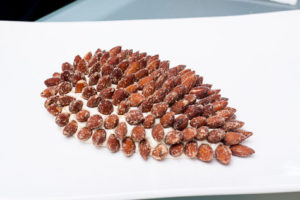
Then just poke in the rosemary to look like pine branches and strategically position your berries for color.
Serve with crackers and celery sticks. The celery sticks help you cut down on cracker consumption.
More ideas:
- Use other flavors of Alouette cheese. They make a great Tomato Basil version as well as others.
- Add minced jalapeno and some chili powder to go Mexican
- Add red and green pepper bits
- Add diced onion
- Add some grated cheddar to get a new flavor twist
- Add bacon bits. The boys love bacon!
- Add Sriracha sauce for a whole different kind of zip!

Your own variation will turn out great!
Enjoy!
Cheers!

"In Summer" Song
https://youtu.be/UFatVn1hP3o
Chris and I will be celebrating a warm-climate holiday this year, so we wanted to send along this little Olaf greeting.
Whether your holidays be warm or cold we hope they are filled with fun.
Cheers to you!
And the ZTeam
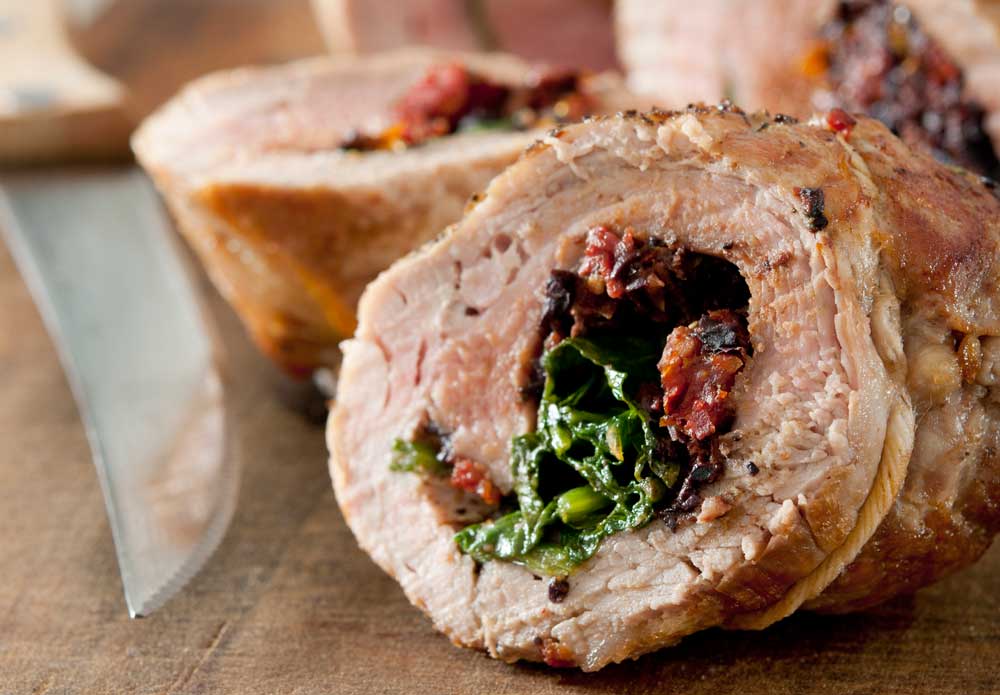
Pork Loin Roast with Red Pepper & Spinach Stuffing
Plan Z Phase: This is a Z2 (ZReduction) recipe. The flavor and aroma of this dish will bring a little bit of the Italian countryside to your dinner table.
Servings: Serves 4 but can be doubled easily.
Ingredients:
- 1-1/2 lb pork loin roast
- 1 tsp of garlic powder
- 1 tsp of Italian seasoning, divided
- ½ cup of roasted red peppers. You find these in the Italian section of the grocery store. They are pre-roasted and packed in a jar. You just need to pull out enough to cover the roast and rinse them well before using them. Pat dry. Store the rest for another use. Or you can make your own.
- 1 cup of baby spinach
Instructions:
Heat oven to 350 degrees.
You are going to “butterfly” your pork roast. This means you are going to open it up so the whole roast will lay flat and you can stuff it and roll it. It's not difficult to do if you are careful. Take a sharp knife and cut across the roast about 1” down from the top. You are then going to continue to cut in a circular motion as though you are opening the roast in a spiral. This is very difficult to describe with just words but all you have to do is imagine that your pork roast is spiral, like a cinnamon roll, and cut into it to “re-open” the spirals.
Then lay the roast opened flat on your work surface. Spread the garlic across the roast and sprinkle with half of the Italian seasoning. Now take pieces of the roasted red peppers and cover the surface of the roast. On top of that scatter your spinach leaves.
Carefully grab one end of the roast the long way and begin rolling it back up. If you tuck in the edge as you start you will roll it up jelly-roll fashion and your stuffing will all be encased inside the roast. You can secure the roast to stay closed by wrapping kitchen twine around it in a few places or if you are lucky like me, when you put the roast in the roasting pan with the seam side down it will stay rolled up and stay put. Whichever works best. You could also use turkey pins and hold it shut that way if you prefer.
Sprinkle with the rest of the Italian seasoning and give it a good grind of sea salt on top too.
Roast your meat until it reaches 170 degrees. This will take up to 90 minutes.
When you take it out of the oven, slice it in 1/2"-3/4” thick slices. They will hold together best that way. Gently place on your plate and serve with side veggies.
Serving Suggestions:
If you serve with sauteed spinach and red bell pepper bits you'll have more red and green!
Enjoy!
Cheers!
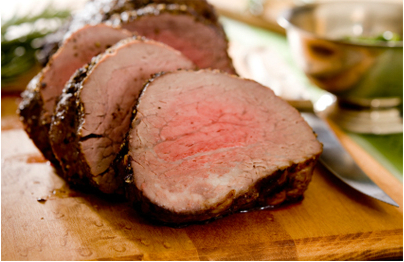
Coffee-Crusted Steaks with Tomato Salad & Caramelized Onion "Jam"
Plan Z Phase: This is a Z2 (ZReduction) recipe.
Don’t let the coffee turn you away! I’m allergic to caffeine and I love this dish! It does not taste like coffee when it’s done and it won’t keep you up at night. You can use decaf grind if you want to. The rub just gives it an interesting flavor sort of a glazed feeling. Go easy the first time to see how much you like it. You’ll have extra rub left over for the next time you want to make it again.
Servings: Serves 2
Ingredients:
(Put these items in your coffee grinder and give it a good whiz.)
- ¼ cup of fine ground, dry coffee
- 12 turns of freshly grated pepper
- 12 turns of freshly grated sea salt
- 1 packet of Stevia
PLUS
- 2 steak pieces, 5 oz each. You can use whatever cut suits your fancy.
- Olive oil spray
For the Onion Jam:
- 2 large Vidalia onions, sliced on level 1 of your mandolin or very thin if you are doing them by hand
- 1 packet of Stevia
Instructions:
On a work surface, sprinkle on the coffee rub. One side of the meat is okay for the first time. Subsequent events you can cover the whole piece of meat it you want. Rub it into the meat and let it sit for 10 – 15 minutes.
Lightly spray a cast iron sauté pan (or other oven proof pan) with olive oil. A little bit is enough.
Put the steak in, on medium high, with the spice side down. Sear the steak for 2 minutes to get a good crust on that side, then turn over.
Put in the oven to roast for 6 – 8 minutes more. I take them out when my insta-read thermometer registers 120 – 125 for medium rare. The meat will continue to cook after you take it out. How long it needs to be in the oven will depend on how thick the piece of meat is that you chose.
For the Onion Jam:
While the meat is cooking, you can place the onions in a large sauté pan. Sauté on high for 5 minutes; stirring often. Add the Stevia and turn to low. Cook another 10 minutes on low, also stirring often. This caramelizes the onions.
Serving Suggestions:
Serve with chopped tomatoes set on a leaf of lettuce.
Enjoy!
Cheers!

My Other Job
When we lived in Chicago, there was an Irish pub across the street from our apartment. They have a burger on the menu called “The Triple By-Pass.” It’s a burger with smoked bacon and melted cheddar, topped with an over easy egg.
The most dangerous thing about the Triple By-Pass burger is the bun. Because the bun contains white flour and high fructose corn syrup. Carbohydrates make us fat. Especially sugar and refined flour.
The American Heart Association and the United States Department of Agriculture have been warning us to cut back on fat for about 40 years.
This advice is based on faulty research paid for by Big Sugar and Big Food. The research (from Harvard, no less) points the finger at fat as the cause of heart disease and obesity.
It’s not.
Following this advice has lead to our nation’s obesity crisis. Two thirds of Americans are overweight or obese. And diabetes costs us $1 billion a day.
Admit it, you’ve heard and read about “artery clogging fat” thousands of times. It’s common knowledge that fat will kill you.
But this common knowledge dead wrong and it’s killing us.
Coca-Cola wants you to think you get fat because you’re not doing a good job of energy balance. “Don’t blame us,” they advertise. They want us to keep drinking Coke and go out and buy a Fitbit so we can see how many calories we’re burning. People who believe that exercise is the key to weight loss have dropped hundreds of millions on these devices. But they haven’t dropped pounds because they invested in another shiny object.
Because losing weight has never been about “calories in, calories out.” Even though you may believe it is.
Please don’t take my word for it. I’m channeling Gary Taubes and his book The Case Against Sugar.
If you’d rather get the shorter version, watch Gary’s talk at Town Hall Seattle.
Do it now. Thank me later.
By the way, I didn’t eat the Triple By-Pass Burger. I opted for the Flank Steak Sandwich – shaved and cooked to perfection, topped with caramelized onions, sautéed green peppers and melted Gouda on pita bread with jalapeno aioli.
I didn’t eat the pita bread. Too dangerous.

(69 years old, 6/3″, 208.0# BP 125/72)

Happy St. Nicholas Day
When I was little, I attended a Catholic grade school. I learned about St. Nicholas Day from the nuns. I brought my new-found knowledge home to my mom and she went right along with it.
I was really into gifts (still am), so when the nuns told me you were supposed to put your shoes by the front door and gifts would appear the next morning, I was hooked.
St. Nicholas Day is the 6th of December and is celebrated all over the world. It’s really big in the Netherlands and other parts of Europe. They even have parades and light fireworks.
So back to the gifts.
The idea is to put your shoes by the door the night before. Traditionally, your shoes would be filled with oranges the next morning, maybe a little chocolate and/or a teeny gift of some kind. I guess how many gifts you get depends on the family budget.
My brother and I put our shoes out and went to bed.
Magically, the next morning our shoes had an orange and some chocolates. St. Nicholas had arrived during the night! Wow!
I kept up this tradition. Even to this day, I put a little gift of a clementine or an orange on the desk of our employees, along with a little dark chocolate treat. I wish them all a Happy St. Nicholas Day. And now, I wish the same for you, too.
It’s fun to add holiday traditions in your life.
And share the joy.
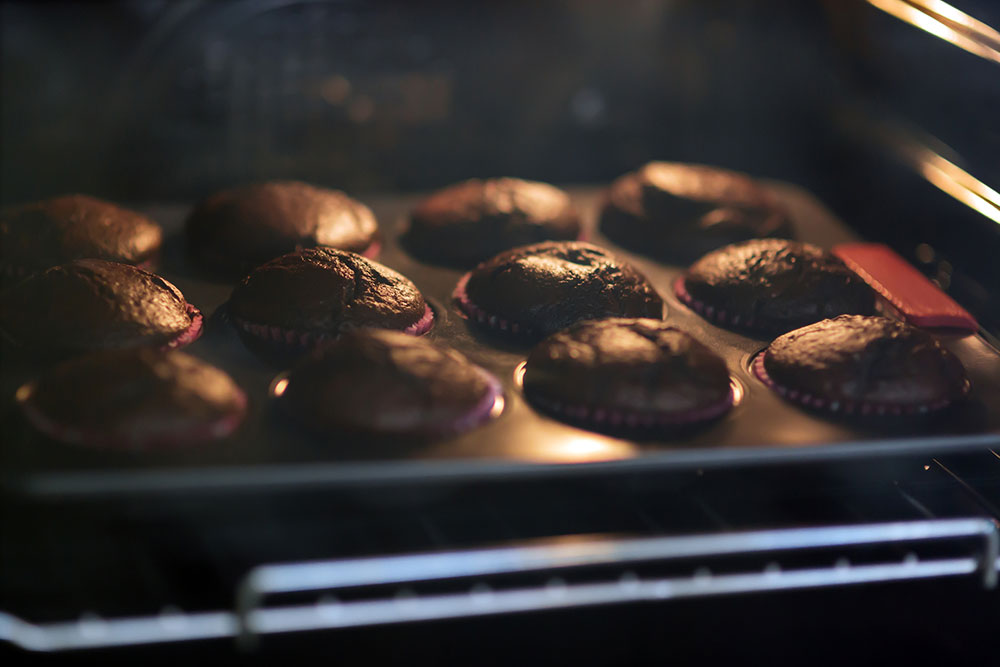
Chocolate Cupcakes
These cupcakes are courtesy of Plan Z dieter Ashley, a professional pastry chef.

Pumpkin Spiced Coffee
Plan Z Phase: This is a Z2 (ZReduction) recipe. The commercials are everywhere in the fall. Pumpkin this and pumpkin that. Starbucks is famous for their pumpkin spiced latte. But get this. A tall (which most know is their smallest size) comes in at 40 whopping grams of carbohydrates. That’s disgraceful and disgusting! Double that for a venti and you’ve now hit the carb jackpot and hit a number of carbs that is higher than most folks can handle for an entire day without gaining weight. People don’t often count the calories or the carbs in their coffee. They’ve destroyed their carb intake for the day with a pumpkin spiced latte and they haven’t even eaten food yet!
So we came up with this reasonable facsimile. We hope you enjoy! Dieter Carolyn who is a pumpkin latte mega-fan enjoyed this and is now converted! And she’s saving money too!
Servings: Serves up to 12 (cups of coffee)
Ingredients:
- coffee for a full pot
- 1 – 2 tsp of pumpkin pie spice mix
- Truvia to taste
- 1 Tbl of cream per cup of coffee
Instructions:
Fill your coffee filter basket with your normal amount of coffee to make a full pot. Now sprinkle on 1 – 2 tsp of pumpkin pie spice over the coffee grounds. Fill with water and brew as usual. You’ll have pumpkin spice-flavored coffee.
If you want sweetened coffee put Truvia in your cup of brewed coffee. A half teaspoon will do it for most folks. Then add a Tbl of cream if you want it creamier (latte style). If you’re not trying to lose weight you can add more cream. Remember it’s not the cream that will make you fat. It’s the sugar – the carbs.
Variations:
Want cinnamon coffee? Sprinkle the same amount of cinnamon over the coffee grounds
Want vanilla coffee? Sprinkle 2 tsp of vanilla over the grounds and proceed as usual.
There are all kinds of spices hanging around in your spice drawer that could make an exotic cup of coffee if you want to experiment. I think of things like cardamon. That would make an interesting kick. Apple pie spice might be a go-to for me. Nutmeg sounds nice and homey. If you are using stevia drops you can put any of those flavors either directly into your brewed coffee or sprinkle them over the grounds to make a whole pot at once. I used to use the toffee flavored stevia drops in my coffee. Since then, I’ve gone back to plain but I did my experimenting. I’m not a caffeine drinker so I’m not an expert. Maybe you have more ideas you share with me!
Enjoy!
Cheers
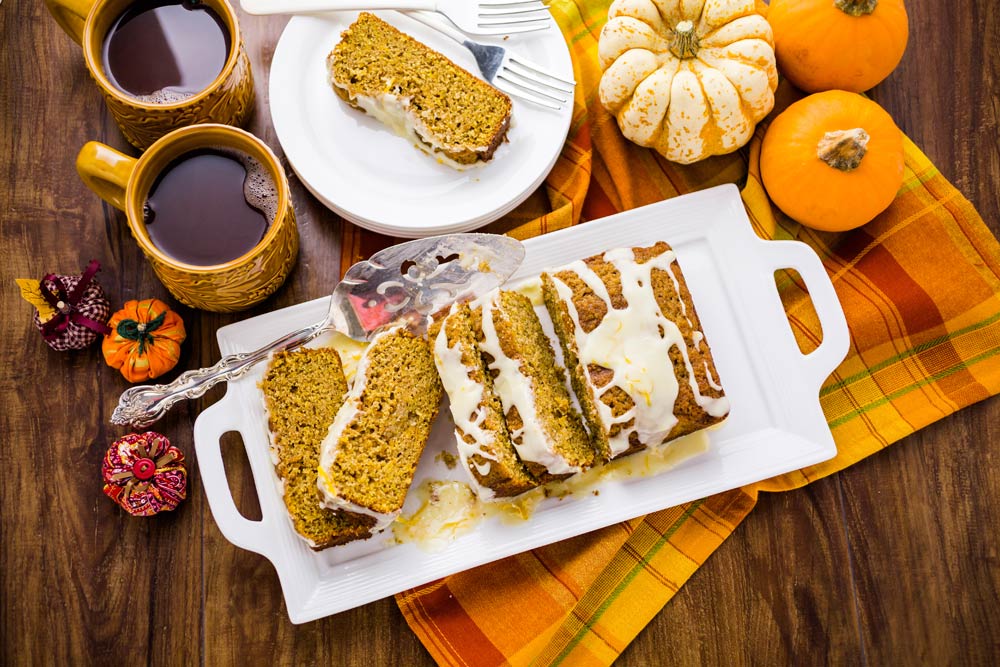
Pumpkin Cake with Cream Cheese Frosting
Plan Z Phase: This is a Z3.5 (ZReboot 3.5) recipe. This is a quick cake that can be served at a party. You don’t need large pieces when something has as much flavor as this does. Pumpkin treats are a big hit in the fall and over the holidays.
Servings: Serves 12
Ingredients:
The Cake
- 2 Tbl of melted butter
- 1 cup of pureed pumpkin (from the can)
- ½ cup of ZSweet or Swerve sugar substitute
- 4 eggs (room temperature)
- 1 tsp of vanilla
- ½ tsp of grated sea salt
- 1-1/4 tsp of baking soda
- 1 tsp of cinnamon
- ¼ tsp of pumpkin pie spice
- 1/3 tsp of nutmeg
- ¼ cup of coconut flour or Carbalose flour
- ¾ cup of Super Fine Ground almond flour
The Frosting
- 8 oz of softened cream cheese
- ½ stick of softened butter
- 1 tsp of vanilla
- 3 – 4 drops of liquid stevia
- ½ cup of POWDERED ZSweet or Swerve*
*I buy powdered ZSweet online but if you only have the granulated version you can put it in your food processor and turn it on to make your own powdered sugar.
Instructions:
For the Cake
Preheat oven to 350 degrees. Spray your pan with butter spray or baking spray. I used my 8" loaf pan. You can also use a 9”x 9” square pan or a 9” round springform pan. The final result will look like a single layer cake.
In your mixing bowl, put in the eggs, butter, pumpkin, sugar sub, and vanilla. Begin beating on medium to mix the ingredients. Stop the mixer and scrape the sides so everything is incorporated. Now let the mixer run for 2 minutes on high. I actually use a timer because I want to make sure the eggs get good and whipped.
Turn off mixer. Now, most cake recipes will tell you to mix all of the dry ingredients in another bowl and then incorporate them. I’m too lazy for that or in a hurry. I put all of the dry ingredients in the bowl on top of the wet ones but I make sure that as I add them I sprinkle them on so nothing is in one blob. Dust your spices over the top. Sprinkle the baking soda and even spread out the flour. Then do the same thing to mix. Run the mixer on medium for about 10 seconds to blend. Then stop the mixer and scrape down the sides. Next, let it run for another 2 minutes to make sure the batter is all incorporated well and you’ve stirred everything really thoroughly.
Pour the mixture into your prepped 9” pan and make sure it’s spread evenly. Then bake for 30-35 minutes. You can test for doneness with a toothpick. If it comes out clean you’re all set.
Cool the cake before you frost it.
For the Frosting
Put all ingredients in a medium bowl and mix until creamy. You can taste test your frosting to see if you want to add any more liquid stevia. I think it’s plenty sweet with just a few drops. A little of that stuff goes a LONG way so be careful when adding it.
I frosted this cake in a simple manner. If you want to decorate it you can make the recipe for the frosting again so you’d have enough to pipe a border on top and bottom.
Store leftovers in the refrigerator. I try to take the cake out of the fridge about 30 minutes before serving it, but truthfully, the cold cake tastes really lovely, too.
Enjoy!
Cheers,
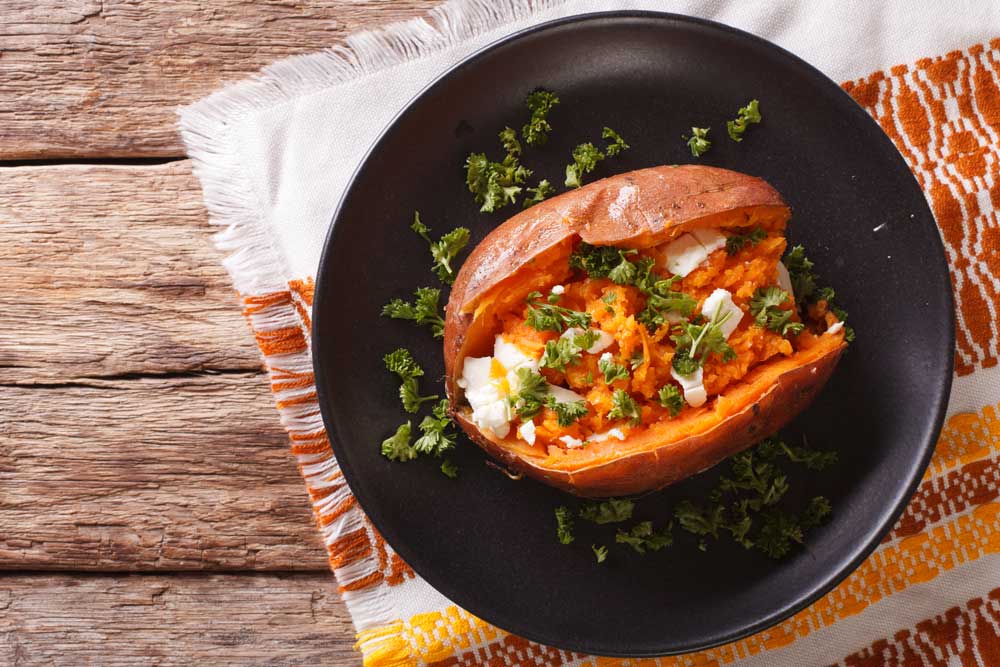
Want Potatoes on Turkey Day? Here's What to Do
My childhood Monday dinner went like this:
Mom would set my plate of food in front of me. Every Monday we had the same meal…baked chicken, mashed potatoes, and a veggie. Usually, the veggie was peas.
Once mom gave me my Monday meal, my first move was to dig a hole in my mashed potatoes and push in a pat of butter. I was raised in Wisconsin during a time when we were not afraid of butter, so that was a nice extra touch. I remember the butter was always cold. I’d cover it up with some of the warm mashed potatoes so it would melt.
I then proceeded to eat my chicken, followed by my peas. I’d save the mashed potatoes until the end. The potatoes were my favorite. I’d break open the encased butter which, by the end of the meal, was melted and gooey. Then I’d dig in with my spoon and savor those potatoes. I’d roll them over my tongue to get every last bit of flavor from them. If there were any mashed potatoes left over I’d ask my mom for a second helping.
Of course, at that age, I didn’t realize our bodies processed mashed potatoes and sweet desserts in almost the same way. I just knew I loved mashed potatoes and I wanted to eat them every chance I got. Knowing what I do now, I find it telling that even as a child I saved my mashed potatoes until the end of my meal so I could eat them like a dessert.
Once I was an adult and started having dinner parties, I specialized in making fancy kinds of mashed potatoes. Some of my most popular dishes were the ones where I added parmesan and coarsely ground black pepper or, (even better) the ones in which I’d add shallots that were roasted in olive oil until they became a caramelized goodness. I recall those as being an extra-special favorite of my good friend, Jill.
We all thought the little gourmet things added to the mashed potatoes made them more decadent. Now I realize adding those things actually made the mashed potatoes more…healthy.
I should probably clarify that statement – mashed potatoes will never be “healthy.” However, by adding fatty things like butter and Parmesan cheese into the potatoes, I was setting up a digestive situation that actually made things easier on our livers. The added fat caused our livers to not convert as much of the potatoes into sugar (and potentially into fat).
Let me explain: the measurement of the increase in your insulin level when you eat something is called the glycemic uptake. Most foods will increase your blood sugar level, at least a little bit. Obviously, eating something sweet will increase the amount of sugar in your blood a lot. What most people don’t realize is that really starchy foods increase our blood sugar just as much as really sweet foods!
If you add a bit of fat whenever you eat high carb foods, the combination ends up slowing down the glycemic uptake so your blood sugar won’t shoot up as much or as fast. And it will come down faster too!
As we head into the holidays, we are heading into a potato frenzy period. Everyone wants potatoes with their holiday meals. Even if you are going to skip eating the potatoes this year, your family will likely pressure you to make them or they might even be so bold as to make a potato dish and bring it along if you won’t make it. So, I wanted to give you some options in case you are hosting the holiday dinner this year. Truth be told, I may eat a whole portion of potatoes on Thanksgiving but I am pickier about what potato dish I choose now. Since I only eat a full portion of potatoes about 4 times a year, it’s a big deal to me. I am still careful, however, in what potato preparation I choose to eat. What accompanies that potato is factored in highly too.
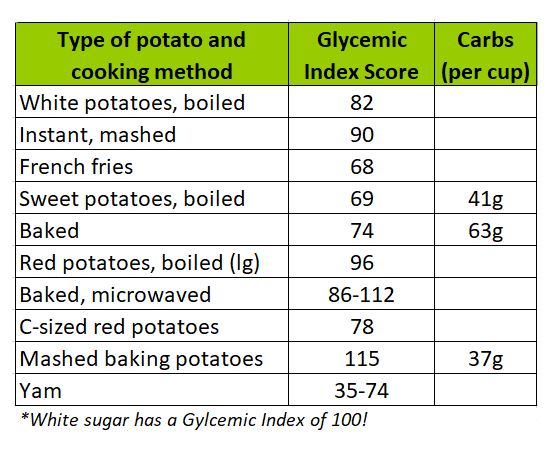
So, here’s a short list that lays out the Glycemic Index of different kinds of potatoes. Considering that sugar scores in at 100, you’ll see how the different potatoes rank. You’ll see why they are so sugary to your system that I refer to them as another dessert. If you focus on that when you are in the buffet line or ordering in a restaurant you’ll be likely to keep your potato portion under control.
How you cook the potatoes matters too. Raw potatoes score lower than cooked, but who wants to eat a raw potato?
For a select few of the potatoes, I added another column to show you how many grams of carbohydrates are in that type of potato and under the specific cooking method. The number of grams of carbohydrates each person can handle in a day without gaining weight will depend on how large that person is (height and weight) as well as the efficiency of their digestive system. But let me stereotype for a minute and speculate that most folks cannot handle more than 80-90 grams of carbs per day without starting to balloon up. So why would you want to sink 37, 41 or even 63 grams of carbohydrates into your system from just one cup of potatoes! Remember that even fruit has carbs.
Everything you eat has to fit in that 80-90 gram number.
Keeping your carbohydrate percentage to less than 20% of your daily food intake is your secret to staying thin and healthy. That will keep your liver happy, your pancreas happy and even your circulatory system flowing smoothly with no clogs.
So memorize this:
The potatoes are the splurge. They are a splurge as much as any dessert.
Cheers,

What’s the Secret to a Happy Family Gathering?
I was reading my latest issue of Real Simple magazine the other day and came across an article on family gatherings that I thought was interesting.
They had done a survey of readers to find out what their secrets were to a happy family gathering. I thought I’d share a few of them with you and run a little commentary. After that, I might add one of my own and then my favorite part will be to ask you for YOUR feedback on your secrets to successful gatherings. You can add your family secrets below at the bottom of the article.
The one that made me laugh was right up front:
"An empty dishwasher and trash before the gathering begins."
I have to say that this is important to me no matter what the occasion. The least stressful dinner party for me is one where I am so prepared that the dishwasher is empty and so is the trash. My husband is an ace at making this happen.
Next up:
"We have a cell phone bucket at the front door."
I wish I had the guts to do this at every dinner party; just to make the point. Truthfully, folks at my dinner parties and other gatherings are not spending time on their cell phones. I don’t have that hosting issue but if I had a house full of my relatives, I can see how it might become a “thing.”
Two more that go together in my mind:
"I always send an invitation not an expectation." And…
"A start time and an end time with an open-house policy. Come by anytime between 3PM and 8PM. Stay as long or as briefly as you like. No pressure."
I love both of these.
My family gave up a long time ago in the effort to get everyone together for a family event. It’s not that we don’t try once in a blue moon, but we have no heavy expectations on how many will come.
I think at last count if every one of my siblings show up with their kids (and their kids' kids) we’d have over 40 people. We are pretty spread out, too. It’s nuts to think any date you pick would work for everyone.
And having an open-house is a great way to take the pressure off of the hosts and guests. Hey, both turkey and roast beef taste good cold anyway. Can you say buffet?
My last feature from the article is:
"Creating space for people to have alone time."
Some folks just need a break from the maddening crowd. My husband’s family is very small. Ours is large. So, he likes to get some separation. He used to go into the den and let all the grand-kids climb all over him like he was some kind of jungle gym. That’s not alone time for sure, but it gave him a break from the crowd of adults all talking at once. The article talks about time for a walk in the woods to digest or even a brief nap.
One I will add of my own:
"Let people help. And team them up."
I have been very successful with this concept. Think about it. It might free some of your time up if you give a couple of folks a recipe and let them make something. I get the ingredients out and set them on the counter. Then I enlist two people to make whatever it is. Salads are super easy. So are side dishes. I suggest you combine generations. Maybe Aunt Ruthie hardly knows her teenage niece. Let them work on the salad together. Or get a nephew. You might find out how talented a cook he is. You’re around working on other things in case someone has a question. First thing they will do is laugh and apologize for their cooking expertise (or lack of it). Then they get down to business. At the end people remark about all they learned about that other person that they never knew before. Of course, everyone enjoys the dish too.
Enjoy a fun-filled season of holiday events.
Cheers,
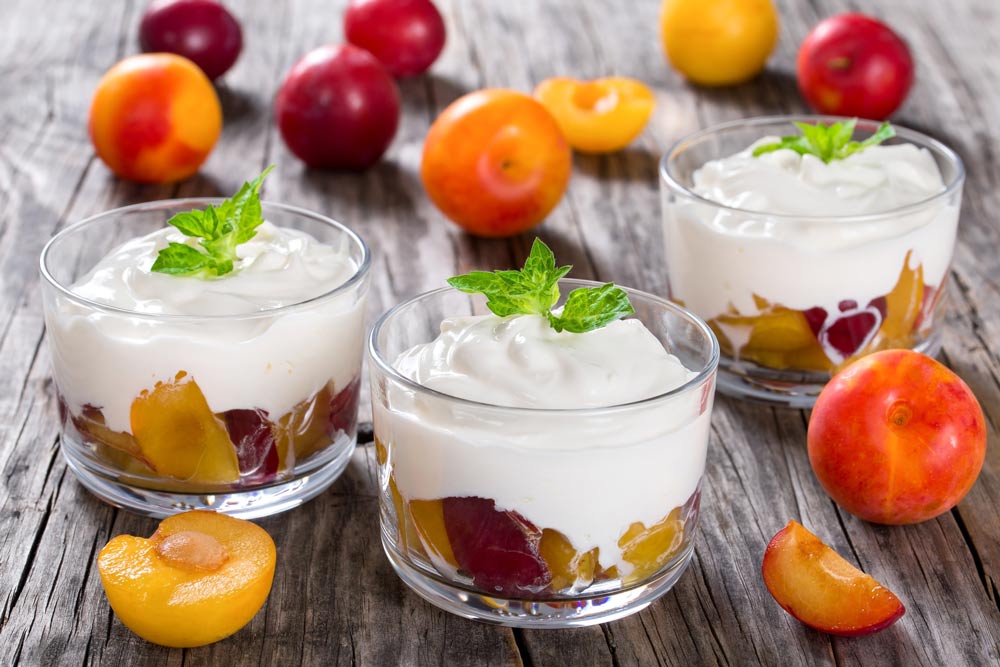
Tipsy Plums with Sweet Cream
So what are your secrets to family gathering success?
Chime in below and let us know.
We can all share these ideas like one big happy Zola family.

How to get Plan Z covered by your insurance
Our newest improvement will be welcome news!
Plan Z is now covered by some insurance plans!
Let me outline four options:
HSA/FSA Coverage
Two easy ones are FSA (Flexible Spending Account) and HSA (Health Savings account) cards. If you have either one of those, all you have to do is order Plan Z using your card!
If you saved the money in your HSA account or your employer provided you with an FSA card, by all means take advantage of it. Making FSA and HSA payments are as easy as using the card like a credit card. When you place your order, use your FSA or HSA card at checkout.
Health Insurance
If you have health insurance, but no flex spending card, you can still work to get the diet approved if your BMI is above 25. Depending on your coverage, your insurance company might pay for all of your diet, or a portion of it. All you have to do is take these special forms to your doctor to complete:
Sample Letter of Medical Necessity
They’ll decide which one they prefer to use. Then ask your doctor to submit the form to your insurance company for approval (it has to come from your doctor's office or your insurance company might not accept it). Obesity is a disease that leads to other diseases that are also covered by insurance. So if you have Type 2 Diabetes, high blood pressure, high cholesterol or even things like sleep apnea, it all adds up to get your diet paid for by your insurance. Your doctor might prefer the general form or the letter format so take them both with you.
Tax Deduction
And lastly, you can get help from Uncle Sam. A quality diet, like Plan Z, is now deductible from your taxes. In this case, you pay for the diet up front, and save your receipt just like you do for other tax deductible items. When you file your taxes, you’ll deduct the cost of the diet along with your other deductible expenses. You can check with your tax advisor if you use one. For those who don’t get a refund, getting to deduct the full amount from taxes is like money in the bank. It’s money you didn’t have to pay in taxes; instead you invested it in yourself by paying for Plan Z.
I hope this helps you make an easy decision to do another round of Plan Z.
Feel free to call us with questions. My goal here was to make you aware and to help answer some of the basics.
Cheers,
P.S. Remember many FSA/HSA dollars expire at the end of the calendar year. It’s a “use it or lose it” system. So take advantage of it TODAY.

Spooky Times
Halloween is hands down my favorite holiday. I used to celebrate big. We’d invite about 70-80 people to dinner and dancing (we had a big house then and we hired a DJ).
I’d make 13 courses. Starting off we’d have five or six appetizers in the bar area. Can you say blue cheese stuffed olives floating in vodka? We’d call those eyeballs.
Then I’d serve a buffet that went along a theme. The theme would match our costumes. So the year my husband and I went as Rhett and Scarlett from Gone with the Wind we served southern food.
The dessert buffet might have a cake covered in an icing spiderweb with candy spiders. One year I did a cake that was a red velvet cake and it had a hand coming out of the top of the cake.
You get the idea.
This year will be a calmer Halloween celebrated with all things pumpkin, so I thought you might enjoy this recipe for pumpkin pancakes. If you decide to drizzle them with syrup, take it easy on the sugar level.
Here, also is my Halloween greeting for you. Share this with your children and if they are older they can share it with their little goblins, too.
Cheers,
Happy Halloween!
Pumpkin Pancakes
A delicious and healthy treat!
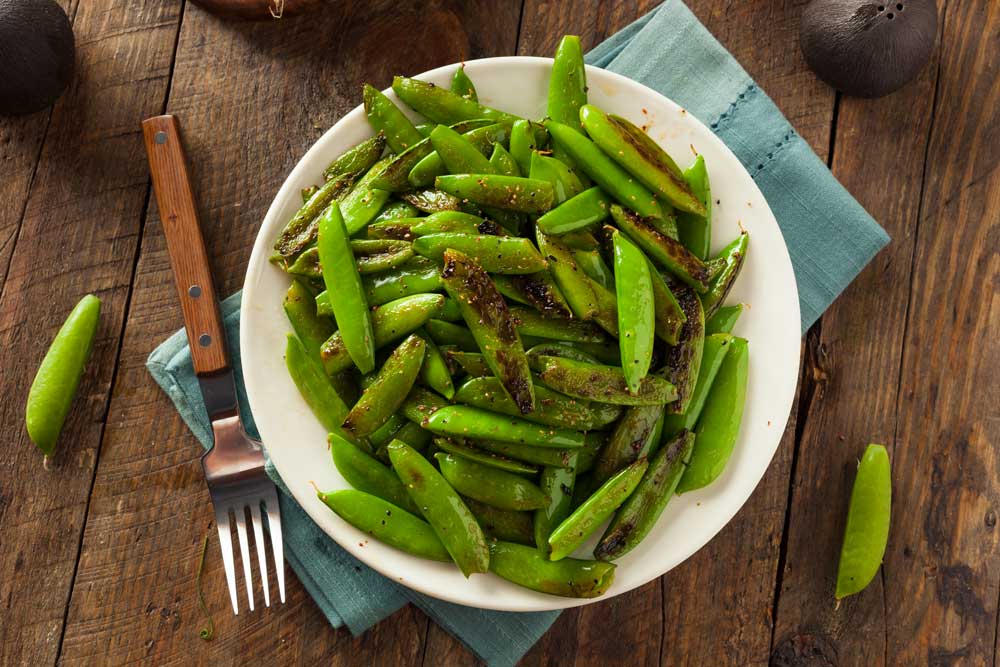
Sea Salt Crusted Snap Peas
Plan Z Phase: This is a Z3 (ZReboot) recipe.
This recipe is amazingly simple; yet tastes sort of gourmet. Just make sure you use a high-quality sea salt and grind it fresh. I use pink Himalayan salt for all my cooking. This is a great side dish, particularly for fish dishes. They are fun to eat even with your fingers. You won’t ever need potato chips again.
Ingredients:
- One handful of snap peas per person, or you decide, you’re not limited
- Olive oil spray
- Grated sea salt
Instructions:
Get out an ovenproof pan. I use Pyrex. Put in your snap peas. Spray on olive oil and grate on a generous amount of sea salt. You decide how salty you want them.
Roast in a preheated oven at 375 for 15 minutes. If you have a convection oven, use the convection setting.
Voila. Done.
Enjoy!
Cheers,
Caramel Sauce
Plan Z Phase: This is a Z3 (ZReboot) recipe.
I never thought I’d be able to come up with a caramel sauce. It’s tricky to make, and my favorite caramel sauce recipe has sweetened condensed milk in it. That’s not something I eat anymore.
This caramel sauce recipe is fairly easy to make. You just need to keep an eye on it and use a large sauce pan even though the ingredients won’t be very deep in the pan. That’s the only way to get the butter and sweetener to caramelize. The first time I made it I used what I thought was a large enough pan, but it took too long to cook and eventually separated before it was finished. I had to start over. The inspiration recipe I used is from a woman named Maya Krampf. Her website is WholesomeYum.com. I’m sure she’d appreciate it if you check that out. My recipe is almost the same as hers; just a slight variation or two.
A couple of hints: You’ll want to serve this caramel sauce the day you make it. I served it about 30 minutes after I made it. It was still warm. As it cools it will thicken a bit more and that’s perfectly fine. I did refrigerate the leftovers and that’s not good. It turns back into a block of sweetened butter-ish stuff and it doesn’t reheat well. It separates when you bring it back up to a warm temperature. So you can make this early in the day and just let it sit at room temperature until you are ready to serve it. If you reheat it very gently in the pan I think it will warm up again without separating.
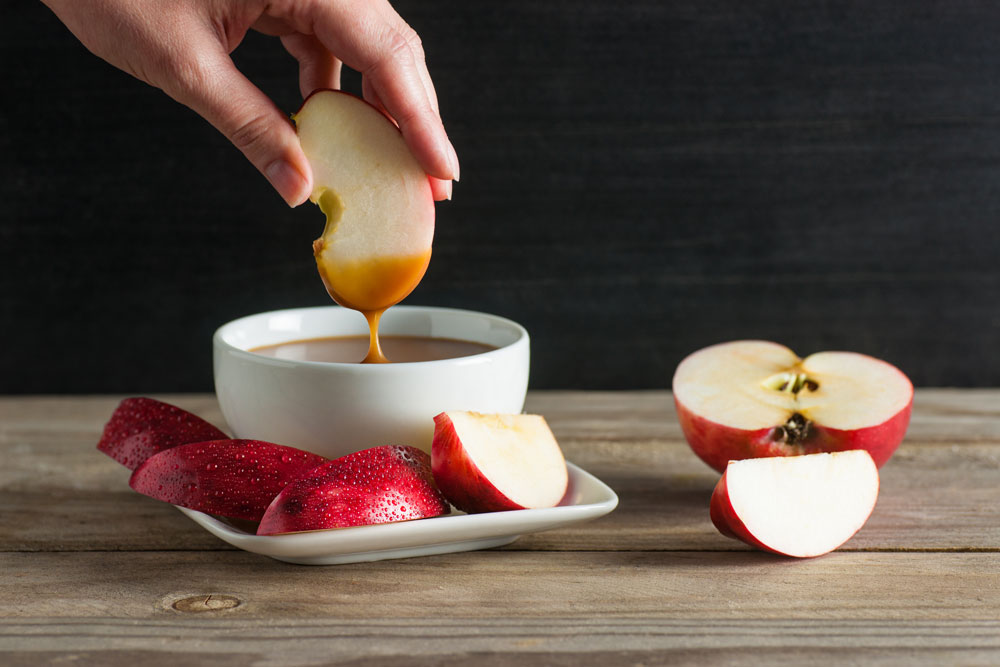
And as Maya pointed out, you don’t want to double or triple the recipe because it takes forever to cook and might separate like mine did the first time around. If you need more, I suggest you make two separate batches. I added some grated sea salt to mine and came up with salted caramel sauce. That’s an option. I served mine with sliced apples. Dipping the apple slices in the caramel sauce was fun and makes you feel like a kid again. I’ve listed some more options at the bottom of the recipe too.
Servings: This recipe makes about 1 cup of sauce
Ingredients:
- 1/3 cup of butter
- 3 Tbl of sweetener. I used Swerve. You can also use ZSweet. If you use Truvia it might have a tinny taste. Truvia doesn’t heat well. You can buy both of the recommended sweeteners online. You could also use a brown sugar substitute. Maya recommends Sukrin Gold. I found that online, too. Be sure to use granular sweetener. I don’t think a liquid sweetener will work for this recipe.
- 2/3 cup of heavy whipping cream
- 1 tsp of organic vanilla
Instructions:
Put the butter in a medium-large sauce pan. Mine is about 8” across. Add the sweetener of choice and melt on medium. Stir regularly and cook for 3 – 4 minutes until it’s golden brown. Watch this carefully so you don’t burn it.

Add the cream. Bring to a gentle boil; just bubbling and reduce to a gentle simmer. I put mine on low. Cook for 7 – 10 minutes; stirring regularly until the sauce is a nice caramel color and will coat the back of a spoon. Remove from heat and stir in the vanilla.
Variations and serving ideas:
I added a nice grate of sea salt to make salted caramel.
You can serve this over ice cream. There are ice cream recipes on Plan Z. I also sometimes buy a small carton of organic coconut milk ice cream or Haagen Daz now makes little cartons. Just keep your portion to 15 grams of carbs or less and make sure you’re in ZReboot and fully stabilized before you venture in this direction.
Serve with sliced apples for a nice treat like I did.
You could also chop up some peanuts and sprinkle those on or dip your slices in chopped peanuts for a caramel apple treat. This way you get the experience of the treat without eating a whole large caramel apple.
You could serve it with grapes that have tooth picks in them. I just don’t recommend eating a lot of grapes.
For the fancy dinner party you might consider making almond pound cake and serve it with a nice drizzle of caramel sauce on top.
Instead of the fruit and cream, for a dinner party I’m going to fry wedges of the pound cake and drizzle with caramel sauce and maybe a squirt of truvia-sweetened whipped cream.
Enjoy!
Cheers,