
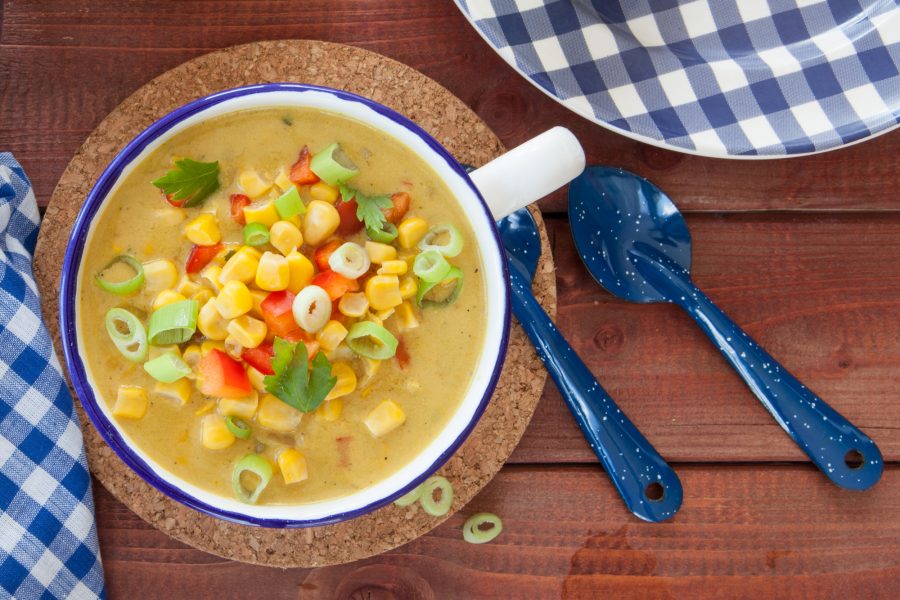
Corn Dip
Plan Z Phase: This is a Z3.5 (ZReboot 3.5) recipe.
Servings: Party Sized. See below.
I came up with this recipe at the end of summer. I took what I call an “inspiration” recipe and Zolafied it so we can enjoy it. It’s really tasty.
The real lesson I am trying to convey as it relates to blood sugar spikes that come from corn, is that if you are going to eat corn, build fat around it in your recipe. That will keep your blood sugar more steady so you can handle this kind of treat once in a while.
That’s not a license to start eating corn on a regular basis but it is a way to be able to eat something like this as a treat.
Ingredients:
- 3 ears of roasted corn*. Or if it’s winter and you can’t get fresh corn, one 15 oz can of corn will work too. I prefer fresh-roasted.
- 2 oz of diced green chilies (or to taste). That’s about 1/3 of the small can
- 6 green onions, chopped. Remove roots and chop the white part and the first section of the light green parts
- 1 cup of sour cream
- 1/2 cup of mayo. I only buy mayo now that is made with olive oil or avocado oil. The avocado mayo is expensive but it’s way worth it for your health in staying away from too much soybean oil.
- ½ cup of red bell pepper bits
- 1 tsp of minced jalapeno (or to taste).
- 2-3 cups of grated cheddar cheese. I use good cheddar and grate it rather than use the stuff in the bag. How much you put in depends on how much you like cheddar and how thick you want your dip. You can start with two cups and see how it goes.
- Frito scoops
- If you have never taken corn kernels off a cob of corn, it’s easy, but be careful. Stand the corn upright on the fat end. Use a sharp knife and cut from top to bottom cutting off the kernels. Keep repeating this process until all corn cobs are cleaned. Toss the cobs.
Directions:
Put all of the ingredients except the Frito Scoops in a bowl. Stir to combine. Refrigerate until ready to serve.
Serve in a pretty bowl with Frito Scoops on the side. Be careful not to use too many scoops. If you take a portion and put it on a plate you can reuse your scoop more than once so you don’t eat too many. My max is 5.
*To roast corn, spray the cleaned ears with olive oil spray. Put in an oven-proof pan and roast at 400 degrees for 15 minutes. Then let cool before cutting off the kernels. You can do this a day ahead and store the corn in a large baggie.
Enjoy!
Cheers,

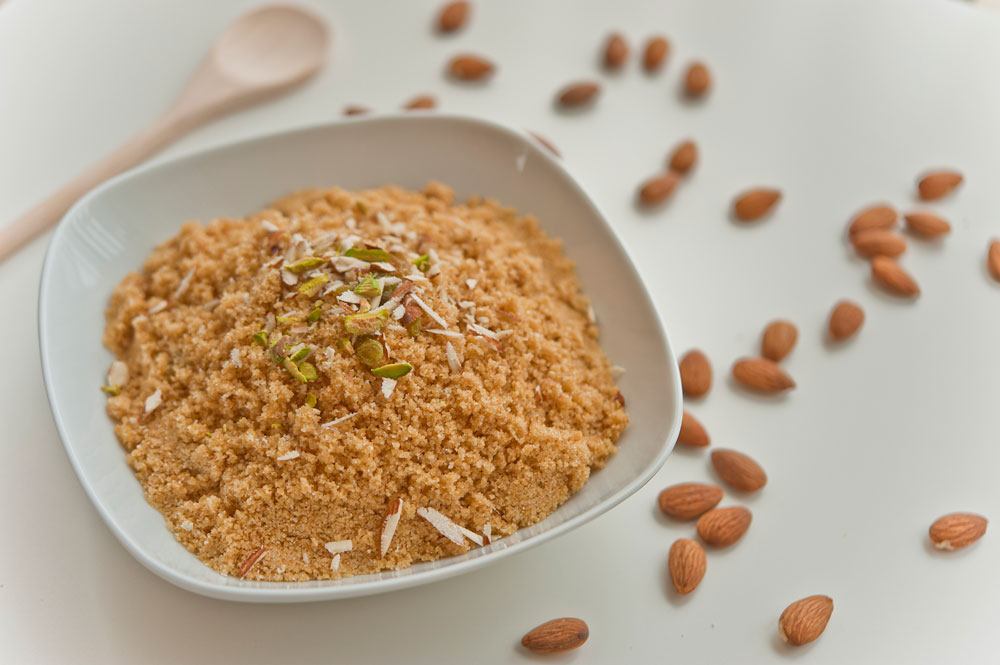
Nut Crust
Plan Z Phase: This is a Z3.5 (ZReboot 3.5) recipe.
Servings: Serves as a crust for a 9" tart. A 9” tart serves 8 people.
A tart with a fruit base, chocolate or even a cream cheese will work well with this kind of crust. It gives you a crunchy bottom similar to a graham cracker crust.
Ingredients:
- ½ cup of slivered almonds (this can also be made with macadamia nuts, pecans or a combination)
- ¼ cup of granular sweetener. I use Swerve brand or ZSweet (you might have to order on line)
- ¾ cup of flour
- ¼ tsp of salt
- 6 Tbl of cold butter, cut into pieces and scattered throughout the food processor bowl
- 2 Tbl of cold water, sprinkled over the top.
- Get out your food processor. First, grind the almonds and sweetener til mixed. Don’t grind too long or you’ll end up with nut butter, but you do want them fine-ground. Add the flour, salt, butter and water. Process in bursts until a dough ball forms. Scrape down the sides if necessary.
Instructions:
Grease a 9” tart pan. Spread the nut mixture across the bottom and up the sides. To make this easier, I use a piece of plastic wrap. That way my fingers don’t get all full of dough and I can slide the pastry around better to spread it evenly. Toss the plastic.
Bake at 350 degrees for 15 – 20 minutes until golden. Cool. Or if you’re filling this with a pie-style filling to put in the oven, you can fill the tart right away and continue your baking process.
Enjoy,
Cheers!
THESE TIMELESS KITCHEN HACKS WILL MAKE YOU THE BOSS
“Hack” is a new slang word for trick.
So what we are going to talk about today is kitchen hacks that make your life easier, and maybe more creative or efficient in the kitchen.
Let me give you one example from my home.
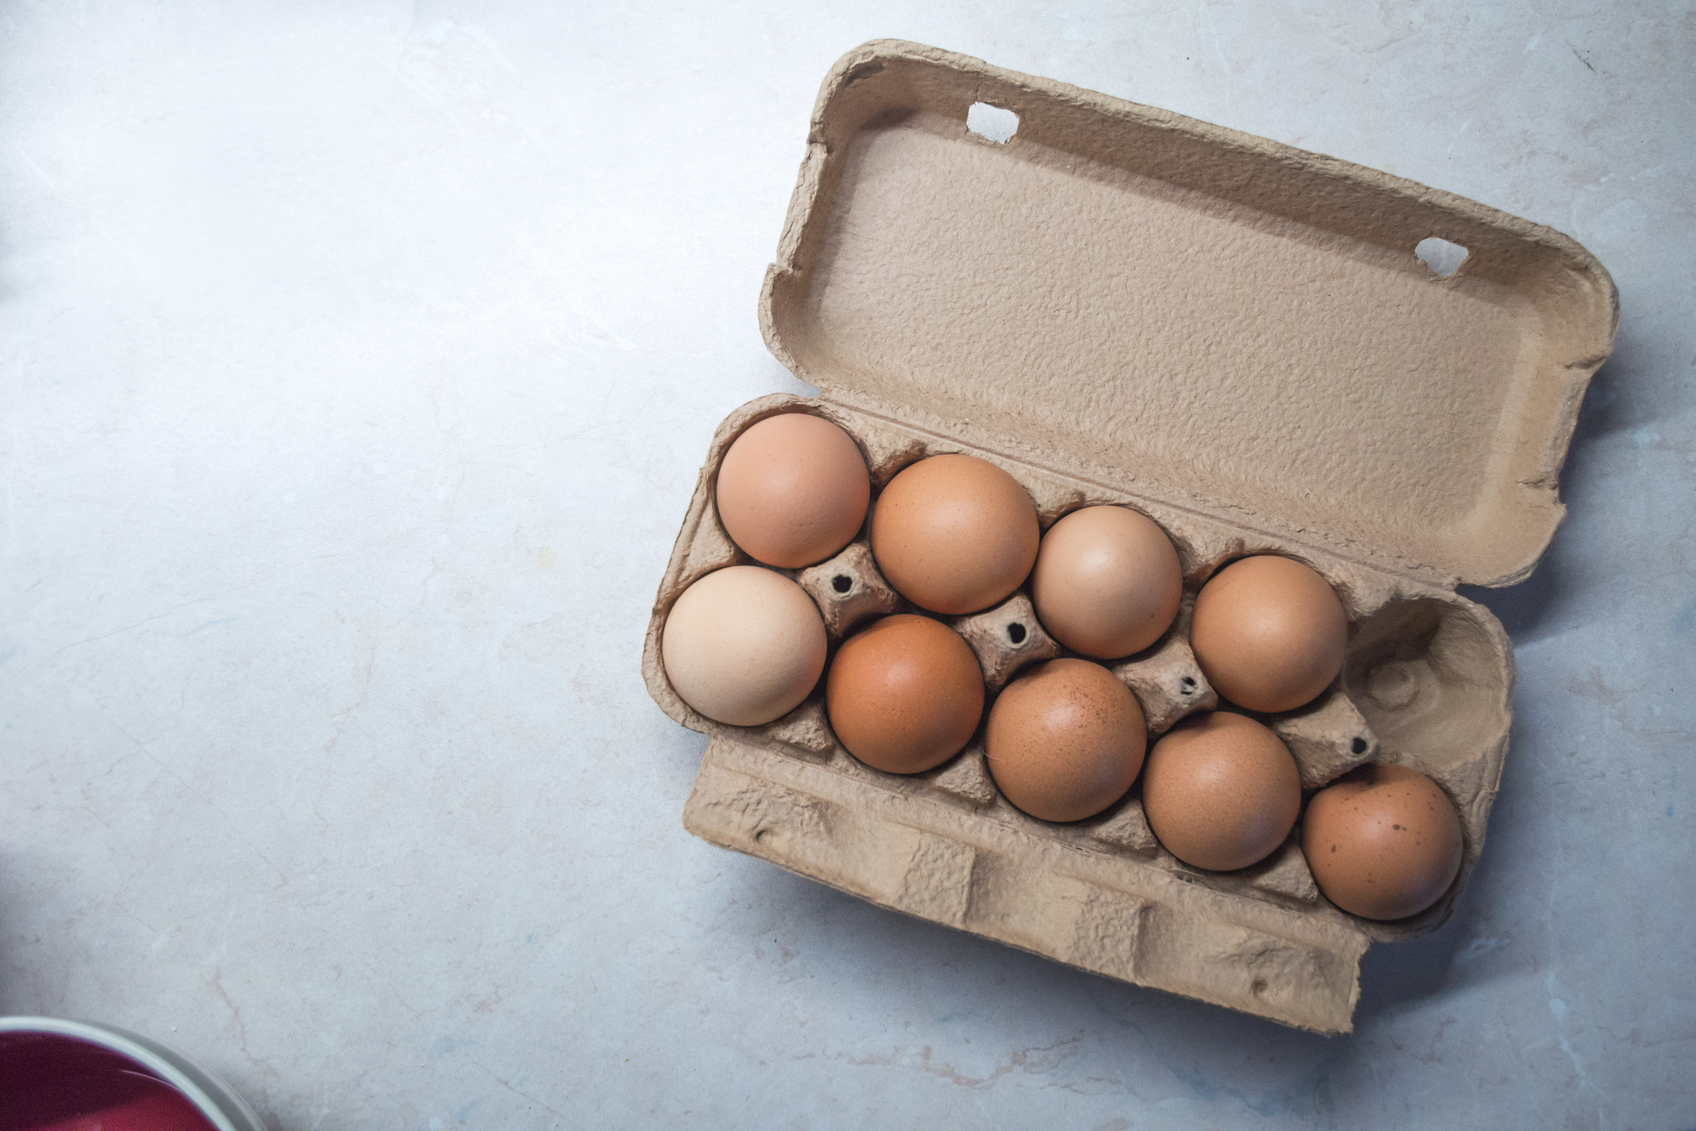
My husband likes to hard-boil eggs for his breakfast. He often makes a half-dozen at a time. That means if he started with a full dozen, there are six eggs left in the carton. He wants to store them in the same carton so when he goes to pull out one of the eggs and he’s hoping it’s hard-boiled, how does he tell them apart?
Here’s the easy way. Choose an egg. Spin it on the counter like a top. If it spins in a circle like a top that means it’s hard boiled. If, when you spin it, it wobbles around on the counter that means the yolk is not yet cooked, and it’s bouncing around inside of the egg. That’s a fresh egg, so don’t crack it if you are looking to eat a hard-boiled egg. Use those to make scrambled eggs or a cake.
I came across a post on the internet that was featuring “25 Amazing Kitchen Hacks.” I had to check it out. I learned a few things and found some oldies I had totally forgotten about. Or it made me think of things I do that were not even on the list.
I thought you might be interested in kitchen hacks, so I am providing a batch of them for you to dive into. These kitchen hacks all come from the Cooking Light Magazine crew so I am confident they are all going to work. Check them out and feel free to share some of your own.
Interesting thing I found in my research… kitchen hack blog posts are very popular! I found zillions of them. All you have to do is Google “Kitchen hacks” and a variety of sources will come up. If you are really into this, here are a few more I book marked for you.
Two of my faves in this list are freezing herbs in garlic oil for winter cooking and using a grill pan as a waffle maker. I got rid of my waffle maker so I am going to remember this one!
Enjoy!
Cheers,
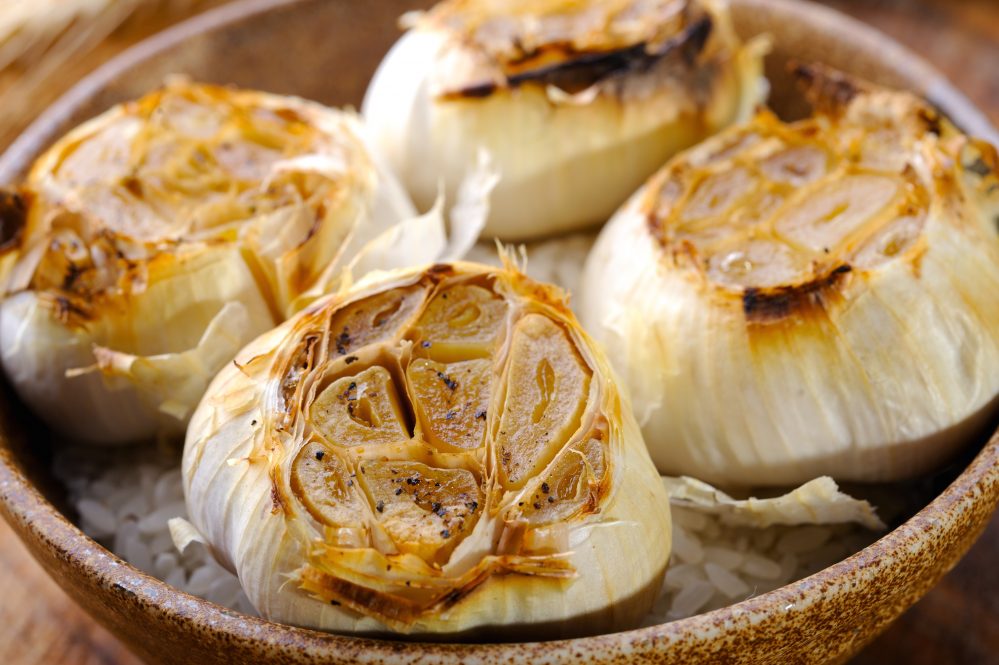
Roasted Garlic
Plan Z Phase: This is a Z2 (ZReduction) Recipe.
This is a super-easy way to roast garlic. Once roasted, garlic no longer tastes hot and pungent. It mellows as it roasts and can even be made into a spread. You could also add some of this roasted garlic to a batch of cooked green beans or asparagus for a nice flavor combo.
Ingredients:
- 1 bulb of regular garlic
- 1 - 2 Tbl of olive oil
Directions:
Just cut off the fuzzy top of the garlic down far enough that you’ll be able to see the cut side of most of the cloves nestled in the wrapper. I cut down about an inch from the top. Use a sharp knife or if you slip you might slice yourself.
Get out a square of aluminum foil and place the garlic flat side down on the foil. Drizzle 1 or 2 Tbl of extra virgin olive oil over the cut top and wrap the garlic in the foil like a pouch. I place it in another dish in case any oil oozes out. You don’t want that on the bottom of your oven, burning.
Then roast the garlic about 30 minutes at 400 degrees. And voila. You can check to make sure it’s done by poking it with a sharp paring knife. If it slides easily the garlic will be soft to eat. It’s ready. Open the foil. You can take it out of the foil or leave it in. Your choice. Let it cool a bit so you don’t burn your mouth. Serve it with seed crackers to keep it very low carb. If it’s a splurge occasion you can serve this with small slices of French bread.
Enjoy!
Cheers,

2nd Tuesday Call - October 9th 2018
On the 2nd Tuesday of each month, I host a live webcast for dieters only. I'll share the latest dieting information. And let you in on my favorite recipes coming out of the ZKitchen. You’ll hear an inspiring interview with a successful dieter, too. Plus, you can be part of the webcast by posing questions and sharing your own Plan Z story with the audience.
- October. MY favorite month! Why? Halloween! But Halloween isn't all about giving out candy anymore. Tune in to find out what we do at our house.
- We will be featuring a new fall favorite recipe. Bye bye candy apples. Here's what's hot.
- Wine. Need I say more?
- Chris interviews Dieter Darryl about his weight loss and health gains.
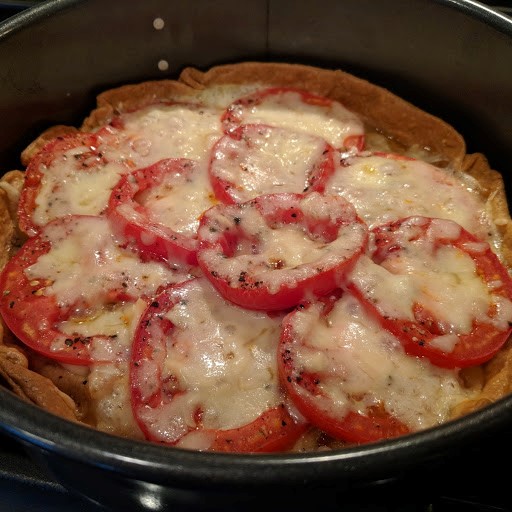
Fresh Tomato Tart
Plan Z Phase: This is a Z3.5 (ZReboot 3.5) recipe.
Now that you can get beautiful fresh tomatoes most months of the year, this recipe can be made at any time. Very fresh Italian. And simple. I try not to use commercially made piecrusts very often but in a pinch, they will save time. Just don’t do it regularly. Serve with a side salad for a simple lunch or dinner. This would also work nicely as a breakfast or brunch option. I can see scrambled eggs on the side.
Servings: Serves 4 - 6
Ingredients:
- 1 (15-ounce) package organic refrigerated piecrusts. You’ll only need 1 crust. You can freeze the other.
- 1 dozen garlic cloves
- ¼ cup of olive oil
- 5 cups shredded fontina cheese
- 4 medium tomatoes
- 1/2 tsp grated sea salt
- 1/4 tsp grated pepper
Instructions:
Press the refrigerated piecrust on bottom and up sides of a 9-inch tart pan with a removable bottom. Bake at 450° for 9 minutes or until piecrust is lightly browned; set aside.
Put your dozen garlic cloves in a small ovenproof pan. Make sure the pan is as small as possible. Mine is about 4” round. Otherwise you might burn the olive oil. I used Pyrex. Drizzle over the olive oil. (If you don’t have a small Pyrex pan you could use two sections of a muffin tin and accomplish the same thing. Just divide them in the two indentations and drizzle the oil over both) Roast the garlic at 400 degrees for approximately 30 minutes. Keep an eye on it. If it begins to brown it’s time to take it out. If it’s just barely brown it will be squishy. You can mash it with a fork. If you let it get browner it will be crustier and you’d chop it up, but I like it either way.
Spread the garlic over the bottom of the baked crust.
Sprinkle 1/2 cup fontina cheese over the garlic.
Slice tomatoes, and sprinkle evenly with salt and pepper. Arrange tomato slices over shredded cheese. Sprinkle with remaining 1 cup cheese.
Bake at 350° for 45 minutes or until tart is lightly browned.
Enjoy!
Cheers,
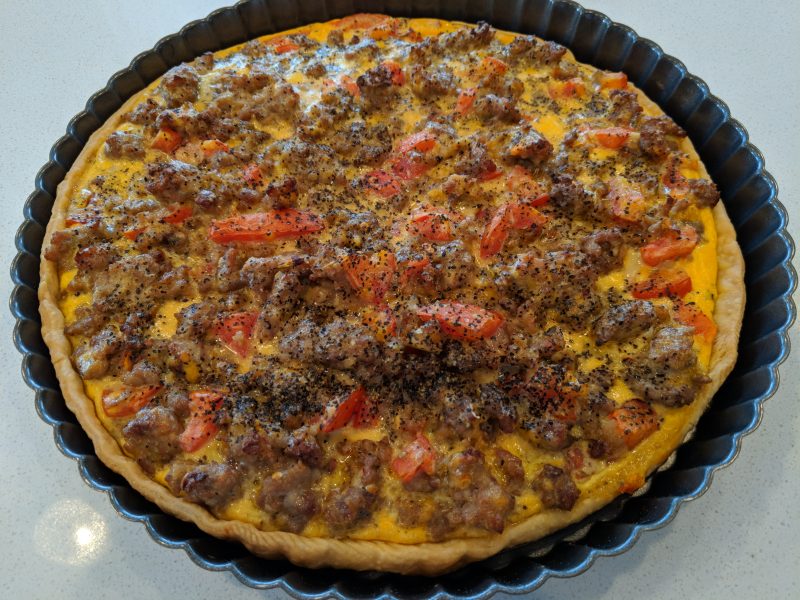
Italian Sausage Tart
Plan Z Phase: This is a Z3.5 (ZReboot 3.5) recipe.
Servings: Serves 6
This has a processed food item in it. Pie Crust. I’m not proud of that but sometimes you just need the convenience. If you have a favorite pie crust recipe you can use that too...like my almond flour pie crust - YUM. The convenience of a pie crust makes this a quick meal. Leftovers heat well too.
Ingredients:
- 1 package of refrigerated pie crusts. They come two to a package. You only need one, so you can save the other one or freeze it. If you are in the first part of ZReboot you can make my almond flour tart crust.
- 1 lb of loose Italian sausage. I used hot Italian sausage.
- 1 large tomato, diced
- ½ tsp of garlic powder
- ½ tsp of Italian seasoning
- 2 Tbl of Parmesan cheese, grated
- 1/3 cup of shredded cheddar
- 2 eggs
- ¾ cup of whipping cream
- Sea salt and pepper to taste
Instructions:
Set oven at 425 degrees. Unroll one pie crust and fit it into a 10” tart pan with removable bottom. Bake 6 – 8 minutes until it’s a light beige.
While that’s happening, you can make the filling. Get out a large saute pan. Add the sausage and begin cooking it on medium to brown it. Break it up as it cooks so it gets to bite-sized bits. This will take about 7 minutes. You don’t want to see any pink. Transfer the sausage to a bowl and add the tomatoes, garlic powder, and Italian seasoning and cheeses.
In another bowl, whisk the eggs and then add the cream and combine. Season with salt and pepper now or you can season each piece individually after it’s baked.
Combine both bowls into one and mix it up thoroughly. Carefully pour the mixture into the crust. Be sure to gently spread it or tilt the tart pan so you get egg in each area.
To be safe, I put the tart pan on a large cookie sheet with sides before it goes in the oven. This way if it has any leakage, it won’t be on the bottom of your oven. Bake for 15 minutes. Then turn the oven down to 350 degrees and bake an additional 12 – 14 minutes until the egg mixture is set and it’s golden on top. Be sure to look at the middle of the tart for any wiggly bits. If you have some, then just cook it a few more minutes.
Remove from oven and cool 5 – 10 minutes before cutting. This can be served warm or even room temperature on a buffet table.
Enjoy!
Cheers,
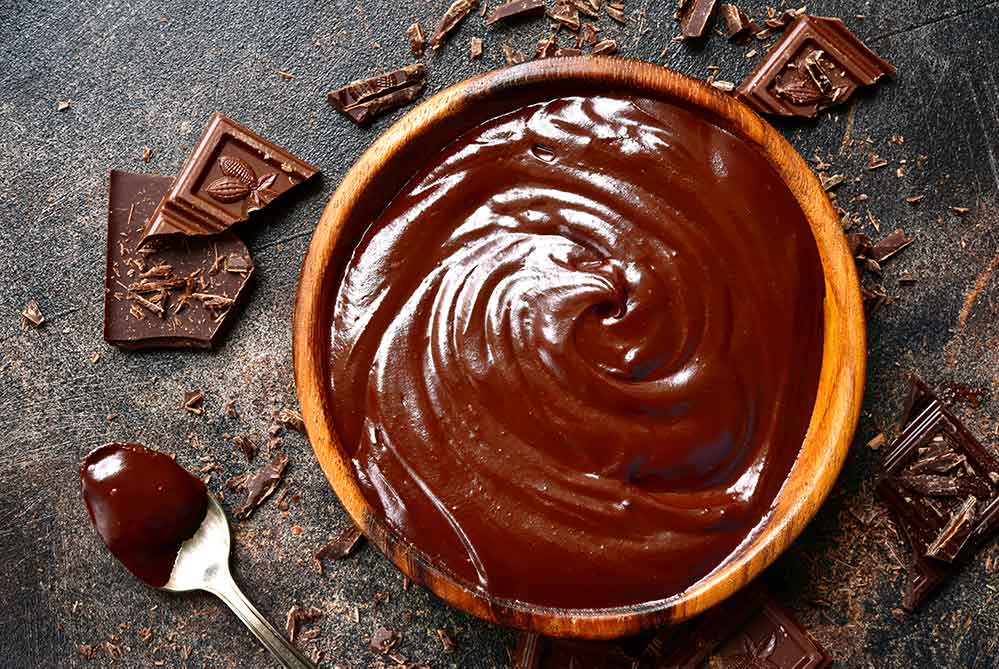
Chocolate Ganache
Plan Z Phase: This is a Z3 (ZReboot) recipe.
Ingredients:
- 8 oz of dark chocolate. You want to use 70-80% cacao. That will give you the dark chocolate flavor with fewer carbs. Don’t use 90-100% cacao or it will taste too strong.
- ¾ cup of whipping cream
- 1-1/2 tsp of vanilla. When I make flavored ganache I still add the vanilla for smoothness.
Instructions:
Dice your chocolate into bits and put them in a bowl that can handle warm frosting. The smaller you dice them the easier this will come together.
In a small saucepan heat the whipping cream just until bubbles form around the edge of the pan. You don’t want to really boil it or it will boil over. Keep a close eye on it. You just want it hot.
Immediately pour the hot cream over the chocolate and stir with a whisk. You want to continually stir the mixture until it’s totally smooth. Then add your vanilla and stir again.
The ganache is ready. Now you have some decisions to make.
You can let it cool down some before you glaze a cake with it or a tart/torte. Pour a puddle of it in the center and spread it with a spatula. You can also pour it around the edge and it will drizzle down.
You can cool it till it’s almost totally cool and use it like regular frosting. If it gets too cool it will get stiff and be hard to work with.

What I do is set the bowl on the counter while I make the rest of the meal and just check it periodically. I’m looking for it to be cool but not stiffening up.
You can cool it until it’s almost totally cool and whip it into a fluffy frosting. Don’t overwhip it or it will turn the cream into butter and you don’t want that.
If you want to frost the top and sides of an entire cake, you’ll need to double this recipe.
If you chill the ganache after you’ve put it on something it will harden and become candy consistency. Think of the outside of a Mounds bar. It will have that snap.
If you want to glaze cupcakes you can keep the warmish ganache in a bowl and just dip and swirl your cupcakes in it to coat them.
Enjoy!
Cheers,
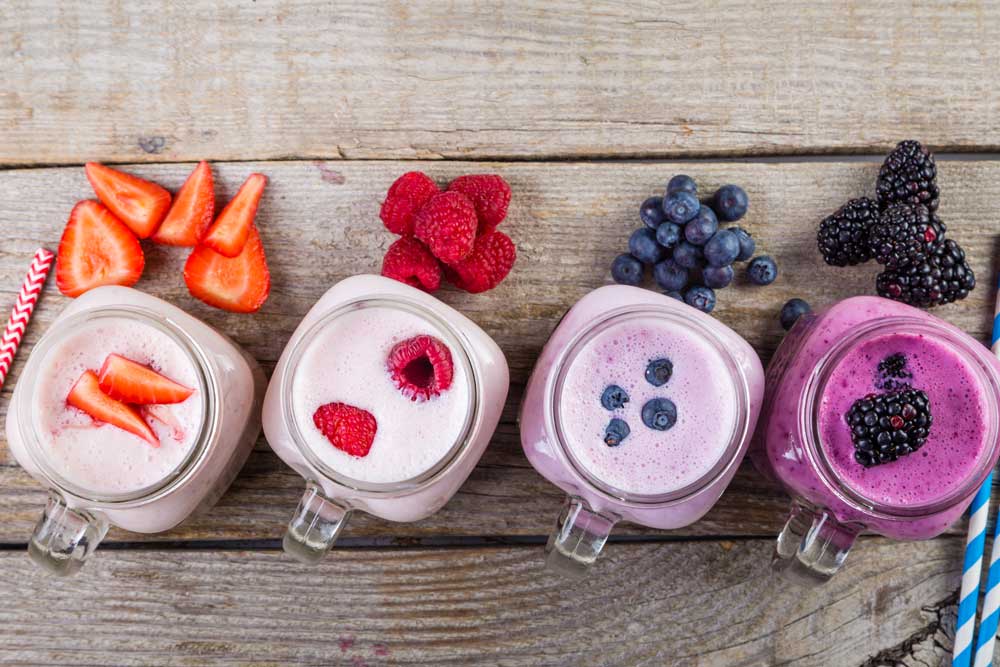
Fruit Smoothie
Plan Z Phase: This is a Z3 (ZReboot) recipe. This smoothie recipe is a great breakfast drink for those on the go. It is also a great mid-afternoon snack for those who want to get more calories in ZReboot. It even makes a great dessert!
This tastes like a luscious thick shake.
Serves: 2 Servings
Ingredients:
- ½ cup of full fat Greek yogurt (Fage, Total is the one I used. Be careful not to get 1%, 2% or 0%. Get Total)
- A handful of frozen fruit. I love mango but lots of other fruits work, too.
- 1 cup of unsweetened coconut milk (SO Delicious is my favorite. Find it in healthy grocery stores in the refrigerated section. Usually near the soy milk. Do not use the stuff in a can. That’s for Thai cooking and is not the same!).
Optional…
- A sprinkle of nutmeg or cinnamon or even pumpkin pie spice mixture
- Up to one tsp of Truvia for sweetener (some fruits don’t need any sweetener)
- 1 Tbl of flaxseed OIL (get this in the vitamin section. It’s refrigerated. Your skin, hair and nails will love it. Also gives a calorie boost for those trying to maximize calories on ZReboot).
Instructions:
In a blender, add the yogurt, fruit and the coconut milk. Whiz until blended. If you like your smoothie runnier add more coconut milk.
Taste.
If you want you can add the other elements (all or as many as you want) and blend again.
Serve.
Serving Suggestions:
This is my breakfast probably 3 days a week. I can just drink it at my desk and get right to work!
You can even make this thicker by adding more fruit or ice and eat it with a spoon!
Enjoy!
Cheers,

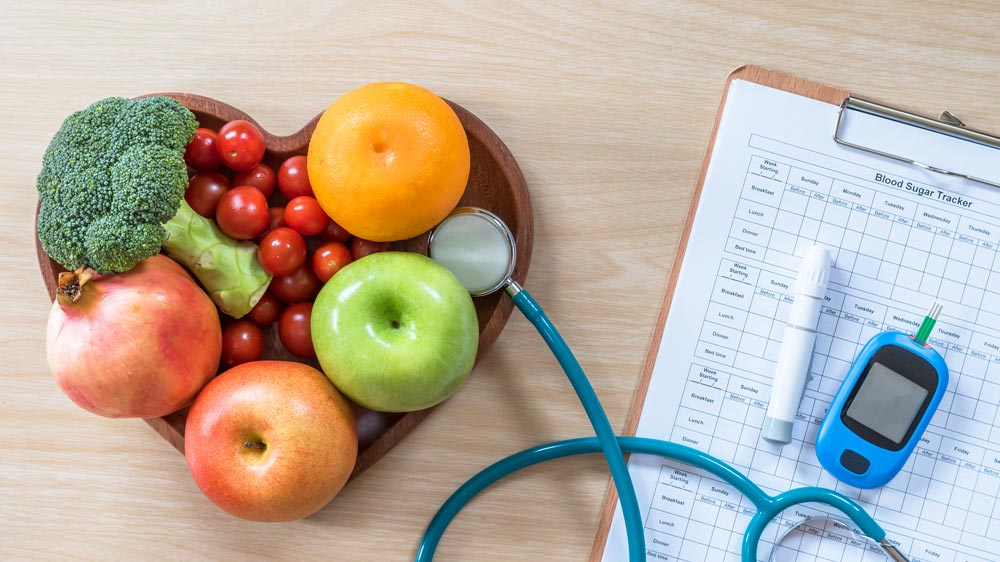
As a diabetic, Plan Z changed my life
"You're not on a diet for the rest of your life, you've just been educated on what you should and should not eat." - Dieter Jay
Dieter Jay is a numbers guy. He is incredibly analytical, and after a lot of deliberation, decided to do Plan Z. He took the Plan Z education very seriously and got excited as he applied what he learned - and got immediate results. After an impressive 33 pound loss on Plan Z, he dropped 6 pant sizes, and even though he is a diabetic, his blood glucose levels (unexpectedly) normalized. He has more energy, more stamina, and his doctor happily took him off his diabetes medication because Jay's blood sugar levels are now under control.
"I averaged a blood glucose level of 156 for a couple of months prior to starting the plan using my little portable meter. During the 6 weeks on ZReduction I averaged 110. I was taking two, 500 mg Metformin pills a day as I have been since I was diagnosed a couple of years ago. After my annual physical in mid-July this year, my doctor reduced my medication to one pill a day for the next two weeks, and then he had me stop taking the pill completely. During the two weeks of half-medication I've averaged 118 and after stopping completely, I've averaged 121. So obviously, the meter doesn't lie....
Unless you educate yourself and really understand what's going on, you can count those calories all day long, but it's the types of foods you're in-taking with those calories...[and] you have to understand how it's impacting your body....
I'm not saying all diabetics can come off their medications or no longer be a diabetic, but there can be no doubt that the educational benefits are significant. And simply losing the weight and knowing what to eat can have an impact on a diabetic's health. Or, for that matter, on the average person's health especially if you've been diagnosed as pre-diabetic."
-- Dieter Jay
Listen to his motivating interview.
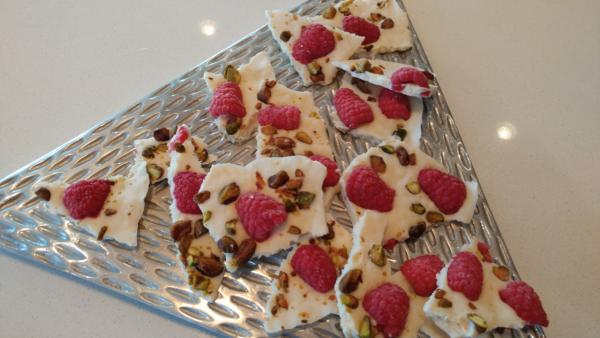
Frozen Yogurt Bark
Plan Z Phase: This is a Z3 (ZReboot) recipe
I found a very similar recipe from the great folks at Epicurious. That’s Bon Appetite magazine’s website. I didn’t have to change too much to Zolafy this recipe. So thank you to them! The final product must be eaten right out of the freezer. They melt fast but they are a fun treat.
Servings: serves 4 – 6 depending on portion size
Ingredients:
- 1 cup of full-fat yogurt (unsweetened). Fage is a good brand. If you can’t find it, ask your grocer to carry full-fat yogurt.
- 1 Tbl of Truvia or ZSweet (order ZSweet online)
- 2 tsp of vanilla extract
- Pinch of sea salt
- 1/3 – ½ cup of fresh raspberries, cut in half top to bottom
- ¼ cup of roasted, salted pistachios. (You can buy the shelled now). Roughly chop them into bits.
Instructions:
Take out a cookie sheet and line it with parchment paper or waxed paper.
In a bowl, mix the yogurt, the sweetener, vanilla, and salt. Stir to combine.
Using a spatula, spread the yogurt in the middle of the cookie sheet on top of the paper coating. Spread it to a thickness of about 1/4 ".
Top with the raspberry bits and the pistachio pieces.
Freeze until completely firm. This will take about 4 hours or you can leave it longer, too.
Break it into pieces and store in a freezer-worthy piece of Tupperware.
Serve right out of the container as a quick dessert snack.
I can’t wait to make other variations. I have in mind:
- Pineapple bits with chopped, roasted and salted macadamia nuts
- In the summer, maybe chopped peaches or apricots with salted and roasted peanut bits.
- How about blackberries cut in half with roasted, salted pecan bits
- Just about any fruit will work and any nut you like.
But whatever you use, this recipe is a hit.
Dieter Margo makes her ZReboot 3.5 variation with 2 cups of yogurt, 2 Tbl Truvia, 1 tsp almond extract, 1 tsp vanilla, a pinch of sea salt, fresh pineapple pieces and chopped pecans. YUM!!!
Enjoy!
Cheers,
Zola Infusions
Soda OUT. Water In.
When you are dieting on Plan Z, one of the things we recommend is that you increase your water consumption. People on Plan Z who drink 100-125 oz of water per day lose 30% more than those who drink less than 70 oz. Studies show that when your body unlocks the stingy fat, that it needs a ready vehicle to flush it out of your system. That’s where the water comes in. But, if you're used to drinking soda and beverages with lots of flavor, switching to water can be quite an adjustments. Here are some ways to jazz it up.
Check out these recipes for water infusions and put a whole new twist on your hydration plan.
1. Raspberry Grapefruit Sparkler
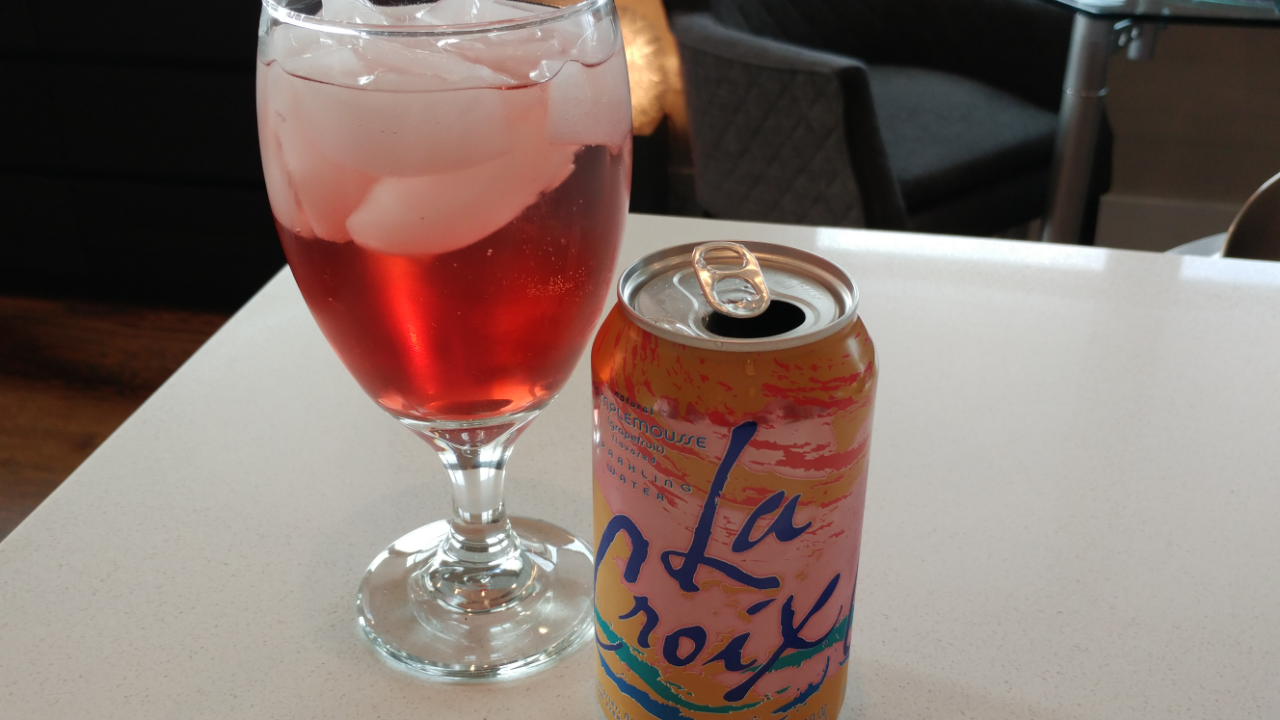
This is a drink you can make in a pitcher and enjoy while you're on Plan Z. I don’t usually like grapefruit at all, but LaCroix makes a grapefruit fizzy water that is just delightful. I use it to make this drink or I drink it plain over ice too.
2. Cucumber Lemonade
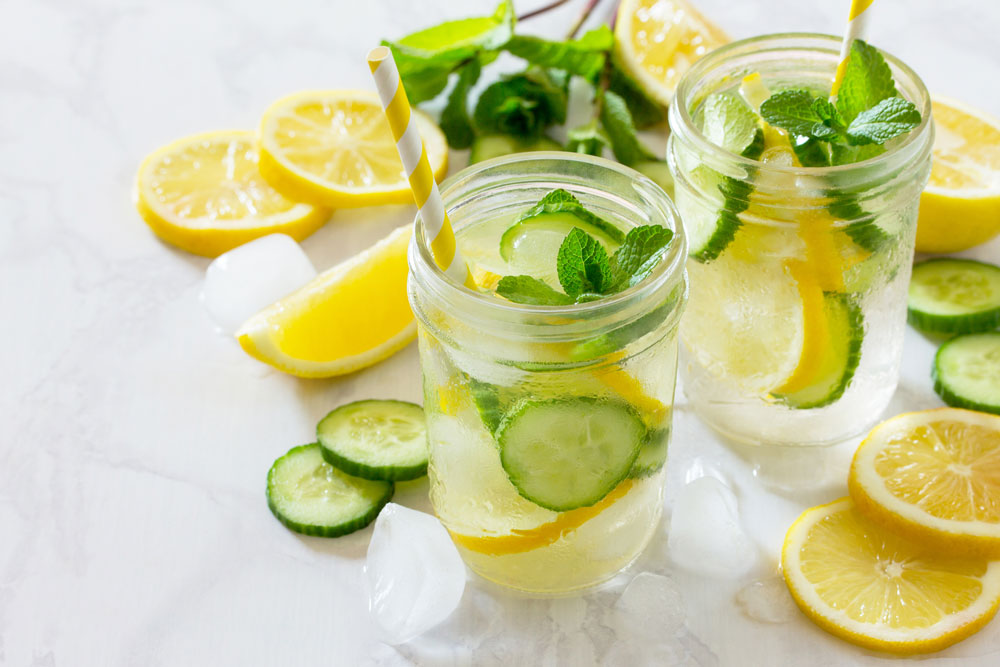
The first time I tasted cucumber water I was hooked. This is a more exotic lemonade but a refreshing one. You’ll feel fancy drinking this.
3. Creme Soda
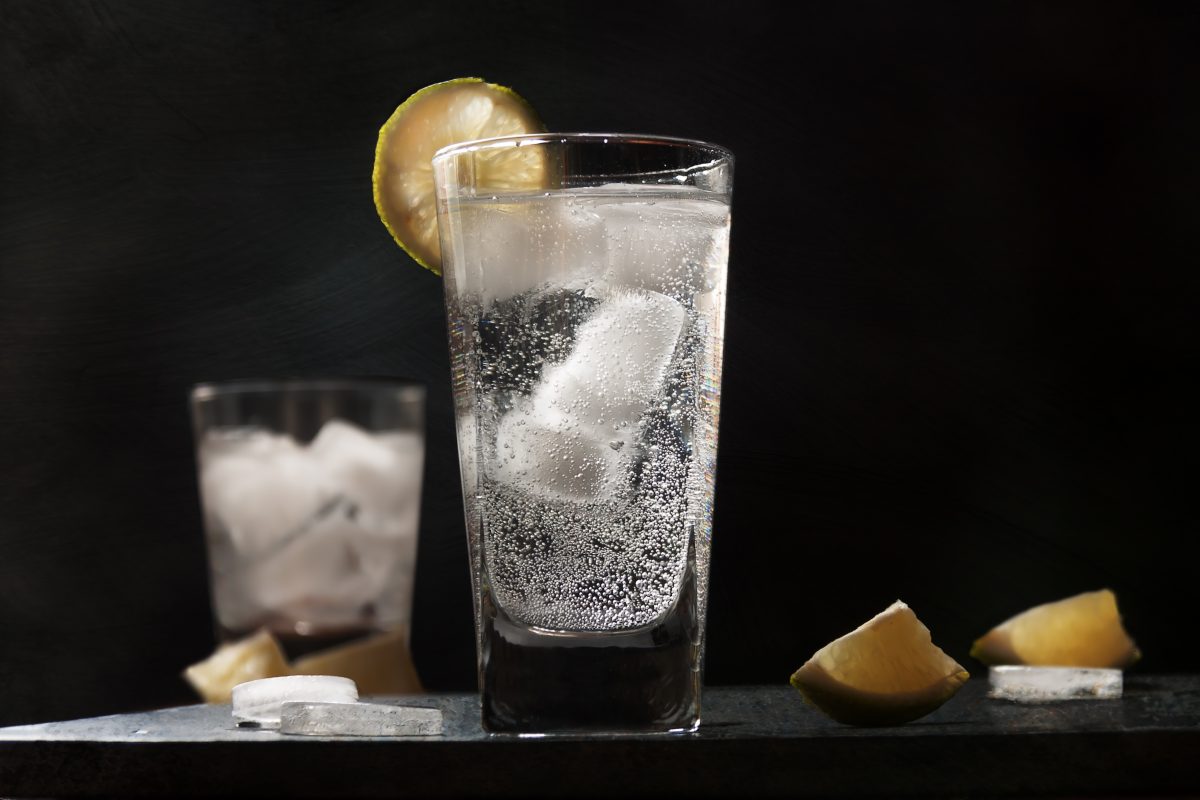
When in a restaurant, order a glass of plain club soda and keep your stevia with you. You can make your own cream soda on the spot!
4. Orange Vanilla Water
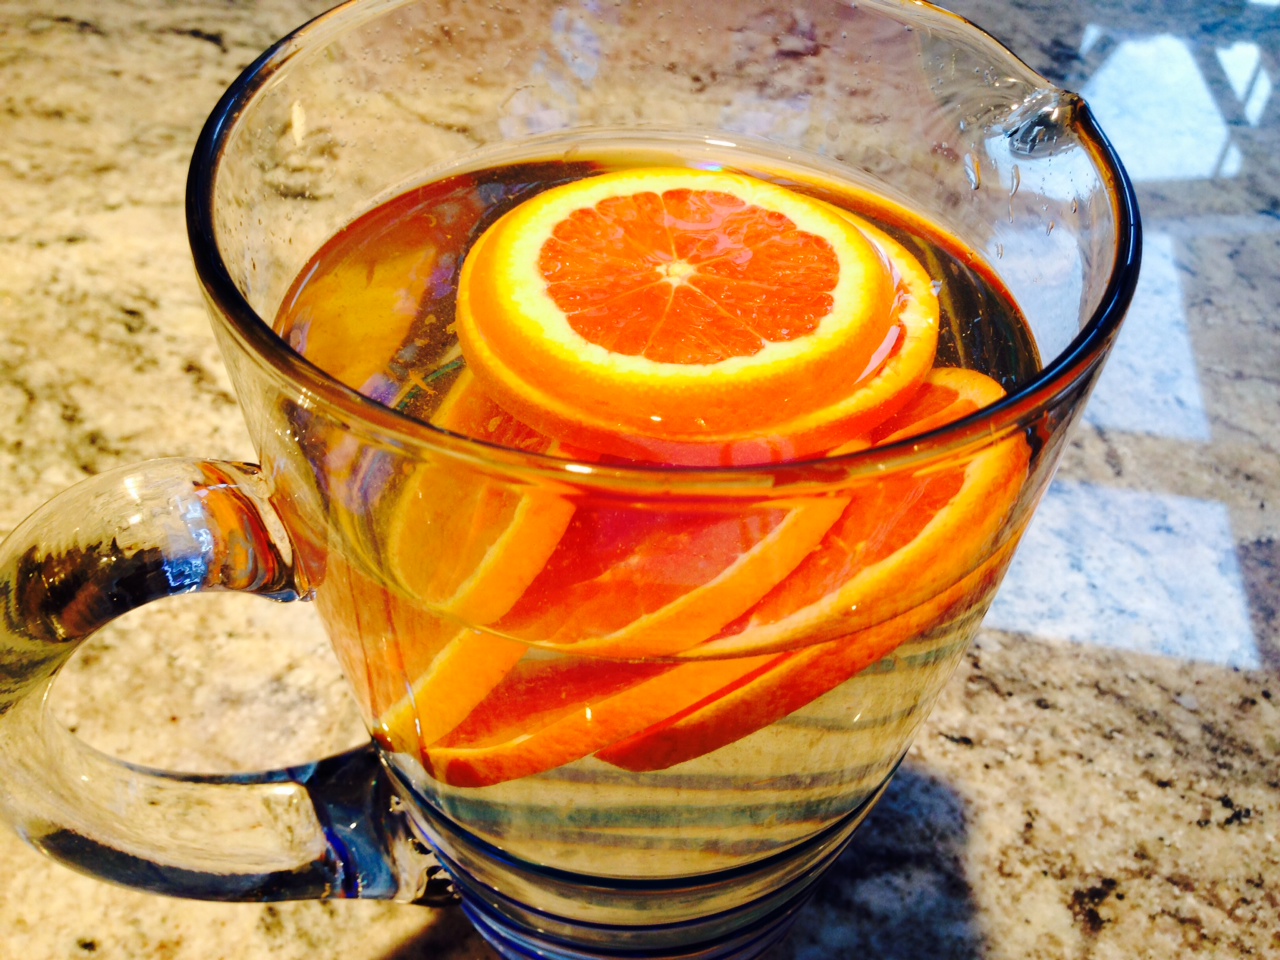
If you miss soda but know in your heart that it’s bad for you. Try a recipe like this one.
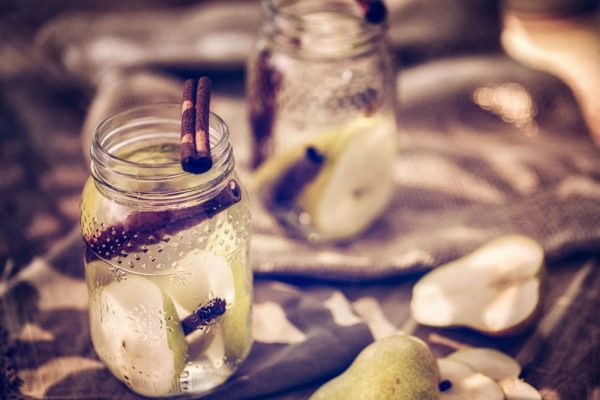
5. Cinnamon Pear Infused Water
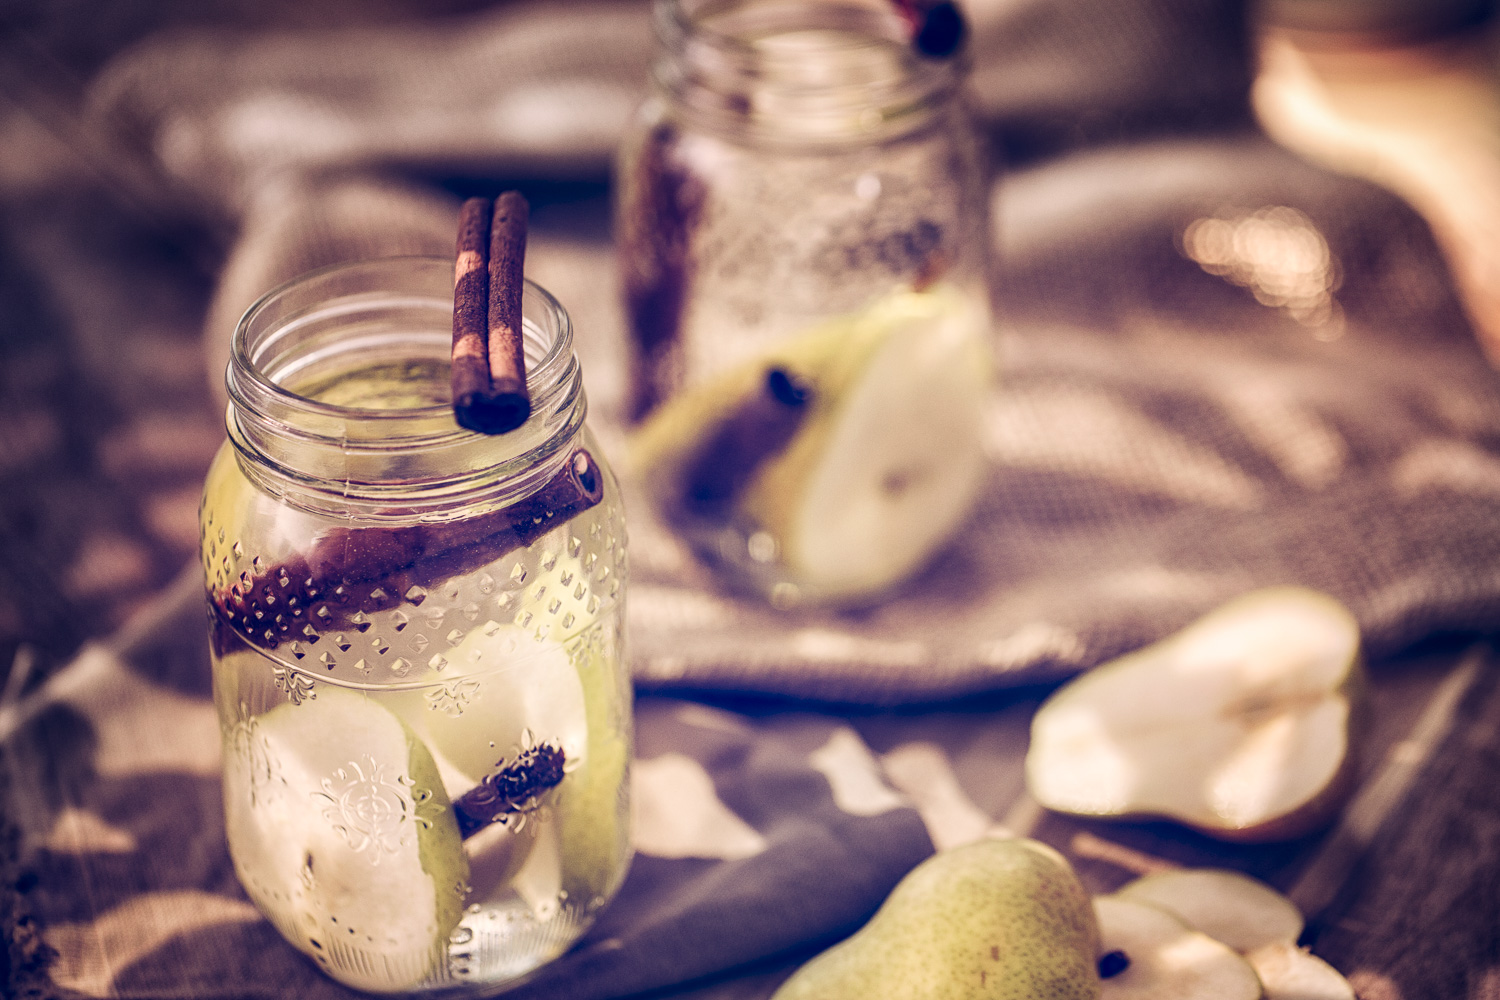
Cinnamon water has a flavor reminiscent of a snicker-doodle or an oatmeal cinnamon cookie. Try adding pear slices – it makes a wonderful summer treat.
Bookin' It
Okay, so you're bookin' it to get the kids back in school. The clothes. The school supplies. When they are in, what's next? How about you pay attention to you for once.
You could lose that annoying weight.
Hi, this is Zola from Plan Z diet.com.
I get it. It's hard to lose weight during the summer. There's too much going on -- too many distractions. But that excuse has passed. During fall it's cooler and easier to lose weight. And Plan Z is a different kind of diet.
You get to eat real food with Plan Z. You can make the same meals for you and for the kids. And they won't complain about what they are eating. Even the teenagers. Comfort food. Easy food. Get it on the table fast food.
And another thing that's different with Plan Z is the education. The kids are learning new things. You can too. So much of what we learned about diet and exercise was sadly wrong. We can fix that.
We say 60% of the value of Plan Z is learning how to keep the weight off for once. If you're one of those dieters who loses and then gains it back, we can change that. Get the facts. Do the math.
Watch this five minute movie and then get bookin' on signing up so you can be ready to lose after Labor Day.

https://youtu.be/CQEnH_Cl9WA
Plan Z Explained
Plan Z dieters lose an average of 31 pounds in 50 days. Find out how.
2nd Tuesday Call - August 14th 2018
On the 2nd Tuesday of each month, I host a live webcast for dieters only. I'll share the latest dieting information. And let you in on my favorite recipes coming out of the ZKitchen. You’ll hear an inspiring interview with a successful dieter, too. Plus, you can be part of the webcast by posing questions and sharing your own Plan Z story with the audience.
- This is going to be one of the most important 2nd Tuesday calls in YEARS! Listen in! Plan Z has hit another major milestone. We are going to tell you all about it. We are also going to announce how we are going to celebrate!
- As part of the milestone, we are also going to introduce an innovative new program that will give veteran dieters benefits they’ve never had before. So if you’ve done at least one round of Plan Z you’re going to want to find out what this is all about.
- Beer. I hear this all the time, “But what about my Beer?”. I’ve been really impressed with the advancements in the beer industry. They are finally listening to those who want low carbs with BIG taste. We are going to hear about how the pros taste (and critique) these light/lite beers and what they think about them.
- Dieter Nancy. West Coast Dieter Nancy has a history of science in her professional background. She knows food and the body. Getting her perspective on Plan Z is going to be interesting. Nancy was also a skeptic when she started. Needless to say… she’s not now. Tune in to hear her observations.
How to Eat Italian Food & Not Gain Weight
On my only trip to Italy I learned an important lesson. When it comes to food, it’s not how creative you can be but how authentic.
While we traveled around, I kept looking for the Italian restaurants that would serve what I referred to as “modern Italian.” I wanted crazy, creative Italian food and I thought I was in the mecca of Italian creativity, so I should find it easily.
Not so much.
What I found were traditional dishes. And what I learned is Italians rate their food based on how authentic it tastes. If the sauce tastes like the one their grandmother made, then it’s proper Italian food. In Italy, restaurants brag about their sauces and the history behind them. When you listen to Italians talk about their food they are talking about how to master a recipe that is decades old; not inventing a new one.
I did finally find what I was looking for in one restaurant in Milan. Milan is probably Italy’s most modern city, the center of fashion, so it makes sense that I found my “modern Italian” in Milan, but it took 12 days of traveling before I found it.
The Italian grandmas in this video have been asked to rate Olive Garden’s food. Be ready for a little bit of cute vulgarity and I’ll be back after you watch this short video.
https://youtu.be/UVyhE3-_lCM
What lessons can we take away that will help in the quest to enjoy Italian food and not gain weight?
- About pasta: In Italy, the primi course is when pasta is eaten. Primi means first. First course. The first course is small. They even use smaller plates for serving pasta. There is not a lot of pasta. Maybe a couple raviolis. Or a small portion of noodles. The focus is on the sauce for sure.
- Even the Italian Pasta Association agrees that pasta should be served in moderation. They refer to it as the vehicle for the sauce and the protein. True Italian pasta dishes are light, fresh, seasonal and simple.
- If you look on the back of most boxes of pasta it will give you the portion they recommend. 1 cup cooked. 1 cup cooked is a reasonable amount of pasta. That’s nothing like the portions served in most American restaurants.
- When I eat pasta, I put my noodles in the bottom of the bowl. Then I add the sauce and the protein. By the time I have enjoyed the sauce and the protein and I get to the bottom, I rarely even finish the pasta that’s in there. I’m full. But if I did finish it, I would not have had so much that it would send me into a weight gain spiral.
- The grandmas mention the sauce several times and the use of fresh tomatoes. American pasta sauces are loaded with sugar. In Italy, the savory acidity of cooked tomatoes is part of the appeal of a delicious marinara sauce. Italians think our pasta sauces are way too sweet. Instead of adding sugar, add flavor - like put salt in your pasta water, add fresh herbs like basil from your garden, and a little garlic.
- In Italy, food is fresh, local and seasonal. Even at the autogrills (quick service restaurants) you can get mozzarella and see the cows roaming in the back. Fresh food gives fresh, rich flavors - without the chemical preservatives found in American food.
- Focus on the sauce. Some spaghetti sauces in Italy have been simmering on the stove all day long before they are served. That’s the way their grandmother did it. Slow down and enjoy the process and your food.
Cheers,
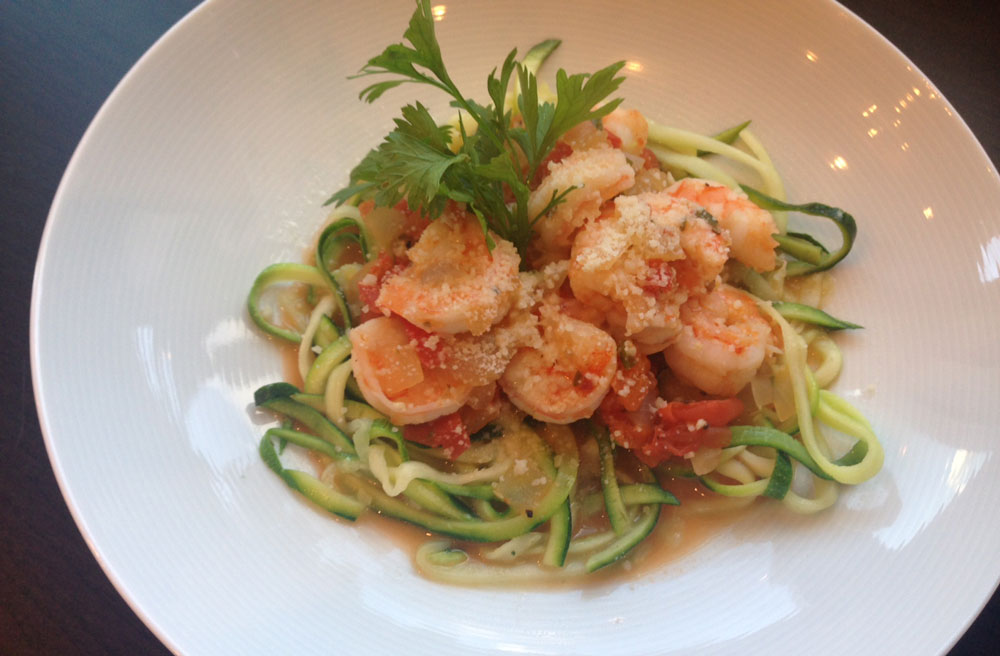
Shrimp Fra Diavolo
A traditional Italian dish that is known for spice. Keep it low carb by serving it with zucchini noodles.
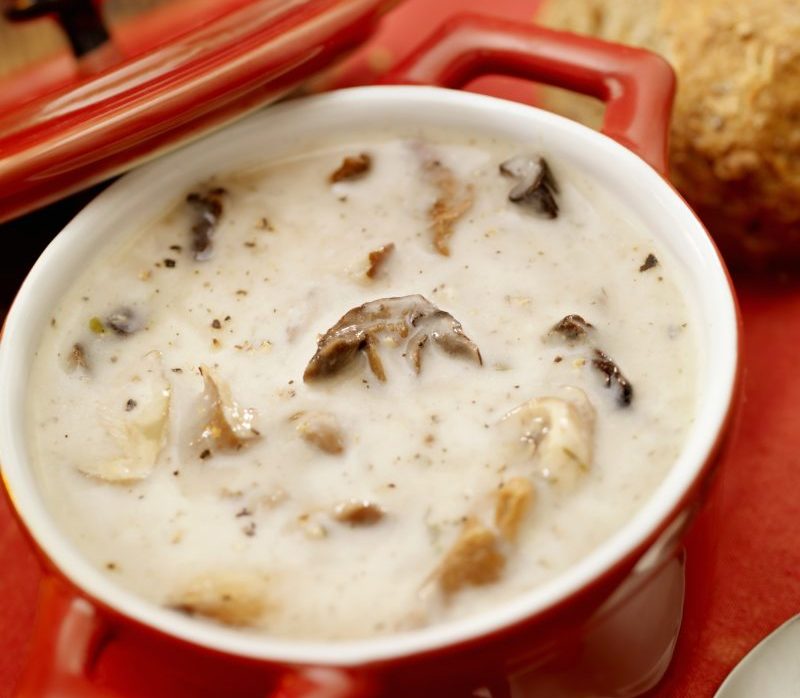
Mushroom-Bacon Soup
Plan Z Phase: This is a Z3 (ZReboot) recipe.
Servings: 4-5 one cup servings.
I had a hankering for bacon. My husband wanted mushroom soup. And thus, this was born. I saw a similar recipe online and just simplified it to my tastes.
Ingredients:
- 5 bacon strips (I use nitrate and nitrite-free bacon)
- 1 pound sliced, clean, fresh mushrooms. (My mushrooms were large, so as they cooked I chopped some into smaller pieces with my spatula. I used all button mushrooms but you could use some exotic ones too)
- 1/2 a medium onion, or shallot, chopped
- 1 garlic clove, minced
- 2 cups of heavy whipping cream
- 8 oz. of beef broth (you can also use chicken broth for a slightly lighter flavor or even vegetable for a vegetarian version of the soup)
- ½ cup of shredded Swiss cheese (or gruyere)
- grated sea salt and pepper to taste
- a whisper of cayenne (optional)
Instructions:
In a medium soup pot, cook bacon over medium heat until crisp. Using a tong, move the bacon to paper towels to drain. When cool, chop the bacon. In the same soup pot, reserve a coating of the drippings. In the drippings, saute mushrooms and onion until tender. Add garlic; cook 1 minute longer. Stir in cream and broth. Gradually stir in cheese until melted. Add cayenne. (I like my soup to have a little brightness to it. The whisper of cayenne adds that without any real heat). Add any of the diced bacon to the soup that you want. I added most of it and reserved just a bit for garnish. Continue to cook to let the cream thicken to your liking.
Serve in soup bowls.
Enjoy!
Cheers,
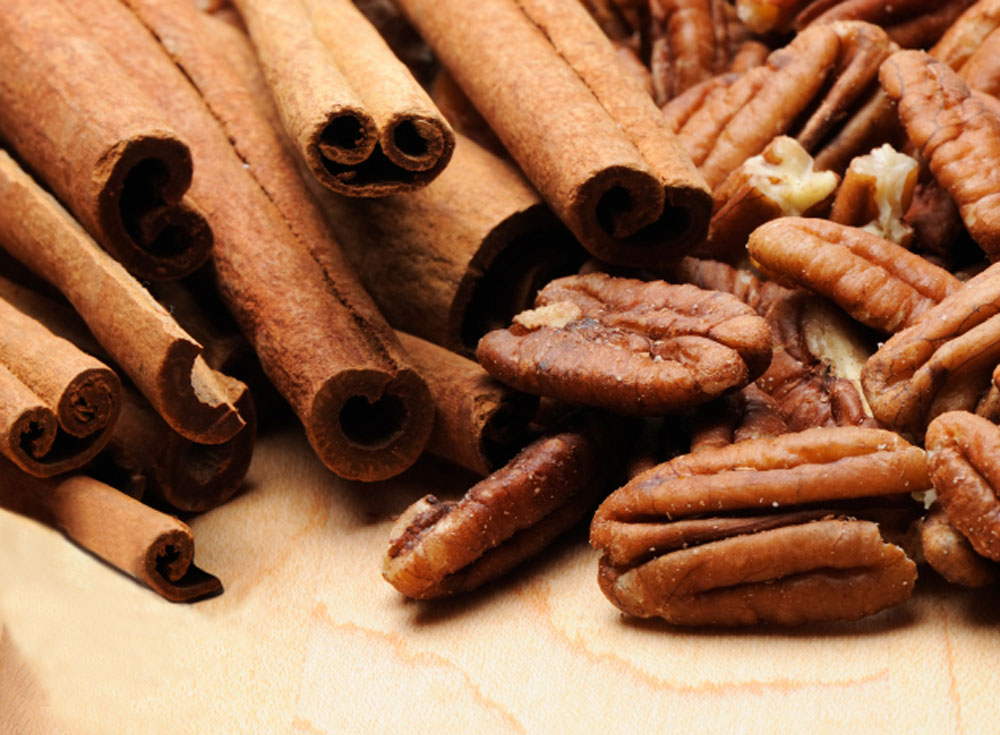
Cinnamon Buttered Pecans
Plan Z Phase: This is a Z3 (ZReboot) recipe.
Servings: Yields 2 servings
Ingredients:
- 1 cup of pecans
- 2 Tbl of butter
- ground cinnamon to taste
- 1 Tsp of Truvia
Instructions:
In a small sauté pan add the butter and begin to melt it. Then add the pecans and stir to coat them with butter. Sprinkle on cinnamon and the Truvia. Stir again. Heat until the pecans begin to brown a bit.
Serving Suggestions:
Serve warm or they will caramelize and harden.
I serve these over fried apples. Or in ZReboot 3.5 I put 1/3 cup of ice cream in a dish and serve on top. You can also make a “Caramel Apple Sundae” by putting the ice cream in, add the fried apples on top and then top with the pecans. You’ll never miss caramel apples again.
Enjoy!
Cheers,
Celery Salad with Dried Fruit, Nuts and Parmesan
Plan Z Phase: This is a Z3 (ZReboot) recipe. I had a hankering on a hot day for a crunchy salad. I don’t often crave celery, but I thought it might be different and hit the spot.
Servings: Serves 4-6 people.
Well, of course I’m not the only one who every dreamed of a celery salad so I found all kinds of them and formulated my own, simple version. Turned out great.
This makes a great side dish to a grilled meat. I served mine with a pork chop.
Serves 4 – 6 depending on whether this will be the only side or if it will stand on its own. This can also be doubled for a party.
It’s a perfect mix of crunch, sweet, and salty.
Ingredients:
- One bunch of celery. (Approximately 8 stalks, give or take). Just wash and trim off the end. Then cut on a diagonal so you get those crazy ¼” slices that look like the letter V or U. Go ahead and include the little leaves in there. They make good salad bits too.
- ½ cup of roasted nuts. I used the premium ones that are cashew, pecans and macadamia nuts. Those are roasted in sea salt so they are healthier. You can do almonds too or any nut that sounds good. Pistachios or even peanuts would work.
- ½ cup of dried fruit bits. Find one or two that don’t have sugar on them. Check the label. I used dried cranberries and raisins. I also thought you could use things like dried apricots. You choose your fave.
- 2 Tbl of fresh lemon juice
- ¼ tsp of red pepper flakes (like the ones folks put on pizza). Or to taste. You can add as much zip as you want.
- Grated sea salt to taste. You won’t need a lot if you use salted, roasted nuts.
- Ground black pepper. Also just a bit because you are using the pepper flakes.
- 1/3 – ½ cup of shaved parmesan cheese.
- ¼ cup of extra-virgin olive oil. (or you can use a dressing of your choice. My thought is a drizzle of Green Goddess would be good, or a Caesar or even a vinaigrette)
- Place the cut-up celery in a bowl of ice water. Let sit for 20 minutes. This will firm up the celery even more for crunch factor. When it’s done, drain it and then place on a kitchen town or paper towel to mostly dry.
Instructions:
While the celery is basking in the bowl you can make the other elements. Put the nuts, fruit, lemon juice, pepper flakes in a serving bowl. Stir and let sit. When the celery is ready add it and stir again. Now adjust sea salt and pepper and taste again. You want to make sure you get that perfect mix of sweet, salty and spicy YOU like.
Add the Parmesan cheese and the olive oil. Mix gently this time so you don’t smash up the Parmesan. You can always add more if you’d like.
If you are using a dressing you can skip the olive oil OR use the olive oil and still drizzle a little dressing on it when you serve.
Serve chilled or room temperature.
It keeps for a few days in the fridge if covered.
Enjoy!
Cheers,
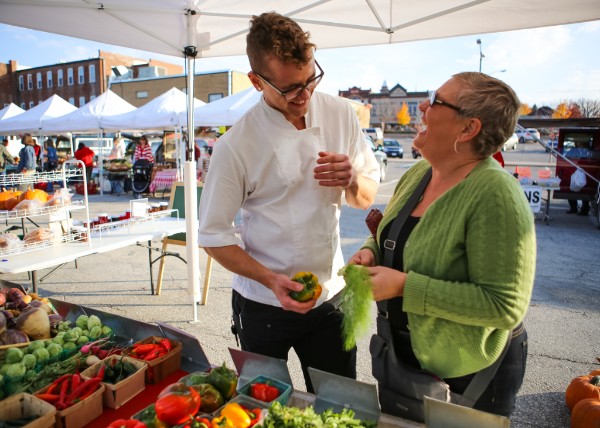
2nd Tuesday Call - July 10th 2018
On the 2nd Tuesday of each month, I host a live webcast for dieters only. I'll share the latest dieting information. And let you in on my favorite recipes coming out of the ZKitchen. You’ll hear an inspiring interview with a successful dieter, too. Plus, you can be part of the webcast by posing questions and sharing your own Plan Z story with the audience.
- When to Buy Organic. I have a simple rule of thumb I use to determine when I will splurge a bit and buy organic over conventional produce. Tune in to find out my secret.
- The Muffin and the Yogurt. This is a quick, but enlightening, story of a day on the road and my attempt to buy something easy at the hotel buffet. Find out why I won’t be fooled again.
- Dieter Christy. Dieter Christy is a whole lot healthier than she was when she started Plan Z and her doctor is thrilled! Christy came to us as a Type 1 Diabetic, and facing serious health issues. Let’s hear Christy’s miraculous story of her 50 day transformation.
- Oh Rats! Diet Soda might actually cause weight GAIN! How can that be! We’ll share the latest.
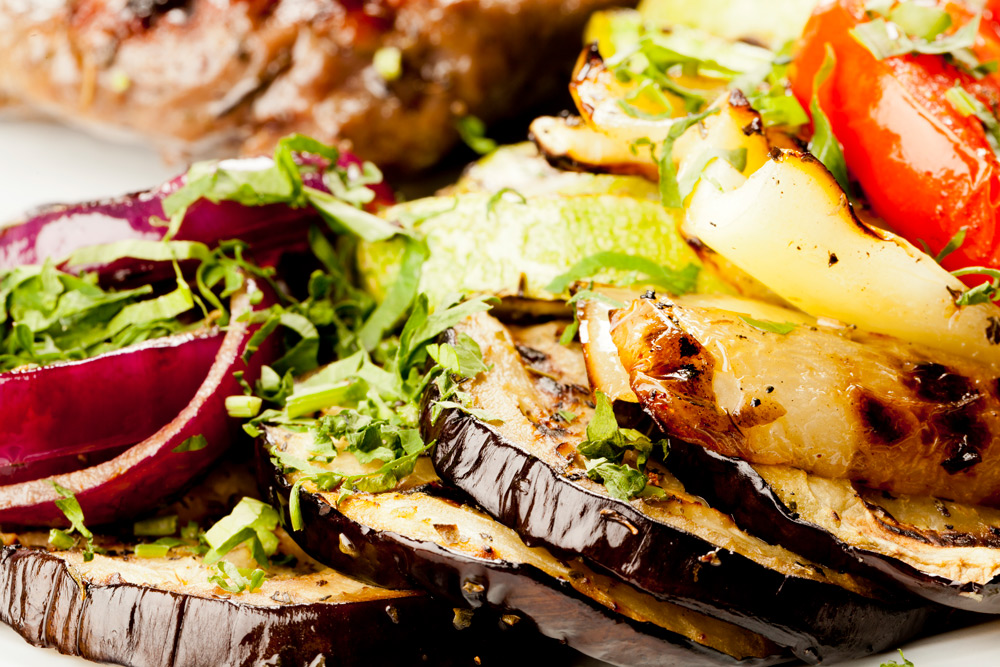
Grilled Italian Veggies with Steak
Plan Z Phase: This is a Z2 (ZReduction) recipe. This is super easy. A great summer entrée that comes together in a flash. If you have a grill pan, you can make it in the winter, too.
Servings: Serves 2 - 3 people (depends on the size of your veggies). Can also be doubled or done in bigger batches for a party!
Ingredients:
- olive oil spray
- 1 Chinese eggplant (if you are in ZReboot you can use 2 baby eggplants). Cut the eggplant into wedges or wide slices.
- ½ large red onion, sliced
- 1 large red pepper cut into 1” wide strips or chunks
- sea salt and pepper to taste
- 1 – 2 Tbl of balsamic dressing
- fresh basil for garnish (you can cut it into shreds, also known as chiffonade)
- protein of choice: a flank steak would work well, but really any protein you'd like to grill. It is up to you.
Instructions:
Spray the cleaned veggies to prepare them for the grill. Grill to your liking. I like grill marks and I like mine just about to wilt, but with some bite still to them. If they won’t all fit on the grill at once you can do them in batches. I cook the onion first and then the other two. The eggplant is the most delicate. Set aside to keep warm as you grill each item.
Season with grated sea salt and pepper. Put in a bowl and drizzle on your dressing. Toss carefully to coat all of the vegetables.
Serve warm, room temp or even cold.
Grill your steak or your protein to your liking and serve the veggies on the side or under your meat. Your veggie portion is one cup of the mixture.
Enjoy!
Cheers,