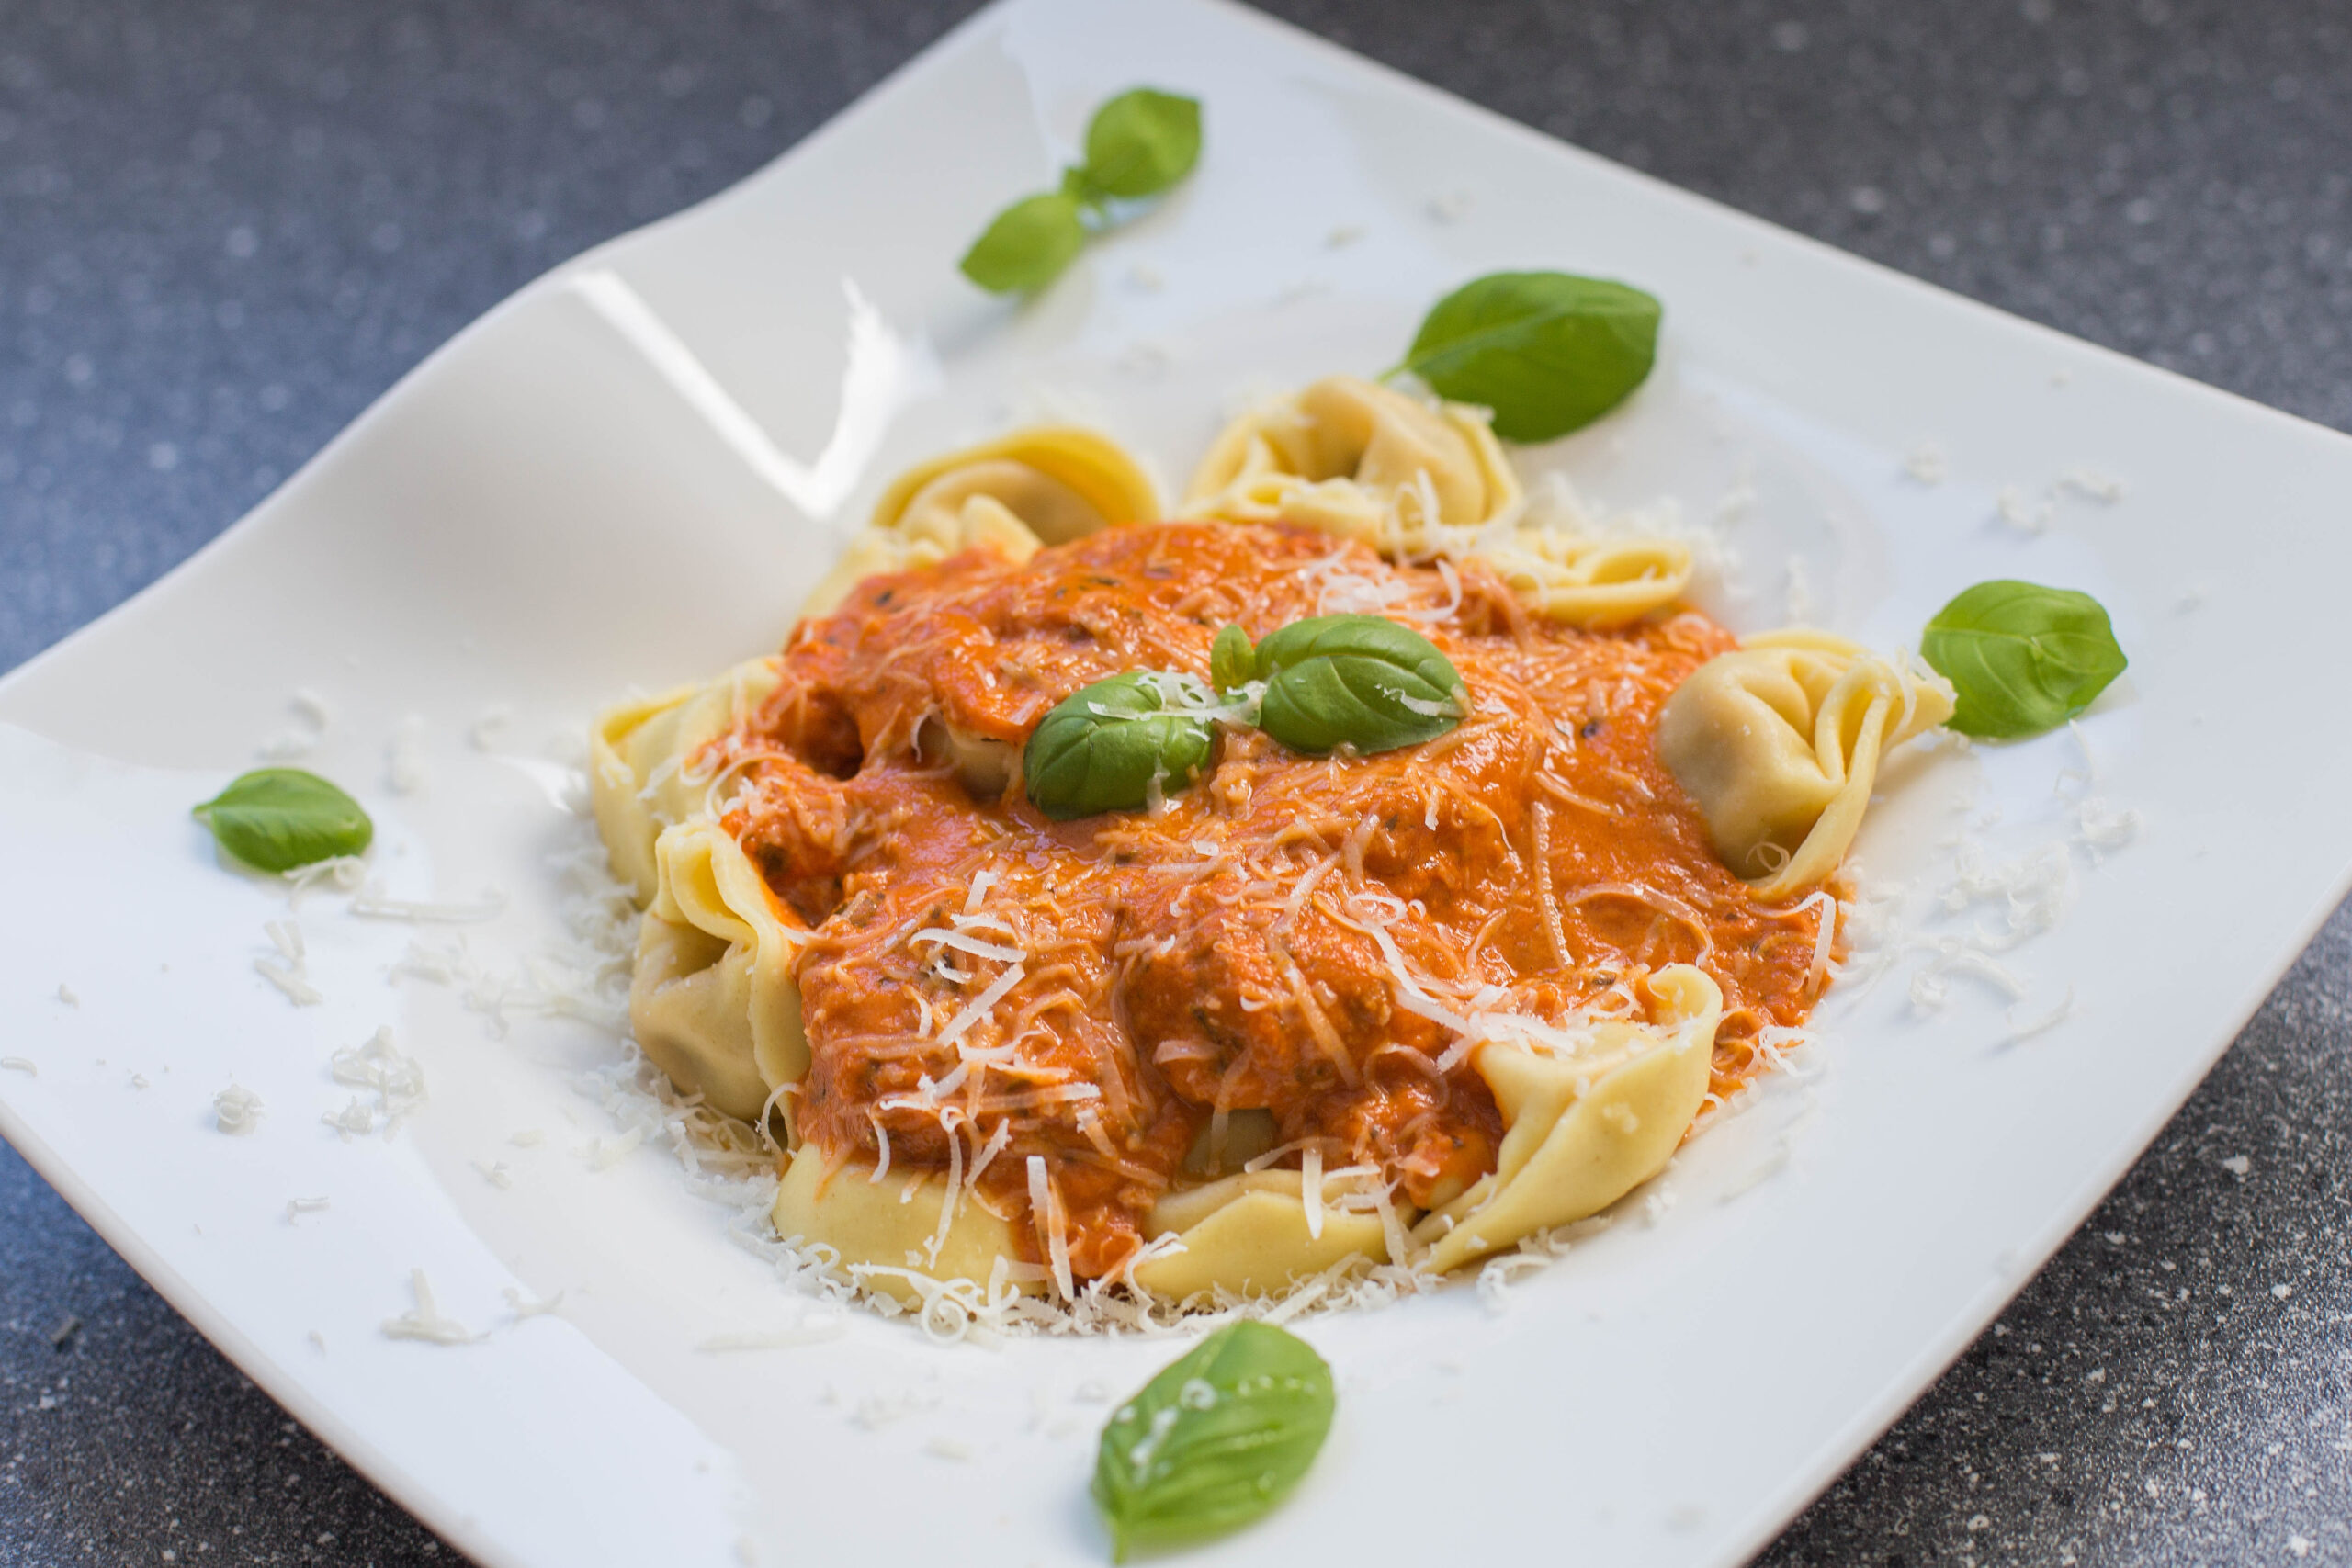
Creamy Tomato Basil Tortellini (EASY)
Plan Z Phase: This is a Z3.5 (ZReboot 3.5) recipe.
This is, hands down, my favorite new dish in 2024. Yes, it’s a pasta dish but you can splurge once in awhile as long as you don’t eat too much of the pasta. The trick with this one is to get a lot of satisfaction out of the zucchini, the lovely tomato sauce and the basil. I only eat 6 or 7 tortellini blobs and I cut them in half as I eat them. That makes them last longer and you feel like you got to eat more of them.
Servings: Serves 2-3
Ingredients:
- 9 oz package of cheese tortellini, refrigerated (the fresh kind). Truthfully you could use other flavors of tortellini for this dish too. I just have stuck to the cheese so far.
- 2 cups of zucchini chunks. Mine are about ½” square. I like the bite.
- 2 cups of juicy tomatoes, chopped
- ½ cup of basil, sliced julienne-style (narrow strips)
- ¼ cup of cream
- 2 Tbs of sour cream. My tablespoons are rather heaping
- ¼ cup of mozzarella cheese. Shreds. I use the “melty” one
- 2 Tbl of olive oil
- 2 garlic cloves, minced. I use jar garlic.
- Grated sea salt and pepper to taste
Instructions:
Prep the veggies and heat a large sauté pan to medium-high.
Cook the chopped tomatoes with the olive oil in the pan for 2 – 3 minutes. It will cook down and you end up with a chunky tomato sauce. Stir as it cooks.
I cook my tortellini in a pot of boiling water. Just follow the directions on the package and then drain. Each brand specifies different cooking times so follow their lead.
In the pan with the tomatoes, add the zucchini and garlic. Add the cream and the sour cream. This will become your creamy sauce. Stir and cook until zucchini is cooked to your liking. I like mine to still have some bite so this only takes a few minutes. Stir in your drained tortellini.
After 1 – 2 minutes add the mozzarella and the basil. Stir it all up. Taste test and add the sea salt and pepper to your liking.
Serve immediately. This is nice with a Caesar salad. I just use a kit bag these days and it works out great.
Enjoy!
Cheers,
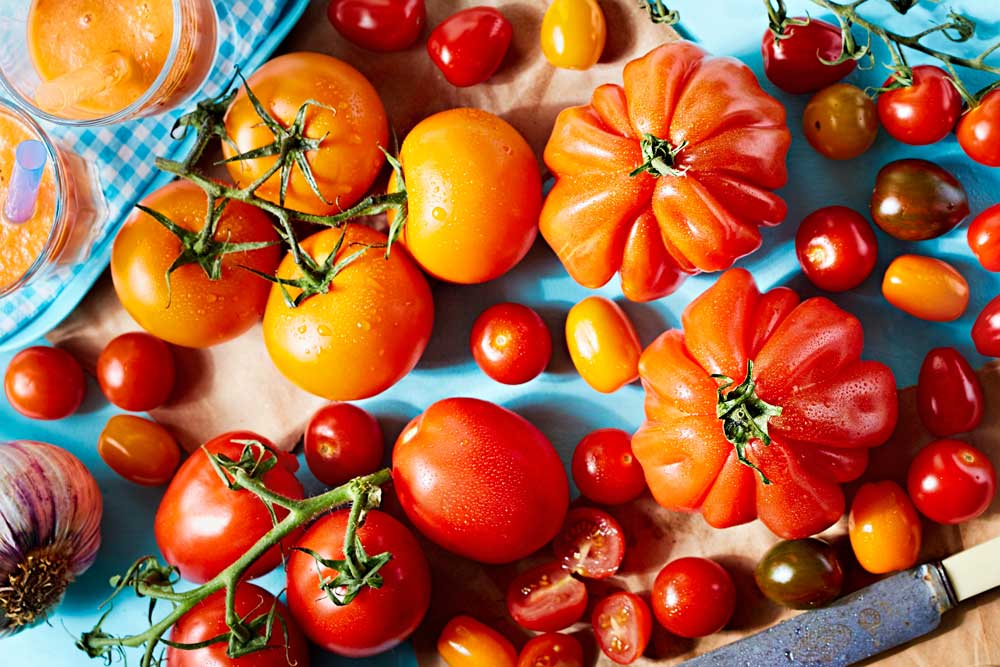
What To Do With All Those Tomatoes
When you grow a garden, you know what it’s like when the tomatoes start coming in heavy and you have to figure out what to do with them. My mother used to can stewed tomatoes. It took her one long weekend, but we had enough for the whole winter.
I had an even worse problem than tomatoes one year with zucchini. When those things ripen, they start taking over the yard! They can get the size of footballs in no time flat. That summer lead me to design a recipe for zucchini lasagna. This was back in the late 70’s before zucchini lasagna became a "thing." I made zucchini lasagna for my family, my friends or even anyone at the office who would take a casserole home.
Now that I live in the mid-South, I am trying to learn more and more about the cooking here. On the surface, it looks like it’s all biscuits and chicken. I do have to admit they make better fried chicken in these parts than I have had anywhere else in the country! Juicy on the inside and super crispy on the outside.
But what else do they eat besides biscuits, chicken, collard greens and okra?
I have discovered I love fried green tomatoes and just recently I came across tomato pie.
Well, it is tomato season and the grocery stores and farmers’ markets around here are bursting with tomatoes. Heirloom, plum, beefsteak, cherry; you name it. They are all ripe, too. They didn’t have to travel far to get here; likely just around the corner, so they don’t have to be taken home and ripened. They are ready to eat today.
I decided to research tomato pie. I was interested in the history of such a Southern delicacy.
This is what I found on Wikipedia:
The Southern tomato pie is a tomato dish from the Southern United States. It consists of a pie shell with a filling of tomatoes (sometimes with basil or other herbs), covered with a topping of grated cheese mixed with either mayonnaise or a white sauce.[1][2] It is considered a summer dish, to be made when tomatoes are in season.[3]
A sweet version uses buttered and sugared green tomatoes, with a recipe dating at least as far back as 1877.[4] The taste has been compared to that of green apple pie.[5][6]
I was not all that surprised that this recipe has a long history. I also thought about how it’s not expensive to make and can be eaten for breakfast, lunch or dinner; and even a brunch dish. With a side salad this can be an entire meal. One pie can give four people a hefty serving each, or with the side salad it can serve six generously.
I was curious about the mayonnaise. I love a BLT so the mayonnaise was not totally shocking but how might it taste baked up and warm?
I know now. Fabulous!
My husband looked at the notes that I took from various recipes that I researched. He was a bit skeptical about the mayo; not sure he was going to like it. It was the only offering for dinner, so he sat on the side sort of observing where this was going.
In the end, he praised it highly. He loved it.
You’ll love it, too.
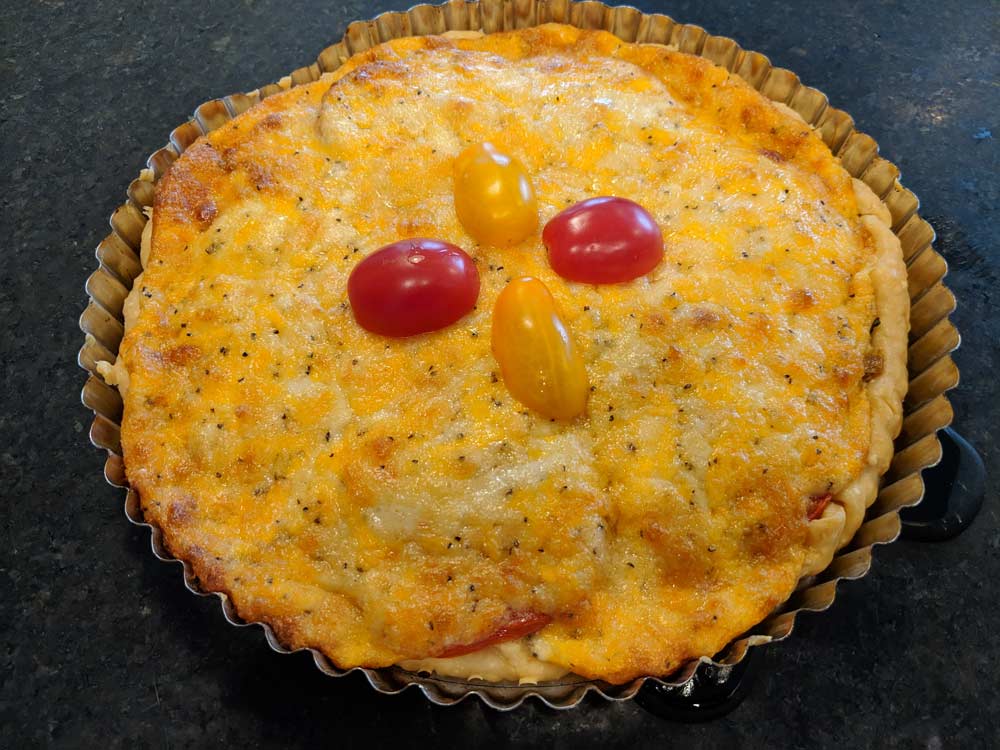
I made mine with a tart pan instead of a pie pan. You can decide what you like better.
Cheers,
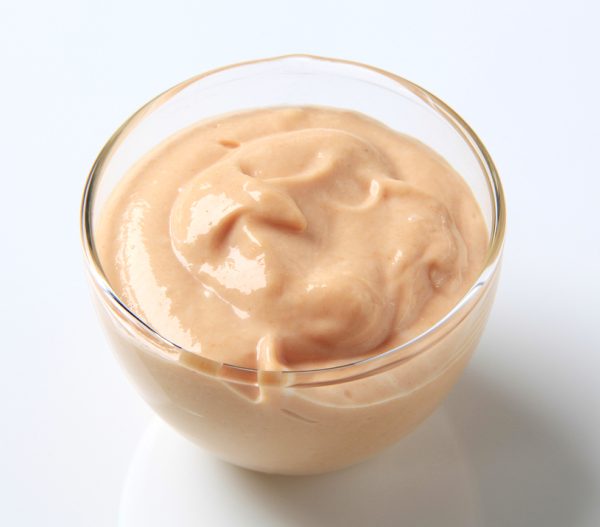
Burger Sauce
Plan Z Phase: This is a Z3 (ZReboot) recipe
Servings:
There is enough for more than two burgers but I’ll let you decide how many this serves. Depends on how much you put on your burger. You can double or triple the recipe for a gang of people.
When I was temporarily living in Nashville, I discovered that every burger joint had their take on a “special sauce” for their burgers. It was sort of like the Big Mac sauce but with way more personality. Those burger sauce recipes are spreading like wildfire. I wanted to make my own smash burgers at home, so I did research to put together my version of the “secret sauce”.
Ingredients:
- ½ cup of mayo. People in the South use Dukes. You choose.
- 2 Tbl of ketchup. This makes it a nice pink color
- 1 tsp of fresh horseradish. You want the fresh stuff that is chilled. Not horseradish sauce that you’d find with the ketchup.
- 1 tsp of Worcestershire. To me, this is the secret ingredient
- A quick squeeze of sriracha (optional)
- ½ tsp of paprika
- 1 small shallot minced or grated. I grate it so it’s smoother
- Season with grated sea salt to taste.
Directions:
Throw the ingredients in a small bowl and mix it with a spoon. And Voila!
These days when I serve burgers I want a piece of crispy lettuce covering my whole burger so I get the crunch. The technique in Nashville is to put this sauce on the bottom side of the bun. Lettuce on top of that and then the burger up above. Burger can have a tomato slice and even cheese if you choose.
BIG YUM!
Enjoy!
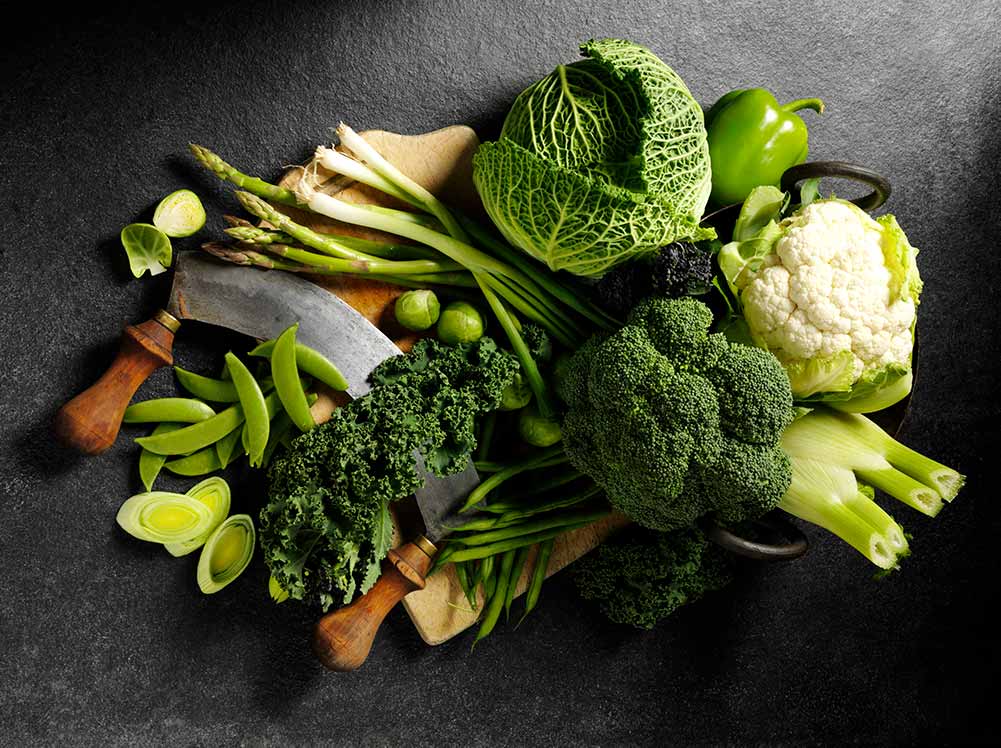
Eat Your Veggies
There are so many vegetable options offered up by Mother Nature that I thought I could go my whole life skipping the ones I didn’t like.
It started when I was a kid. My family believed in the “Clean Plate Club.” You didn’t leave the table without eating everything on your plate, whether you wanted to or not. Compared to my brothers and sisters, I was a pretty good eater. My mom never had trouble getting me to eat my vegetables -- except when she served lima beans. I hated lima beans. They were my "vegetable to avoid." I thought they were so disgusting to chew that I’d swallow them like pills. I flushed them down with milk.
In the summer, after dinner, we’d go back out to play and that play might include a rousing game of football. We’d play on the grass by the school around the corner. If I got tackled, my brothers often mushed my face in the grass; sort of a final motion conducted at the end of a tackle. I hated the smell of getting my face planted in the grass so I worked hard not to get tackled. I got faster.
When I got to college, sprouts became popular. I tried them. They were all the rage. They smelled like the grass my face had been smashed into. I gagged and sprouts came off the list of vegetable options for me.
I never got into kale, either. It had that same kind of earthy smell and tasted, to me, reminiscent of dirt. Arugula, too.
Those experiences shaped my eating habits as an adult. And after years of struggling with food and weight issues (and then developing the Plan Z Diet), I’m reconsidering some of the veggies I used to hate. Now I know you can't pick and choose the veggies you eat based on childhood likes and dislikes. These vegetables are chock full of important nutrients our bodies need to stay healthy. And any vegetable can taste good -- if you know how to cook it.
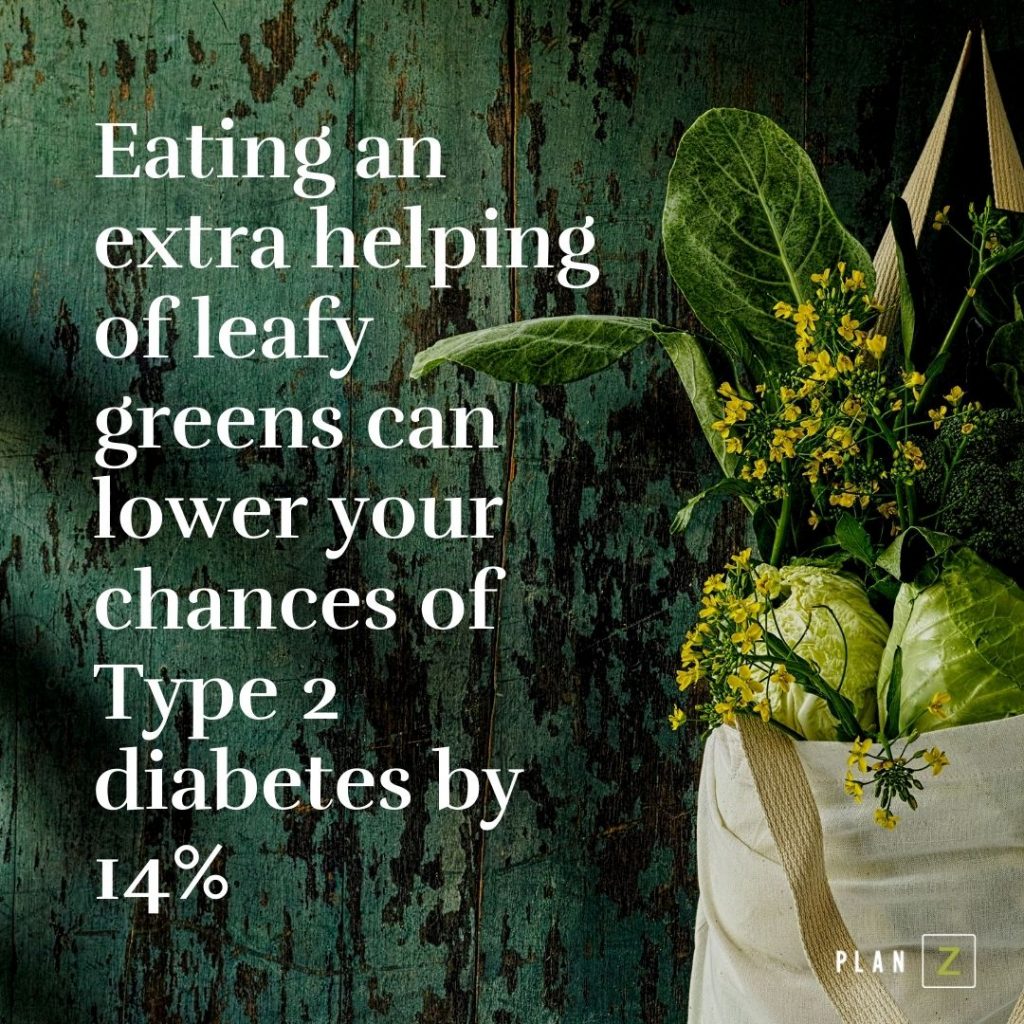
Can green vegetables lower your blood sugar? One study shows that eating an extra helping of leafy greens can lower your chances of Type 2 diabetes by 14%! For prediabetics trying to control their blood sugar with diet, that’s major.
Leafy greens are one of the easiest foods to incorporate into your diet. They are healthy, filling, delicious, and do not require a lot of fancy cooking. All you have to do is chop them up and throw them in a salad! Want to lose weight and get healthy? Eat leafy greens every day and you will see the benefits. Here are some reasons to eat more of these low-carb, powerhouse greens.
- Kale: Considered one of the healthiest green foods on the planet, kale is one of America's most popular superfoods. In a 1-cup serving, kale contains 206% of our daily value for Vitamin A, 134% of our daily value for Vitamin C, and 684% of our daily value for Vitamin K1. It also has a lot of protein (for a leafy green). Like meat, kale contains all nine essential amino acids needed to form the proteins within the human body, (plus nine other non-essential ones, too). It's actually been described as the "meaty" leafy green. Want to maximize the benefits of kale? Eat it raw.
- Watercress: This tiny but mighty green packs a powerful punch. According to the CDC, watercress is considered the #1 most nutrient-dense vegetable. A serving of watercress actually has four times more beta-carotene and vitamin A than an apple2. Give watercress a try. It tastes like spinach. Yum!
- Beet Greens: Did you know beet greens have more iron than spinach? Like other dark green leafy veggies(DGLV), they also have amazing amounts of Vitamins A, C, and K. While DGLVs provide excellent amounts of calcium, beet greens also provide an excellent amount of magnesium at 98 milligrams per serving, or nearly 25% of the recommended daily amount. This unique aspect of beet greens gives them a calcium:magnesium ratio of 1.6:1 (in comparison to the ratio in turnip greens of 6.2:1, or the ratio in mustard greens of 9.2:1). The ratio in beet greens may be more helpful to the average U.S. adult than the ratio in these other greens since the average U.S. adult is more deficient in magnesium than calcium3. Need more magnesium in your diet? Eat beet greens.
- Spinach: One of my favorite leafy greens! Spinach, scoring 86.4 on a nutrient density scale of 100, is high in niacin and zinc, as well as protein, fiber, vitamins A, C, E and K, thiamin, vitamin B6, folate, calcium, iron, magnesium, phosphorus, potassium, copper, and manganese. Wow! Did you know Vitamin C in spinach is known to have the ability to prevent wrinkles and protect us from eye diseases, prenatal health problems, and cardiovascular diseases? It is also the presence of lutein content that prevents the thickening of the walls of arteries, thus reducing the risk of heart attacks. Moreover, it contains nitrite that not only helps in preventing the occurrence of a heart attack but also cures the heart diseases associated with fat deposition4. So eat your spinach!
There are so many, many reasons to eat your veggies! And there are so many delightful ways to cook them! I add a massive handful of spinach to almost every soup recipe I make. Easy.
I’m also going to start adding watercress to more of my salads. I am also eating more spouts and have taken a new look at microgreens (you know, the stuff that comes on the plate at some fancy restaurants). Before, I thought they were just there to lend a delicate decoration :)
Here’s a recipe for kale chips! Next time you want a potato chip, make these kale chips. I even serve them as an appetizer before a dinner party. People gather around as I take them off the hot cookie sheet and they dive right in.
Cheers,

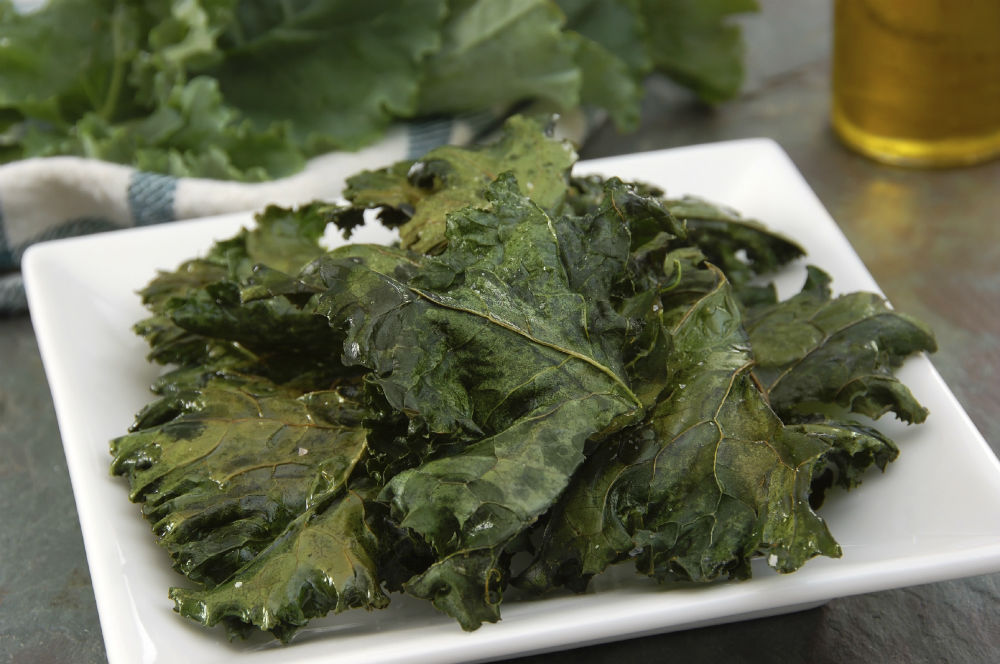
Baked Kale Chips
If you have a hankering for healthy potato chips, try these instead! They are low carb and delicious!
Creamy Pea Salad
Plan Z Phase: This is a Z3 (ZReboot) recipe
Servings: Serves 4 and can easily been doubled easily.
I think I might have had this once at a picnic as a kid. But I’m a Northern girl. This is straight up Southern food. And it’s good! Simple and lovely on a hot day.
Ingredients:
- 4 slices of bacon cooked til crispy.
- 2 cups of peas. Frozen peas work just fine.
- ¼ cup of red onion, diced
- ½ cup of cheddar shredded or cut into small chunks. I did half of each
- ¼ cup of mayo (Dukes is popular in the South)
- ¼ cup of plain yogurt
- ½ Tbl of honey
- 1 tsp of rice vinegar (this gives the sauce just a bit of a bite)
- Sea salt and pepper to taste.
Instructions:
If your peas are frozen put them in a colander and run cold water over them to thaw them and get off the ice. If fresh peas just make sure they are clean.
I cook my bacon in the oven. Here’s my recipe for “Oven Bacon”. Drain cooked bacon on paper towels. Then dice.
Dice the onion and prep the cheese.
In a large bowl, whisk together the mayo, yogurt, honey, rice vinegar and salt and pepper.
Add the salad ingredients and fold to get it all mixed up.
Refrigerate at least an hour before serving so the flavors meld.
Keep the salad cold if you’re serving it outside.
Enjoy!
Cheers,
Angry Sandwich Sauce
Plan Z Phase: This is a Z3 (ZReboot) recipe. You can use it in ZReduction, too, but limit yourself to a 1 teaspoon just to be on the safe side.
Servings: Serves 1 - 2
We have a position at Plan Z Diet that we call VP Anger Management. We have that position because we should all be angry about the misinformation in the diet/food business. VP Anger Management writes about those issues.
Chris, VP Anger Management, loves his food spicy. Well maybe not a spicy ice cream sundae but just about everything else.
He invented this sauce to go on sandwiches. The South is really known for their secret sandwich sauces, and this is his.
Ingredients:
- 1 Tbl of Duke’s Mayo (or any other mayo. I like to use mayo made with avocado oil or olive oil instead of soybean oil, but Duke’s is famous around here)
- 1 Tbl of Dijon mustard (any brand without sugar will work. Maille is our favorite)
- 2 blurps of Tabasco sauce (if you are a fan of Tabasco you will be familiar with a blurp in comparison to a drop. Let ‘er fly. – or to taste)
Instructions:
Stir all items together and then spread it on your sandwich. Or brush it across your brat. Get creative and enjoy!
Cheers,
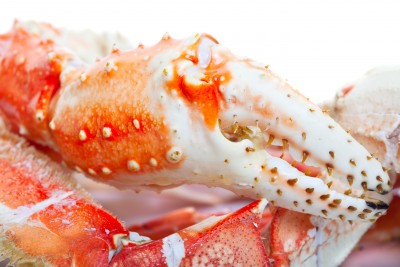
King Crab Legs
Plan Z Phase: This is a Z3 (ZReboot) recipe. This is an expensive entrée. It’s one of those offerings that should probably be saved for a special occasion. It’s easy enough to be served to a group at the holidays, but if the group is too large, you might have to consider a home equity loan to pay for it. JUMBO KING CRAB legs are about as long as a yardstick and up to two inches in diameter. You can get them frozen in town at the best fishmongers, but don’t be surprised if they are in a locked cabinet. These monsters are hard to come by—and worth every penny. As you watch your guests roll their eyes in ecstasy, you’ll know it was worth the investment. When you moan with joy at how easy it is to put this whole dinner together, you’ll pat yourself on the back for choosing to “go for it.” Of course, this dish has to have “sides.” We can’t just serve crab legs. I dreamed up a colorful Asian twist on the traditional coleslaw. Don’t be afraid. The Asian Coleslaw goes great with the King Crab. It can be made in advance, so you can entertain with ease. When you serve this dish it won’t have a complicated presentation either. The majesty of the crab legs pretty much does the trick. Have plenty of napkins or even bibs ready.
One extra possible bonus could be the good luck that goes along with serving this meal. Tradition in some circles dictates that, if you serve lobster on New Year’s Eve, you’ll have luck throughout the year. Since these crab legs are just as expensive—if not even MORE expensive—than lobster, I think the same theory applies. Try it for yourself and see. If your dinner comes off without a hitch, at the very least, you’ll feel lucky for having the experience of eating it and sharing it with friends or family.
Servings: Serves 4
Ingredients:
- 4 frozen Jumbo King Crab legs. Do not thaw. Truth be told, they will probably be about 2 feet long including the claws.
- one big pot of boiling water
- 3 sticks of lightly salted butter
Instructions:
Leave your Jumbo King Crab legs in the freezer until ready to cook. Well, actually it’s fun to take them out and wave them around to show them off. Then put them back until you’re ready to cook. Get your water boiling. This takes time. In the meantime, slowly melt your butter in a saucepan. When the butter is full melted, take a tight sieve or spoon and skim off the froth that has formed on top. Now you have that fancy clarified butter they serve in restaurants. Keep it warm. When ready to cook, take the “Masters of Ceremony”—the crab legs—out of the freezer. Make sure you have a very sharp chef’s blade or a meat cleaver. And be careful you haven’t had too many cocktails or beers. This is precision work. You are going to cut each frozen crab leg into two pieces. They have to fit in the pot and on the plate (sort of). Hold the leg with one hand and tap the knife or blade so it barely cuts into the shell, and then push down or gently whack them on your cutting board. One whack should do it to cut each one. Just make sure you don’t slip. Wear oven mitts if your are prone to accidents.
Put the crab legs in the full-boil water and cook them for 5 minutes. The legs are actually already cooked. You are just thawing and warming them. If they are too long to be immersed in your pot, carefully turn them over so the other part goes in the water for a few minutes. You’ll be serving them with your butter.
Hints: you might want to invest in poultry shears. You’ve already got your investment in the crab legs to make your life easy. The blades on poultry shears are curved. They are used for cutting chicken bones and things like crab legs. You can use an oven mitt over the hand that will hold the crab leg and use your shears to quickly slice through the crab leg pieces. Or you can have fun passing the shears and watching your guests do their handiwork while they eat. It’s slightly messy but it sure is fun.
Enjoy!
Cheers,
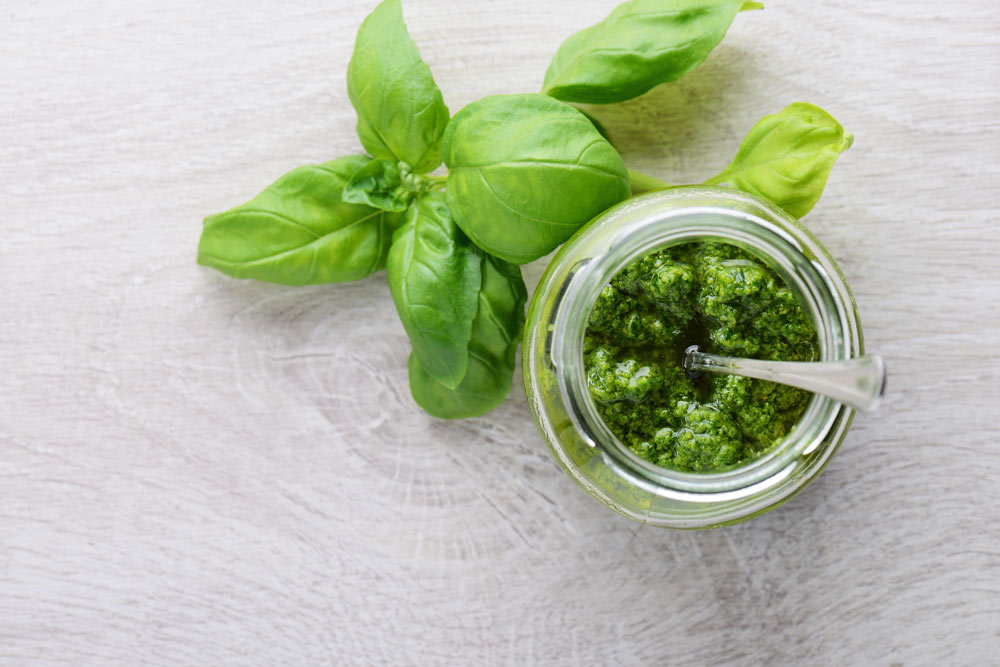
Pesto
Plan Z Phase: This is a Z3 (ZReboot) recipe. Pine nuts in large quantity can be hard to find. I have seen in some restaurant menus that chefs have made pesto with walnuts, so I decided macadamia nuts must work too. Now I can attest. They not only work, it tastes great!
Ingredients:
- 3 cups basil leaves
- 1 cup pine nuts (or any other kind of nut)
- 1 tsp salt
- 2 Tbsp chopped garlic (jar garlic is fine)
- 1/4 tsp cayenne pepper
- 2 cups shredded Italian cheese (Parmesan, Asiago and/or Romano - your choice)
- 3/4 cup olive oil
Instructions:
Harvest the branches of the basil. Pluck any flowers off the top if you’ve let them grow. Slide the green leaves off the branches. You don’t have to be delicate about this. I just yank and grab leaves in bunches. If I get a few stray, narrow stems, that’s fine. Make sure you remove the woody parts in your pesto. Wash the leaves in a water bath or use your salad spinner. When I’m in major pesto manufacturing mode, I have a lot more than three cups of basil leaves. That's when I fill my sink with water and put them all in and slosh them around. Then I drain them on dishtowels while the nuts are roasting.
Speaking of roasting nuts: pour them on a cookie sheet or any other metal pan that’s oven proof. Roast the nuts at 350 degrees for 10 to 12 minutes. Watch at the end. Pine nuts are rather delicate. They can brown some, but don’t let them burn. Remove the nuts from the oven and let them cool down.
In your food processor, press in your three cups of basil leaves. Add the pine nuts, salt, garlic and cayenne (to taste). I like my pesto to have a little zip, but cayenne is optional. You can leave it out if you want to. Next, add your cheese. Turn your processor on to chop up the basil, etc. Stop the processor to scrape down the sides if you didn’t get an even chop. Then add the oil through the top of the processor in a stream while it’s running. It’s like you are making salad dressing. When the whole smear is moving around the bottom, you’re ready to package your pesto.
You can put your pesto in jars like you would if you were canning jams, but for me, that’s too much in one container. A little pesto goes a long way. It doesn’t do well sitting in your refrigerator for weeks or months after opening, so I use small packages. I use small, sandwich-sized plastic freezer bags (regular sandwich bags will do in a pinch). The zip-top kind work best. Put three heaping tablespoons of pesto in the bottom of each bag. Place the bag on the counter. Press the pesto so it stays toward the bottom of the bag. Then, with the pesto at the bottom, roll up the bag like a cigar, squeezing out the air as you go, and then just zip the end shut. Visualize the little cigar-shaped packages all in a row. Your pesto is ready to freeze. I keep it in the freezer until the day I want to use it and then thaw in the fridge or the microwave. Voila! A batch of pesto in just a few minutes.
Enjoy!
Cheers,
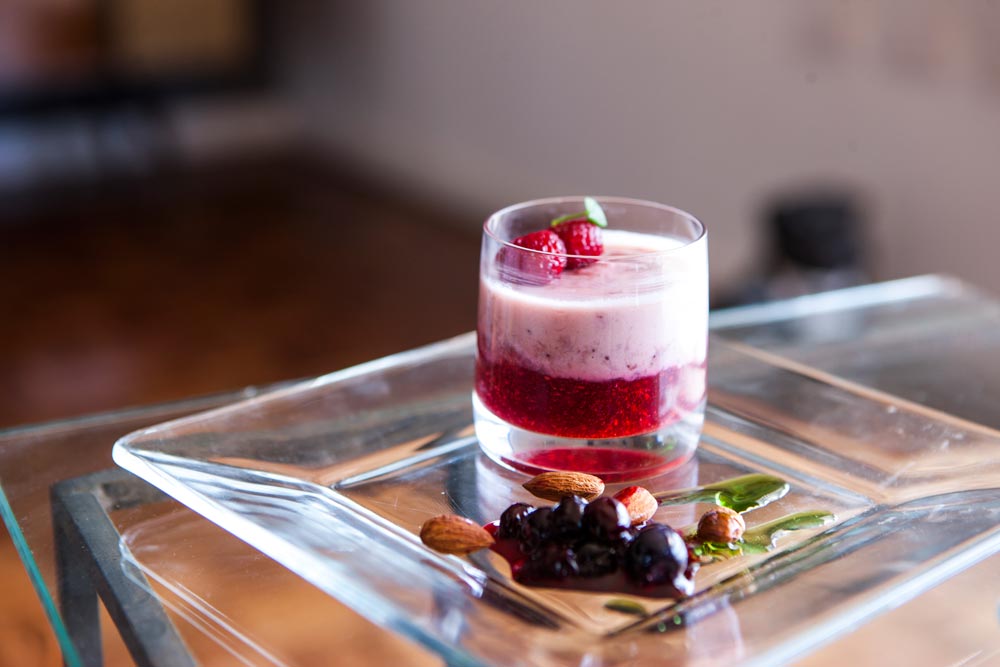
Raspberry Gelee
Plan Z Phase: This is a Z2 (ZReduction) recipe. Super easy!
For those of you old enough to remember the Jello product that formed 3 layers (foam, sauce and jelly-jammie) you’ll know exactly what this tastes like except this one is made with natural ingredients and actually includes REAL raspberries! I had a flashback to childhood as I ate this.
This is also elegant enough to serve at a dinner party. Serving it in a pretty clear serving dish will show off the layers but any dish will do. It can also be made with strawberries or blackberries.
Servings: Serves 5. Can easily be doubled.
Ingredients:
- 1 envelope of unflavored gelatin
- ¾ cup of water
- 2 tsp of Truvia
- 2-1/2 pints of raspberries
Instructions:
Put the gelatin into the water. Heat for 1min 30sec on your microwave or until it’s almost boiling. Stir the gelatin until it dissolves.
In a small blender, add 1 pint of the raspberries along with the gelatin mixture and the Truvia. Blend until smooth. The smooth mixture will look pink.
Take out your dishes. Put a small handful of raspberries into each dish. Reserve a few for garnish. Pour the pink mixture over. Divide evenly among the dishes. Put in the refrigerator for at least an hour to firm up. If you are going to leave them in the refrigerator longer then cover the tops with plastic wrap.
To serve, just add an extra raspberry on top for a fun look. Or cluster 3 to make it look really fancy.
These will keep in the refrigerator for a few days without getting rubbery if you just keep them covered and sealed.
Enjoy!
Cheers,

A New Puppy
It was Sunday morning. We were in the mood for brunch, so we went to a restaurant called 1885.
1885 has indoor and outdoor seating. One section of the outdoor seating runs along one side of the bar. We sat there so we could chat with our favorite bartender, Daniel.
We were not there long when a couple of folks sat down beside us. Turns out they are brother and sister, from Nashville. They drove to Chattanooga to pick up a new puppy from a breeder. They decided to have a bite to eat before they headed back to Nashville.
My eyes popped when I saw a cute little puppy in the arms of the woman. He was wriggling around but he was not crying so he seemed to be okay.
We started to talk and it seemed like everyone in the restaurant was getting up to come over and take a peek at the puppy. He was a 7- week old Corgi. He doesn’t really look like a Corgy yet, but he does have the unmistakable short legs.
Puppy kept wriggling and people kept cooing over him.
At one point it seemed logical for me to ask this question. “Since you are going to be eating would you like me to hold the puppy so you can eat in peace?” The young woman loved the idea. She felt she could trust me.
The active puppy was a bundle to handle. The woman was wishing he would settle down and go to sleep. She thought he should be tired. My thought was that he was on sensory overload. He had just been taken from his mom and his fellow litter mates so how could he be calm? But I didn’t say anything.
The food was about to arrive, so I was getting ready to hold the puppy. I leaned over to the gentleman and I said, “Before you hand me the puppy I want you to know I am known as a baby-whisperer. Experience shows if you hand me a baby it will be asleep in my arms in less than five minutes.”
The food arrived.
They handed the puppy over to me. I had no experience putting puppy babies to sleep but I thought I’d employ my “magic”. I cuddled him into my arms and stroked him gently. What you see in the picture is the result. In less than five minutes he was sound asleep in my arms. The young woman had no trouble eating her lunch in peace. The puppy was in good hands. My hands.
That’s pretty much the end of the story.
When she finished eating I handed her back her new, darling puppy. The new puppy parents crated him up for the 2-hour drive to Nashville.
I have been thinking about the puppy fairly often; wondering if he’s settled into this new home. I know the young woman was excited to get her new puppy; he was all she could talk about. So let’s hope the puppy is happy; as happy as he was sleeping in my arms.
Cheers!
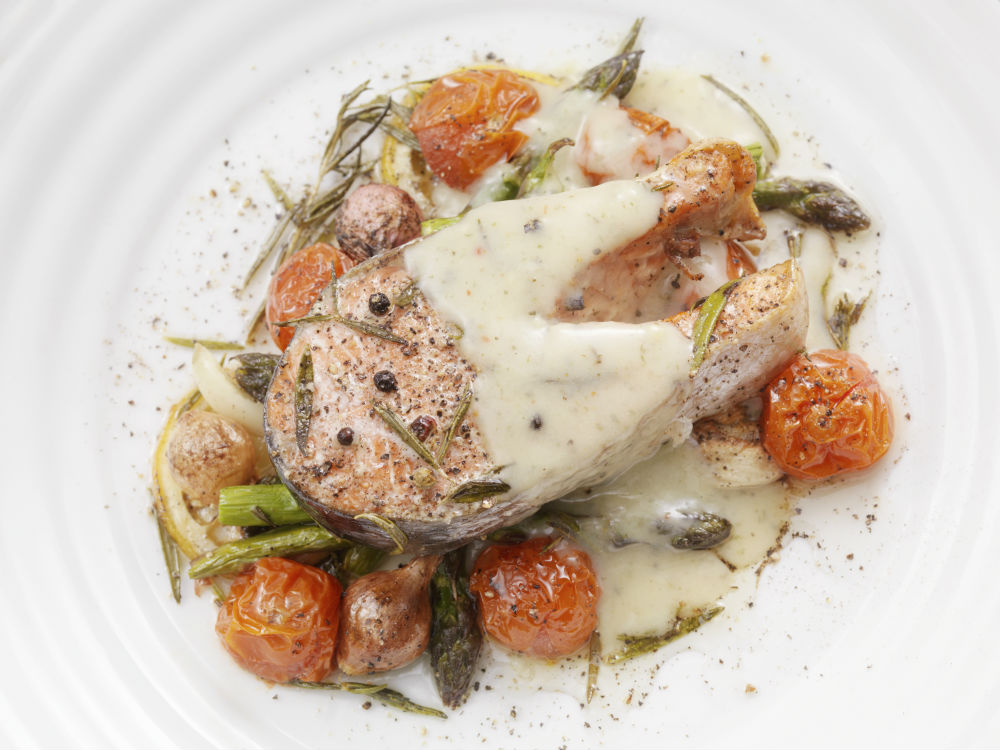
Roasted Salmon with Creamy Lemon Sauce (EASY)
Plan Z Phase: This is a Z3 (ZReboot) recipe.
I wrote this recipe up for 2 people but the sauce will feed four. So, you’ll either enjoy lots of sauce or have extras for two people. This is EASY and can be served at a dinner party.
Servings: Serves 2 – 4
Ingredients:
- 2 pieces of salmon fillet. Try to get salmon that is cut into portions with the skin removed. That makes it all easier. Most filet pieces are 6 – 8 oz.
- 6 – 8 Tbl of butter
- 1 – 2 tsp of grated garlic. (jar garlic will work)
- 1 shallot peeled and minced (my husband will want a large shallot)
- Leaves from 2 – 3 sprigs of fresh thyme.
- ½ cup of heavy cream
- ½ cup of chicken broth
- Juice of one lemon
- Sea salt and pepper to taste
Instructions:
Place salmon on a greased cookie sheet or other oven-proof pan. Spray the top of the salmon with olive oil and dust with grated sea salt and pepper.
Roast at 400 degrees for 12 – 15 minutes depending on how you like your salmon.
While the salmon is roasting you have the option of roasting it on a cookie sheet and have green beans, asparagus or even broccoli florets roasting along with it. Just spray the veggies with olive oil and dust with sea salt before you put them in. When the salmon is done the veggies should be ready too.
Now you can make your decadent sauce.
Melt the butter over medium low heat in a sauté pan. Start with six Tbl. You can add more later if you want. Add the garlic, shallot and thyme and sauté for 3 – 5 minutes until soft. Add broth and cream and bring to a low simmer. Cook the sauce on low heat until it coats the back of the spoon and starts to thicken. Check sauce to make sure it’s as thick as you want it or cook longer. Stir often. Whisk in the lemon juice and season with the sea salt and pepper.
Serve the sauce with the salmon and veggies.
Enjoy!
Cheers,

7 Shocking Facts About Dairy You Need To Know
https://youtu.be/4v3p1B_R4No?si=BzI6DW72i5KwJDZW
We’re told that milk is a perfect food that we should drink daily—three glasses to be exact—in spite of a large (and growing) body of research showing its lack of benefits and awful side effects. Even though cow’s milk today contains dozens of reproductive hormones, allergenic proteins, antibiotics, and growth factors, some of which are known to promote cancer, the dairy industry wants us to believe that their cows are happily producing milk and grazing through green pastures. For the most part, that couldn’t be further from the truth. In this video, Dr. Mark Hyman talks about common dairy myths, why it is such a contentious food, how to tackle the pros and cons of whether it belongs in your diet, and which dairy is actually okay to eat.
Dairy and the Best No Dairy Alternatives
I was born in Wisconsin. America’s Dairyland. I was proud to be from Wisconsin. Still am.
In June, the “June is Dairy Month” commercial jingles would come on the radio across the Midwest. My favorite that ran for years went like this:
“Dairy foods are great foods. Dairy foods are great. Live better, yet be healthier, with milk in your glass, butter on your bread and cheese upon your plate. Dairy foods are great foods. Dairy foods are GREAT.”
That ditty still runs through my head each June.
I want to talk about dairy and I want to talk about dairy alternatives.
First, we have to talk cow or no cow.
Milk: With all due respect to dairy farmers, we don’t need cow's milk. We don’t need any milk but we like it. Right? We were raised on it. As a young adult, I was drinking a full gallon of skim milk every two days. Dairy companies loved me. In college, I ate a block of cheddar cheese for my dinner as I studied. Again, dairy companies loved me. Then, on college football Saturdays at the University of Wisconsin I used to treat myself to a Babcock Hall ice cream sundae for breakfast. Yep, even the University of Wisconsin's dairy companies loved me.
We don’t need milk for a myriad of reasons but one of them is the lactose. That’s milk sugar. The less fat they leave in the milk the more lactose it will have in it. That means carbohydrates are hiding in your cow's milk.
Good news is lactose-free cow's milk is now available and it tastes great. Take it from me. I bought the Fairlife version and bought the full-fat one even. I took a few sips and I was bolted back to my childhood like something out of the movie Back to the Future. I had not touched cow's milk in over 8 years.
I probably won’t go back to drinking cow's milk. I now know my body doesn’t need it. I drink mostly water now. The withdrawal I went through (at least psychologically) was killer when I gave up cow's milk. For years I could not look at scrambled eggs or mashed potatoes without wanting a glass of milk to go with them.
Here are the kinds of milk I drink now and the one I’m trying:
Coconut milk is my favorite. I don’t sit down with a glass of it but I will make a smoothie out of it.
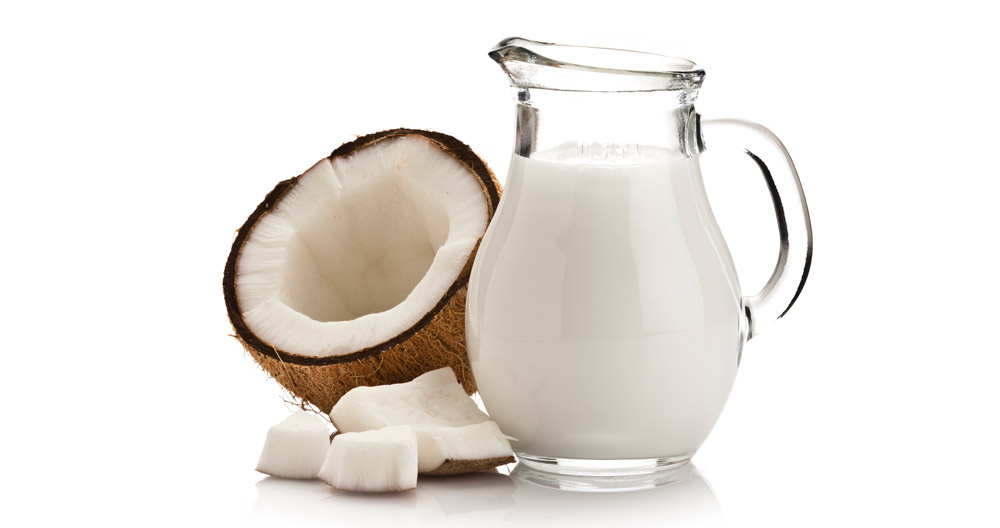
Almond milk. Same thing. My husband makes his smoothies often with this milk. Or there is one on the market that is a combo of almond and coconut in one carton. My only caution is to get one that's UNSWEETENED. You can always add stevia drops to it to sweeten your smoothie if you need that sweetness.
Pea milk is the new one I’m trying. Seems fine in a smoothie. I won’t be drinking a glass of it when I have Fairlife as an option but it seems like a suitable secondary option and none of the last three I mentioned have any lactose in them.
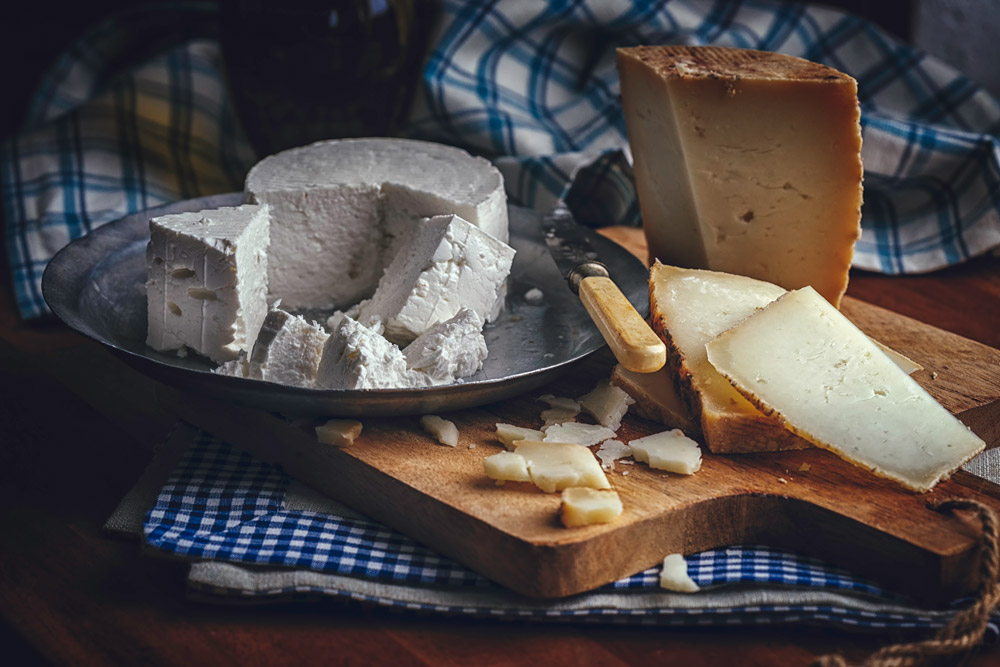
Cheese: Let’s talk cheese. My recommendations here are to first off, eat good cheese! Go to the cheese pro at your grocery store. Try to learn about new cheeses. Expand beyond cheddar.
Quit eating processed cheese “food.” Some cheese isn’t really even cheese. It’s closer to plastic, or at least that’s the joke made about it. Have I had any American cheese since I got enlightened? Sure. But not much.
Here’s what the Mental Floss website says about American cheese.
American cheese—the kind you get in the individual plastic wrappers—is processed cheese or “cheese food,” meaning it’s not actually real cheese. The next time you’re at the grocery store, take a look at the packed singles and notice how many don’t actually have “cheese” in their name. Kraft Singles, for example, are made with milk, whey, milk protein concentrate, milkfat, less than 2% of calcium phosphate, salt, sodium citrate, whey protein concentrate, sodium phosphate, sorbic acid as a preservative, cheese culture, enzymes, annatto, and paprika extract (for color). In short, Kraft Singles are made with less than 51% actual cheese, so it can’t legally be called "cheese."
You can leave the cheese out of American cheese, but you can’t take out the Americana. That stuff is still classic and gooey.
Try finding other cheeses you love. And explore sheep cheese and goat cheese while you are there. Many people are sensitive to cow's milk cheese, but they don’t realize they might still be able to eat goat or sheep's milk cheese. I found out they even make sheep cheddar now. It’s great.
Yogurt: I’ve become a big yogurt consumer. Most often I buy a coconut milk-based yogurt. I buy the unsweetened. Then I add stevia drops; just a few. A little vanilla and maybe some berries. That’s a full and focused breakfast that will tide you over until lunchtime.
Just recently I discovered yogurt made from cow's milk but it’s lactose-free. That came into my life during a trip to France. I could not find any yogurt that was not from a cow. Those French love their dairy, too.
I steer totally clear of soy-yogurt, soy-milk, and soy-based cheeses. What I have read about soy increasing the risk of breast cancer scared the daylights out of me. And watch out. Soy is the protein in a zillion other processed food products, including power bars. I used to think those were good for me. Not anymore.
Butter: Full fat butter is for me. None of those “I can’t find the butter in the butter” products anymore. I used to love that stuff because it melted so well. Now I know better. I know the butter won’t clog my arteries like they used to think. It’s the inflammation caused by other foods that cause the plaque to start to form.
I also cook with ghee. That’s clarified butter. It has many health benefits and it has a high flash point so it’s great for sautéing. That’s what they use in restaurants. When your steak comes glistening with that butter coating, that’s ghee. When your veggies are swimming in wonderful goodness, that’s ghee. Don’t be afraid of ghee. It’s even shelf stable. You don’t have to refrigerate it, so you can find it by the oils and baking supplies in the store.
Coconut oil is my other favorite. Again, so many health benefits. That stuff will even fix your hair if it’s brittle. Google the benefits of coconut oil and all kinds of things pop up. Here’s one you’ll be interested in if your doctor is telling you that you’ll need cholesterol meds if you don’t straighten up and fly right.
Coconut oil contains natural saturated fats that increase the good HDL cholesterol in your body. They may also help turn the bad LDL cholesterol into a less harmful form. By increasing HDL, many experts believe that coconut oil could be good for heart health compared to many other fats.
This concludes my dairy lecture for the month of June 2024.
Enjoy!
Cheers,
![]()
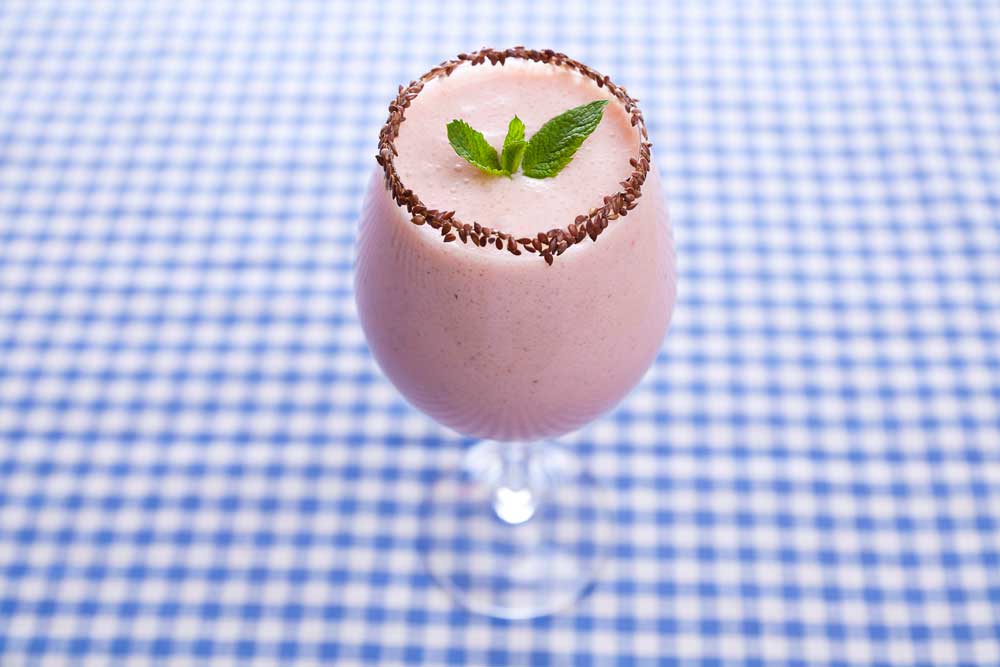
Zola's Favorite Breakfast Smoothie
Want to know how Zola starts her day? Here it is!
Zola's Favorite Breakfast Smoothie
Plan Z Phase: This is a Z3 (ZReboot) recipe.
On the go? Need something quick that will keep you full and focused while you rush off to work or to do errands? Use your Bullet Blender to whip this up. Pour it in your insulated mug and you’re good to go.
Serving Size: Serves 1
Ingredients:
- 1/3 cup of plain Greek Full Fat Yogurt*
- 1-1/2 cups of frozen fruit pieces (my favorite is mango but also good are strawberry, raspberry, blueberry, peaches or a mix of berries)
- 1 cup of unsweetened coconut milk (from the carton)
- 1 Tbl of flaxseed oil (optional but your hair and nails will love it. Also good for digestion)
- ½ - 1 tsp of Truvia (optional)
- ¼ tsp of nutmeg or cinnamon (optional)
- 1 scoop of unsweetened whey protein or rice protein powder. The vanilla-flavored one is good. If you are not getting enough other nutrition this is a great way to get extra protein. (If you do not want to do the vanilla protein powder you can substitute a ½ tsp of vanilla instead)
Instructions:
Put all the ingredients in a blender and whiz til smooth. The frozen fruit will make this a cool concoction that goes down great. You can take it to go too and just sip on it.
*Look for Fage brand or Stoney Creek. Both companies make a high quality yogurt and they make full fat versions. You do not want low fat or flavored yogurts. They contain high amounts of sugar. If your grocery outlet does not carry full fat yogurt, ask the customer service department to order it and promise you’ll be back to buy it regularly.
To your health!
Enjoy!
Cheers,
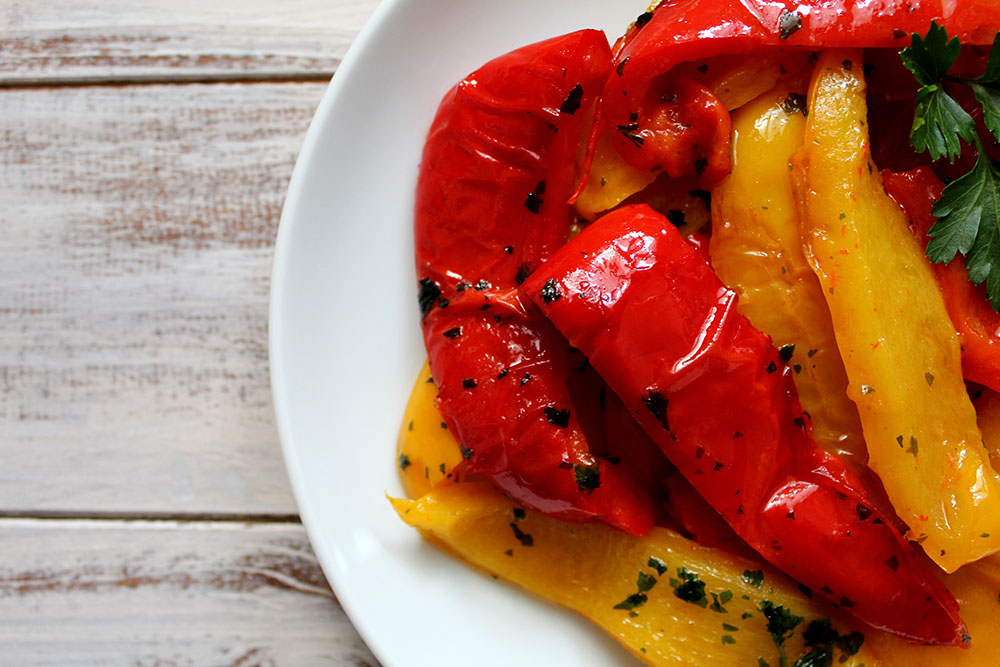
Colorful Peppers with Zip
Plan Z Phase: This is a Z3 (ZReboot) recipe. Things like peppers are popular at Italian little plates restaurants. I’m offering you a recipe for mine here. Mine have a bit of an after-burner kick to them.
Serves: Serves 6 – 8 as a “little plate”, appetizer or side dish
Ingredients:
- 2 each, red, yellow and orange bell peppers cleaned and cut lengthwise into quarter inch wide strips
- 1/3 cup of extra virgin olive oil
- sea salt
- 1/2 tsp of cracked red pepper flakes
Instructions:
Preheat oven to 400 degrees.
Put the peppers in a 9" x 13" roasting pan. Drizzle on olive oil, grate a light dusting of sea salt and sprinkle on the flakes. Stir.
Roast for one hour until just a few of the peppers get a blackened tip.
Serve immediately or store in the refrigerator and reheat before serving.
Enjoy!
Cheers,
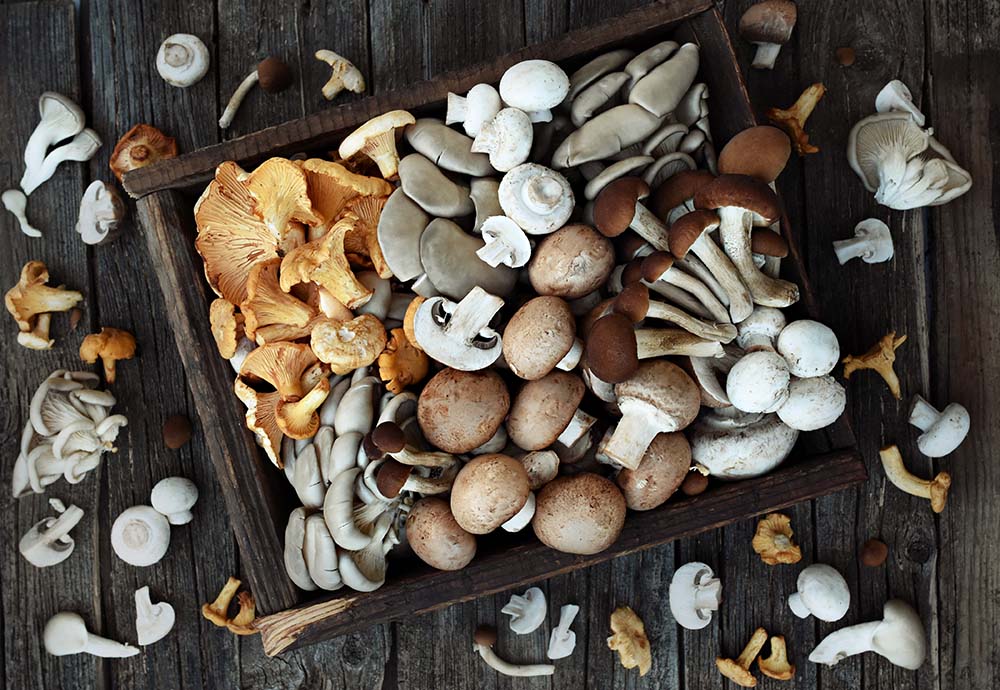
Balsamic-Roasted Exotic Mushrooms with a White Truffle Olive Oil Glaze
Plan Z Phase: This is a Z3 (ZReboot) recipe. I ordered this dish at a restaurant in town. It was so good I said, “I have to figure out how to make this myself!” It was that wonderful.
Servings: Serves 6 – 8 as a “little plate,” appetizer or side dish
Ingredients:
- 2 pounds of a variety of mushrooms cleaned and trimmed. I use lots of creminis cut in half and then add some shitakes and chanterelles. You can even make this with regular button mushrooms.
- 1 cup of a good, aged balsamic vinegar. You don’t have to get the really expensive stuff; just a good one.
- 1 cup of water
- 3 Tbl of white truffle infused balsamic vinegar (get this from a gourmet specialty store or online)
- 2 Tbl of extra virgin olive oil
Instructions:
You’ll need your 9" x 13" pan. Put the mushrooms in. The is a real pile of mushrooms. Don’t worry they’ll shrink during the roasting process and be half this size when you’re done. Roast the mushrooms with the first vinegar and the water at 400 degrees for 30 minutes. Open the oven and stir the mushrooms. Roast for 15 minutes more. Now pour off most of the liquid that has accumulated in the bottom of the pan. Leave just enough so the pan has moisture on the bottom. Roast for 15 – 30 minutes more. Don’t let the mushrooms completely dry out. Drizzle the white truffle vinegar and the olive oil over the mushrooms, stir and serve.
If you want to serve later you can. Just reheat the mushrooms and then drizzle before serving.
Enjoy!
Cheers,
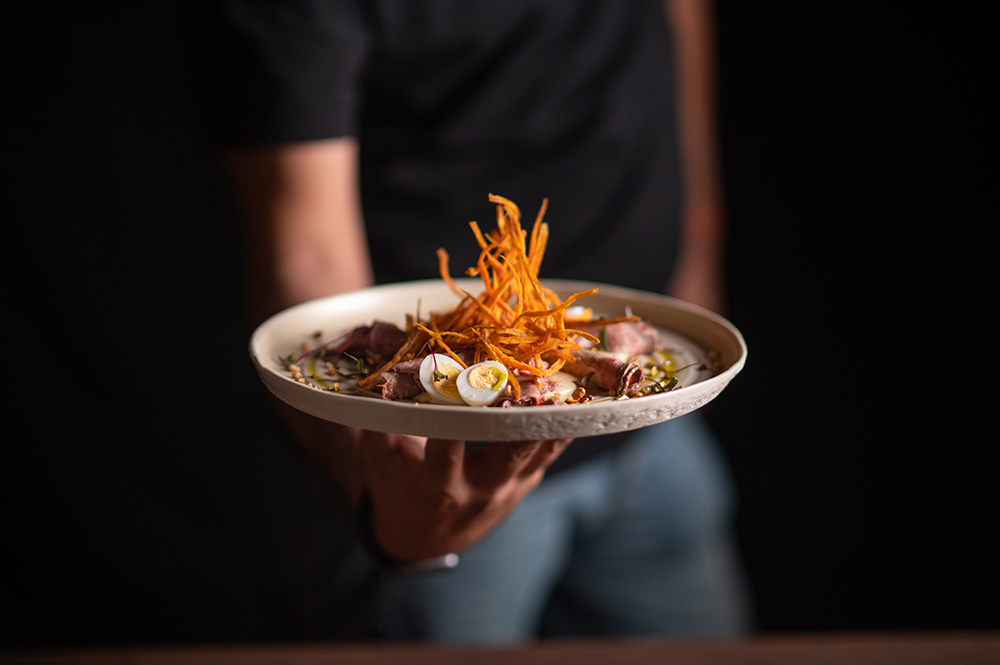
Lovely Little Plates
“Little Plate” restaurants are all the rage. In our “hip and happening” neighborhood no fewer than a half dozen of these popular eating places have debuted in the last 6 months --all located within a mile of our place. There are more spread throughout the city.
You’ll find them all over the country.
One place I haven’t been to yet (Amada Tapas and Wine) would call their “little plates” tapas. The tradition of tapas in Spain goes back a long way. The term “little plates” being used today extends well beyond Spanish cuisine.
The whole idea is to have lots of things on the menu that are enticingly priced and draw you in to the variety. In most places you’d be tempted to order maybe 3 little plates per person. You’d think based on the price per plate that you are spending less but you’re really not at most locations. On the other hand look at the variety! If you have 4 people at a table, that’s 12 plates of things to pass, nibble, share and just plain enjoy.
Some people still prefer to have an entrée so most restaurants will still have a selection of entrees to choose from. Then, if you add a little plate to your order, it might stand in for the appetizer.
At two different “little plates” restaurants I ordered a mushroom dish. I thought it was so good at the first place I had to try it again and see if it was the same at both. After I had it the second time I said, “That’s it. I have to figure out how to make this myself!” It was that wonderful.
Things like peppers are popular at Italian little plates restaurants. I’m offering you a recipe for mine here. Mine have a bit of an after-burner kick to them.
Serve these as side dishes or have yourself a “little plates party.” You can either cook them all or ask each couple to bring a dish that qualifies as a little plate item and then you can pass the dishes or set up a buffet.
Enjoy!

Dieter Cindy's Mocha Mix
Plan Z Phase: This is a Z2 (ZReduction) recipe. Dieter Cindy developed this recipe while looking for ZReduction-friendly beverages. She now makes it in batches so she can just pull out a tsp of "mix" and add the coffee & cream. Even her coworkers love it. We love it too!
Serves: The recipe below serves 1, but you can easily make "The Mix" in batches so it's ready to use when you flavor your coffee.
Ingredients:
The Mix (for one serving)
- 1 tsp unsweetened cocoa powder
- 1/2 tsp cinnamon
- 1/4 tsp Truvia
Your cup of coffee (made the way you like it)
Instructions:
Add 1 scoop of mix to the bottom of your empty coffee cup. Now add a small amount of water or coffee to get it wet, otherwise you end up with powder floating around your cup. Mix around so there are no lumps in it.
Pour in 8-10 oz of black coffee and heavy whipping cream (you can have up to 4 Tbl of heavy whipping cream per day on ZReduction).
Yummy! And easy!
I tend to make "batches" and then I can just pull out a tsp of "mix" and add the coffee & cream...
If you are making a larger batch, the ratio is 4:2:1 (4 parts of cocoa powder, 2 parts cinnamon, 1 part Truvia)
Hope you enjoy!
Cindy

Dauphinoise Potatoes (aka Potato Gratin)
Plan Z Phase: This is a Z3 (ZReboot) recipe if chilled for 8 hours or more before serving OR a Z3.5 (ZReboot 3.5) if served immediately.
Don’t let the name intimidate you. This is a wonderful potato casserole from the southeast part of France. Wonderful for holidays and dinner parties. Works great on a buffet too if you like room temp potatoes or have a chafing dish. For the LOWEST glycemic index, and therefore the lowest effect on blood sugar, make this dish the day before you serve it. This is why. Chill it overnight or make it early in the morning and chill all day and then reheat to serve it.
Servings: Serves 6 and can be doubled easily. Just cook the potatoes in batches.
Ingredients:
- 3 lbs of potatoes (see notes below), sliced with a mandolin to 1/3” or cut into 1” chunks.
- 1.5 cups of heavy cream
- 3/4 cup of full fat milk
- 1/3 cup of mayonnaise
- 1/4 cup of dry white wine
- 3 tsp of finely chopped garlic
- 1/2 tsp of ground black pepper
- 3/4 cup of shredded Italian cheese blend. Romano, Parmesan, mozzarella and even fontina can be found in one package. If you can’t get that, you can just do Romano or Parmesan.
- 1/2 cup of shredded Gruyere cheese
Instructions:
Selecting your potato at the store:
If you want to keep down the effects of the carbs, go for a young potato. The younger or smaller, the lower the glycemic index. That means they won’t spike your blood sugar as much as a big potato. Big potatoes have more starch. Choose a baby red potato or even fingerlings. Traditionally, this dish is made with layers of large potatoes. You can do this with layers of slices or even chunks of small potatoes. It won’t look quite the same but will taste just as yummy. This recipe is really decadent.
I don’t peel my potatoes; just wash them. The vitamin C is in the skin.
Preheat oven to 375 degrees. Spray a 2-quart shallow baking dish with oil. (9” X 9” It can be an oval or any other shape too.)
Cover the potatoes with water in a medium saucepan. Bring them to a low boil. Then turn them down to simmer and cook until tender when poked with a sharp knife. This will only take about 5 minutes. You want them to be mostly cooked but not falling apart. Immediately drain them through a colander.
In another saucepan, add the cream, milk, mayo, wine, garlic and pepper. Cook until the mixture begins bubbling gently, stir frequently for five minutes or until it begins to thicken slightly.
Put a layer of potatoes in the baking dish. Pour on half of the cream sauce. Put in another layer of potatoes and pour on the rest of the cream sauce.
Sprinkle on the cheeses.
Bake 20 – 30 minutes until bubbling hot and cheese is browned to your liking. Let set for 10 minutes before serving so it thickens up and you don’t burn your mouth.
Enjoy!
Cheers,
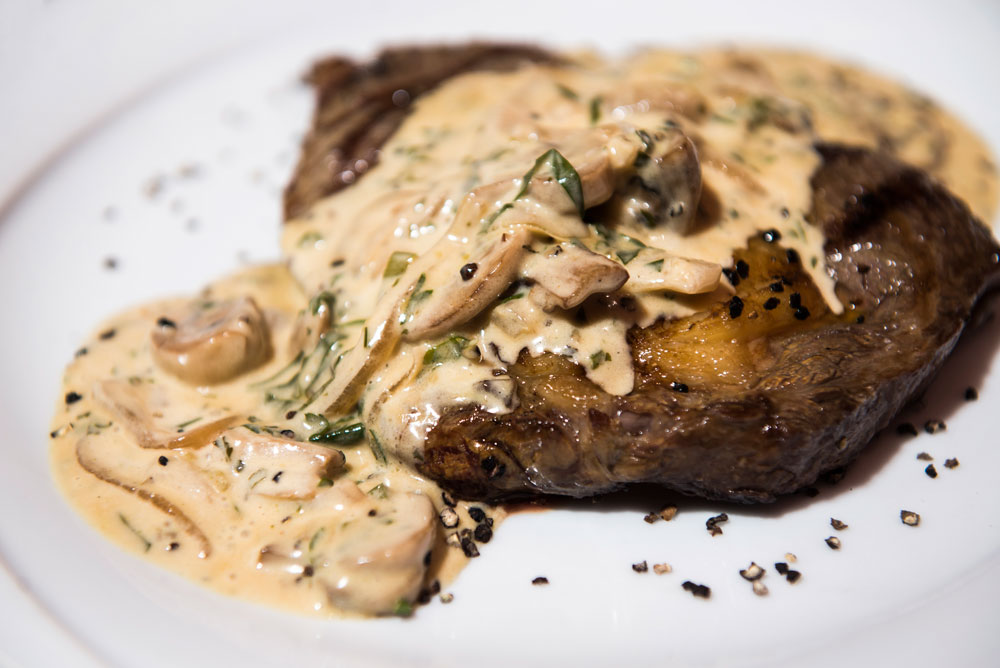
Mushroom Steak Sauce (SUPER EASY)
Plan Z Phase: This a Z3 (ZReboot) recipe.
Smell this sauce before you put it on your steak and you’ll swear you’re in an old-time steakhouse. The addition of the Worcestershire and Dijon elevate this simple sauce.
Servings: Serves up to 4.
Ingredients:
- 8 oz of sliced mushrooms (You can use button, shitake, or cremini. I say sliced because it makes it even faster!)
- 3 Tbl of butter or ghee
- 1-1/2 tsp of minced garlic (Jar garlic will work.)
- 1/2 cup of chicken or beef broth (I use low sodium.)
- 1 cup of heavy cream
- 2 tsp of Dijon mustard (You can use different mustard, but this is my fave.)
- 2 tsp of Worcestershire sauce (In my opinion, this is the secret to this sauce.)
- 1/2 tsp of grated sea salt (Or to taste)
- 1/4 tsp of grated pepper
Instructions:
Melt the butter or ghee in a saute pan set at medium-high. Add the mushrooms and garlic. Saute for about three minutes or until the edges of the mushroom begin to brown. Stir often to keep the garlic from getting burned.
Stir in the broth, cream, mustard, Worcestershire, salt, and pepper. Cook and stir periodically for five to eight minutes or until it is reduced to your liking. I like it thick and creamy. Taste and add salt and pepper. Stir and taste again. Pour over your cooked steak and Enjoy!
Cheers,