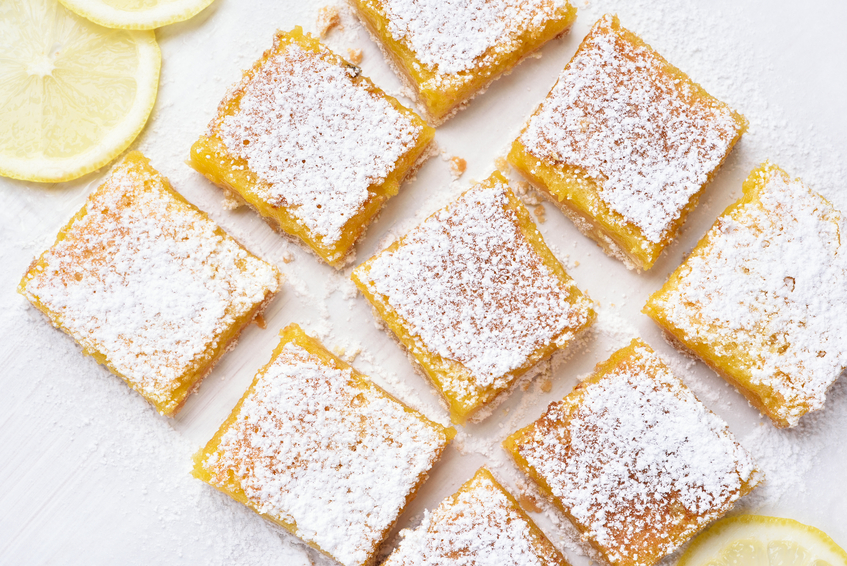
Creamy Dreamy Lemon Bars
Plan Z Phase: This is a Z3 (ZReboot) recipe.
My husband’s favorite dessert flavor is lemon. These hit his tart meter for sure! They taste divine and have no sugar and no gluten. Your friends and family won’t need to know these aren’t “bad” for you!
This is the kind of dessert I serve at fancy dinner parties; even holidays. Rather than a large dessert, folks seem to enjoy something small and decadent.
You can buy Swerve sugar substitute in some stores or order it online. The Super Fine ground almond flour and the coconut flour are in most grocery stores. Check out the organic section and look for the brand Bob’s Mill. Be SURE to get Superfine almond flour. It works best in baked goods.
For the crust:
- ¾ cup of softened butter
- 1/3 cup of Swerve granular sugar substitute
- 2 cups of Superfine ground almond flour
For the filling:
- 4 eggs
- 1 cup of Swerve granular
- ¼ cup of coconut flour
- ½-3/4 cup of lemon juice. 2 lemons should net you the right amount depending on size. The more tart you want these the more lemon juice.
- ¼ cup of whipping cream
Optional:
- Swerve powdered sugar for a dusting on top of the bars
Instructions:
Preheat oven to 350 degrees.
In a bowl, add the softened butter in chunks, the almond flour and the Swerve. Use a pastry cutter or a fork to blend. Just keep cutting the butter into the almond flour until it’s all mixed to a dough consistency. Turn the dough out into a 9" x 13" baking pan. You are going to want to spread the dough across the bottom of the pan. In order to keep my hands clean, I use a piece of plastic wrap. I spread that over the dough and then I can manipulate the dough across the bottom of the pan without getting dough in my fingernails. Toss the plastic when finished.
Put the crust in the oven and bake 15 – 20 minutes or until it’s golden on the edges and about set. It might be a little loose in the middle but try to bake it until it firms up and is light beige. Keep an eye on it because it can brown very quickly toward the end of the baking time. Cool the crust on the counter for 10 minutes and then cool it in your refrigerator for 10 more minutes so it sets up nicely.
While the crust is cooling in the refrigerator you can make your filling.
In your blender, add the eggs, Swerve, coconut flour, the lemon juice and the cream. Blend until fully mixed. This will only take about 10 seconds. The cream is a nice addition because it mellows out the tartness of the lemon juice. These will still be plenty tart. They won’t be the electric-yellow color of many lemon bars but they are still pretty.
Take the crust out of the refrigerator and pour the filling over the top. Carefully transfer to your oven and bake this mixture for 20-25 minutes or until it’s almost set. They might be a little jiggly in the middle but you’ll know it’s set enough when you see little bubble marks across the top.
Leave them on the counter to cool to room temperature. They will firm up more as they cool. Then transfer to the refrigerator and let them chill for at least two hours. This makes them easier to cut evenly.
You can cut the whole pan into bars or just cut off as many as you want to serve and keep the leftovers in the refrigerator covered in plastic wrap.
If you want to dust them with a bit of powdered sugar, leave that process until just before you want to serve them. That will ensure the powdered Swerve tastes fresh and doesn’t soak into the bar surface.
Enjoy!
Cheers,

The Path to Becoming Non-Diabetic
From the IDF Diabetes Atlas:
Today, there are over 537 million people living with diabetes. By 2045, IDF projections show that 1 in 8 adults, approximately 783 million, will be living with diabetes, an increase of 46%. Over 90% of people with diabetes have type 2 diabetes, which is driven by socio-economic, demographic, environmental, and genetic factors.
I don’t want to spoil your appetite, but these are pretty alarming numbers.
There are many companies that capitalize on this. When I watch the evening news, I am bombarded with flashy advertisements for drugs to treat Type 2 Diabetes. None of them say they can cure diabetes. They say they just allow you to manage it better. These drugs are designed to lower your A1C but none of them are going to fix the problem. Seems like every few months they come out with another one. And none of them are cheap.
The Diabetes Association tells us that you can’t cure Type 2 diabetes. They say once you have it, you can only control it. (We do know that if you have Type 1, they are correct. Type 1 diabetes cannot be cured. Only managed.)
However, when it comes to Type 2 diabetes, I know Plan Z dieters who would say this statement is false. I get weekly emails from dieters who say they have lost weight on Plan Z and have lost their need for their Type 2 diabetes meds, too. They go to their doctor for a check-up and the doctor is so amazed by how much healthier they are that the decision is made to quit the meds -- with their doctor's blessing.
The reason Plan Z dieters are able to lower their blood sugar levels is not magic. The ZReduction phase of Plan Z has been specifically designed to put your blood sugar levels in the optimum zone. Our hope is that when you follow the diet guidelines, you not only lose weight, but you get healthier, too. And folks who are diabetic see HUGE benefits from sticking to the foods that will not dramatically raise their blood sugar levels.
I’m not an MD, so the powers that be would frown upon me for giving out medical advice. But this guy can. Dr. William Davis is a cardiologist. Here's a video that he did that explains the process of how someone with Type 2 diabetes can go about becoming non-diabetic. Because he's explaining a path for long-term blood sugar management, his fat and carb ratios are similar to the ratios we recommend you use in the ZReboot phase. This video is powerful and eye-opening. If you've ever wondered why your blood sugar levels drop so quickly in ZReduction, this guy explains it. Folks who have not been through Plan Z can find it confronting, and for that reason some have called it controversial. But once you've been through the Plan Z Diet (and had the experience), it just sheds medical light on why your blood sugar levels dropped so quickly.
If you're like me, you may have to rewind/replay a few bits -- he's really smart and sometimes he talks kind of fast!
https://youtu.be/0iuY1Ll7ijo?si=tD4BDCElsHxUy1w0
Pretty powerful, right?
Now, I’m not suggesting that anyone quit their meds on their own. That’s a decision to be made with the help of a personal physician. But if someone close to you is struggling with managing their Type 2 diabetes, please tell them to have hope. They are not as powerless as the pharmaceutical industry would have them believe.
Here's what one of our Plan Z dieters had to say after lowering his A1C to non-diabetic levels:
“[My doctor]…had nothing but raving reviews for me. He said A+++++. Shook my hand 3 times and said he's never seen a change like this in anyone. Even though he still acted like a doctor does and talked about carbs and protein like a nutritionist does he stopped and said "well what am I doing telling you this, you know how to do it already," it made me laugh cause on the food part of what he was trying to tell me I felt like correcting him on a few things but I let it slide." He called your diet amazing and what it has done for me… It was so funny I don’t think I've ever seen him on a loss for words in the 25 years I've known him… He said that according to my numbers I’m healthier than some 25 year olds.”
No more Type 2 diabetes meds for him.
Is he cured?
Dr. Davis would say yes.
Could this dieter get diabetes again if he goes back to his old eating habits?
Absolutely.
But if it were me, after becoming non-diabetic, I would not go back to eating the way I used to. In fact, I’d pass this along to every overweight person I know. This information can save lives. Oh, and by the way, it’s not only overweight people who get Type 2 Diabetes. Yes, the percentage is higher, but even skinny people are susceptible. So you may want to consider sharing this with everyone.
Dr. Sarah Hallberg says Type 2 diabetes is just a state of carbohydrate toxicity. I completely agree. I know from experience that if you just keep your daily carbohydrate consumption under 20% of your total intake you can live a healthier life. That means everything, though. There are carbs in veggies and in fruits. It’s not just keeping the ‘white stuff’ to a minimum.
Most of us were taught how to count calories. We have to learn to count carbohydrates now instead.
It doesn't have to be difficult. And it doesn't have to taste bad, either. You can start simple, like with a recipe for Raspberry Ice Cream. This delicious dessert can be as easy as 4 ingredients and takes less than 3 minutes!
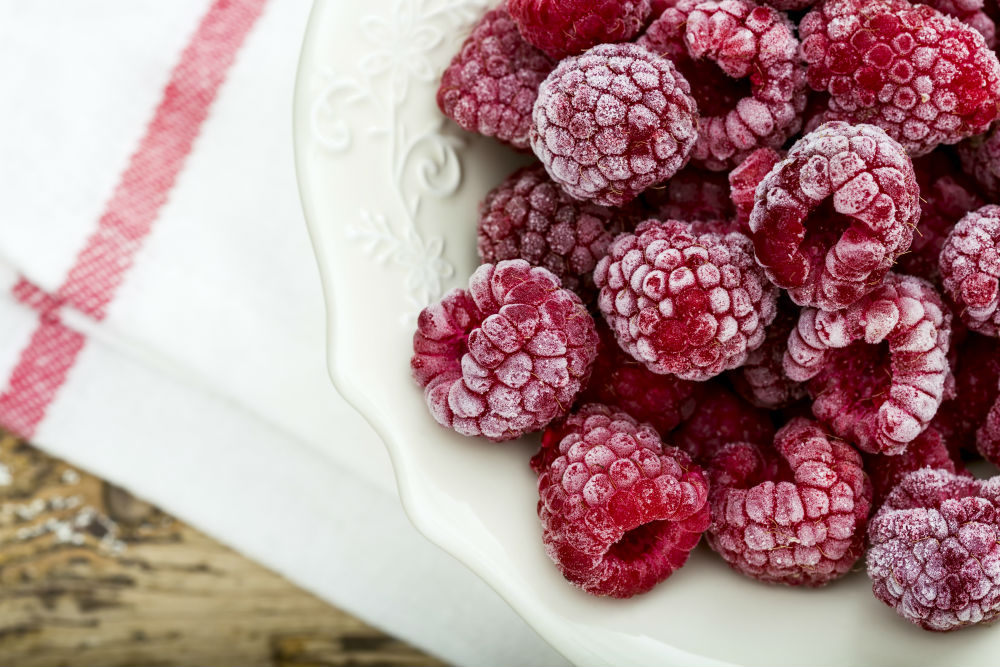
Raspberry "Ice Cream"
I scream. You scream. We all scream for ice cream – and we are on a diet! BONUS!
Enjoy!
Cheers,

The Only Chocolate You Should Eat
Many diet gurus will tell you that chocolate is high in fat and calories and to stay away. But there's more to it than that. I’m here to tell you that when you are finished dieting, chocolate can be part of your eating plan on a fairly regular basis.
As president and "Chief Dieter" of Plan Z, I get chocolate-related questions fairly often, especially around Valentine's Day. Before starting Plan Z, I was a food writer and loved to cook, bake and entertain (in fact I still do), so I have a lot to say about this topic. I also loooove chocolate. (Who doesn't, right?) Without being too long-winded, here’s the scoop:
Chocolate starts out healthy. It comes from cacao, which is a plant with amazingly high levels of antioxidants, minerals, and vitamins. The health benefits of cacao are so numerous that raw cacao is known as a "superfood."(1) Raw cacao is super bitter though, so the beans are processed. They are fermented, dried, and shipped to factories where they are roasted and cracked. That's how you get cacao nibs.
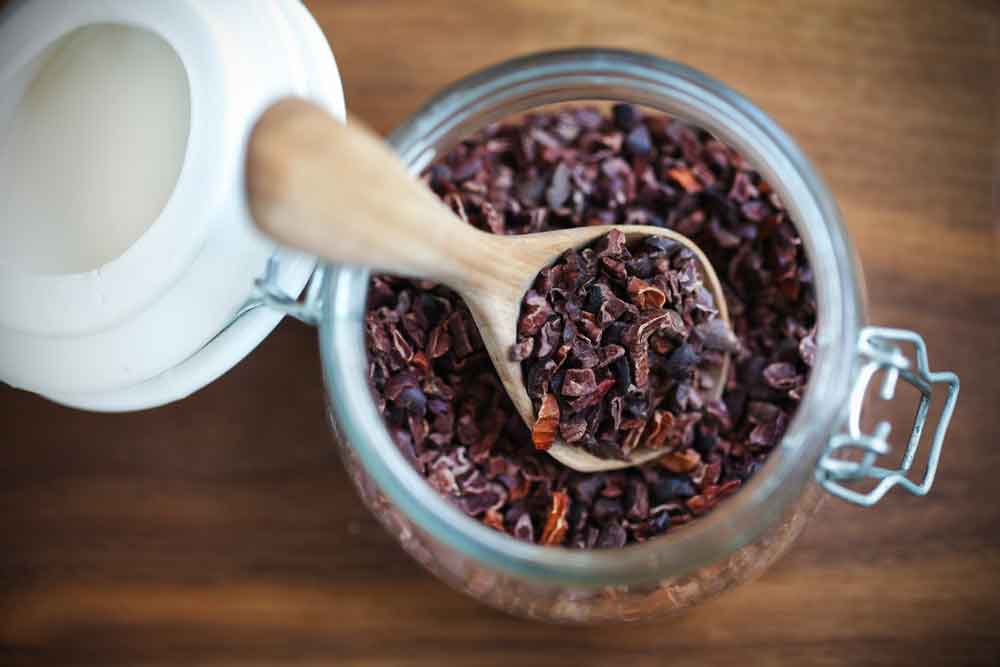
Cacao nibs resemble the texture of nuts but have a choco-bitter flavor. Pure cacao nibs are high in fiber, protein, healthy fats and low in sugar. Yes, they are good for you! They are a great plant-based source of iron, and they are also very high in magnesium, which is something everyone needs more of in their diet. 28 grams of cacao nibs added to your breakfast gives you nearly 1/3 of your daily recommended intake. Wowza! They also have a lot of the anti-inflammatory benefits of the cacao bean. But the nibs are dry and brittle and do not taste like the chocolate that comes to mind when we think of "chocolate." So what happens next? They are processed...again.
The nibs are and ground into a thick paste. This paste is chocolate in its pure form. It contains a mix of cocoa solids and cocoa butter (cocoa solids = chocolate flavor, cocoa butter = chocolate texture). Claire Saffitz from Bon Appetit says it best, "Basically, it's what's in the chocolate that isn't sugar, dairy, vanilla, emulsifiers, or other flavorings." All chocolate products are made from this "chocolate liquor" (it's called liquor but there's no alcohol in it). How? The chocolate liquor is -- wait for it -- processed.
Unsweetened chocolate is chocolate liquor pressed into a solid mass. It has no sugar or milk additives. It's also called baker's chocolate. If you bake, you're probably used to seeing it in recipes for chocolate desserts. What's interesting is those unsweetened baking bars most closely resemble how chocolate was eaten for the last 3,500 years. It wasn't until 1847 that we started adding sugar to chocolate bars (3). Before developing Plan Z, I was an avid baker. I remember tasting a bit of baker's chocolate -- I thought it tasted like dirt! No one snacks on unsweetened chocolate anymore. How our taste buds have changed!
Cocoa powder is unsweetened chocolate without the fat. Sometimes it goes through a process called "Dutching" which makes it darker, more mellow, and easier to dissolve into liquids. If you want to geek about the difference between natural cocoa powder vs Dutch-process check out this article. My favorite hot chocolate recipes use Dutch-processed cocoa powder.
To make the chocolate that we eat (and dream about), that chocolate liquor is processed (again) and mixed with other ingredients -- like vanilla, sugar, more cocoa butter, and milk.
Dark chocolate is a chocolate that is at least 35% chocolate liquor. The higher the percentage, the fewer additives and the greater the health benefits. Want to eat chocolate and stay healthy? Dark chocolate is your best choice. Choose dark chocolate that has at least 70% cacao. I shoot for closer to 85% for my baking. If it’s higher than that, you probably won't like it (see my dirt experience above). Believe me. Big YUK. Because dark chocolate at 70% or higher is still mostly cocoa butter and cocoa solids, it's got many of the health benefits I mentioned above. It's rich in minerals, such as iron, magnesium, and zinc. The cocoa in dark chocolate also contains antioxidants called flavonoids, passed down from the cacao bean. This is the chocolate that is linked to health benefits when eaten in moderation.
Milk chocolate contains at least 10% chocolate liquor and at least 12% milk. Huge difference. Since it has added milk, it is softer and melts easier than dark chocolate. It's gone through additional *ahem* processing to add sugar, milk, sometimes additional cocoa butter. It's not normally used in baking because it can make a dessert too sweet. It has such small quantities of cacao that you won't get any health benefits from milk chocolate. It's got so many additives and sugar in it that this kind of chocolate is linked to health problems.
White chocolate doesn't actually have any chocolate in it at all! White chocolate is cocoa butter, sugar, and milk. While it is delicious in its own right, you won't get any health benefits associated with white chocolate. All the sugar and other additives negate any benefits from the original cocoa plant.
In conclusion: When choosing a bar of chocolate, the higher the cacao percentage, the better off you'll be.
Let's say you decide to go with dark chocolate. How much is too much? Experts will say if you want to munch on dark chocolate every day, you should not go over 1 – 2 ounces. That’s usually a couple of little squares. It’s not a whole bar.
Here's what you need to remember: Cacao is healthy food. Chocolate is a processed food.
My husband enjoys the benefits of dark chocolate. He adds a tablespoon of cacao powder to his smoothies. He sips the chocolate/fruit smoothie for his breakfast. Our cat likes it, too. He wants a little sip, so my husband indulges him.
When I make chocolate desserts I usually cut them into thin wedges. That’s usually enough to satisfy your guests’ sweet tooth. They actually appreciate that you didn’t cut them a big slab.
Enjoy your chocolate in moderation. Just keep it dark.
Cheers,
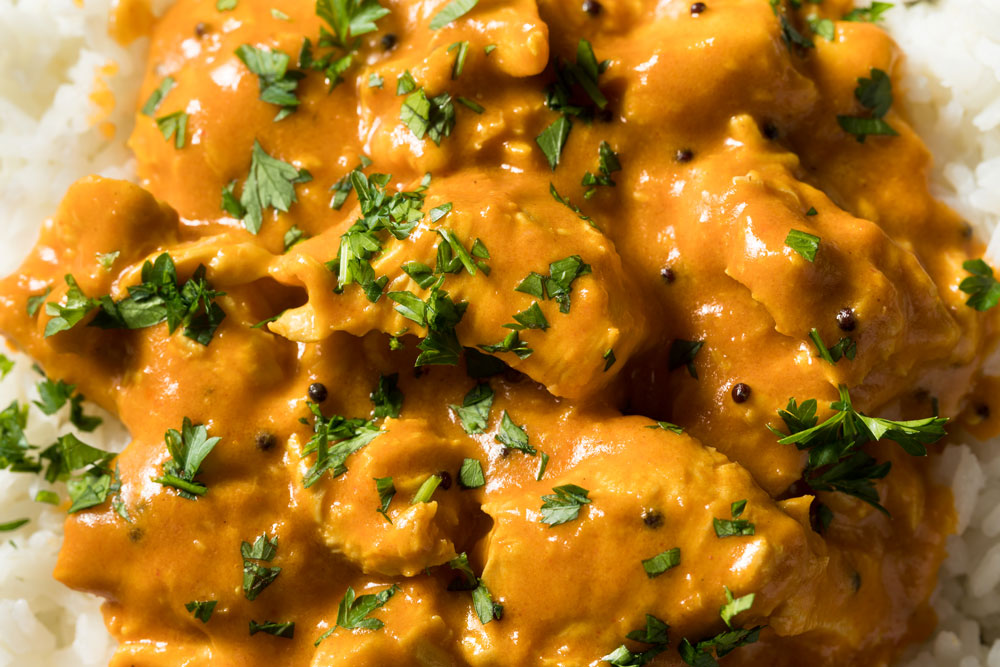
Mango Chicken Curry
Plan Z Phase: This is a Z3.5(ZReboot 3.5) recipe.
Lovers of Indian food are going to go ga-ga for this meal! This is a dish with enough spice to keep you interested but I’d put it in a medium category and not a spicy one. The mango is really interesting and it adds sweetness and lightness to the dish. The dish comes together in 30 minutes or less. It’s totally delicious.
I found this recipe on a site called The Endless Meal. I usually refer to these things as my “inspiration recipes” because I put my own twist on them and change enough to make them mine. Not this time. As I was putting the recipe together, I kept coming to the same conclusion the originator did. I only made one tweak to the cooking methods and I was happy with the result.
Servings: Serves 2.
Ingredients:
- 2 Tbl of coconut oil. You can use solid coconut oil or liquid.
- 1 medium onion, chopped (Approx 2 cups)
- 4 cloves of garlic
- 4 Tbl of minced ginger
- 2 Tbl of curry powder. If you want yours to be milder you can cut back on this.
- 1 tsp of grated sea salt
- 1 tsp of grated pepper
- 3 ripe mangoes, peeled and cubed, or 3 cups of frozen mango chunks thawed and divided. It’s not often you find ripe mangoes so feel free to use the frozen ones. They worked perfectly and are faster to work with.
- 1 can of coconut milk (14 oz)
- 1 lb of chicken cut into cubes. I used chicken breast. Thighs are an option, too.
- Optional: Rice or cauliflower rice. You can find cauliflower rice in the frozen section. If you choose rice, I recommend using Jasmine and trying to keep it to a minimum. My typical portion is about 1/4 cup. They make ready rice packages that you just pop in the microwave and voila.
Instructions:
Heat the coconut oil in a large sauté pan over medium heat. Add the onion, garlic, and ginger. Sauté until the onions are translucent, about three minutes.
Get out your blender. Add the onion mixture, curry powder, salt, pepper, one cup of the mango chunks, coconut milk, and a half cup of water. Blend on high until smooth. Remember you have a hot item in the blender, so I always hold a kitchen towel over the top of the blender and start off my blending very slowly and then increase the speed.
Return the mango-curry sauce to your sauté pan. Add the chicken chunks. Cook on medium for approximately 15 minutes, stirring fairly often. You just need to make sure the chicken gets cooked through (no pink in the middle). When you are sure the chicken is fully cooked you can get ready to serve. If you are a novice, you can take a piece of chicken out and cut into it to double-check there is no pink. Stir in the rest of the mango chunks and you’re ready to go.
Make your rice or cauliflower rice and serve the dish in bowls or on plates.
Enjoy!
Cheers,
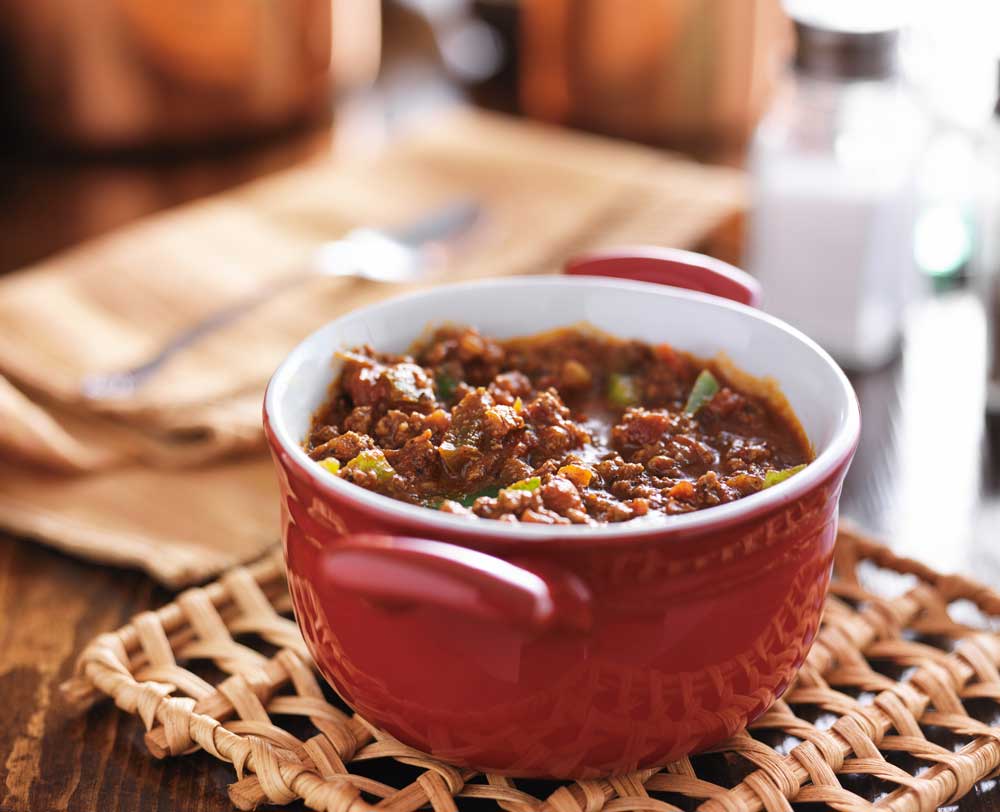
Beefy Chili with Roasted Poblanos
Plan Z Phase: This is a Z2 (ZReduction) recipe. My newest chili. LOVE this stuff! Big YUM.
Servings: Serves 6 – 8. Each serving is 1-½ cups. Since this recipe includes veggies, a 1-½ cup includes your veggie portion for the meal as well. If you want to bulk up your portion, try adding shredded cabbage to the chili while it's simmering. Since cabbage is unlimited on ZReduction, you can add as much as you want. YUM!
Ingredients:
- 2 lb of ground sirloin
- 2 large poblano peppers, seeded and cut into narrow strips
- 1 cup of red onions, diced
- 1 cup of Vidalia onions, diced
- 2 Tbl of minced garlic (jar garlic will work)
- ½ tsp of ground cinnamon
- 2 Tbl of chili powder (you choose your favorite from mild to monster)
- 1 tsp of cumin
- ½ tsp of celery salt
- 28 oz can of crushed tomatoes
- 15 oz can of diced tomatoes
- 3 cups or more of organic beef broth
- Garnishes*
Instructions:
Preheat your oven to 400 degrees.
Place the poblano pepper strips on a lightly oiled cookie sheet. Roast in your oven at 400 degrees for about 15 minutes or until they just barely start to char along the edges. They will sort of curl on the sides. They don’t all have to curl. Just a few. Then take them out and set them aside.
While they are roasting you can make the rest of your dish.
In a medium soup pot add a whisper of olive oil spray and then add your ground sirloin. Begin sautéing on medium and break it up with a spatula or wooden spoon. Cook until about half done. Add the two types of onion. Cook a minute and then add garlic, chili powder, cumin, celery salt. Stir. Make sure the beef is cooked all the way through and then add the tomatoes (both cans) and the beef broth.
How much beef broth you add in the end depends on how soupy you want your chili. In this version, I like it soupier and less tomato taste. You’ll need the full three cups to achieve that.
Cook until the liquid reduces slightly and flavors meld. This takes about 10 minutes. Then add the poblanos, heat and you’re ready to serve.
Garnishes:
You can garnish your chili with lots of options. For Z2, stick to: diced onion, diced red pepper, minced cilantro, bits of green chilies (from a can is fine) or bits of tomato. Take it easy on hot sauce but you can add a bit if you want the chili hotter. This is not a SPICY chili. This is a flavor-filled chili. You can always add more heat but you can’t get it back out very easily!
Enjoy!
Cheers,
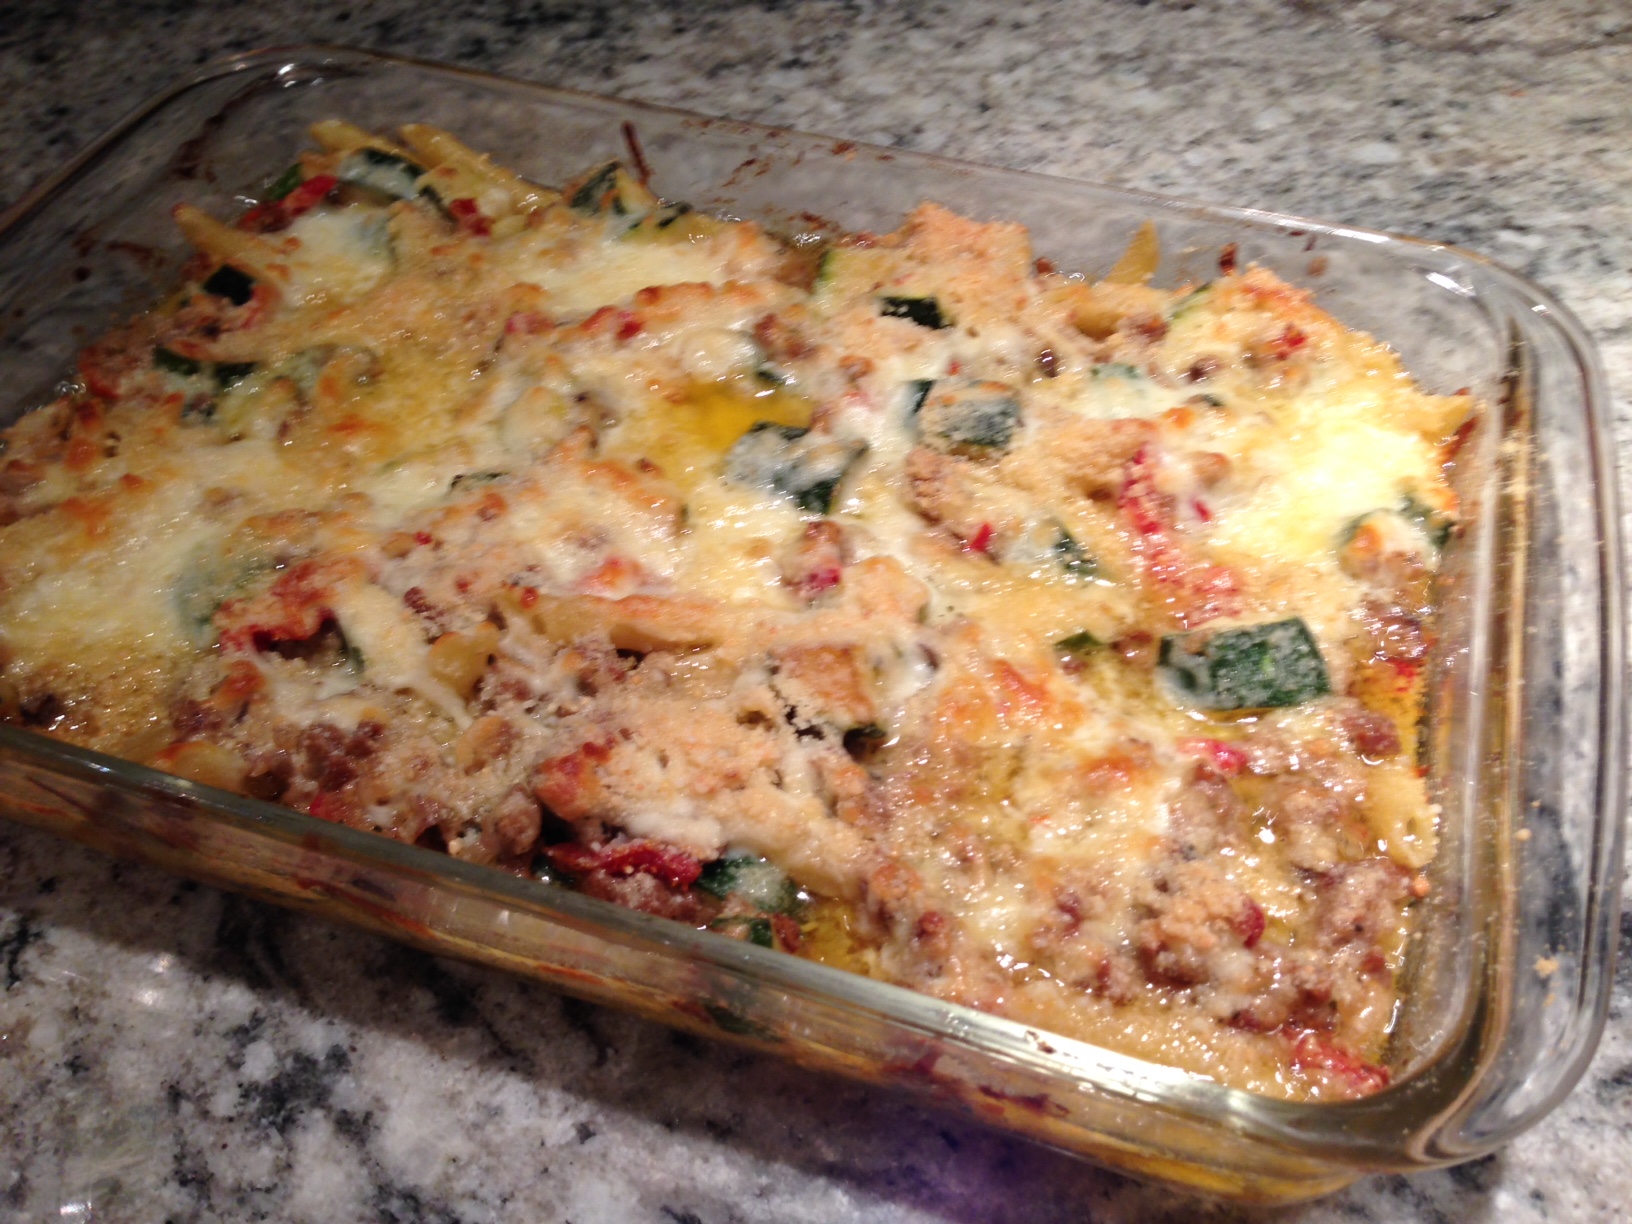
Italian Sausage Casserole with Peppers and Mushrooms
Plan Z Phase: This is a Z3 (ZReboot) recipe.
I found a good low-carb recipe online. I tweaked it to Zolify it and made it easier. This is the result. Yummy, comfort food.
Servings: Serves 4. Serve with a salad for a well-rounded meal. Ceasar salad kit will work well with little effort needed.
Ingredients:
- 3 Tbl olive oil
- 8 oz of mushrooms. Cremini mushrooms give a nice hearty flavor. White mushrooms are fine too.
- 8 oz of loose Italian sausage. You pick mild or hot.
- ½ of a red bell pepper cut into strips.
- ½ of a green bell pepper cut into strips. You can add more peppers if you would like.
- ¼ tsp Italian herb blend.
- ¼ tsp of a general seasoning or more Italian blend. I use a product called “Special Sh*t” – yep that’s the real name. It’s really good!
- Fresh ground pepper to taste.
- 1- 1/2 cups of grated mozzarella cheese.
Instructions:
Preheat your oven to 375 degrees and get out your 9 X 9” pan. Spray the pan with olive oil spray.
Get out two medium-sized sauté pans. Put a tablespoon of olive oil in each one.
Put the sausage in one pan and cook it on medium until it’s browned all the way through. While it’s cooking keep breaking it up into bite-sized chunks.
While that’s cooking put the mushrooms in the other sauté pan and cook them until they begin to brown and most of the moisture has boiled off. When they are done, transfer the mushrooms to the bottom of the casserole pan.
In the pan used for mushrooms add another tablespoon of olive oil. Sauté the pepper strips until they are loose. They will cook more in the oven, so they don’t have to be wilted before they go in the pan.
Layer the peppers over the mushrooms and then season with the Italian herb blend, the peppers, and your other seasoning of choice.
Now layer your browned sausage on top and cover with the mozzarella.
Bake for about 25 minutes until the dish is all cheesy and hot.
Enjoy!
Cheers,
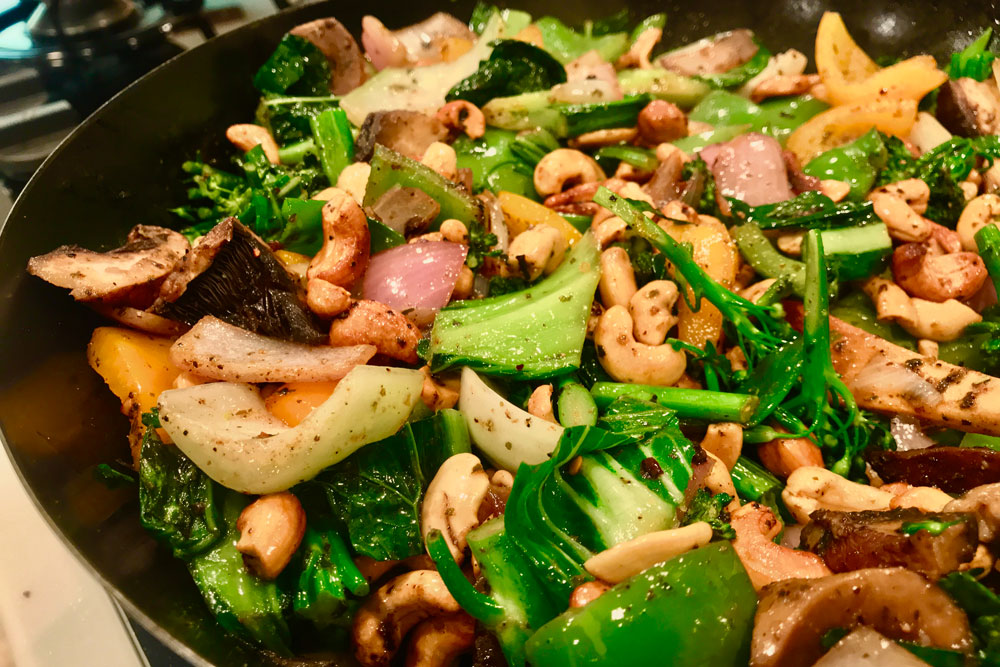
Veggie Stir Fry (EASY)
Plan Z Phase: This is a Z3 (ZReboot) recipe.
This colorful dish is super simple to make. You can include whatever assortment of veggies you like. I’ll give you a list of suggested options. You can serve this with something cooked on the grill; chicken, fish, or even steak. For a light dinner, I might go crazy and serve this with a chicken eggroll or two instead of the other protein. That’s my favorite option. I have dinner ready in under 20 minutes.
Servings: Serves 2. Can be doubled easily.
Ingredients:
- 3-4 cups of assorted veggies. Options include: bell pepper (red, yellow, green, and even purple. These I cut into strips) snap peas or snow peas, sliced carrots, sliced mushrooms, broccoli florets, baby corn, water chestnuts, onions, bok choy, celery, zucchini. You choose as many options as you like. Just make sure it’s about three to four cups total.
- 1 Tbl olive oil.
For the sauce:
- 1/4 cup of tamari, coconut aminos, or Bragg’s aminos (last resort use soy sauce)
- 3 tsp of minced garlic (jar garlic will work)
- 1 tsp of sesame oil
- 1/2 cup of chicken or vegetable broth
- 2 tsp of cornstarch
- 1 cup of cashews (roasted and salted work great)
- 1/4 cup of chopped green onions (optional)
Instructions:
In a skillet or sauté pan add the olive oil and heat on medium-high. Add your veggies and sauté for two to three minutes until veggies are almost tender. Stir to keep mixing them up and get them cooked on all sides
While that’s cooking, in a small bowl add the soy sauce, garlic, sesame oil, broth, and cornstarch. Stir to mix it all in and make sure the cornstarch does not leave lumps. You can also stir the cornstarch into a small amount of the broth first. That helps keep you from having lumps. Pour the sauce over the veggies and cook until the sauce has thickened.
At the last minute, stir in the cashews. They give it a nice extra crunch. When serving you can garnish with the chopped green onions. Enjoy!
Cheers!

Easy Cajun Shrimp
Plan Z Phase: This is a Z2 (ZReduction) recipe. This dish can be as easy as 3 ingredients and 3 minutes! I am going to describe a pre-cooked version of the shrimp dish and one you cook yourself. I am also going to give you spice mix options.
Servings: Serves 2 - 3
Ingredients:
- Shrimp: You have two choices, buy one pound of peeled and deveined shrimp or if you want to save even more time you can buy 1 pound of cooked shrimp.
- For the spice mixture: The super-fast option would be to buy a Cajun rub mixture in the spice section. You’ll use 3 tsp if you go that route. Make sure you choose a sugarless version.
(Optional) If you have a spice selection in your cupboard, here’s the mixture you can make:
- ½ tsp of paprika
- 1 tsp of Italian seasoning
- ¼ tsp of garlic powder
- ¼ tsp of grated sea salt
- ¼-1/2 tsp of black pepper
- ¼ tsp of cayenne (or to taste)
Other:
- A salad on the side: I recommend you pick up a nice bunch/bag of baby spinach or kale and then add your favorite ZReduction approved veggies.
Instructions:
In a large zip lock bag, add your spice rub or spice mixture. Then toss in the shrimp to coat them. Just bounce the bag around to coat them all.
Spray your sauté pan with olive oil. Heat the pan and add the shrimp. If your shrimp are fully cooked already, all you need to do is heat them up. That will only take about 3 minutes. Just stir and toss them.
If your shrimp are raw, you’ll need to cook them 5 – 6 minutes until no pink remains. Just flip them over once or twice to make sure both sides get cooked.
Once the shrimp are cooked, make your salad. Drizzle on one Tbl of approved dressing. To go with the shrimp I recommend a vinaigrette or ranch dressing. Toss and serve with the shrimp on top.
Enjoy!
Cheers,

It's My Birthday, But YOU Get the Present
Today is my birthday (yay), but once you get to be a certain age, the celebration changes. This year, I’m giving YOU the present.
Use this code to be part of the celebration. Enter the coupon BIRTHDAY at checkout and I will include one of my favorite kitchen accessories with your next purchase.
Our Crave Control sale continues, so now is a great time to double up on the savings.
This offer ends Friday so order today to get your free gift :)
Cheers,
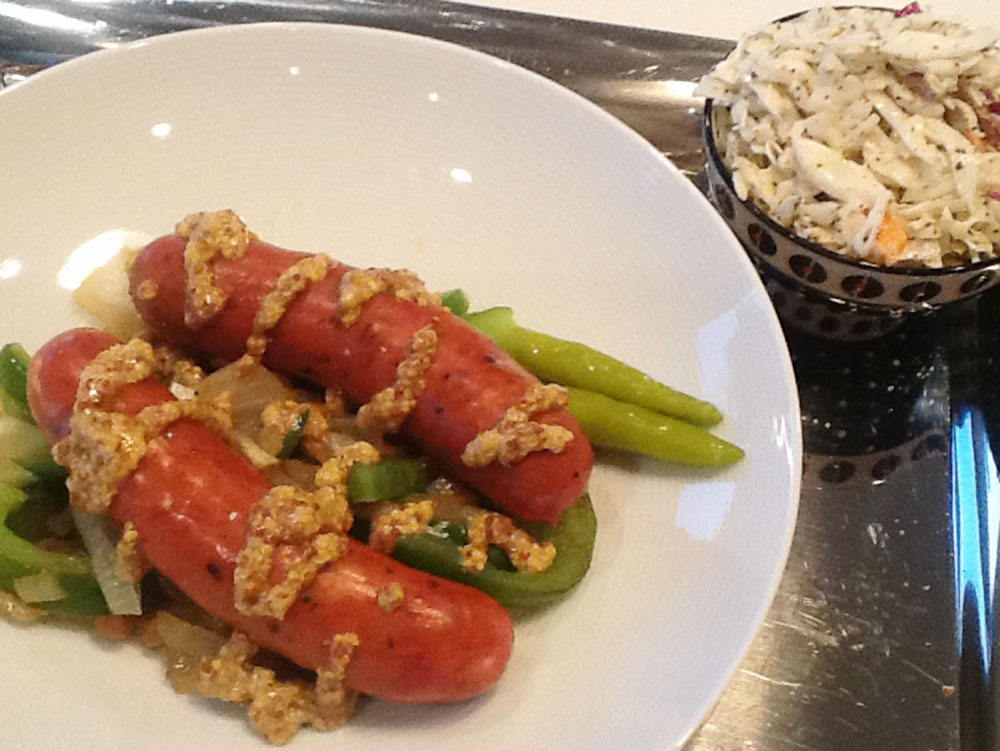
Sausage with Peppers and Onions
Plan Z Phase: This is a Z2 (ZReduction) recipe. This recipe can be made in a pinch when you take advantage of the pre-cut produce in the grocery store. That way if you are cooking for just yourself you don’t buy a lot of ingredients that will go to waste. It’s a little more expensive by the pound, but it’s cheaper overall not to have the leftovers if you aren’t going to get to them in time to eat them before they spoil.
Servings: Serving size is 2 sausages per person.
Ingredients:
- Sausages: You have a couple of choices for your sausages. If you're in the ZReduction phase of Plan Z, you can have Hebrew National hot dogs or Aidell’s chicken sausages. Stick to ZReduction approved varieties. For example, don’t buy the dogs with cheese or mango in them. Those could stall you.
- 2 bell peppers (or a variety of mini bell peppers)
- 1 onion
- Salad fixings (if you want to have leafy greens with your meal), use a salad in a bag in a pinch
Instructions:
You can cook your sausages on your grill or you can use a grill pan and cook them on the stove.
While they are cooking you can make your peppers and onion combo. Cut up an onion and cut red, green, yellow, orange or red bell peppers into strips. You are shooting for a full cup of veggies. If using small peppers, you can cook them whole (see image).
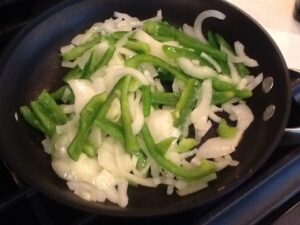
Spray a sauté pan with oil and spray the peppers and onions. Go ahead and overfill the cup you’re measuring in. These are really low cal and no fat. Then sauté on medium until they wilt and are soft enough to eat. You can spice them up with your favorite seasoning if you like. Grated sea salt is fine. Or even Italian seasoning. The Aidell’s sausages have so much flavor you won’t really need more seasoning.
Serve with a squirt of mustard across the top and you’re ready to dig in.
You can have a separate salad on the side if you want.
Enjoy!
Cheers,
Dark Chocolate Peanut Clusters
Plan Z Phase: This is a Z3 (ZReboot), and Zola to GO! recipe. These are delightfully decadent treats.
CAUTION: These are candy. They have about half as many carbs as the original made with lighter chocolate and sugar, but they are still candy. I am hoping one will satisfy you. The peanut butter ones are especially dreamy. The best news is the glycemic index on a dark chocolate nut cluster is 21. Anything under 50 is low so this is really a pretty healthy treat overall.
Servings: Makes approximately 2 dozen clusters
Ingredients:
- three 3.5 oz bars of dark chocolate (72% cacao or 70% at the lowest) chopped
- 2 tsp of coconut oil (find this is the baking or oil section, it's white and semi-firm)
- 3-4 cups of roasted Spanish peanuts. If you can't find Spanish, you can use regular roasted peanuts. You can even do almonds. The bigger the nut the fewer you'll need or the fewer the recipe will make.
- sea salt to garnish
Instructions:
In the top of your double broiler put in your chopped chocolate. Heat on medium high until you get a mild boil going. Stir chocolate occasionally until melted. Won't take more than five minutes once it gets started. Add the coconut oil and take off the heat. Stir.
Add the roasted peanuts. Add enough peanuts so that there is no pool of chocolate left in the bottom. You want just chocolate coated peanuts.
You can begin forming them while the chocolate is still hot or wait until it cools down a bit. (Depends on whether you have kids helping.)
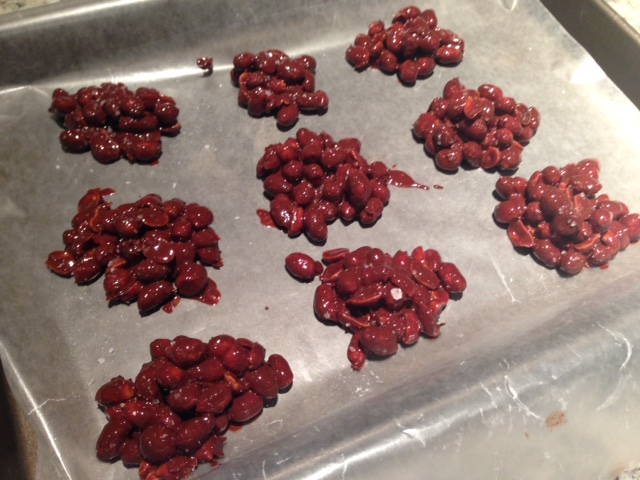
Take out a cookie sheet. Line it with waxed paper or parchment paper. Place spoonfuls of the nut/chocolate mixture on the paper. They will spread a bit. If you want them thicker go back and add another peanut or two or three on top. As they cool they will become thicker.
Place your pan in the refrigerator to firm up the candies. In my house, when I was little, we put them in an uninsulated attic. Our cookie sheets would not fit in the refrigerator. This is where they were stored, too. You can also put them in a clean place in your garage if it's cool.
Store covered or in Tupperware in a cool place. They will last several weeks.
For Z3 and even into ZLife, don't over do it. One a day should satisfy your sweet tooth. Eat them like a "squirrel" in teeny bites and you can make one last for quite a while!
Variations:
My family did Spanish peanuts
- You can also make some with regular roasted peanuts
- With one batch I added 1/3 unsweetened peanut butter (ration one cup of chocolate to 1/3 cup of peanut butter -- or less). And I even added blobs for a peanut butter swirl. The peanut butter won't harden but it will taste like the inside of a peanut butter cup.
- You can also mince up a few dried cranberries and add those to the plain version for another variation. Careful on the cranberries. They are higher carb. Sometimes I add a whole cranberry on top as a marker so I know which ones have the cranberries in them.
Enjoy!
Cheers,
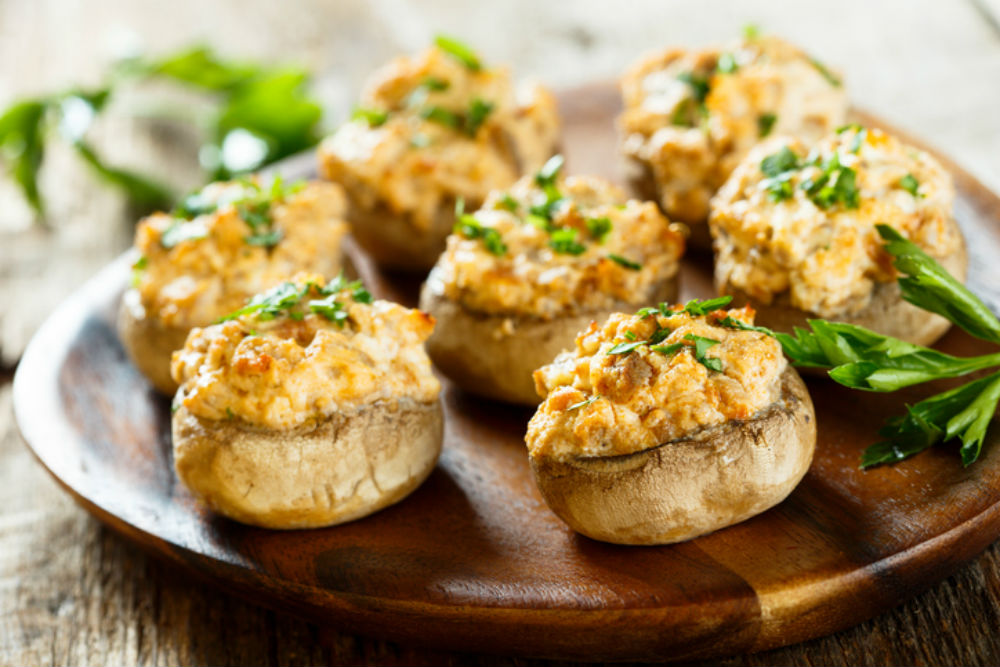
My Best-Ever Stuffed Mushrooms
Plan Z Phase: This is a Z3 (ZReboot) recipe. Just in time for football season or any other partying event. These won’t last long on your platter. Might consider a double batch. They are that good. BIG YUM!
Servings: One batch will make 12 – 18 mushrooms
Ingredients:
- 6 strips of bacon. I use uncured bacon without nitrates.
- 1 lb of button mushrooms. You can use the large ones for this dish.
- 1 Tbl of butter
- ¼ cup of minced shallots or onion
- 8 oz of cream cheese, room temp and cut into 1” chunks
- 1 cup of shredded cheddar cheese
- 1/3 cup of grated parmesan cheese
- ½ tsp of garlic powder
- ½ tsp of Italian seasoning
- grated sea salt and pepper to taste
- a whisper of cayenne or to taste (optional)
Instructions:
Preheat oven to 350 degrees.
While your oven preheats, cook your bacon until it is nice and crisp. Then chop or crumble it into little pieces and set it aside.
Take the mushrooms out of the package. Remove all black material on the mushroom caps or the stems. Don’t wash your mushrooms or you make them mushy but you want to get the black bits off. Use a damp paper towel to remove that stuff. Then twist and remove each stem. Cut off the dry ends of the stems and finely dice the stems. You’re going to use them in your mushroom filling. Don’t dice the mushroom heads; set them aside.
Melt butter in a medium saute pan and add the shallots and mushrooms stems. Cook on medium until they are soft. Stir often. Add the cream cheese and keep temperature on low to melt the cream cheese. Stir often so it doesn’t stick. When it’s hot and melty, add the cheddar cheese, garlic powder, Italian seasoning, salt, pepper and cayenne. Then add the bacon and stir. Let the mixture cool a bit so you don’t burn yourself while you stuff your mushrooms.
If you have mini muffin pans they will come in handy. If you don’t, you can use a cookie sheet.
Spray the insides of the muffin containers or the surface of the cookie sheet with olive oil spray.
Fill your mushrooms with mounded portions of the filling. Set them in the muffin tin depressions* or put them on the cookie sheet. You might have some filling leftover; depending on the size of your mushrooms. (I suggest you make an omelet with that on another day).
Sprinkle the tops with parmesan cheese. Press the cheese lightly with your fingers so it sticks.
Bake at 350 degrees for about 20 minutes. The cooking time depends on the size of your mushrooms. With a variety of medium and large shrooms 20 minutes was enough for me.
Carefully remove your mushrooms from the pan to cool. I use a fork on one side and my finger on the other to take them out. Be careful. They will be pretty hot and you don’t want a steam burn!
I served my mushrooms warm but they would be just as good as they cool on a buffet.
*The reason I suggest the mini muffin tins is because mushrooms give off a fair amount of liquid while they cook. This way the liquid stays in the bottom of the depressions.
Enjoy!
Cheers,

Cranberry Champagne Cocktail
Plan Z Phase: This is a Z3.5 (ZReboot 3.5) recipe. Just in time for the big party on New Year’s Eve. This cocktail is good anytime but especially when celebrating something big. Those of you old enough will remember champagne cocktails were big in the 50’s. I’m reviving them and taking out the sugar!
Ingredients:
- 2, 750 ml bottles of a brut champagne. Choose any one. I don’t use particularly expensive champagne when I am turning it into a cocktail.
- 1-1/2 cups of white rum
- ½ cup of unsweetened cranberry juice
- liquid stevia to taste
Instructions:
This is a perfect chance to use one of those new beverage dispensers. Or if you still have a pretty punch bowl you can use that. I serve these cocktails in champagne flutes but any champagne cup or glass will do.
Pour the champagne, rum, cranberry juice in the container. Stir. Taste. You’ll have to decide how much liquid stevia you want to use. I’d start with a few drops and stir again. This all depends on your sweetness taste and that of your guests. I might choose not to put any sweetener in but that’s just me.
Options:
- If you want to make this spread further you can try adding plain sparkling water and see if you like that.
- If you are serving this in a punch bowl you might like to slice up a lemon and float the slices on top as a pretty garnish.
Enjoy!
Cheers,

Sloppy Christmas
When I was a little girl, our Christmas was a bit different than what most families experience.
My mother would save having the big dinner for the weekend after Christmas. She was a generous woman; and when I tell you the story it will all make perfect sense.
I come from a big family. 7 kids. There were the older ones and then me, and my brothers were at least five years younger than the rest.
So, when it came to Christmas dinner the older kids would have had to face the dilemma of where to eat if it were not for the creativity and generosity of my mom.
The boyfriends and girlfriends wanted my family members to come to THEIR house for the big meal. If my mom had insisted on hosting Christmas dinner ON Christmas, they would have had to choose. That can cause great consternation in some families. Not ours. My mom solved that by moving her dinner date. That way the older kids could eat the big meal over at the other house and when we gathered, they could all come to our place. That way all the older kids got to celebrate and feast twice and never both meals on the same day.
Us little kids just wanted to play with our new toys, so we hardly noticed the big kids were not around.
But that leaves the dilemma of what to feed us little kids. My mom solved that too, in grand fashion.
She made up a big batch of Sloppy Joes!
That way people could eat whenever they were hungry and we little kids loved our Sloppy Joes. In those old days, my mom would just brown up a bunch of ground beef and throw a can of Manwich on top. That stuff was new to the grocery shelves and all the rage. We were excited and happy. That’s all it took. A side of potato chips and we were fed.
Mom got to relax and save her energy for the dinner on the weekend.
So now, when I make Sloppy Joes, I go beyond the Manwich can, but these are still super-easy to whip up.
Enjoy! You might be having company this holiday, and this makes quick work out of feeding a crowd or people who arrive at different times. They work for New Year’s of course or even save the idea for a birthday party!
Cheers to you,
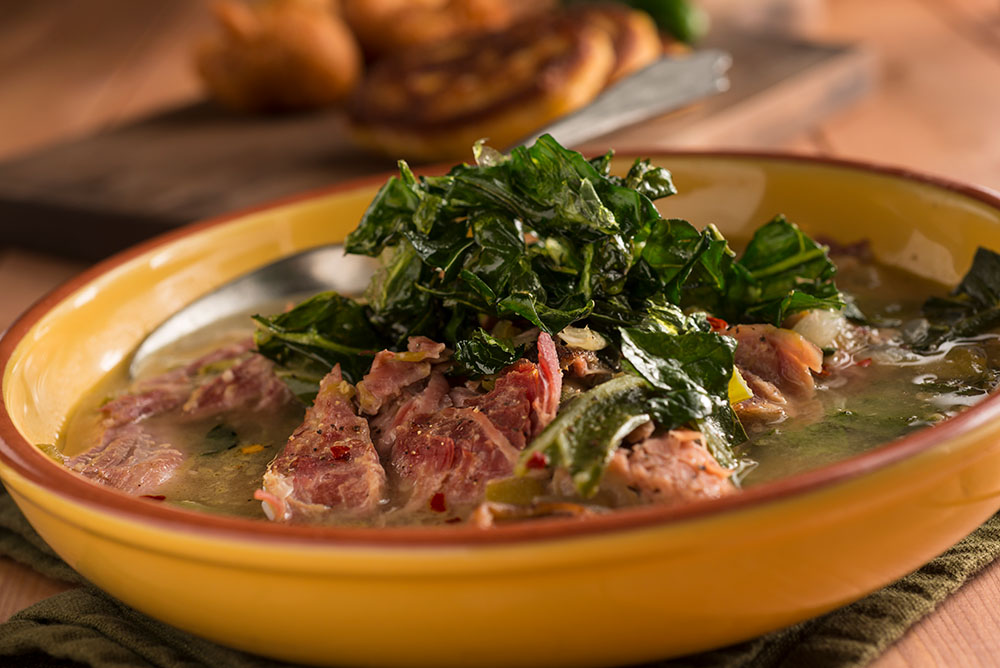
Chef Jernard’s Holiday Collard Greens
Plan Z Phase: This is a Z3 (ZReboot) recipe.
Celebrity Chef Jernard Wells knows soul food. He's originally from Chattanooga, and celebrates his southern roots. His show “New Soul Kitchen” airs on Cleo TV, and he’s also a contributor on the show “Food Fantasies.” While a lot of his food is quite decadent, he also loves greens, and shared his wonderful southern greens recipe in a local interview. What's great about it is it can easily be modified to fit ZReboot. His original recipe calls for 1/3 cup of apple cider vinegar and 1/3 cup of sugar (eek), so we've made some modifications. By dialing back the vinegar and replacing the sugar with your favorite sugar substitute, you can still enjoy this delicious recipe.
You can even enjoy this in ZReduction - just don't eat the meat when you eat the greens. Turkey legs and turkey bacon are no-nos on ZReduction, so give the meat to your family. The smoky flavor from the meat makes the greens delicious, so I would still recommend making the recipe as it is written unless you're vegetarian.
For me, since I don't like my greens to have a sweetish flavor, I skip the sweetener and nix the apple cider vinegar. It's still delicious.
If you're not sure how sweet you like your greens, you can experiment with the sweetener/vinegar ratio that works best for you. Start with 1 tsp each, and work your way up from there.
Servings: Serves…a LOT. You can cut this recipe in half and still have plenty.
 Ingredients:
- 5 strips of sliced turkey bacon
- 2 smoked turkey legs, meat pulled off the bone (if you can't find smoked turkey legs, smoked turkey wings will work, too)
- 2 medium-size sweet onions, finely chopped
- 6 garlic cloves, finely chopped
- 3 (32-oz.) containers chicken broth
- 3 (1-lb.) packages fresh collard greens, washed and trimmed
- 3 Tbl granulated garlic powder
- 3 Tbl granulated onion powder
- 1 Tbl ground black pepper
- 2 Tbl sea salt
- 1 Tbl of red pepper flakes
- 2 Tbl of olive oil
If you like your greens to have a Southern vinegar kick (optional)
- 2 Tbl apple cider vinegar (or to taste)
- 2 Tbl sweetener or to taste (like Swerve or monkfruit - unless you've cooked with stevia before, I wouldn't recommend using it in this recipe. Stevia sweeteners can have a metallic taste when heated)
Instructions:
Grab a big pot and set it to medium heat. Once the pan's hot, add the olive oil to the pan. Add the turkey bacon into the pot and sauté it for four minutes to release flavor. Then add onions, and sauté for four more minutes. Once the onions are translucent, add the smoked turkey legs (or smoked turkey wings) and garlic. Sauté one more minute.
Then add chicken broth, granulated garlic powder, granulated onion powder, ground black pepper, sea salt, and red pepper flakes.
Next add the collard greens. Your house should smell great!
Cook on low with the lid slightly covering the pot.
Collard greens require at least an hour to turn tender, but after an hour, they may still not be tender for everyone. After 2 hours of simmering, they should be nice and soft. Some folks let greens cook all day. The longer they cook, the more mellow (and tasty) they become. Just remember, you'll get more nutrients out of the greens when they're on the firmer side.
You can also make greens in a crockpot. Just add all the ingredients to your crock pot, slow cook all day, and enjoy healthy winter comfort food later that evening.
Enjoy!
Cheers,
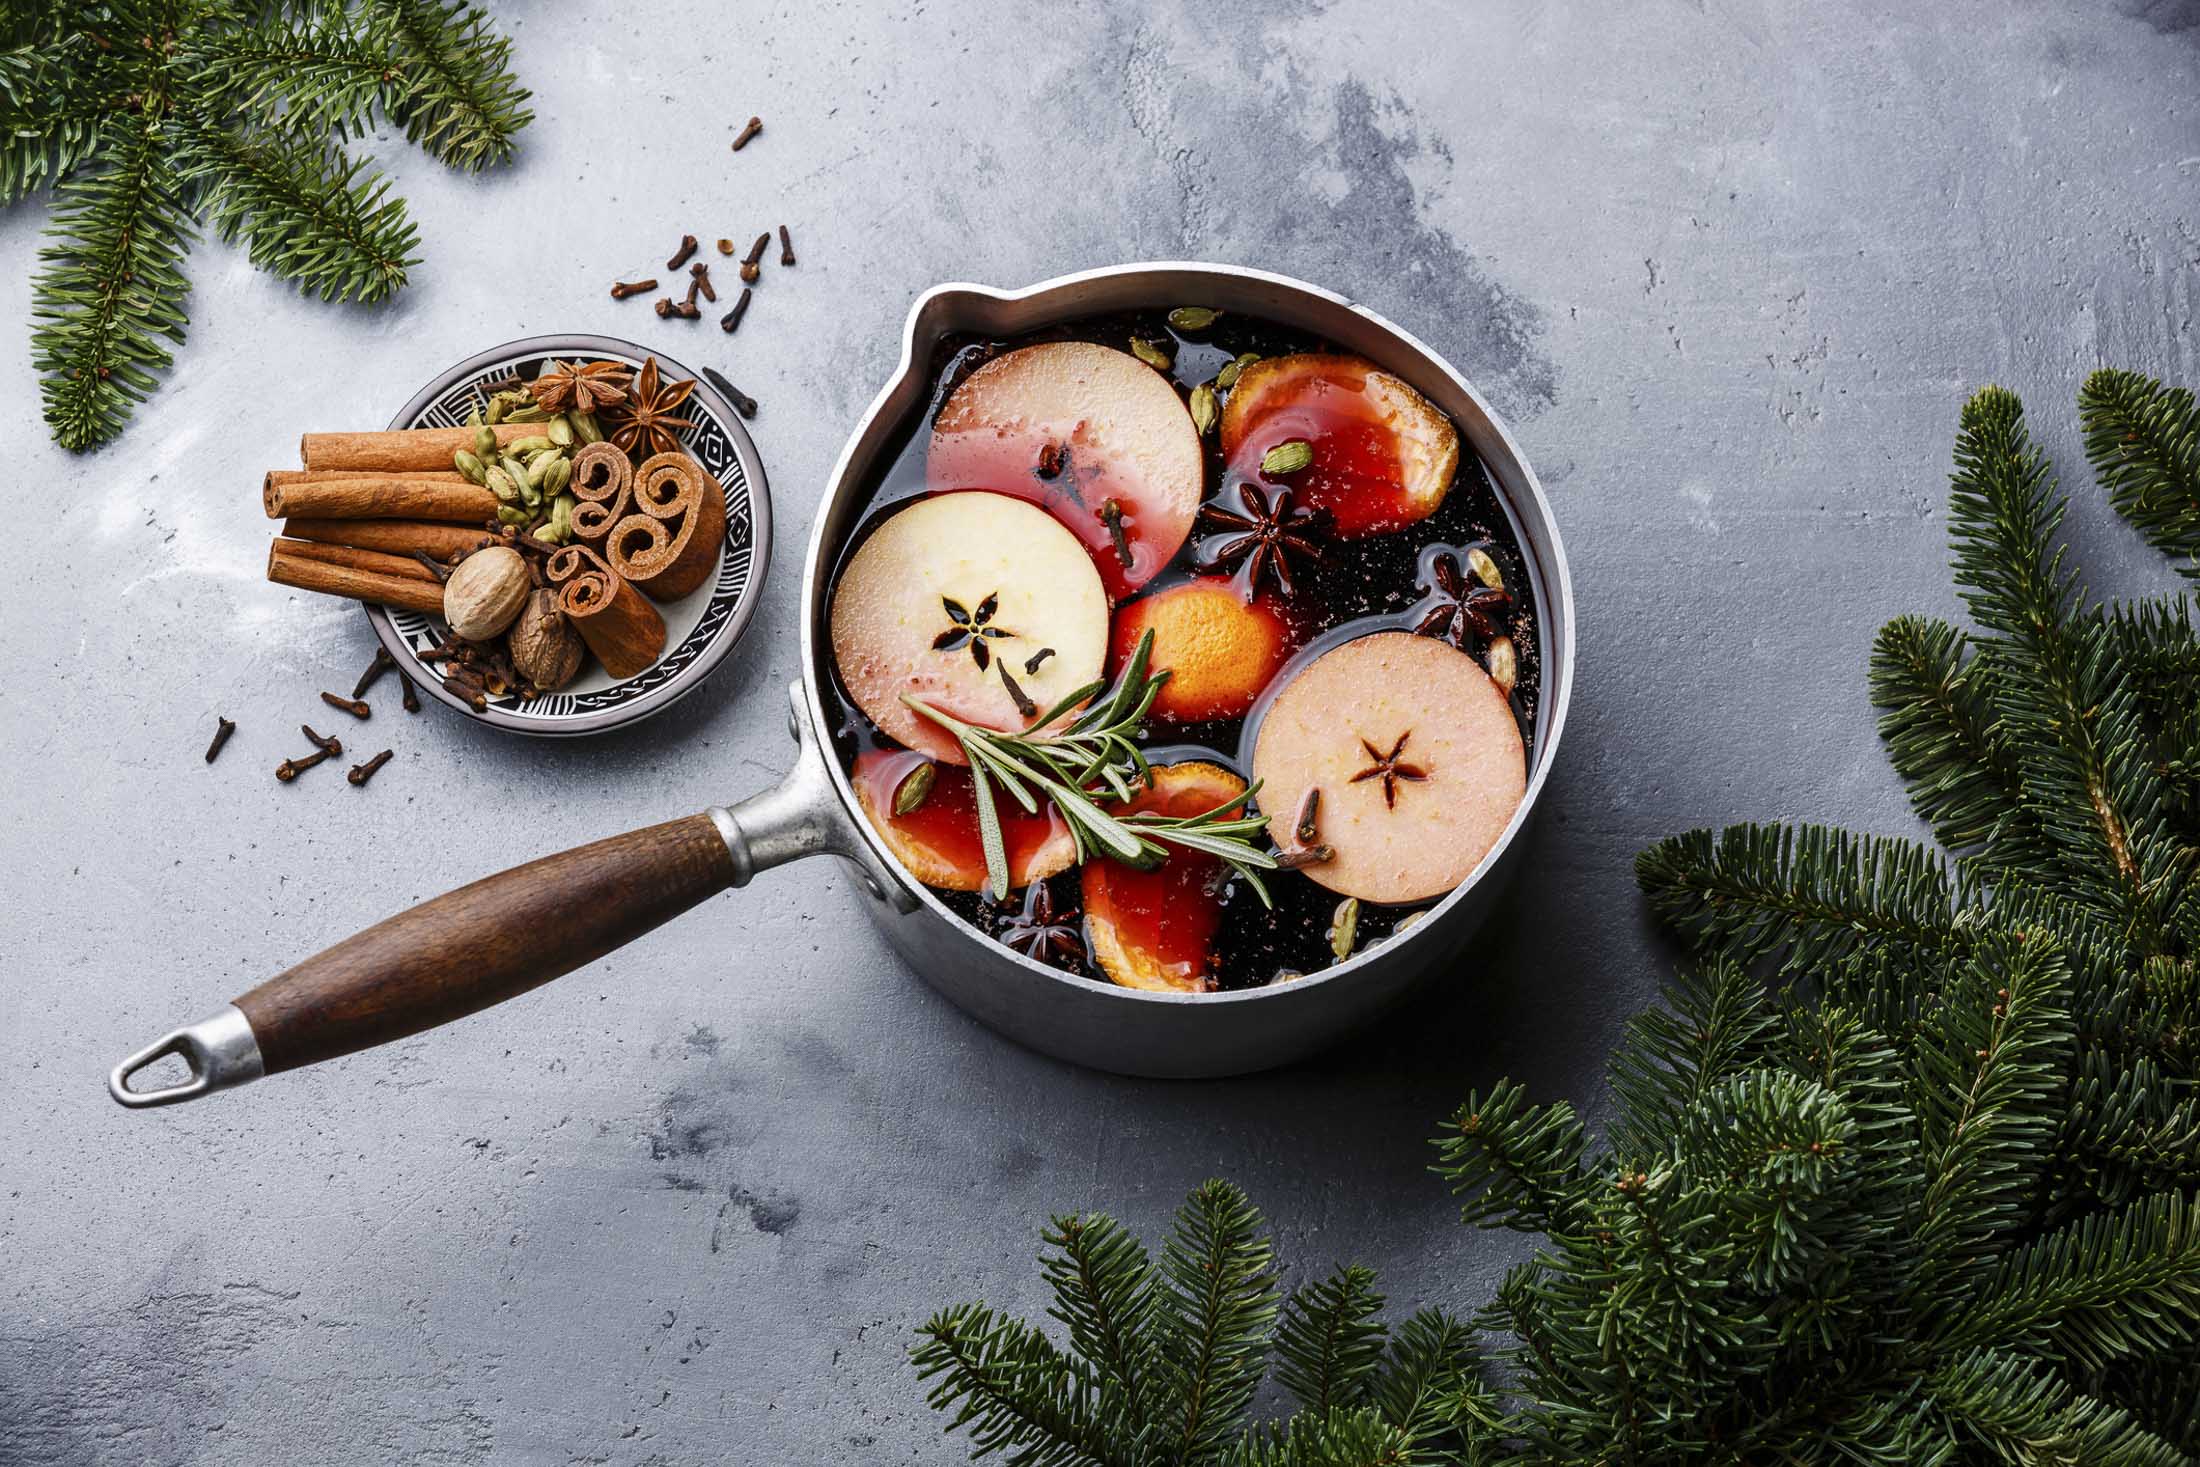
Holiday Aromatherapy - Simmering Spices for Your Kitchen
This isn’t a recipe for food you can eat. This is s a recipe for making your house smell wonderful for the holidays. Even if your Christmas tree is artificial you can fill up your kitchen (and beyond) with the smells of the season. No calories. Just whiffs of wonderful.
This recipe is variable; depending on your tastes. I’d recommend you choose cinnamon sticks as one of your 3 – 4 choices to put in your mix, but that’s cuz I’m a cinnamon nut. Choose 3 or 4 items and make your own brew. Don’t drink it though. It will likely taste awful. It’s the aroma you’re after.
Recommended items and quantities:
- 3 cinnamon sticks
- 1 tsp of dried orange peel or use fresh peel pieces
- 1 tsp of dried lemon peel or use fresh peel pieces
- ½ tsp of ground cloves or use dried whole cloves
- 3 bay leaves
- 3 pieces of star anise
- 1 tsp of nutmeg
Get out a small sauce pan. Put in up to 2 cups of water. Add your 3 or 4 selected items. Put the water on to boil. Once boiling, turn down and let simmer for about 10 minutes. After that you can turn it off and let the wonderful smells waft through the kitchen and beyond.
Later you can turn it back on again and heat it once more. Don’t ever leave it boiling unattended. Add more water as needed.
Cheers!

Christmas Shopping
One in 20 people considers Christmas shopping more stressful than divorce or burglary. How sad is that!
I’ll admit I mostly hate shopping. I’m one of those rare women who doesn’t want to browse. If I need something I go get it. My husband calls me a destination shopper. That means I know what I want. I go to the store, I walk in, and go directly to what I am looking for. I pick it up, take it to the cashier, pay for it, and go back to my car for the drive home. Done.
I might hate Christmas shopping but I am not afraid of it! I don’t get sweaty thinking about having to do it. I have no fear. I just tackle the task and get it done. I treat it a little differently than shopping the rest of the year. I try to make it a little more fun but I am still task-focused.
What I thought I’d do today is lay out how I organize myself to keep my shopping stress down during the holidays. Maybe some of what I do will help you too.
Ideas for stress-less shopping.
- The first thing I do is get out a file folder. I mark it “gifts” and I keep all my ideas and notes in there.
- I keep two lists. One is gifts that are for family. The other list is business gifts.
- I peruse catalogs looking for ideas. I do this while I watch the evening news so I am getting two things done at once. (As soon as you order something from a catalog you’ll never be at a loss for catalogs to show up in your mailbox. Many of those catalog companies own more than one kind of catalog so you’ll get an assortment).
- I tear out pages that have things I am interested in. I mark the item and note who it might work for. All those pages make it into my folder.
- I may buy that item from the catalog. I often do, but I might decide to get it locally or get something very similar locally. The catalog page then acts as my reminder.
- I never go looking for deals but sometimes they “come to me”. When I am taking my ideas to the local stores, sometimes I find out what I am after is on sale. That’s a bonus. That's a reason I have about a half dozen favorite stores on my shopping route. Early in the process, I find out if things on my inspiration list are available locally. Then I can wait for a bit to see if they go on sale.
- I have two main shopping days. One is when I do all my catalog ordering and the other is when I go out in my car. That doesn’t mean I don’t have other shopping to do. I try to be organized enough that I can get most of it done in a couple of days.
- I always shop alone. No distractions from chatting with anyone else.
- Okay, so when I do my catalog shopping I do it by computer. I get each thing ordered and check them off. Oh, how good it feels to have all those items checked off my list.
- By ordering I also know I will always have a box to wrap it in. And so many places do free shipping now so I’m not spending extra money.
- My husband’s hint is Tuesday evening. He does all his shopping on Tuesday evenings. That’s when the fewest people are in the stores.
- For the Saturday shopping I’m going to do, I go to bed early Friday and I’m up and out the door when the stores open.
- I map out my route. I do. I figure out what store order I am going to go in so I can make an efficient trip.
- Then I make a small list of what I am going to get at each store so I don’t forget anything. I keep my big folder in the car in case I need to reference it but I am basically working off of a short list in my pocket.
- Holiday traffic on Saturday afternoons can be atrocious! Crowded streets, traffic backups, and few parking spaces. Even if you live in a smaller town this same thing happens, so I know you know what I mean. I try to be off the streets by 1 PM; even if that means I have to go out again the next day.
- Up until I go out and do my big days of shopping, I might start picking things up during lunch hours. That’s when I do my destination-style shopping. If I need to go to some kind of specialty store, this allows me to concentrate on that one item at that special store. It makes that gift feel more special too.
I try to make the whole Christmas process feel special by keeping my stress down. The catalog perusing makes me feel like I took time to select each gift with a special person in mind. Then the actual shopping is more like an errand; an errand just to go get it.
Enjoy!
Cheers,
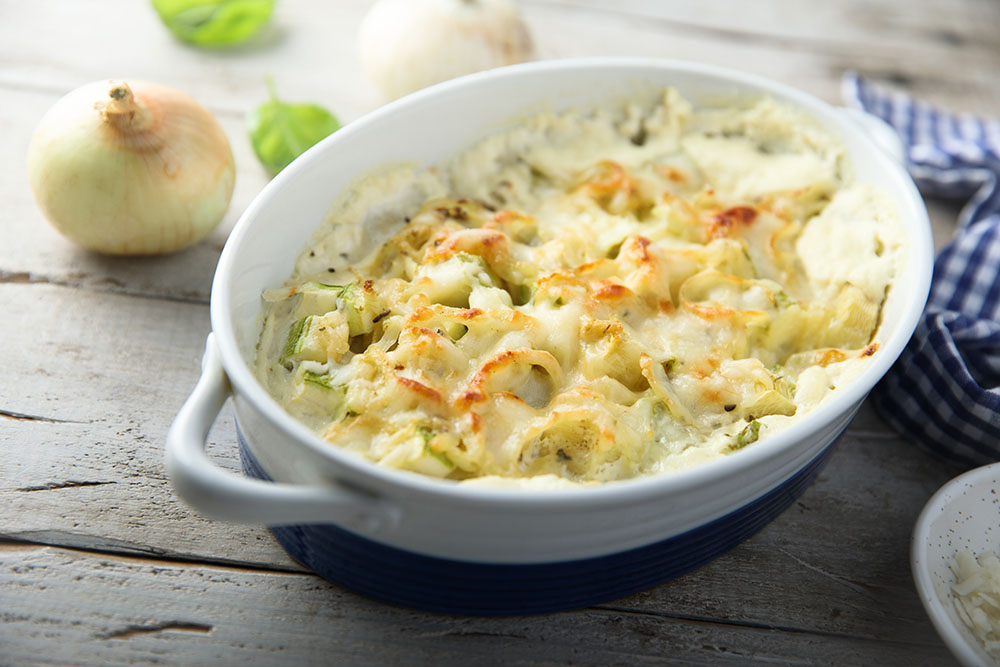
Creamy Leek and Onion Casserole
Plan Z Phase: This is a Z3 (ZReboot) recipe. What a decadent side dish! When I serve it, people at the table often ask me why this tastes so unique, so we play guess the secret ingredient . . . the answer is . . . the nutmeg. Almost no one ever gets it but when I tell them they all say . . . “Oh yeah!” This dish goes well at dinner parties and holiday celebrations. You can make a batch of it and store it in a big casserole dish and then heat and serve. This goes with everything from steak to a holiday turkey. This will transport and reheat easily. Bring it to a buffet/potluck as a side dish or vegetarian dish.
Want to add another dimension? Stir in some fresh, crispy bacon bits!
Servings: Serves 6
Ingredients:
- 4 Tbl butter
- 1 Tbl of olive oil
- 4 large leeks, cleaned and sliced thinly
- 2 large Vidalia onions, sliced thinly
- 1 cup chicken or vegetable stock (canned organic is fine)
- 1/2 cup heavy cream
- sea salt and pepper to taste
- ground nutmeg to taste (just a light dusting will do it)
- 1 cup of grated Parmesan cheese
Instructions:
Melt butter and olive oil in large entrée sauté pan. Add leeks and onions and cook over medium heat until they are completely loose. Add chicken stock and simmer, stirring regularly, until the stock almost disappears. Then at this point add cream to the sauté pan with the leek mixture. Heat thoroughly. Cook until it thickens slightly. Season with sea salt, pepper and nutmeg. A sprinkling of each will do. Stir them in. Just before serving, add the Parmesan and stir until it melts. You can serve now or cool it down for serving later.
Note: If you are making this ahead, you can add the Parmesan right away. Chill. Then just reheat in the oven in a casserole dish. If it looks a bit dry in the oven, you can add a little extra cream. Stir once while it is reheating in the oven. This usually takes about 30 minutes on 300 degrees.
Enjoy!
Cheers,
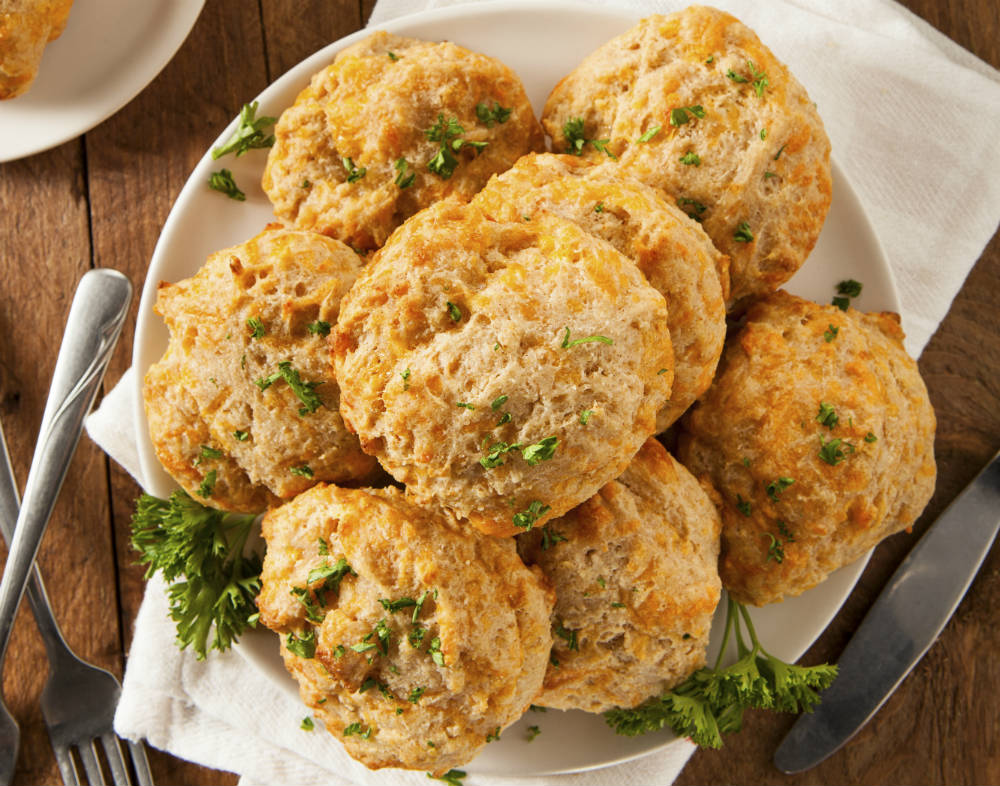
Cheddar Cheesy Poof Biscuits or Crackers
Plan Z Phase: This is a Z3 (ZReboot) recipe.
LOVE these cheesy bits for an appetizer. They go great while you are sipping your wine.
This is not a completely original Plan Z recipe. I saw a version very similar to this on line and I just adjusted it to suit my tastes. The BEST low carb bites you could ask for. My guests raved! The person who designed this recipe didn’t take credit so I guess that person will remain anonymous but I am very grateful.
Serves: Makes about 18
Ingredients:
- 6 oz of cream cheese softened
- 2 cups of grated cheddar (in this recipe it will be worth it to buy a good block of cheddar and grate it yourself)
- 2 eggs
- 1 tsp of salt
- ¼ t of chili powder (or to taste)
- ½ cup of super fine ground almond flour
- butter or olive oil cooking spray
- 1/2 tsp garlic powder (optional)
Instructions:
Preheat oven to 350 degrees. Spray a cookie sheet with cooking spray. Then, in a medium bowl add your ingredients. Thoroughly mix with a spoon or spatula. Drop by spoonfuls onto the cookie sheet. Bake 10 – 15 minutes or until light brown. Keep an eye on them so they don’t burn. They will be about 1/4" thick and moist. Carefully remove them from the cookie sheet and serve warm or at room temperature.
If you want them to taste like the biscuits at Red Lobster, add a half teaspoon of garlic powder.
I can see myself making these with a combo of cheddar and blue cheese...
Or Gruyere...
Or Mozzarella and Parmesan combined. All would be very yummy!
If you want to make a stiffer cracker, squish the spoonfuls down gently with the bottom of a glass to flatten them before you bake them. Then keep a close eye as they bake. They will cool to a stiffer consistency and taste a lot like Cheeze Its.
Enjoy!
Cheers,
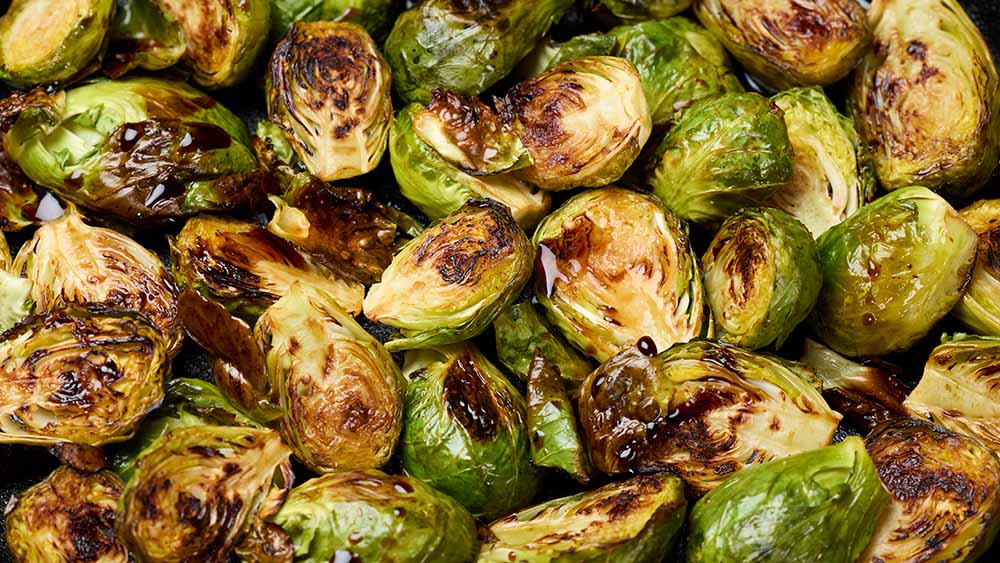
Brussels Sprouts with a Balsamic Drizzle
Plan Z Phase: This is a Z2 (ZReduction) recipe.
Servings: Serves 3 – 4
Ingredients:
- 1 pound of Brussels sprouts, trimmed and outer leaves removed
- olive oil spray
- sea salt and pepper to taste
- ½ cup of balsamic vinegar
- whisper of cayenne (optional)
Instructions:
Heat oven to 375 degrees.
Cut the Brussels sprouts lengthwise into halves or quarters (depending on how large they are). I always do mine quartered because I want more browned edges.
Spray a cookie sheet with the olive oil spray. Put on the Brussels sprouts and lightly spray them. Grate on sea salt, pepper and if you want, the cayenne.
Roast the Brussels sprouts for about 25 minutes. I stir them at the half way point so more browning takes place. Cook until they are a color you find appealing. Like I said, I like mine almost crispy.
In a small sauce pan pour in the vinegar. Reduce it on medium-high (low bubble) until it reduces by half. Balsamic vinegar becomes thick and sweeter as it boils down. Keep an eye on it or you can boil it down to nothing in an instant.
Let that liquid sit until the Brussels sprouts come out of the oven. When they do, drizzle on the balsamic reduction. Toss and serve.
Enjoy!
Cheers,