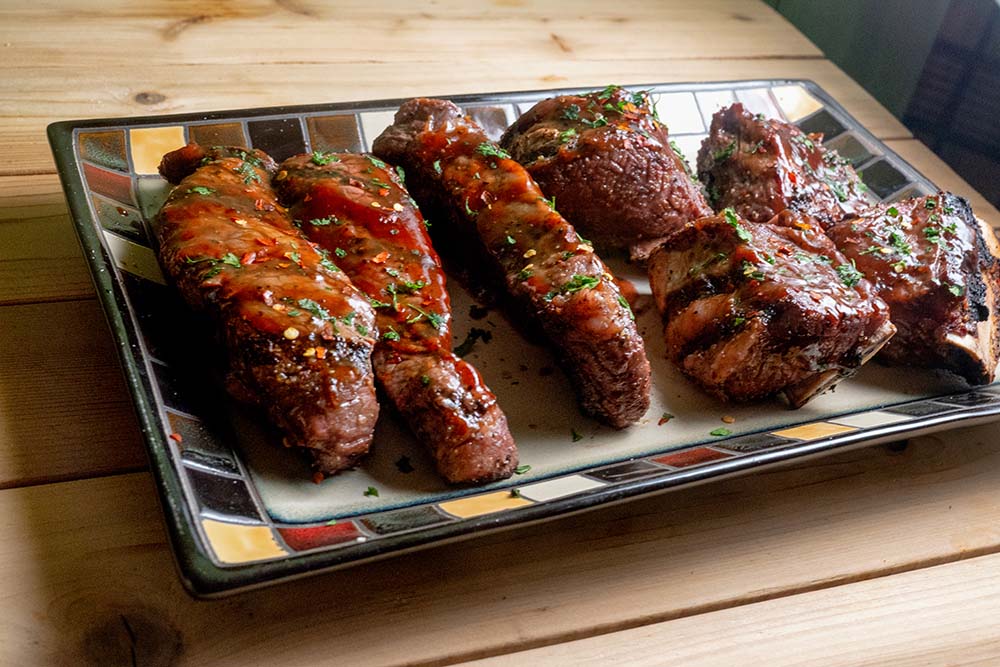
Super Easy Ribs with Smoky Barbecue Sauce
Plan Z Phase: This is a Z3 (ZReboot) recipe.
To keep this recipe super easy the ribs are done in the oven. You could adapt this recipe for cooking on the grill but the whole point of this is you don’t have to babysit the cooking process like you do with grilling.
Servings: Serves 6
Ingredients:
- 2.5 pounds of country-style pork ribs. These are the big fat ones with no bones. Cut from the loin area rather than belly.
- 2 Tbl of grated sea salt
- 1 Tbl of garlic powder
- 1 tsp of ground black pepper
- 1 cup of barbecue sauce (here’s my super easy sauce that is Plan Z Approved)
Instructions:
Place the ribs in a large pot and cover with water. Add the sea salt, garlic powder and pepper. Bring the water to a boil over medium heat. Slowly boil the ribs until they are tender. 40-45 minutes. When you take them out you might think they look a little weird but stick with me. When they come out of the oven they will look great!
While the ribs are boiling pre-heat the oven to 325 degrees.
You can also make the barbecue sauce now.
Remove the ribs from the pot and place them in a 9” x 13” oven-proof pan. A casserole dish works great. Pour the barbecue sauce over the ribs. Cover the baking dish with aluminum foil.
Bake in the oven for 1-1/2 hours until they measure 160 degrees on a meat thermometer.
Serve hot and sloppy!
Enjoy!
Cheers,
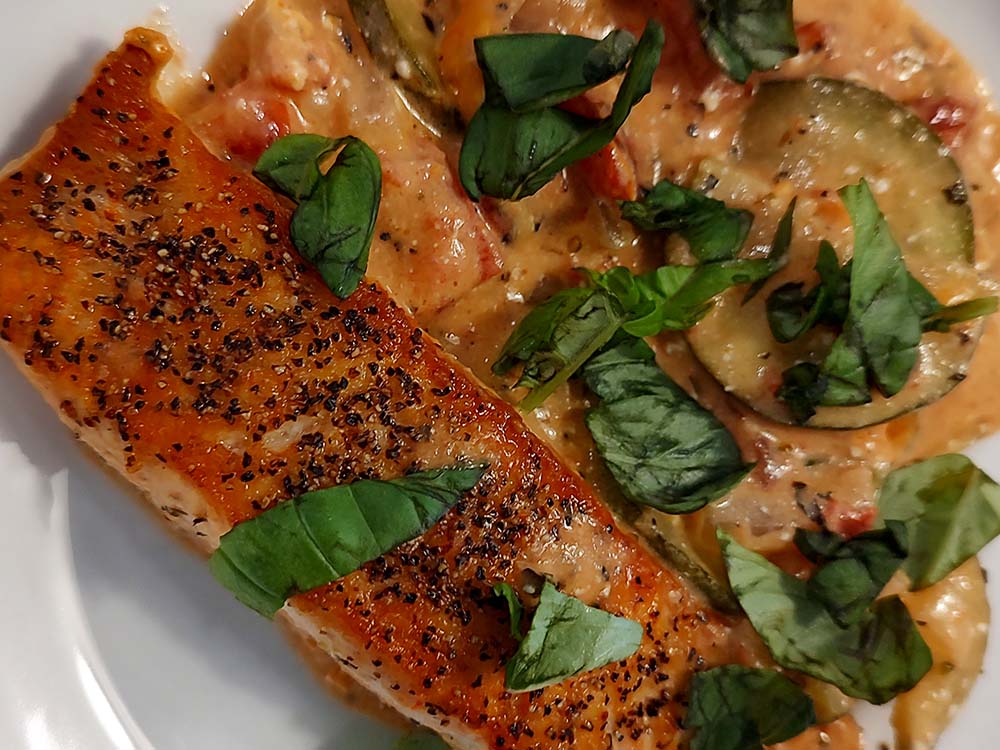
Creamy Tomato Skillet Salmon (Easy)
Plan Z Phase: This is a Z3 (ZReboot) recipe.
This comes together fast and easy yet it is fancy enough to serve to company. I just drooled over my dinner!
This tasty recipe is originally from Eating Well magazine. I didn’t have to do much to Zolafy this one :)
Servings: Serves 4
Ingredients:
- 4 pieces of salmon approx 6 oz each. Have your fish monger remove the skin. That will save you time and keep you from an accident.
- ¼ tsp of grated sea salt
- ¼ tsp of grated black pepper
- 2 Tbl of olive oil
- 1 medium zucchini cut in half lengthwise and then thinly sliced into half-moon shapes
- 1 cup of chopped sweet onion (Vidalia)
- ¼ cup of dry white wine
- 15 oz can diced tomatoes. I buy fire-roasted with no salt.
- 2 oz of cream cheese cut into cubes
- 1 tsp of Italian seasoning
- ½ tsp of garlic powder
- ¼ cup of chopped, fresh basil to garnish (optional but the color looks nice)
Instructions:
Pat the salmon dry with paper towel and then sprinkle on the salt and pepper. Heat the oil over medium-high heat. I use a large cast iron pan but any large sauté pan can work. Add the salmon top-side down. Cook until the underside is browned and readily able to be flipped over without breaking up. The trick here is not to mess with it. Let it cook about 4 minutes without peeking or poking and it will be nicely browned. When you turn the salmon over cook it 2 – 3 minutes more (depends on how rare you like your salmon). Transfer to a plate and cover.
Do not rinse out your pan. Just add the onion and zucchini to the oil that’s in there. Cook for 3 minutes, stirring often. Add the wine and increase to medium-high. Cook until most of the liquid is evaporated. Add tomatoes, cream cheese, Italian seasoning and garlic powder.
Season again with salt and pepper if you choose. Stir until the cream cheese has melted and it’s all creamy goodness. Return the salmon to the pan and heat gently just to make sure the salmon gets hot again.
Serve on pretty plates and sprinkle on the basil. I plated mine next to the sauce but now that I have eaten it next time I’d serve the salmon on top of the sauce.
You are ready to serve.
Enjoy!
Cheers,

The Critical Difference Between Successful and Unsuccessful Dieters (and People)
I have two jobs.
You know me as VP of Anger Management for the Plan Z Diet.
And at the same time, I’m also a professional speaker and author. My book, The Accidental Salesperson: How to Take Control of Your Sales Career and Earn the Respect and Income You Deserve, is a business bestseller. Over the years, I have conducted more than 2200 seminars on three continents.
I was working on a project for my “other job” and ran across an article I want to share with you:
How to Make Yourself Work When You Just Don’t Want To is by Heidi Grant Halvorson. It was posted on the Harvard Business Review website.
Halvorson describes how this applies to the commitments we make to ourselves at work. As you read the next two paragraphs, just think about your commitment to weight loss instead of work.
“In his excellent book The Antidote: Happiness for People Who Can’t Stand Positive Thinking, Oliver Burkeman points out that much of the time, when we say things like “I just can’t get out of bed early in the morning, “ or “I just can’t get myself to exercise,” what we really mean is that we can’t get ourselves to feel like doing these things. After all, no one is tying you to your bed every morning. Intimidating bouncers aren’t blocking the entrance to your gym. Physically, nothing is stopping you – you just don’t feel like it. But as Burkeman asks, “Who says you need to wait until you ‘feel like’ doing something in order to start doing it?’”
“Think about that for a minute, because it’s really important. Somewhere along the way, we’ve all bought into the idea – without consciously realizing it – that to be motivated and effective we need to feel like we want to take action. We need to be eager to do so. I really don’t know why we believe this, because it is 100% nonsense. Yes, on some level you need to be committed to what you are doing – you need to want to see the project finished, or get healthier, or get an earlier start to your day. But you don’t need to feel like doing it.”
“In fact, as Burkeman points out, many of the most prolific artists, writers, and innovators have become so in part because of their reliance on work routines that forced them to put in a certain number of hours a day, no matter how uninspired (or, in many instances, hung over) they might have felt. Burkeman reminds us of renowned artist Chuck Close’s observation that “Inspiration is for amateurs. The rest of us just show up and get to work.”
So if you are sitting there, putting something off because you don’t feel like it, remember that you don’t actually need to feel like it. There is nothing stopping you.” (End of excerpt)
See what I mean? This is a powerful concept.
You don’t feel like eating the burger without the bun? You don’t feel like skipping the bagel a coworker left in the break room? You don’t feel like doing the Plan Z Diet and losing those last 30 pounds?
That’s okay. Feeling like doing something has nothing to do with whether or not you do it.
There is nothing stopping you.
I started with a new exercise routine a couple of years ago. I had a cancer scare and decided my routine needed to change.
I never “feel” like doing it. I do not enjoy it. It is not fun. It is very hard work. I do it anyway because I want to maintain muscle mass and bone density into my old age. (I’ll be 80 in 6 years.) I don’t have to like it or feel like doing it. All I have to do is show up and get the work in.
Who wants to be up by 5:30 AM and out the door to get in 10,000 steps? Nobody. I just do it. I do 2500 steps before I allow myself to go home and drink a cup of coffee. I don’t have 10,000 steps yet, but I have a good start on my commitment and my day. Later in the day I walk to work and back. Then if I still don’t have 10,000 steps I go back out and do more until my pedometer says I can stop.
A few days a week I also lift weights using bands at home.
I don’t have to feel like it or enjoy it to do it and benefit from it.
What a liberating idea!
Think about the implications and the power of this idea in taking charge of your own weight and health.
You don’t have to wait until you feel like taking control to take control – of anything.
Stay Angry My Friend,

VP Anger Management
Plan Z Diet
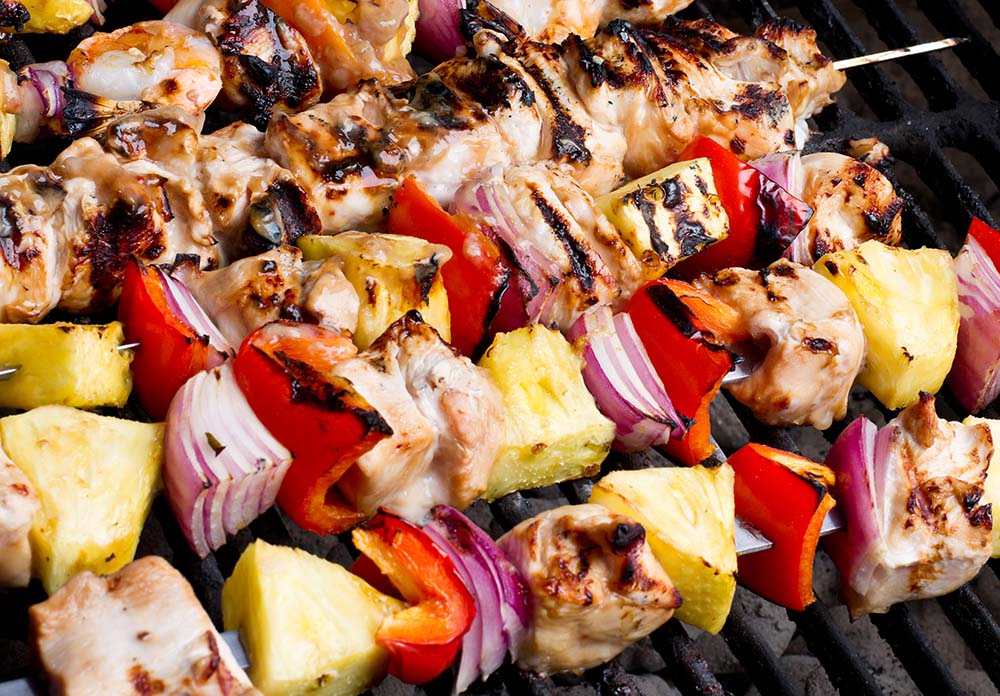
Baked Pork Loin Kebabs
Plan Z Phase: This is a Z3 (ZReboot) recipe.
It may be grilling season, and for some it’s ALWAYS grilling season. Maybe you don’t have access to a grill, or maybe you just don’t want to fire that grill up but want to feel like you’re eating grilled food. At least sort of.
So, here’s my rendition of baked kebabs. Of course, you could grill these but let’s look at a baked option.
Servings: Serves 4
Ingredients:
- 4 pork loin chops (approximately 1-1/2 lb). Trim off the white fat edges.
- 1-1/2 to 2 cups of pineapple chunks. Most stores sell them cut up for you already.
- 1 medium red onion cut into 1" chunks. Or I combined red onion and white onion as options.
- 2 large bell peppers cut into 1” chunks. Any color will work.
- Jalapeno slices (optional)
- Olive oil spray
- Sea salt and pepper to taste
You'll also need:
- Bamboo skewers. How many you need will depend on how many kebobs you assemble. I usually gauge 2 – 3 per person. No need to soak them unless you’re going to grill them. They won’t be in the oven that long.
Ginger-garlic Teriyaki Glaze
- 1 bottle of teriyaki sauce. Approximately one cup. I try to buy the ones with no soy in them. Primal Kitchen makes a nice one.
- 5 tsp of minced ginger. I used the one in the tube you get in the produce section, but you can also use grated fresh ginger or minced ginger in the jar.
- 3 tsp of dried garlic powder. You can also use fresh garlic for this or the minced garlic in a jar.
Instructions:
Mix your Ginger-garlic Teriyaki Glaze recipe in a bowl first so you can set it aside so the flavors meld.
Next, cut the pork loin chops into 1” cubes.
Get ready to assemble.
You have all the flexibility now.
I always start with a piece of meat on the end of my skewer, so it has an anchor. Then thread on what you like in any order. The pieces of onion, pineapple, peppers and even the jalapeno get threaded on. I ways end with a piece of meat as the anchor on the other side and I probably have 4 pieces of meat, total, per skewer but other than that, it’s up to you.
Get out a cookie sheet or two and spray the surface. Add the kebabs on top and spray the tops of the kebabs with the oil. Sprinkle on sea salt and pepper.
Bake in your oven at 375 for about 15 minutes. This depends on how cooked you want your pork. Some want it chewy. Most want to make sure no pink remains but not cooked quite as much.
The time can vary a bit, depending on your tastes.
For the last five minutes brush on some of the glaze and put it back in the oven to heat the glaze. You can pour it all on or save some of it for dipping sauce. Your choice.
Enjoy!
Cheers,
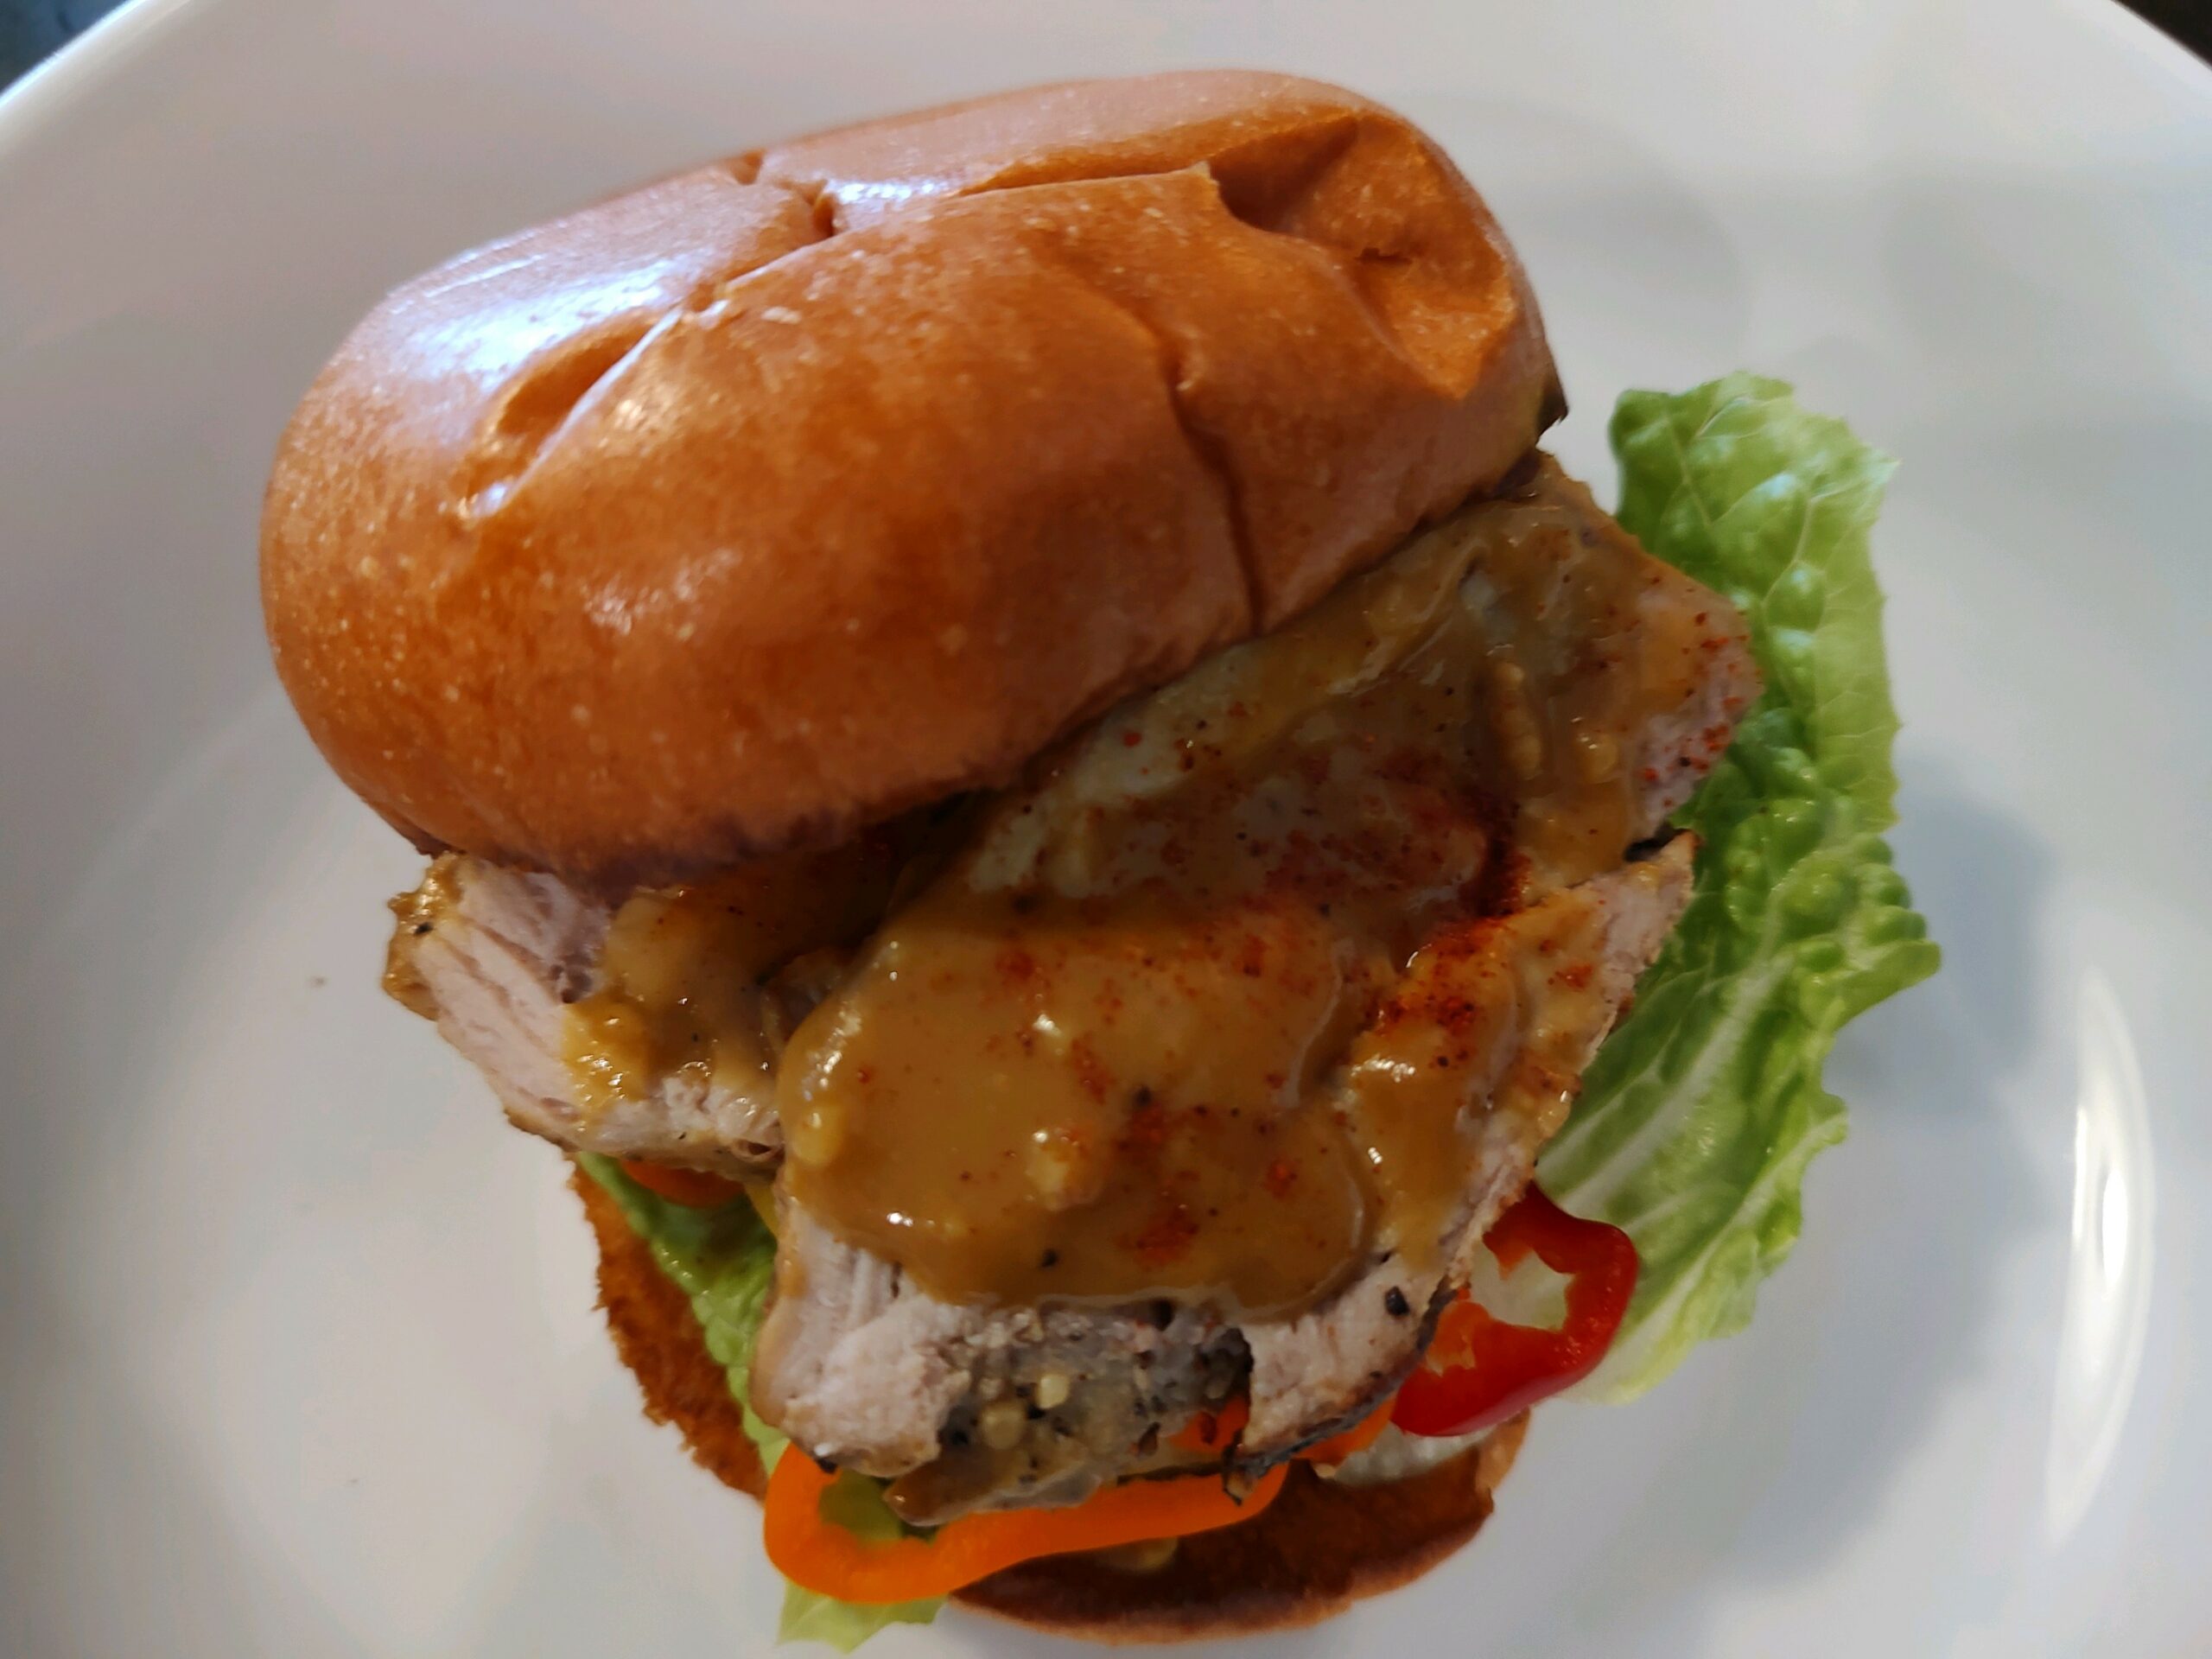
Pork Tenderloin Sandwiches with Amazing BBQ Sauce
Plan Z Phase: This is a Z3.5 (ZReboot 3.5) recipe
I doctored this recipe to Zolafy it. It was not difficult to get the sugar down to reasonable. I have to say I “woofed” my dinner! I have never said that in my life, but I found this sandwich to be incredible! My husband took seconds on the sauce before he even took a bite of his sandwich!
Servings: Serves 4
Ingredients:
- 1 Tbl of olive oil
- 1 tsp off minced garlic (jar garlic can work)
- ¼ cup of yellow mustard
- ¼ cup of Dijon mustard
- ¼ cup of fruit vinegar. I used citrus or you can use apple cider vinegar
- 3 Tbl of brown sugar substitute (Swerve and ZSweet are good choices)
- 1 Tbl of honey
- Up to 1 tsp of hot sauce (or to taste)
- 2 tsp of Worcestershire sauce
- 1 lb pork tenderloin, trimmed
- Grated sea salt and pepper to taste
- Hamburger buns or other. You could do ciabatta buns or even serve it open-face on a grilled piece of rustic bread
- Romaine lettuce for garnish
- 1 cup of mini-peppers thinly sliced, seeds removed. Or you can just use bell pepper strips of whichever color you like.
Instructions:
To make the pork: You can grill it, turning occasionally for about 12 minutes. You want to make sure it hits 165 on a meat thermometer. Baste with the olive oil. Season with grated salt and pepper
I seared mine and roasted it at 375 degrees. I used my cast iron pan and sprayed olive oil over the roast. Dusted on a bit of grated sea salt and pepper. Then seared it for 3 minutes on each side and put it in the oven for 12 – 15 minutes. Again, make sure it’s 165 degrees. It will be medium.
For both methods. Take out when it’s 165 degrees. Let it sit to rest for 10 minutes. Then thinly slice.
While the meat is roasting or grilling:
Make your sauce. Use a small sauce pan. Add the olive oil, and garlic. Cook the garlic for just a minute to get it to open up. Add the mustards, vinegar, sugar, honey, hot sauce, and Worcestershire. Cook on medium, stirring regularly until it thickens. About 3 minutes. Remove from heat. You will have about ¾ cup of sauce.
To Serve:
Tear off a piece of romaine approximately the size of the bun bottom. Spread a tablespoon of the sauce on the bun bottom. Then put on the piece of romaine. Top with thin slices of the peppers. Then top with thin slices of the pork. Drizzle more sauce over the pork and put the top bun on.
Enjoy!
Cheers,

The Scary New Research On Sugar & How They Made You Addicted To It
https://www.youtube.com/watch?v=DnEJrgc1BCk
In this podcast episode, Steven interviews "The Glucose Goddess" Jessie Inchauspé, a French biochemist and bestselling author. After breaking her back at 19, Jessie became interested in achieving optimal health. Her book, Glucose Revolution explains why blood sugar spikes are so bad for us and how to flatten those spikes to transform our health. Warning, they use strong language.
It's a long interview, but if you suffer from spikes and dips in your blood sugar, the information in this interview could help change your life for the better.
56 minutes and 19 seconds into the interview, the glucose goddess explains why all calories are not created equal. This is affirming for all of us in living in ZReboot and beyond.

The News
It’s amazing how stressful it can be leading up to good news.
This time of year, is the first anniversary of my husband learning his kidney cancer was gone. Every six months we have to travel to Nashville to visit his kidney surgeon.
They do some testing to make sure nothing shows in the pictures that would indicate that the cancer is growing back.
We really have nothing to fret. He’s already gotten the great news once at the six- month point. That doesn’t mean you don’t worry, though.
We arrived in Nashville the day before the appointment. It’s not worth the stress of trying to do the drive the day of. We just get a hotel room. We stay at the place we lived for 4 months while he was being treated last year. It’s more of an apartment building that’s furnished and has hotel services. The folks there are very good to us.
We had an early dinner and tried to get a good rest.
The appointment was fairly early in the morning, so we didn’t have to spend a lot of the day wanting to bite our nails.
First stop is for the testing. Then not long after we were able to go to the surgeon’s office to get the results.
Most often with this kind of stuff you sit in the lobby for way too long and then get called to a quiet office in back and once again sit and wait for the doctor.
Not in this place.
We did have to wait in the lobby, but as soon as my husband stepped through the door the surgeon was standing about 20 feet away and screamed that the test results were clear! No cancer! There were hugs and then we made it to the consult room where we talked about the results and what we had all been through in the last year.
My husband and I are not happy dancing, screaming people, who when we got the news melted down in laughter and tears. We are the people who got to the consult room, sat down and I gently put my hand on this thigh. He caressed my hand. That was our way to saying “wahoooo!”
We all celebrate in our own ways. My husband and I have been celebrating events and news for 40 years now. I think this every-six-months meeting is the hardest.
Cheers,

Huevos Rancheros Zola Style (Mexican eggs with a spicy tomato sauce)
Plan Z Phase: This is a Z2 (ZReduction) recipe. If you like Mexican comfort food this is your go-to. Perfect for lunch or dinner. This version is spicy enough to make most noses run but not too spicy for most tastes. If you want it truly hot, add another adobo chili to the mix or splatter on hot sauce when you eat it.
Serving Size: Serves 4
Ingredients:
- 16 oz of tomato sauce (Hunts brand with no sugar is good)
- 2 adobo chiles in sauce. Caution - these are SPICY! If you don't want the heat, just add a little of the sauce. 1 – 2 tsp will do.
- 16 oz container of your favorite fresh salsa (from the refrigerated section)
- 1/2 onion, sliced thin (optional - this depends on how much onion is in your salsa and how much you like onions in your eggs)
- 1 cup fresh tomatoes chopped
- 3 tsp of minced garlic (jar garlic will work)
- juice of one lime (optional)
- 8 eggs (I'm factoring two eggs per person, but you can adjust to your liking)
- cilantro (optional)
Instructions:
In a small blender add the tomato sauce and the adobo chilies. Caution - those chipotle chiles are spicy. If you've never used them before, taste a little bit of one so you can decide how much heat you want. If you don't want the heat, just use the sauce from the can. Or cut the chiles and remove the seeds (those are the spiciest). Whiz til smooth. Taste it. If you like heat and want it spicier, add more chiles and whiz again! Set aside.
In a large skillet add a bit of olive oil spray and then add the onions. Cook them on medium until they loosen. Stir often. Then add the salsa, tomatoes and the garlic. Transfer in half of the adobo/tomato sauce. Cook for a few minutes so the onions in the salsa cook down, then taste and adjust to your liking. If you want it tangier, add the juice of the lime. If you want it spicier, add more sauce. If you want to add spices like a dash of cumin or taco seasoning, now's the time. Get creative. Make it your own. Cook this sauce at a simmer for 10 minutes to meld the flavors. Stir periodically.
Now, at this point if you like your eggs soft, you can just drop them into this hot, bubbly sauce and let them sit (don't stir) until the whites are hard. Then sprinkle cilantro on top and serve!
If you like your eggs firmer (like me), take out a large sauté pan and lightly spray with olive oil. Cook your eggs sunny side up until the whites are firm (unless you like them fried hard). Then lay them gently in the sauce so they can absorb those yummy flavors for a minute. They'll continue to cook in the bubbling sauce. Then sprinkle cilantro on top and serve immediately. Oh so yummy!
You can have a plain salad on the side if you’d like and your breadstick/cracker portion.
Enjoy!
Cheers,

Notes: You can easily make this a heavier meal by adding your favorite veggies when you cook up the onions. If you all a lot, it might make your sauce thicker. If that happens, just add a little bit of chicken broth (or water) when you add the adobo/tomato sauce to the pan to get it the consistency you like.
In ZReduction, you can have a little bit of sour cream as a garnish when you serve. In ZReboot, you can serve this with fresh avocado.
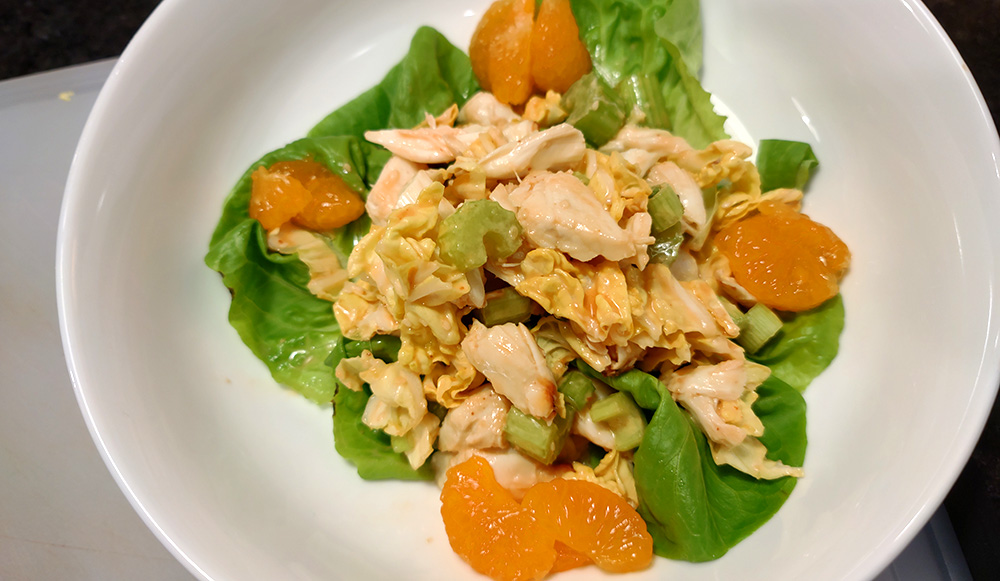
Asian Lump Crab Meat Salad
Plan Z Phase: This is a Z3.5 (ZReboot 3.5) recipe.
This is the first time I have ever made an Asian dish that includes almost no kind of soy sauce (tamari, etc). It is so amazing! All the Asian influence comes out in the toasted sesame seeds, the sriracha, and the sesame oil.
This is an expensive dish. Jumbo Lump crab meat runs about $30 a pound. To save a bit you can use regular lump. I would not go all the way to canned crab or it would be lots of shreds. This is worth it – a nice splurge!
Servings: 4 appetizers or 2.5 entrees.
Ingredients:
- 1lb jumbo lump crab meat, sorted with any shells removed.
- 2 celery stalks, finely diced, including leafy green tops
- 2 green onions, finely sliced
- 1 cup napa cabbage, thinly sliced, then diced (about 1/3 of a medium head)
- 1/4 cup mayonnaise
- 1 Tbsp. toasted sesame seeds
- 1 Tbsp. Sriracha hot sauce
- 1 tsp. sesame oil
- 1 tsp. agave
- 1 tsp. soy sauce
- 1 tsp. seasoned rice vinegar
- 1/2 Cup unseasoned panko bread crumbs
- Optional for serving: shredded iceberg lettuce, sesame seeds, mandarin oranges, and minced cilantro.
Instructions:
Gently sort through the crab meat, ensuring any shells are removed and set aside. In a medium-sized mixing bowl combine the next 10 ingredients and stir to coat evenly. Gently fold the crab into the mixture. This salad can be made ahead of time to this point, and refrigerated for up to 24 hours. Fold in the Panko bread crumbs just before serving, so they maintain their crunch. Consistency should be light and fairly dry. Serve a scoop over thinly shredded iceberg lettuce and top with additional sesame seeds. I like serving as an appetizer in short-stemmed ice cream glasses or small bowls with chopsticks.
Enjoy!
Cheers,

Picking Your Next Diet
It has come to my attention that a drug used to treat diabetes is now flying off the shelves as a weight loss drug. If you (or someone you know) are thinking about using that kind of drug to lose weight let me ask you to think twice. I can tell you stories.
Before I created Plan Z Diet, I tried just about every diet on the planet. Same results every time. I’d lose a little weight and then it would come roaring back and I inevitably ended up with more than I started with. It’s a vicious cycle. Those of you around in the 1990s might remember another drug that was widely prescribed for weight loss.
At the time I was a patient at the obesity clinic at the University of Wisconsin. They had a great reputation, so I trusted them. The drug of the day was Fen-Phen. They prescribed it for me. I visited weekly with my food log and weighed in. They’d ask me questions. Sometimes they took blood. They always took my blood pressure.
I’ll cut to the end of the story…
I took that drug for 18 months. I lost a whopping 13 pounds. They told me I was going to have to take that drug forever to keep off what I had lost. They told me I could expect slow progress going forward. I remember being on a golf course one time and hardly having the energy to drag myself up the hill to the green so I could putt. That drug affected every day of my life.
The clinic shut down for budgetary reasons and I was left out in the cold. In less than a year of not taking the drug, the weight was back. I was eating healthy. No matter.
Then after two years, they came looking for me. They realized that Phen-Fen could cause serious heart issues. So they wanted me to come into the hospital to ensure I was okay. I was okay as far as my heart was concerned but not really. I had another story of promise only to fail in my efforts to lose weight and keep it off.
Now it’s happening again.
The diabetes drugs that are gaining popularity to an alarming extent are showing signs that it’s not such a great idea to take them. They don’t know what the long-term effects will be. Some have started reporting slacking in their faces. Their skin has lost elasticity and can only be fixed by a dermatologist with injections.
Those injections are expensive and so is the drug! They are charging up to $1000 or more a month for the drugs. People are draining their savings in the hope this will work. The insurance companies call them “vanity drugs” and most are not covering them.
You know my preference is you do Plan Z.
Plan Z was designed by someone who has been through it all. I’m not out to take your money and disappear. We have been around for 13 years.
Plan Z is safe. There are no drugs involved. I invented a natural remedy to help you diet comfortably and you don’t have to take it forever. I teach you the tools you need to keep the weight off.
Plan Z is not expensive. And if you are struggling financially, we can work with you on a payment plan.
You eat real food with Plan Z and you will not be dependent on injectable drugs.
You’ll see success stories all over our website at www.planzdiet.com. The people say, “This diet is different!” It’s not like all those failures you’ve experienced in the past. This really is different. Plan Z gives you the support you need to be successful and the coaching and information you need for the long haul.
The current drug fad too shall fade… as the one for Phen-Fen did.
What I worry about is there are over 100 million people in the US who need to find an answer. Taking a diabetes drug to lose weight is not it.
Plan Z is the answer!
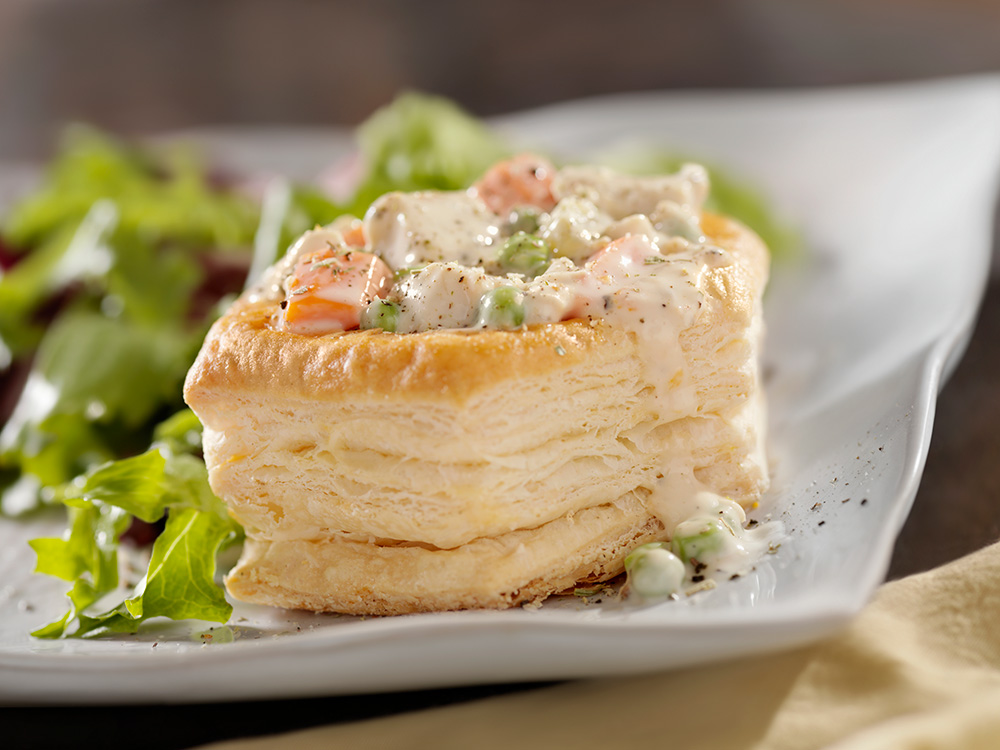
Chicken à la King
My husband says they used to serve this in his school cafeteria. I had seen recipes for it, but I thought I would not like it.
Ha! It’s really good!
Plan Z Phase: This is a Z3 (ZReboot) recipe. Traditionally it is served over toast or in those little puff pastry cups. For 3.5 (Reboot 3.5) you can use either of those. For Z3 I’d eat it like a thick soup or stew.
Servings: Serves 2 – 4 depending on portion size.
Ingredients:
- 3 Tbl of butter
- 1/3 cup of chopped green bell pepper
- Sea salt grated to taste
- ¼ tsp of grated pepper
- 1 8oz package of sliced mushrooms
- 2 Tbl of flour
- 1 cup of chicken broth
- 1 cup of whipping cream
- 1/3 cup of diced, roasted red peppers (from the jar)
- ½ cup of frozen peas
- 2 cups of chopped or shredded deli-roasted chicken. (I use white meat for this and save the dark meat. You can do either.)
- 1 (10oz) package of frozen puff pastry shells or toast
Instructions:
Preheat your oven to follow the directions for baking the tart shells. Or prepare to make toast. You can bake the pastry shells while you work on the sauce. Be sure to pick out the middles of the pastry shells so you have an indentation to put some of the entrée inside.
Melt the butter in a large sauté pan. Add the bell pepper, salt, pepper, and mushrooms. Saute until pepper is tender and mushrooms loosen. Stir in flour. Gradually stir in chicken broth and the cream. Add the roasted pepper bits and frozen peas. Keep cooking on medium, constantly stirring until it thickens and is bubbly. This won’t take more than a couple of minutes.
Stir in the chicken and cook until the chicken is hot.
Serve on toast or in the puff pastry shells.
Yummy comfort food!
Enjoy!
Cheers,
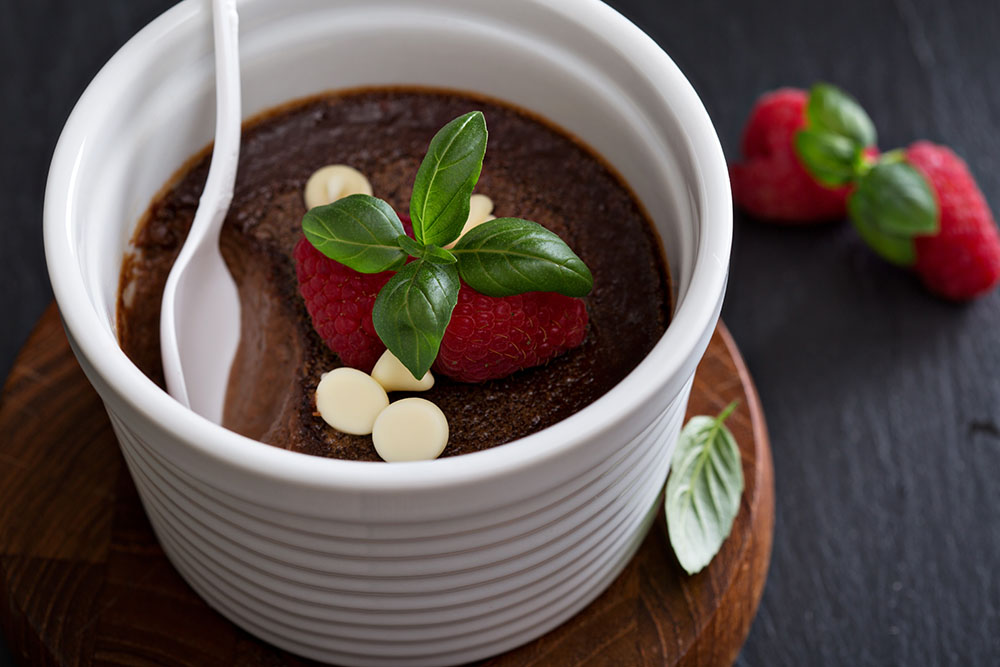
Chocolate Liqueur Pots de Crème
Plan Z Phase: This is a Z3.5 (ZReboot 3.5) French dessert recipe. When I made it the other night one dinner guest declared it “Birthday Cake Good.” Which means...who needs birthday cake when you can eat this kind of Big YUM stuff!
This can be made in using several flavors of liqueur to go to along with the chocolate. Chocolate-raspberry, chocolate-orange, etc.
Serving Size: Serves 6. Can be doubled easily.
Ingredients:
- 7 ounces of bittersweet chocolate, chopped into bits (get 70 percent cacao or higher)
- 1-3/4 cups of whipping cream
- 4 tsp of Truvia
- pinch of salt
- 1/4 cup of liqueur. Choose anything from a cream liqueur like Baileys or even raspberry (Chambord) or orange (Grand Marnier) etc.
- 1 tsp of organic vanilla
- 6 large egg yolks (use the whites for something else)
Instructions:
Preheat oven to 325 degrees.
Take out a 9" by 13" ovenproof pan and lay a kitchen towel, folded, inside. This will help keep your ramekins stable.
Heat water in a double boiler until it begins to boil. Put the chocolate in the top and begin to melt it. Stir. When melted, take off heat but keep it from getting hard again.
While chocolate is melting: In a small sauce pan, add the cream, truvia, salt. Stir. Then bring that just to the boiling point. Don’t let it boil over. It’s hot enough when the bubbles form along the outside edge of the pan. Take it off heat and add your liqueur and vanilla. Stir.
In a medium bowl add the egg yolks and stir with a whisk to mix them well.
Slowly add the cream mixture to the melted chocolate. Stir continually with a whisk until it’s all incorporate and your mixture is smooth and creamy.
Then VERY slowly add the creamy chocolate mixture to the eggs. You have to do this VERY slowly. Just add a bit at a time and then mix it. If you put in too much too fast you’ll shock the egg yolks and they will “cook” leaving you with lumpy, scrambled eggs. So go slowly.
When it’s all mixed you’re ready to load your ramekins. Put your ramekins in the 9-by-13-inch pan on top of the towel. The towel stabilizes them. Turn on the hot water on your tap. Let it run to get it very hot.
Pour the chocolate mixture into the ramekins so they almost fill. (My ramekins are about a half cup size. I used to have pot de crème pots. You can use those too.)
Then put some hot water in a container that you can pour from. Slowly pour hot water around the ramekins so it soaks the towel and goes up about halfway up the sides of the ramekins.
Cover the pan with aluminum foil so the tops of the chocolate mixture stay moist while baking.
NOW CAREFULLY TRANSFER the pan to the oven. Put on middle rack and bake approximately 25 to 30 minutes. Make sure you are keeping the pan level so you don’t get burned by hot water sloshing around as you transfer it in and out of the oven. And keep the water out of the chocolate mixture or they won’t bake properly. They will be slightly jiggly when finished but not totally firm and not soupy (lift the aluminum foil lid to check them).
When baked, carefully remove the ramekins from the water and let cool at room temperature for 15 minutes. I use oven gloves and a tong or a spatula to lift them. You can then transfer them to the refrigerator to chill. If you are going to serve them much later, after cooling, cover them with plastic wrap to keep the tops moist.
Garnish with fruit if you like or serve plain.
Enjoy!
Cheers,
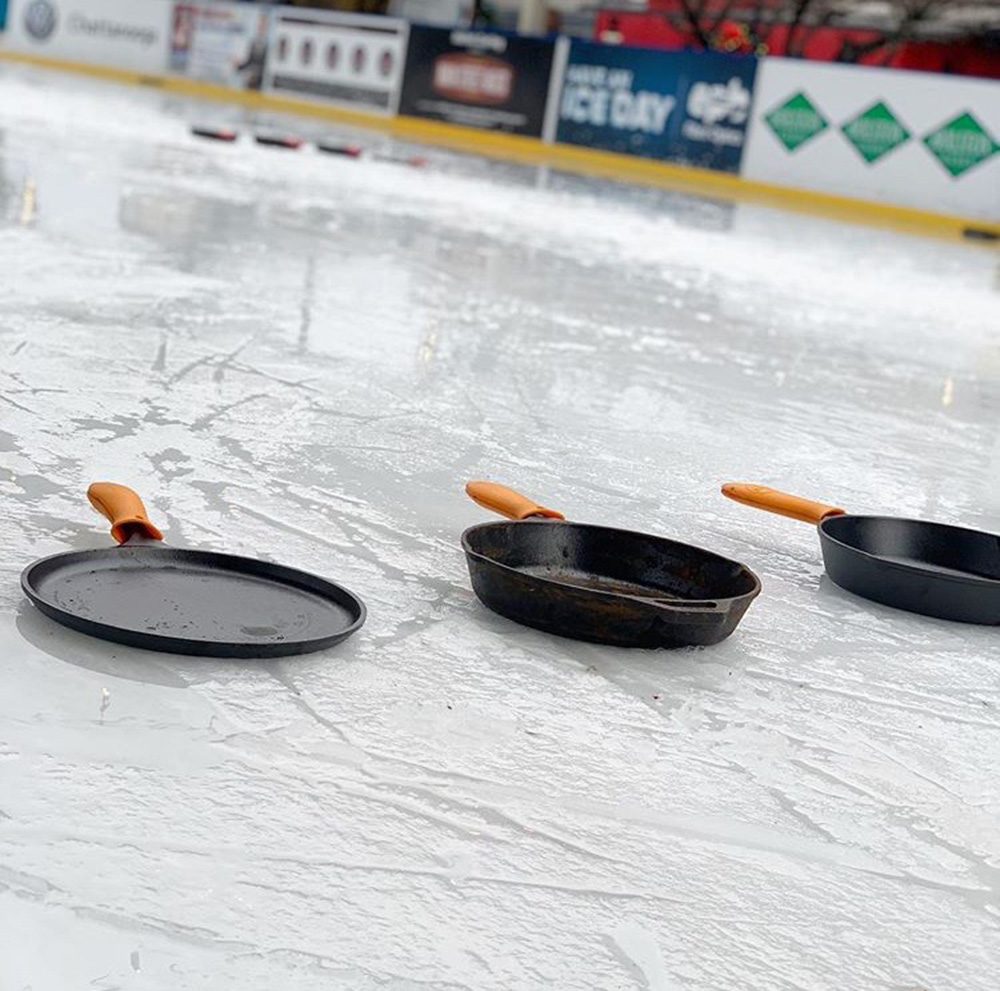
Skillet Curling
There is only one ice rink in Chattanooga, Tennessee: Ice On The Landing.
As a child in Appleton, Wisconsin I would see an ice rink about every six blocks. We even had one on the other end of the block from where we lived. What the town did was flood what during the summer was the baseball park. Every winter, they would turn it into a massive ice rink.
Even before I started school, I was allowed to put my ice skates on while sitting on the basement steps inside the house. I put all of my other gear on, and my brother and I would set off for the ice rink. Like I said, we didn’t have far to go, and the sidewalks were often snow or ice covered so we didn’t even damage our skates.
I loved ice skating so much that I was known to go after breakfast, after lunch, and even after dinner. I became such a good ice skater that people in the neighborhood called me “Little Peggy Fleming”. If you are old enough, you’ll remember the famous Olympic skater. If not, you can look her up.
When I was about 10, I asked my mom if I could take ice skating lessons. I had dreams of well…you know. The closest place that taught serious youngsters to skate was about 30 miles away. Once a week they’d take you by bus to Green Bay, Wisconsin where they gave lessons at the Ice Arena. We had 7 children in our household, so it did not take long for my mother to turn me down. From then on, I was plastered to the TV watching whatever ice skating I could find, even hockey. I wanted to learn.
By the time I was 12, I was twirling, leaving the ground to do jumps, and skating to music at the local, large public ice rink. The school I went to was right next to the public ice rink. After school, we would go skating with a bunch of kids. We’d play tag. My claim to fame was that I could outskate every boy at the park. Girls too, of course. I was never “it”. That still makes me smile.
The ice rink here in Chattanooga is only a block from where I live. Sadly, I have not skated there yet. Due to Covid, it was closed for 2 years. Now, I look and it’s too crowded or it doesn’t fit into my schedule. When I do skate I don’t just want to skate around the ring with the “rookies”. I want to be able to spin and jump! At my current age, I’m sure I’d be very conservative in my moves. Unless I can go in circles and spin around I know I won’t be satisfied.
The ice rink is located at the historic Chattanooga Choo Choo. It’s so much warmer here than in Wisconsin, they form the ice using an electric chiller that runs 24/7. Kind of like a refrigerator. Otherwise, they’d have a big puddle. I’m sure it’s quite expensive to operate, so the “season” is only 10 weeks long.
The last open weekend they hold a “Skillet Curling Contest” on the ice. If you know curling, you know it’s not usually played with cast iron skillets. Not far from Chattanooga is the world headquarters of Lodge Cast Iron, in South Pittsburg. Yes, they supply the skillets for the tournament. They make more cast iron skillets than anyone. It makes total sense then for the rink to hold a cast iron skillet curling contest. The teams in the tournament are not only having fun. They’re trying to raise money as well: for the Chattanooga Food Bank.
Cast iron is my favorite skillet. Maybe soon I will tell you my cast iron skillet story. In the meantime, this video is pretty funny.
Enjoy!
Cheers,
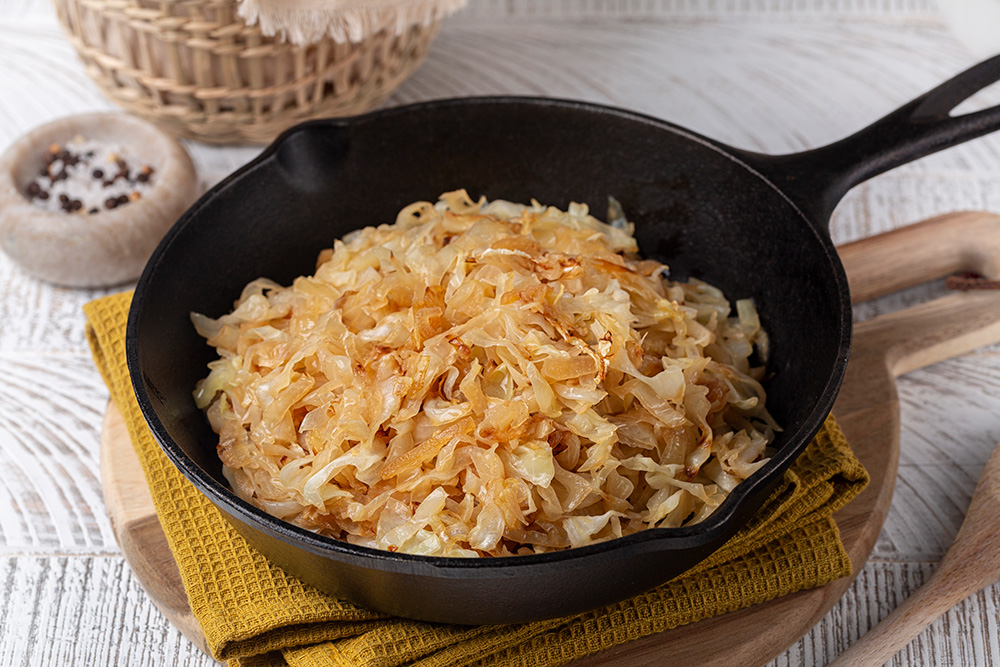
Dieter Brenda's Sautéed Cabbage
Plan Z Phase: This is a Z2 (ZReduction) recipe.
Cabbage is one of the foods that's unlimited on ZReduction, so it's the perfect food to nosh on when you're hungry between meals.
Dieter Brenda sent us this cabbage recipe from the blog Well Plated. We just tweaked it slightly to make it ZReduction approved. Sautéed cabbage is filling, tasty and satisfying. Eat it with dinner, or as a snack. Or, add a sliced onion and use it as a substitution for noodles that’s healthy and delicious. Or, try adding chicken broth and your favorite seasoning to turn this a brothy side or a simple soup. Thanks for the recipe, Brenda!
Servings: The recipe yields 6 servings, but you can eat as much as you want on ZReduction. Cabbage is an unlimited food.
Ingredients:
- 1 small green cabbage (about 2-½ pounds)
- 1 onion (optional)
- 1-½ tsp sea salt
- ½ tsp freshly ground black pepper
- ½ Tbl apple cider vinegar plus additional to taste
- 1 Tbl chopped fresh thyme (optional)
- olive oil spray
Instructions:
Cut the cabbage in half from its top down through its core. Place the cut-side down on your cutting board, then slice it as thinly as possible around the core so that you have fine ribbons. You can discard the core, it's tougher than the rest, and can sometimes be a little bitter. If you are cooking cabbage for a long time (like in a soup, you can keep it in there because it will eventually soften and break down, but that's up to you).
Heat a large sauté pan or a heavy-bottomed pot over medium-high heat. Spray the pan with olive oil spray. Once the pan starts to get hot, add the cabbage, salt, and pepper. Sauté for 10 to 15 minutes, stirring occasionally, until the cabbage is tender and begins to brown. Don't feel like you need to constantly stir it. Leaving cabbage undisturbed for a minute or two as you go is what will allow it to develop brown caramelized bits (aka FLAVOR). Just don't let it burn. You want it to turn brown like slightly toasty bread, not like burnt toast. If your cabbage starts looking too dry, add a splash of water (or broth) and cover it for a minute. That will loosen it up again.
When it's cooked the way you like it, remove from the heat and stir in the apple cider vinegar. The acv will brighten it up and it adds a special zing to the cabbage. Taste it and add a bit of additional salt and pepper if you like, or a splash more vinegar if you'd like your food a little more zippy. Sprinkle with fresh thyme. Serve warm.
Enjoy!
Cheers,

What To Bring To Dinner
When people call me to let me know they are accepting an invitation to dinner at our house, they often follow the “yes, we’d love to come” with “what can we bring?”
Easy question. Often a difficult one to answer.
I have had so many dinner parties over the years that you’d think I would have mastered the answer to this question. Instead, I often stutter. Their offer is generous and appreciated, but I often don’t know what to say. Usually, it’s because I don’t even know what kind of food I’m going to make yet. It’s hard for me to give them direction on something they could make or even what type of wine to bring; red or white.
Thanks to my old buddy in Florida, Jim, I now have a creative solution. Jim and his wife Connie started to tell people not to bring something for the dinner party. They asked guests to bring something to be donated to the local food pantry instead. When they have had a few parties and have enough foodstuffs they take them to the local food pantry. The quick trip to the food pantry happens about once a month. The food pantry benefits and everyone enjoys lovely dinners.
If this idea catches on, food pantries around the country will be thrilled! Talk about a win-win! Try it. I bet your local food pantry would appreciate it too. Plus, you get a nice dinner topped off with a warm feeling.
Cheers,

Puff Pastry Cocktail Cheese Straws
Plan Z Phase: This is a Z3.5 (ZReboot 3.5) recipe.
Puff Pastry Cocktail Cheese Straws are the perfect party appetizer! One that goes great with strolling drinks. Drink in one hand, cheese straw in the other.
Servings: Makes about 20 straws. Plan on each guest eating about 3 with a cocktail or glass of wine.
Ingredients:
- 1 sheet of puff pastry (thawed)
- Flour to dust your work surface (I use gravy flour in the can, but regular works too.)
- 1 cup shredded cheddar cheese
- 1 egg to make an egg wash
- Cayenne pepper for "zip"
Instructions:
Take the puff pastry out of the package and put it on the counter about an hour before you want to start. You need it to soften up so it's easy to unfold without it cracking apart. Some people are good at softening their puff pastry faster on defrost in their microwave. I've never been happy with the result, so I just leave it on the counter.
Lightly dust your work surface with the flour. Roll out your dough until it measures the size of a cookie sheet (11 X 17 inches or so). Keep it in a rectangle shape as you roll. Take your egg and crack it open in a small bowl, then mix it with a 1/2 cup of water. Mix the two together with a fork until they're well-jumbled. Take a brush (a pastry brush or, in a pinch, your barbecue brush will do) and spread some of the egg wash across the dough.
Spread your shredded cheese across half of the dough. Sprinkle lightly with cayenne. The more you sprinkle, the spicier your straws will taste. Fold the other half of the dough over the shredded cheese so the two sides come together. If you did this right, your pastry now measures about 11 X 8 inches. Squish the dough down gently just so the two sides stick to each other. I do this with my hand and just press it down with my palm.
Spray your cookie sheet with oil (plain or butter flavor).
Take a pizza cutter and cut long strips of dough. Each strip will be about 1/2 inch wide. When you've cut all of the strips, you are going to start putting them on the cookie sheet. Pick each one up and twist it a few times by holding one end in each hand and twisting in opposite directions. It's sort of like you are making licorice, only not so many twists. Just two or three twists. Then place the twisted straw on the cookie sheet and press down on the ends so the straw doesn't untwist. This sort of "sticks" the straws to the cookie sheet so they stay still while cooking. Place the straws an inch or more apart on the cookie sheet because they "grow" while they cook. You might have to do at least two batches from one sheet of pastry.
Bake at 375 degrees for approximately 10 to 12 minutes. Watch for the straws to get lightly browned. Remove from the oven and let cool slightly. You want them to firm up, but don't leave them on the cookie sheet until they are fully cool or they will stick. Five minutes on the sheet ought to do it. Then run your spatula along the length of the straw to loosen it and pick it up with your fingers or a tong and put it aside to finish cooling.
Enjoy!
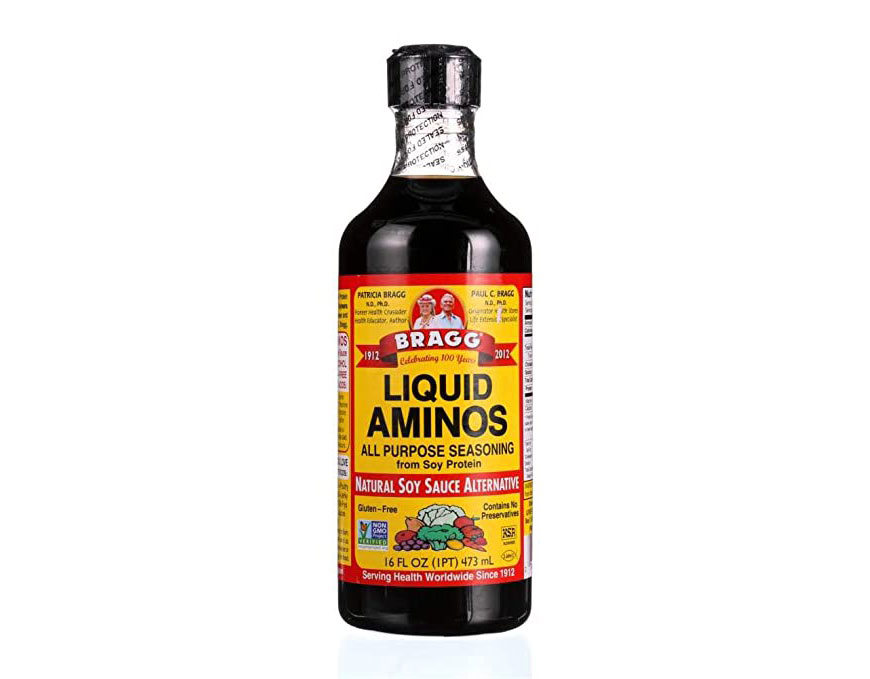
Bragg Liquid Aminos
 Bragg® Liquid Aminos is an umami-packed, gluten-free liquid seasoning made from non-GMO verified soybeans. It delivers essential amino acids and is a perfect alternative to soy sauce.
This irresistible seasoning is as flexible as it is delicious.
- All natural
- Certified non GMO
- Gluten free
- Not fermented
- No preservatives
- No alcohol
- Dash or spray for taste delights
- From soy protein
Bragg's has a small amount of naturally occurring sodium. No table salt is added. If less sodium is desired use 6 oz Bragg's (empty) spray bottle, dilute with 1/3 purified water or to taste and then either add in or spray Bragg's on food. It's a delicious, nutritious, gourmet alternative to tamari & soy sauce.
Bragg Liquid Aminos contains following 16 amino acids: Alanine; Arginine; Aspartic Acid; Glutamic Acid; Glycine; Histidine; Isoleucine; Lysine; Leucine; Methionine; Phenylalanine; Proline; Serine; Threonine; Tyrosine; Valine. Essential and non-essential amino acids in naturally occurring amounts from liquid soybean protein only. Nutrition you need, taste you love. To season your favorite foods & also makes a delicious broth.

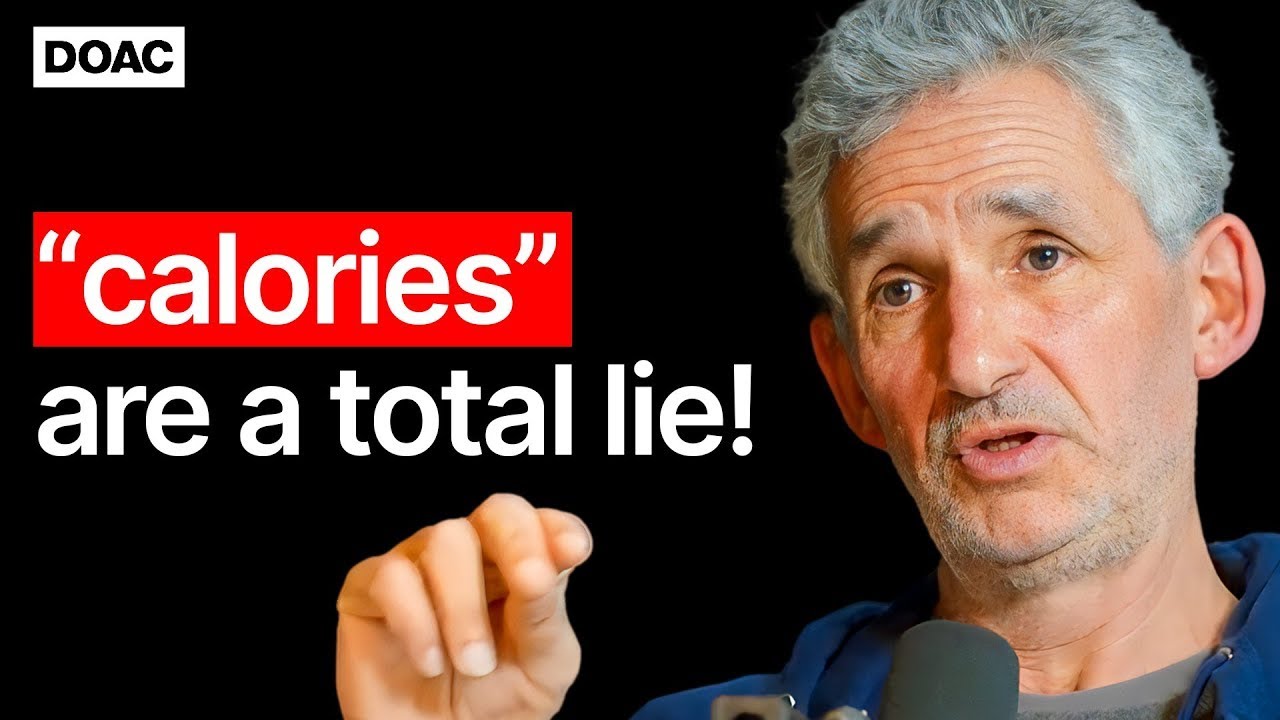
The Shocking New Truth About Weight Loss, Calories & Diets
https://youtu.be/66hWntvp0_4
Dr. Tim Spector, OBE* explains why counting calories doesn’t work. And why exercise isn’t the answer either.
This is important for Plan Z Dieters because if you eat the ZReduction foods and portions you will lose weight without counting calories. He explains why calorie counting doesn’t work at the 17:40 mark.
Plus, we have that “crazy” no exercise rule in ZReduction. Our clients are often skeptical that they can lose weight without exercising. But Dr. Spector explains why exercise isn’t the answer at the 1:02:22 mark of the video.
Watch it all if you can. But be sure to watch my two favorite segments (about eleven minutes’ worth) to help you unlearn what you always believed to be true about losing weight.
And if you’ve got a few more minutes, listen to what he has to say about diet drinks and artificially sweetened foods. That’s right after his exercise expose.
Rated R: Language. But both people on this podcast are British so the two or three swear words they use sound really good.
*OBE stands for Officer of the Order of the British Empire. The OBE is generally given to people who have made a major contribution to their line of work, or whose work has gained national prominence.

Beef Taco Soup (EASY)
Plan Z Phase: This is a Z3 (ZReboot) recipe.
What’s the difference between chili and taco soup? Broth, of course. There is more broth in taco soup is more so it’s thinner than chili. The internet tells me that chili is technically considered a stew. Go figure.
Servings: Serves 3 - 4. Can easily be doubled.
This is not a spicy soup. If you want it hot, you’ll need to add hot sauce to your portion. This way you can find just the right spice level for you.
Ingredients:
- ½ lb of ground beef. I used 70/30. The fat is okay in ZReboot.
- ½ diced onion. You decide on the color: white, yellow or red
- 2 oz of diced green chilies (You can save the rest for an omelet)
- 3 cups of chicken or beef stock.
- 15 oz of diced tomatoes (I use the fire-roasted ones by Hunt's)
- 2 Tbl of taco seasoning (I bought McCormicks. It has a bit of cornstarch in it but that’s okay. No sugar!)
- 15 oz of canned black beans. Rinsed and drained
- 1 cup of canned corn, frozen or fresh cooked
- ½ diced red bell pepper
- ½ diced green bell pepper
Optional:
- garnish with sour cream, grated cheddar, chopped green onions, cilantro, and ripe avocado chunks
Instructions:
In a medium soup pot, brown the beef. Continually break it into chunks. Add the onions and continue to break it up while the onions get soft. (And that’s the hardest part!)
Now dump in all the rest of the ingredients (except toppings) and let it simmer for 30 minutes. You just want it bubbling a bit. Stir occasionally.
Serve warm in bowls or mugs. Top with your extras and you’re ready to eat.
Enjoy!
Cheers,

Celebrate in Style
Lots of reasons to celebrate pop up each year. Birthdays, anniversaries, even weddings, showers, graduations … and more. My birthday is Tuesday of this week.
I have worked hard to find unique ways to celebrate holidays and special occasions. Today I’m offering you a way to make your celebration special.
The idea comes from two parties I designed. Years ago, for a neighborhood Christmas party, I decided it would be fun to serve champagne in demi-bottles. Demi-bottles are smaller than a regular bottle but bigger than a split. (Approx. 12 oz.). The individual bottles of champagne were served with a straw. The party guests strolled around the cocktail party with a bottle in hand instead of a cocktail glass ... sipping champagne at their leisure. It’s fun to be dressed up and sipping through a straw. The idea was a big hit with guests.
It was a big hit with me, (the hostess) too. Each bottle held more than one glass of champagne. This cut down on guests having to work their way back to the bar for a refill. Plus, I didn’t have to worry about getting their glasses refilled or washed!
Another year I took the idea one step further. I was helping a young lady who was working on a wedding shower. She wanted to make a big impression; a fun one. We decided that the splits of champagne with straws were perfect. To top it off we came up with the idea of customizing the label on the bottle.
We took an informal picture of the bride and groom with their dog. Then we used the back of the label to do a “mock” description of the contents. We took cute jibes at three of them. The dog’s name happened to be Roy, and he’s a pug, so the drink became “Royal Champugne.” (Catch the spelling?) You can do all kinds of fun things with your bottle. All you need is simple cut-and-paste skills, a computer, and a color printer. A glue stick will be handy.
I think I’ll get myself a split of champagne this year and do a quiet toast.
Cheers,