
The “Hummers”
The hummingbirds visiting my balcony have been the highlight of my summer.
Then “POOF”. They are gone!
Hummingbirds (also known for their nickname “hummers”), gorge themselves in order to double their weight before they take off for the tropics. They can fly 500 miles a day after they’ve “fueled” up.
Over Labor Day weekend they were gorging for sure. My balcony looked like the drive through at a Chick-fil-A during rush hour! My big, beautiful midnight blue salvia plant was extremely popular.
Most folks think you should plant red plants to attract hummers. I used to do that with little success. This year I went a different direction and planted the midnight blue salvia which grows tall and wide with trumpet-shaped blossoms that the hummingbirds love.
When I watered my plants this summer, I told my husband I was “going out to feed the hummingbirds”. Yes, I was watering the plant but each time I watered, the plant was producing more nectar and the hummers would come “running”. There are other plants on my balcony, but the salvia is my favorite.
I never saw more than three hummers feeding at one time, but they just kept coming and going. I could not tell them apart because they all had the same coloring. They were not the fancy red throated hummers. They were more plain.
In any case I decided to name them.
The names I gave were Henri, Miss Mimi and Lucifer. I decided all my hummingbirds were French.
Each time one or two came I called out their names and my husband would come running to try to catch a glimpse. Half the time as he got close to the window they’d fly off, but I could see them from my lounge chair, so they were not startled by me.
Who knows which one was there at any time. I just made it up.
I had fun with it.
But now they’re gone. I am a bit sad but for the fact a new one has shown up. She must be late in leaving. I can tell she’s new because she has a white throat. We named her Blanche. (French for white).
Fun Facts About Hummingbirds -
- They are the only bird that can fly backwards.
- A group of hummingbirds is called a “glittering”.
- Hummingbirds are the smallest birds that migrate. They travel alone.
- They weigh about as much as a nickel.
- They have no sense of smell. Go figure!
- Their nests are mostly made of spider web material and fuzz from flowering plants. They don’t use twigs or sticks.
- Their nests are about the size of an egg and hold two baby birds. They only produce two.
Oh, and one more.
- Hummingbirds are named because of the sound their wings make when they fly. (Most of us already knew that.)
You can guess what I’ll be planting in at least one of my balcony pots next summer.
Cheers,
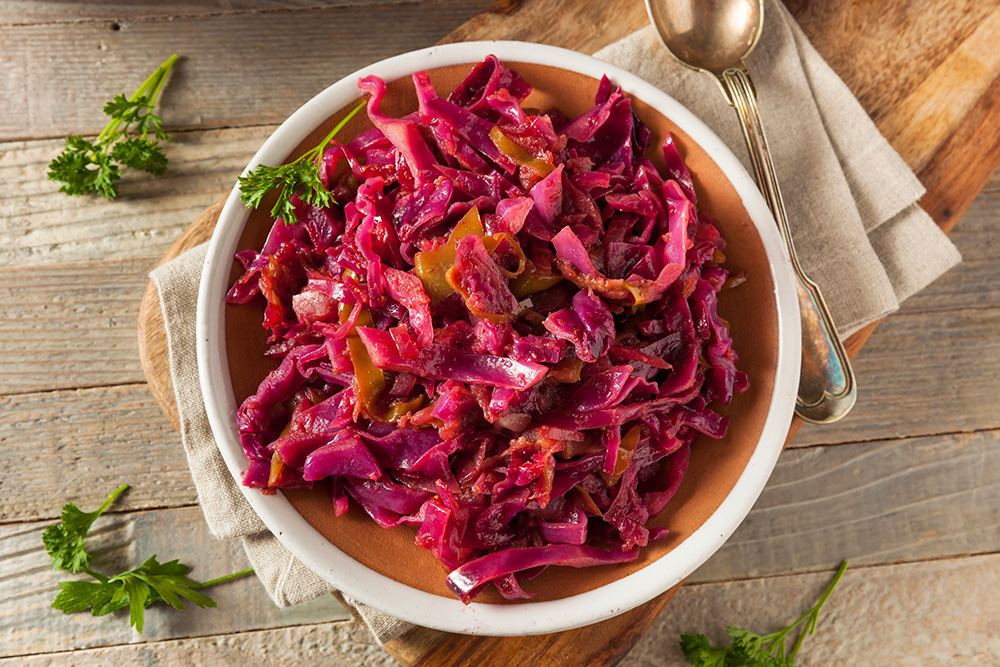
Braised Red Cabbage
Plan Z Phase: This is a Z2 (ZReduction) recipe.
For all you cabbage lovers out there, this recipe is a ZReduction take on a German classic. While you can whip this dish up in about 30 minutes, red cabbage tastes sweeter the longer you cook it -- so if you are on ZReduction and like your cabbage a little sweeter, cook it low and slow until the flavors mellow and meld to your liking.
Servings: Cabbage is unlimited on ZReduction, but the other ingredients are not. So limit yourself two, 1-cup servings per day on Z2.
Ingredients:
- 1 large red cabbage, peeled, cored and cut into strips
- olive oil spray
- 1 medium red onion, sliced thin
- about 1/3 cup of good balsamic vinegar, divided
- 2 sweet apples (like Honeycrisp) peeled, cored, and cut into thin pieces
- 2/3 cup of unsalted chicken or vegetable broth
- grated sea salt to taste
- freshly ground black pepper to taste
OPTIONAL...choose ONE of the following seasonings
- 1/4 tsp ground allspice OR
- 1/2 tsp caraway seeds (if you want a more authentic German flavor)
Instructions:
Heat a large pot on medium heat. Spray with olive oil spray. Add the onion slices and cook them, stirring frequently under medium heat for about 3 minutes. Add about 2 Tbl of the balsamic vinegar to the onions and cook for 2 minutes until the onions are golden. Add the sliced apples and cook for another 2 minutes.
Add the cabbage to the pot in 3 batches, stirring well after each one. Once all the cabbage is stirred in, add 2 more Tbl of apple cider vinegar (or to taste), and the broth. Your cabbage should never be dry.
Now, you get to decide whether you will add either ground allspice or the caraway seeds. For you purists out there, yes, I have had braised red cabbage dishes with both allspice and caraway seeds, but these seasonings dramatically change the flavors of the dish (in delicious ways).
If you are new to red cabbage and like milder, simpler flavors, a smidge of allspice (and/or cinnamon) will be just right. You can taste the cabbage as it's cooking and decide if you want to add it or not. However, if you like bolder flavors and enjoy the taste of caraway seeds, go for the caraway! You can add as much as 1 tsp, but I found 1/2 tsp was plenty for me.
Stir all the ingredients until they are well combined, cover the pot, lower the heat, and let the cabbage cook for 18-20 minutes, stirring occasionally. If your cabbage starts to look a little dry, add more broth. After 20 minutes of simmering the cabbage is ready to serve, but you can let it simmer for up to an hour. It will sweeten and soften as it cooks, so you can decide when to take if off the heat. If you want an extra tangy zip, add a dash of balsamic vinegar just before serving.
This dish tastes even better the next day.
Enjoy!
Cheers,

Walking the Bridge
What will I be doing to celebrate Labor Day?
I’ll be walking the bridge. That’s what my husband and I call it. The Walking Bridge.
Technically it’s called The Walnut Street Bridge. That’s because Walnut Street dead ends in front of Edwin Hotel and from then on the bridge transports you by foot or by bike over the Tennessee River to the North Shore neighborhood of Chattanooga.
It’s the longest bridge of its kind in the US. Built in 1890, it’s 2376 feet long. It takes the average person about 30 minutes to walk it. We park near the hotel and walk over the bridge and back.
I always feel accomplished when I complete a walk over and back. I feel like I have done something for myself.
It’s a good idea to get out early though. The summer temperatures in Chattanooga can get mighty toasty. That’s about the only thing I don’t completely love about Chattanooga. I am not a hot weather girl; never have been.
The rest of the year though the weather here is pretty ideal. Never too cold (at least not for a girl born in Wisconsin).
This is a perfectly green city. Lots of trees and with the mountains all around us you feel surrounded in Nature.
You have no excuse here not to get outside. This is a sportsperson’s mecca. Water sports, hiking, climbing and even hang gliding off the cliffs. Most of it is a bit much for me but it’s nice to know it’s nearby. Most weekends there is a race of some kind. It might be a marathon, or a paddleboard race on the water. You name it. Once people come here to visit they are taken with the beauty and ease of life here.
And that’s why we stayed.
Happy Labor Day!
Cheers!
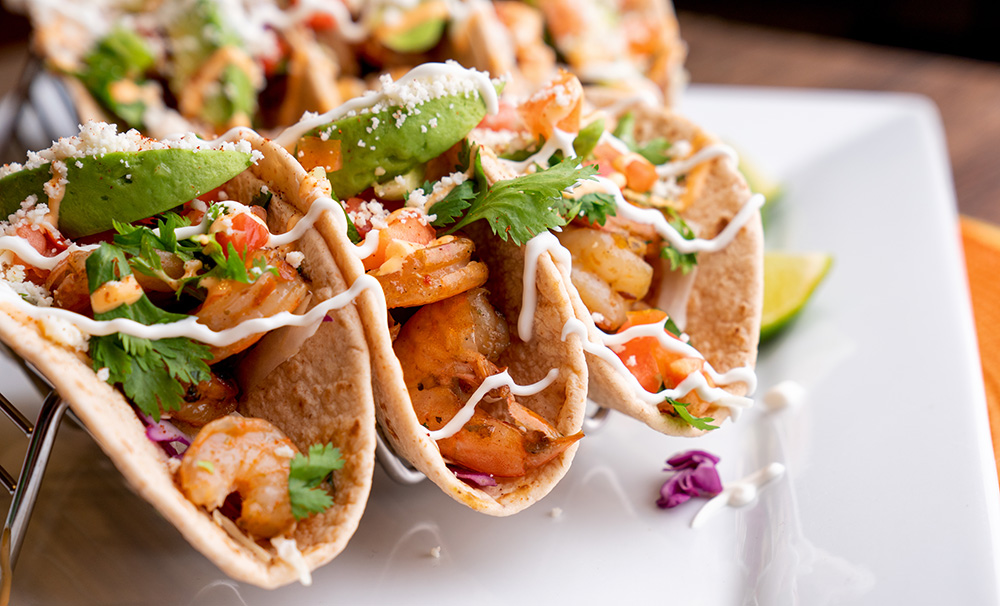
Shrimp Tacos with Lime Crema
Plan Z Phase: This is a Z3.5 (ZReboot3.5) recipe
These taste so fresh! They remind me of the best tacos I had in Cancun.
Servings: Makes 8 tacos
For the filling:
- 1 lb of shrimp. Any size will do but I try to buy the bigger shrimp (medium to large). If you don’t want to work much you can buy them peeled and deveined. Then all you have to do is pull off the tails. Otherwise you’ll need to peel them, devein them, pull the tails and then rinse. Pat dry before cooking.
- 1 tsp of minced garlic (jar garlic will work)
- Grated sea salt and pepper to taste
- A dusting of cayenne (optional)
- 1 Tbl of olive oil
- 8 low carb taco tortillas or shells. I used 6” flour tortillas but if you like corn, you can use corn tortillas. They make lots of low carb versions now.
For the toppings:
- 2 cups of shredded cabbage. I just buy a bag of shredded coleslaw mix when I'm in a hurry.
- 1 large avocado, peeled, pitted and chopped
- ½ cup of diced red onion (or more to taste)
- 1 cup of shredded cheese. I used queso fresco (a crumbly cheese). My husband used Monterrey Jack.
For the sauce:
- 1/3 cup of sour cream
- 1/3 cup of mayonnaise (I use avocado oil mayo)
- 2 Tbl of lime juice (from one squeezed lime)
- ¾ tsp of garlic powder
Instructions:
Make the sauce first. Stir all of the sauce ingredients in a small bowl and set aside so the flavors meld together.
Put the cleaned and prepped shrimp in a bowl. Add the minced garlic, salt and pepper and stir.
Heat a medium sauté pan on medium high. Add the olive oil and cook the shrimp for 1 – 2 minutes per side. Smaller shrimp will require less cooking time. You want your shrimp to be cooked through so there is no pink in the middle.
Transfer them to a platter or bowl to cool down. They do not have to be hot to make your tacos.
Heat your taco shells or tortillas on a cookie sheet in the oven on warm. You can do this while you are cooking the shrimp.
Arrange your toppings so you and your guests can make their tacos with their favorite topping amounts.
I put my cabbage on the bottom of the taco tortilla. Then I add the shrimp and toppings. Lastly, drizzle on some of the lime crema.
Enjoy!
Cheers,

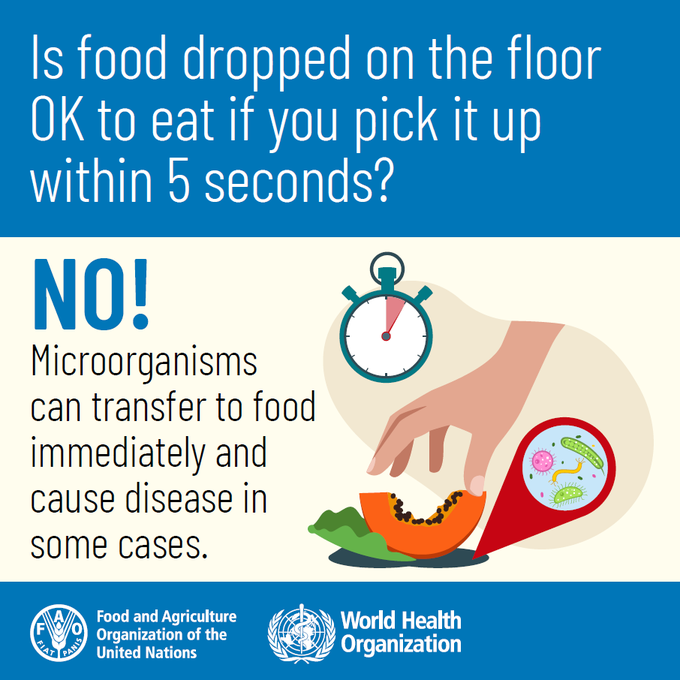
Food on the floor
My niece sent me a picture the other day of her 7 month-old baby Thalia eating in her high chair. Was all that mush food? Why was it spread all over the surface of the high chair? And what was that on the floor? The rest of her food? Perhaps there was more on the floor than on her high chair. And oh, is that the dog on the floor lapping up the food? And am I seeing Thalia throwing food down to the dog? Some of it landed on his back!
That brings me to the five second rule. She’s not far away from Cheerios or pieces of hot dog set on her tray. When my nieces were babies that’s what their mom fed them at breakfast and lunch. When they babies flipped that solid food on the floor it was picked up and put back on the high chair tray.
Is that a good idea? Is the five second rule a real thing? Here’s what the scientists have to say:
Much of the rest of this science is an excerpt from a Bon Appetit newsletter feature. Those folks know their food, so I’m confident they know the right food science folks too. I thought you’d find this interesting.
The rule’s “genesis is difficult to ascertain,” says Paul Dawson, PhD, a food scientist at Clemson University. In Did You Just Eat That, Dawson and his co-author, Brian Sheldon, PhD, wrote that an early iteration is sometimes attributed to Mongol ruler Genghis Khan. During his 13th-century reign, food that fell on the floor at one of the Khan’s elaborate banquets could stay there as long as he deemed fit; the delicacies were simply too good to ever go bad. Fast-forward to the 1960s, when Julia Child echoed the same sentiment on her cooking show, The French Chef. After dropping a potato pancake on the stovetop, she wasn’t fazed: “But you can always pick it up, and if you are alone in the kitchen, who is going to see?” Child told her audience.
These days scientists know a whole lot more about what might be lurking on our floors. Viruses, microorganisms, bacteria, and foodborne pathogens, like E. coli and salmonella, can all be found on everyday surfaces, says Donald Schaffner, PhD, a food science professor at Rutgers University. Some likely come from the air, while others are transmitted from surface-to-surface contact—via shoes, kids, or pets. Most of these won’t make us sick, he says, but some can: “If a foodborne pathogen from the floor were to be eaten, symptoms could include nausea, vomiting, and diarrhea.”
There’s no amount of time that would guarantee none of those bacteria or pathogens transfer from floor to food, says Schaffner. In a 2016 study, he found that the longer the test foods—watermelon, bread, buttered bread, and gummy candy—sat on the inoculated surfaces, the more bacteria they would pick up. But the amount of moisture in the food was a bigger factor in determining how intensely and how quickly foodborne occurred. When testing wetter foods like watermelon, “we almost always saw 100% of the bacteria transfer virtually instantaneously,” Schaffner says.
The cleanliness of the surface also affects how much bacteria a food might collect. “If a floor is free of any microorganisms, then nothing can transfer to the food,” Schaffner says. This kind of sterility requires fastidious cleaning. “A vacuum or broom will not remove or eliminate bacteria and viruses,” cautions Dawson. For that, “surfaces that are in contact with food require use of a sanitizer.” The type of material also makes a difference; Schaffner found that less cross-contamination occurred between foods that were placed on porous carpet versus those on tile or stainless steel.
Immediately washing your dropped ingredient with tap water will remove some of the bacteria they might have collected, Dawson says. But this only applies to certain foods—like uncooked fruits and vegetables, rather than eggplant parm or a piece of cake (which you probably don’t want to wash with tap water, right?). Not all foodborne pathogens are destroyed by cooking them either, Schaffner says . Though, “as long as the food is properly cooked and consumed promptly,” the risk of getting sick from food that briefly liaised with the floor is very low.
So, should you eat food off the floor? “I try not to tell people what to do,” says Schaffner. Dawson recommends discarding dropped food: “I don’t think it’s good practice to eat off the floor,” he says. Though the scientist admits he’s been known to ignore his own advice for “a cashew or two.”
Have I ever dropped food while I was cooking for a dinner party? I’m sure I have. Did I ever pick it up and put it in the pan to cook it and serve it? Nope. When I was a young adult, I worked in restaurants. I did a short stint cooking on the line. I was in charge of omelets, salads and sandwiches. Did I drop food on the floor there? Of course I did. In that environment you are moving so fast that when you crack open and egg and throw the shell toward the garbage bin it doesn’t always make it to the container. Those floors have raised mats on them for a reason. All the food you drop goes into the cracks in those mats. And it stays there til closing time when the right guy will come by and pick up the mat, scoop up all the food that hit the floor, throw it in the garbage and then sanitize the floor and the mat. That’s where I learned there is no five second rule; not even a one second rule. Just carry on and cook.
Cheers,
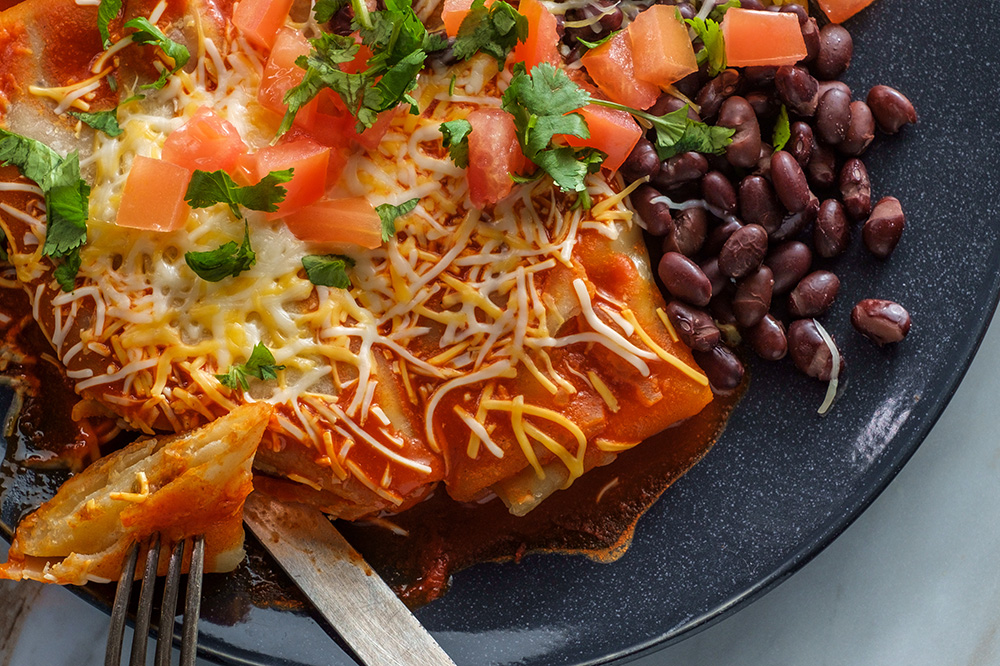
Chicken "Chimichangas"
Plan Z Phase: This is a Z3.5 (ZReboot3.5) recipe
At first you’d think chimichangas would be high carb. The good news is they have low carb tortillas at the grocery store that taste the same as the traditional. Look for the low carb versions. Carb Balance and Carb Counter are two I reach for. The fabulous thing is they have so much fiber mixed in that they come in at about four grams of net carbs per tortilla. I still would not eat them often but once you are stabilized a couple times a month should be okay.
Servings: Serves 4
Ingredients:
- 2 cups of chicken. I used one package of tenderloins.
- 1 Tbl of your favorite chili powder (smoked is best)
- ½ tsp of cumin
- ¼ tsp of paprika (I use smoked for this too)
- ½ tsp of grated sea salt
- ½ cup of salsa. I found one in the fresh produce section. Fresh salsa would be best but jar salsa can work, too.
- 2 cups of Mexican cheese blend, shredded
- 2 ounces of cream cheese, softened. You can also buy whipped cream cheese and just use the rest for something else.
- 3 – 4 green onions, cleaned, and chopped. White and green parts only.
- ½ of a 15 ounces can of traditional refried beans.
- 4 burrito-sized low carb tortillas
- 1 Tbl of olive oil
- Sour cream as an optional garnish
Instructions:
Preheat the oven to 375 degrees.
Spray chicken with olive oil spray and bake for about 20 minutes. Then cut up or shred the chicken after it cools down. Or, if you're in a hurry, you could use a rotisserie chicken for this recipe and shred it up.
In a medium bowl, combine the shredded chicken, chili powder, cumin, paprika, sea salt, cheese, cream cheese and some of the green onion. Save the rest for garnish. Smoosh it around with a spatula or spoon until it’s well mixed. Your chicken mixture should taste smooth and mild. If you like your food spicier, adjust the seasonings to your liking.
Increase the oven heat to 400 degrees so it will be ready to bake the chimichangas.
To Assemble:
Spoon 3 – 4 Tbl of refried beans onto your tortilla. Spread the beans around with a knife or the back of a spoon. Add about ½ cup of the meat mixture (maybe a bit more. I like mine STUFFED) into the center of the tortilla. Now fold it up. That means bring in the sides and hold those with your thumbs while you fold the tortilla from the front to the back to seal in all the stuffing. This can be a bit tricky but you’ll get the hang of it. Just don’t let go halfway through. If you have an issue, you can always unroll it and try again. Set them seam side down on a cookie sheet sprayed with olive oil. Do this 4 times so you have 4 chimichangas.
Brush the sides and top with olive oil and bake for 20 minutes at 400 degrees. Now you have baked burritos. What makes them an authentic chimichanga is to fry them.
I used to think that meant deep fried, so I never made them at home. All it really means is to heat up the oil in a sauté pan and “fry” the chimichanga on both sides until they are lightly brown. I love mine a little crispy.
Garnish with salsa, a dollop of sour cream and sprinkle on some more onions. I love the contrast of the cold sour cream and the hot chimi so when I served mine, I gave myself a mountain of sour cream :)
Enjoy!
Cheers,
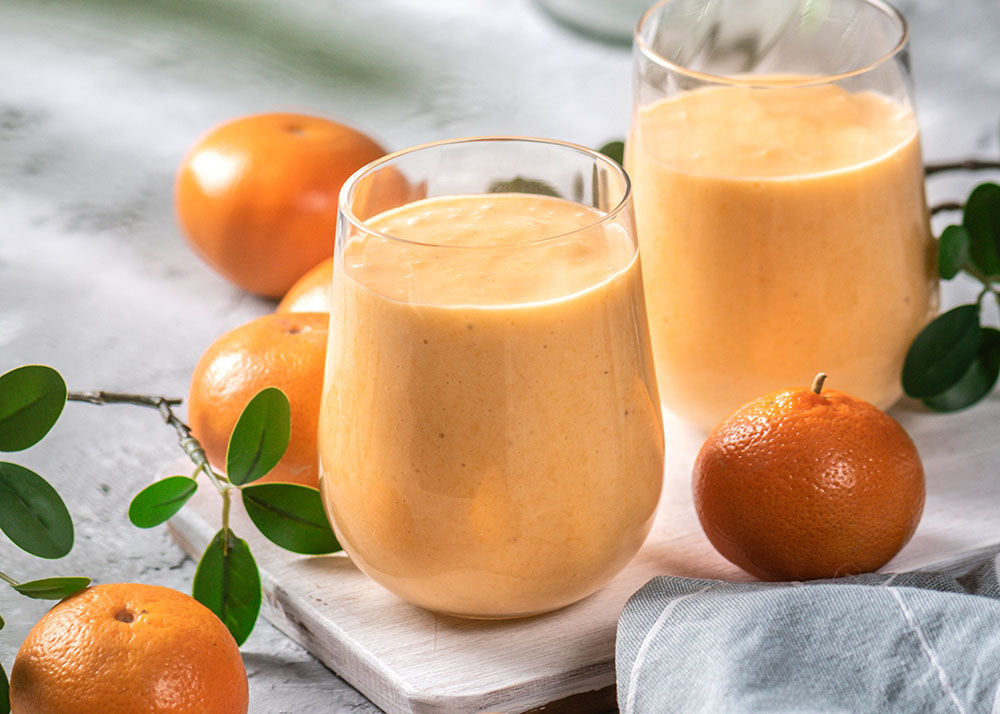
Healthy Orange Creamsicle
Plan Z Phase: This is a Z2 (ZReduction) recipe.
We have to thank Dieter Claire for inventing this recipe. She modified the fruit parfait recipe and developed a strawberry "ice cream" recipe and this one with frozen mandarin oranges. She says, “it’s like an orange creamsicle.” YUM!
Servings: Makes 4, 1/2 cup servings (because of the cottage/ricotta cheese, one serving counts as 2 oz of your protein allotment)
Ingredients:
- 1 cup of cottage cheese or ricotta cheese
- 1 tsp of Truvia
- 1 tsp of vanilla
- 2 cups of frozen mandarin oranges (you can use fresh or canned)
Instructions:
This recipe requires a little bit of freezer time, but it's worth it. First, you need to freeze your mandarins. If you are using canned mandarins packed in water, you'll want to drain the water first, then stick them in a freezer bag and pop them in the freezer for a few hours. If you are using fresh mandarins or cuties, peel them and stick them in the freezer.
Once they're frozen, you're going to put them in a food processor or blender along with the all the other ingredients.
Whiz everything up until it is smooth and light.
Serve immediately.
Enjoy!
Cheers,
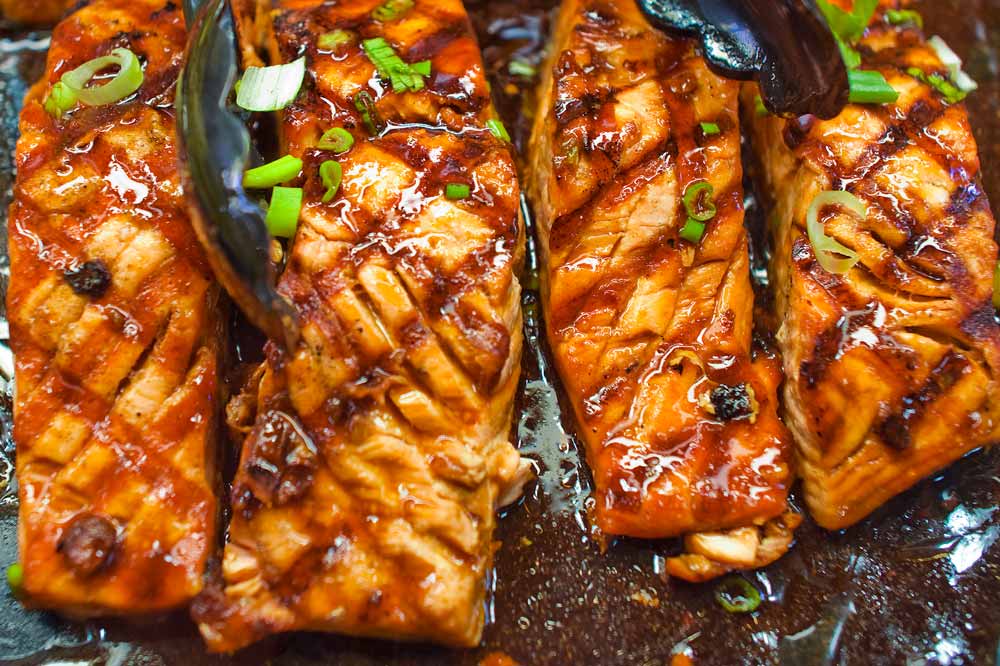
Grilled Asian Salmon
Plan Z Phase: This is a Z3.5 (ZReboot 3.5) recipe. When my husband is in the mood for Asian food, this is his favorite dish. It’s a super easy dish, so it doesn't take much to talk me into it.
Servings: Serves 4
Ingredients:
- 4 pieces of salmon filet, skin on one side (approx 6 to 8 oz each)
- 2 tsp fresh, finely grated ginger
- 2 tsp sesame oil
- 1 tsp hot chili oil
- 2/3 cup Bragg’s Aminos (soy sauce)
- 3 Tbl brown sugar (or Swerve Brown)
Optional:
- green onions for garnish
Instructions:
Put all ingredients except the salmon in a Pyrex or other ovenproof pan. Stir to mix. Then place the salmon flesh side down on the mixture. Let marinate in your refrigerator for 30 minutes while you relax. Don’t marinate too long or the fish starts to fall apart.
When ready to make dinner, you are going to grill your salmon. You can also do this in a sauté pan if you don’t have a grill pan or don’t want to use it. DO NOT THROW AWAY THE MARINADE. Spray the pan with olive oil spray. Place the salmon flesh side down to start and grill or sauté on medium-high for 3 minutes. Turn salmon over. Grill on skin side for up to 4 minutes more, or to your liking. My husband likes his salmon cooked through. I use a gauge of 6 to 7 minutes per inch to cook it just past the pink-in-the-middle stage. You can judge your own cooking time based on your taste.
While the salmon is cooking, pour the marinade into a small sauce pan. Heat it on medium-high until it gently boils and starts to cook down. It will get close to a syrup consistency. Don’t let it boil over, but you do want a gentle boil to reduce it.
When the salmon is done, serve with a drizzle of the sauce. Garnish with green onions. YUM.
Enjoy!
Cheers,
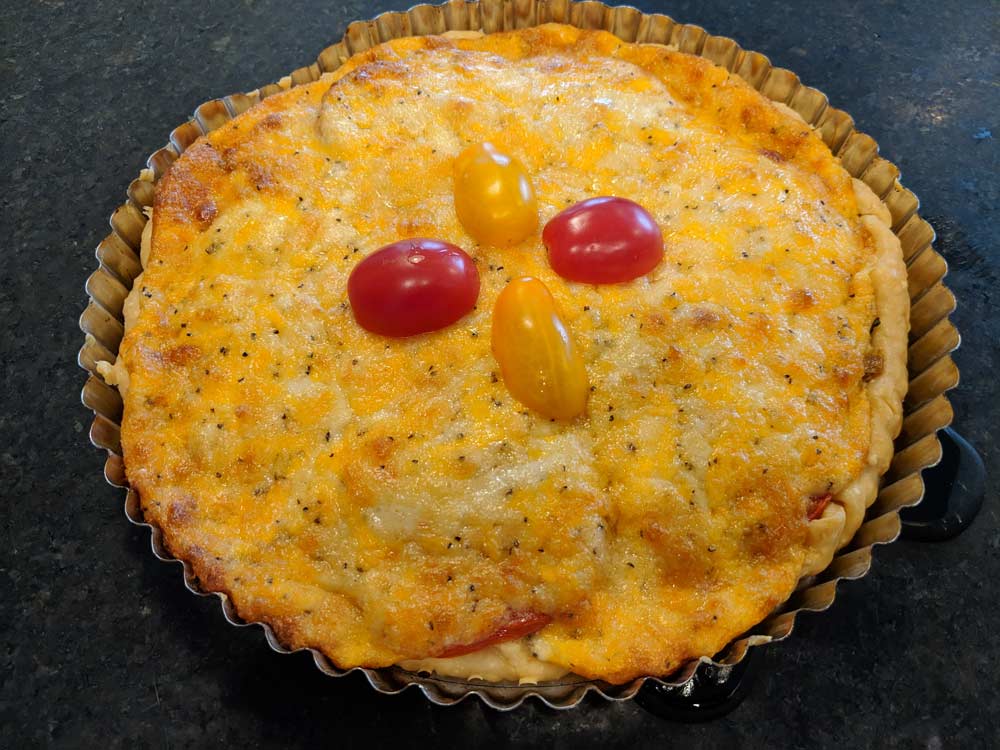
Southern Tomato Pie
Plan Z Phase: This is a Z3.5 (ZReboot 3.5) recipe.
Serves: Serves 4 to 6
Ingredients:
- 1 prebaked pie shell. I used this for convenience and it only has 16 grams of carbs for one slice (6 portions) so it’s doable on a low carb diet. You want to be very low carb, make this almond flour pie crust.
- 4 to 6 tomatoes cut into ¼” slices. I do not bother to peel them. The skin melts right in the pie
- 1 Tbl of butter
- ½ cup of onion or leeks
- 1/2 tsp of powdered garlic (or to taste)
- 10 fresh basil leaves sliced thinly. You’re shooting for a quarter cup.
- 1 cup of grated mozzarella, divided
- 1 cup of grated cheddar (when you review different recipes not everyone suggests cheddar, but I thought it gave it more color and flavor
- 2/3 cup of mayonnaise (In the South, Duke’s mayo is popular)
Instructions:
Preheat your oven to bake your pie crust according to the directions on the box or in the recipe for the almond crust version.
Take your tomato slices and spread them across paper towels set on your counter. Don’t let them touch. Spread them out. Lightly grate sea salt on top. Let them sit at least 15 minutes or up to 30.
Bake your crust in a pie pan or 9” tart pan with a removable bottom. This will take less than 12 minutes depending on the recipe.
When the hot crust comes out of the oven spread on ¼ cup of the grated mozzarella. You just want a few shreds to cover the bottom of the crust.
Let cool.
In a saute pan, melt the butter and put in your leeks or onion. Saute’ just until loosened. If you are in a hurry you can just spread the onion on the bottom of the crust and put the butter bits on top. Sprinkle on your garlic powder.
Put on a layer of tomato slices. Then sprinkle on the basil. If you are using a tart pan it’s probably going to be just one layer of tomato slices. If it’s a pie pan you’ll likely have a second layer of tomato. Grate on sea salt and pepper to taste.
Then combine the rest of the cheeses and the mayo in a small bowl. Top the tomatoes with this mixture and spread it to the edges.
Bake for 30 minutes at 350 degrees or until the top is lightly browned.
Let it set out of the oven for 5 to 10 minutes so you don’t burn your mouth. This also makes it easier to cut and hold together well.
Serve warm.
Enjoy!
Cheers,
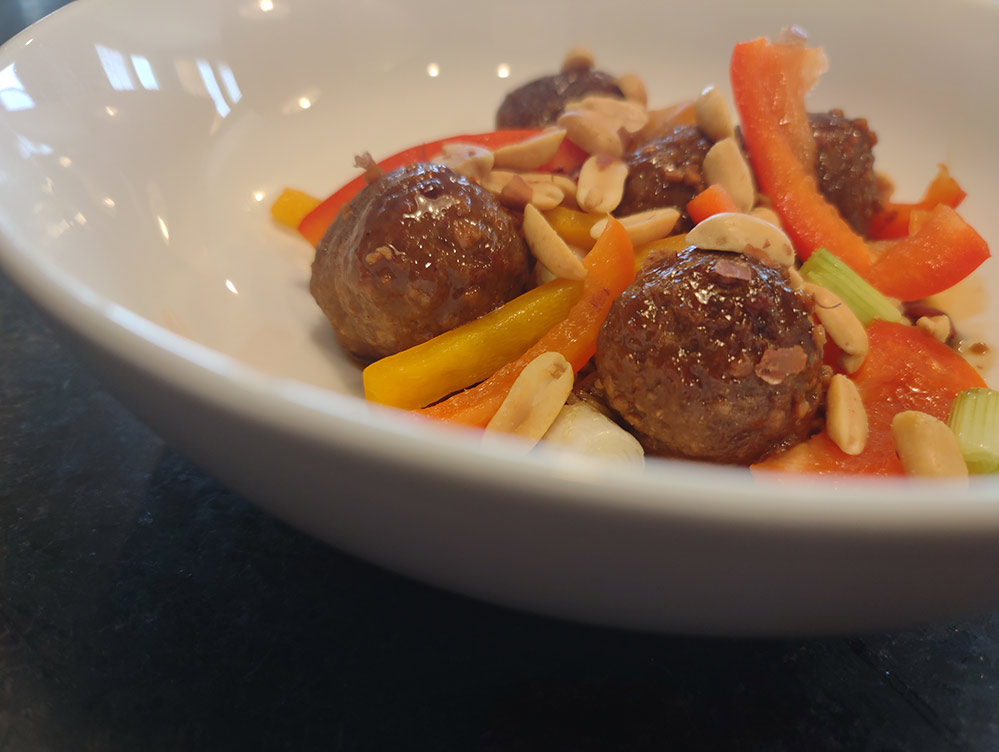
Super Easy Kung Pao Meatballs
Plan Z Phase: This is a Z3 (ZReboot) recipe
This meal comes together in a MINUTE – or at least it feels like it. I made this for Saturday night movie night and it was a hit!
Servings: Serves 2. Can be easily doubled to serve more or it can be set out on a buffet.
Ingredients:
- half a bag of frozen, beef or pork meatballs (use the plain ones, not the Italian ones)
- 3 Tbl of Tamari or soy sauce (Tamari is healthier)
- 2 Tbl of rice vinegar
- 1-½ Tbl of sesame oil
- 1 Tbl of brown sugar (or a brown sugar substitute like Swerve Brown)
- 1 Tbl of minced garlic (jar garlic will work, too)
- ½ tsp of chili pepper flakes (or to taste)
- 1 tsp of cornstarch
- ¼ cup of cold water
- 1 red bell pepper sliced into thin slices (optional)
- 1 handful of salted peanuts (optional)
- 4 green onions diced (optional; remove the roots, clean thoroughly and chop up the white and green parts)
Instructions:
Get out your 9" x 9” oven proof pan. Spray the surface with olive oil. Add the meatballs and spray those, too. Bake them according to the instructions on the bag.
While they are cooking you'll make your sauce.
In a saucepan on medium-low heat, add the Tamari, vinegar, sesame oil, brown sugar, minced garlic and chili pepper flakes.
While it’s heating, put your water and cornstarch in a small bowl. Stir gently until the cornstarch no longer sticks to the bottom of the bowl and is incorporated.
Once the sauce ingredients start to bubble, add the cornstarch mixture. Mix it in and stir while the sauce is bubbling. You should see it thicken up fairly quickly. Take it off the heat.
When the meatballs come out of the oven, drizzle the sauce over the meatballs and toss the meatballs around to coat them.
You are ready to serve!
When serving, be sure to scrape the bottom of the oven-proof pan so you get every bit of sauce.
If you decide to do the “make a meal” version of the recipe like I did, serve the meatballs in a dinner bowl and top them with your ingredients of choice. I added sliced red and yellow bell peppers, and a little celery for crunch.
If you are in ZReboot 3.5 and decide to add rice, put that in the bottom of your bowl before you add the meatballs, or you can serve it on the side. Just keep your rice portion to 1/4 cup cooked or less.
Sprinkle on extra hot pepper flakes if you want it zippier.
Enjoy!
Cheers,
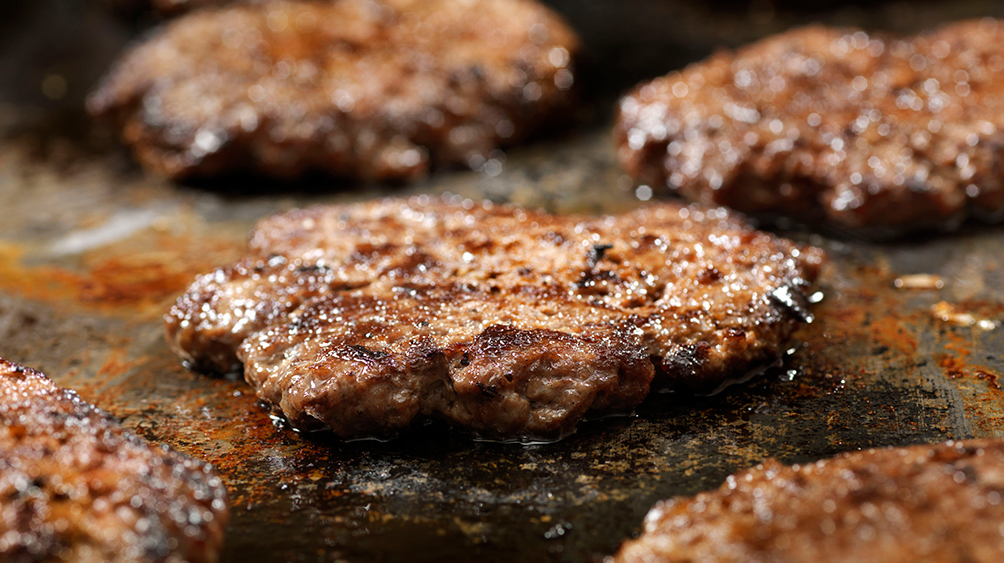
Smash Burgers
Plan Z Phase: This is a Z3 (ZReboot) recipe
Smash burgers are all the rage. Step into a brew pub and you’ll likely find a smash burger on the food menu.
These are NOT the huge, 8oz burgers we’ve been fed in the past. These are a thinner burger that’s usually six ounces or even less. You can always make your burger with two patties and bring it back to huge but more popular is to just make your burger with one patty.
The meat is important to a fabulous smash burger. A mix of ground meats is the secret. Whatever mix you choose at the store it’s likely to contain some regular ground chuck. You want that for the fat content. It’s usually 80/20. But then you look to see what else is in the mix. They will have some combination of ground chuck mixed with maybe brisket or sirloin or other high-end meat. You want to try to find grass fed too.
Another secret to a great smash burger is high temperature. You heat the pan in advance. I make mine in a cast iron pan but a griddle or other sturdy sauté pan can work. When you put the meat in the pan it will sear it. A chemical reaction takes place called maillard. That’s the caramelization. The meat gets a little bit of a crispy crust on the surface and around the edges.
So here’s the recipe for a smash burger.
Servings: Serves 3. Can be easily doubled.
Ingredients:
- 1 lb of ground chuck mixed with other top-line meats.
- Avocado oil or peanut oil (you need an oil that can handle high heat without burning)
- Grated sea salt
Instructions:
Heat your cast iron skillet on high heat for about 2 minutes.
While that’s heating, divide your meat into 3 patties. Don’t make them uniform. One reason it’s called a smash burger is you literally smash it with your spatula. The point is not to make a perfectly shaped burger. These can be a little wild. Misshapen is good. That means there will be nooks and crannies that also get browned and caramelized so the edges of the burger taste a bit crispy but you have a juicy burger on the inside. The burgers will be pressed down so they are fairly thin. You’re not going for a fat burger. You want the patties to be about 5” in diameter. That way they will stick out beyond the edges of the bun when they are finished.
When the pan is ready, quickly and lightly brush it with the oil.
Then place your smashed patties in the pan. Smash them down with your spatula and then leave them alone. Cook on high heat for 2 – 3 minutes. Dust on grated sea salt and then carefully turn the burgers over to cook the other side. Medium rare will take about 2 minutes more. Dust that side of the patty with sea salt too and you’re ready to serve.
Options:
There are traditional garnishes for a smash burger but I’m not going to dictate. Most smash burgers have American cheese on them. They also have a sauce made from mayo, ketchup and bits of pickles. I dispense with that and just have 1000 island dressing on mine. Stay away from the bun until you are in ZReboot 3.5 and your weight is stabilized. If you are including a bun, the buns do not need to be fancy. A big, fluffy bakery bun can even detract from the smash burger. When I make smash burgers I buy the usual, mass-produced burger buns.
Enjoy!
Cheers,
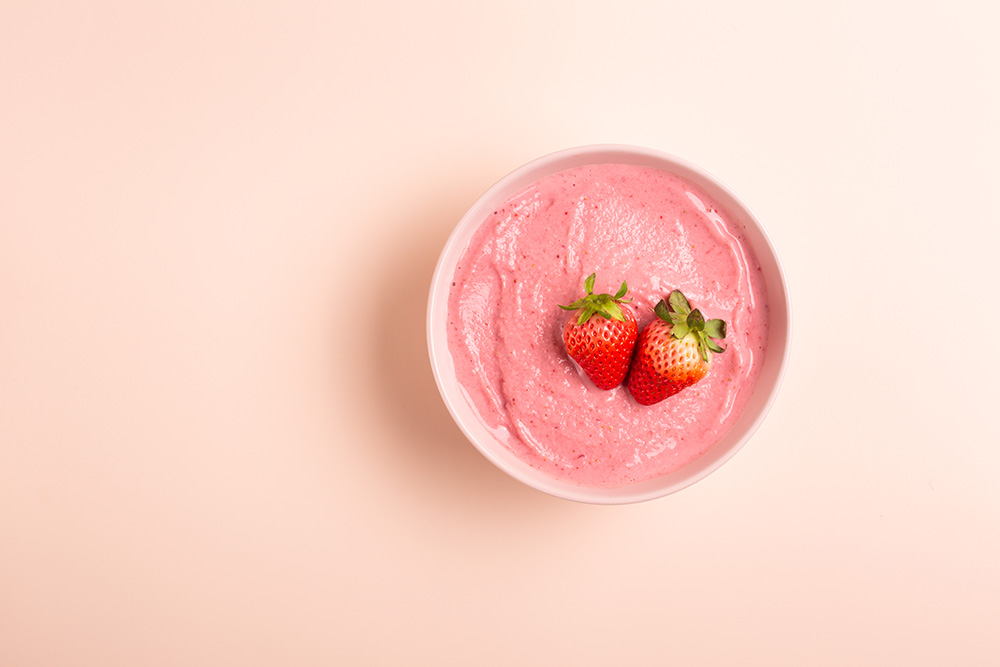
Strawberry "Almost Ice Cream"
Plan Z Phase: This is a Z2 (ZReduction) recipe.
Dieter Claire invented this recipe by modifying the fruit parfait recipe and adding extra frozen strawberries. She says, "it's as close to ice cream as you can get." Great idea, Claire!
Servings: Makes 4, 1/2 cup servings (because of the cottage/ricotta cheese, one serving counts as 2 oz of your protein allotment)
Ingredients:
- 1 cup of cottage cheese or ricotta cheese
- 1 tsp of Truvia
- 1 tsp of vanilla
- 2 cups of frozen strawberries
- sprinkle of nutmeg or pumpkin pie spice
Instructions:
All you have to do is whiz everything in your food processor or blender until smooth and light.
For this recipe, I recommend using a food processor. If you are using a blender, you'll want to add up to 1/4 cup of water to get the right consistency.
The texture will be a little different from traditional ice cream (keep that in mind, texture-people), but the it's got an awesome dreamy flavor!
Serve immediately.
Enjoy!
Cheers,

How to Buy Sparkling Water
Have you noticed how water is all the rage now? Everyone is drinking it. Bottled. Canned. It’s everywhere.
When I was a kid the only bottled water available in the grocery store was distilled water. My mom used them to fill the iron or some other appliance. Now there is an entire aisle (sometimes more) of different kinds of water.
I thought I’d give tips on how to buy the healthy versions. There are plenty that are not healthy. The unhealthy ones are full of sugar, caffeine, artificial sweeteners and more. Some of them are as bad as soda.
The first thing I want you to do when you pick up a bottle or can of water is look at the nutritional information. If it does not say “0 carbs” put it back down. Easy.
Then look at the ingredients list. Do you see artificial sweeteners, artificial ingredients, or things you cannot pronounce? If so, it’s not for you. Put it back.
One we get asked about often is Clear American sold at Walmart. That has aspartame in it. Yikes. You do not want to buy products like that, or any of the other "sparkling water" with artificial sweeteners in them. Why? Because that's not water anymore -- that's soda. So keep looking. Walmart has plenty of other options.
Some waters have “natural flavoring.” That’s okay as long as it’s not so much that the carb number goes up. You don’t have to give up flavor to have good water to drink.
There are classics on the shelves like San Pellegrino, Evian, Perrier and others. Those are examples of European waters that come from fresh springs deep in the earth. There are a TON of very inexpensive spring waters that are US sourced, too. Look for those, too.
If you are fortunate enough to be able to find “reverse osmosis” water you are in luck. It's non-spring water that was put through a process to remove pollutants, lead, fluoride, and other “nasties” that are in many waters. (If your water from your tap smells funny, it probably has some of those ingredients in it).
Syfo is one brand of water that is new. That one is reverse osmosis water. I was lucky enough to first find it a few months ago when we were temporarily living in Nashville. I am pretty sure it’s got national distribution now. My husband loves it. It not only comes in plain but also cherry and lemon/lime. He’s especially attracted to how much fizz it has.
Syfo is not expensive but there are others that are even more economical. One of my favorites is La Croix. I’m a Wisconsin girl so I am drawn to Wisconsin products. New on the shelves is Spindrift. That one comes in lots of flavors. You can buy cases of 12 and even 24 in some canned waters.
There are tons of options now and here’s why.
I once worked for a top dog in the food/beverage industry. He told me once 5% of the population starts buying a product, every major manufacturer will jump on board. They start competing with each other to get some of the share of the market.
Water clearly falls into that category now.
Drink up. Try to get 70 oz of water a day or more. The new rule of thumb is to divide your weight in half and shoot for drinking that much per day in ounces. Your body will thank you and in short order your body will begin to tell you it craves water.
Cheers,
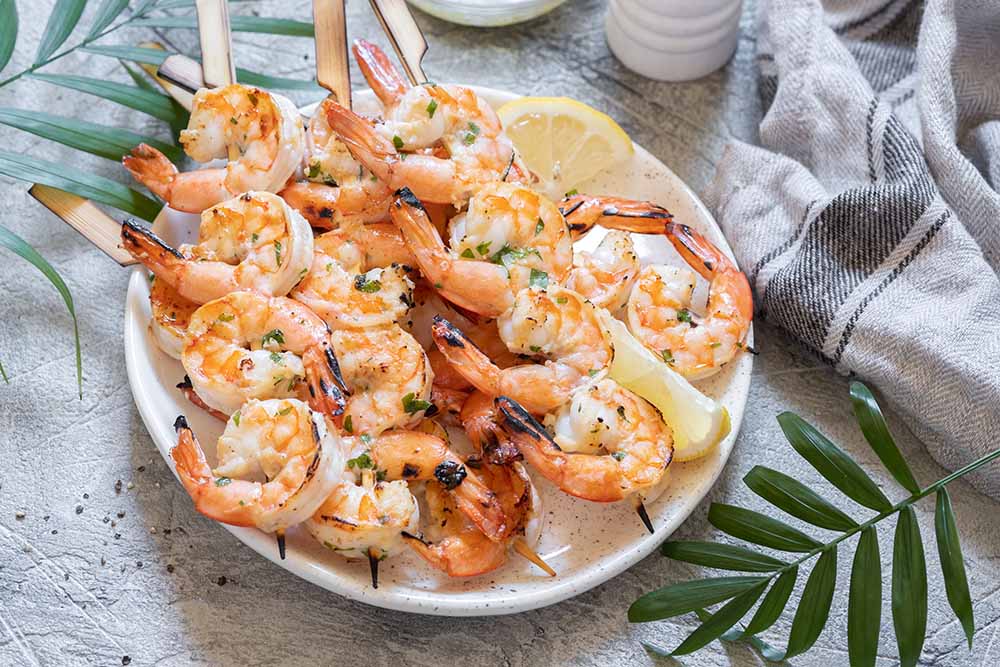
Grilled Shrimp "Scampi"
Plan Z Phase: This is a Z3 (ZReboot) recipe.
Shrimp scampi is one of my favorite dishes, but traditional shrimp scampi recipes normally have you cook the shrimp in lots of butter, wine, garlic and oil, and then serve the shrimp + buttery garlic sauce over pasta. Just thinking about it makes my body want to gain weight! In this recipe inspired from the Liz Berg's blog That Skinny Chick Can Bake, you'll marinate the shrimp in a garlicky basil sauce, and then grill your shrimp. Voila! A scampi-tasting shrimp recipe without the butter!
A recipe like this is perfect for the first week of ZReboot.
Servings: Serves 4
Ingredients:
- 1 Tbl olive oil
- 3 Tbl butter, melted
- 2 Tbl fresh lemon juice
- zest of 1/2 a lemon
- 1 Tbl grainy mustard
- 1/4 cup minced basil
- 3 cloves garlic, minced (jar garlic is fine, but fresh is better)
- 1/4 teaspoon crushed red pepper flakes
- 1/4 teaspoon your favorite seasoning (or you can use 1/4 tsp salt plus a little black pepper)
- 2 pounds jumbo shrimp, peeled and deveined
Instructions:
In a shallow glass dish (I used my 9" x 13" inch Pyrex cake pan), mix together olive oil, butter, lemon juice and zest, mustard, basil, garlic, red pepper flakes, and your seasoning. Add shrimp and stir until the shrimp are coated with the paste.
Place in the refrigerator for about an hour.
Prepare grill. Thread shrimp onto skewers. Gently heat any marinade left in the pan and smear over skewered shrimp.
Grill approximately 2 minutes per side or until the shrimp is just starting to turn pink. Serve hot.
Enjoy!
Cheers,

Blistered Tomatoes
Plan Z Phase: This is a Z2 (ZReduction) recipe. Sometimes the simplest things are the best. I am offering up two options for grilled veggies. The first is grilled chinese eggplant. The second is blistered tomatoes. Blistered tomatoes sounds odd but taste GREAT. In fact they taste wonderfully sweet and make a great topper for a salad or just eat them as your side dish. Blistered tomatoes are very popular in big city restaurants so enjoy them hot off the grill at your house. They taste great cold too. These are two of my favorites for the summer.
Ingredients:
- 1 cup of cherry tomatoes per person
- light spray of olive oil
- salt and pepper
- a sprinkle your favorite seasoning (to taste)
Instructions:
All you have to do for these tomatoes is spray them with olive oil, season them to your liking and grill them until they blacken in spots and become sort of charred and soft.
Is use my grill pan to cook them so there’s no chance of them falling through the grates of a regular grill but you can use a grill basket and put them on there if you choose.
Just heat your grill pan to medium high. Put the oiled tomatoes on the pan and let them begin to cook. Shake the pan once in awhile to change the position of the tomatoes so they blacken on more than one side.
The combination of the higher heat and the oil will bring out a very sweet flavor in the tomatoes. Grill as long as you want and then salt and pepper them before you eat.
Enjoy!
Cheers,
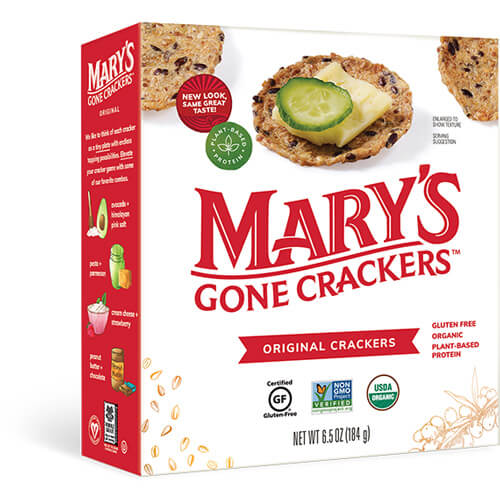
Mary's Gone Crackers
The cracker that launched a million crunches remains the choice of Mary’s loyalists everywhere. Why? Because it was a resounding “Yes!” to the question “Can a gluten-free cracker taste great?” Mary’s Gone Crackers® Original Seed Crackers combine organic, gluten free, whole grain brown rice, quinoa, flax seeds and sesame seeds to create a cracker with a rich, earthy flavor and a satisfying crunch.
On ZReduction, your serving size is 4 crackers per meal (or 8 in a day).


'Cue Tips
For lots of people, cooking in the summer revolves around the barbecue. The stereotypical vision is a guy with a slightly rounded belly standing barbecue ready, favorite beverage in one hand and a long tong in the other. The grill is smoking away behind him.
I propose we go beyond that vision. Here are my quick barbecue tips – I call them ‘Cue Tips.
‘Cue Tip #1 It’s Not Just for Meat Anymore
Go beyond grilling meat. You can cook the whole dinner on the grill! One of my favorite simple summer appetizers is grilled asparagus with sea salt. Take cleaned asparagus, spray it with olive oil and sprinkle with sea salt. Grill on medium until the asparagus has char marks all the way around. The asparagus should still be al dente (slightly stiff). Serve it warm or room temperature on a platter and let your guests eat it with their fingers.
A second idea involves making eggplant chips. If you abhor eggplant my guess is this simple recipe will change your mind. Take a Japanese eggplant (the skinny light purple eggplant) and slice it thinly. Place the slices on paper towels and sprinkle with sea salt. Let stand for 30 minutes or so. Spray with olive oil and grill on medium high heat until the eggplant is browned on both sides. A few char marks are good. They will be stiff. Sprinkle again with more salt as they come off the grill. The result will taste a lot like a healthy potato chip. Serve as a snack or as a side dish.
‘Cue Tip #2 Think International
The grill isn’t just for good ole American burgers, steaks and ribs. Consider grilled quesadillas. You can really make them with anything you want inside. Just don’t forget the cheese. That’s the glue that allows you to flip them on the grill. They can be Mexican ingredients like onions, beans (drained) or refried, peppers, etc. Or you can go International like I do and mix styles.
‘Cue Tip #3 Stop Playing With Your Meat
I know it’s fun to squish down the burgers with your spatula but it really takes the flavor out of the meat and toughens your burger. Leave your meat alone. A good rule of thumb is 7 minutes per inch to cook meat or even fish to a medium temperature. Turn at the 3 or 4 minute point and leave it alone on a medium high grill. If you want to check for doneness, do it with a sharp paring knife and a fork. Poke the knife in and use the fork to pull the meat apart enough so you can see how pink it is in the middle.
‘Cue Tip #4. Think Outdoor Oven
If you think of your grill as an outdoor oven you’ll be less likely to burn your food. There are knobs on a gas grill for a reason! Most people turn every burner to high and leave them there. They seem to feel flames indicate cooking is going on. True but not necessary. There’s a thermometer on most grills too. Look at it. Turn the grill on high to pre-heat it.
Sear your meat and then turn it down. Keep the temperature around 375 - 400 and things will “roast” in your grill. Your food will stay moister and tastier. And you won’t have to stand around with the spritzer bottle putting out flames. If you are a charcoal griller use the indirect method.
‘Cue Tip #5. Think Ahead
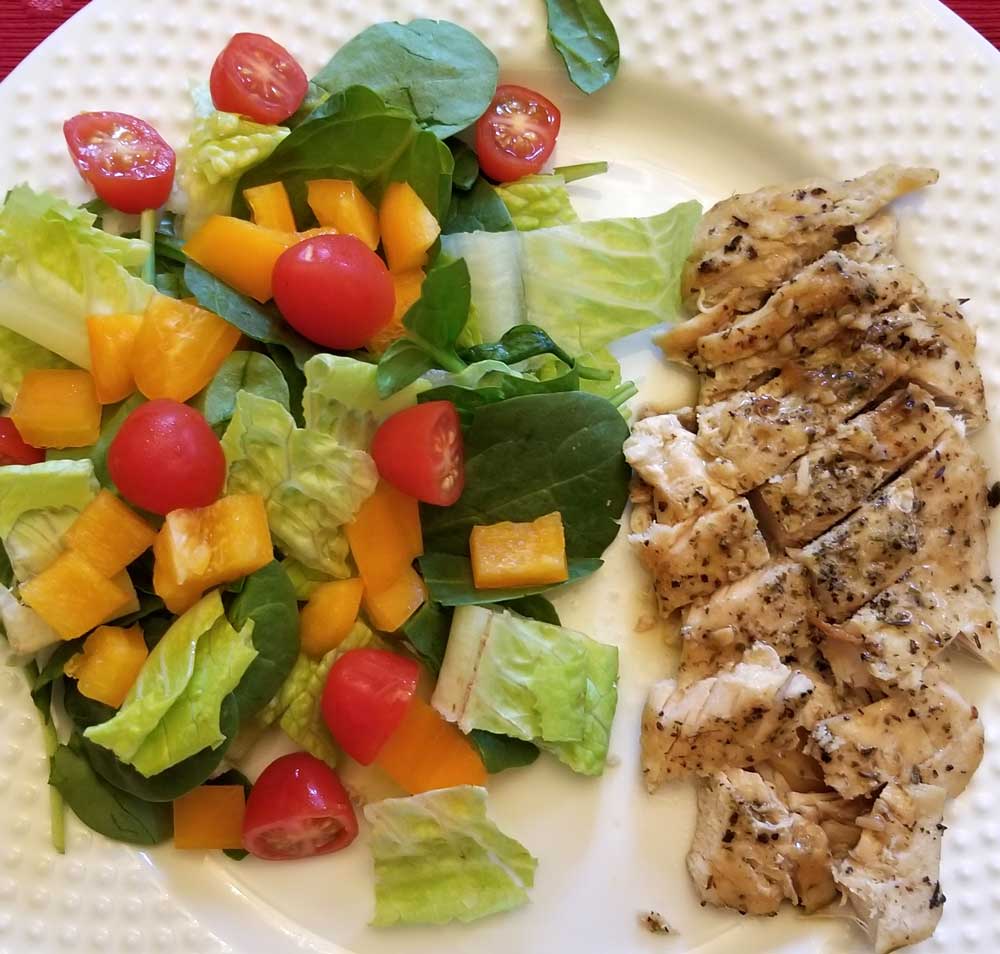
My friend Pete displayed this brilliant idea. He cooked the meat ahead of time! Early in the day it’s not so hot and you can grill at your leisure. This leaves more time to talk to guests instead of standing around a very hot grill. Take chicken, for example. You want to make sure chicken is thoroughly grilled so you don’t pass out food poisoning to your guests. If you grill it on medium high earlier in the day, check it with your paring knife in the fattest portion of the meat to make sure it’s done, then you can store it in the refrigerator until guests arrive. Take it out and let it warm up to something closer to room temperature and just re-heat the meat on the grill. Takes less time and is less risky. Which leads me to ‘Cue Tip #6.
‘Cue Tip #6. Leave the Sticky Stuff to Last
Most often the grill starts to flame up because something on the meat has sugar in it. Think barbecue sauce. If you follow Tip #5 and then when you are re-heating your meat add the barbecue sauce then and just on top you are less likely to have charred mess on your grill rack at the end of the night. Then again, some people LIKE to have to scrape that stuff off of the grill.
‘Cue Tip #7. Dessert
On a clean grill there’s a beautiful treat called grilled pineapple. Take large chunks from a ripe pineapple and grill them or when desperate you can even use slices from the can. Spray with canola oil and grill gently until soft and slightly browned. Serve on vanilla ice cream. You can do this with peach halves too. If they are not sweet enough for you, add a drizzle of maple syrup to the pineapple (careful not to let it burn) or a drizzle of caramel on the peaches.
Hey, I’m no grilling champion and I know some people get pretty testy when folks question their grilling methods. If you fancy your grilling techniques stick with them. If you’re looking for more from your grill get out the ‘Cue Tips.
Enjoy! Cheers,
Instant Pot Italian Chicken with Gravy
Plan Z Phase: This is a Z2 (ZReduction) recipe.
A delicious recipe submitted by Dieter Claire. Does this take longer than sautéing in a pan? Well, yes, but the chicken that comes out is soooooo tender it's worth the time. We completely agree, Claire, thanks for sharing!
Servings: Serves 4 with a little gravy for everyone
Ingredients:
- 4 thawed boneless skinless chicken breasts
- 1 cup chicken stock (no sugar added)
- 1/2 tsp salt
- 1/2 tsp black pepper
- 1-1/2 tsp Italian seasoning
- 1/2 tsp onion powder
- 1/2 tsp garlic powder
- 1-1/2 tsp cornstarch dissolved in 1/4 cup of water
Instructions:
For the Chicken
Mix the salt, pepper, Italian seasoning, onion powder and garlic powder in a small bowl and rub liberally on both sides of the chicken breast. (I find using an Instant Pot seems to make the seasonings milder, so I go a little stronger on the rub than when fixing it in a conventional manner.)
Spray your Instant Pot lightly with olive oil, set it on sauté and wait for it to get hot. Brown the chicken breasts individually on both sides, then take them out and put them on a plate once they have browned.
Deglaze the fond (those tasty, browned bits) from the bottom with some of the chicken broth.
Set the Instant Pot trivet inside and add the rest of the chicken broth. Add the chicken breasts back in. (I have a small Instant Pot, so I use the smaller chicken breasts. Adjust this if you have a bigger pot.)
Close the lid and set the timer for 7 minutes at high pressure. Make sure you close your vent! When time is up, release pressure naturally. Open and move chicken to a plate. Cover with foil to keep warm while you make your gravy.
For the gravy
At this point, you will have a lot of seasoned broth in your Instant Pot. Remove the trivet and set the Instant Pot to sauté again. Add the cornstarch dissolved in water to the Instant Pot, stirring to make sure it's all blended. Cook until it is the consistency you like. Your tasty gravy will thicken as it cooks.
Enjoy!
Cheers,
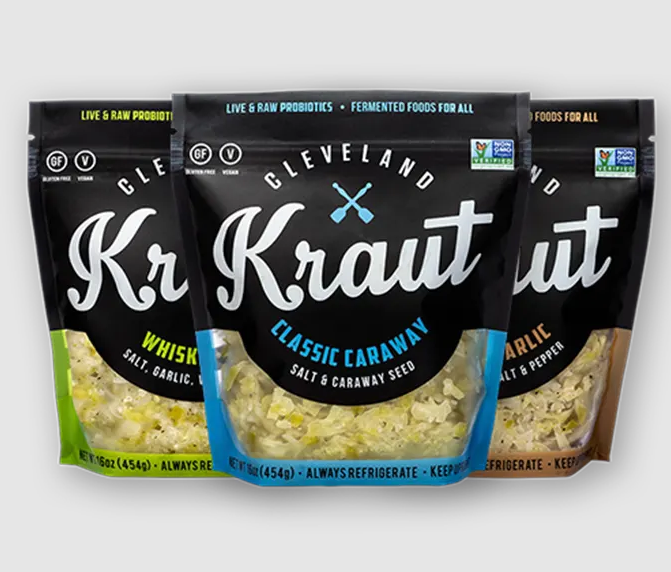
Cleveland Kitchen Krauts & Kimchi
Cleveland Kitchen takes pride in producing the best tasting and crunchiest sauerkraut & kimchi in the world. Their kraut is unpasteurized and lacto-fermented, full of natural probiotics, nutrients and flavor. There is a teensy amount of naturally occurring sugar in kraut, but there are no added sugars in the varieties below so the ones listed here are Plan Z approved. Save the "Gnar Gnar" and the "Beet Red" flavored kraut for ZReboot.
Classic Caraway:
Cleveland Kitchen's take on a classic, the Classic Caraway packs traditional Bavarian flavor with a fresh crunch and robust taste. This is Grandma’s kraut with an edge. Throw the Classic on hot dogs, hamburgers, pierogies & sausages.
Roasted Garlic:
A garlic-forward variety which is brimming with both raw & roasted garlic & a touch of fresh ground black pepper. Packed with pre & probiotics, this rich kraut is a perfect way to boost your immune system.
Whiskey Dill (our favorite):
This spirited kraut offers notes of fresh garlic & dill with barrel aged whiskey that adds a subtle sweetness to each batch. This non-alcoholic ferment will add a delicious crunch that you crave.
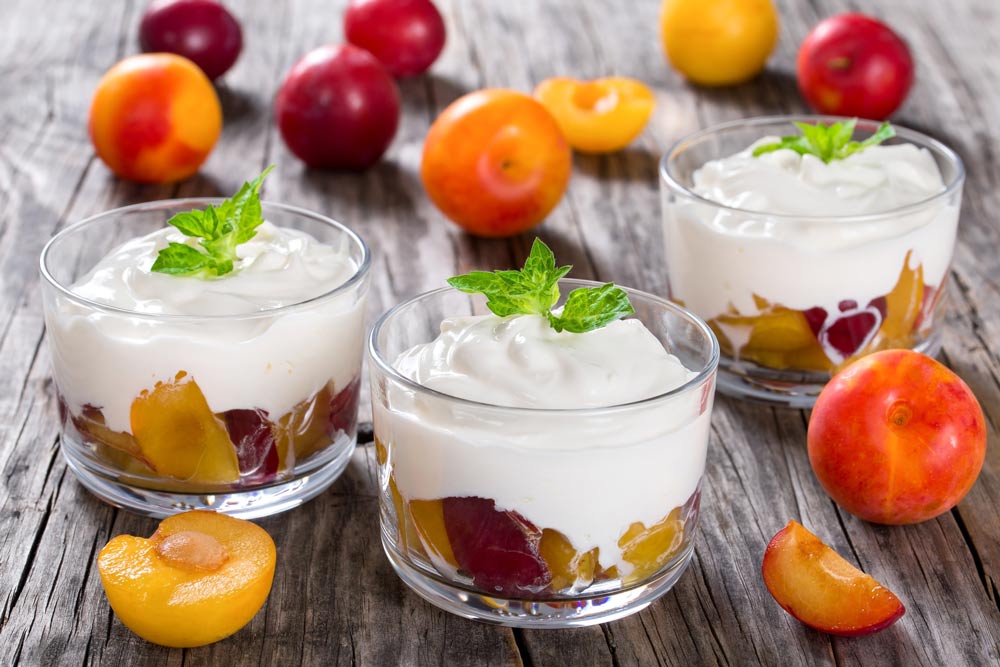
Tipsy Plums with Sweet Cream
Plan Z Phase: This a Z3 (ZReboot) recipe. Here’s a dessert recipe that you can team up 2 or 3 people to make (depending on the size of your gathering). The plums could be made along with the cream before dinner. They can be stored (the cream in the fridge and the plums covered on the counter). Then, when dessert time comes the plums can be reheated. Or not. You choose.
These can even be set out on a buffet for self-service.
The recipe can be doubled, tripled or more. Just multiply as the ingredients are listed in equal proportion.
Servings: Serves 2
Ingredients:
For the Plums
- 3 ripe plums sliced thinly (no need to peel them)
- 1/3 cup of vodka. I use orange or vanilla-flavored vodka. If you do not cook with alcohol, use sparkling water.
- 1 tsp of Truvia
For the Sweet Cream
- 1/3 cup of crème fraiche (find this in tubs in the cheese section or near the cream cheese)
- 1 tsp of organic vanilla
- ½ tsp of Truvia
Instructions:
Heat plums vodka and 1 tsp ot Truvia on medium and cook until the plum slices are softened. Remove from heat and set aside so you can make your sweet cream topping.
In a small bowl, mix the creme fraiche, vanilla and 1/2 tsp of Truvia well with a spoon. Serve over the warm plums.
BIG YUM!
Enjoy!
Cheers,