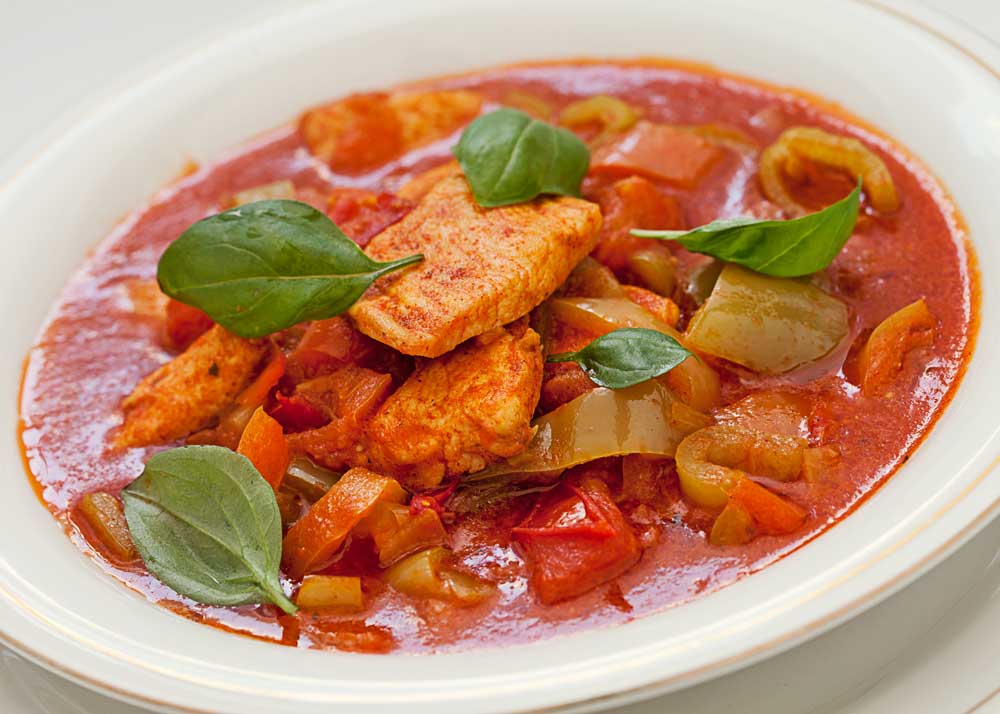
Chunky Chicken Chili
Plan Z Phase: This is a Z2 (ZReduction) recipe. We made this during a snow storm, the taste took off the chill of the day.
Serving Size: Serves 6 (can be doubled easily)
Each serving is 1-1/2 cups
Ingredients:
- 2 lb of chicken breasts (no skin)
- 3 chopped bell peppers. One red, one yellow and one orange.
- 1 chopped yellow or white onion
- 28 oz of diced tomatoes, they can be plain or flavored, no sugar
- 1 jar of roasted salsa with no sugar in the ingredients list. I do try to get roasted but if the store doesn't have roasted salsa, any salsa with no sugar will do. Read the labels. You’ll find one.
- ¼ cup of minced, fresh cilantro
- juice of two limes
- 4 cups of chicken broth (no sugar)
- 2 Tbl of paprika (I use smoked paprika)
- 2 tsp of dried oregano
- 2 tsp of ground cumin
- 2 Tbl of ground garlic powder
- 2 tsp of cracked red pepper flakes
Instructions:
Cut the chicken breasts into chunks approximately 1” in size. Spray a soup pot with olive oil spray and begin to brown the chicken on the outsides on medium high. Stir regularly to keep the chicken browning on the other sides too.
When the chicken is half cooked add the onions and peppers. Cook until they loosen up but don’t let them get mushy. Add the tomatoes, the broth and the salsa and stir. Then add the cilantro, lime juice and all of the flavorings.
Cook on a bubbling medium high for 15 minutes to make sure the chicken is cooked all the way through. Turn down to a low simmer and let it cook another 15 minutes to meld all of the flavors.
Serve. Watch your servings. You should be able to have 1-1/2 cups per person but just be sure not to go over on your chicken portion. You can eyeball 6-8 oz. Just think of a batch of chicken bites about the size of your palm or a bit bigger. You can have a plain salad on the side if you want some greens.
Enjoy!
Cheers,
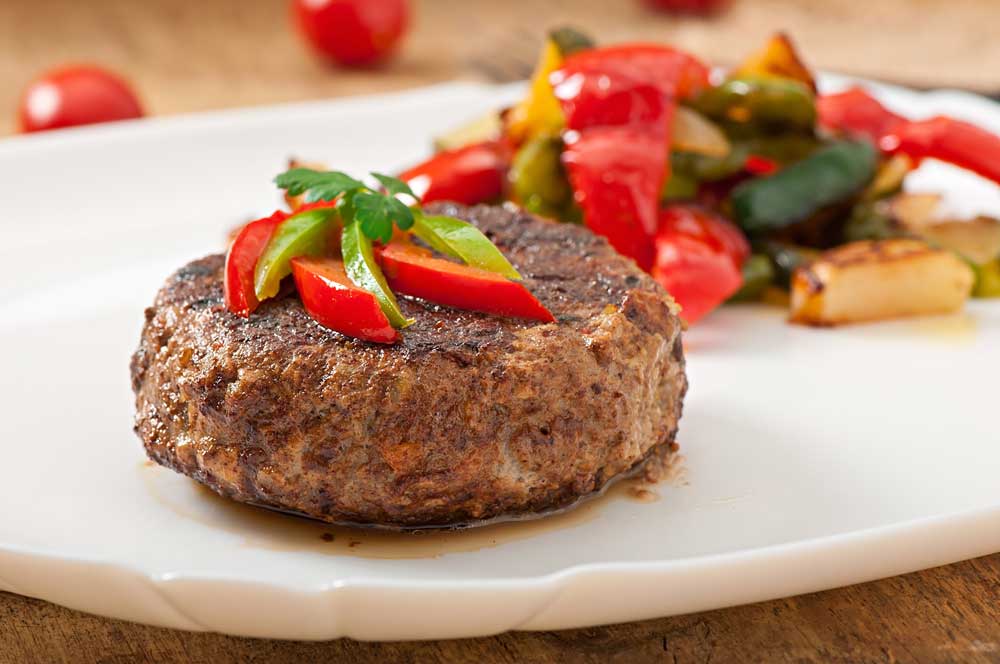
Poblano Burgers
Plan Z Phase: This is a Z2 (ZReduction) recipe. Poblanos are not hot peppers, and after you roast them they take on a smoky, mild pepper taste. Makes for a delicious burger!
Servings: Serves 4
Ingredients:
- 24-32 oz of ground sirloin (depends on how big you want your burgers)
- 2 poblano chiles, roasted*
- 1 – 2 tsp of cracked red pepper flakes (to taste)
- 2 tsp of ground cumin
Instructions:
Preheat oven to 375 degrees.
*First, roast your poblanos. Cut the tops off the peppers. Cut the green outside portions away from the seed pod and the veining. You’ll be left with the green outer portions of the large chilies. Cut those into narrow strips (1/4”). Spray a cookie sheet. Scatter them across the sheet and roast at 375 degrees for 15 – 20 minutes or until the pepper edges begin to brown. These are not hot peppers, and after you roast them they take on a smoky, mild pepper taste. Now dice them.
In a medium bowl add the ground meat, the diced poblanos and the other ingredients. Form into 4 equal patties, 6-8 oz each.
Grill to your liking and serve.
Want a peppery meal? Serve with grilled bell peppers.
The patties can be put in baggies and kept in the refrigerator or freezer until you want to grill them.
Grill burgers and these can be kept in baggies to take to work or put in the freezer for later retrieval. They reheat pretty well on the go.
Cheers,
Enjoy!

Zola’s Fresh and Golden Margarita
Plan Z Phase: This is a Z3.5 (ZReboot 3.5) recipe. Today is National Margarita Day and in true traditional for those of you in ZReboot 3.5 or ZLife here is Zola’s preferred blend.
Serving Size: Serves 6
Ingredients:
- 1-1/2 cups gold tequila
- 1/3 cup of Cointreau or Grand Marnier
- 3/4 cup fresh lime juice
- 1/3 cup of fresh squeezed orange juice
- 4 tsp of Truvia or better yet, use liquid stevia 16 – 20 drops.
- 8 cups crushed ice
- 2 tablespoons grated sea salt
- 6 lime wedges
Instructions:
Combine tequila, triple sec, lime juice, Orange Juice and stevia a in large pitcher; stir to dissolve dry Truvia or drop in the liquid version. Add crushed ice. Grate salt in a shallow bowl. Moisten rim of 6 Margarita glasses with lime wedge. Holding each glass upside down, dip rim into salt.
Pour Margarita into glasses and garnish with lime wedges.
Enjoy!
Cheers,
Shallot Onion Rings
Plan Z Phase: This is a Z2 (ZReduction) recipe. My husband loves these so much he asks for them probably 4 times a week and has even begun making them himself! They taste every bit as good as regular onion rings without the breading. There is another recipe for making these with regular onions but they shallots make the perfect ring and they cook up perfectly crispy.
Servings: Serves 2
Ingredients:
- 2 large shallots, peeled and cut thinly into rings (or as many as you want for a larger group)
- olive oil spray
- sea salt
Instructions:
Preheat oven to 400 degrees or 375 convection.
Spray a cookie sheet with olive oil spray. Spread your rings out across the cookie sheet. You need to spread them out so they all have a chance to brown.
Lightly spray the tops with olive oil spray and dust them with grated sea salt.
Bake in your oven for 12 – 15 minutes. Keep an eye on them. Toward the end they really start to brown up and some will even get a bit charred. That’s okay! Some of us love the darker ones!

Serving size…if you really go for it you can have up to one cup of these as your veggie portion. Truth be told we usually have a half veggie portion and then half onion rings. My husband is at goal so he has as many as he wants. Sometimes I just have one little bit and have my regular veggie portion too.
Enjoy!
Cheers,
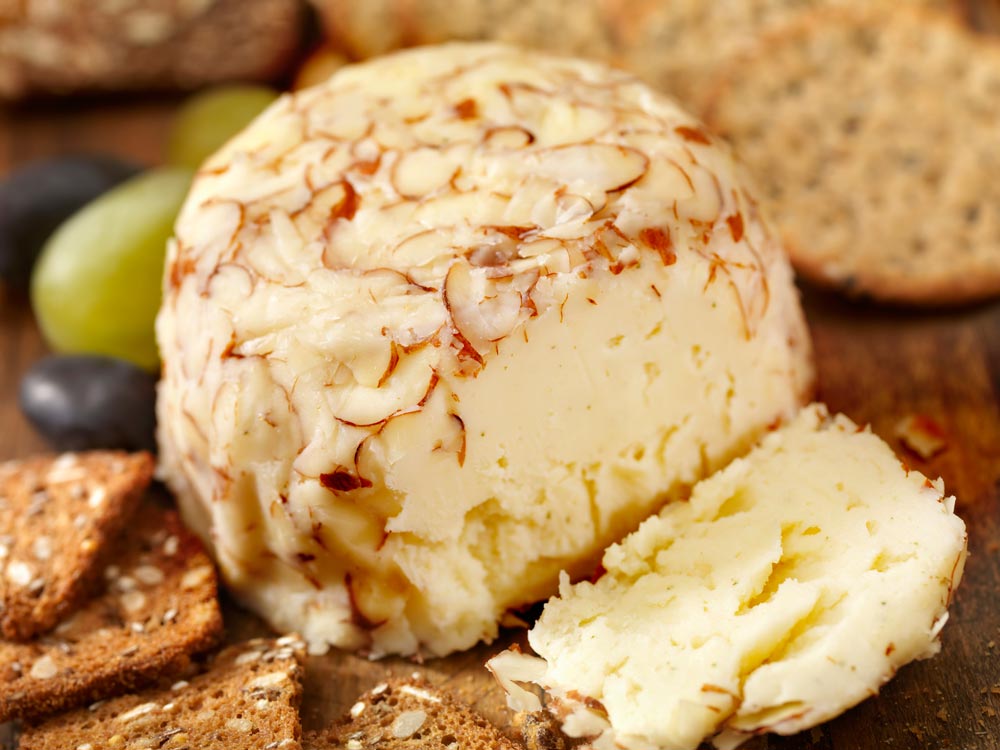
Cheese Ball
Plan Z Phase: This is a Z3 (ZReboot) recipe. Dieter Misty wrote to me asking for a cheese ball recipe. She was accustomed to making the one that uses the dry soup mix pouch. We checked the ingredient list of that pouch and gasped at all the garbage in the ingredient list. So I worked with Misty to come up with one that is all natural. REAL ingredients.
Ingredients:
- 8 oz of cream cheese, softened
- 2 cups of grated cheese (most folks use cheddar but you can use all kinds of flavors; pepper jack will make a spicy cheese ball)
- ¼ cup of dehydrated onions. You can buy them in the spice section. Or you could mince real Vidalia (mild) onion.
- ½ tsp of grated sea salt
- ¼ teaspoon of lemon pepper
- 1 tsp of onion powder
- 1/2 tsp of Truvia
- 1 cup of chopped nuts, optional
Instructions:
Add all ingredients to a medium sized bowl, mix thoroughly and form into a ball.
Optional: Many like to coat their cheese ball with chopped nuts. Pecans are the traditional favorite or chopped peanuts might be fun, too. If you want to do this just form your cheese ball and roll it in the chopped nuts.
You can use Triscuits or veggies. Celery sticks would be very easy and make perfect scoopers.
Enjoy!
Cheers,

Garlic-Mustard Beef Kebabs
Plan Z Phase: This is a Z2 (ZReduction) recipe. These are fun any time of year. I did them in the broiler so it’s even easy during the winter. Don’t forget to soak your kabob sticks for about 15 minutes in water. I forgot this time and you can see the charred results in the picture. It was fine but I did run the risk that the stick would crack and fall apart or even flame up so don’t skip the soaking part.
Servings: Serves 4
Ingredients:
- 24 oz of beef tenderloin cut into one inch cubes
For the glaze
- 1/3 cup of mustard use your favorite. The mildest would be Dijon. No sugar though.
- 4 tsp of minced garlic, jar garlic will work
- 2 Tbl of white wine vinegar
- 1 Tbl of Bragg’s aminos
- 1 tsp of dried thyme
- 2 tsp of paprika (I used smoked paprika)
- sea salt and pepper to taste
Instructions:
Put all of the glaze ingredients in a bowl, mix and set it aside to blend the flavors. Good idea to do this about an hour ahead of cooking time. You can just let it sit in the fridge.
Preheat Broiler
When you are ready to broil or grill, put the meat into the bowl with the glaze. Toss it around. Then thread it onto the soaked skewers. This is a bit messy but that’s part of the fun.
Place the prepared skewers on a sprayed cookie sheet. Put the sheet in the oven on a rack about 4” below the broiling element. Broil for 4 – 6 minutes for medium rare. These will NOT take long. The meat is lean and you are close to the element so unless you like your meat cooked more, keep an eye on them. You can turn them once if you want. I chose not to and they got nicely browned anyway.
Each dieter gets six ounces of beef kebabs.
Enjoy!
Cheers,

Broccoli Cheddar Soufflé
Plan Z Phase: This is a Z3 (ZReboot) recipe. This is a wonderful side dish, brunch dish or breakfast. It’s also a meatless meal for the vegetarian in your life. Light and fluffy.
Serving Size: Six servings as a side dish.
Ingredients:
- 3 cups of frozen broccoli bits, thawed (one bag)
- 1 Tbl of butter
- 2 Tbl of flour
- ½ tsp of grated sea salt
- ½ cup of cream
- ¼ cup of shredded cheddar cheese
- 4 eggs – separated
Instructions:
Preheat oven to 350 degrees
If you have an electric stand mixer you can start the egg portion of this recipe and then while the eggs are whipping, work on the broccoli. Otherwise do the broccoli first.
In the mixer bowl beat the egg yolks for about five minutes until thickened and lemon-colored. While these are beating you can start on the broccoli.
In a sauce pan add the broccoli and butter. Cook on medium heat until butter is melted. Add the flour and salt and stir. Gradually add the cream. Bring to a boil and cook for a further 2 minutes or until it begins to thicken. Remove from heat and add cheese. Stir to melt the cheese in. Add the broccoli mixture to the egg yolk mixture.
If you do not have a mixer. Add the egg whites to a small bowl and beet until they form stiff peaks. If you use a small bowl with high sides this goes faster.
Fold the egg whites into the broccoli cheese mixture. Do this slowly and carefully so the egg whites stay sort of fluffy. Pour into a non-greased baking dish. You can either use a soufflé pan if you have one or individual soufflé dishes. You can even use a 9 X 9 oven-proof dish if you wish.
Bake for 20-30 minutes. Check if it’s done by inserting a knife in the middle and if it comes out clean it’s finished. It will be a light golden brown on top. How long it takes to bake depends on which pan you use.
Enjoy!
Cheers,
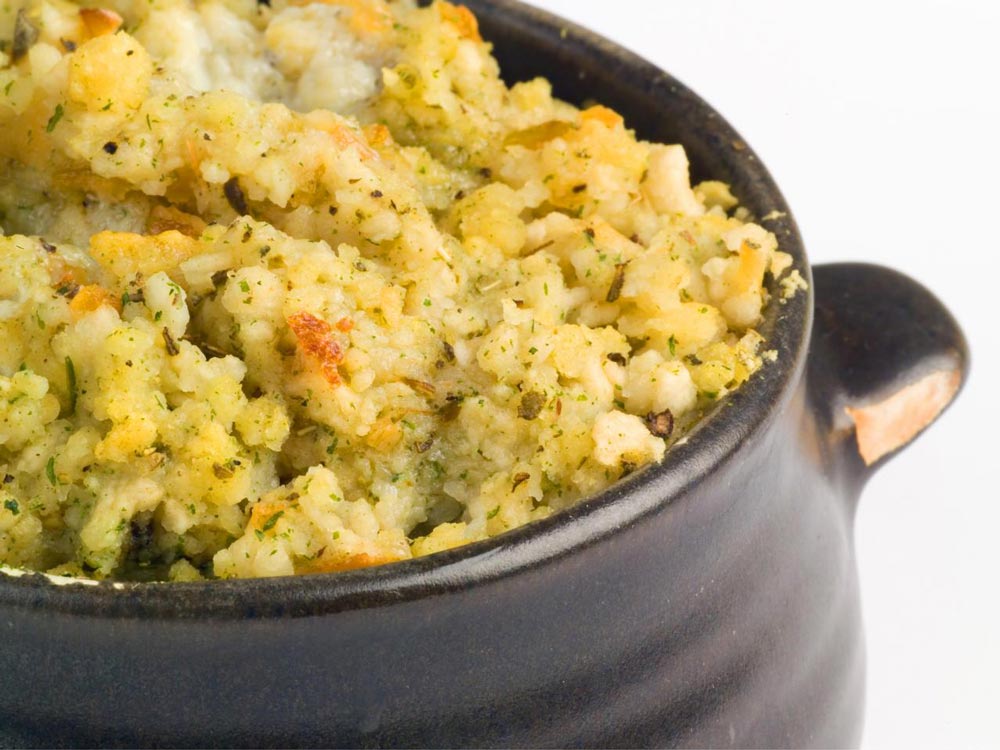
Turkey Day Leftover Casserole
Plan Z Phase: This is a Z3.5 (ZReboot 3.5) recipe. A great way to put those Thanksgiving leftovers to good use.
Servings: Serves 6 – 8
Ingredients:
- 1/2 green pepper, diced
- 1/2 red pepper, diced
- 1 bunch of green onions, diced including some of the green part.
- 15-oz can chopped tomatoes with chili pieces included or without chilies if you want a mild dish.
- 5 to 6 cups leftover turkey, this can be slices or chunks.
- 6 slices Swiss cheese
- 20 oz of organic cream of mushroom soup — you can use the fancy Portobello mushroom soup if you’d like; don’t use the cheap stuff like Campbell’s it’s full of preservatives
- 1/2 cup white wine or water if you don’t use alcohol.
Optional:
- If your family made stuffing you can add a light layer of stuffing on top. Take it easy and don’t eat any other bread with this meal.
- Cayenne pepper
Instructions:
Preheat your oven to 350 degrees.
Put your green peppers, red peppers and your onions into a 9" x 13" inch casserole dish. Pour on the tomatoes right from the can without draining them. Mix it into the peppers. Layer on your turkey. Place the Swiss cheese slices on top of the turkey.
In a bowl, stir together the wine and the mushroom soup. Then pour that over the turkey and cheese and around the casserole.
Lastly, layer on the stuffing. Take it easy. Just include enough for flavor, this is not a stuffing-heavy dish. Now sprinkle with cayenne to taste. A nice light dusting will be enough to give it some new zip and a little different flavor than it had on Thanksgiving Day.
Pop the casserole in your oven and bake at 350 degrees for an hour.
Serve in large, shallow bowls like a stew. If you’re hungry, a nice light salad on the side and a piece of bread to soak up the extra sauce should be plenty. Then on to leftover desserts!
Enjoy!
Cheers,
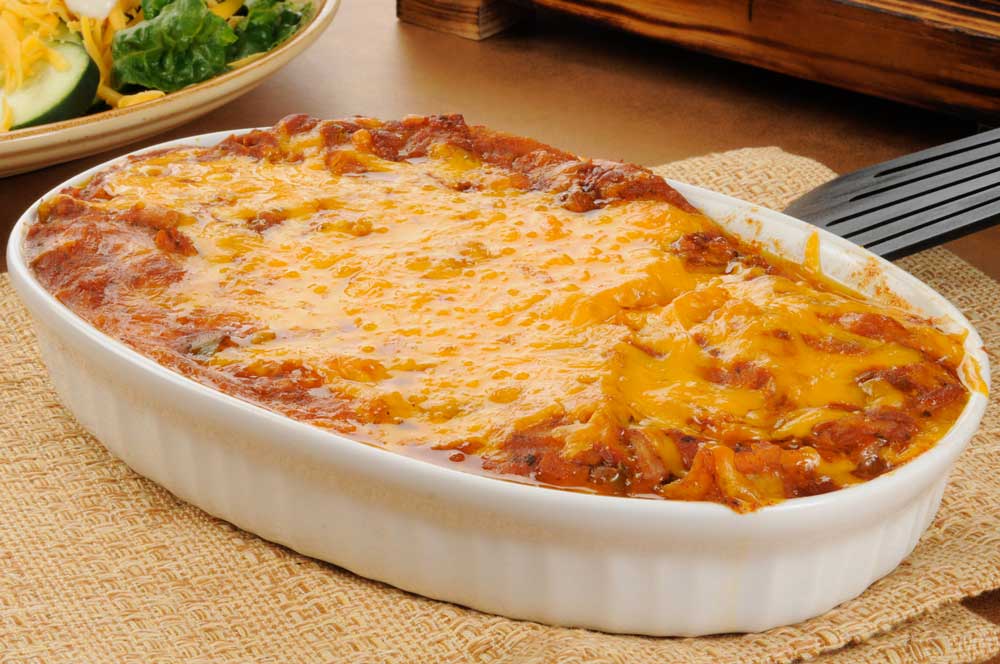
Taco Casserole
Plan Z Phase: This is a Z3.5 (ZReboot 3.5) recipe. This taco casserole uses just 2 small flour tortillas. That said, that’s 50 grams of carbs just from the tortillas. Divide that by six and it’s not so bad but this also has beans in it. So keep your portion small and see how the scale looks the next day. I ate this and got away unscathed, but for each of us it will be different.
This is a throw it together FAST meal for any weeknight. Depending on how many you have at the dinner table the leftovers reheat well and taste yummy even a couple of days later.
This is not a spicy dish but you can add hot sauce at the table for zing.
Servings: Serves 6
Ingredients:
- a 10 oz jar of enchilada sauce. I try to find an authentic one with nothing on the label I can’t pronounce and no sugar.
- 1-1/2 pounds of ground sirloin
- 1 tsp of garlic salt
- 1 tsp of onion powder
- 1 16 oz can of refried beans. Again, find the good, authentic ones.
- 2, 8” flour tortillas. Read the labels. I found some with only 25 grams of carbs. They rank all over the place. And you only need the small ones; not the burrito size.
- 2 - 3 cups of shredded Mexican cheese mixture
- Sour cream (optional)
Instructions:
Preheat oven to 375 degrees.
Take out your large sauté pan. Spray some olive oil. Add the ground sirloin and break it up as it cooks. Add the garlic salt and onion powder. Cook until no pink remains.
Take out a 9" x 9" ovenproof pan. Pour 2 Tbl of enchilada sauce in the bottom and spread it around. Then place in one of the tortillas to give it a bottom ‘crust’. Into the meat mixture add ½ of the remaining enchilada sauce and the refried beans. Mix them together but leave lumps so you can tell sections of beans and sections of meat. Transfer half of that to your 9" x 9" pan now. Sprinkle with half of the cheese. Place another tortilla on. Add the second half of the meat mixture. Sprinkle with the second half of the cheese. Then drizzle on the remaining enchilada sauce.
Bake at 375 degrees for 20 – 30 minutes til heated through. Let rest for 10 minutes before cutting. This gives the casserole time to firm up so it cuts more evenly but it also gives time so you don’t sear your mouth.
Serve with a dollop of cold sour cream. I love the hot casserole with the cold sour cream.
Enjoy!
Cheers,
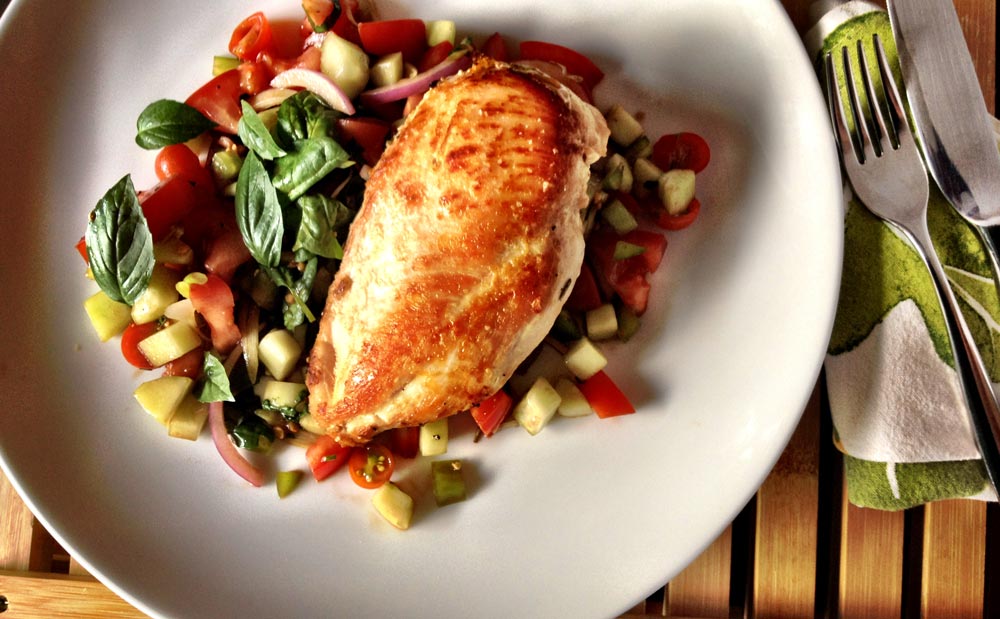
Summer Garden Bruschetta Salad with Chicken by Chef Josh
Plan Z Phase: This is a Z2 (ZReduction) recipe contributed by Chef Josh.
With gardens and farms in full swing here in the Midwest its very easy to find local produce at local stores and farmers markets. I’ve even embarked on my first patio garden, which consists of a few basil varieties, Tuscan kale, Cherokee Purple tomatoes, Sweet 100’s cherry tomatoes, as well as some baby lettuce, green beans, and broccoli rabe. While the harvests haven’t been huge, its been a learning adventure on how to grow and cultivate the land to produce great produce. It's a difficult task (especially on a patio), so hats off to you farmers and pro gardeners out there.
My Grandpa told me that during the summer months he and my Grandma basically live off of their garden and hardly ever feel the need to eat meat. My Grandpa is 86 and still cultivates a large enough crop for his wife of 53 years, their kids, and many of their grand-kids. In other words, he is a stud.
I call this salad my “bruschetta” salad because it reminds me of a tomato mixture I would create to top toasted bread as an appetizer at one of the first restaurants I worked in. You’ll recognize it, because its basically on every menu these days. So while “Bruschetta” actually means “grilled bread rubbed with garlic” here, in this recipe, it simply means “delicious tomato salad with balsamic.”
This recipe is a great one for the summer. You could grill the chicken if you’d like, and then it's simply chopping the rest of the ingredients and tossing them together with a touch of balsamic vinegar, salt and pepper. It would be equally delicious with salmon.
Servings: Serves 2
Ingredients:
- 2 skinless chicken breasts (6 oz each)
- 2 ripe Roma tomatoes, quartered and diced
- 1/2 of a cucumber, peeled, seeded and diced
- 1/2 of a green pepper, diced
- 1/4 of a small red onion, julienned
- 10-15 small basil leaves, torn
- 2 scallions (tops and bottoms), sliced on a bias thinly
- 1 cup of baby spinach (or more if you choose)
- 1 garlic clove, smashed
- 1/4 cup of chicken stock
- dried herbs like rosemary and basil for example
- salt and pepper
- 1 Tbl balsamic vinegar
- extra virgin olive oil spray
Instructions:
Preheat oven to 375 degrees.
For the Chicken:
Heat a pan, spray well with extra virgin olive oil spray (I use organic) and then sear with the chicken breast “skin side down.” This is easy to tell because one side is smooth, and the other is rough and also has the tenderloin attached to it. The smooth side is the one that had the skin on it. While it is searing season with salt and pepper, add some dried herbs like rosemary and basil, and let it cook on medium high until it is nice and brown. Flip the chicken, add the smashed garlic, and deglaze the pan with 1/4 cup chicken stock. (Deglaze for those who don't already know, is where you add a cold liquid to a hot pan to remove all the brown food residue stuck to the bottom of the pan to make a sauce.) Put the pan with the chicken in the oven for 15 minutes (make sure it is oven proof or transfer it to an oven proof dish).
For the Bruschetta Salad:
Simply toss the rest of the ingredients together with 2 squirts of extra virgin olive oil spray, and the balsamic vinegar. When the chicken is finished cooking you could add the roasted, smashed garlic to the salad as well. Season the salad with salt and pepper to taste, and serve next to your roasted chicken breasts! A serving size for Z2 (ZReduction) is one chicken breast, one cup of veggies and unlimited salad greens.
Enjoy!
Chef Josh
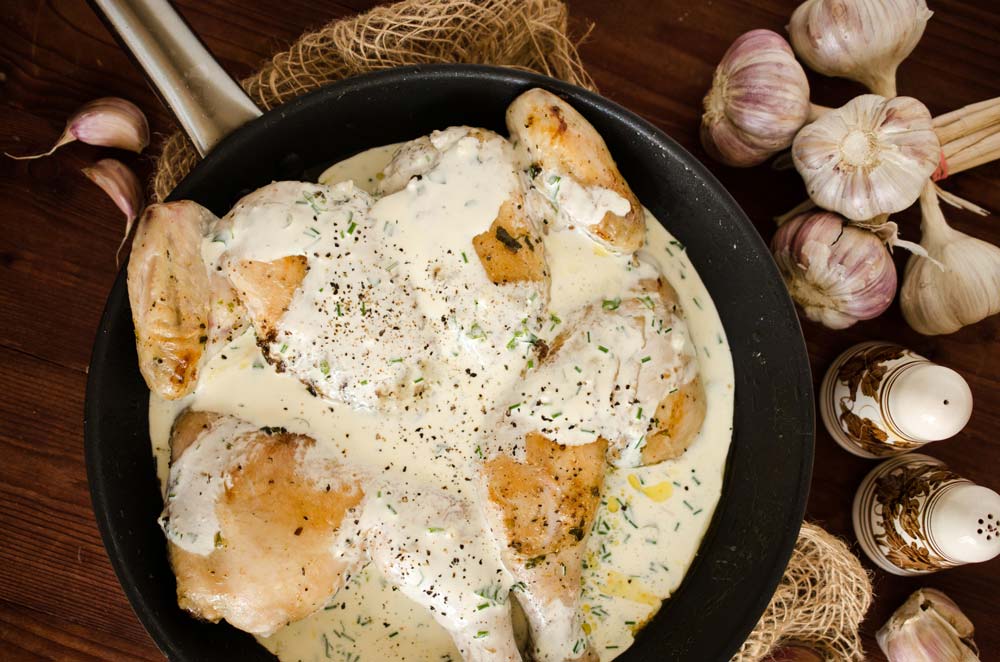
French Chicken with Lemon-Tarragon Cream Sauce
Plan Z Phase: This is a Z2 (ZReduction) recipe. For today’s recipe I am offering up a delightful chicken dish. It tastes very French. Anything with tarragon tastes French. This is super easy to make and dieters are enjoying it all over the country. We have thousands of Plan Z dieters in 39 states now. They are enjoying the meals, eating healthy and losing weight.
Servings: Serves 6
Ingredients:
- 6 skinless, boneless chicken breast pieces
- Sea salt and pepper to taste
- 1 cup of organic chicken broth or stock
- Juice of one lemon
- 1 cup of cream
- 3 Tbl of finely minced, fresh tarragon
Instructions:
Season chicken with salt and pepper. Spray large sauté pan with olive oil. Put the chicken in smooth side down. Sauté on medium high for 5 minutes until chicken has a nice, golden crust.
Place the chicken in an oven-proof pan and put in your oven to roast at 375 degrees for 30 minutes or until chicken has no more pink in the middle.
While the chicken roasts, make your sauce.
In a medium sauce pan add the chicken broth. Cook on a medium boil until the broth reduces in half. This makes the flavor richer. Add the lemon juice and the cream. Cook on low boil until the sauce begins to thicken. Don’t let it boil over. This process will likely take about 15 minutes. Hang around so you can keep an eye on it. The cream will thicken as the sauce cooks. Season with pepper if you want. When the sauce has thickened, add the tarragon and turn off the heat. Just let it sit until the chicken is done.
Serve the chicken with a drizzle of sauce over the top. Green beans and an optional salad will round this French meal out nicely.
Enjoy!
Cheers!
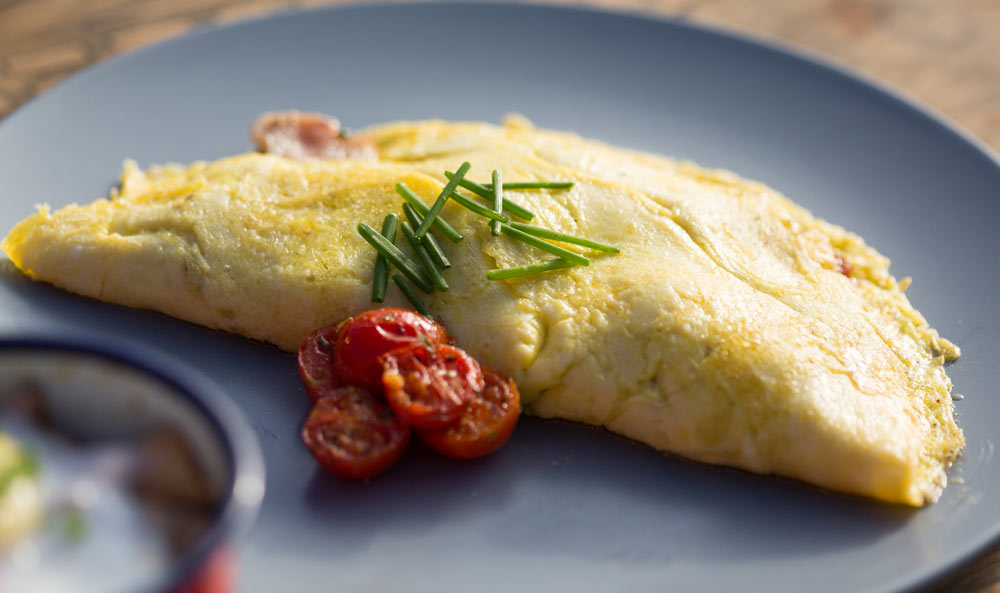
French Omelet
Plan Z Phase: This is a Z2 (ZReduction) recipe. This omelet taste very fresh and French. You can have this for a lunch or even a light dinner.
Servings: Serves 1.
Ingredients:
- 2 eggs
- 2 Tbl of minced shallot or mild onion
- 1 Tsp of minced, fresh tarragon
- ¼ cup of minced tomato
Instructions:
Requires a 6” or 7” Teflon- lined sauté pan.
Lightly spray the sauté pan. Begin heating on medium. Add shallots and tomatoes. Cook until loosened and warm. Remove them from the pan and set aside on a small plate.
Spray pan again.
Whiz eggs in a blender. I use a small “bullet” blender. I find that if the eggs have a lot of air in them the omelet will be lighter when finished.
Pour the eggs into the pan and cook on medium. The egg mixture will begin to thicken on the bottom. Should take a few minutes. Take a spatula and loosen the edges. Tip the pan so the runny part of the eggs still in the middle has a chance to run under the cooked part of the omelet. Do this in a few places to evenly distribute the runny part so it can continue to cook. Cook until the middle is almost totally set.
Then put in the tomato shallot mixture and sprinkle in the tarragon. Cook for a minute more and then gently fold over the omelet. If it cracks have no fear. That happens.
Let the omelet continue to cook until it’s to your liking. The French like their omelets a bit loose in the middle. I’m not a huge fan of so what I do is plate my omelet and put a pan cover over it to continue to steam the omelet a bit longer until moist in the middle but done all the way through. By doing this I don’t over-brown the omelet.
Serve with a fresh salad. You have not used up your total allotment of veggies so you can add a few more things to your salad until you have reached a full cup.
Enjoy!
Cheers,
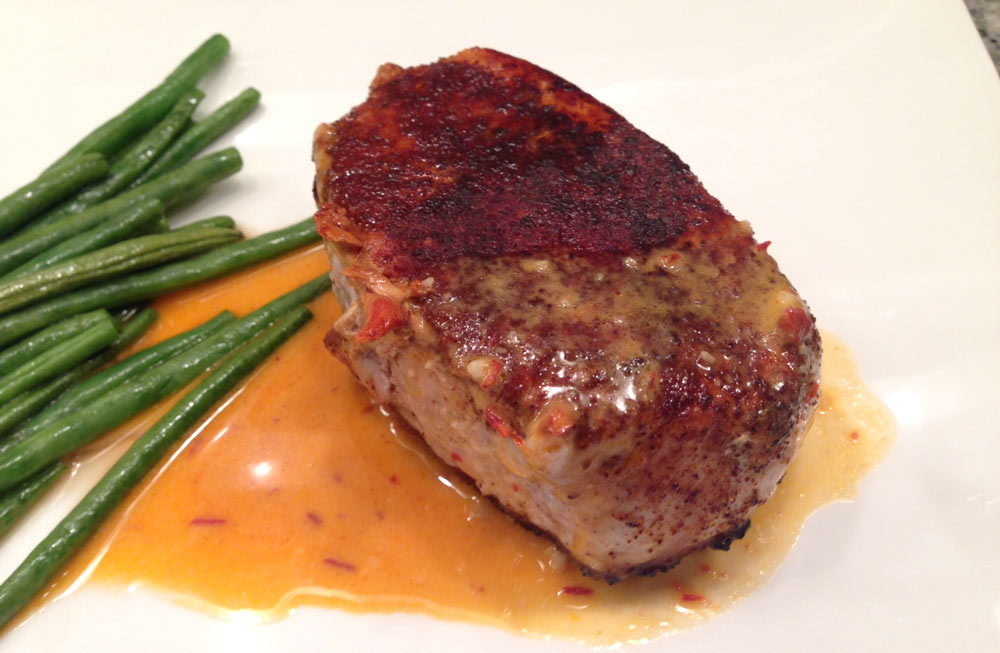
Chili Roasted Pork Loin Chops
Plan Z Phase: This is a Z2 (ZReduction) recipe. This southwestern dish will satisfy your cravings for a little bit of spice and a lot of flavor.
Servings: Serves 4
Ingredients:
- 4 pork loin chops
- 2 tsp of chili powder
- ½ tsp of ground cumin
- A generous pinch of cinnamon
- Olive oil spray
- Grated sea salt
Instructions:
Preheat your oven to 400 degrees.
In a small bowl mix the chili powder, cumin and cinnamon. Rub the mixture on top of your chops. Heat a cast iron pan. Lightly spray with olive oil and put the chops in plain side down.
Sear on medium high for 3 minutes. This gives that side a good crust.
Turn the chops over and put them in the oven. If you are not using cast iron you’ll have to transfer the chops into an ovenproof container. Roast the chops at 400 degrees for 20 minutes or until the measure 160 degrees with a meat thermometer. The rub will have penetrated the meat and you’ll have a satisfying meal. Serve with salad and veggie.
Enjoy!
Cheers,
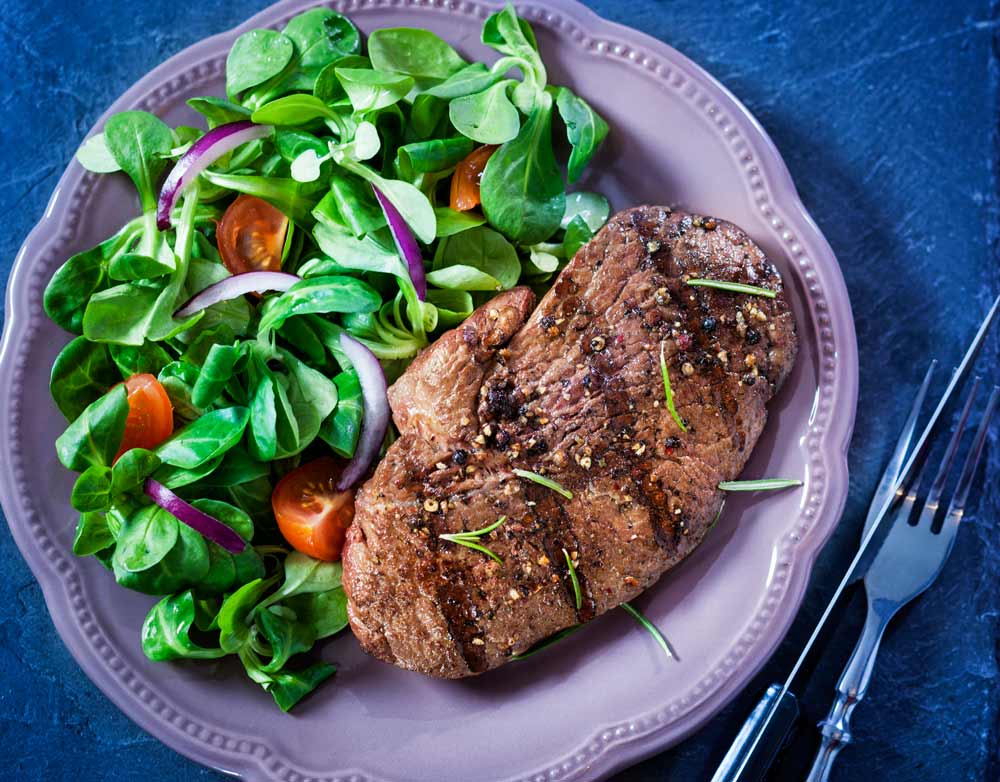
Spicy Steak Salad
Plan Z Phase: This is a Z2 (ZReduction) recipe. This is especially good on a hot night. One theory is the spicier the food you eat the better you’ll feel in hot weather. That’s why in India they eat such spicy food. This steak salad can be made extra spicy or just with a kick. This version has a kick but I give you instruction on how to crank up the heat if you like your food spicy.
Servings Size: Serves 2.
Ingredients:
For the Steak
- 2 six ounce tenderloin steaks*
- 1 cup of beef broth
- 3 cloves of garlic, minced, jar garlic will work
- 1 – 2 tsp of cayenne. The first time you make this I suggest you stick to one tsp and work your way hotter.
- your favorite burger rub (optional)
- ½ tsp of grated sea salt
- freshly ground black pepper
For the Salad
- leafy greens
- your favorite salad fixins
Instructions:
In a Ziploc baggie add the steak and other ingredients. Let marinate at least 2 hours. The longer it sits the stronger it will get. Don’t marinate overnight or it will turn the meat brown. Take steaks out of the bag and toss marinade.
Take out your grill pan or fire up the grill outside. Grill the steaks to your liking. I use a gauge of 7 minutes per inch of thickness for medium rare, grilled at medium-high. This is just a gauge. Your grill may vary.
While the grill is cooking the steak you can prep your salad and have it on the plate, ready to go.
Take the steak off the grill. Let it sit for 5 minutes so it re-absorbs the juices. Cut it on the bias into thin slices and put those over the salad. You can just drizzle the dressing around the side or leave it plain. The meat juices will give you some “dressing” to wet the salad. The zip in the steak will be mild.
Enjoy!
Cheers,
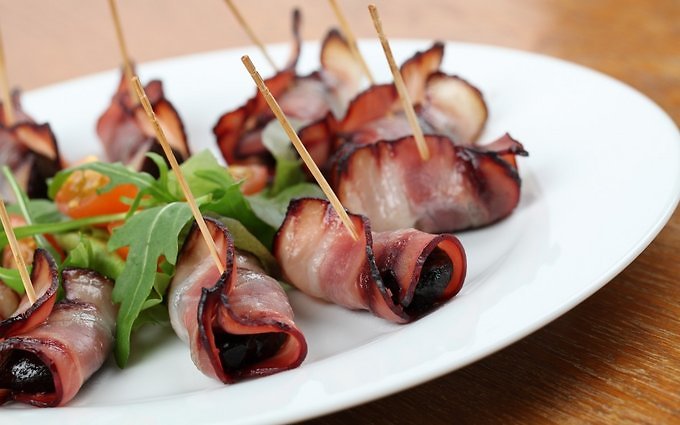
Bacon-Wrapped Prunes
Plan Z Phase: This is a Z3.5 (ZReboot 3.5) recipe. Okay, this sounds weird but they are really quite tasty. A bit of salt with your sweet. I tried two ways to cook them. Both worked. I’m also including a variable or two in case you want to get wild. Prunes are a higher carb fruit so eat sparingly.
Servings: 21 prunes, feeds approximately 10 people
Ingredients:
- 21 prunes (you can vary the number)
- 7 pieces of regular American bacon
- olive oil spray
Instructions:
Preheat oven to 400 degrees.
Most prunes come dried and in a bag now. The first thing you’ll need to do is “plump them back up.” This usually means covering them in water and boiling them for a few minutes until they soften up. You’ll do the same thing to prepare the prunes for this dish. If you want to get wild you can add some liqueur or wine to the water to infuse the prunes with extra flavor. After you cook the prunes, put them on a paper towel to drain. When they have drained you can proceed. One-third of a piece of bacon is enough to cover one prune all the way around. So if you cut your bacon strips into three segments, crosswise, you’ll have enough to wrap each prune. You want the bacon to overlap a bit. Place each wrapped prune on a baking sheet sprayed with oil. Make sure they are seam-side down.
Bake the prunes wrapped in bacon for 15 minutes at 400 degrees. Then open the oven and gently turn the prunes over so the other side can brown against the cookie sheet. The second side should only take about 5 – 7 minutes. You want the prunes baked to a brown crunchiness but not blackened. Let cool slightly and eat. An alternative method would be to fry them. You can use a sauté pan and spray it with oil. Brown the seam side first so it sticks together then gently turn so they brown all over. This method is a little greasier so I’d suggest you drain them on paper towels before you serve them.
I did find out that Devils on Horseback (a British recipe) is very much the same recipe. In that recipe, they stuff the prunes with chutney and serve on toast with watercress. I guess this is just a simpler version. Either way, they are great little tidbits!
Enjoy,
Cheers!
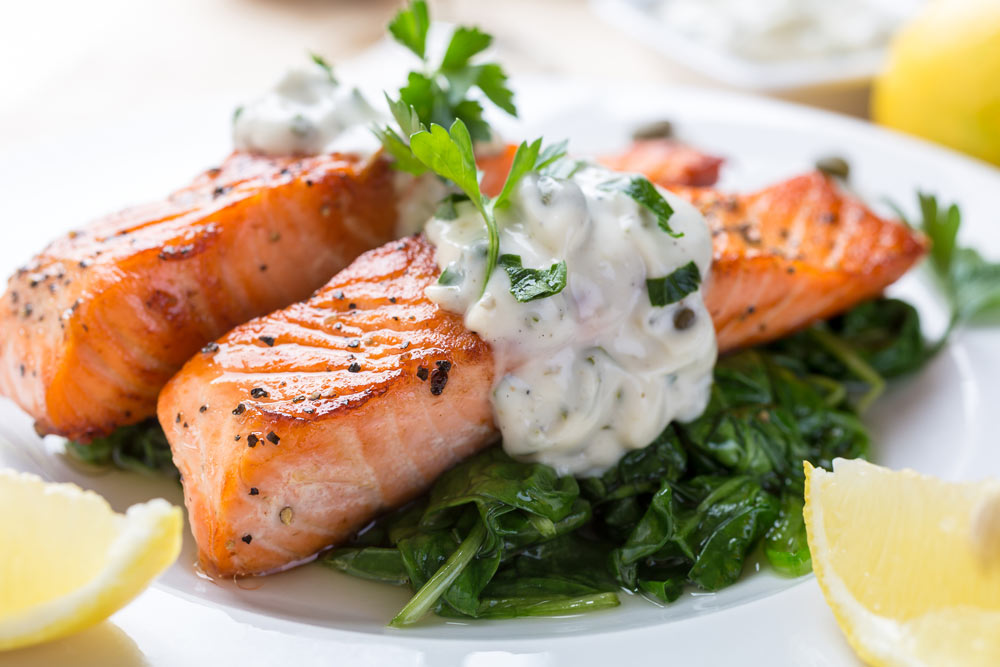
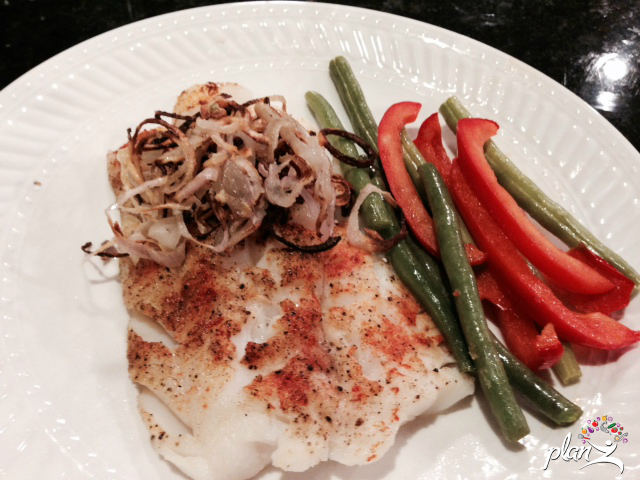
Cucumber Sauce for Grilled Fish
Plan Z Phase: This is a Z2 (ZReduction) recipe. This sauce is made in a French style. It’s a take-off of a classic cucumber sauce. You can serve this with grilled fish - hot or cold.
Servings: One serving is 2 Tbl
Ingredients:
- 1 peeled English cucumber cut into chunks
- 1 Tbl of green onions, chopped
- 1 tsp of dried dill or 1 Tbl of chopped fresh dill
- 3 tsp of lemon juice
- 1 – 2 tsp of prepared horseradish (not horseradish sauce and make sure it has no sugar).
- Sea salt to taste
Instructions:
Put all ingredients in a small food processor and blend until slightly chunky. You can make this as smooth as you want. I just like it to have a little depth to it.
Enjoy!
Cheers,

Just Like Strawberry Pie
Plan Z Phase: This is a Z2 (ZReduction) recipe. If you love strawberry pie, then this is your Z2 dessert. Just no crust, but maybe you won’t even miss it.
Servings: Serving size approximately 1/3 cup cooked. That’s because the strawberries will shrink some.
Ingredients:
- 16 oz of ripe strawberries, washed, stemmed and cut in halves or quarters. Cut the big ones into quarters.
- 3 Tbl of water
- 3 tsp of corn starch
Instructions:
Put the berry pieces in a medium sauce pan. Add just enough water to wet the bottom of the pan so the strawberries don’t stick. Heat on medium high. When the berries are warm take the corn starch in a little bowl and add one Tbl of water to it. Mix with a spoon to get it saucy. Add that to the cooking berries. It will thicken up pretty quickly. I smoosh a couple of the berries so they dissolve into the pink sauce. I try to leave many of the berries intact so they have some stability to the dish. If you keep cooking it you’ll end up with strawberry mush but that still tastes good, too.
Enjoy!
Cheers,