
It's a New Year. Don't Be Fooled.
I don’t want to go all “Debbie Downer” on you at the beginning of a New Year but I thought a good theme to start 2023 would be to talk about not getting manipulated in the grocery store. Plan Z Dieters know to read labels and avoid the middle aisles of the grocery store. But the temptations don't stop there. In fact, they start the minute you walk in the door.
It’s a game folks, and “they” are winning.
Who is “they”? “They” are the grocery chains and the massive food manufacturers, and I was once on their team.
In my early 20’s I worked for Quaker Oats in the Marketing Department. I loved it. I was involved with Aunt Jemima products including the pancake mixes and syrup. We also oversaw the cookie mixes and all the boxed mixes for things like cornbread or grits in a bag. Down the hall were the folks in charge of Life Cereal.
Further down the hall were the folks in the Sales and Distribution unit. Our department developed the marketing campaigns and the commercials. Their job was to ensure the product had the best advantage in the store so it would be grabbed from the shelf, put in the cart and taken home to be consumed.
The Sales and Distribution unit spent considerable time negotiating shelf positioning for the products. They talked end caps and shelf talkers. They had a language all their own. Shelf positioning is a huge game of trading favors and discounts to get your product where “they” want it. The food manufacturer wants to sell their product. The grocery store wants the biggest margins they can get.
If you venture into the aisles when you go into a grocery store, keep in mind that the items positioned at eye level are always going to be the most expensive. The items at the bottom are most likely to be the cheapest. The top shelf is a crap shoot. No one wants the top shelf or the bottom, so they do deals to get to be in the middle.
End caps are another story. The end caps are positioned as you turn the corner in any aisle. They always make those positions look like they are great deals when they probably aren’t. They also give them themes. Maybe you weren’t planning to make Valentine’s Day cookies. They put a few great cookie mixes up there along with the canned frosting. Now it looks tempting to take those things home and make cookies with your kids or grandkids. They make cookie baking sound easy and fun. Grandparents get sucked in every time. They plaster red cardboard hearts across the display and tug at your heartstrings. That’s manipulation.
Shelf talkers might as well be called shelf stalkers. They scream at you to take notice and “buy me”. We always think the pricing on those things is to our advantage. Sometimes it’s not.
Here is a tip for grocery shopping with children. That special cereal with the big marketing campaigns (read: commercials) will be right in line with your child’s arm height and length. They know kids lunge for things they see on TV. That’s manipulation.
Mostly I spend time telling people to stay out of the aisles almost altogether. For today I decided to just start with this and let you absorb the information. I have also shared advice on how to buy sparkling water or spaghetti sauce,
We all go innocently into the grocery store to buy food. Since it’s such an important part of our lives, we believe the grocery store will be a safe place filled with the smell of baking bread. How can anyone be so mean as to manipulate us when our health and our food consumption are at stake? Believe me when I tell you they didn’t start baking that bread inside the store for nothing. That smell of bread sells more bread. And the milk and the eggs are in the BACK of the store for a reason. They want you to pass through the bakery to get there. Those donuts will taste mighty fine with that glass of milk. Don’t let “them” fool you.
Happy New Year! May 2023 be one of hope, peace and health for all.
Cheers!

A Holiday Chat with Zola
We sat down recently to chat with Zola and learned all “merry” of things holiday-related:
Do you go “all-out” with your holiday decorating?
I used to. Now I do what I call “holiday lite.” This year I decorated the balcony with two lighted trees and another planter with sticks and greenery. Out by our front door is greenery with sparkly sticks in it. Two reindeer and a door knocker that is silver and white with birds and holly.
Favorite Family Recipe?
My new favorite recipe is Lemon Brownies. I designed the recipe for Thanksgiving instead of serving pie. We loved it.
Your favorite Christmas moment?
I love the morning of Christmas Eve. That’s when I get to just chill with a warm beverage and sit in front of my tree and just take it all in. I look at the gift wrapping I’ve done, admire the decorations. It’s my “me” time at Christmas. A cup of low carb hot chocolate doesn’t hurt either.
What do you do for gift wrapping?
That’s one thing I still go all out on. Each year my gifts have a theme color. This year is silver, black and white. I wrap all gifts so they match/coordinate and then I go nuts on the bows. My husband wraps my gifts and turns them over to me for to do the bows.
Your favorite Christmas food?
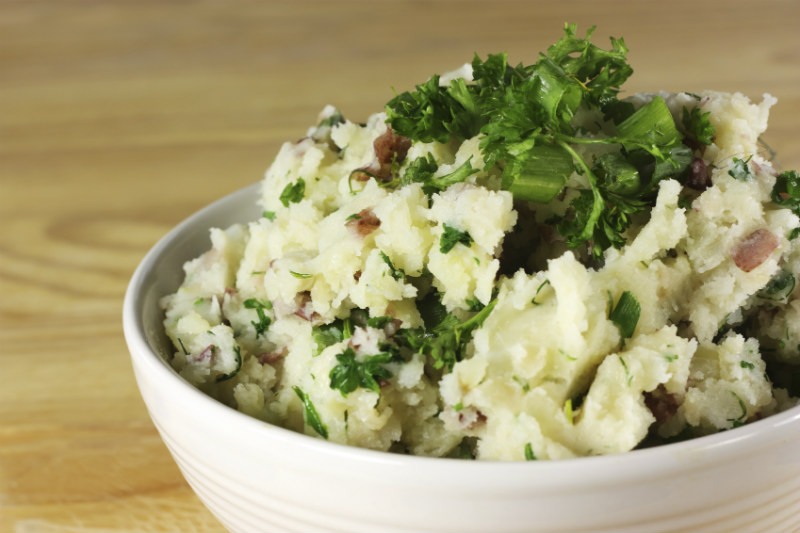
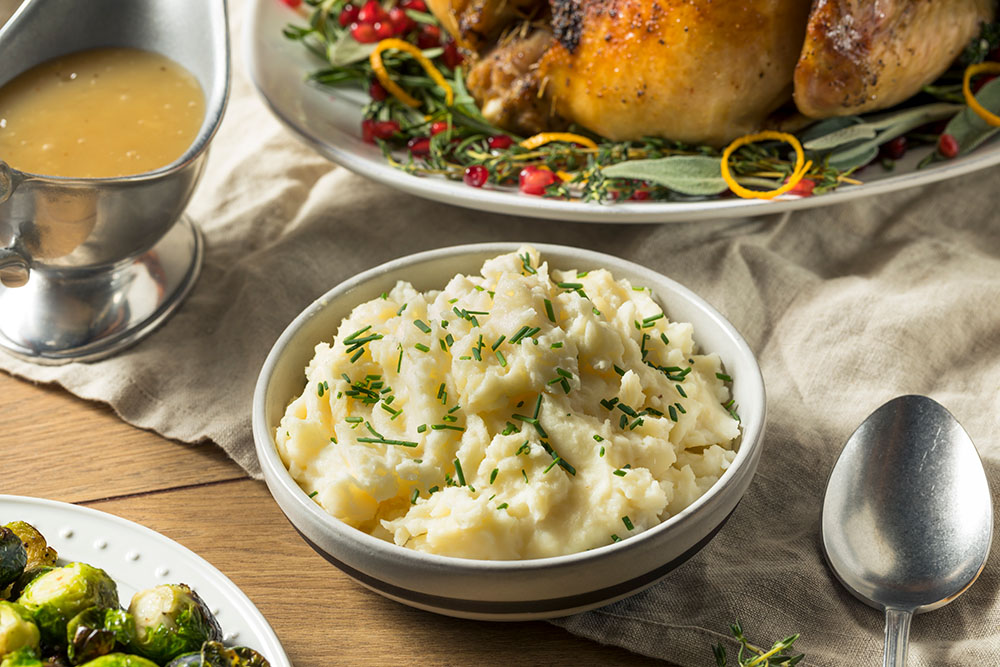
I still look forward to mashed potatoes. This is one of the few times a year I eat an adult-sized portion. So carb-laden! But now I don’t feel guilty when I load them with butter and cream. I hear sour cream is a great addition, too. And caramelized leeks! BIG YUM! If you make this recipe the day before and chill it overnight the potatoes become carb resistant. You can heat them up and eat them guilt-free.
What’s always in your refrigerator/freezer?
Butter, various mustards for my husband, whipping cream, and a variety of bottles of vinegar are always in my fridge. Never know when you might have to whip up a dressing! And in my freezer, you’ll always find frozen raspberries. My husband is NUTS for the raspberry ice cream recipe. He even eats it when we are in ZReboot!
Do you make Christmas Cookies?
I have. It’s not a thing that was a must in my family though. We used to make chocolate peanut clusters when we were kids, and we’d keep them chilled in the attic behind my parents’ bedroom. My little brother and I would sneak in the attic for an extra treat. I also liked them cuz when I was a tiny child and had no cooking skills, I could still “help” make them (my siblings just handed me a wooden spoon to hold and I thought I was helping).
Favorite Guilty TV Watching:
Right now I am kinda into watching Jeopardy. I can do that and make dinner at the same time. My husband and I compete for who can blurt out the answer faster.
If I had an extra hour in my day today, I would:
Go to the zoo. Even in winter, I love to stroll through the zoo. This year they are having an Asian Lantern Parade. I am also looking into going to see a light display put on by the city/power company.
My secret cleaning weapon:
Windex. I love a shiny surface.
I love to shop for:
You are asking the wrong woman. I am not a shopper – that is except for food. I take an hour in the afternoon and shop for dinner. The French do that. They shop day-of. Who knows what they want for dinner before 3 pm? Not me! I know, I’m spoiled.
Household chore I actually like:
Cooking. Go figure!
I also don’t mind cleaning. I get a great feeling of satisfaction from that. I love a spotless kitchen. My husband cleans the floors and I love him for that. I hate ironing though.
Signature dish:
I don’t have one. I rarely cook the same thing twice. Hence the development of over 1000 recipes for Plan Z! My husband will ask for a few repeats here and there but strangely enough, I cook a new meal probably over 150 times a year. That’s not normal behavior. I know.
Favorite holiday movie?
My favorite holiday movie is actually one that is a tad on the adult side. You would not want to watch it with the little kiddies. It’s “Love Actually.” That scene with Hugh Grant dancing gets me every time. I actually ran into Hugh Grant once. Really! Literally! We were visiting London and went to a play. During intermission, I decided to go to the ladies’ room. I had to part a big, velvet curtain to get into the hallway. As I stepped out Hugh Grant came running in and smacked right into me. “So sorry” came out of both of us and that was it.
When I got back from the ladies’ room I spied him in the crowd sitting about 4 rows in front of us. He was sitting next to his lady-friend at the time, Elizabeth Hurley – the model. The odd thing is she was sitting in the theatre in a grey sweatsuit! A bit casual for legitimate theatre, I’d say.
The movie is heartwarming and my husband and I watch it every year. There are few spicy scenes in it though, and I think it has a grown-up rating.
If you want to know what I watch with the kiddies it’s “Home Alone.” The paint can in the head just kills me – and almost kills the burglar. I love to listen to my husband laugh at scenes he’s literally seen dozens of times.
Favorite Christmas Song
This one brings tears to my eyes and fond memories every time.
Bing Crosby singing White Christmas is the tune. It HAS to be the Bing version, though. Do you remember that part of the song where Bing whistles? Well, my dad could whistle that part perfectly and always did it in perfect pitch. I was so impressed as a little kid.
https://youtu.be/GJ36gbGlm8Y
Second place would be Feliz Navidad. That’s cuz I took Spanish, can sing the words, and actually know what they mean!
Sloppy Joes
Plan Z Phase: This is a Z2 (ZReduction) recipe.
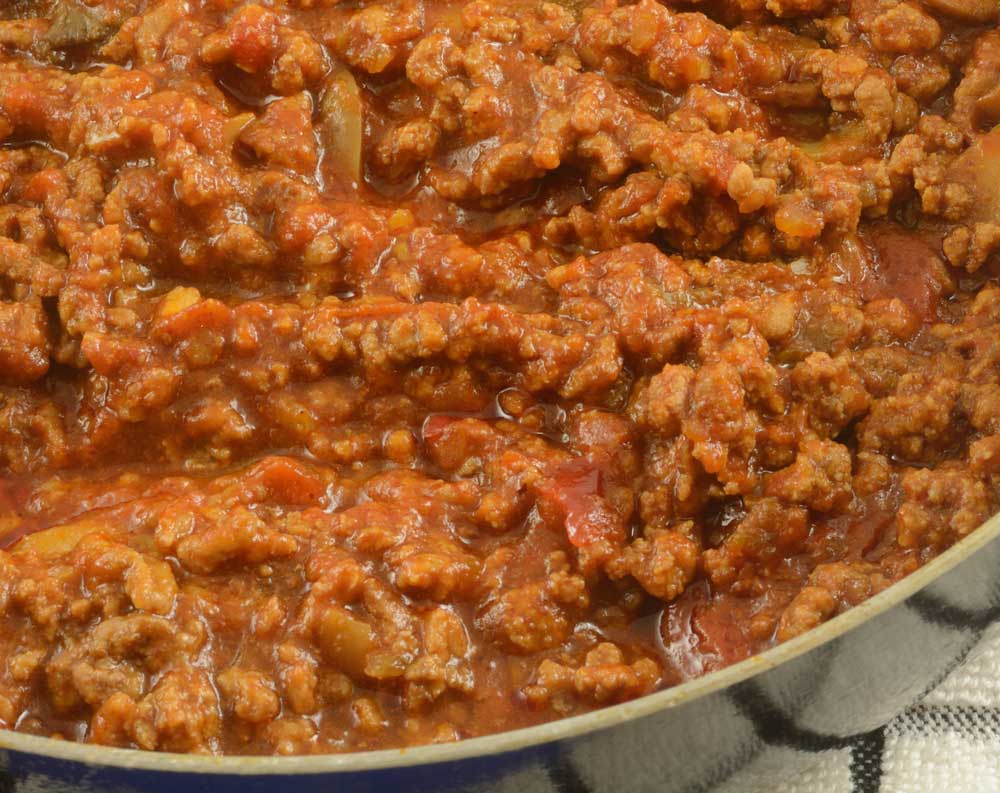
This recipe is a Zolafied version of Crockett’s Public House Sloppy Joe recipe. Dieter Ian saw this on the TV show Diners, Drive-Ins and Dives and brought it to my attention. You could call this the “adult version” of Sloppy Joes. It does have some ZIP to it. You could leave out the jalapeno and the cayenne if you want it to taste more like the Manwich in the can. Don’t be intimidated by the length of the ingredients list. The recipe is worth it. And you probably have most of these ingredients in your pantry.
Of course, in ZReduction you will eat this with salad greens instead of with a bun.
Servings: Serves 3 – 5 depending on how hungry you are. One cup is about 4 ounces of protein. You can have up to 8 ounces total.
Ingredients:
- olive oil spray
- 1 cup of diced red onion
- 1 cup of diced red bell pepper
- ¼ tsp of minced jalapeno pepper. Or to taste. (I use a grater to do this)
- 16 ounces ground sirloin
- 1 Tbl minced garlic (jar garlic will work)
- 1 cup tomato sauce
- 3 ounces tomato paste (that’s half of the small can. Save the rest for another dish)
- 2 Tbl red wine vinegar
- 2 Tbl Worcestershire sauce
- 2 tsp of granulated Truvia
- 1-1/2 tsp paprika
- 1-1/2 tsp grated sea salt salt
- 1-1/2 tsp fresh ground black pepper
- 1/2 tsp cayenne pepper (optional)
- 1/2 tsp ground cumin
- 1/2 tsp dry mustard
Instructions:
Spray your medium-large saucepan with olive oil. Over medium heat sauté the red onions, bell peppers, and jalapenos in the olive oil. Cook until softened (about 3 – 5 minutes). Add the ground sirloin. Cook through, breaking the meat into small chunks as it browns. Add the garlic and cook for 2 minutes. Make sure meat has no pink left.
Add the tomato sauce, tomato paste, vinegar, Worcestershire, Truvia, paprika, salt, black pepper, cayenne, cumin, and mustard. Reduce the heat and simmer until the sauce thickens about 15 minutes.
Serve with your favorite ZReduction salad. There are not many veggies per portion in this dish so you should be able to have close to a full serving of your vegetable without worry.
Enjoy!
Cheers,
Air Fryer Green Beans
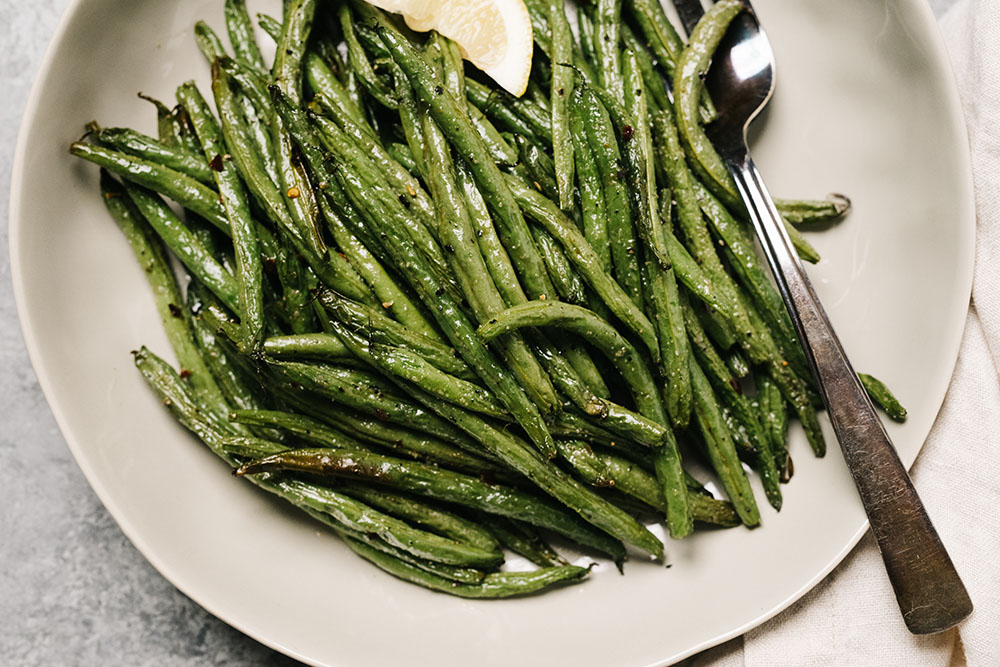
Plan Z Phase: This is a Z2 (ZReduction) recipe. Dieter Debbie has mastered air fried veggies on ZReduction, and shared this with the Plan Z Facebook group. It's simple, and delicious and can be ready in a jiffy. We're posting it here for everyone to enjoy. Thank you, Debbie!
Servings: Serves 2
Ingredients:
- About 1 lb of fresh green beans, but you don't have to be that technical. You can use approx 1 handful (or 8 oz) per person. Since this recipe is for two people, I'm using about 1 lb of green beans, or 2 generous handfuls.
- 1/2 tsp sea salt
- 1/4 tsp freshly ground black pepper
- 1/2 tsp garlic powder (if you want a stronger garlic flavor, use 1 tsp garlic powder)
- olive oil spray
Instructions:
Wash and trim your green beans. Put them in a large bowl and toss them with sea salt, pepper and garlic powder. Then lay them in your air fryer basket (or on an air fryer tray) and spray them with olive oil. If you don't have olive oil spray, just add a little oil in the bowl when you're tossing them in seasonings.
At this point, they should look slightly shimmery from the olive oil spray. That's a good thing. You don't want them to be too dry.
Stick them in the air fryer and air fry at 350° for 8-10 minutes.
After they've been cooking for 5 minutes, stir them around and check for doneness.
If you like your green beans crisp-tender, cook 2-3 minutes more. If you like them softer, cook for another 5 minutes.
Enjoy!
Dieter Debbie
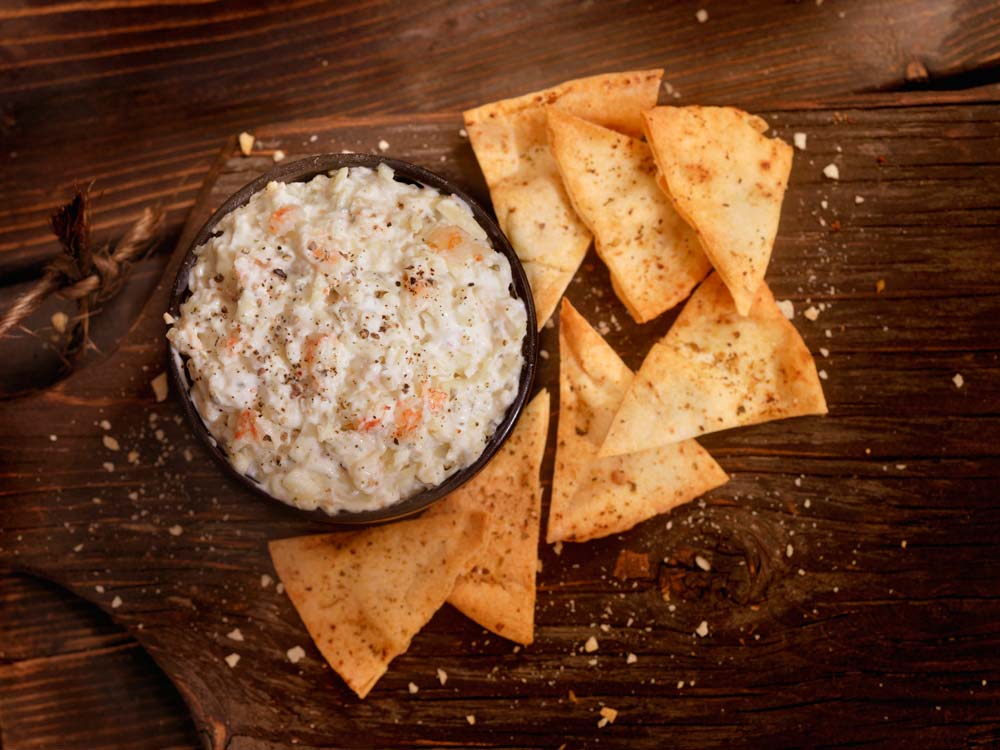
Fireside Shrimp Dip
Plan Z Phase: This is a Z3 (ZReboot) recipe. I found a recipe very similar to this one about 15 years in an old Southern cookbook. I have made a few changes to “Zola-fy” it. This goes over BIG at any party and it's so simple!
Ingredients:
- ½ pound of cheddar cheese (I use sharp cheddar but you can use any cheddar or even one like pepper jack for spicier version)
- 1 can of baby shrimp (4-1/2 oz)
- 1 small onion, minced (about a cup or a bit less)
- 1 cup of mayonnaise
- 1 Tbl of Worcestershire sauce
- pepper to taste
Instructions:
Grate your cheese. I use the larger holes in the grater so I get ribbons of cheese. Put those in a medium bowl. Open your shrimp. Put them in a colander and rinse them well. I get all the fishy smell off and shake off the excess water. Put those in the bowl.
Add the onion, mayo and the Worcestershire sauce along with a nice grate of pepper. Stir it all together.
Serve with crackers and/or celery sticks.
When you take your portion you can put a mound of this on your plate and re-use your cracker so you don’t consume too many carbs. Or just pile it on celery and crunch away.
This dish does well made ahead. Then take it out and put it in a pretty bowl to serve. It usually doesn’t last long once people dig into it. It can also be made a day ahead. The flavors continue to blend the longer it sits before serving.
Enjoy!
Cheers,
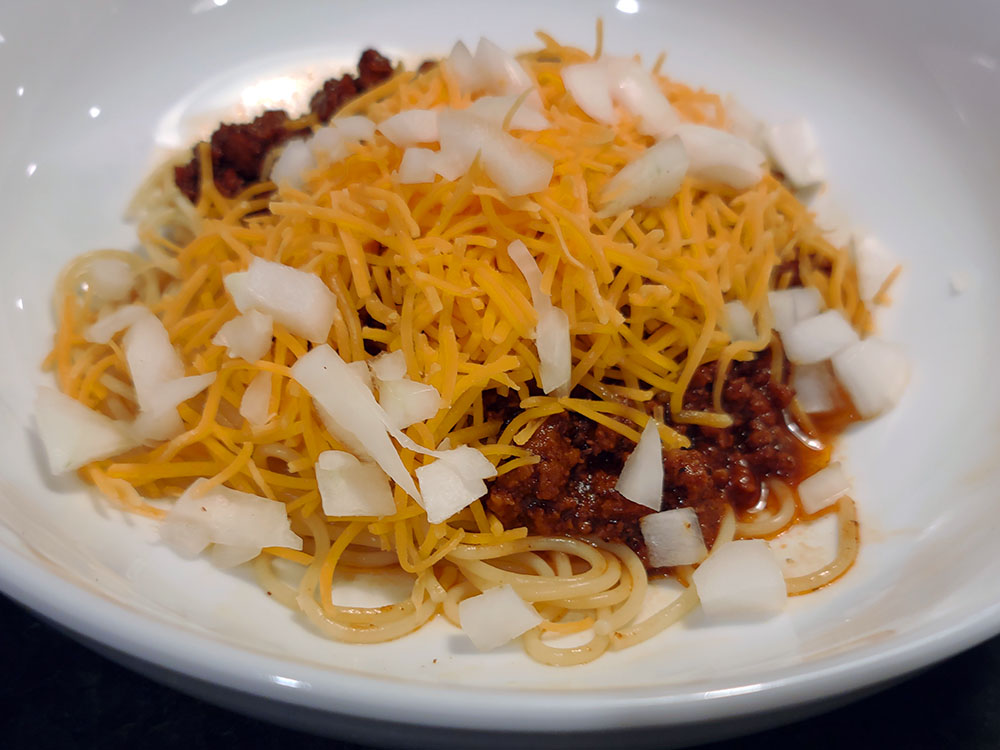
Cincinnati Chili (EASY)
Plan Z Phase: This is a Z3.5 (ZReboot3.5) recipe with the spaghetti but Z3 Reboot recipe without the spaghetti.
This is a famous chili that probably should not even be called a chili. It was invented by two brothers who emigrated from Europe in the 1920’s. Of course, they lived in Cincinnati. When finished this will look sort of like chili but it’s served on spaghetti. There are no beans and it’s not spicy. It’s flavorful for sure, but not “hot.” Don’t let the list of ingredients throw you off. This is simple to make.
Servings: Serves 3. This recipe can be doubled easily. If you double it, it will take about twice as long to cook down to the perfect sauciness.
Ingredients:
- 1 Tbl olive oil
- 1 lb ground beef (you choose how lean)
- 3 oz of canned tomato paste (1/2 of a small can)
- 3 tsp of minced garlic (jar garlic will work)
- 1 cup of diced yellow onion plus more for the garnish
- 2 Tbl chili powder
- 1 tsp ground cumin
- ½ tsp ground cinnamon
- A whisper of cayenne pepper
- 1/8 tsp ground cloves
- 1 tsp ground black pepper
- 1 teaspoon white sugar (or sugar substitute)
- 1 tsp of grated sea salt
- 2 tablespoons vinegar. I used champagne vinegar. Apple cider vinegar will work too.
- 1 teaspoon Worcestershire sauce
- 3 cups water
Instructions:
This is super-easy to make. You basically put all ingredients in a pot and let it cook down. Put the oil in a small soup pot. Add the ground beef. Begin cooking it at the same time you continually chop it up. You want this to be diced meat; not big chunks. Part of the secret of this is a smoother “sauce.” When it’s almost browned add the tomato paste and get it all broken up so it is incorporated into the meat mixture. Now you can add all the rest of the ingredients. Bring it to a boil. Let it bubble a minute. Then turn it down to medium-low and let it cook down. Stir every few minutes to make sure nothing sticks to the bottom but you don’t really have to “baby-sit” it. This will take 30-45 minutes. While this is cooking, make your pasta.
When it’s done it will be saucy rather than thick like most chili. The idea is to have some sauce floating on the bottom of the pan so your pasta gets coated.
To Serve:
You serve this in a bowl with a fork. You cut up your spaghetti with the fork as you eat it and scoop the meat.
3 cups of cooked spaghetti. I use angel hair or thin spaghetti. It makes me feel like I got more noodles than I really did.
1 tablespoon diced onion, or to taste
A handful of grated Cheddar cheese, or to taste
The pasta will be on the bottom of the bowl. Then ladle on your chili. Top it with grated cheddar and chopped onion.
Enjoy!
Cheers,
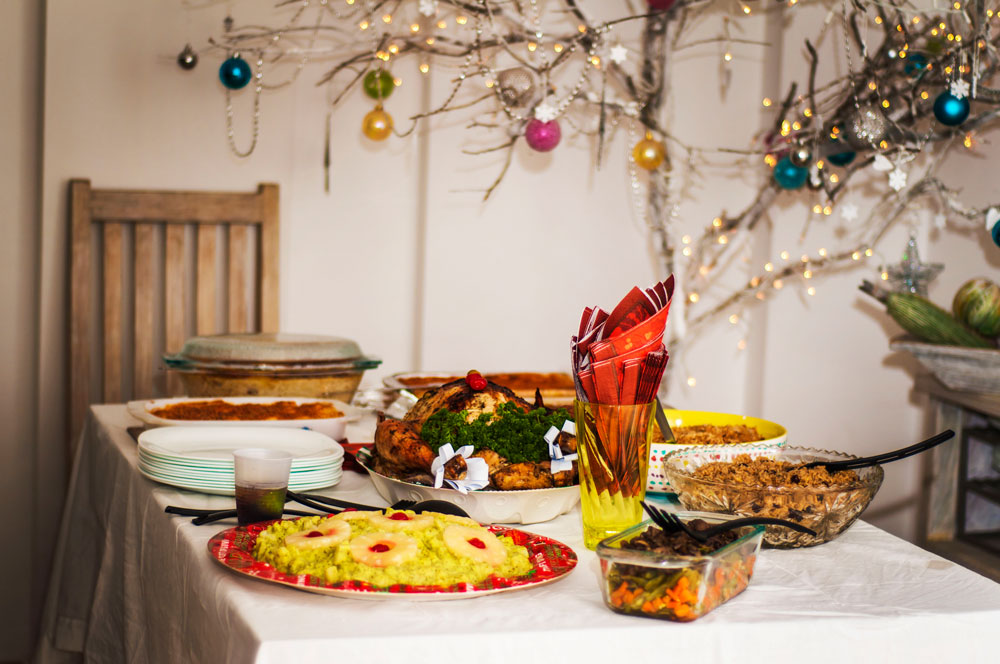
Potluck with Purpose
Years ago, I got turned off by potlucks. The ones I attended didn’t work very well. No one did anything to organize what people brought so when you got your food and sat down to eat, nothing was coordinated. The food didn’t taste as good as it could because so many things were competing for your taste buds’ attention. It made me sad. People worked so hard on their dishes.
The other thing that happened was there was no balance. One time there’d be way too many desserts, only one or two sides, and maybe even no entrée. Or there’d be three vegetable trays with a dip that clearly all came from the same deli counter. So much food got wasted that way.
One year I decided that I was going to need some help in putting on a dinner party, so I asked people to bring a dish. I asked them to bring a dish that had a family history. It should be something their family made during the holidays that had a story to go with it.
I asked them to let me know what they were bringing so I could make sure we had a balanced buffet and see if I needed to make anything to round out the offerings.
This turned out to be a great idea for a few reasons.
Under the balance category, I had no fewer than three people tell me they wanted to bring mac and cheese. Well, if I had not asked that I would have had a buffet FULL of mac and cheese and not much else. So the first person to offer it up was given that deed and the others were asked to come up with Plan B. That was easy.
A couple of people brought desserts. A couple brought appetizers and the others brought side dishes. I was able to make just a couple of things to make sure the vegetarians and vegans in the crowd had enough to eat. I also provided shaved rare roast beef and turkey from the deli so everyone got a protein option. They could go low carb with it or I provided little buns and toppings so they could make sliders. That turned out to be the entrée. We had plenty of food but not massive amounts of anything that had to go to waste.
Before I served dinner, I gathered everyone around the buffet. This was my favorite part. I asked each person in turn to tell the story of what they brought. This got everyone to speak up and participate but it was the stories that were so grand. Each person had a funny or touching story to tell. Everyone in the room got to know a little bit about the family histories of those gathered and it kicked off dinner with a delightful opening.
I thought the hints in here might give you some direction for your next potluck, especially during the holiday season.
Cheers,
![]()
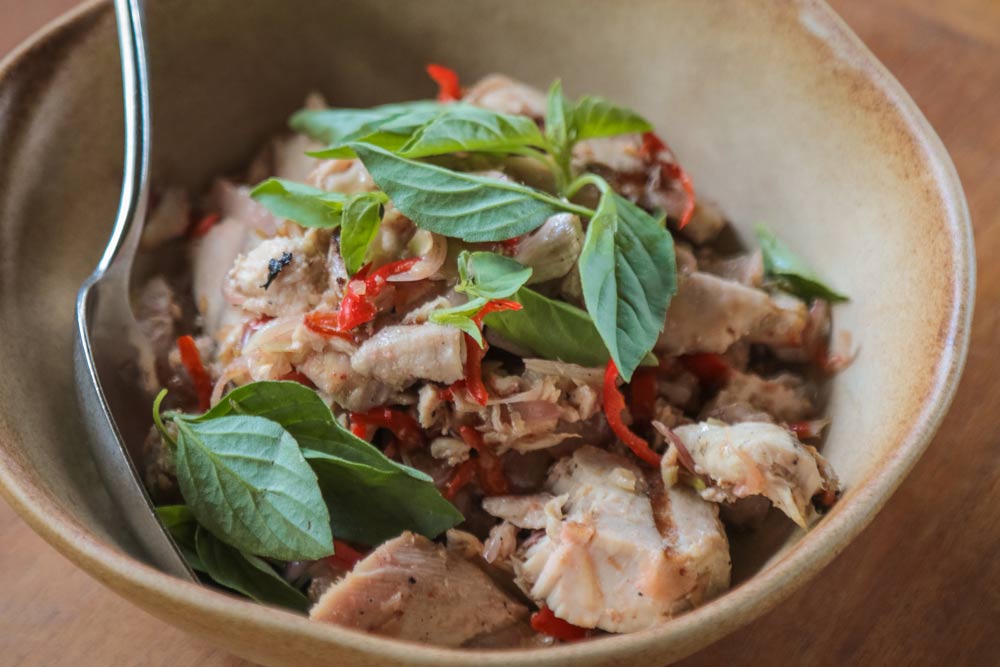
Thai Basil Chicken
This dish will be ready in about 20 minutes. All you have to do is a little chopping.

Leek Tart
Plan Z Phase: This is a Z3 (ZReboot) recipe with Almond flour crust. This is a Z3.5 (ZReboot3.5) recipe with boxed pie crust from the store. It makes for a lovely dish cut into wedges and served on a holiday buffet.
Servings: Serves 6 as a light entrée. You can add a side salad for a more complete meal.
Ingredients:
For the Crust: You can use this Almond Pie Crust recipe. Or buy a boxed pie crust from the refrigerated section at the grocery store.
For the Filling:
- 1 lb of cooked bacon, diced. I cook my bacon in the oven for this dish. It’s easier.
- 3 to 4 cups of thinly sliced leeks. Use the white portion only. Remove the root section and discard the rest. Throw the rest away in the garbage pail or compost bin. DO NOT put it in the garbage disposal. I learned the hard way and paid a big bill.
- 1 Tbl of peanut oil.
- 1.5 Tbl of white flour
- 4 large eggs
- 1 cup of whipping cream
- ½ tsp of grated sea salt
- ¼ tsp of grated fresh pepper
- 1/8 tsp of ground nutmeg (a whisper will do.)
- A whisper of cayenne (optional. It won’t make it spicy. It will brighten the flavor a tad.)
Instructions:
Preheat oven to 400 degrees.
Press your crust into a tart pan and up the sides. Don't worry if you don't have a tart pan. A larger pie pan can also work. If you use a removable tart pan, I suggest a cookie sheet underneath the tart pan in case of leaking.
Put the peanut oil in the pan and sauté the leeks until tender. Stir in the diced. bacon bits and get it all mixed up. Add the flour and stir until incorporated. Then put all this mixture in the crust. Spread it edge to edge.
Bake at 400 for 10 minutes.
While this is going on you can make your filling. Beat the eggs, cream, salt, pepper, nutmeg, and cayenne until well mixed. I do this in my Bullet blender, but it you can do it with a mixer in a bowl too.
Carefully pull open the oven and pour the liquid filling mixture over the leeks and bacon. Bake until a knife inserted in the middle comes out clean. 20-25 minutes should do it.
Let it sit for a few minutes before you cut it so it firms up and you don’t burn your tongue. Serve warm.
Enjoy!
Cheers,

Happy Thanksgiving
https://www.youtube.com/watch?v=NpJ7mcm8MnY
We hope you jiggle with happiness over the holidays.
Have a Happy Thanksgiving!
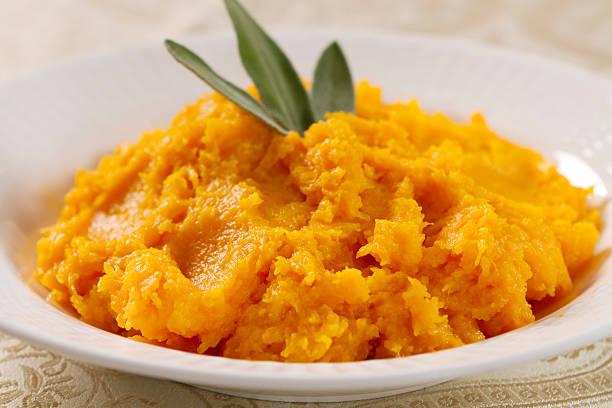
Butternut Squash Mash
Plan Z Phase: This is Z3 (ZReboot) recipe. Just in time for the holidays or anytime! If you have a hankering for potatoes this will give you the same texture in your mouth and a party on your tongue!
Serving Size: Servings 6
Ingredients:
- 2 to 2-1/2 pounds of butternut squash
- ½ tsp of grated sea salt
- ¼ tsp of pepper (or to taste)
- ¼ cup of heavy cream
- 1 tsp of Truvia (optional)
- butter to taste (2 – 3 Tbl should do it)
Instructions:
Preheat oven to 400 degrees.
Peel the squash(es). Carefully cut them in half or quarters and take out the seeds. Toss that stuff in the garbage. Cut the squash flesh into 1” chunks. In a large pan sprayed with olive oil put in the squash. Spray with olive oil and season with the salt and pepper. Cover with foil. Roast in your oven until soft. This might take 30 – 40 minutes.
Remove from the oven and put in a heatproof bowl. Add the cream and Truvia. Use your electric mixer to mash them (or use your own favorite method for mashing potatoes).
Add the butter and give it another quick mash.
These can be made ahead and re-heated. They make great leftovers too.
For me, these are just as sweet and wonderful as mashed sweet potatoes. And maybe even better than baked potatoes!
Check out these numbers and tell me what you think!
Smashed Butternut Squash Glycemic index = 8 22 grams of carbs per cup
Mashed Sweet Potatoes Glycemic index = 17 41 grams of carbs per cup
Baked Potato Glycemic index = 29 63 grams of carbs per cup
You want all of these numbers to be as low as possible. The squash kicks potato butt! Choose the squash every time and change the traditions in your family for the better.
Enjoy!
Cheers,
Breaking Thanksgiving Tradition
Everyone has their Thanksgiving traditions; especially when it comes to food. My husband, for example has to have his mashed potatoes. On occasions when we’ve been invited over to the neighbors' house for a gourmet Thanksgiving extravaganza, Chris will accept the invitation and volunteer to bring the mashed potatoes. He, of course, is expecting that I’ll cook them, but in a pinch I’m sure he’d do it. He wants them that badly.
My family had certain foods we always ate on Thanksgiving too but it was mostly out of necessity. We were usually feeding more than 20 people which meant a 23-25 pound turkey was taking up most of our single oven. My mom kept it simple. We didn't have room for anything else in the oven! I can remember my mother balancing cut acorn squash with a pat of butter inside on each side of the turkey and squeezing in some sweet potatoes. That was about all that would fit! The mashed potatoes, of course and were being cooked on the stove top. There were so many children eating, I don’t think she wanted to risk having too many things. Simple fruit salads, some peas and breads rounded out the meal. My dad liked simple food. He was a big influence on what was served.
So when I left home I went the opposite direction. I’ve never made the same thing twice for Thanksgiving. I’ve always had turkey but it’s never been prepared the same way twice. I’ve always had mashed potatoes, but I always doctor them up with something. I like to add roasted leeks, or parmesan cheese and black pepper. The list goes on and on.
Now that I live a low carb life, my holiday is even more unique (although I may have a few cheats on Thanksgiving).
Do you ever think about breaking tradition and making something different?
If so, I'd love to hear about it!
Enjoy your holiday!
Cheers,
Italian Shrimp Cocktail
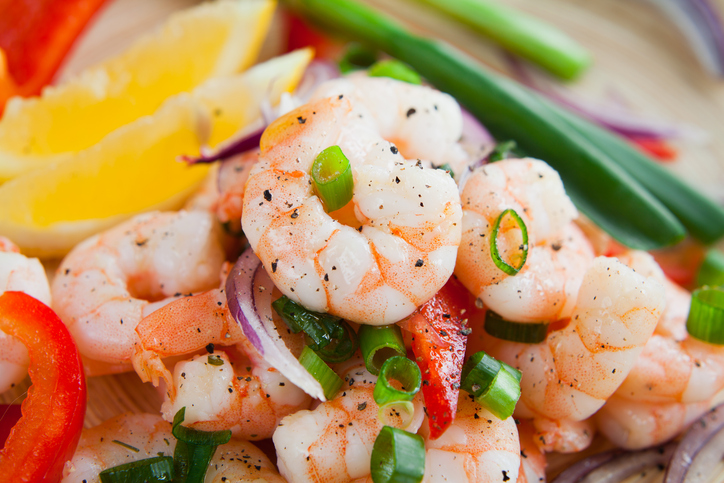
Plan Z Phase: This is a Z3 (ZReboot) recipe. This is what I call cheating when I’m in a hurry. I use my favorite bottled Italian dressing as the marinade and everyone thinks I put so much effort into this really pretty dish. One of the other secrets to this dish is to serve it in a pretty bowl. Dieter Rachel served hers in a glass trifle bowl so the orange of the shrimp sparkled attractively from across a crowded room. Brilliant idea.
Servings: Serves 12 as part of a large cocktail party or 6 as a single appetizer
Ingredients:
- 1½ pounds large cooked shrimp, thawed and rinsed
- 1 large red bell pepper diced
- 1 bunch green onions trimmed and diced, include some of the green parts
- a few slices of red onion (optional)
- your favorite Italian dressing
- salt and pepper to taste
Instructions:
Pile all of these items in a large zip lock bag. Pour half of the jar of Italian dressing in the bag about 6 hours before the party. Zip the bag tightly so there’s no leaking (if you worry about leaking, put the bag inside a bowl). Now, refrigerate. Whenever you open the refrigerator door to get something out just flip the bag over so all the shrimp get coated.
When party time comes put the shrimp in your display/serving bowl. If you think it needs a little more dressing, drizzle it on. It’s a lot easier to add more than it is to get it back off!
Serve well chilled.
Enjoy!
Cheers,
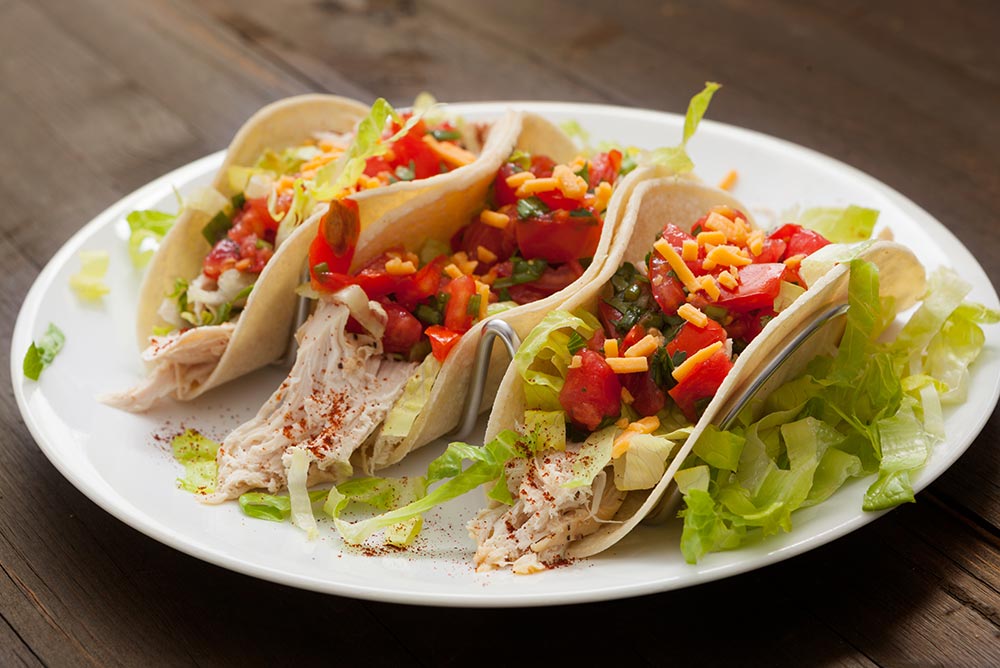
Rotisserie Chicken Tacos
Plan Z Phase: This is a Z3.5 (ZReboot3.5) recipe.
In a hurry to make dinner? These tacos are quick and easy. This dish can meet that goal in 15 – 25 minutes!
Servings: Makes 12 Tacos. Serves 2 – 4 depending on how hungry you or your guest might be.
Ingredients:
- 1 Tbl of olive oil
- ½ cup of diced yellow or white onion
- 3 cups of shredded rotisserie chicken meat. If you don’t know how to remove the meat off a rotisserie chicken, there are several videos on YouTube. They have different flavors of rotisserie chicken in the deli at the grocery store. I found one Mojo flavor which already had some Mexican-style spices included. Any can work, even lemon pepper or plain.
- 1 tsp of ground cumin
- 1 tsp of paprika
- ½ tsp of grated sea salt
- ½ tsp of grated black pepper
- ½ cup of mild salsa (or to your taste)
- ½ cup of low sodium chicken broth
- 14 ounce can of black beans, drained. I like a little sauce still mixed in but if you want you can rinse them, too. I heat the beans in a sauce pan while the rest of the dinner is cooking. Heat on medium. Then keep them on low.
- Shredded cabbage (approximately 1/3 cup per taco) I buy coleslaw mix. I like my taco greens to be raw and crunchy. But if you want a softer, milder flavor you can use lettuce instead.
- 12 small low carb flour tortillas. We use the 6 inch tortillas.
Topping options:
- Chopped tomatoes
- Diced red onion
- Shredded cheddar cheese
- Sour cream
- Hot sauce of your choice.
- Lime
Instructions:
Heat oven to 350 degrees.
Heat the oil in a large sauté pan. Add the onion and cook over medium heat for a minute or two to loosen it up. Add the shredded chicken, cumin and paprika. Add the salt and pepper and stir to incorporate the spices.
Add the salsa and broth and stir until well combined. Let it cook down on medium until almost all the liquid has evaporated or absorbed. This will take 3 – 4 minutes.
While the chicken mixture is cooking down, heat your tortillas. I put them on a cookie sheet and let them heat up during the time the sauce is cooking down. They will be soft and warm.
Get out your plates or dinner bowls.
I put one tortilla in at a time. I want my cabbage (or lettuce) on the bottom. Then I add the chicken. Next put on a layer of beans. This is to your taste. You’ll may have extra beans left over but I leave that up to you. Then add your other toppings of choice and roll it up. Push that taco aside and make your second one right next to the last one, etc. I let the guests do the rest. You can instruct them on the layering or not.
When my husband and I eat this, we limit ourselves to one or two tacos. We want to keep down the carbs. We just overfill them.
Enjoy!
Cheers,
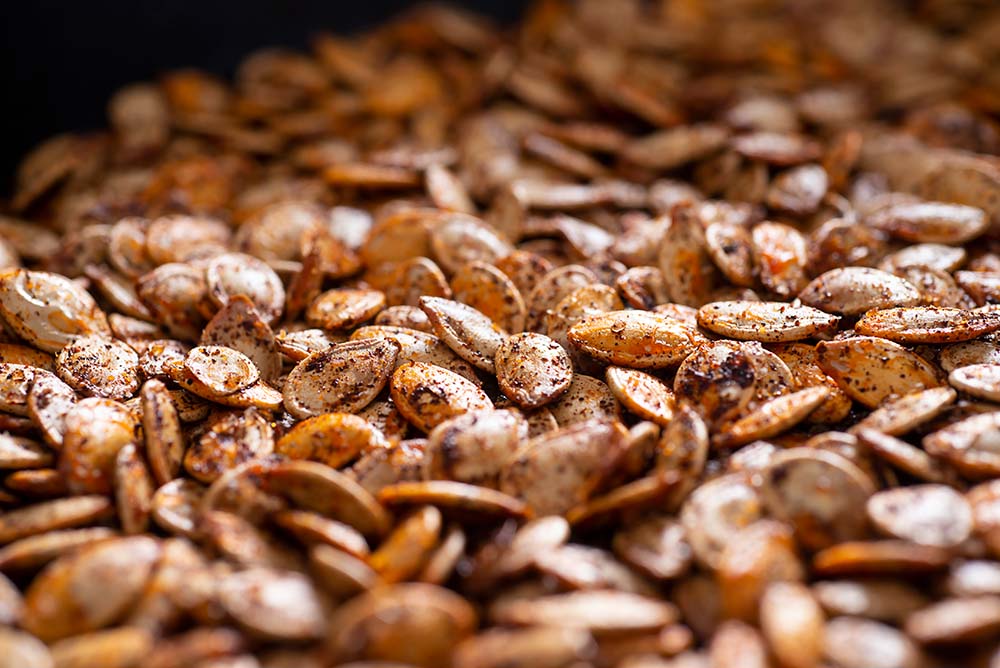
Roasted Pumpkin Seeds
Plan Z Phase: This is a Z3 (ZReboot) recipe.
In addition to being crunchy, satisfying and delicious, pumpkin seeds are a nutritious snack. They are very high in fiber, and are also rich in zinc, magnesium, copper and iron. You can buy shelled pumpkin seeds in the grocery store (also know as pepitas), but when pumpkin season rolls around, you can buy a fresh pumpkin, scrape out the seeds, and toast the whole seeds yourself. YUM!
*If you have a sensitive digestive system, Crohn's disease or IBS, skip this recipe. These little fiber-dense, seedy bits can cause digestive flare-ups.
Ingredients:
- 3/4 cup of fresh pumpkin seeds (we like the seeds from sugar pie pumpkins)
- 1 Tbl melted butter (or ghee, or coconut oil, or olive oil)
- 1 tsp of your favorite seasoning (it can be whatever you like -- pumpkin pie spice, or chili powder, or curry powder!)
- 1/2 tsp sea salt (optional -- only use if your seasoning does not have salt, and you'd like your seeds a little salty)
Other Tools needed:
- colander
- parchment paper (or foil)
Instructions:
Preheat oven to 325 degrees. While your oven is preheating, you're going to scoop your seeds.
When you scoop the seeds out of your pumpkin, they're going to be gooey. So after scooping them out of your pumpkin, the first thing to do is put the seeds in a colander and rinse them under cold running water. You can leave some of the pumpkin bits on there, but if you leave too much, they won't get crispy. So make sure to get the big pumpkin globs off. Lay the seeds flat and pat them dry with a paper towel.
Put the dry seeds into a bowl and add your butter (or oil). Then season your seeds and toss thoroughly so the seasoning is evenly distributed. You can use whatever seasoning you like. That's what's great about this recipe. You can make them as mild or as spicy as you want. And if you don't want your seeds to have a spice, that's ok, too. Just oil and salt is delicious.
Line a baking sheet with parchment paper or aluminum foil. Then spread your seeds out evenly. If you're doubling this recipe, you might need two cookie sheets.
Bake 20-30 minutes, stirring every 5-10 minutes. The cooking time here is approximate. Since some pumpkins have smaller seeds than others, the cooking time will vary. You want your seeds to be a toasty, golden color, but not too brown. So just keep an eye on them, and when they are crisp and golden, and your kitchen starts smelling really good, they're done.
Enjoy!
Cheers,

What to Buy and When
This year I am really paying attention to food prices and availability.
Thanksgiving is right around the corner and holiday food conversation is all the buzz.
One good piece of news is this year there is a bumper crop of cranberries! Yahoo! I am from Wisconsin. Do you know which state grows the most cranberries in the country? Yep. Wisconsin. The sight of a cranberry bog at harvest time will take your breath away.
So, you don’t have to worry so much about cranberry prices this year. You know I suggest you buy them fresh and make your own cranberry sauce, but some folks just can’t resist that canned-shaped tube on a serving platter.
Wisconsin is most famous as The Dairy State. We have a lot of cows in Wisconsin. They all must get milked every day. What I have heard is the whole dairy industry is suffering. Butter prices are expected to keep rising because of the shortage of labor and cost of transporting it to the grocery store. So here’s an idea. Buy your butter when you see a relatively good price and freeze it. Butter freezes just fine, and folks use a lot of butter at the holidays in all their special recipes.
Another freezable item. The turkey. Lots of folks buy their turkey frozen on any given year. If you have room in your freezer you might watch for what feels like a good price (an early sale perhaps?) and buy it then and keep it in the freezer until a few days before you want to cook it and then thaw it. It’s up in the air what will happen with turkey prices so I can’t make any promises.
What else is on your holiday menu? Can any of the other items be bought ahead of time and frozen?
Remember last year when nobody could find canned pumpkin? No matter the current price of that important ingredient you might want to buy it earlier and just keep it in the cupboard instead of stressing out and going to three stores to find it, -- like I did last year.
Thanksgiving is so important to so many. Another way to save money is to co-op your Thanksgiving this year. That way the host doesn’t have to carry all the monetary burden. Assign the guests a dish and see what beautiful rendition they bring.
Plan ahead and have a Thanksgiving with less stress.
Cheers,
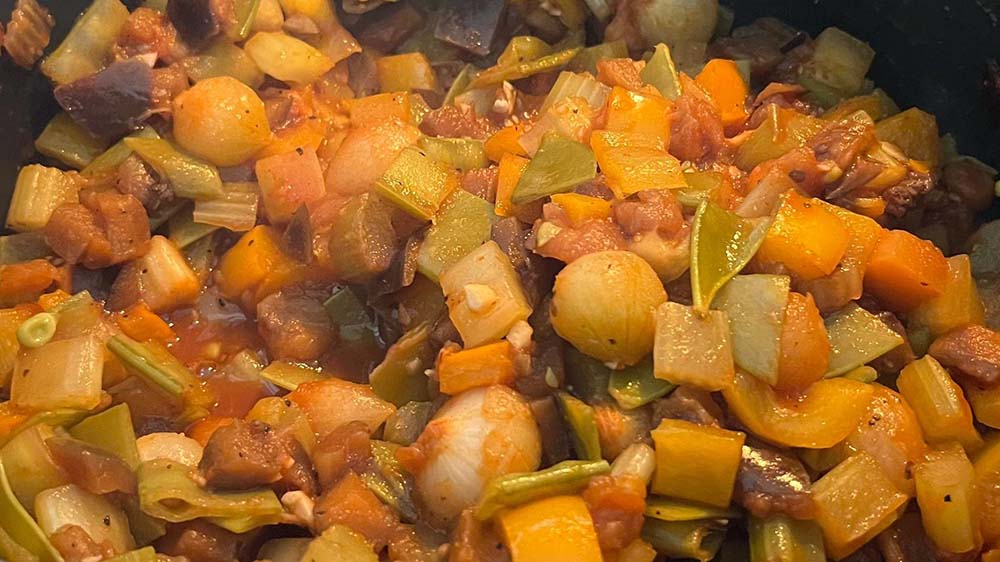
Angela's Shortcut Ratatouille
Plan Z Phase: This is a Z2 (ZReduction) recipe.
When you need some serious cold weather comfort food, ratatouille hits the spot. This shortcut ratatouille-inspired recipe was submitted by dieter Angela. She Zolafied the original recipe and created a delicious ZReduction veggie sauté that can be made in less than half the time of a traditional ratatouille. Thanks for the delicious recipe, Angela!
Servings: Serves 8
Ingredients:
- olive oil spray
- 2-3 Japanese eggplants diced into chunky 1” cubes (about 6 cups)
- 8-10 pearl onions (or 2 onions chopped into chunks)
- 3 bell peppers, seeded and chopped (any color)
- 2 celery stalks, diced
- 1 cup of snow peas, trimmed and cut into large pieces
- 6 cloves minced garlic (about 2 tablespoons)
- 16 oz can of Hunt's tomato sauce
- 1 tsp Italian seasoning (or to taste)
- sea salt and pepper to taste
Instructions:
Heat a Dutch oven or large pot over medium heat. Spray with olive oil spray. Add the eggplant, season with a pinch of salt, and cook for 10 minutes, until the eggplant starts to get soft. Take the eggplant out and put it in a big bowl.
Spray your pot with olive oil spray, then add the onions. Season with a pinch of salt, and cook for 10 minutes, until soft. Take the onions out and put them into the big bowl with the eggplant.
Add more olive oil spray, then add the peppers, celery and pea pods. Season with a pinch of salt, and cook for 5 minutes, until they are lightly softened.
Now add the eggplant and the onions back into the pot with the peppers, celery and snow peas. Then add the garlic. Stir and cook for 1 minute until the garlic smells fragrant.
Pour in the tomato sauce and stir it all together. Add Italian seasoning to taste. Cook the mixture at a simmer for at least 30 minutes so all the flavors meld together. If you like your veggies softer, cook the mixture for one hour. Just stir it once in a while. If it starts to dry out, add a little bit of water (or chicken broth) to loosen it up.
Serve and enjoy!
Angela
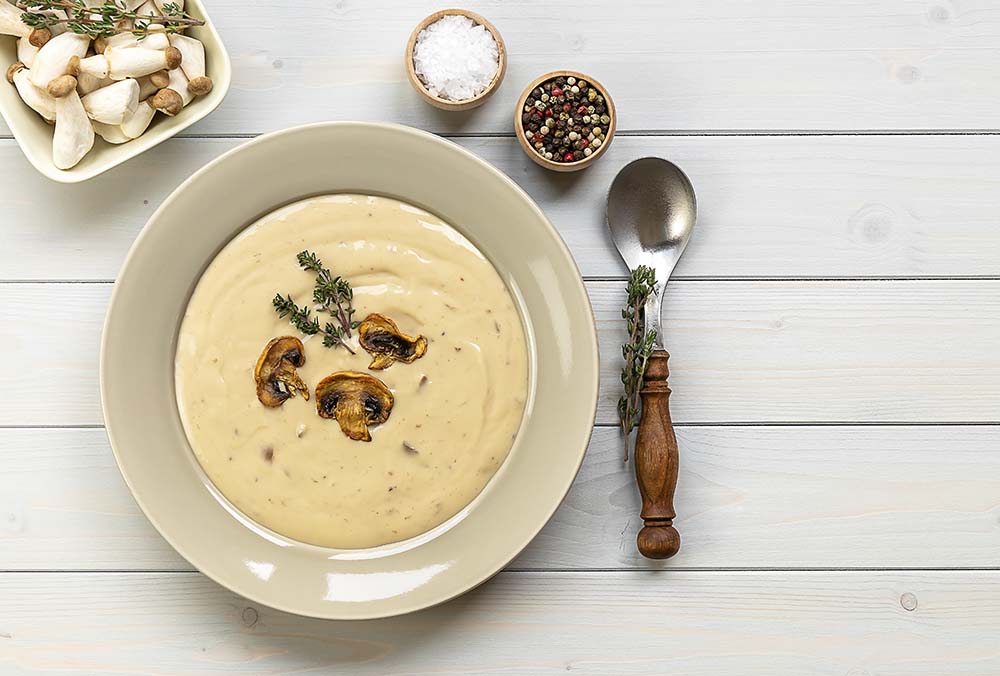
Mushroom Cheddar Soup
Plan Z Phase: This is a Z3.5 (ZReboot3.5) recipe
This is a yummy, satisfying soup.
Servings: Serves 4
Ingredients:
- 1 lb of sliced baby bella mushrooms. If you don’t like baby bellas you can use a different mushroom.
- 1 cup of yellow onion, sliced into half-moon shapes
- 1 Tbl of minced garlic. (jar garlic will work)
- 1 Tbl of olive oil
- Grated sea salt to taste
- Grated black pepper to taste
- ¼ cup (1/2 stick) of butter
- 3 Tbl of white flour
- 2 cups of low-sodium chicken broth
- 2 cups of lactose-free milk (Fairlife is my favorite)
- 2 cups of shredded cheddar or cheddar blend
Instructions:
In a large sauté pan, sauté mushrooms, onion and garlic in the olive oil. Cook over medium heat for 3 – 5 minutes or until mushrooms are starting to brown on the edges. Season with the salt and pepper.
Add butter to the pan and melt over medium. Add the flour and stir constantly 2 minutes more or until fully incorporated. Doing this will keep your soup from getting lumpy.
Add the chicken broth and milk. Stir until incorporated and bring heat to medium high heat.
When it starts to boil immediately turn it down to simmer. Cook it over low heat for 10 – 15 minutes until soup thickens. Stir often.
Stir in the cheese and cook 3 – 5 minutes more until cheese is all melty and you’re ready to serve.
Enjoy!
Cheers,

Shrimp in a French Lemon White Wine Cream Sauce
Plan Z Phase: This is a Z3 (ZReboot) recipe.
This is an elegant meal you can serve to company or even just for a romantic meal at home. I served this with haricot vert (roasted French green beans). That kept the meal totally low carb.
Servings: Serves 2 as an entrée or 4 as an appetizer
Ingredients:
- 12 Large shrimp, peeled, deveined and leaving tails on is optional. (You can also use fresh sea scallops for this dish.)
- Grated sea salt to taste
- Grated fresh black pepper to taste
- 2 Tbl of peanut oil (this oil is good to use when you are cooking at high heat)
- 4 Tbl of butter, divided
- 2 tsp of minced garlic. (jar garlic can work)
- 1 cup of dry white wine. I use chardonnay but pinot grigio or sauvignon blanc will work too
- ½ cup of heavy cream
- 1 Tbl of fresh lemon juice (or to taste)
Instructions:
Rinse your shellfish (shrimp or scallops) and dab dry with a paper towel. Grate on your sea salt and pepper. Heat the oil over high heat in a skillet. I use cast iron but you can use non-stick too.
Once the oil is almost smoking add the shrimp. They will cook fast. Cook for 2-3 minutes without messing with them. You want them to get a bit of a brown sear on the edges. Turn over and cook 30 seconds more. Take out and put in a bowl with some kind of top over it. They will continue to cook and not get cold.
Reduce the heat. Take the pan off the heat and wipe it out with paper towels.
Put back on heat on medium and add 2 Tbl of butter to the pan. Add garlic and cook just until it’s fragrant. You don’t want to brown garlic. That makes it taste burned. About 30 seconds.
Add the wine and cook until reduced by half. This should take about 3 minutes. Add the cream and lemon juice. Cook a few more minutes until it’s starting to thicken. You want it bubbling to reduce the cream, but you don’t want it to boil over. This will take 2 – 4 minutes. Stir in remaining butter and you are ready to serve.
I put the sauce in the bottom of a dinner bowl and decoratively place the shrimp on top with seared side showing.
Enjoy!
Cheers,

How to Buy Stevia
Shopping for sweetener options can be a scary and overwhelming decision-making process. The number of sweeteners designed to replace sugar is growing by the day. It can make you dizzy standing in sweetener aisle of the grocery store. One blogger counted over 160 options. I can’t even keep up!
I keep it simple. I only use a few brands that I know are ok; but I am always on the lookout for new products that might be a major improvement.
When I first started Plan Z, the only option I recommended was Truvia. At that time, Truvia had enough distribution to be in grocery stores all over the country. So our dieters could find it in their local stores - even if they lived in a small town.
Why Truvia?
Truvia is an all-natural sweetener. We ask Plan Z dieters to get off of processed foods, so I needed to find something natural - no chemical experiments.
Two more sweeteners that have come out that I like are ZSweet and Swerve. These are starting to get distribution in stores but you can always find them online. Truvia, ZSweet and Swerve are granular (their texture is like sugar). You can also find liquid sweeteners that are all-natural too.
If you are looking to expand your sweetener options beyond these, here are a few hints:
- Look for all-natural. There are all kinds of “science experiments” on the market. They are not regulated by the FDA so you have to be wary. If an ingredient ends in the letters OSE it is technially a sugar. Then there are sugar alcohols. Some are naturally occurring and some are modified to be used in food. I am not going to go all "chemistry" on you in this article. I'll leave that to the scientists and food bloggers. This stuff can get pretty complicated.
- Watch out for blends. Why? Because they are "blended" with sugar! Even Truvia makes a baking blend that is half sugar/half stevia. We will get more into detail on baking later, but you don’t want this if you are trying to stay away from sugar. These blends are a lower calorie option for semi-low carb baking.
- Read the labels. Many sweeteners have all kinds of fillers. Some are ok, some are not. In general, you want as few ingredients as possible. Steer clear of sweeteners with lots chemicals and ingredients you can't pronounce. As far as these things go, erythritol is okay. It is a sugar alcohol, but it is natural and made from corn. I trust it. If you see Reb A in the ingredients that’s just a version of stevia. Reb A is okay, too.
Which type of sweetener is best for your recipes?
Flavored Sparkling Water
If your goal is to get off of soda, I commend you. There are so many options that are better for you. Even diet soda is a nightmare. Here’s how you can make drinks that taste like soda but are not soda:
Buy plain sparkling water. Pour it into a glass. Then add stevia drops. They will have a few options in the store but if you want to get a myriad of flavors you have to go online. My go-to brand is Sweetleaf. But there are other brands that are just as good.
You can get flavors like cherry and cola. Vanilla drops make a lovely cream soda. That's one of my favorites. They have a lemon-lime that even mimics that favorite soda in the green bottle. Serve over ice and enjoy!
Coffee
If you want to snazz up your coffee, you don’t have to buy a flavored creamer with chemicals and preservatives in it. You can buy sweetened drops designed to flavor coffee. Hazelnut and English Toffee flavors are popular. Get them online and add real, full fat cream. You’ll be in heaven. The lighter the creamer (think half and half) the more lactose that’s in there. That’s sugar. That’s not helping.
Cold dishes
I recommend making cold dishes with Truvia. Truvia stays stable and measures very much like sugar when it remains cold. For example: if you make broccoli salad and you want the dressing to be a little sweet, this is the time to use Truvia.
Warm dishes
When I first started Plan Z and Truvia was my only option I used it in warm dishes. In most applications it worked, but not always. Sometimes Truvia can have a metallic aftertaste when heated. If the dish you are cooking will chill down to room temperature you might get a "cold" after taste. It’s sort of like you put a menthol lozenge in your mouth. Not great. You can get used to it but now you don’t have to. You can use ZSweet or Swerve. You’ll have to experiment a bit but from my experience ZSweet and Swerve don’t give off that aftertaste. In a dish like a sweet and sour stir fry I still use Truvia, but you might prefer one of the others.
Baking
Low-carb baking has become popular with the Keto crowd. That's great news because now there are many more low-carb recipes online that you can grab and bake. Many mainstream recipes have been adjusted for low-carb dieters, too. So, if you have your grandmother’s recipe for sour doughbread you might find a low-carb version online.
If you're trying to convert a recipe yourself, it might be a challenge at first, but it can be done. If you want to dramatically cut back the carbs you have to figure out what flour and what sweetener to use.
There are more flours available than even before. Almond flour is the most popular, followed by coconut flour. But the recipes don’t convert one for one. If you are used to baking cakes with white flour and switch to almond flour, your finished cake will be... different. It will be quite a bit denser. It might even resemble a brick! There is a lot of chemistry and detail to baking to get things to come out right. I say just follow someone else’s recipe until you start to get the hang of it.
When it comes to the best sweeteners for baked goods, I say use either Swerve or ZSweet. The biggest reason for that is...they caramelize. You know when you bake cookies and they're chewy on the inside but crispy on the bottom? That's caramelization. Swerve and ZSweet take care of that process.
Another bonus is you can get these products in confectioner's sugar so your can make frosting. You can make a yummy cream cheese frosting this way or even fluffier frostings. If the brand you like doesn’t come in confectioner form, not to worry. You can put your granular version in a food processor or blender and whiz it until it’s broken up to powdered form. Let the powder settle before you open the lid though, or you might sneeze for a few minutes!
To be honest, I have moved away from baking. I’m more likely to make a recipe like the one I am offering you today. Something like a mousse or a fruit parfait are just as popular at dinner parties. Plus, by serving desserts like these, I don't have to put in the time it takes to bake.
You decide what works for your lifestyle. Good news is you can still eat like a king or a queen and not gain weight.
Cheers,
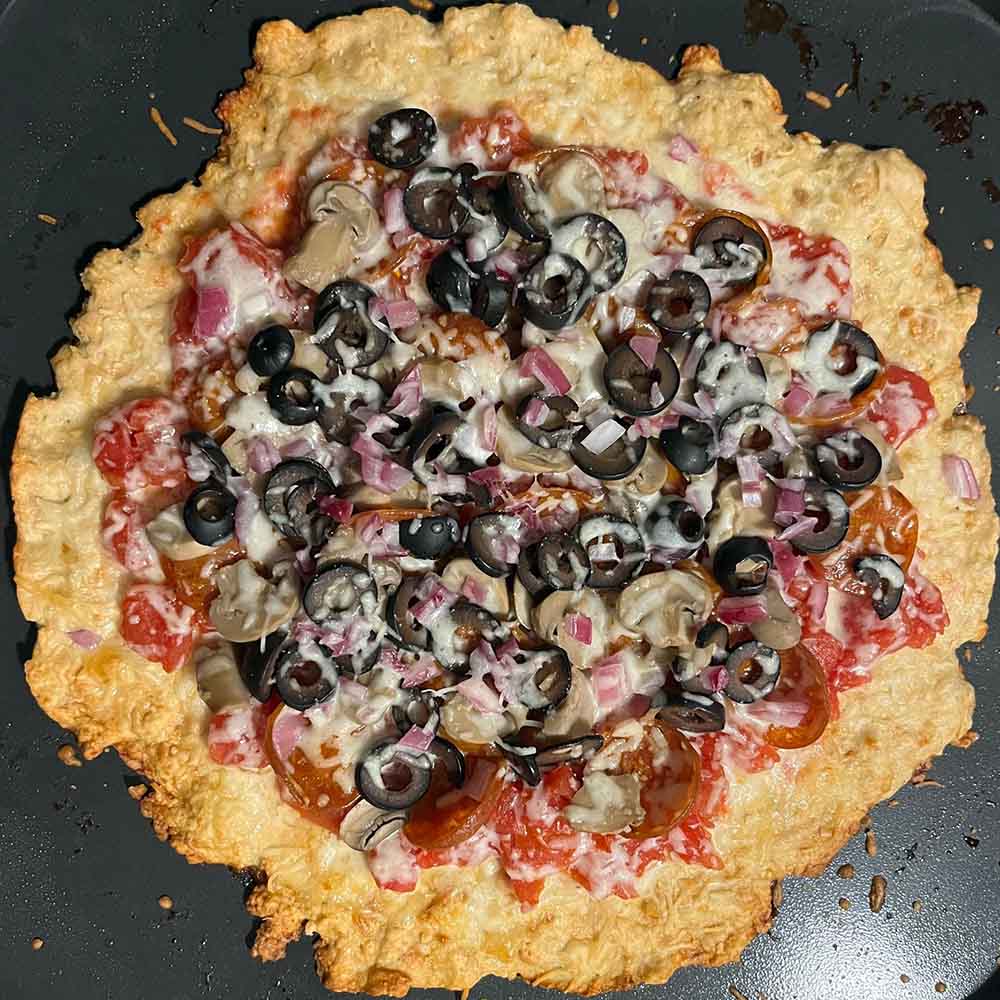
Dieter Angela's Ground Turkey "Meatzza" Crust
Plan Z Phase: This is a Z3 (ZReboot) recipe.
We can't take credit for this delicious recipe. Dieter Angela adapted this from the blog, My Life Cookbook, and we're so grateful she did. Angela writes:
"I love pizza, so I was looking for alternatives. I was disappointed to find cauliflower crust is not much lower in carbs than a traditional pizza crust. I came across that recipe for a meatzza crust and was pleasantly surprised. It satisfied my pizza craving, and I could have a slice of pizza without needing a fork! For those pizza cravings, here’s a recipe for a meatzza crust."
Ingredients:
- 1 lb ground turkey
- 1 egg, beaten
- 3 grissini breadsticks crushed into breadcrumbs
- 2 Tbl of grated parmesan cheese
- 1 tsp Italian seasonings
- 2 tsp salt
- ½ tsp pepper
- 2 cloves garlic, crushed
- ½ cup of low carb sauce (like Specialty Selects Marinara, or a sauce with no added sugar in the ingredients)
- 1 cup mozzarella, shredded
Optional Toppings:
- Angela used diced tomatoes instead of marinara, mozzarella, pepperoni, black olives, mushrooms, and onions
- You could also use toppings like pepperoni, sausage, peppers, spinach, cooked bacon - whatever you like!
Instructions:
Preheat oven to 350 degrees. In a large bowl mix the ground turkey, egg, crushed grissini sticks, parmesan cheese, Italian seasonings, salt, pepper and garlic.
Cover a cookie sheet with parchment paper or a silicon mat. Take the mixed turkey mixture and form it into a pizza crust. Make it fairly thin so it won't taste too "meaty."
Bake for about 20 minutes, but start checking it after 15 minutes. The cooking time will depend on how thin you make the crust. You want the turkey to be cooked through, but you don't want the crust to be too brown because you will bake it again once you put the toppings on.
Take the crust out of the oven, and cover with sauce and then cheese. For a relatively low carb sauce I like Aldi's Specialty Selects marinara sauce. You can use whatever you want but make sure the carbs are low as tomato sauces can have a lot of sugar in them. Then, add the toppings you want to your liking. Bake for another 5 minutes, then place it under the broiler to brown the top (if you want your cheese brown and crispy).
Enjoy!
Angela