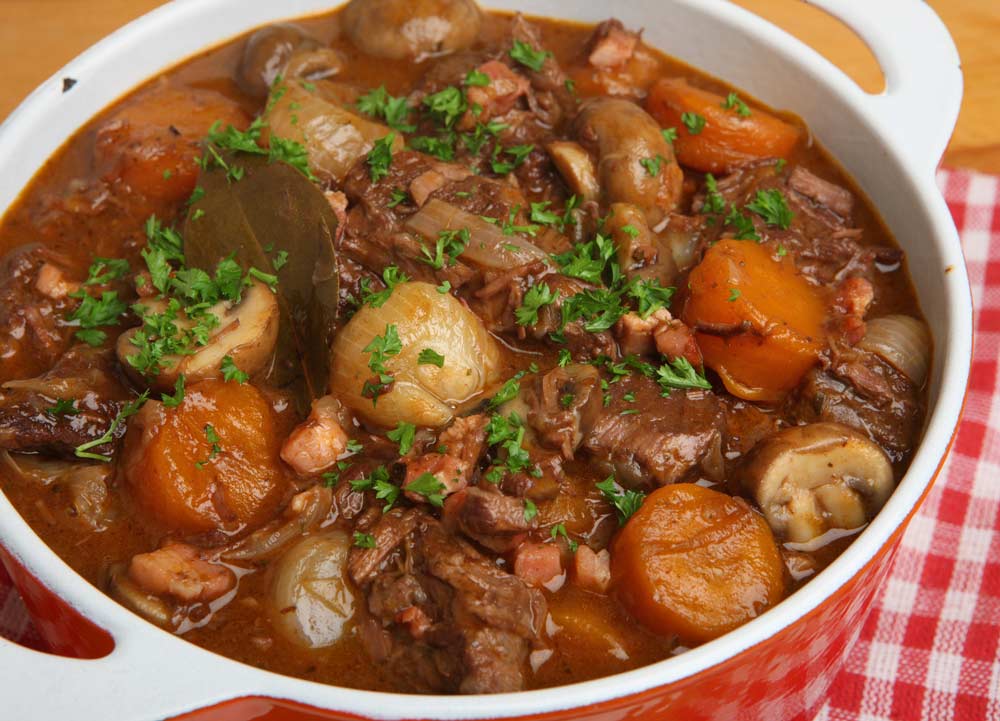
Beef Bourguignon
Plan Z Phase: This is a Z3 (ZReboot) recipe. This is a remake of Beef Bourguignon. Who can resist this traditional French dish? So lush-tasting. It just about melts in your mouth.
My husband just about rolled over and begged for more when I served this.
A portion of red meat for this dish is usually five ounces. That's not that much, but that's the portion size I'm following here. You decide how big your portion is going to be. If you want more, just put in more meat. This recipe can handle about 10 more ounces of meat without having to extend any of the other ingredients.
Servings: Serves 4
Ingredients:
- 20 oz beef tenderloin cut into one-inch chunks
- 3 Tbl Worcestershire sauce
- 2 tsp grated garlic (Jar garlic is just fine.)
- 1-1/2 pounds button mushrooms either thickly sliced or cut in half
- 3 cups pearl onions (You can use the frozen ones right from the bag.)
- 3 tsp fresh thyme leaves
- 30 oz beef broth
- 3 oz tomato paste
- 4 Tbl balsamic vinegar
- 1 Tbl cream of tartar
- 1/4 cup water
- Olive oil spray
Instructions:
Earlier in the day
Take your cut-up tenderloin and put it in a plastic zipper bag. Add the 3 tablespoons of Worcestershire sauce and garlic. Let this marinate in the refrigerator for up to 4 hours. Turn to coat periodically.
When ready to cook dinner
Spray a soup pot (medium-large) with olive oil spray. Add your mushrooms and pearl onions. Brown on Medium High until one side of both mushrooms and onions get a brown tinge to them. Stir periodically while this is happening. It will take about 10 minutes.
While the veggies are browning, take out your cast iron pan or other large sauté pan and spray it with olive oil spray. Add the meat. (Throw away the marinade.) Brown the meat on Medium High on one side only. This will take just a few minutes. Turn off and let sit until the veggies are ready.
When veggies are ready, you are going to add items to the soup pot. Most beef bourguignon recipes call for several hours of cooking. That's because in those recipes you are using beef that has to tenderize. In this one you are saving the calories and splurging by using tenderloin, so this won't take anywhere near as long to cook. Add the beef, the beef broth, tomato paste and balsamic vinegar. Bring to a boil. When it's boiling, turn down to a simmer (Medium should do it) and let this cook for 20 to 30 minutes. What you are watching for is the way you want your meat cooked. If you like it Medium, check it at 15 minutes. Because the chunks are fairly small, this really won't take long.
In a small cup stir the cream of tartar into the water to dissolve it. Now pour the white mixture into the beef. Keep simmering and stirring at this point so that the cream of tartar gets well mixed in. This will help thicken your sauce. The sauce should be gently simmering so it will continue to reduce and thicken. This should not take more than 5 minutes. It won't end up quite as thick as some beef bourguignon recipes, but it will be close enough that you should not notice the difference. Season with salt and pepper to taste.
Serve in a bowl with a side salad and you have a nice French meal.
(A serving of meat equals 5 oz.)
Enjoy!
Cheers,
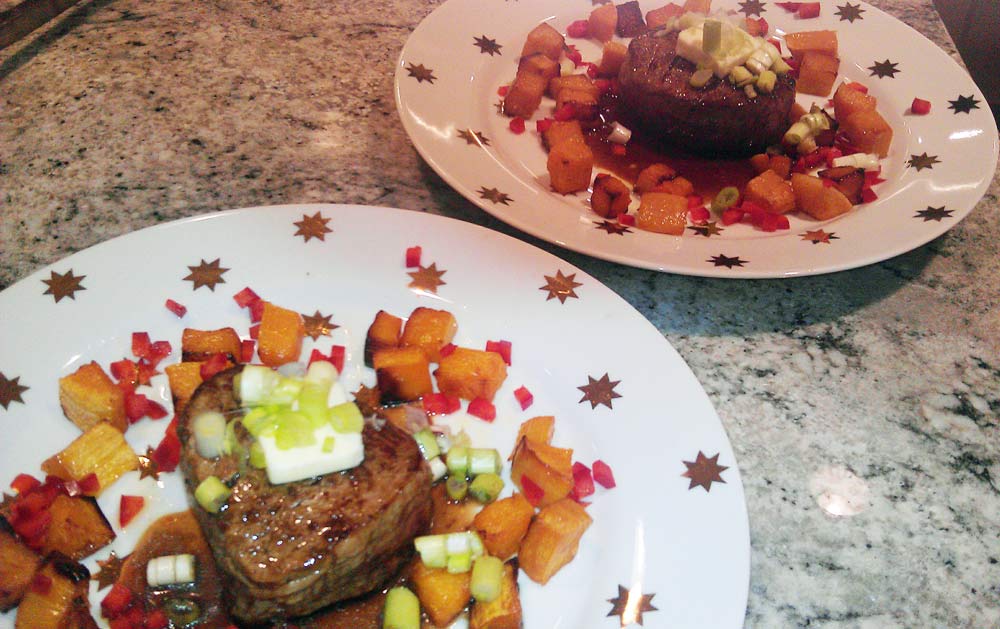
Steak with Asian “Gravy”
Plan Z Phase: This is a Z3 (ZReboot) recipe.
Servings: Serves 2 (can be doubled easily)
Ingredients:
- 2, 6 - 8 oz steaks. You choose the cut.
For the sauce:
- ½ cup of beef broth
- ¼ cup of port wine
- 2 Tbl of Bragg’s Aminos
- 1 Tbl of minced ginger (jar ginger will work)
- 1 tsp of corn starch mixed in 2 Tbl of water
For the Garnish/finishing:
- 1 – 2 tsp of Asian oil. You can use sesame or hot chili oil depending on your tastes (both of these are optional. I have eaten this without the oil and it’s lovely).
- 4 green onions, chopped. White and light green parts only
Instructions:
You will grill or broil your steak to your liking. While the steak is cooking you can make your Asian steak “gravy”.
In a sauce pan add the beef broth, port, Bragg's and ginger. Bring to a low boil and reduce the liquid by half. Add the corn starch and continue to cook until the sauce thickens a bit.
Plate your meat and drizzle the sauce on top. Then drizzle the oil on top and garnish with the green onions.
In this picture you’ll see the steak served with a scattering of roasted butternut squash and a few bits of raw red bell pepper for color.
Enjoy!
Cheers,
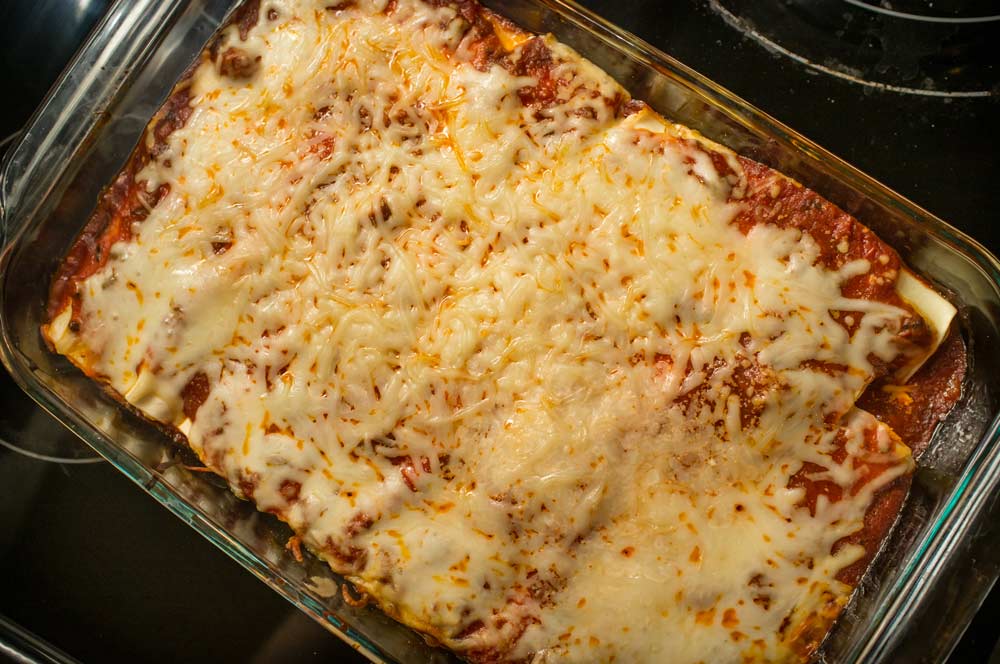
Manicotti Casserole
Plan Z Phase: This is a Z3.5 (ZReboot 3.5) and Zola To GO! recipe. This time of year I make many casseroles. First reason is it makes for great cold weather comfort food. Second reason is so many people need a dish to take to a party or potluck. These fit the bill.
Manicotti is a dish full of carbs because the pasta consists of large manicotti tubes that you stuff with ricotta cheese and optional meat mixtures. For this dish I did away with the manicotti noodles altogether and just concentrated on the inside elements with just a bit of optional pasta up top.
Ingredients:
- 1 cup of cooked noodles (optional) You get to choose which kind. I’d recommend penne, rigatoni or even wide noodles like papardelle. I just cut the papardelle into chunks so they are not long. To cook the pasta just follow the directions on the box of noodles you choose.
- 2 Tbl of olive oil
- 1 lb of ground beef
- 1 pound of Italian sausage. If you cannot find loose sausage just cut the casings and remove the loose meat from inside the sausage.
- 1 cup of diced onion
- 8 oz of sliced mushrooms
- 24 oz jar of premade pasta sauce. Look for one with no sugar. You may do quite a bit of label reading before you find one but they DO exist. Even some big brands make options. You choose the flavor. I used vodka sauce but there are several options to choose from.
- 1 pound of shredded mozzarella or Italian cheese blend
- 1 cup of ricotta cheese
- ½ tsp of Italian seasoning
Instructions:
Preheat oven to 350 degrees.
This dish is very easy to prepare. It’s more about assembly than anything.
In a pot add your water and bring to a boil. Add the pasta and cook according to package directions. The pasta is actually optional. This tastes great just served in a bowl like a thick stew. But if you are craving noodles you can use a few so you feel more Italian. You can begin the rest of the meal while the pasta cooks.
In a large sauté pan, add the olive oil and begin to heat it. Add the ground beef and the sausage. Continually break it up into small pieces while it cooks. When it’s half-way done, add the onion so that can partially cook too. When cooked through, pour the meat mixture into the bottom of the 9" x 13" pan. Don’t wash the pan. Add the mushrooms and cook those until the edges begin to brown. Pour those over the meat mixture and stir it up a bit.
Pour half of the pasta sauce over the meat mixture and stir.
Put the ricotta in a small bowl and add the Italian seasoning. Stir. Now take a spoon and take globs of the ricotta and distribute them across the meat mixture.
Sprinkle over half of the cheese. Then drain your pasta and spread the pasta over the meat and cheese mixtures. If you are not using pasta, just skip this step.
Finally, spread the remaining sauce and the last of the cheese over the top. Try to make sure the pasta is all covered. Whatever sticks up with get crunchy but I like a few noodles with a crunchy edge so it’s up to you. Put the casserole in the oven and bake for 30 – 40 minutes or until the top of the cheese begins to brown just a tad.
Remove from the oven and let sit 10 minutes before serving. This is sort of a “spoon-it-out-of-the-casserole” dish rather than cut it. It’s not like lasagna with all the noodle layers. It will hold together pretty well though.
Leftovers can be kept in the refrigerator. Once the casserole has cooled in the refrigerator it will hold together VERY well and can be cut into wedges for re-heating. This helps it travel well if you want to take portions to work or you want to freeze them for later retrieval.
Enjoy!
Cheers,

Grilled Beef Tenderloin with Cannellini Beans and Roasted Tomatoes
Plan Z Phase: This is a Z3 (ZReboot) recipe.
Servings: Serves 4
Ingredients:
- 1 bag frozen small onions (about 4 cups)
- 3 large tomatoes
- 2 pints of cherry tomatoes or small pear-shaped ones (varying colors is a good idea if you can get yellow, purple and red ones)
- 2 cans of cannellini beans (15-oz size)
- olive oil, spray and bottled
- garlic
- sea salt
- beef tenderloin (2 inches in length per person or one-third to one-half pound per person)
Instructions:
Find a heat-proof pan 9 x 13 inches. Spray with olive oil to coat pan. Toss in the frozen onions, straight from the bag. Cut the 3 large tomatoes in half and set them inside the pan, cut side up. Arrange the rest of the tomatoes in the pan in between onions and large tomatoes. Drizzle 3 to 4 tablespoons of quality olive oil over the tomatoes and onions. Grate sea salt on top of onions and tomatoes to taste. It doesn't need a lot. Roast at 500 degrees for one hour. While that's roasting, open the cannellini beans and put in a sauce pan. Drizzle with 3 tablespoons of olive oil and put in at least 1 teaspoon of chopped garlic (jar garlic is fine). Heat and simmer for 10 minutes. Turn off. When you want to serve dinner, heat your grill to 400 degrees or more. Spray the tenderloin on all sides with olive oil. Grill tenderloin, turning every few minutes until it's as done as you like it (15 minutes or so for medium rare). Let sit 10 minutes before you cut and serve. Reheat your tomatoes and beans while the meat sits.
Serve two half-inch slices of tenderloin per person, with the tomatoes and beans served on the side. Arrange them as you see fit. The beans can be on top of the tomatoes or over to the side. If you want to expand the meal a bit, you can add a side salad or another vegetable.
Enjoy!
Cheers,
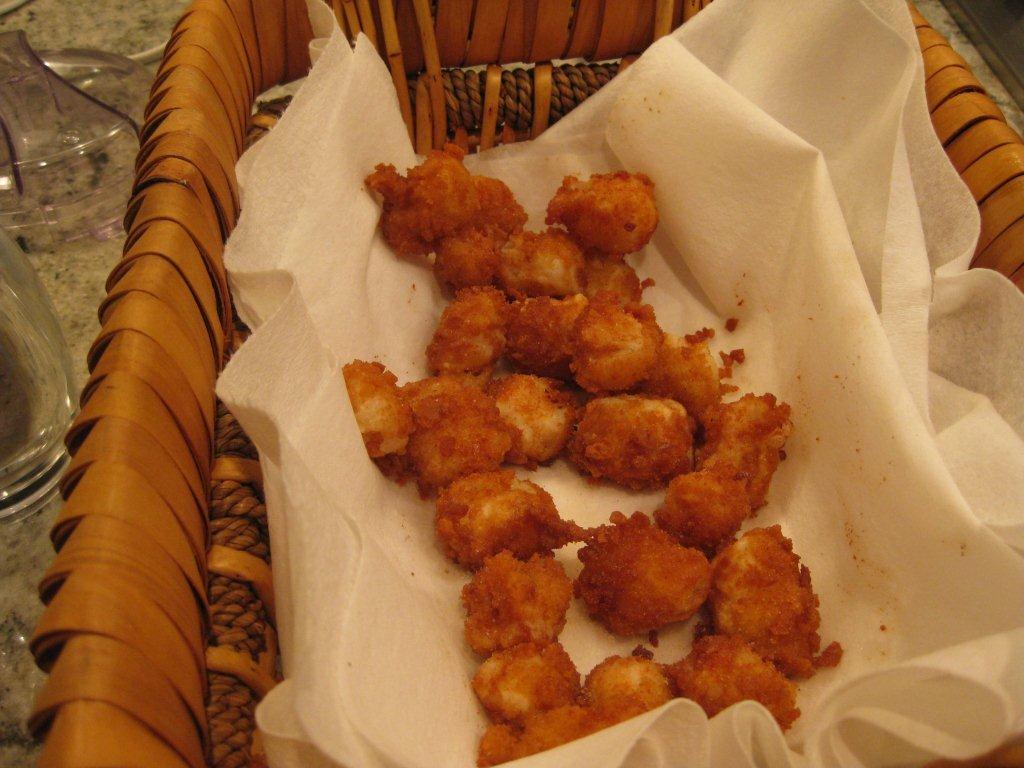
Deep Fried Bay Scallops with Dipping Sauce
Plan Z Phase: This is a Z3 (ZReboot) recipe.
Servings: Serves 4
Ingredients:
- 1 pound of bay scallops or sea scallops cut in to quarters (in the picture my bay scallops are quite sizable)
- 1 – 2 Tbl of flour
- 1 egg
- 8 – 10 Melba Rounds ground to fine crumb. You choose your favorite flavor.
- peanut oil for frying
- melted butter
- seasoning
Instructions:
Spread your Melba crumbs on a large plate and set aside.
Rinse the scallops thoroughly. I use a colander to rinse them. Put them on a plate and dap at them with paper towels to get most of the moisture off of them. Then dry out your colander. Put half of the scallops back in the colander. Dust them in a tablespoon of flour. What I do is sprinkle it on and then shake and toss the scallops around so they get coated with some flour but then I let the rest of the flour fall through the colander into the sink. This way you don’t actually use a tablespoon of flour. Most of it drops off but you still get coated scallops. Set them aside on a paper towel. Do this again with the second batch.
Heat at least an inch of peanut oil in a pan with high sides. You can do 2” if you want. You can test the oil for readiness for frying two ways. One way is to heat it and then put a drop of water in the pan. If it bounces or spits back it’s ready for frying. The heat would be at medium-medium high. The second way is to get one scallop ready for frying and put just one in. If it readily begin to fry up your oil is ready. It’s important in frying to get the oil ready and cook fairly quickly because as you use the oil more and more it will become dark and cloudy. You want to get done as fast as possible without being reckless.
As the oil heats you can prep your scallops.
In a small bowl put in your egg and break it up with a whisk.
You will take your scallops in small batches (6 – 8 at a time) and swirl them around the egg. The toss them around in the Melba crumbs. You need these Melba crumbs to last the entire batch of scallops so don’t be picky about getting the scallops completely coated. Even just one side is enough so some bare spots are fine. You can see in the picture how I did it. They are not completely covered.
When you pull them from the crumbs they are ready to gently put into the frying oil. Be sure in this recipe to use peanut oil. Peanut oil has what’s called a high flashpoint so it takes well to frying. It will do the best job with the best flavor and crispiness.
You can add 2 batches of 8 scallops easily to your oil. Just make sure they are not stuck together or stick to each other in the oil. Move them around with a metal spoon or spatula. They will be golden brown and done in 3 minutes or less. You do want to make sure the scallops get completely cooked so test on but cutting it open if you want. Make sure the insides are white and not grayish. Gray is a sign that they are not fully cooked.
Fry the scallops in batches. As they come out of the oil spread them on paper towels (you can see how I put paper towel in a basket). Grate some sea salt over the finished product. Be sure to turn off your oil and dispose of it properly.
While they are frying you can pretty easily melt a stick or two of butter. Then just decide how you want to flavor the butter. (If you have ghee in your cupboard this is the perfect time to melt some up). Your flavored butter or ghee can be plain. I put in a tablespoon of Cajun spice. Other options would be cayenne for hot, smoked paprika, or you can put fresh herbs in. Some like Italian seasoning or dill. Up to you.
Enjoy!
Cheers,
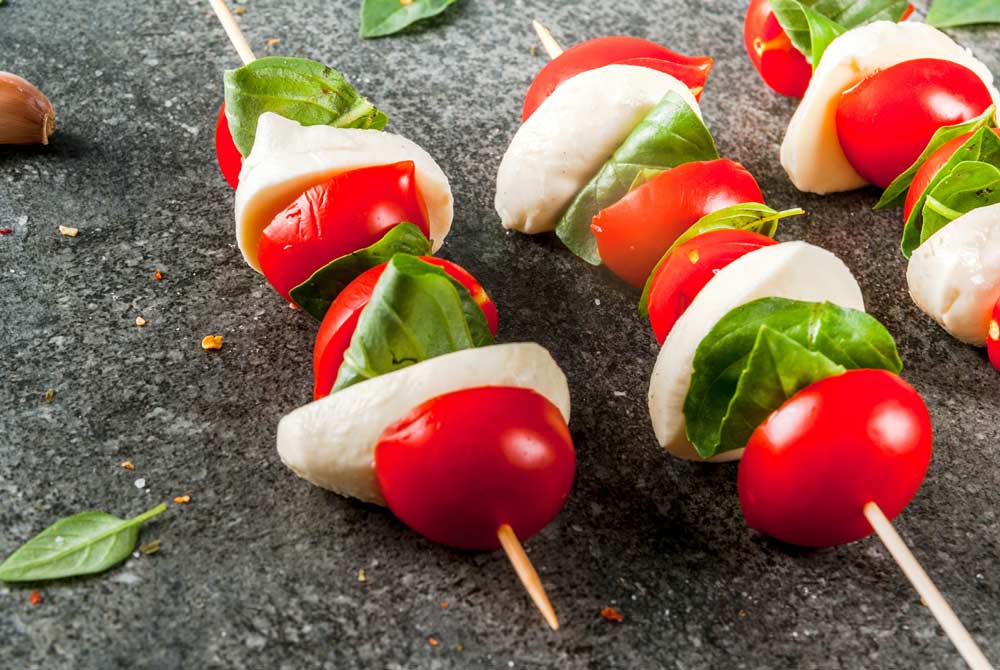
Tomato and Fresh Mozzarella Sticks
Plan Z Phase: This is a Z3 (ZReboot) recipe. This is one of the easiest appetizers on the planet.
Servings: For a cocktail party for 40 I’d plan to serve 20 of these along with the other appetizers.
Ingredients:
- cherry tomatoes
- fresh mozzarella balls (the tiny, one inch size, or you can cut larger ones into cubes)
- basil leaves
- balsamic vinegar (or preferably balsamic vinegar glaze. It’s thicker, but it’s harder to find. Lots of stores don’t carry it.)
- long toothpicks (regular length work too for smaller portion)
Instructions:
All you need to do is thread the cherry tomatoes alternately with the mozzarella balls and basil onto the toothpicks. One tomato, next mozzarella, basil, next tomato, etc. With longer picks you’ll have three tomatoes and two mozzarella balls per portion.
Refrigerate, covered with plastic wrap until ready to serve.
Just before serving drizzle the balsamic vinegar over the picks already set up on your serving platter. You can also grind a light dusting of sea salt over the top if you desire.
You have pretty, little red and white finger food.
Enjoy!
Cheers,
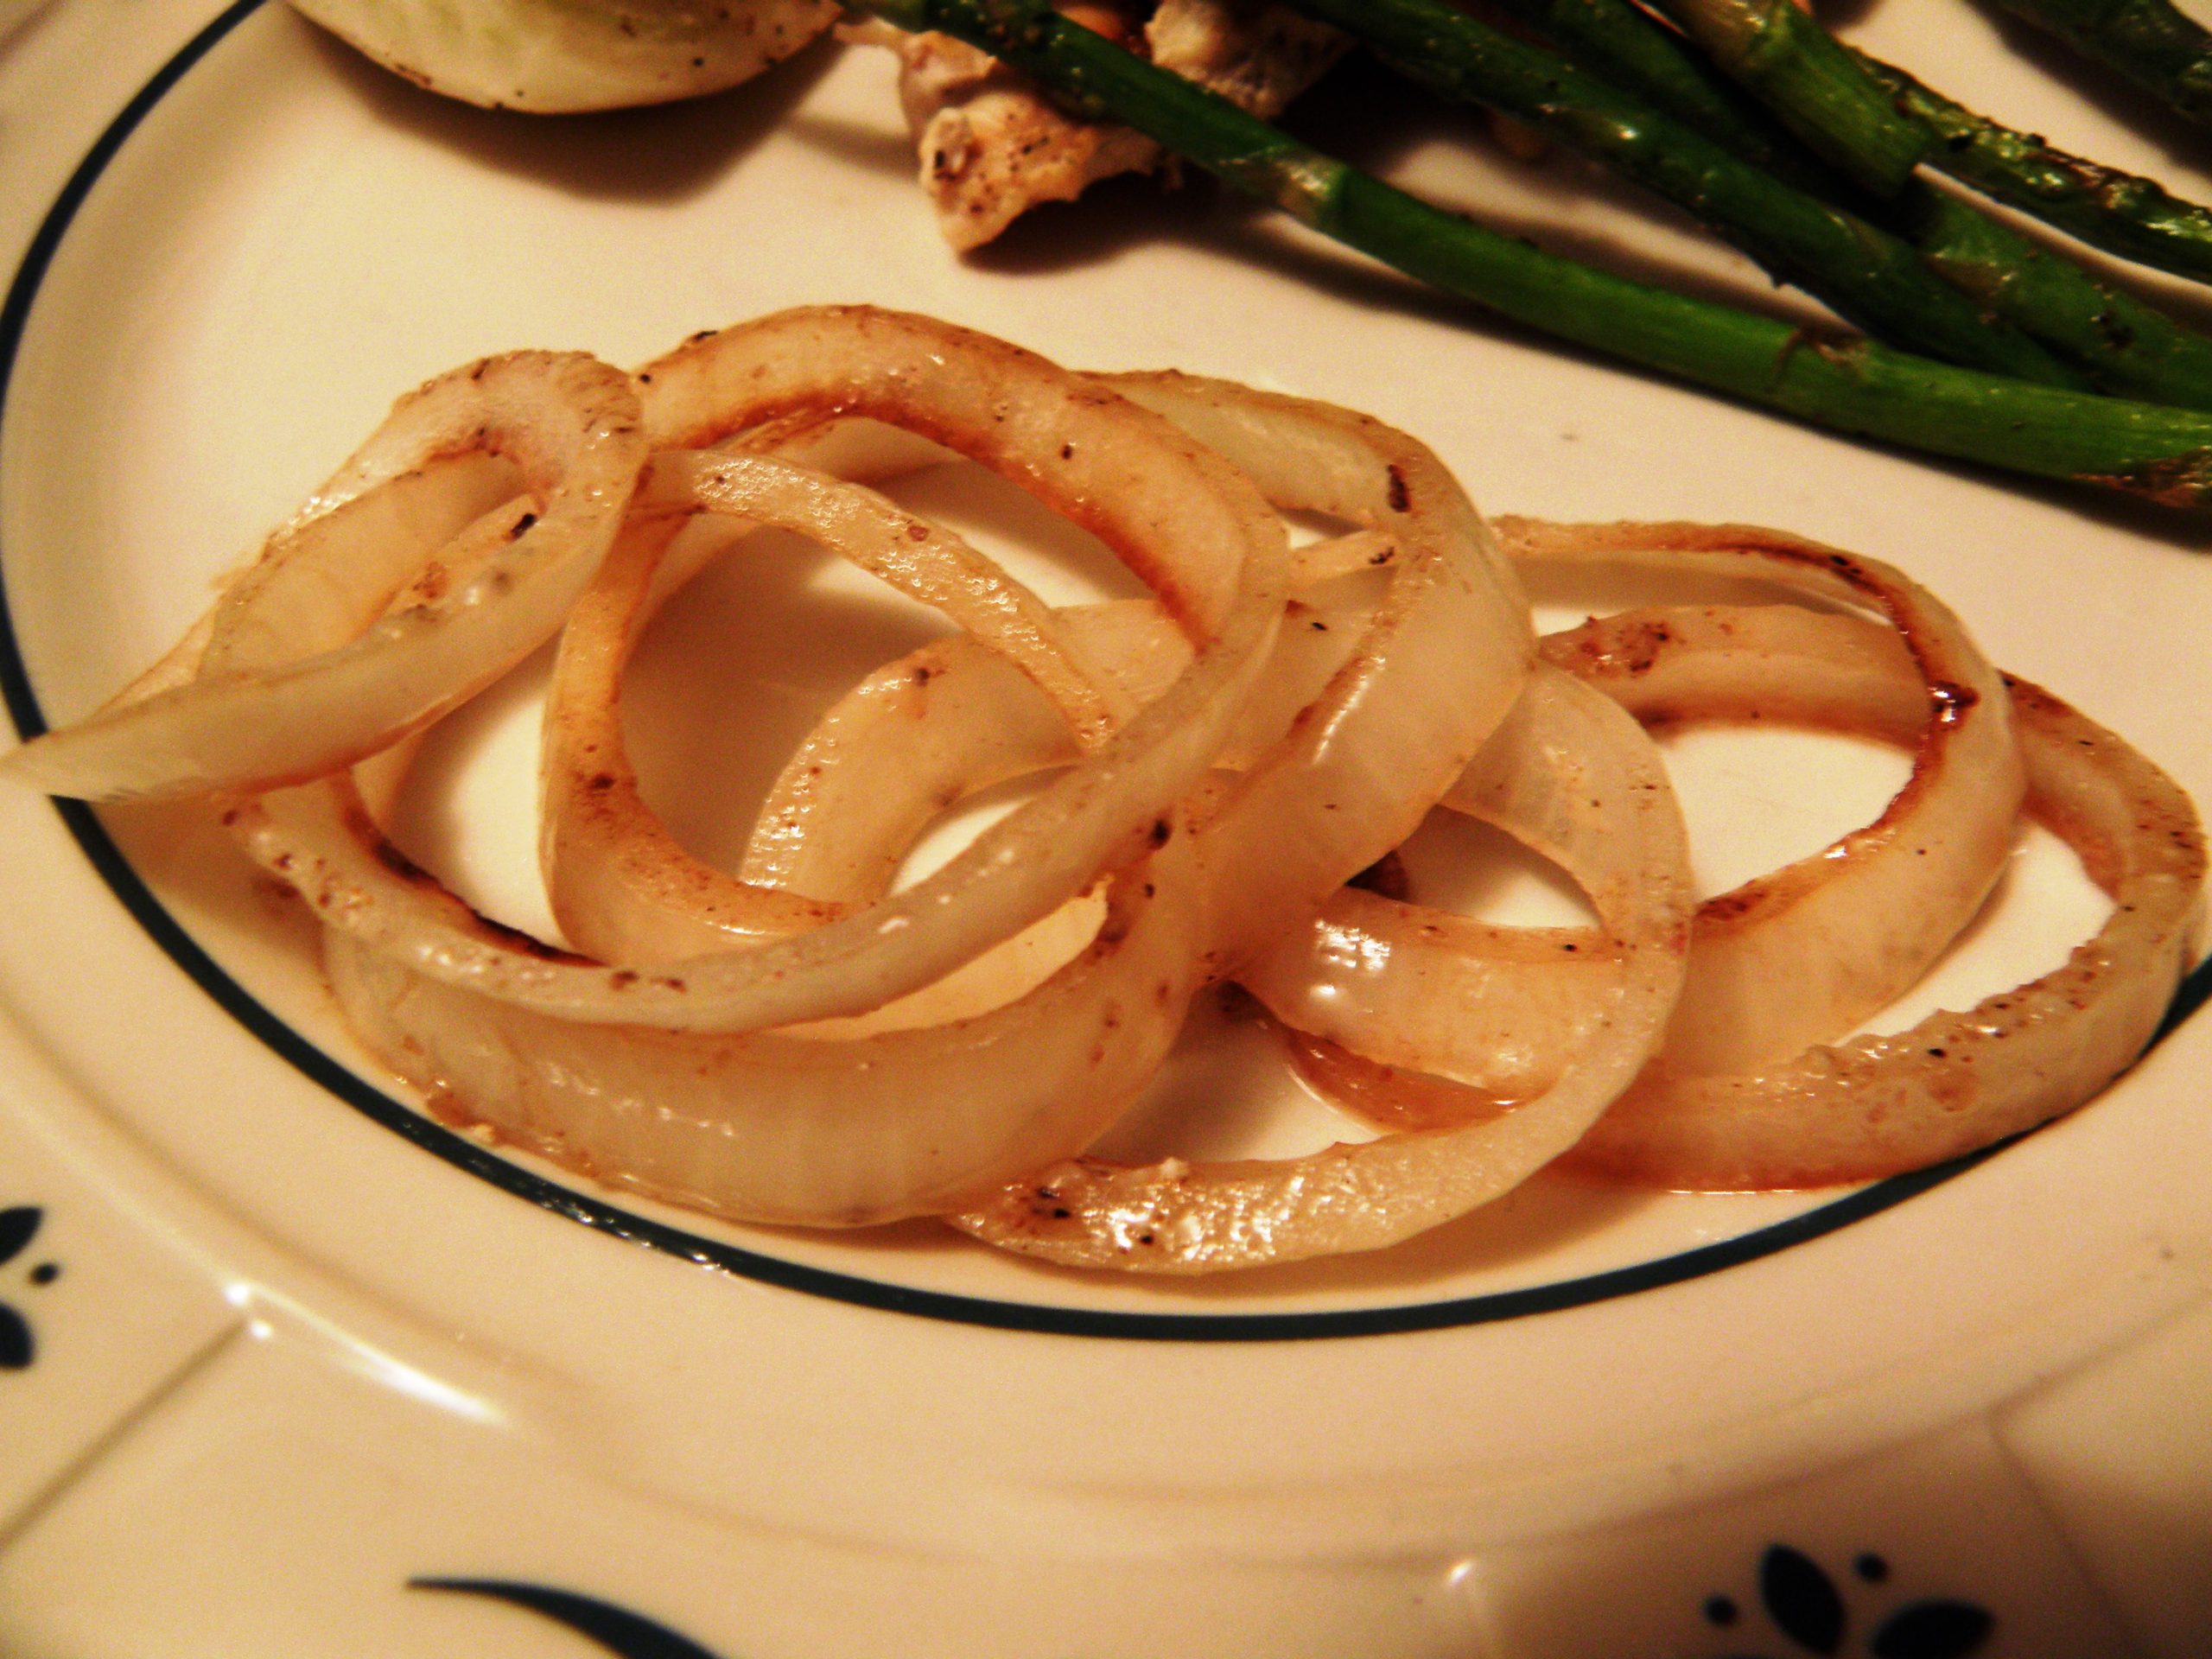
Yum Yum Onions
Plan Z Phase: This is a Z3 (ZReboot) recipe. I titled these Yum Yum Onions for the obvious reason. I am convinced they will receive rave reviews at your table, like they did at mine. Be sure to make extra! This is a great low-carb option.
Servings: Serves 3 – 4 (Or only two if one of them is my husband. The man loves onions)
Ingredients:
- 2 large Vidalia onions, thinly sliced. I use my mandolin on level 2.
- ¼ cup of butter cubed
- ¼ tsp of your favorite blackening spice or meat rub.
- 1 tsp of stevia. Truvia or Purevia are two brands
- ¼ tsp of grated sea salt
- 2 Tbl of sherry vinegar
- 2 Tbl of port
- ¼ cup of grated parmesan cheese
Instructions:
Saute the onions with the butter until all loosened. Add the blackening spice, stevia, salt, vinegar and port.
Cook until onions are fully cooked. Sprinkle on the parmesan cheese and stir to melt. Then serve.
Special notes: If you are making a big batch of these you can sauté the onions and put them in a 9" x 13" pan in batches. Then add the other ingredients and stir. Bake for an hour at 350 degrees stirring half way through. Put them in a bowl and then stir in the Parmesan. Then serve.
Leftovers will keep fine in the refrigerator. Serve with leftover turkey, chicken, beef, pork, lamb….even fish.
Enjoy!
Cheers,
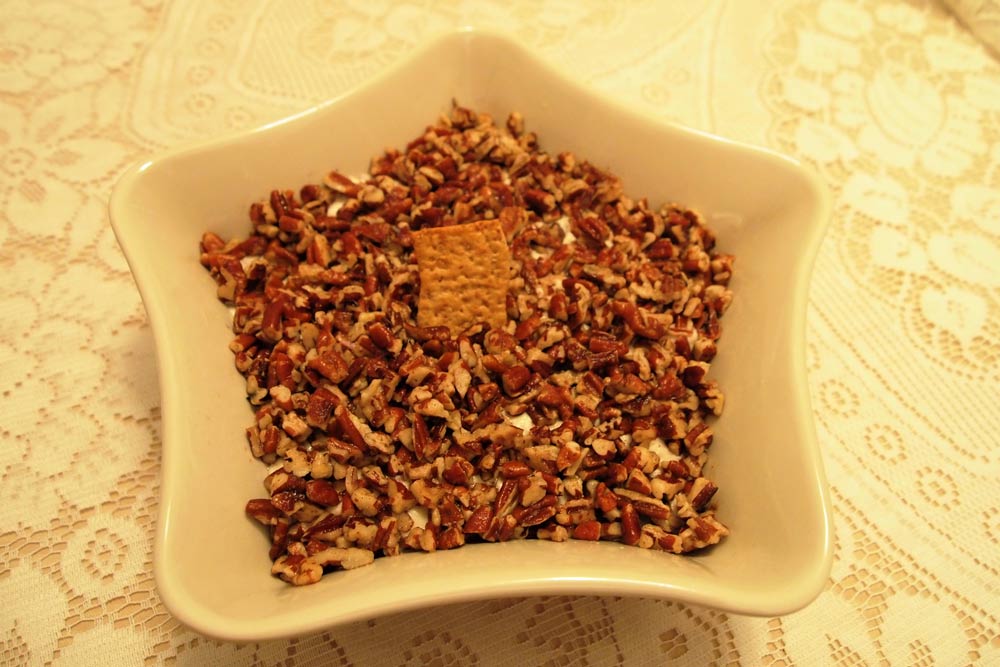
Hot Chipped Beef
Plan Z Phase: This is a Z3 (ZReboot) recipe. When you’re feeling in a retro mood, pull this recipe out, serve with crackers and you’ll be singing the yum-yum song.
Servings: Serves from 12 to 20
Ingredients:
- ½ cup chopped onion
- ½ cup chopped green bell pepper
- 4 Tbl butter, divided
- one half cup of sour cream
- one half cup mayonnaise
- 1 – 8oz package of cream cheese, softened to room temperature
- 5 oz of sliced corned beef chopped
- 1 cup of chopped pecans
- whole wheat crackers
Instructions:
Preheat oven to 350 degrees.
In a large sauté pan put in the onion, green pepper, and two tablespoons of the butter. Heat on medium high until the onion and bell pepper are softened. Add the sour cream, mayo, cream cheese and chopped beef. Stir on medium low until you have a creamy white sauce and the beef is all mixed in. Pour this whole concoction into a 9" x 9" oven proof pan. In a small sauce pan put in the last two tablespoons of butter. Start the better melting and add the pecans. Coat the pecans in the hot butter until hot and bubbly and then spread them across the top of the cream cheese/beef mixture.
Bake 15 – 20 minutes until the dish is completely heated through.
Serve hot or warm with the whole wheat crackers. Be prepared to watch your guests balance large scoops of hot beef on their crackers. They can’t help themselves. This dish is addictive and can disappear fast.
Enjoy!
Cheers,
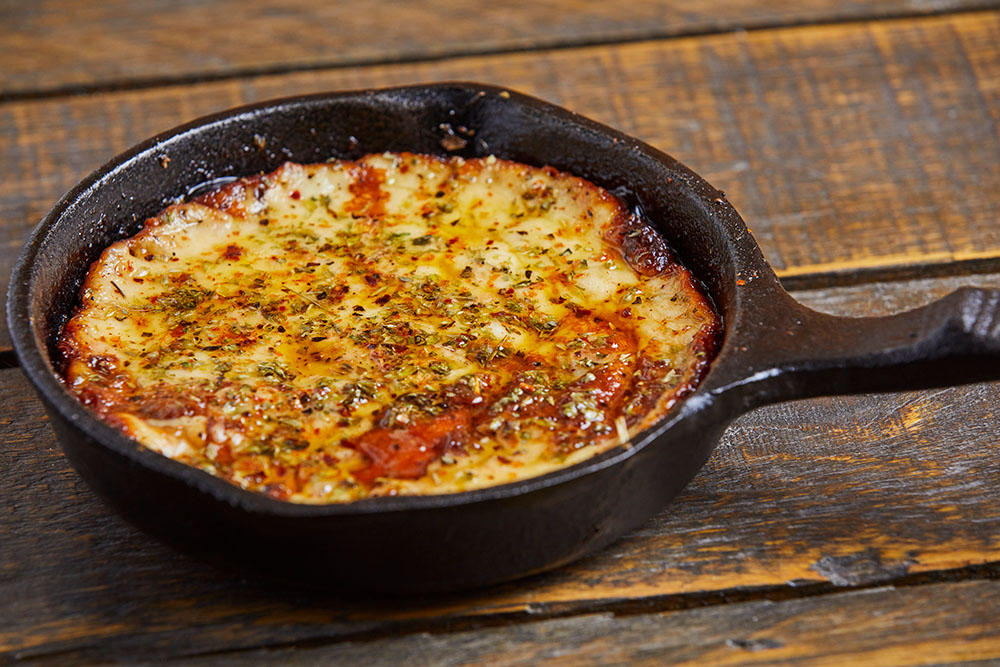
Broiled Provolone with Italian Herbs and Crackers
Plan Z Phase: This is a Z3 (ZReboot) recipe. Two basic ingredients and some herbs. Simple elegance at its finest.
Servings: Serves 6 for a light appetizer
Ingredients:
- one 1-inch thick wheel of provolone (the wheels are usually about 5 inches in diameter; close in size is fine)
- your favorite crackers to serve with cheese (12 to 20 of them)
- 4 Tbl olive oil
- dried Italian herbs (in a jar) to taste
- sea salt to taste
Instructions:
Preheat your broiler. Put 1 Tbl oil in a metal or glass pie pan. Swish it around. Place the disk of cheese on top. Drizzle the rest of the oil on top. The oil will drift off the sides but don't worry. Sprinkle with dried herbs and grate sea salt on top.Place 6 to 8 inches below the broiler element. Broil for up to 7 minutes (check it at 5 min) or until slightly browned and puffy in spots on top. The edges will crisp. Watch out for splattering oil. It's HOT. It might smoke a little too. That's okay. Carefully slide the broiled provolone out of the pie pan and onto a serving plate. Coax it with your spatula. The oil will come along with the cheese, so make sure your serving plate has a lip on it.
Serve the crackers on the side. Tell your guests to dig in quick! They can stretch the cheese using a couple of knives to "pull it apart" and cut bite-sized pieces. Stack a slice on a cracker and enjoy. The cheese will begin to immediately get chewier as time passes, so encourage them to dig right in.
Enjoy!
Cheers,

Parmesan Crackers
Plan Z Phase: This is a Z3 (ZReboot) recipe.
Make these crackers when you have invited a friend over for a glass of wine and you want to have a little snack on the side. Make them for any cocktail party. Make them as a side cracker to go with a bowl of soup, even for an elegant party. Combine them with my Hearty Italian Tomato-Mushroom soup for a simple lunch with a salad.
Speaking of salads, they make a great crouton substitute on a Caesar salad or they round out most other salads nicely. You can make them double the size and they sit beautifully UNDER the salad or balance on top like a hat.
It's a beautiful addition to any meal. They melt in your mouth. They are best eaten the day they are made. They taste their most exquisite when they are slightly warm (you can even warm up ones that you made earlier in the day), and they keep pretty well for a day or two.
So, here's the simplest recipe I know that goes in an oven.
Ingredients:
- Shredded Parmesan cheese. Not grated cheese. You can grate your own or you can use the mass-produced kind that comes in a bag. Both make a fine cracker.
- olive oil to spray the pan
- pepper or cayenne to season crackers (optional)
Instructions:
Heat your oven to 375 degrees.
Take out a cookie sheet and spray it with olive oil spray. Spray lightly so crackers are not greasy.
Scoop a heaping tablespoon full of the shredded cheese from the bag and place it on the cookie sheet. Place the next mound near it but leave about an inch or more all around so when the crackers spread a bit during baking, they won't run into each other.
Bake approximately 10 to 12 minutes or until the crackers are golden yellow and even a slight tinge of light brown on the top or edge.
Remove from oven and let cool for just a minute on the counter. The only tricky part is getting them off the cookie sheet. You want to let them "set up," but you don't want to leave them until they are completely cool or they become difficult to remove from the sheet and you might break them in the process (pieces still taste good though). Use a thin spatula to slide under the crackers and remove them to a surface to keep cooling.
You can sprinkle on the pepper or cayenne before you bake to make zippier crackers. I'd make them plain the first batch so you can taste test before deciding if you want to add seasoning. Most times I make them plain because the flavor of the baked Parmesan is so intense it really doesn't need any more embellishment.
Enjoy!
Cheers,

Turkey Roll-Ups
Plan Z Phase: This is a Z3 (ZReboot) recipe. This is a recipe that can made by a supervised child or a helper. It's basically assembly work. Your time is then freed up to work on the other things. It took me about 30 minutes to do 30 rolls.
Servings: Makes 12 pieces
Ingredients:
- 12 slices of deli smoked turkey (Have the deli counter person slice it fresh for you. Tell that person you want it thin but no tears in the meat so it will stay together. You can even look for special variations, e.g., Cajun, etc. Your choice.)
- 1/2 cup French or coarse mustard
- 1/2 cup mayonnaise
- 3 tomatoes sliced thinly
- 6 slices provolone, cut in half
Instructions:
Stir the mustard and the mayonnaise together in a bowl. Lay out a single slice of your turkey. Spread with one teaspoon of the mustard/mayonnaise spread. This doesn't have to be spread across the whole slice of turkey. Just spread in the middle. Lay one-half slice of provolone on top. Lay one thin slice of tomato in the middle. Now roll it up like a cigar. Keep tight enough so it stays rolled when you set it down.
You might serve the rolls in a bowl instead of on a platter. Set them along the rim of a shallow bowl (like a pasta serving bowl). You can do more than one row of rolls of different flavors. For extra color, place a bunch of parsley or a combination of herbs in the middle.
Enjoy,
Cheers!
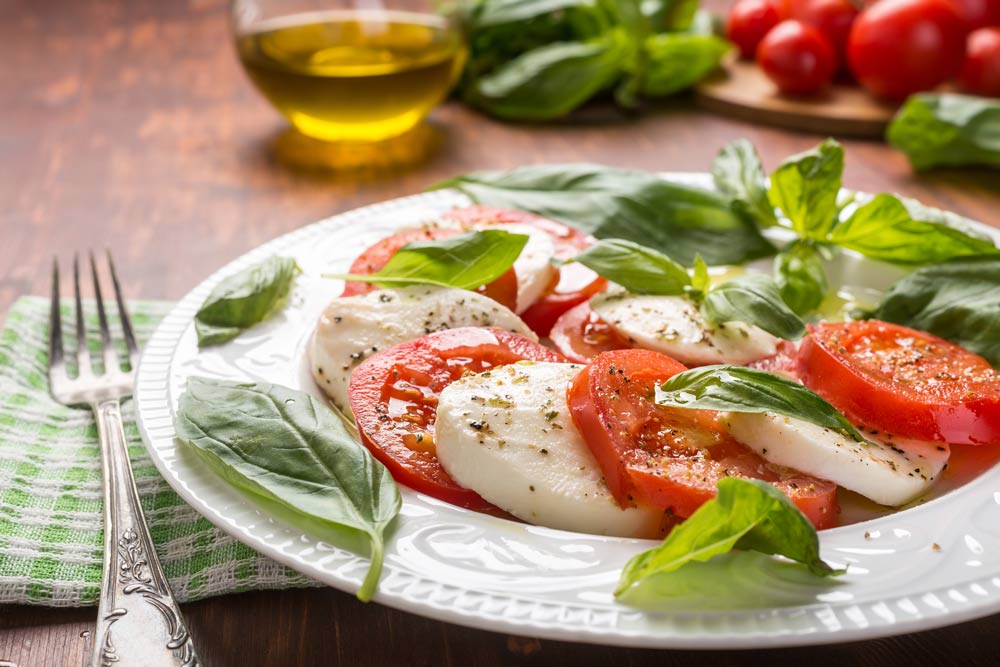
Caprese Tomato Salad
Plan Z Phase: This is a Z3 (ZReboot) recipe. This makes a quick light appetizer that's pretty in the summer. Or it can be a side salad or even an Italian side dish to go great with grilled summer foods.
Servings: Serves 4 as a side salad. Serves 12 as a cocktail appetizer.
Ingredients:
- 4 ripe medium-sized tomatoes (You choose your favorite type. For presentation, you probably want round ones as opposed to Roma or pear shaped.)
- 4 balls of fresh buffalo mozzarella
- Italian dressing (You choose your favorite. Homemade or commercial.)
- basil for garnish
- salt and pepper to taste
Instructions:
The amounts of ingredients for this recipe are approximate. Amounts depend on how large the tomatoes, how big the mozzarella, and how much dressing you want.
All you have to do is slice the tomatoes into one-third-inch slices. Same with the mozzarella balls. You can save the ends of both for something else. Place the slices on the plate by alternating the tomatoes with the mozzarella: red, white, red, white.
Now drizzle on dressing. A couple of tablespoons per person usually does it, but it's up to you. You can leave this to marinate for up to an hour or you can proceed to the chiffonade (below) right away.
When you're ready to serve, take the basil leaves and remove them from the stem. Stack the leaves on top of each other. You're going to make what's called a chiffonade. Stacking the basil leaves just makes it easier. Slice the basil on a diagonal, very thinly. You'll have basil "ribbons" or a chiffonade. Sprinkle them on your tomatoes and mozzarella. Sprinkle on salt and pepper to taste and you're ready to go.
Enjoy,
Cheers!
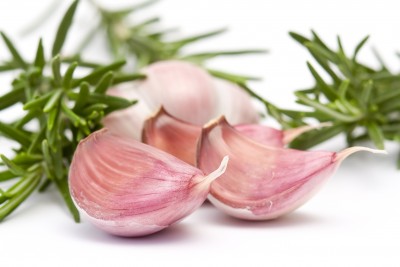
Caramelized Roasted Garlic
Plan Z Phase: This is a Z3 (ZReboot) recipe. The recipe this week is about as easy as they get; with one trick. You will want to roast the garlic until it is lightly golden on the edges and the timing depends on your oven, the size of the garlic and the amount of oil you use.
Servings: Serves 4 with crackers as an appetizer
Ingredients:
- 1 head of garlic peeled and divided into individual cloves. You can also use a few cloves of elephant garlic. Just cut them into ½-1” chunks.
- olive oil
Instructions:
Preheat oven to 375 degrees.
This is an amazingly versatile recipe. My husband could not believe I had not yet written it up for you. Do not be afraid of this garlic. When you roast garlic this way it become mellow; not harsh. It becomes soft as creamy cheese and can be spread.
The first thing you need is a small, oven-proof container to roast the garlic in. Some people just wrap the garlic in aluminum foil. I do not agree with this technique. I want the garlic immersed in the oil but with just enough of the garlic tops sticking out (exposed to the oven temp) so they start to brown. Any garlic will brown in aluminum foil if you leave it in long enough but this way you can keep an eye on it and know exactly when it is done. I use a large ramekin to roast my garlic. You can use a little oven-proof pot or a piece of bakeware too. If you have to use a 9" x 9" pan (which I had to do on vacation once), I built a little wall of aluminum foil to block off most of the pan surface. That worked, but a smaller vessel is ideal.
When I separate the garlic cloves I only use the larger chunks. Save the bitty ones for another use. Place the garlic chunks in the small, oven-proof container. Pour olive oil over the top until it reaches almost to the top of the garlic, ½” or maybe more. Roast at 375 degrees for 30 minutes. Check then to see if your garlic is beginning to brown. If it is, remove it from the oven to cool. If it is not browning yet, add 10 minute increments until it is browning; just a bit and then remove it to cool.
Leave in the olive oil until it is cooled down. Then you can take it out and mash it in a container with a fork to make a paste. It is not a pretty concoction but you can spread this on bread or serve it with crackers for an exotic appetizer.
You also have the option of using the recipe to make roasted garlic mashed potatoes. When you are ready to mash the potatoes you can add the caramelized garlic and oil into the pot along with salt and begin mashing. You can then judge if you want to add cream or milk to get the consistency you like. If you use Yukon gold potatoes you are not even likely to need milk. The oil and garlic whipped into the potatoes make a smooth side dish.
Let your imagination run wild. I have used the caramelized, roasted garlic as a spread on toasted Italian or French bread and then topped it with all kinds of things to make different kinds of bruschetta. I have also used it as a paste to roast meat or inserted it inside the meat. You can also include it as a portion of an antipasti platter. This might be the one “homemade” item on the platter and get the rest from a deli. Or add it to roasted asparagus at the end of roasting time and you will have garlic-roasted asparagus. Or green beans. Or peas.
You can roast the garlic along side any other item you have in the oven (except maybe baked goods). That way the oven is working on more than one thing at a time. You can even do the roasting at 350 degrees or 400 degrees. Just adjust your roasting time accordingly. Lest I confuse you by giving too many options, I will quit now.
Enjoy!
Cheers,
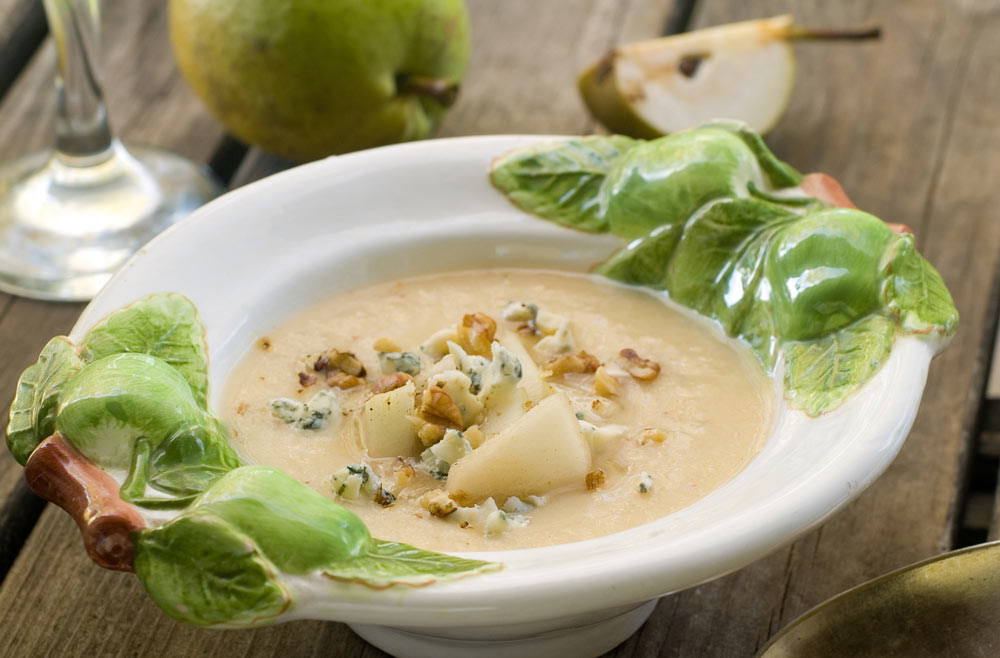
Pear and Blue Cheese Dip
Plan Z Phase: This is a Z3 (ZReboot) recipe.
Servings: 4 servings
Ingredients:
- 2 cups of pears cut into dice. These can be canned pears or fresh. If you use canned pears be sure they are not packed in sugar. If they are in any kind of sweetened juice just rinse them well before cutting them up.
- ¼ cup of mayonnaise (find an organic one or some make their own)
- ½ cup of blue cheese crumbles (or more to taste)
- ½ cup of chopped pecans
Instructions:
Preheat your oven to 350 degrees.
Put the pears in an oven proof 9" x 9" pan. Stir the mayo amongst them to coat the pear bits. Then later on the blue cheese and finally the pecan bits.
Bake in your oven at 350 approximately 15 – 20 minutes until the pecans begin to toast and the mixture is bubbly.
You can use celery sticks to dip or a few of the wafer thin crackers. You can even just eat it with a spoon!
Enjoy!
Cheers,
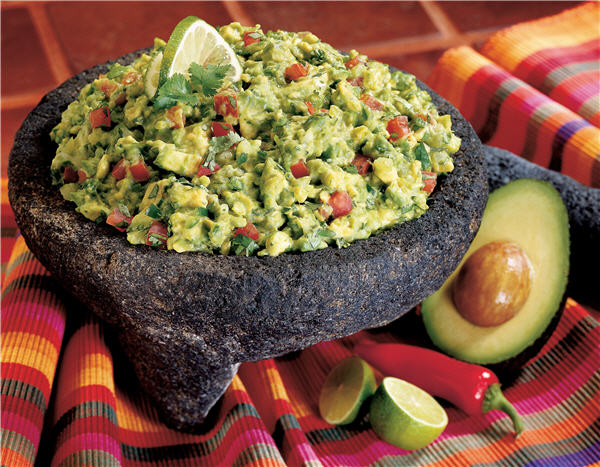
Rockin' Guacamole
Plan Z Phase: This is a Z3 (ZReboot) recipe.
This is a great tasting guacamole to accompany any Mexican dish. The key to a really good guacamole is to keep it simple and keep it fresh. Good, fresh veggies are essential.
Servings: Serves 6 to 8
Ingredients:
- 1 large, ripe avocado
- 1/2 small onion, chopped very finely (but not minced)
- 1/2 small tomato, diced in 1/4" cubes
- 1 small clove of garlic, minced
- 1 tsp fresh squeezed lemon juice
- 1/2 tsp cumin
- pinch of salt
- lime wedge (optional as a garnish)
Instructions:
Add all ingredients in a bowl and smash the avocado with a fork until you reach the desired consistency. Some people like their guacamole chunky, I like mine a bit more smooth.
Serve on Melba toast rounds or on whole wheat crackers. Zola recommends scooping out a portion of the guacamole on your plate so you can re-use your crackers (and consume less of them!). You can squeeze some fresh lime on your guacamole if you want a little more of a citrus punch to it.
Goes great with Zola's cheesy chicken enchilada casserole or Efrem's tortilla-less enchiladas!
Enjoy!
Cheers,

Creamed Spinach
Plan Z Phase: This is a Z3 (ZReboot) recipe. Creamed spinach makes a wonderful, old-school side dish or you can use it as a dip. Serve with Melba rounds and just reuse your rounds so you don’t eat more than 3 or 4.
Ingredients:
- 10 oz box of frozen chopped spinach, thawed
- 8 oz of mascarpone or cream cheese (full fat)
- 2 Tbl of butter
- 6 pieces of bacon, fried crispy and diced
- 1 cup of parmesan cheese, divided
- ½ cup of swiss cheese, grated
- light grating of sea salt
- dusting of cayenne (optional)
Instructions:
Preheat oven to 350 degrees.
Take out the spinach. Lay it on paper towels and begin squishing out the water. It might take a few towels to get it all soaked up. You want most of the water out of it. Toss the towels.
Put the spinach in a 9" x 9" oven-proof pan.
Add the mascarpone, butter, bacon, Parmesan, Swiss cheese and seasonings. I like the cayenne to give it a bit of zip.
Microwave on high for 1 – 2 minutes; just to loosen up the cheeses. Stir them all together. Then bake for 30 minutes at 350 degrees.
Enjoy!
Cheers,
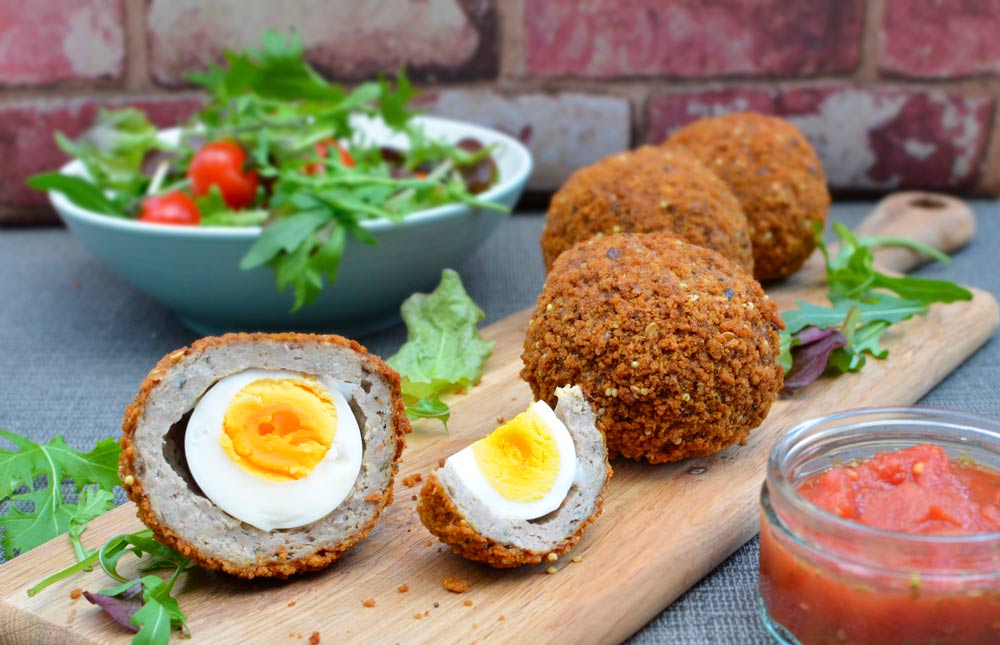
Scotch Eggs
Plan Z Phase: This is a Z3 (ZReboot) recipe. A traditional Scotch Egg involves wrapping sausage around a whole hard-boiled egg, which can often be a challenge since they are so slippery. It is also common in Scotland to make this smaller version, which Scots will eat either as an appetizer or as part of a main meal.
Servings: Serves 2-4
Ingredients:
- 1/2 - 3/4 cup flaxseed meal
- 1/2 tsp ground black pepper
- 1/2 tsp ground sage
- 1/2 lb ground sausage meat
- 3 eggs (2 hard boiled, 1 raw)
- 1 Tbl quinoa flour
- oil for cooking (I used sesame oil)
Instructions:
(NOTE: This recipe requires something of an assembly line, and though it is not difficult for one person to do every step, it does work well as a family project. I suggest setting up all the steps before proceeding, since your hands will get a bit gooey along the way.)
Finely chop the two hard-boiled eggs and set aside. Whisk the raw egg in a bowl.
Mix flaxseed meal, black pepper, and sage together in another bowl or on a plate.
Dust your cutting board with flour and then flatten sausage on it until 1/8-1/4-inch thick. Take a heaping teaspoon of chopped egg and place on sausage.
Wrap some of the sausage around encasing the egg completely (it will be similar to a meatball in appearance). Dip the sausage-coated egg in the whisked egg until coated, and then roll in flaxseed meal mixture until coated in it. Set on a separate plate. Repeat with the rest of your hard-boiled egg and sausage.
Heat the oil in a pan until hot (the amount of oil depends on the pan you choose to use, but you should make it at least 1/4 inch deep). Cook Scotch Eggs for about 5-6 minutes, or until browned, turning as needed. Remove and drain any excess oil on paper towels.
Scotch Eggs are equally good served hot or cold, and they reheat well in the microwave too. There is some variation in the amount of flaxseed meal needed because how much you need depends on how large you make your Scotch Eggs. It is hard to mess up this recipe, however, so I encourage you to tweak the amounts (or ingredients, if you do not care for sage) to suit your own tastes.
Enjoy!
Cheers,
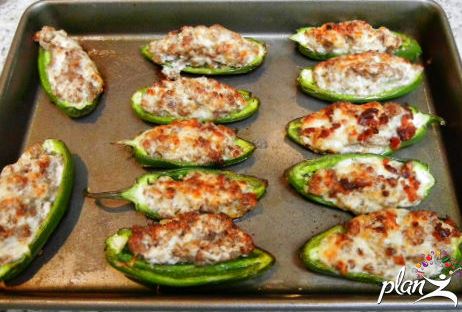
Stuffed Jalapeno Peppers
Plan Z Phase: This is a Z3 (ZReboot) recipe.
Serving Suggestions: Makes 32 for a party or cut the recipe in half for fewer people.
Ingredients:
- 2 pounds of loose sausage. I used mild Italian but I can see you being able to use many types of sausage. You could use chorizo for a Mexican appeal and even more spicy heat. Or Andouille for the Cajun slant. Or I even thought about using breakfast sausage that has a bit of maple in it for a sweet-hot version. If the sausage you choose is in casing, just cut the casing and take it out. In most cases it comes out very easily.
- 1-1/2 packages of cream cheese. 12 oz, softened.
- 1-1/2 cups of shredded cheese. I used the 5 cheese Italian blend but yet again, I can see all kinds of options. You can use cheddar, pepper jack, some Parmesan, blue cheese crumbles, or others. I do suggest one of the cheeses you choose be a creamy one so the peppers will have some gooey texture, so if you use Parmesan include a gooey one from the list above to go with it.
- 16 large, fresh jalapenos, halved lengthwise and seeded*
Instructions:
Preheat oven to 400 degrees.
Put the sausage in a sauté pan and begin browning it on medium high. I constantly cut up the sausage while it cooks because I want brown edges all around and I want to make sure I have teeny bits rather than larger chunks. While the sausage is cooking you can begin the work on seeding your jalapenos. Just stir the sausage regularly and keep breaking it up. Cook until there is no pink left in the sausage bits.
When the meat is cooked and broken up add the cream cheese and the other cheese(s) of choice. Stir to get it fully mixed.
Then here’s another trick. Rather than stuffing the peppers right away, I put the mixture in the refrigerator and chill it. When the mixture gets cold it hardens up and makes it easier to work with to stuff the peppers. Use a spoon to take out a mound of it, form the mound with your hands into a cigar shaped piece and pop it into the jalapeno shell and set them on the cookie sheet. (In the picture you can see them ready to go into the oven). They can go into the oven now or go back in the refrigerator to bake them later. When you are prepping for a party this is very handy. You can prep them the day before and cover them, put them back in the refrigerator and bake them during the party.
Bake for 20 – 30 minutes or until the peppers are roasted and the filling is warmed through and gooey but not running out of the pepper shells.
Serve hot from the oven.
Depending on the size of your peppers you might have filling left over. You can keep this for later. It will make a lovely stuffing for an omelet.
*Hints: Be very careful when you seed jalapenos. Use rubber gloves or be careful not to get any jalapeno juice in your eyes. The easy way to seed them, once cut, is to take a small knife and cut around the vein edges and then use the small side of a melon baller to slide out the guts. This makes fast work of seeding. The pepper juice will be invisible on your fingers so before you get some in your eye, was your hands thoroughly.
Enjoy!
Cheers,
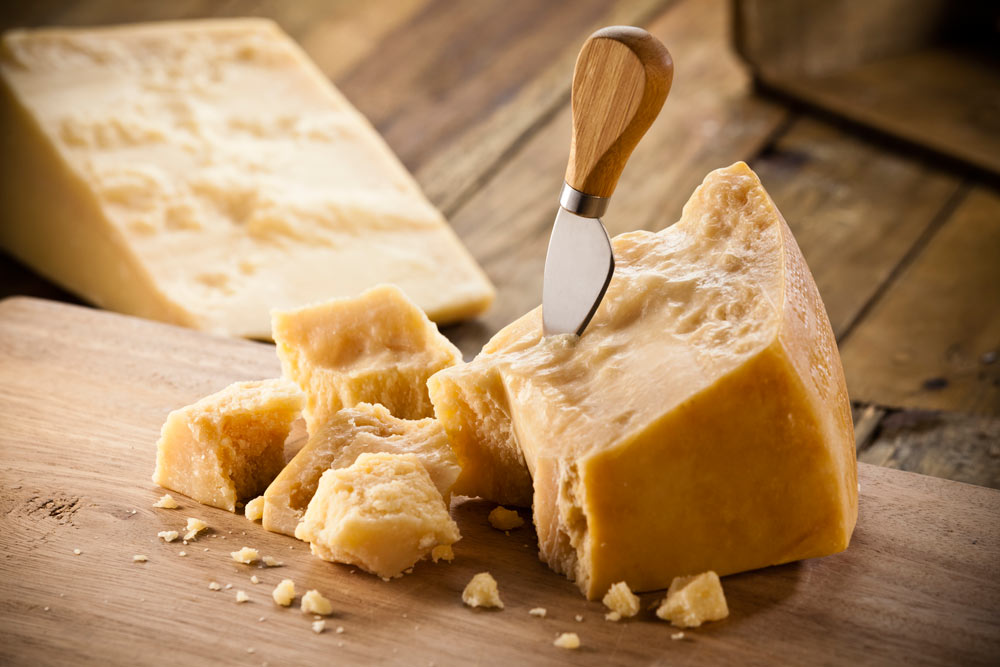
Parmesan-Reggiano in the "Raw"
Plan Z Phase: This is a Z3 (ZReboot) recipe. There's only one ingredient in this recipe. The success is in the quality and the presentation. Cooking rookies and gourmets in a hurry can't beat this one for ease. I've been to several Italian restaurants lately that seem to have "discovered" Parmesan-reggiano cheese--only this time they aren't grating it on your pasta; they are serving it as a pre-appetizer. An amuse bouce some would call it. My theory is that it makes a great cocktail hour treat for the guests and takes a huge burden off the party host.
Servings: 8 servings
Ingredients:
- Parmesan-Reggiano cheese (approx. 1 pound wedge)
Instructions: All you need to do is go to your local cheese purveyor--a good one--someone like Whole Foods. Ask for a chunk of their best Parmesan reggiano cut right off the wheel. You'll be assured of freshness this way, but be nice and order enough to make it worth it to the cheese seller to cut it off the wheel. A pound or so will do it. It's expensive but worth it. I ask for it by making the wedge shape and size I want with my hand and they get the idea.
The second secret is the display. Find a cool tray/platter in your collection. It needs to be something you don't mind people cutting on. I have a metal one that is in the shape of a triangle with bumps on it that shine under the lights and just makes the cheese look fancier. Rustic works great too. Use a sharp cutter. A cheese knife with that little forked end is best, but otherwise a sharp knife will do. Don't use a cheese planer. Start off the cutting so your guests will get the idea. We are not talking shavings here. We are attempting to cut the cheese in "baby-blocks"--think of the size of sugar cubes. Don't get too picky. Just don't make them too small. The idea is to kind of suck on the pieces while you sip your drink. It's amazing. You never knew how good a good Parmesan cheese could taste until you serve it this way with your favorite cocktail or a wonderful glass of wine. Sure beats that stuff my dad sprinkled out of the green can onto his spaghetti! Oh, by the way, if you don't eat it all in the one sitting, the cheese will keep its flavor for up to a month if you wrap it tightly and keep it refrigerated. It's also decadent grated or shaved on other things like salads or bruschetta, so don't forget it's in the refrigerator.
Enjoy!
Cheers,
Extra Easy Meal Ideas
Here's a list of very quick and easy dishes that you can prepare in minutes:
Grilled Chicken Tenders with a Side Salad
The grill pan comes in GREAT. All I had to do was pick up chicken tenders at the grocery store. Season them with a rub or celery salt and grill them. VERY lightly spray the pan with olive oil spray. No butter. And a quarter of a second is a portion of oil so keep it very low! My portion was 3 or 4 tenders. One package usually fed two of us because Chris got the extras. On the side I’d have a cup of lettuce and a cup of chopped veggies from the list. The dressing recipe is on the website, but basically it’s: 3 parts water, 1 part vinegar and 1 package of stevia (or a part of a pack). Whiz in your blender and voila. Balsamic vinegar is a good choice to start. Then experiment.
If you grill extra chicken tenders you have them for Zola To GO! You can eat them cold at your desk or heat them in the microwave. Or use a few to make a small chicken salad.
Grilled Sirloin Burgers
Buy high quality meat for this and you’ll have great burgers. I just take 2 pounds of ground sirloin and cut it into 4-6 sections. Make patties and put them in little ziplock bags in the freezer. Thaw and grill them in your grill pan. Or you can grill them and re-heat them as part of Zola To GO! Lightly spray the grill pan with olive oil. Just a teeny squirt is all you need. Season your burgers before you put them on. Salt and pepper is just fine. Sometimes, I use a rub.
Horseradish Burgers
These are a big hit at my house. Buy sugar free horseradish and put about 2 Tbl in a pound of ground sirloin. Smush it around. Add some garlic powder if you want. Or even chopped onion. Make burger patties and proceed as above.
I often have just a couple of slices of big, beautiful tomato with my burger or I add a slice of onion - or I grill an onion and add that. You can add a bit of balsamic to your onions and have caramelized onions. The onion string recipe I have goes well, too.
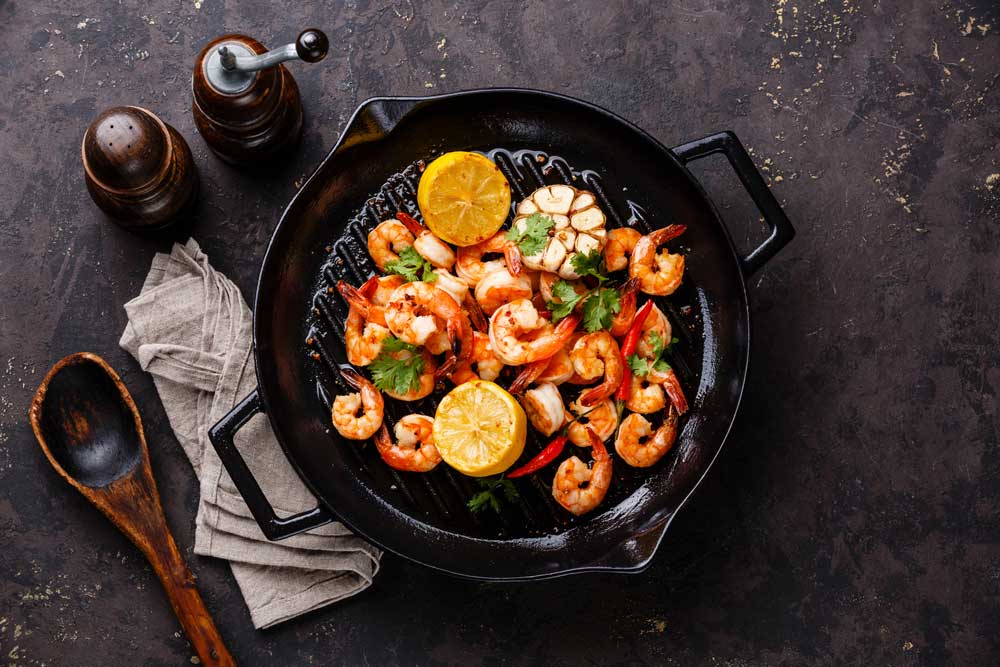
Grilled Shrimp
These are fun too. You can use some of your Bragg’s Aminos and give them an Asian feel. Remember you can have any rubs that have no sugar in them so you can look for an Asian rub or just use any other rub along with a sprinkling of the Bragg’s Aminos.
Little Salads
I often chopped tomatoes and added a bit of chopped shallot. You can grill green onions and flavor them, too.
Wilted Spinach Salad
You can wilt spinach by putting it in a sauté pan and add a bit of garlic (fresh or powder). Add a teeny splash of water and just toss the spinach with a tong for less than a minute. When the first bit of spinach begins to wilt, turn off the heat and begin moving the spinach to your plate. The heat you’ve gotten to the spinach will continue to cook it.
I could go on and on…. and I will. Stay tuned!
Enjoy!
Cheers,