Chocolate Crusted Peanut Butter Tart

 Add to favorites


Plan Z Phase: This is a Z3.5 (ZReboot 3.5) recipe. I recently devised this fabulously divine peanut butter tart so maybe you’ll want to whip one up. It’s light, creamy, rich and perfect for family and friends. Easy too! When special occasions come up (like birthdays), don’t think cake. Think this!
Servings Size: 8 servings or more. This is really rich so instead of a piece that’s 3” wide at the back is probably enough.
Ingredients:
For the crust
- 2 cups of chocolate cookie crumbs (You can use Famous chocolate cookies or there are organic cookie options too that are just chocolate wafers). You just whiz them in the food processor or put them in a large baggie and crush them with your rolling pin.
- ½ cup of melted butter
For the bottom layer
- 4 oz of bittersweet chocolate diced (65% cacao or up to 85%). The higher the number the deeper the chocolate flavor – less sweet
- 3 oz of whipping cream
For the peanut butter layer
- 8 oz of cream cheese (softened)
- ¼ cup of Truvia
- 1 cup of smooth peanut butter
- 3 cups of whipped topping or cream. You can whip your own cream and sweeten with 2 tsp. of Truvia and 2 tsp of vanilla. Make 3 cups of finished cream. OR you can buy Truwhip. This is like Coolwhip but it’s made with Truvia. It does have other natural sweeteners in it. At ZReboot 3.5 your liver can handle some sugar like this. Just don’t overdo it.
Optional top decoration
- 4 oz of bittersweet chocolate (65% cacao or up to 85%)
- 3 oz of whipping cream
Instructions:
You’ll need a 9” tart pan with removable sides. I use a cheesecake pan so the outside edge is smooth. Combine the cookie crumbs, and melted butter in a bowl. Mix with a fork until the crumbs are all wet with butter. Pour this mixture into the bottom of the tart pan and flatten it with your fingers. Gather some of the crumbs up along this sides and press them firmly to you make a 1” (or so) rim on your tart. Make room for the tart pan in your freezer and put it in there for 15 minutes to harden it.
While it’s in the freezer, make your bottom layer. In a small sauce pan, carefully, and slowly melt the chocolate and cream. Stir constantly. This will only take a couple of minutes on medium low. Even before the chocolate is fully melted take it off the heat. The heat of the pan and the hot cream will continue to melt the chocolate. If people make a mistake here, it’s keeping the pan on the heat too long and your chocolate will overcook and stick to the bottom of the pan or become grainy.
Take the tart crust out of the freezer and spread this layer over the crust bottom. Don’t try to get it up the sides. That’s not necessary. Return the pan to the freezer for up to 15 minutes more; or until the chocolate has hardened.
While this is happening make your peanut butter filling. In a bowl beat the cream cheese, Truvia and peanut butter until fluffy. Add the whipped topping and beat just until mixed.
Take the tart out of the freezer and spread the peanut butter mixture on top. Smooth the top with a spatula and lightly cover with plastic wrap and put it in the refrigerator. You can do this a day ahead of serving or chill for at least 3 hours. On the day you’ll serve it, remove plastic wrap and take a very sharp knife and carefully work it around the rim of the tart. You need to do this to loosen the sides of the tart away from the metal rim before you spring the pan open. Because the tart is cold this takes some pressure and some patience. It’s worth this extra step though so you don’t break the crust trying to get it out of the pan.
Display on a pretty platter.
Then make your final topping or plan to serve plain. Melt the chocolate and cream, and this time use a small spoon to take the chocolate mixture out of the pan and drizzle it around the edges of the tart. I do this in a swirl pattern to decorate the tart. I leave the middle 2 or 3” plain so the drizzle decoration looks like a chocolate-swirl wreath around the sides. You can leave the tart out of the refrigerator for up to a couple of hours before serving it; depending on how hot it is in your area. I like to leave it out at least 15 minutes so the depth of flavor comes out. If you serve it too cold it tastes too much like refrigerator cold. I don’t like to serve this sort of dessert right out of the refrigerator because I think it tastes better if it’s just cool and not cold. Cut with a sharp knife and serve. You’ll hear MMMM and YUM from all who taste it.
Enjoy!
Cheers,

Cranberry Royale (EASY)
This is a takeoff of a cranberry bake recipe from Southern Living. This is homey, tasty, and not too sweet. Just a little cranberry twang but plenty of sweetness in the apples.
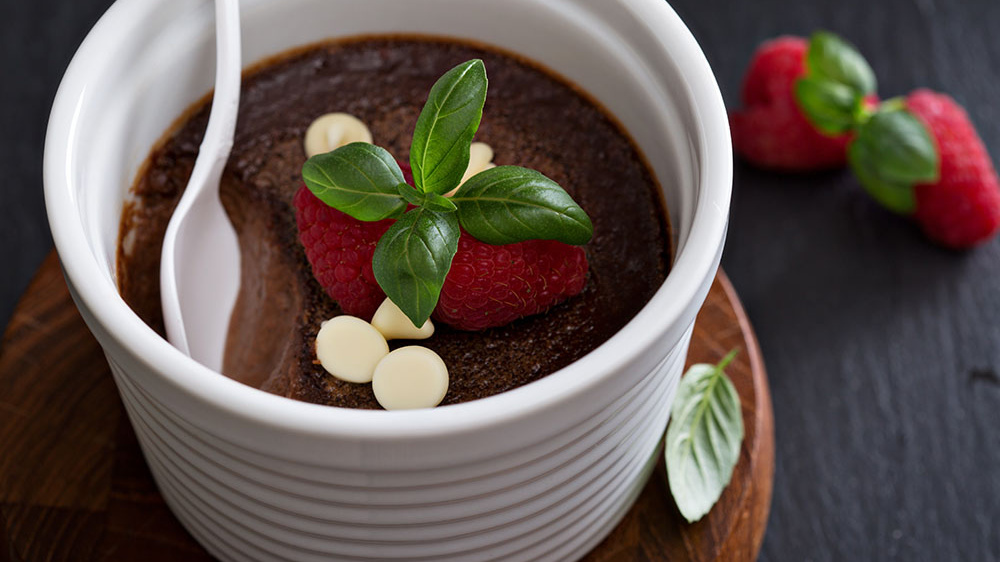
Chocolate Liqueur Pots de Crème
When I made it the other night one dinner guest declared it “Birthday Cake Good.” Which means...who needs birthday cake when you can eat this kind of Big YUM stuff!