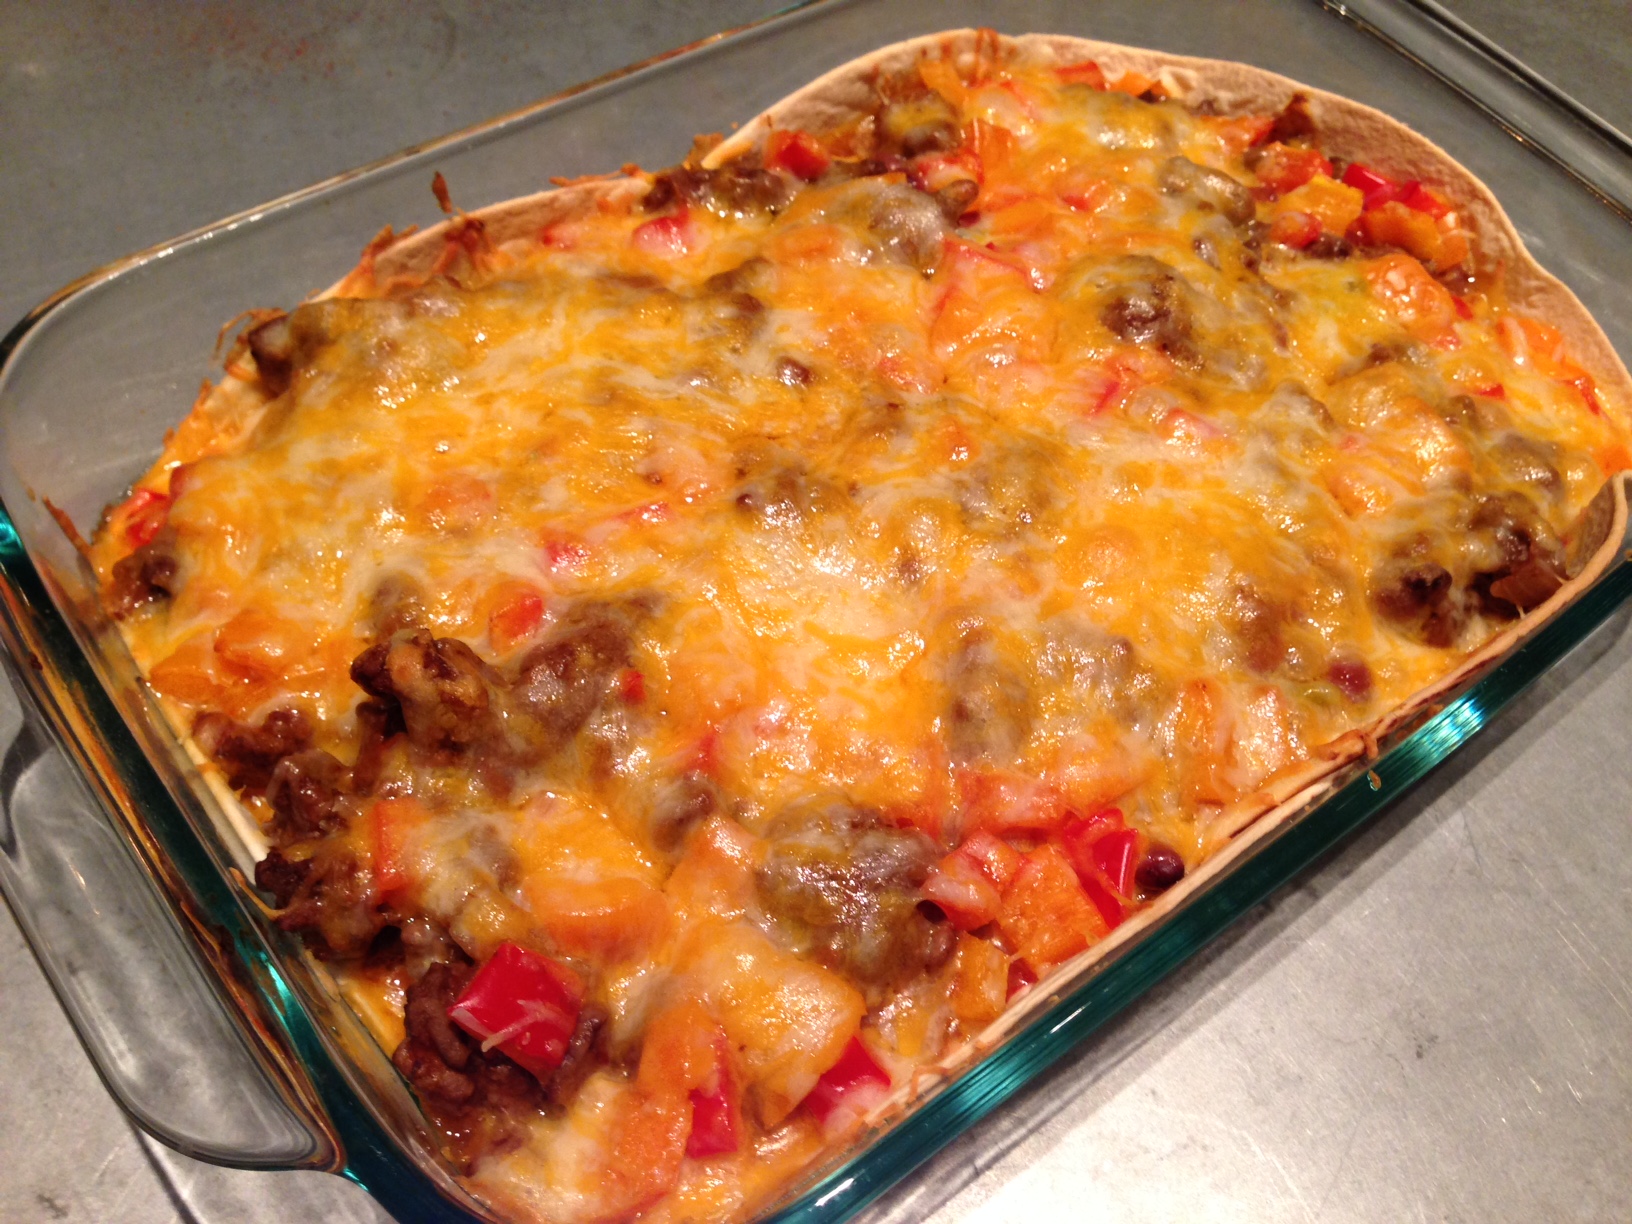
Mexican Casserole
Plan Z Phase: This is a Z3.5 (ZReboot 3.5) recipe. I was shocked. I have made this casserole so many times in so many variations -- I had no idea I had never typed it up to share with all of you! I am going to give you one version here but I’ll also editorialize a bit and give you other options to experiment. This recipe is so easy it comes together in under 15 minutes and then you just bake to heat it. A novice can handle this one for sure…and a busy parent can get a kid-friendly recipe on the table fast.
Servings: Serves 4-6 depending on portion size.
Ingredients:
- 1 Tbl of olive oil
- olive oil spray
- 1-1/2 burrito-sized tortillas (about 8” in diameter)
- 1 lb of ground beef. You decide how lean you want it.
- ½ cup of chopped onion
- 1 cup of diced veggies. I used red and orange bell peppers.
- ½ tsp of ground cumin
- ½ tsp of ground chili powder (or to taste)
- ¾ cup of enchilada sauce (I used medium. You choose your heat level.)
- 1 cup of chili beans in sauce (I use Bush’s brand)
- 2 Tbl of chopped green chilies (I get the ones in the little can. They are pretty mild.)
- 2 cups of shredded cheese (I use the Mexican blend but you can choose your favorite.)
Instructions:
Preheat oven to 350 degrees. You’ll need a 9” x 9” oven proof pan or a 6” x 10” works too.
Take out your pan. Spray with olive oil. Put in your tortilla so it runs up the side a bit and then put the other half to cover the rest of the bottom and up the side a bit. Spraying the pan will allow your tortilla to crisp up when it’s in the oven. You don’t need a lot of carbs. This is plenty.
In a large saute pan add the other olive oil and put in your meat. Begin to break it up and brown it until no pink remains. When the beef is half done you can add your onions and the spices. I left my pepper bits raw but if you want less crunch in the finished product you can add the pepper bits when you add the onions and cook them down a bit. Now stir in your enchilada sauce.
All that’s left is assembly. Put half of your meat mixture in the ovenproof pan on top of the tortillas. Then sprinkle on half of the cheese. Add the bean layer and the raw bits of veggie if you didn’t cook them. Scatter on the green chilies. Put on the next layer of meat mixture. Top with the final cup of shredded cheese.
Bake at 350 degrees for 20 - 30 minutes to heat it through and make the cheese all melty. Let sit about 10 minutes out of the oven for the casserole to firm up and make it easier to eat without burning your mouth.
To serve take a sharp knife to cut through the tortillas and make uniform slices. Serve in bowls or on plates.
Optional sides and toppings:
- Sour cream (I love a good dollup of cold sour cream to balance off the hot casserole)
- Salsa (find a nice one with no sugar)
- Hot sauce (my hubby loves Tabasco on this)
- Fritos (A single, small handful is plenty. I only eat about six. You can eat them on the side for crunch or chop them up and sprinkle on top of your casserole piece.)
For a bigger crowd: Everything in the recipes doubles except the tortillas. In a 9” x 13” pan you’ll likely only need two tortillas to cover the whole pan bottom and up the sides a bit. You can likely get away with 1-1/2 pound of beef too. Don’t really need a full 2 pounds.
Freeze leftover tortillas if you think you’d be tempted to start eating the extras too often. I serve a dish like this maybe once every 2 or 3 weeks. Don’t want to overdo the carbs. And to think we used to be afraid of the fat!
Save the leftovers of the sauce, the beans and the veggies to use in an omelet!
Enjoy!
Cheers,
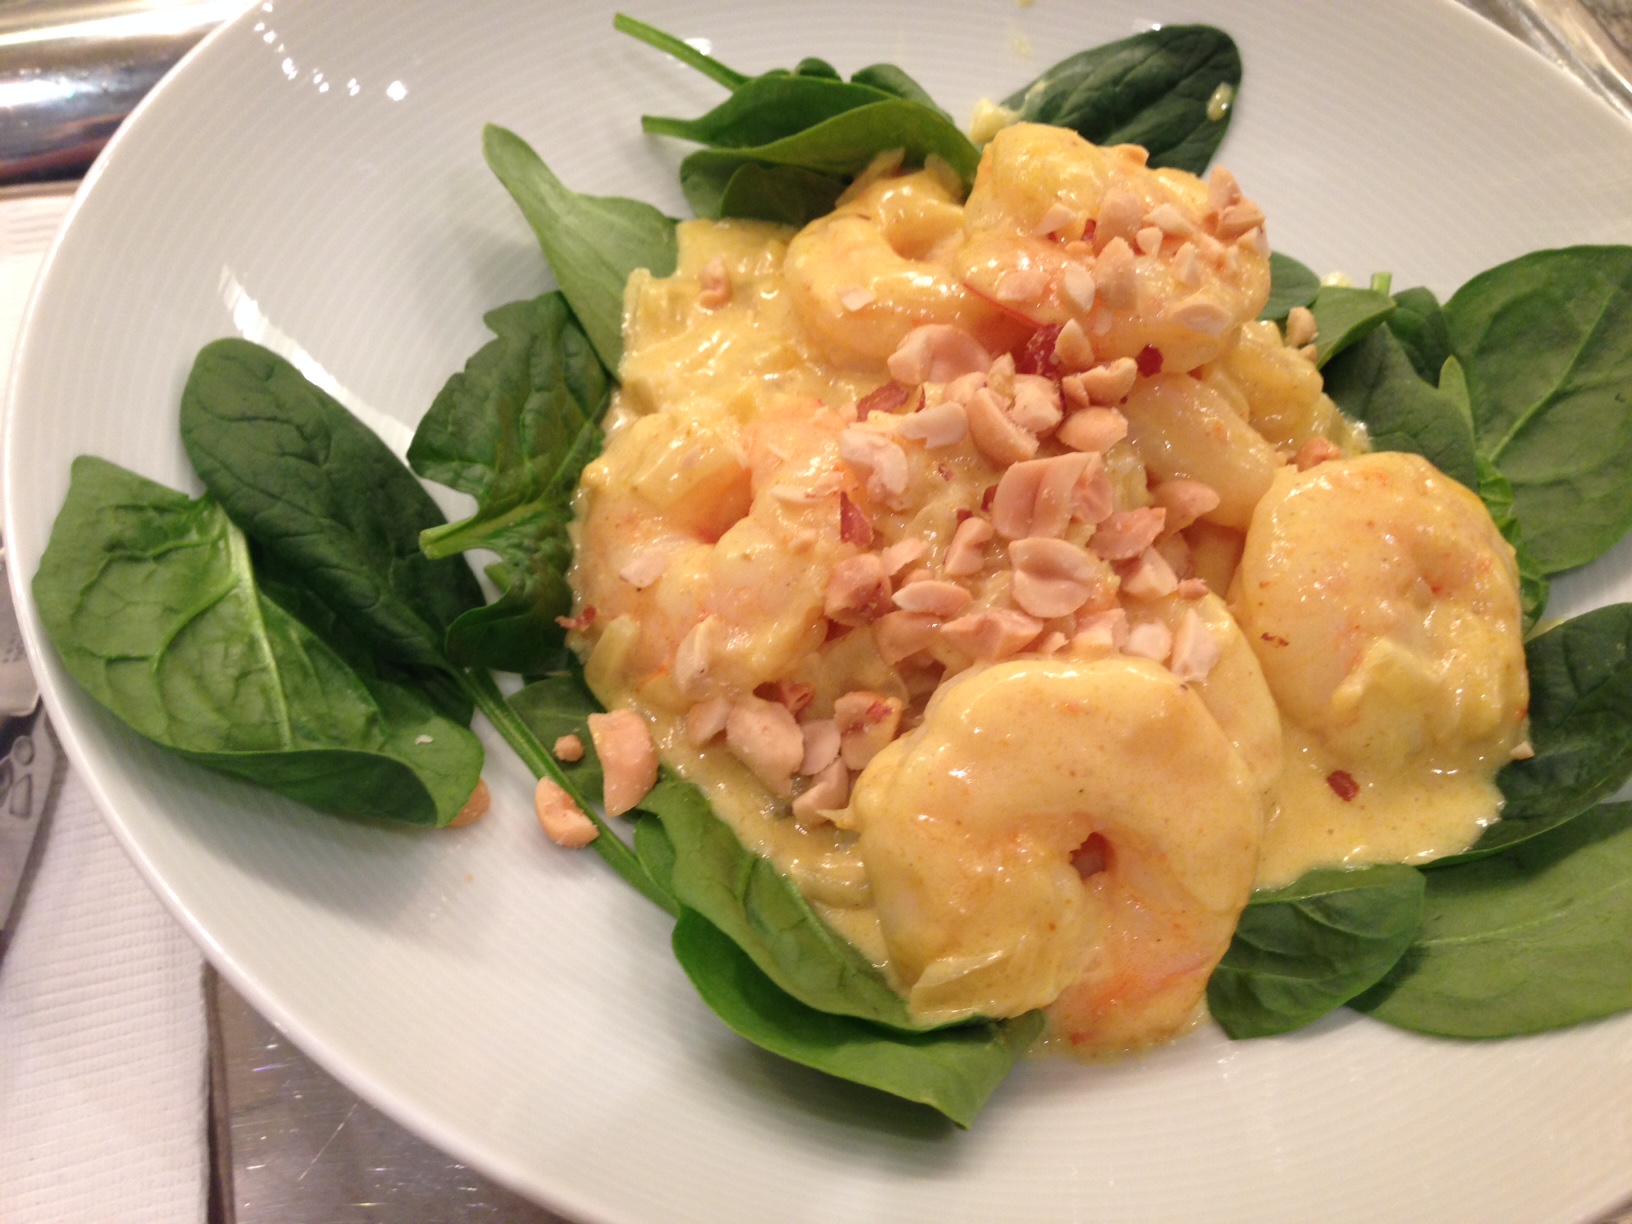
Shrimp Curry
Plan Z Phase: This is a Z3 (ZReboot) recipe.
Z3.5 with rice.
Z3 without rice.
This dishes coaxes out an abundance of flavor from the shrimp. Creamy, smooth, and slightly spiced your taste buds will light up with his lightened seafood recipe.
Servings: Serves 4
Ingredients:
- 1-1/2 pounds of cooked shrimp, tails removed. I encourage you to buy smaller shrimp for this dish. Maybe 30/40 count shrimp. You can save money that way. You’ll see in the picture my fishmonger only had bigger shrimp that day but this dish would actually be easier to eat with smaller shrimp.
- 1/3 cup of butter
- 1 cup of chopped onion (yellow or white or vidallia)
- 2 Tbl of flour (this is optional if you like a watery curry. Also, I used gravy flour so it’s smoother and I can get away with less flour this way)
- 4 tsp of curry powder
- grated sea salt to taste
- ¼ tsp of ground ginger
- 1 – 2 cups of organic chicken broth
- 1 – 2 cups of cream or Half n Half
- garlic powder to taste, I used about 1 tsp
- Worcestershire to taste, I used 6 blops/drops
- Tabasco to taste. I used 10 drops. My curry was not hot so add more as you choose. This is a different kind of heat than the usual cayenne heat. It’s a more in-depth heat combination with the Worcestershire and garlic.
Other optional things:
- Put raw, baby spinach in the bottom of the bowl.
- If you are in ZReboot 3.5 or beyond you can add a quarter cup of cooked rice to the bottom of the bowl. I used cooked Basmati rice.
- Garnish with chopped peanuts on top.
Instructions:
Melt the butter in a saute pan on medium. Add the onions and begin to cook. When they are loose, add the flour (if you choose). Then add the curry powder, salt and ginger. Stir thoroughly. Turn heat to medium high and slowly add your chicken broth and your cream. If you use whipping cream keep in mind that as it simmers it will thicken the sauce. I have put 1 – 2 cups of each in the ingredients list so you can judge how creamy or how thin you prefer your curry sauce. You’re going to simmer your sauce and stir it frequently until it’s the consistency you like. Depending on how much water and cream you choose this might take 10 minutes. You can also taste test it to see if you want to add more zip. I even added a bit more curry powder to mine. I wanted the curry to stand out. Once the sauce is ready, put in your shrimp and heat it on medium just until your shrimp are heated through. This will only take a few minutes.
I like to eat my curry out of a bowl. So that’s how I serve it.
Enjoy!
Cheers,
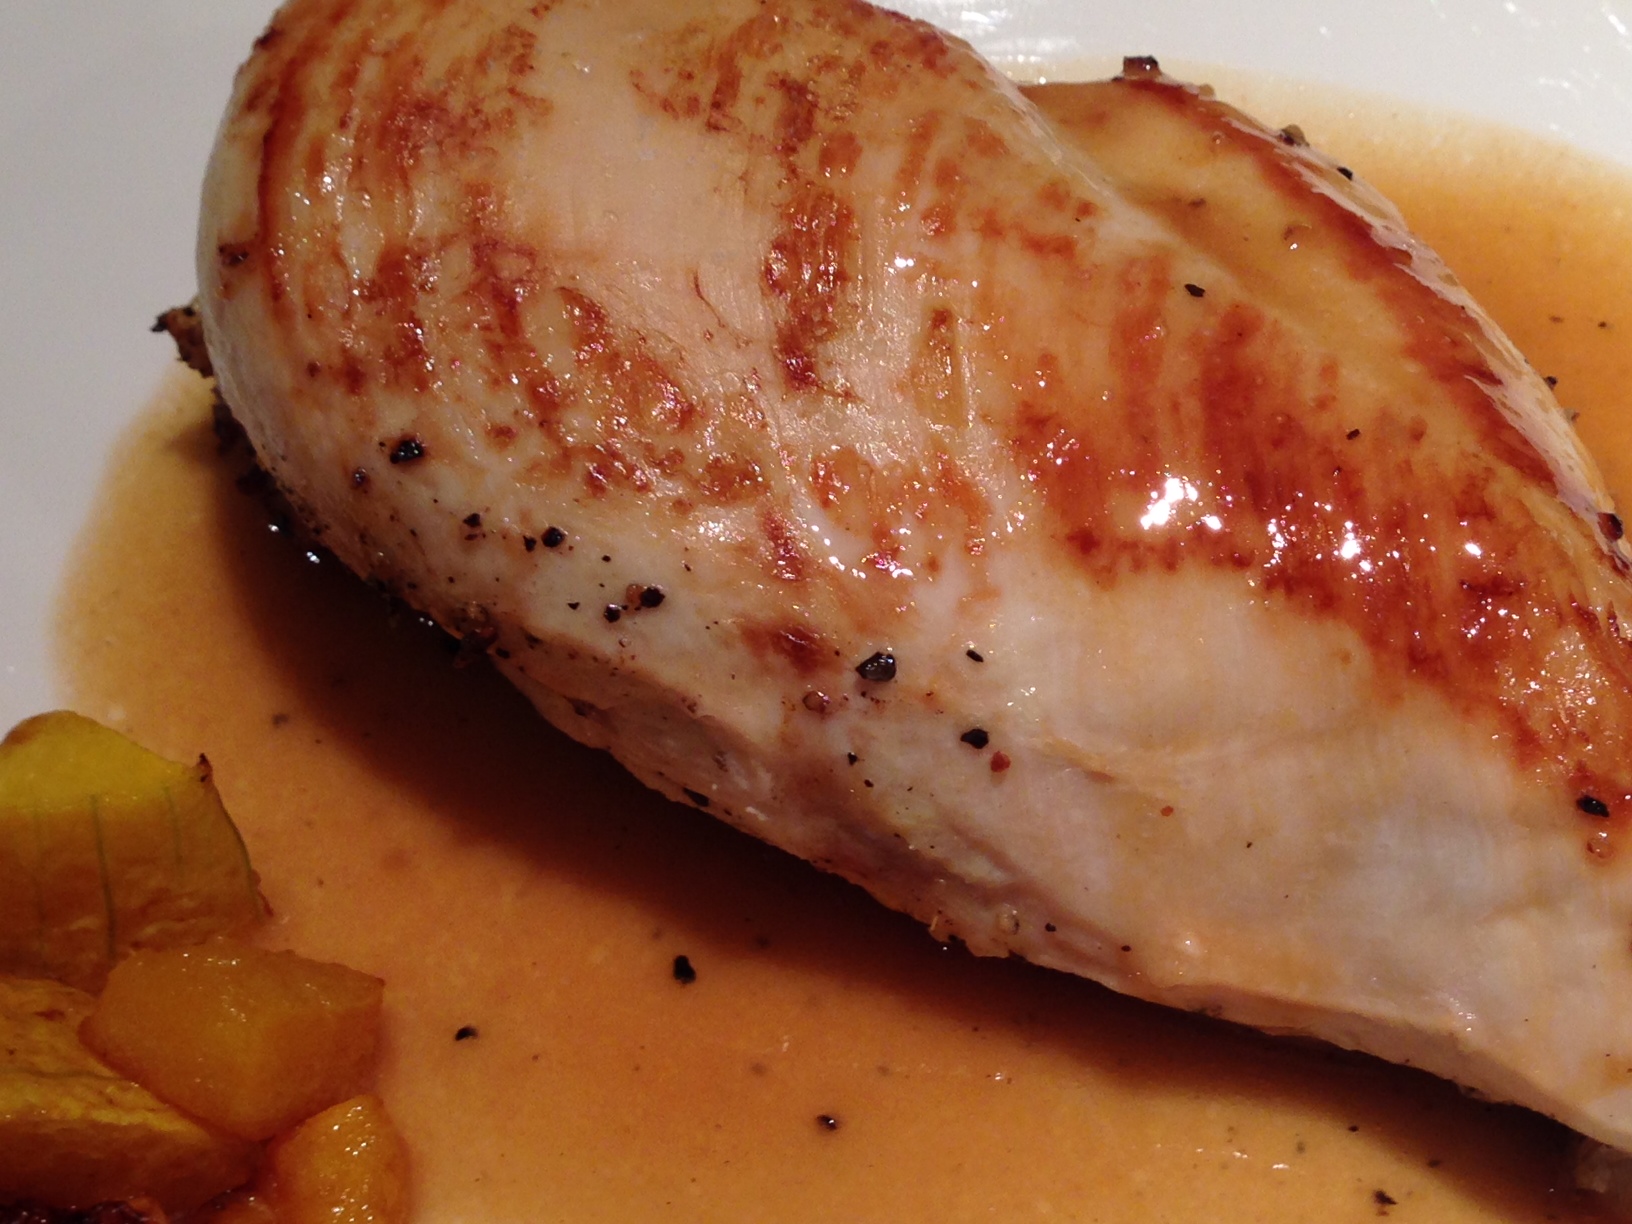
Lime Chicken
Plan Z Phase: This is a Z2 (ZReduction) recipe. Okay, so I know this sounds odd but it really tastes very good! Simple to make. It will make even a rookie cook a star.
Servings: Serves 4
Ingredients:
- 4 boneless, skinless chicken breast pieces
- grated sea salt and pepper
- olive oil spray
- 1 cup of organic chicken broth (find one with no sugar)
- 1 tsp of Truvia
- 3 Tbl of lime juice
- 2 tsp of Dijon mustard (no sugar)
- 2 Tbl of water
- 1 tsp of corn starch
Instructions:
Preheat oven to 375 degrees.
Spray an oven proof skillet with olive oil spray. Spray the chicken and grate on the salt and pepper. Place the chicken top-side down in the heated saute pan and saute for 4 minutes on medium high. You are just getting the top side browned. Turn the pieces over and then transfer them to the oven to roast for 20 – 30 minutes more or until they have no more pink showing in the middle. If you don’t have an oven proof pan – like cast iron – you’ll need to transfer the chicken to a pan that is safe for the oven – like a Pyrex one.
While the chicken is roasting you can make your sauce.
In a small sauce pan add the broth, Truvia, juice and mustard. Heat to a slow bubble. In a small dish, combine the corn starch with the water. Stir so the cornstarch dissolves. Add that to the sauce pan and keep it bubbling. Stir with a whisk until the sauce just begins to thicken up; sort of like a glaze. You’re not using very much corn starch so this is not going to thicken like a gravy. You are just making a zesty/sweet sauce. This will only take a few minutes.
Remove the chicken from the oven and pour 2 Tbl of sauce per person over the chicken. People who are not on ZReduction can have more sauce.
Serve with your veggie portion and an optional side salad. This is not a lot of sauce so you don’t have to subtract it from your allowed portions. This is just to give the chicken some new life with a zesty sauce.
Enjoy!
Cheers,
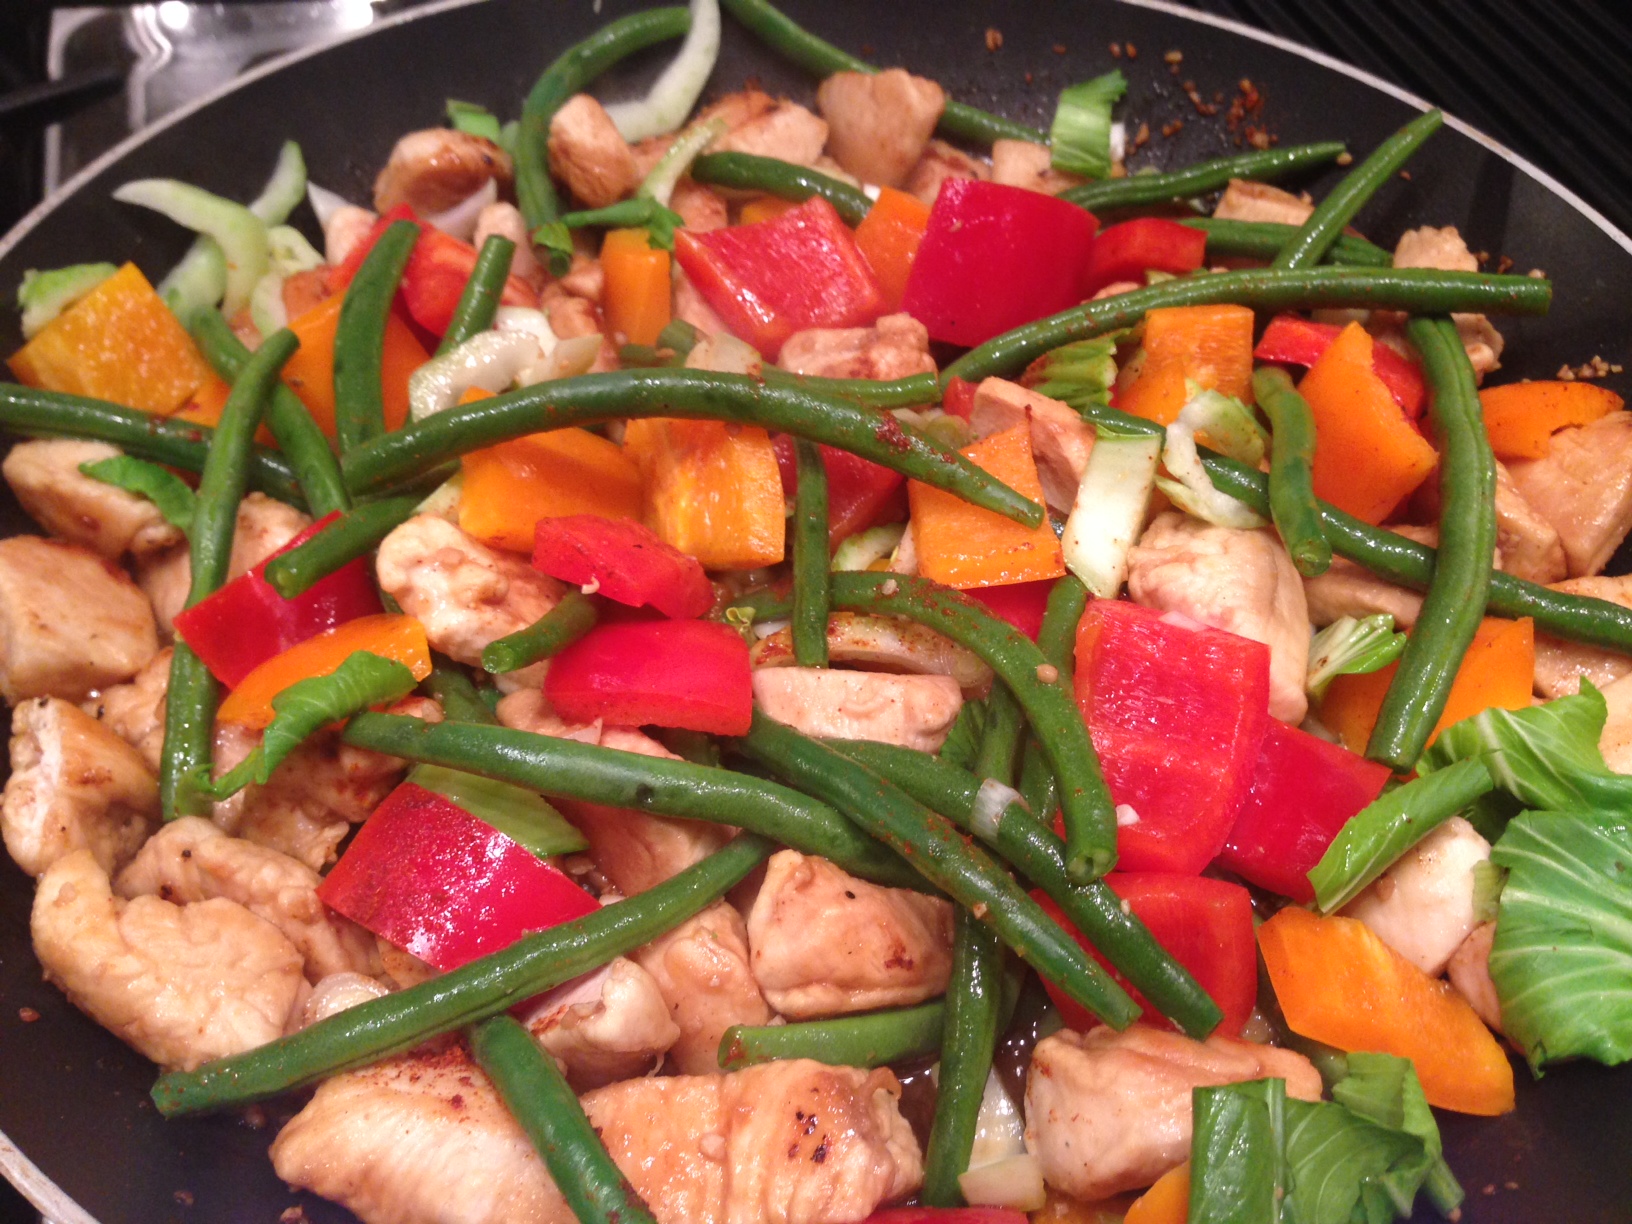
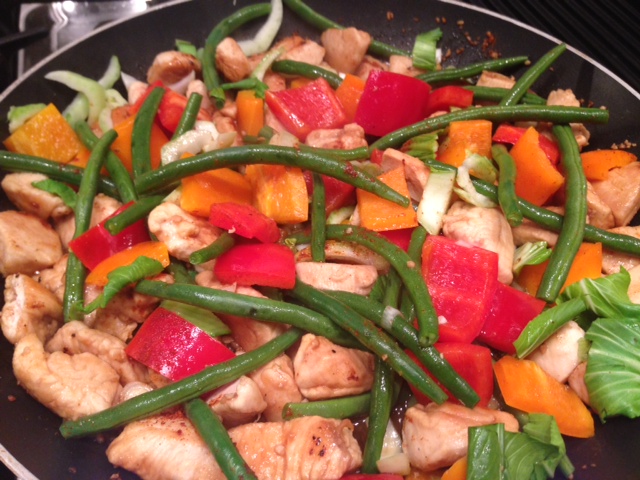
Zippy Szechuan Chicken and Veggies
Plan Z Phase: This is a Z3 (ZReboot) recipe. Take your taste buds on a weeknight trip to Asia with this slightly spicy Chinese-inspired dish. You can easily substitute the chicken for either shrimp or beef.
Servings: Serves 4 and can be doubled or expanded easily. 1 serving is 1-1/2 cups.
Ingredients:
- 4 skinless, boneless chicken breast halves cut into 1-inch cubes
- 3 Tbl cornstarch
- olive oil spray
- 3 cloves of garlic minced (jar garlic works fine)
- 7 Tbl Bragg’s Aminos
- 2 Tbl rice wine vinegar or white wine vinegar
- 1 tsp Truvia (optional)
- 1/3 cup water
- 8 green onions cut into 1/4-inch disks, white and light green parts
- 2 handfuls of green beans (Just pick the ends off. Don't cut them up.)
- 1 red bell pepper cut into chunks
- 1 yellow bell pepper cut into chunks
- 1/4 tsp of cayenne or to taste (This makes it zippy.)
Instructions:
Take the chicken cubes and corn starch and throw them into a plastic bag. A food storage bag is good. Seal it shut or hold it shut and toss around the chicken so it gets coated with the cornstarch. Take your colander and set it in the sink. Dump the chicken and cornstarch into the colander and sift it so the excess cornstarch falls through the openings. Just bounce it around. Corn starch is a carbohydrate so continue to sift just until there is a very light coating on the chicken. Most of the corn starch will go down the drain.
Spray a large sauté pan with olive oil and put in your chicken. Cook for 6 minutes until it starts to brown. Stir it around often. Cut a piece open to make sure the pink is all gone so you are sure the chicken is cooked. Add everything else. Cook another five minutes. Stir regularly. Stop now if you want your veggies crisper. You can cook it a little longer to get the veggies softer if you want.
Enjoy!
Cheers,
Creamy Pasta Bake with Chicken
Plan Z Phase: This is a Z3.5 (ZReboot 3.5) recipe. This is a dreamy, smooth pasta dish that uses little pasta but is still big on taste. This dish can be easily doubled and baked in a 9" x 13" pan for a larger crowd.
Servings: Serves 4
Ingredients:
- 1 Tbl of olive oil
- 2 cups of cooked chicken or pull-apart rotisserie chicken from the deli section
- 8 oz of assorted mushrooms. I used shiitake and cremini (baby bellas). Both of these mushrooms pack a big flavor punch but you can use any mushrooms you like.
- 1/3 cup of diced onion (I used Vidalia)
- 1 tsp of Italian seasoning
- 2 tsp of minced garlic (Jar garlic will do)
- 1-1/2 cups of mascarpone cheese. Look for mascarpone in the fancy cheese section or near the cream cheese. It comes in white, plastic tubs at most places. You'll need one and a half of the 8 oz tubs.
- 1/4 cup of half an half
- sea salt and pepper to taste
- 1/4 cup of bread crumbs
- 1 Tbl of butter
- 1/3 cup of grated Parmesan
- Enough cooked pasta to cover the bottom of the casserole dish. This can be any kind of pasta you prefer. Rigatoni, penne, macaroni, or even spaghetti. About 1 cup of dry pasta (or less) will be enough when you cook it to cover the bottom of the casserole. This secret is how you keep down the amount of carbs in this dish.
Instructions:
Preheat oven to 375 degrees.
Cook your pasta in boiling water until done. Drain and set aside. Measure the amount of cooked pasta you will be using by spreading it in the bottom of the casserole dish. No more needed.
While the pasta is cooking you can make your other filling.
In a large saute pan add the olive oil and put in the onion and mushrooms. Saute on medium until the onion is cooked and the mushrooms just begin to brown. Add garlic and Italian seasoning and stir. Add the mascarpone and cream. Heat on low until the mascarpone melts. Stir often to speed up this process. Add the chicken and your pasta. Season with grated sea salt and pepper. Pour the mixture into your casserole.
In a small sauce pan add the breadcrumbs and butter. Stir and melt the butter so the crumbs are coated in butter. Take off heat and add the grated Parmesan.
Sprinkle this mixture over the top of the casserole dish.
Bake at 375 degrees for 20 minutes so it gets hot and the breadcrumb topping gets crunchy.
Enjoy!
Cheers,
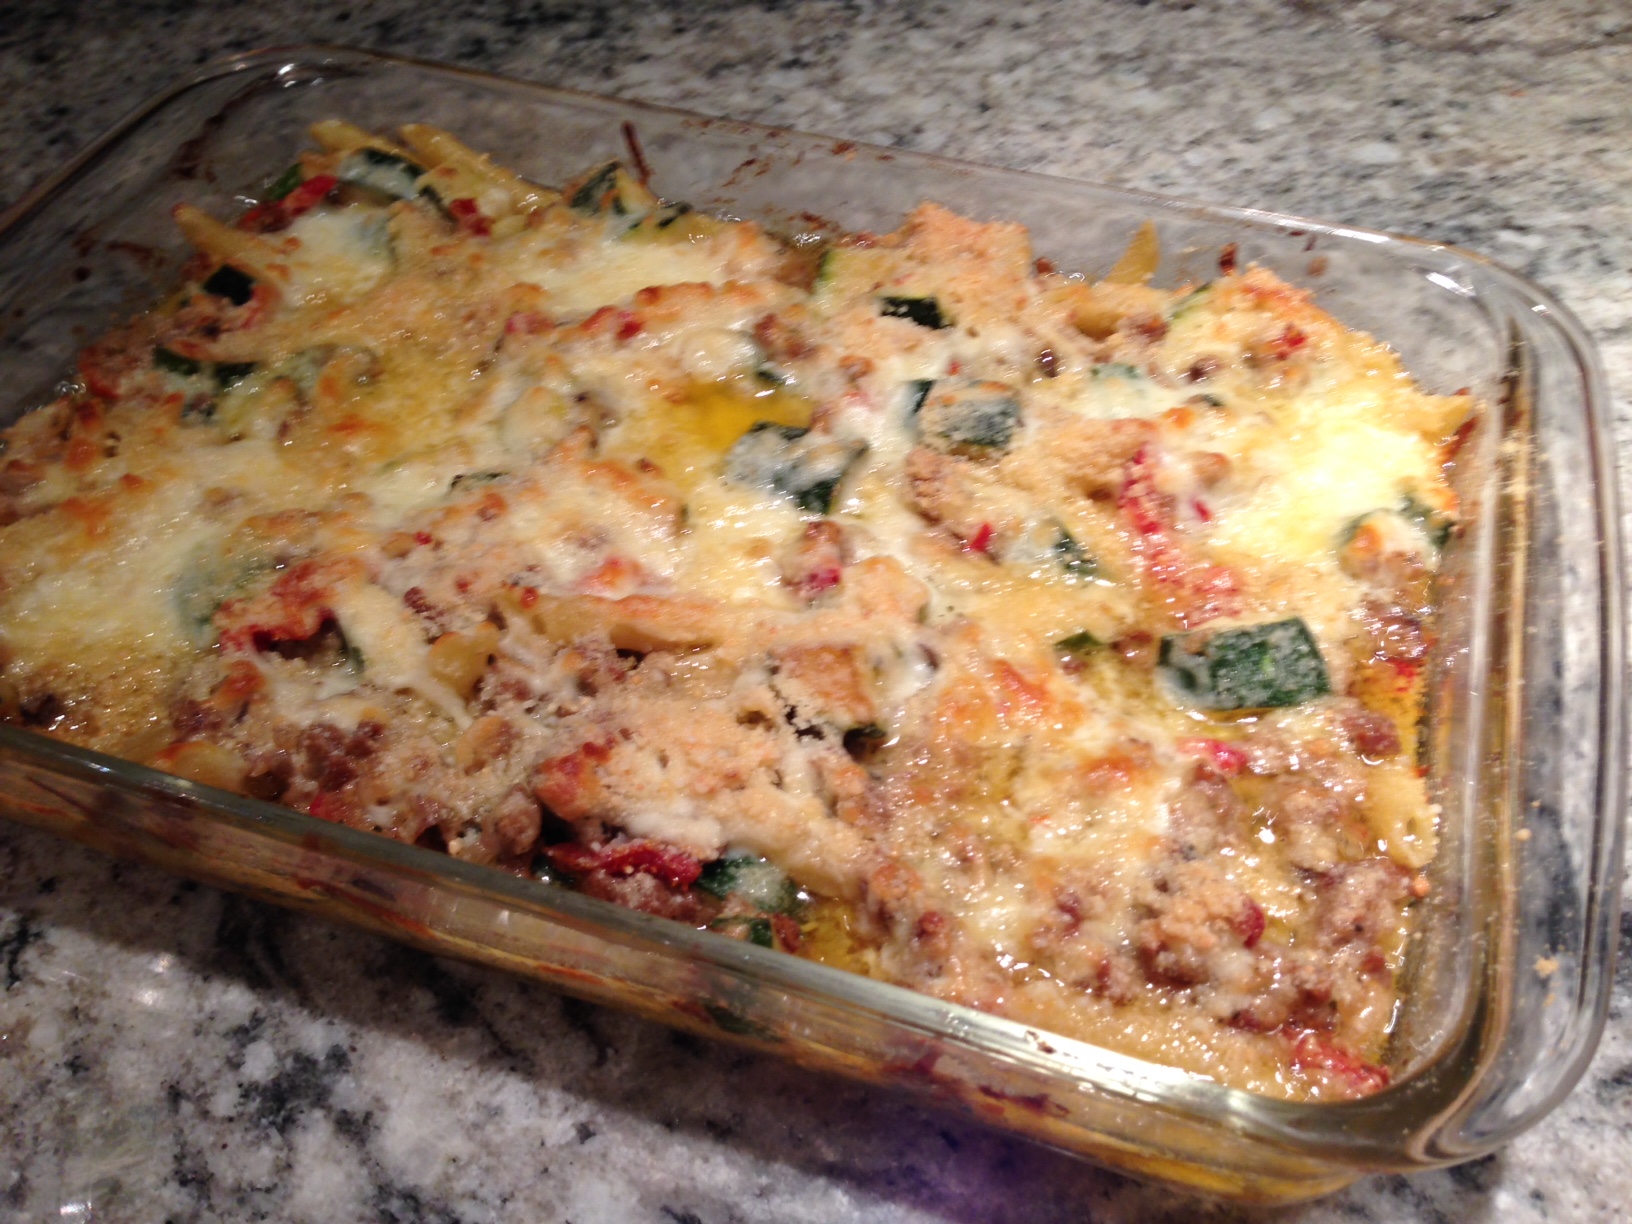
Italian Sausage Zucchini Casserole (with Pasta)
Plan Z Phase: This is a Z3.5 (ZReboot 3.5) recipe. This dish is Italian comfort food. I curl up on sofa with a bowl of this and watch a movie. You can go totally low-carb with this one and make it without the pasta. Tastes just as good. This also makes a great casserole addition to a pot luck party.
Servings: Serves 8
Ingredients:
- 1-1/2 cups of pasta, cooked and drained. You choose your favorite. I used penne. It can even be spaghetti if you want, but be careful trying to measure that. 1-1/2 cups of penne is just enough to cover the bottom of the casserole dish when it’s cooked. By using a small amount of pasta you are keeping the carb count low.
- 1 Tbl of olive oil
- 1 pound of loose Italian sausage. You can choose mild or hot. You could also do this with links and just cut them into bite-sized pieces or if your store doesn’t sell loose sausage you can buy the links and just cut open the casing and remove the sausage.
- 1 cup of chopped onion
- 1 cup of chopped mushrooms
- 2 small zucchinis cubed into bite-sized pieces. Cut off stem and discard
- ½ cup of sun-dried tomatoes, chopped. Take them out of the jar and drain off most of the oil and then chop.
- 1 tsp of Italian seasoning
- 1 cup of mascarpone (8 oz tub)
- 2 cups of shredded mozzarella cheese (or Italian blend)
- 1 cup of grated Parmesan cheese (or an Italian blend)

Instructions:
Preheat oven to 400 degrees.
Take out a 9” x 13” casserole dish.
In a large saute pan cook the sausage until it begins to brown on the edges. I continuously break it up and toss it around so I have small bits. You can also leave it chunky if you like that better. Just make sure you get it cooked all the way through.
While the sausage is cooking you can make the other elements. In another saute pan add the olive oil and heat. Then put in the onion, zucchini and mushrooms. Saute until they are all loosened and nearly cooked. Add the sun-dried tomatoes and the Italian seasoning. Combine with the cooked sausage.
Next, add the mascarpone cheese and one cup of the mozzarella. Heat until the cheese melts into a wonderful goodness. If you stir the mixture, the cheese will melt faster.
Take your casserole dish and put the pasta on the bottom. Pour the sausage mixture over the top. You can either stir it up or leave the pasta on the bottom. Then spread the remaining mozzarella over the top and sprinkle on the Parmesan.
Bake at 400 degrees for 15 minutes to melt the cheese and get a good crust. Should be bubbling. I recommend you let the casserole sit for 10 minutes before cutting so you don’t burn your mouth.
Store leftovers in the fridge. This will transport well and can be reheated in the microwave.
Enjoy!
Cheers,

Yellow Cupcakes
Plan Z Phase: This is a Z3.5 (ZReboot 3.5) recipe.
I have not perfected low-carb baking yet but these are pretty good. They have a little denser texture than a light and fluffy cupcake but since they are made the old-fashioned way they don’t have chemical ingredients that processed cupcakes do. They might remind you of a cupcake your grandma made.
They have a secret ingredient in them. Don’t freak. It’s beans. They keep them moist and if you follow the instructions you won’t taste the beans at all. If you want them to be really sweet you’ll need to add some extra sweetener. They were plenty sweet for my husband. He really likes them but your family might yearn for them to be sweeter. You decide.
I found this recipe online and changed a few bits to Zolafy it!
Servings: Serves 12
Ingredients:
- 15 oz can of white beans (cannellini beans)
- 5 large eggs plus one egg yolk
- 6 Tbl of butter, softened to room temperature
- ¾ tsp of liquid stevia or ¾ cup of ZSweet or Swerve (new sugar substitutes. Order online)
- 1 Tbl of vanilla
- 6 Tbl of coconut flour
- ½ tsp of grated sea salt
- ½ tsp of baking soda
- 1 tsp of baking powder (try to find the kind that has no aluminum in it)
Instructions:
Preheat oven at 350 degrees.
Rinse the beans in a sieve and shake off the water. In a blender, blend the beans with the eggs, vanilla and salt. In a large mixing bowl cream the softened butter with the sugar substitute. Beat in the pureed mixture. Measure out the coconut flour. Pack it into the measuring spoon and take a knife to level it off. Add to the batter along with the rest of the dry ingredients. Whip for another 2 minutes.
Spoon the batter into muffin liners that have been lightly sprayed with olive oil spray. Use your ¼ cup measuring spoon to fill the muffin liners. Fill then to ¾ full. Bake the cupcakes for 25 minutes or until they begin to get golden and spring back when you touch them.
Make sure you let the cupcakes set for a minimum of 3 hours. Even better, let them set overnight if possible. During this waiting time the bean flavor dissipates and disappears.
I frosted mine with the cream cheese frosting.
Be careful with these. Don’t eat more than one a day and watch the scale to see how your body reacts. They are very low-carb (4 grams) without the frosting.
Enjoy!
Cheers,
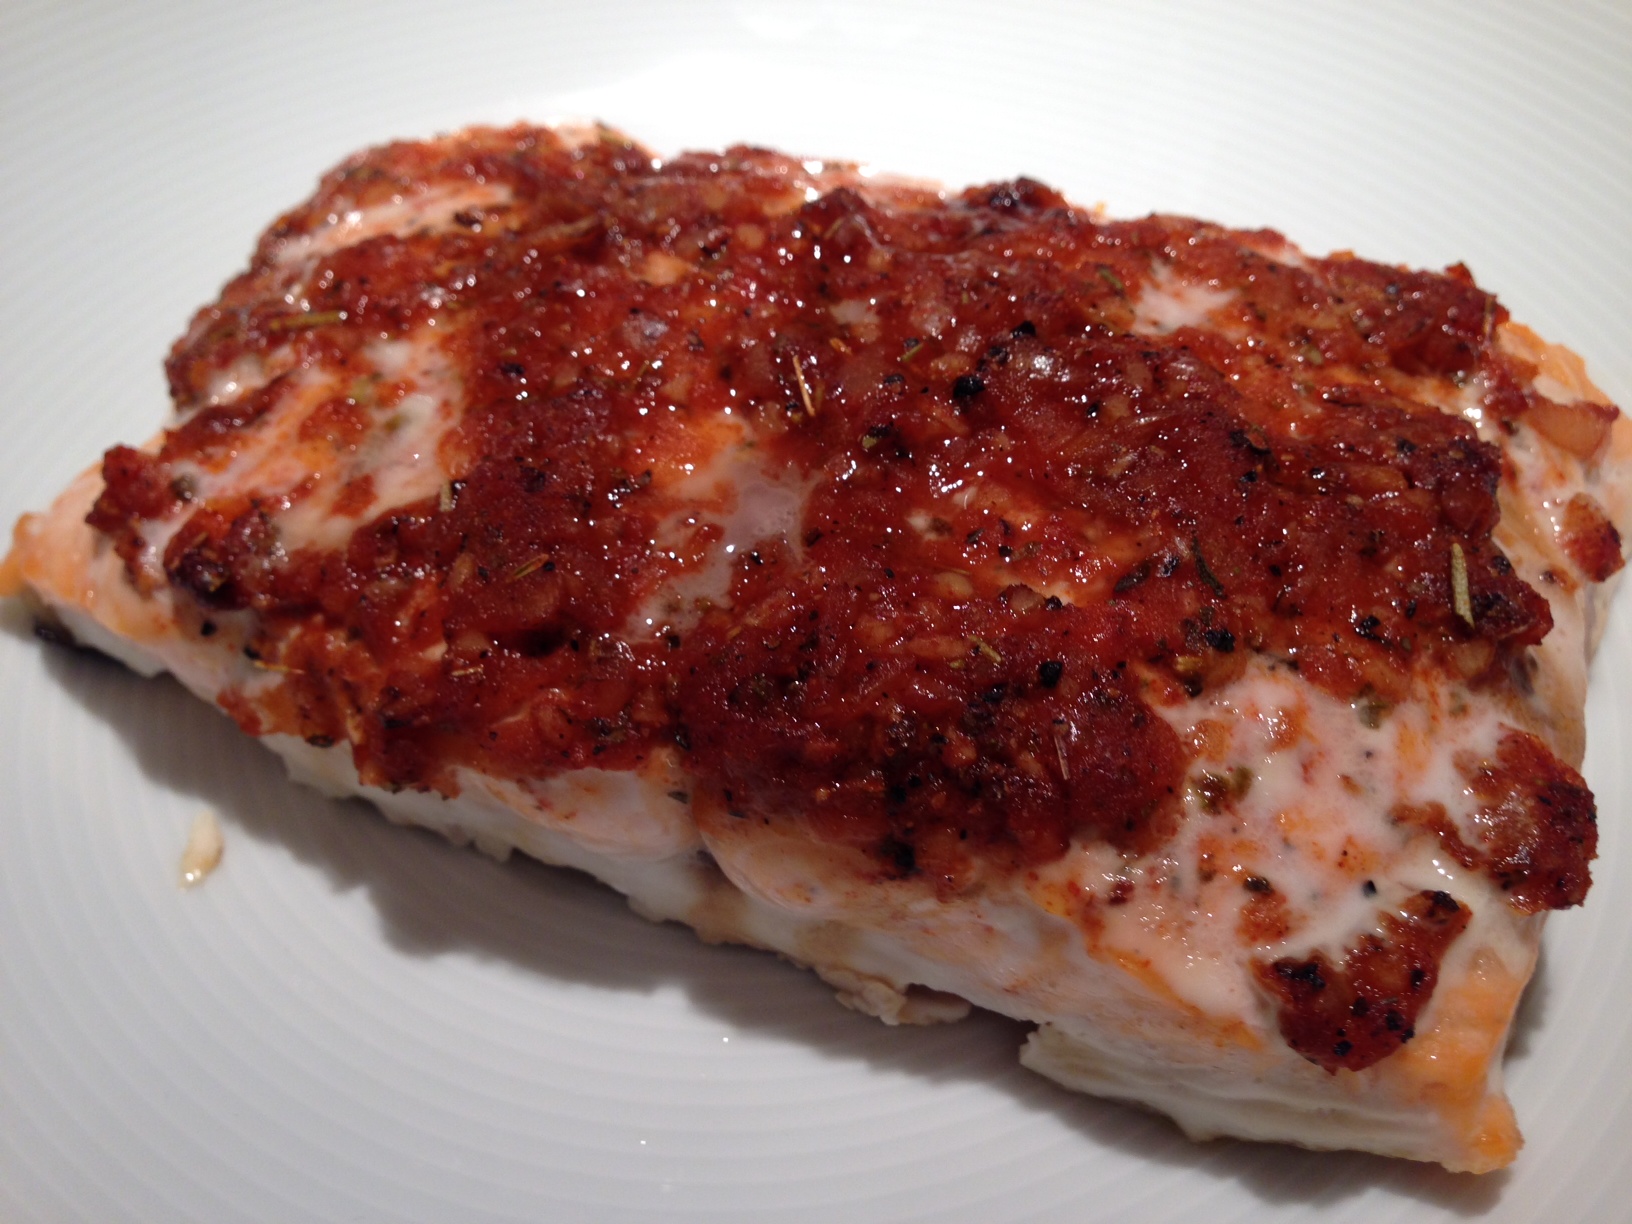
Spicy Paprika Salmon
Plan Z Phase: This is a Z2 (ZReduction) recipe.
If you like paprika and some zing, you’ll like this dish. Salmon has such a robust (almost fatty) flavor you get a big bang for your fish buck with this one. You could also make this dish with other fish pieces like Halibut, Sea Bass, Haddock or… even thinner pieces like Sole but you won’t cook it nearly as long.
Servings: Serves 2
Ingredients:
- 2, 6 – 8 oz salmon filet. (I find filets are less likely to have bones and are easier to cook than steaks but you can choose)
- 1 clove of garlic, minced (jar garlic will work)
- 2 Tbl of grated onion (this means get out your grater and using the largest grating side just rub the onion across it to get a grated onion)
- ½ tsp of black pepper
- ¾ tsp of paprika (I used smoked paprika which gives it a different flavor. Use your favorite)
- ¼ tsp of cayenne (or less if you want less spicy)
- 1 tsp of Italian seasoning
- ¼ tsp of grated sea salt
Instructions:
Preheat oven to 375 degrees.
Mix all spices in a small bowl. Spray an oven proof pan lightly with olive oil. Put in your salmon. Spread the mixture across the tops of the salmon pieces. Put in the oven to bake.
How long they will take depends on how thick they are and how you like your salmon. For medium salmon filet that’s about 1” thick in the middle it might take around 20 minutes. You can judge around that for thicker or bigger pieces or if you like your salmon more well done (like my husband does) keep it in longer.
Enjoy!
Cheers,
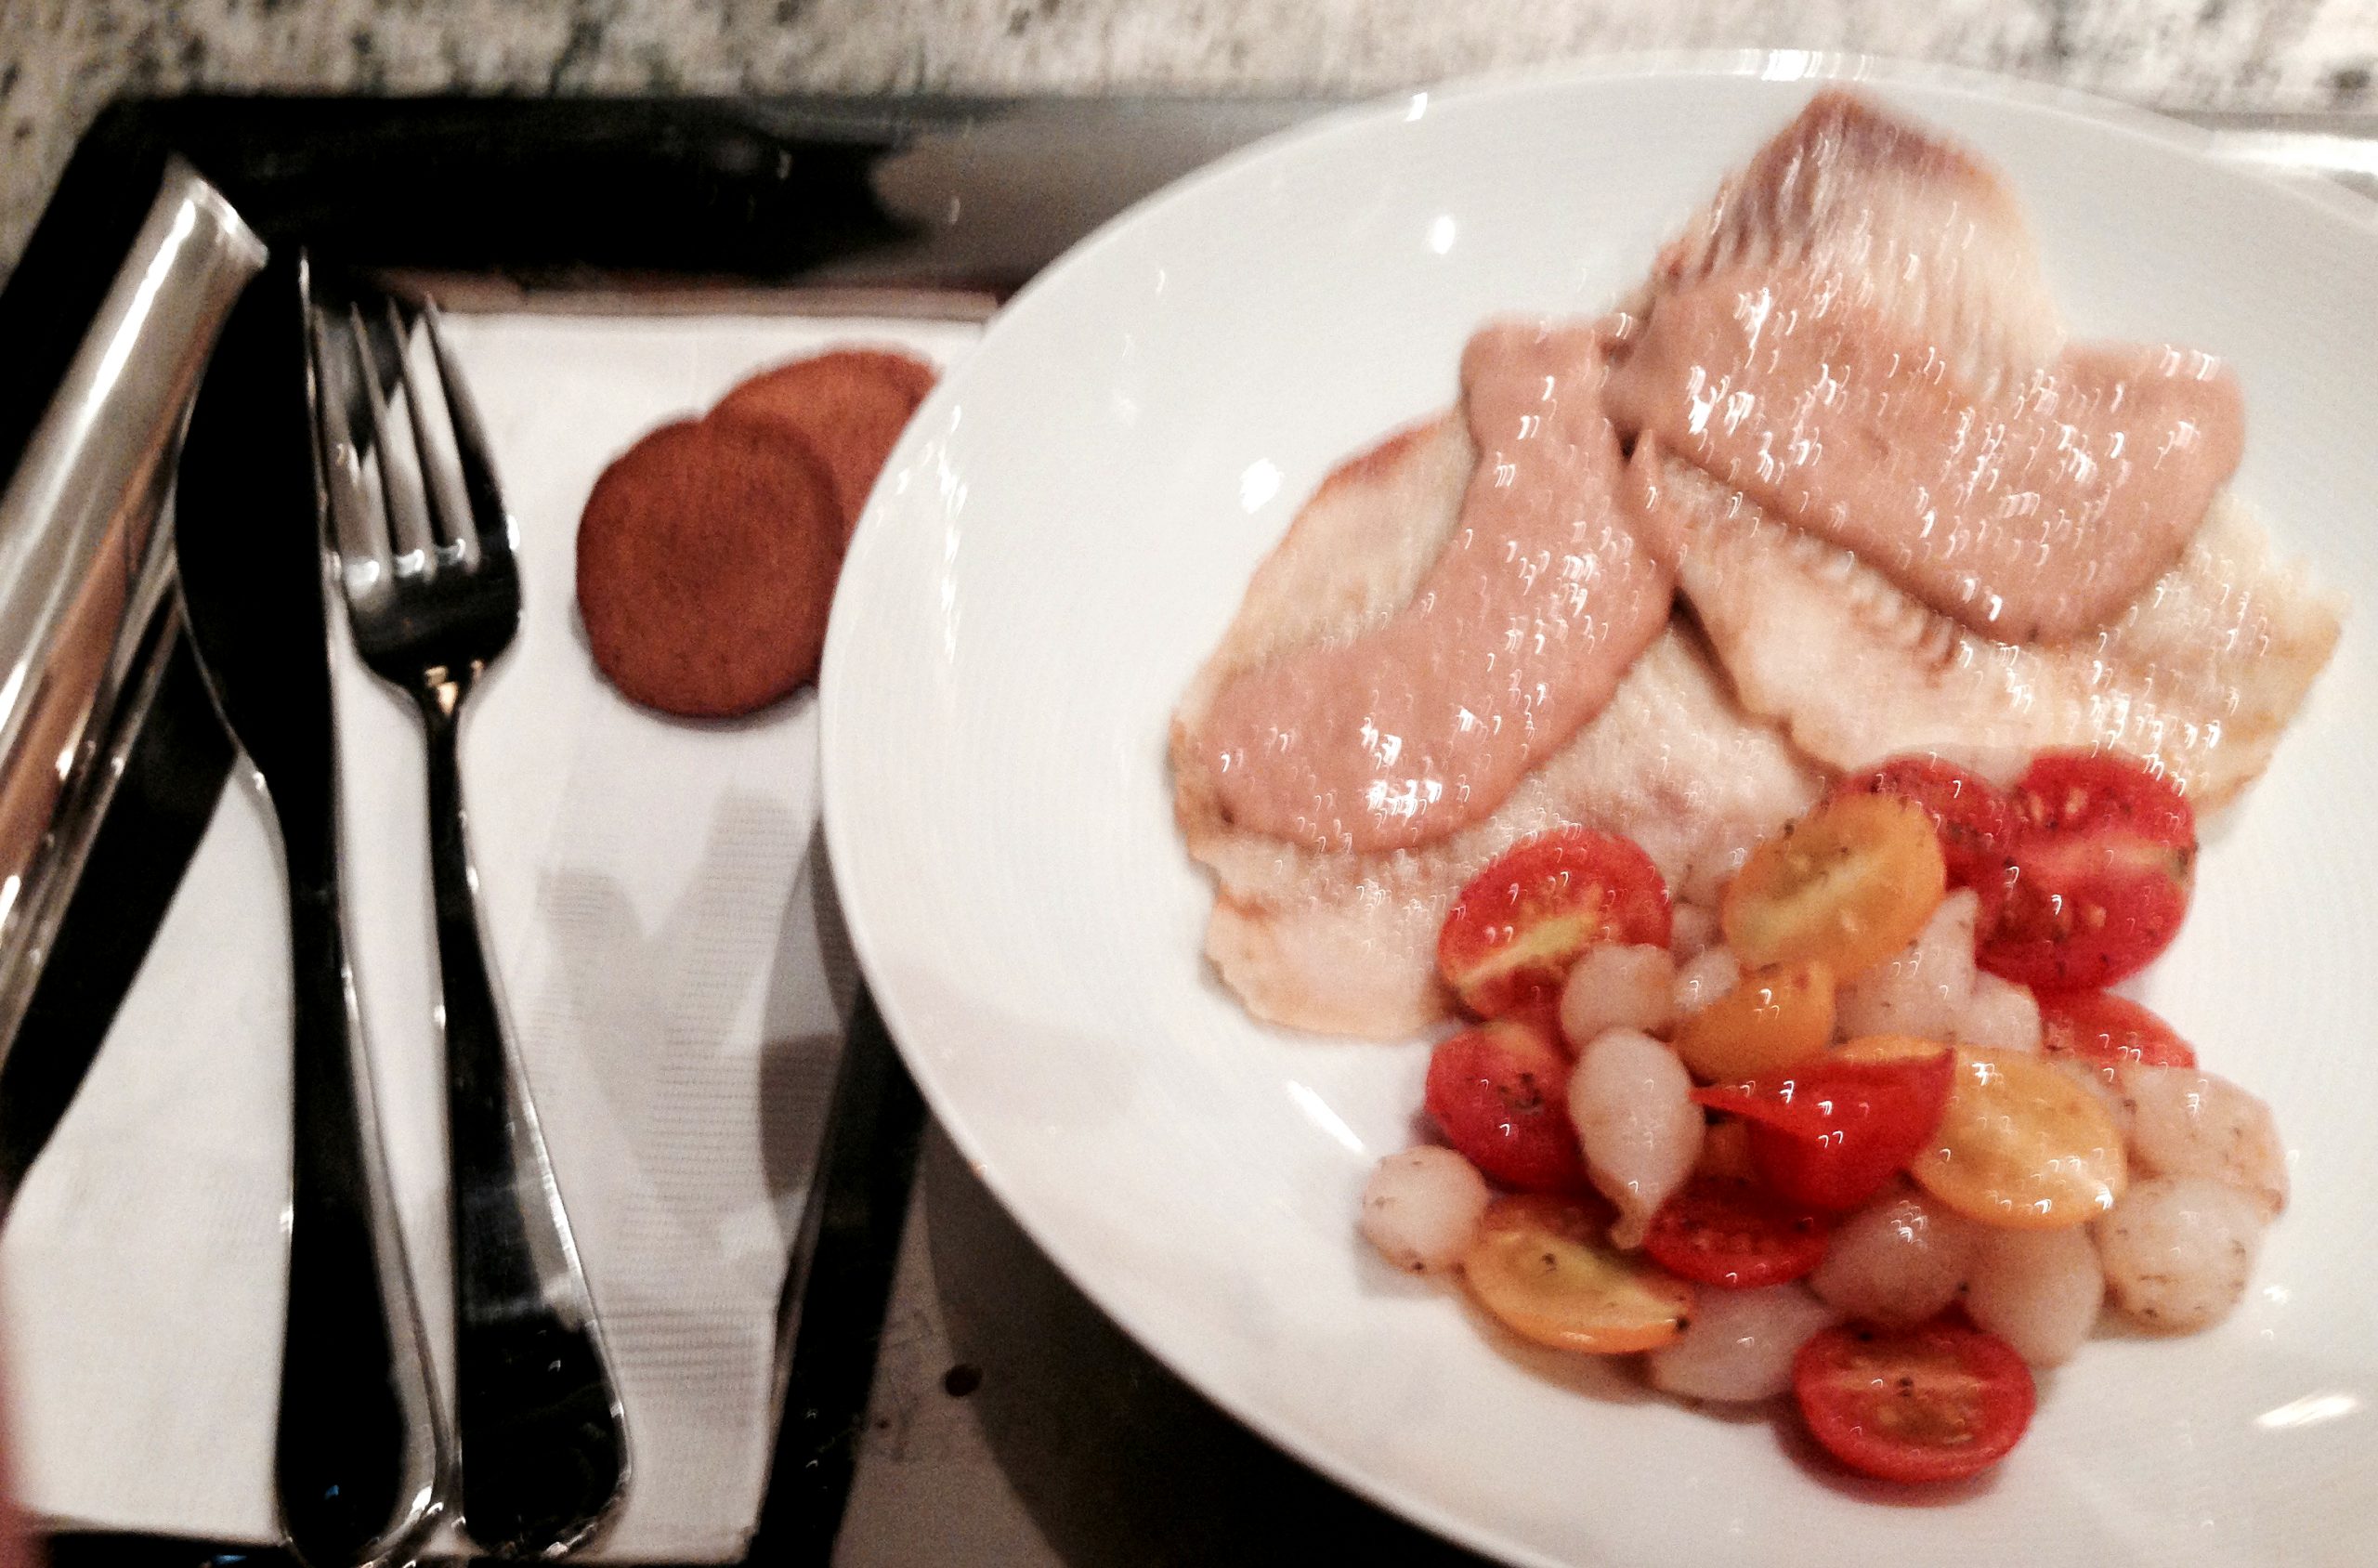
Whitefish with an Asian-Cajun Remoulade
Plan Z Phase: This is a Z2 (ZReduction) recipe. Some would call this fancy frou-frou food. Who knows what a remoulade is!? Foodies do. And foodies understand the concept of fusion food. This is one of those--a spicy combination of Cajun and Asian flavors make a new style of remoulade that can go with any kind of fish. I used flounder for my dish, but you can use any white fish. If you use a thicker one like sea bass you’ll have to cook it longer but the sauce won’t change.
Servings: Serves 4
Ingredients:
- 1/3 cup of olive oil (for Z3). 1/3 cup of water (for Z2)
- ½ cup of chopped shallots
- ¼ cup of chopped celery
- 1 Tbl of chopped garlic
- 2 Tbl of Bragg’s Aminos
- 1 Tbl of Worcestershire
- 3 Tbl of tomato sauce (from a can will work just fine)
- 2 Tbl of sour cream
- ¼ tsp of grated sea salt
- 1/8 tsp of cayenne pepper (or to your taste. You can always add more.
- Your fish choice. 6-8 ounces per person.
Instructions:
Take all of the Asian remoulade items and put them in a small blender. Blend until smooth. Set aside
For thinner fish:
Heat broiler. Spray a pan and put the fish on it. Spray top of fish fillets. Broil 6 minutes or until fish is done. Serve with sauce. For Z2, use up to 2 Tbl of sauce. For Z3 you are not limited in your sauce amount.
For thicker fish:
Heat oven to 425 degrees. Spray a pan and put fish on it, flesh side up. Spray top of fish fillets. Roast 12 – 15 minutes or until fish is done. You can tell by cutting into it and seeing that it’s cooked through. For things like sea bass, if it starts to split open it’s likely done. Just check to make sure. Sauce instructions are the same as above.
I served this with caramelized pearl onions and cherry tomatoes. I didn’t garnish this in a pretty manner like I would for a dinner party. For a weeknight at home it was just fine.
Enjoy!
Cheers,
Shrimp Cocktail Chowder
Plan Z Phase: This is a Z2 (ZReduction) and Zola To GO! recipe. Talk about easy to make. This soup is done in a flash. If you’re like me you’ll make a triple batch. You can freeze the portions and just add shrimp bits when you go to serve it.
Serves: Serves 4
Each serving is 1-1/2 cups
Ingredients:
- 24 ounces of cooked shrimp cut into bite-sized bits
- olive oil spray
- 1-1/2 cups of chopped onion. You choose which kind. I used Vidalia onions.
- 1 large rib of celery, chopped
- 2 cloves of garlic (jar garlic will work)
- 3 cups of organic vegetable broth
- 15 oz can of crushed tomatoes
- 15 oz can of diced tomatoes
- 1 tsp Truvia
- ½ tsp of allspice
- 1 tsp celery salt
- 1 tsp of pepper
- 1 tsp of dry mustard
- 2 Tbl of Worcestershire sauce
- ¼ cup of cider vinegar
- 3 Tbl of fresh horseradish (not prepared horseradish) – or to taste
- pinch of cayenne (optional)
Instructions:
In a soup pot spray in the olive oil. Then add the celery and onion. Cook on medium until wilted. Just a couple of minutes. Then add the garlic and cook one more minute. Add the vegetable broth and the crushed and diced tomatoes. Stir. Add all of the spices. Don’t be afraid of them. This is what makes it taste like cocktail sauce. Stir and cook on medium for 15 – 20 minutes. The soup will boil and bubble. Stir fairly often. The melding of the flavors comes together and you have great soup. If you want more flavor melding at this point, take out half of the soup and put it in a blender. Whiz it until smooth and then add it back to the simmering pot.
When you go to serve you have some options:
- You can serve the shrimp on top cold and have that ying/yang of hot and cold.
- You can put the cooked, cold shrimp into the soup and let them heat.
- Or in a warm climate or summer, you can serve the soup cold with the cold shrimp and it will sort of be like a gazpacho.
Enjoy!
Cheers,
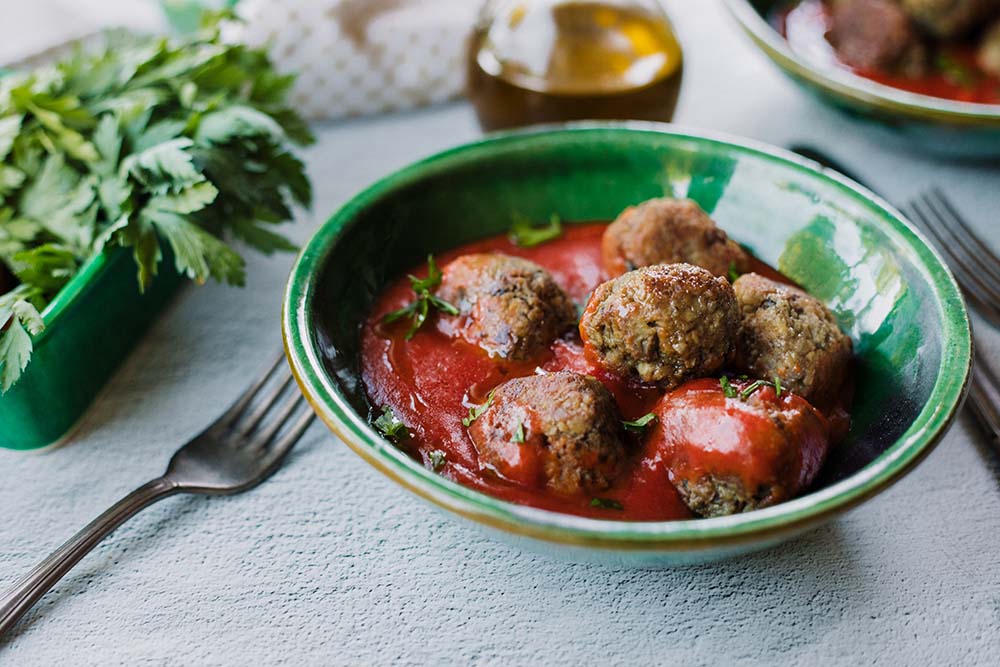
Authentic Italian Meatballs
Plan Z Phase: This is a Z3 (ZReboot) recipe. These meatballs are my take on an authentic meatball recipe from New York city. These actually have a cheesy element to them that make them super yummy. BIG YUM!
When I am in a hurry I can make these and then serve them with a jar of marinara sauce. You CAN find marinara in the grocery store that has no sugar in it. It might take some label reading, but you'll find one.
And if I'm feeling super-fancy I might make a little pasta. For me, a full serving of pasta now is about 1/3 cup cooked. I put it in the bottom of the bowl. I eat the meat and sauce on top and hardly notice I have very few noodles.
Servings: Serves 4 (1 serving = 4 meatballs)
Ingredients:
- 1 pound of high quality ground beef. I use 94% lean, but you can use any grade)
- 1/2 cup of breadcrumbs
- 1/2 cup of minced onion (you choose your favorite. I use Vidalia)
- 1/2 cup of whipping cream or whole milk
- 1 cup of finely grated Romano cheese
- 4-7 tsp of minced garlic (Jar garlic will work, but fresh will taste even better! You decide how much.)
- grated sea salt and pepper
- 1 egg
- 1 Tbl of Italian seasoning blend
Instructions:
Preheat the oven to 400 degrees.
Line a big cookie sheet with aluminum foil. Spray it with olive oil.
Take all of the ingredients and put them in a big bowl. Get in there with your hands and really mix it all up. The hardest thing to do is get the cheese mixed in. In my case I left little blobs of cheese in places and that didn't hurt the results at all. I loved the little cheese bits. you don't want to handle the meat any more than necessary so do your best to go fast. The Italians feel handling the meat too much makes tough meatballs.
I used a little 1/4 cup measure to scoop my meat and formed meatballs with my hands. Then place them on the cookie sheet so they don't touch each other.
Bake at 400 degrees for 12-20 minutes depending on how big they are and how browned you like your meatballs. I like mine to almost have a crunch to the outside so I keep them in there to the 20 minutes limit. Just keep an eye on them. I also use my convection setting. That makes them crunch up on the outside too.
Save any leftover meatballs you have in tupperware for an easy on the go lunch for the next day.
Enjoy!
Cheers,
Peanut Butter Thai Stir Fry
Plan Z Phase: This is a Z3 (ZReboot) recipe.
I love peanut sauce with my Thai food. It feels like Asian comfort food. Don’t knock it til you try it. I thought it sounded really weird when I was younger but once I tried it I became a big fan.
Servings: Serves 4 but can be easily doubled.
Ingredients:
- 1 cup of chicken broth (divided)
- 3 cups of assorted veggies. I used: orange and red pepper chunks, 1/2 of a large onion, 1 cup of celery chunks,, and 1/3 cup of water chestnuts cut in half (water chestnuts are higher carb so keep the amount low)
- 2 cups of bok choy chunks (Take off outer leaves, rinse and chop. Discard the bottom.)
- 2 Tbl of Bragg's Aminos
- 1/2 cup of peanut butter
- pinch of red pepper flakes (or to taste)
- 3 boneless chicken breast halves cut into chunks
- 2 Tbl of peanut oil
- 2-3 cups of napa cabbage, shredded (take off outer leaves and then cut into 1/4-1/3" wide slices)
Instructions:
Add peanut oil to a large saute pan. Heat on medium and add your chicken chunks. Stir often to briskly cook them. This will only take about five minutes. Just make sure there is no pink left.
In another pan, add the broth. Bring it to a boil and add peppers, onions, celery, and bok choy. Saute on medium for five minutes or until the veggies are loose. Stir often. Add the Bragg's Aminos and garlic and peanut butter. Stir and add pepper flakes. Add chicken and shredded napa cabbage. Stir. Cook on medium just until warm.
Want a looser sauce? (I like mine a little runnier). Add the other half of the chicken broth and stir to heat.
This dish has some zip but it is not spicy. To make it spicy, add more pepper flakes or serve with Sriracha sauce on the side, so each individual can make it as zippy as they like.
Enjoy!
Cheers,
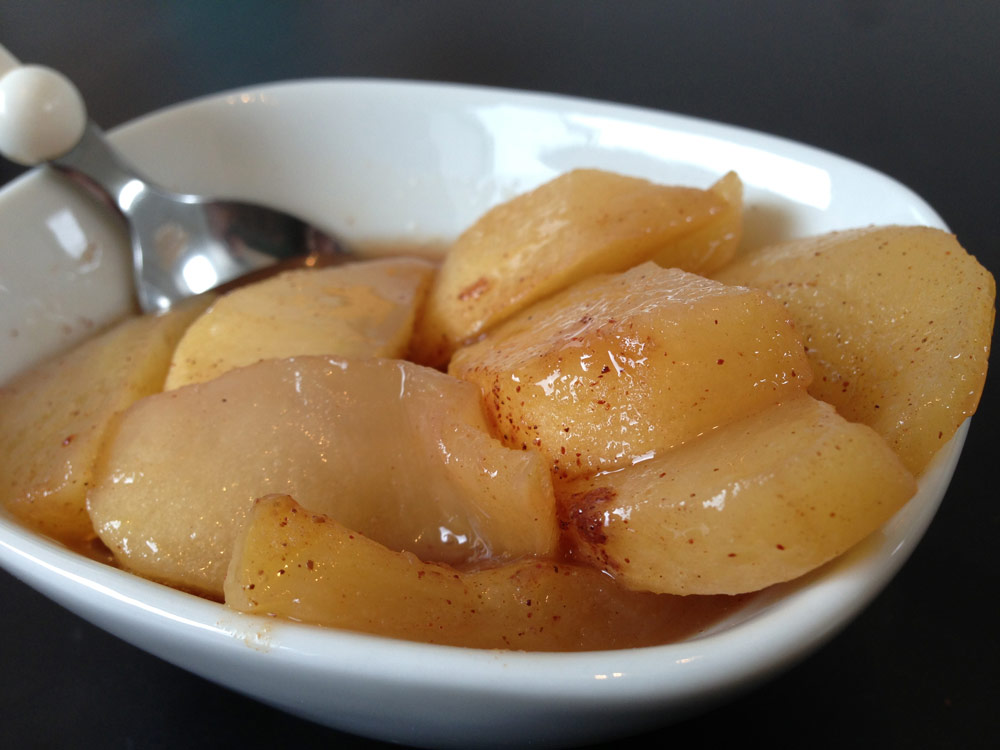
Winter Apple "Pie"
Plan Z Phase: This is a Z2 (ZReduction) recipe. Spice up your holidays without losing a step on Plan Z with this comforting winter-inspired recipe.
Servings: Serves 4 - 6
Ingredients:
- 4 apples, peeled, cored, and sliced
- 1-1/2 cup water
- 1 tsp pumpkin pie spice
- 3 tsp Truvia
- 3 tsp fruit pectin (non-sugar necessary see picture below)

Instructions:
Put all ingredients in a saucepan and bring to a boil over med-high heat. Boil for 5-7 minutes. Turn off heat and let sit and cool to thicken before eating.
Special note:
We have never worked with fruit pectin in this diet. Amy came up with the idea to try it. Brilliant idea! I checked the carb content and approved it. This opens up a whole new world of opportunity for thickening.
Enjoy!
Cheers,
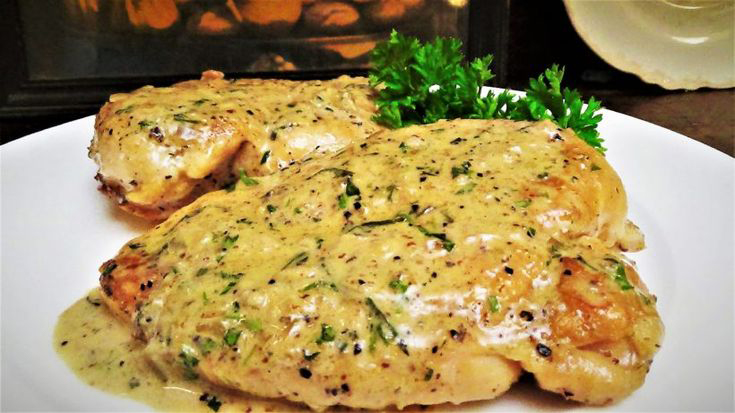
Chicken Breasts with Zola’s French Pan Sauce (BUFFET STYLE)
Plan Z Phase: This is a Z2 (ZReduction) recipe. This is my favorite new creation. I think I have made this three times in the last two weeks and that’s pretty much a record for me. This dish is easy and it tastes fancy!
Servings: Serves 12-16.
Ingredients:
- 6 skinless chicken breast halves
- 1/2 tsp of grated sea salt (or to taste)
- 1/2 tsp of grated black pepper (or to taste)
- 1 cup of organic chicken broth or stock
- 8 tsp of Dijon mustard
- 1/3 tsp of dry tarragon (you can add more tarragon for a stronger flavor but tarragon is pretty strong in small quantities so factor that in)
- 1/2 cup of heavy cream
Instructions:
Preheat oven to 350 degrees.
For a buffet cut the chicken breasts into strips. Spray your chicken breasts lightly with olive oil spray and then grate on salt and pepper. Grill on one side. Roast in the oven at 350 degrees for 15 minutes or until there is no pink inside.
While the chicken is cooking, you can get out that sauté pan. Add the chicken stock and begin to boil it. Turn down to medium so it just continues to bubble and reduce. Add the Dijon and the tarragon. Cook for 3 minutes for the flavors to blend. If the stock starts to run down too low just add a bit more. About 10 minutes before the chicken is done, add the cream. Continue to bubble the sauce. Don’t over-boil it but if you keep it bubbling the cream will thicken the sauce naturally. This won’t be a gloppy cream sauce because you’re on Plan Z and are limited in your cream amount but it will thicken enough that you’ll swear you’re eating in France. If the sauce looks done early just turn it off and wait for the chicken.
When the chicken is done, plate it and pour cream sauce over the top. This will eat up ½ of your cream allotment per day so keep that in mind.
Serve with roasted green beans. You can put the green beans in the oven with the chicken and roast them. Top with grated sea salt and you’ll be amazed at how special green beans can taste. You can do the same thing with asparagus instead if you prefer.
You can also use the leftovers as an easy Zola to Go! recipe. Simply stick any extra chicken in tupperware for lunch the next day or you can reheat the chicken in a casserole dish for an easy leftovers dinner.
Enjoy!
Cheers,
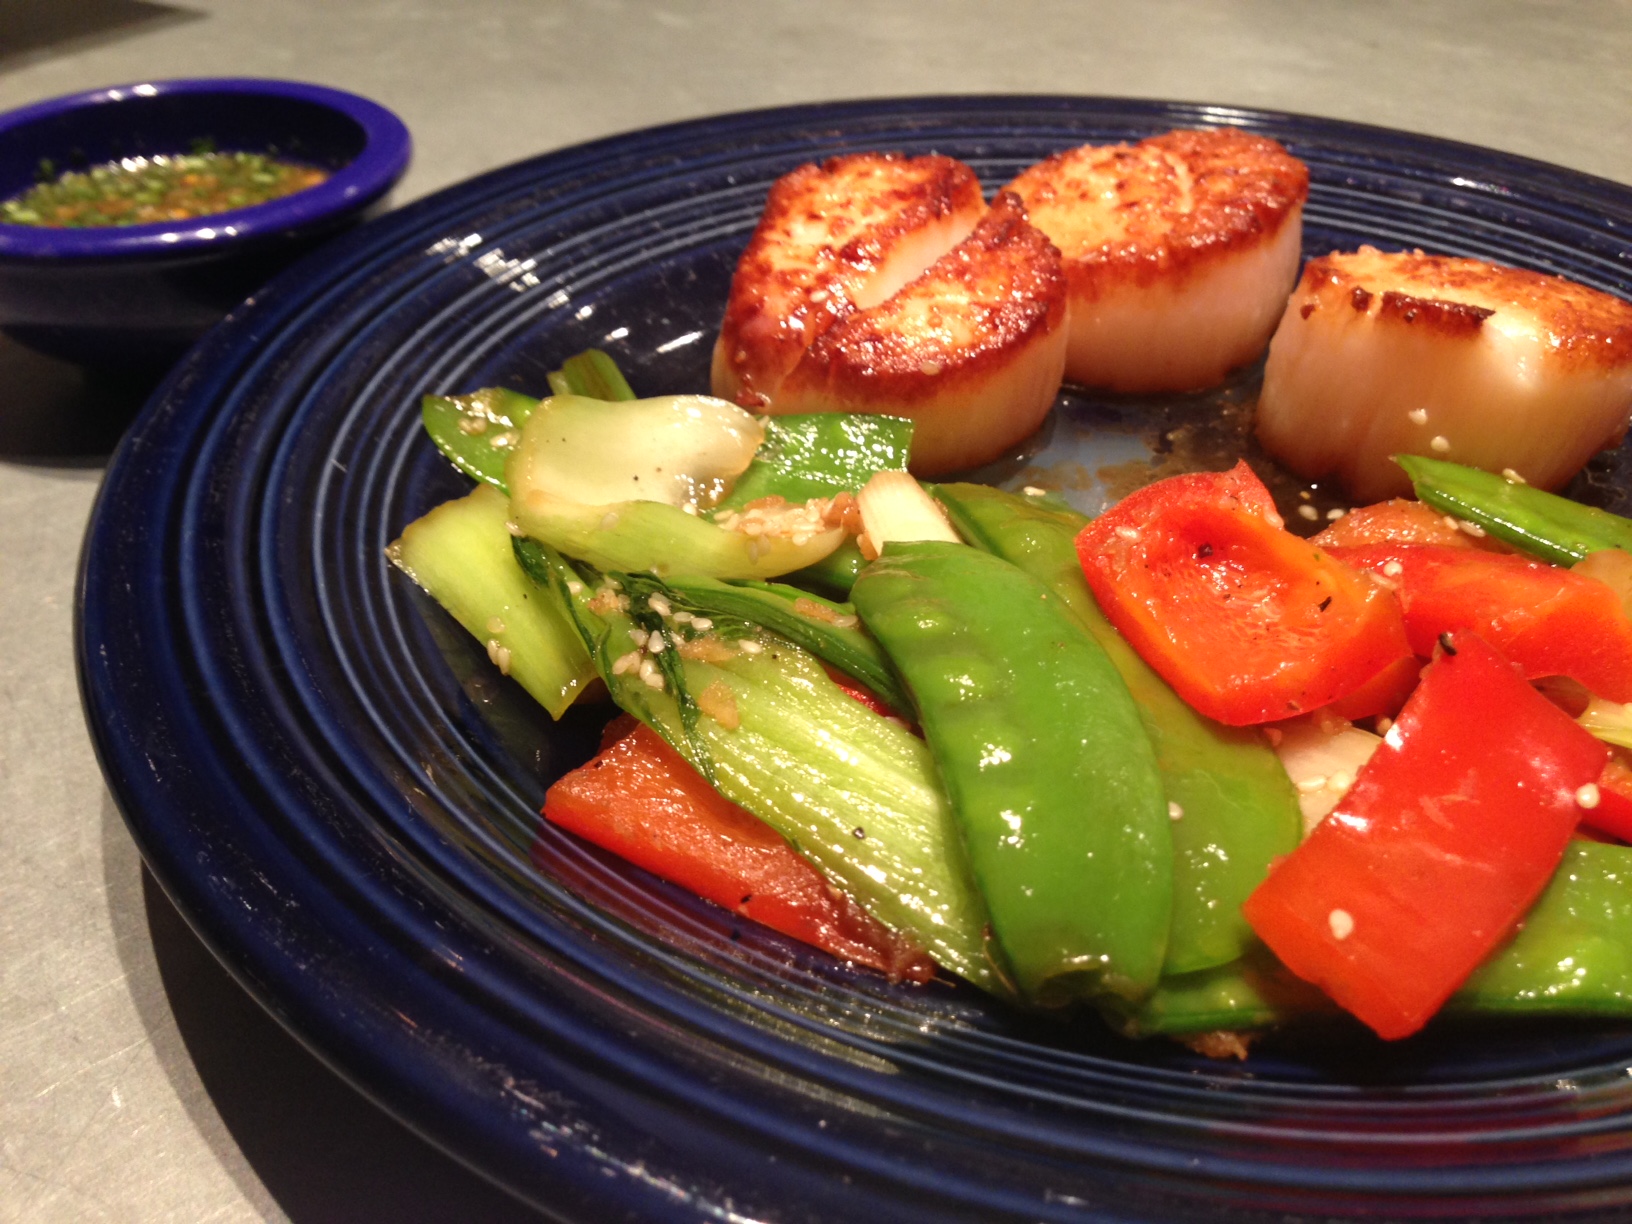
Asian Veggie Stir Fry
Plan Z Phase: This is a Z2 (ZReduction) recipe. This dish can be served with something as simple as a grilled steak or a baked chicken breast. If you want an American-Asian combo this is the way to go. It’s also designed to be served with my seared sea scallops recipe for a more Asian-directed entrée.
Servings: Serves 2 (can be doubled easily)
Ingredients:
2 cups of a variety of vegetables. I used:
- 1 red bell pepper, chopped to large chunk (1” pieces)
- 1 bunch of green onions. Trim off the root end, wash and then cut into 1” pieces
- 1 baby bok choy (cut off the stem end and then wash thoroughly) Cut that into chunks about the same as the red pepper)
- 1 cup of pea pods (snow peas). To prep them just gently zip off the stem end to strip it.
- 2 tsp of minced, fresh ginger (jar ginger can work in a pinch)
- 2 Tbl of Bragg’s Aminos
- water
- ½ tsp of sesame seeds (optional)
Instructions:
In a large saute pan, add a spritz of olive oil. Put in all veggies and begin to saute to loosen them. Add the Bragg's and stir. Keep stirring. This is how Asian cultures stir-fry. Very soon add the water before the Bragg’s scorches on the bottom of the pan. Add the ginger and lastly add the sesame seed. This whole process of stir frying won’t take more than five minutes for al dente veggies. If you like your veggies softer, keep cooking but you might need to add a bit more water.
This served 2+. My husband is not on ZReduction so he happily ate the extras. If you have kids or guests you can double this and probably get enough for 6 for a side dish. This will also transport very easily and reheat in a microwave.
Enjoy!
Cheers,
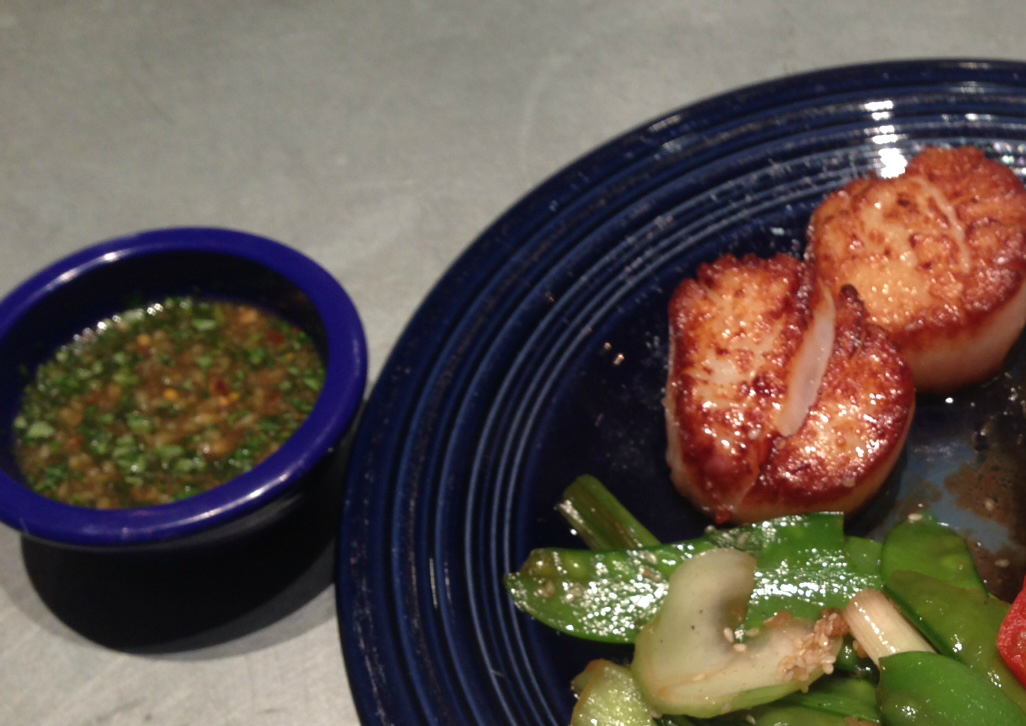
Spicy Dipping Sauce
Plan Z Phase: This is a Z2 (ZReduction) recipe. Serve with my seared sea scallops or with any fish or seafood. I think grilled shrimp would be great! Or even cooked, cold shrimp would pair nicely with this on a hot day. You can serve the sauce hot or cold.
Serving size: One serving is 2 Tbl max. You have to watch anything with Bragg's in it. It’s better than soy sauce but you’ll still have a tendency to gain or stall for a day if you eat too much. Serious sodium. I probably don’t use more than a single tablespoon for my serving but my husband snarfed up all of his and most of my leftovers. I gently dip, just to barely coat the bite of food.
How spicy this is will depend on how much of the red pepper flakes you use. It does not take a lot to make this flaming hot because you are heating the peppers and that brings out the heat.
Ingredients:
- 3 tsp of minced garlic
- 2 Tbl of Bragg’s Aminos
- 2 Tbl of rice wine vinegar
- 1 tsp of Truvia
- ¼ - ½ tsp of red pepper flakes (or to your liking. I used a ¼ tsp and my mouth was WELL heated)
- 2 Tlb of lemon juice
- 1 Tbl of fresh cilantro, minced
Instructions:
Put all of the ingredients except the cilantro in a very small sauce pan. Heat until bubbling. Turn off. Add cilantro and stir.
This dipping sauce can be served with any kind of fish or seafood. I paired it with my seared sea scallops recipe and Asian veggie stir fry for a delicious meal. If you do fish you can drizzle it over the top but be sure to taste test to make sure you can handle the heat. Some love heat!
Enjoy!
Cheers,

Simple Winter Chicken Salad
Plan Z Phase: This is a Z3 (ZReboot) recipe. In a hurry for dinner? Feeling like a cold entrée? This whips up really fast and will remind you of summer even though it includes winter fruit.
Servings: Serves 3-5 depending on size of portion
Ingredients:
- 1 whole rotisserie chicken from the deli. I get a plain one. Pull it apart and cut the meat into cubes. Toss the skin. You’ll end up with about 4 cups of chicken.
- 1 – 2 ripe pears. Core and cut into cubes. I don’t bother to peel them. The skin gives you a bit more fiber; just wash them thoroughly.
- 1 cup of pecan pieces. I use pecans halves and just chop them coarsely. I like bigger pieces of pecan.
- about 1 cup of mayo (Or to your taste. Depends on how creamy you like your chicken salad.)
- sea salt and pepper to taste
- a whisper of cayenne (optional)
Instructions:
Put all of the ingredients in a bowl and stir. I use plenty of pepper in mine and I always add a whisper of cayenne to dishes like this to give the flavor a little extra sparkle.
Serve on top of salad or toast one piece of a low-carb bread, butter it and serve open-face. Julian’s bakery makes a nice low-carb whole wheat. I don’t eat it often but when I do I feel spoiled.
More options: Some folks like to add a little mustard to their chicken salad, or if you are in the mood you can sprinkle in a bit of curry powder instead.
Enjoy!
Cheers,
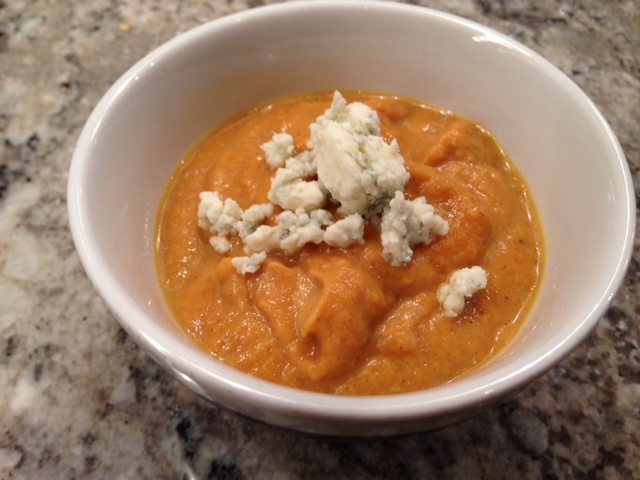
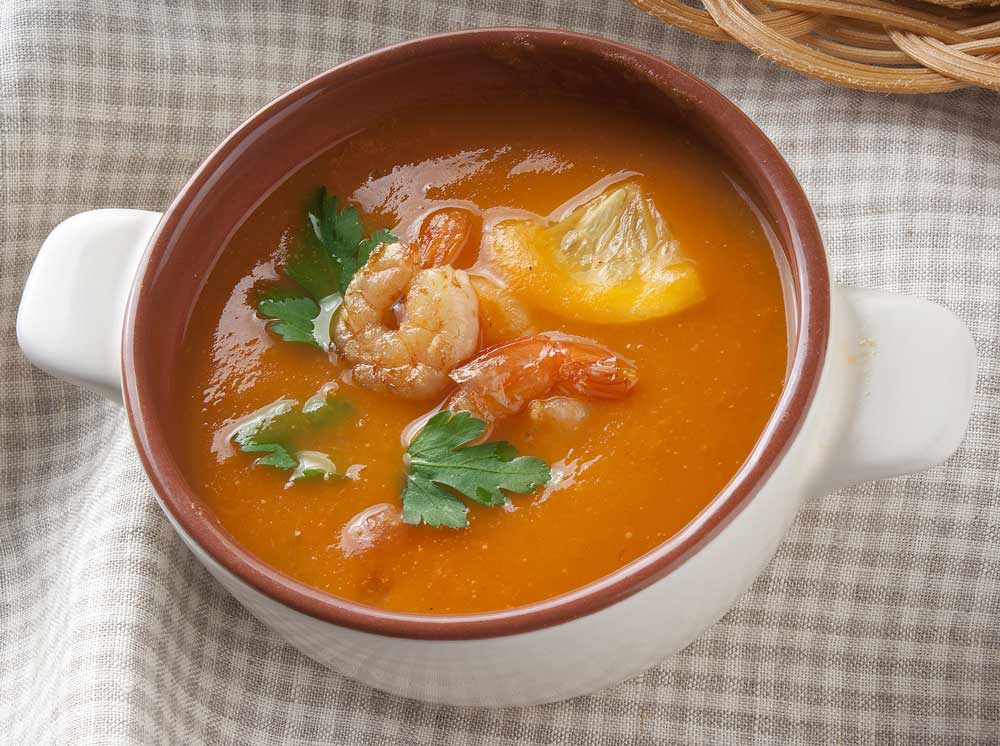
Pumpkin Soup for Fun or Fancy
Plan Z Phase: This is a Z3 (ZReboot) recipe. This is a perfect way to start a holiday dinner. Impress the family even though this dish is super easy. Or make it for a Saturday afternoon or even a weekday lunch. You won't be disappointed. Taste close to dessert with a little bit of savory mixed in, thanks to chicken stock and shallots.
Serving Size: Depends on bowl size. I do a teeny bowl for a half-cup tasting. So 6-12 servings.
Ingredients:
- 2, 15-oz cans of pureed pumpkin. Find this in the baking section.
- 1 quart of chicken stock
- 1 cup of whipping cream (full-fat cream)
- 1 large shallot, minced (these are the little purple French onions. Mild)
- 1 Tbl of maple syrup
- 2 Tbl of butter
- 1/2 tsp of nutmeg
- 1/2 tsp of cinnamon
- 1/2 tsp of grated sea salt
- a hint of cayenne (depends on taste, but I can't leave this out. Put a whisper in, stir and taste. Then add more if you want).
- blue cheese or Gorgonzola is optional
Instructions:
In a large sauce pan, stir in the pumpkin, and everything else except the blue cheese.
Heat on medium to heat it through. Stir often. Don't let it boil. Just meld the flavors. This will take about 10 minutes. Voila. EASY!
You can always cook it to this point and then chill it down and store in the fridge. This can be made a day or two ahead for holiday serving. When you re-heat it do it slowly. If it gets too thick add a bit more stock or cream. The cream is what gets thicker over time.
Before serving sprinkle on blue cheese or pass it for those that may or may not want it.
Another variation: if you want a curried pumpkin soup you can add a tsp or two of curry powder (to taste). All else will be the same. Don't change a thing.
You can also garnish with chive strings. They look lovely and fancy.
Enjoy!
Cheers,
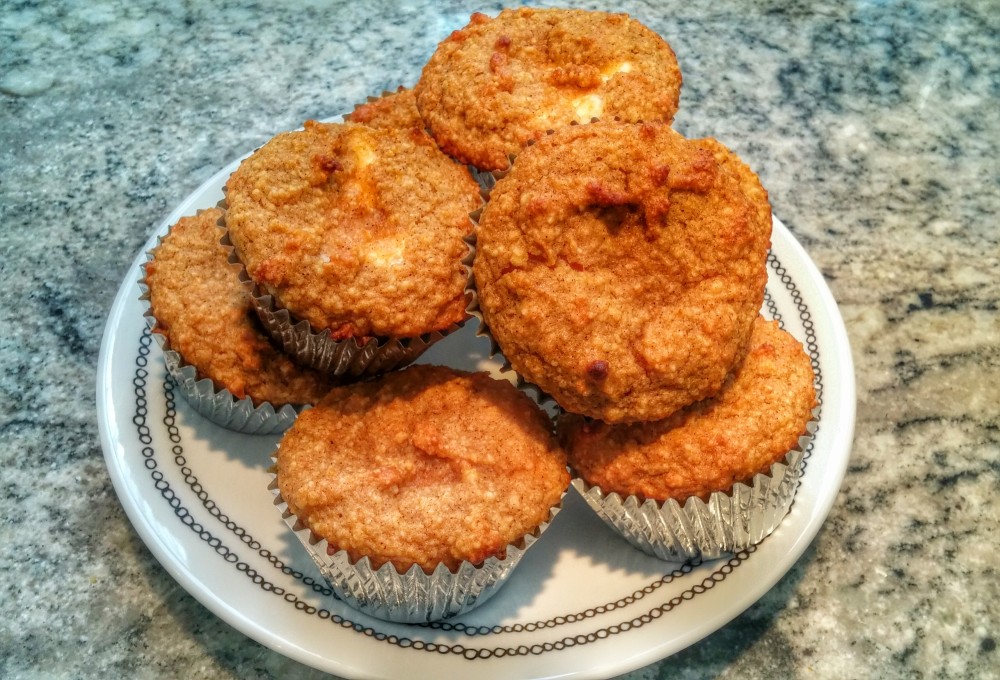
Pumpkin Cream Cheese Muffins
Plan Z Phase: This is a Z3 (ZReboot) recipe. Dieter Caitlin found the perfect fall recipe from Carolyn, the writer and recipe developer behind All Day I Dream About Food.
This perfect pumpkin treat invites all the spice and warmth of autumn into your mouth without the additional unwanted carbs.

Servings: Serves 15
Ingredients:
Pumpkin Muffins
- 3/4 cup pumpkin puree
- 3 cups super fine ground almond flour (Bob's Redmill is the most popular brand with the best consistency.)
- 1/3 cup unflavored whey protein powder
- 2 tsp baking powder
- 1/2 tsp baking soda
- 1/2 tsp salt
- 1-1/2 tsp cinnamon
- 1/2 tsp ginger
- 1/4 tsp cloves
- 1/4 cup butter, softened
- 1/2 cup Swerve Sweetener or other erythritol
- 3 large eggs
- 1/2 tsp vanilla extract
- 1/4 cup unsweetened almond milk
Candied Pepitas:
- 1/2 tsp butter
- 1/4 cup pepitas
- 1 tbsp Swerve Sweetener
- 1/4 tsp cinnamon
Cream Cheese Filling:
- 8oz cream cheese, softened
- 1/4 cup powdered Swerve Sweetener or other powdered erythritol
- 2 tsp cream
- 1/2 tsp vanilla
Instructions:
On a plate lined with two layers of paper towel, spread out the pupmkin puree and blot with another layer or two of paper towels. Let sit while making the pepitas and cream cheese filling.
For the candied pepitas, melt butter in small skilet over medium heat. Add pepitas and toss to coat. Add sweetener and cinnamon and toss to coat. Remove from heat and set aside.
For the cream cheese filling, beat cream cheese with powdered sweetener, cream and vanilla extract until smooth. Set aside.
For the muffins, preheat over to 325 degrees and line 15 muffin tins with paper liners (if you only have one muffin pan, like I do, you can do the last three muffins after the first batch is cooked).
In a medium bowl, whisk together the almond flour, protein powder, baking powder, baking soda, salt and spices.
In a large bowl, beat butter with sweetener until well combined. Beat in pumpkin puree, eggs and vanilla extract.
Beat in almond flour mixture in two additions, alternating with almond milk.
Drop a spoonful of batter into the bottom of the prepared muffin tins and use a spoon to make a well in the center. Drop a tablespoon of cream cheese filling into the well, then top with more batter to fill muffin tins about 3/4 full.
Sprinkle each muffin with some candied pepitas.
Bake 23 to 25 minutes, or until the tops are set and edges are just browned. Let them cool in the pan for 15 minutes before transferring to a wire rack to cool completely.
Repeat with any remaining batter, filling and pepitas.
Thanks again to Carolyn from All Day I Dream About Food for this wonderful recipe.
Enjoy!
Cheers,
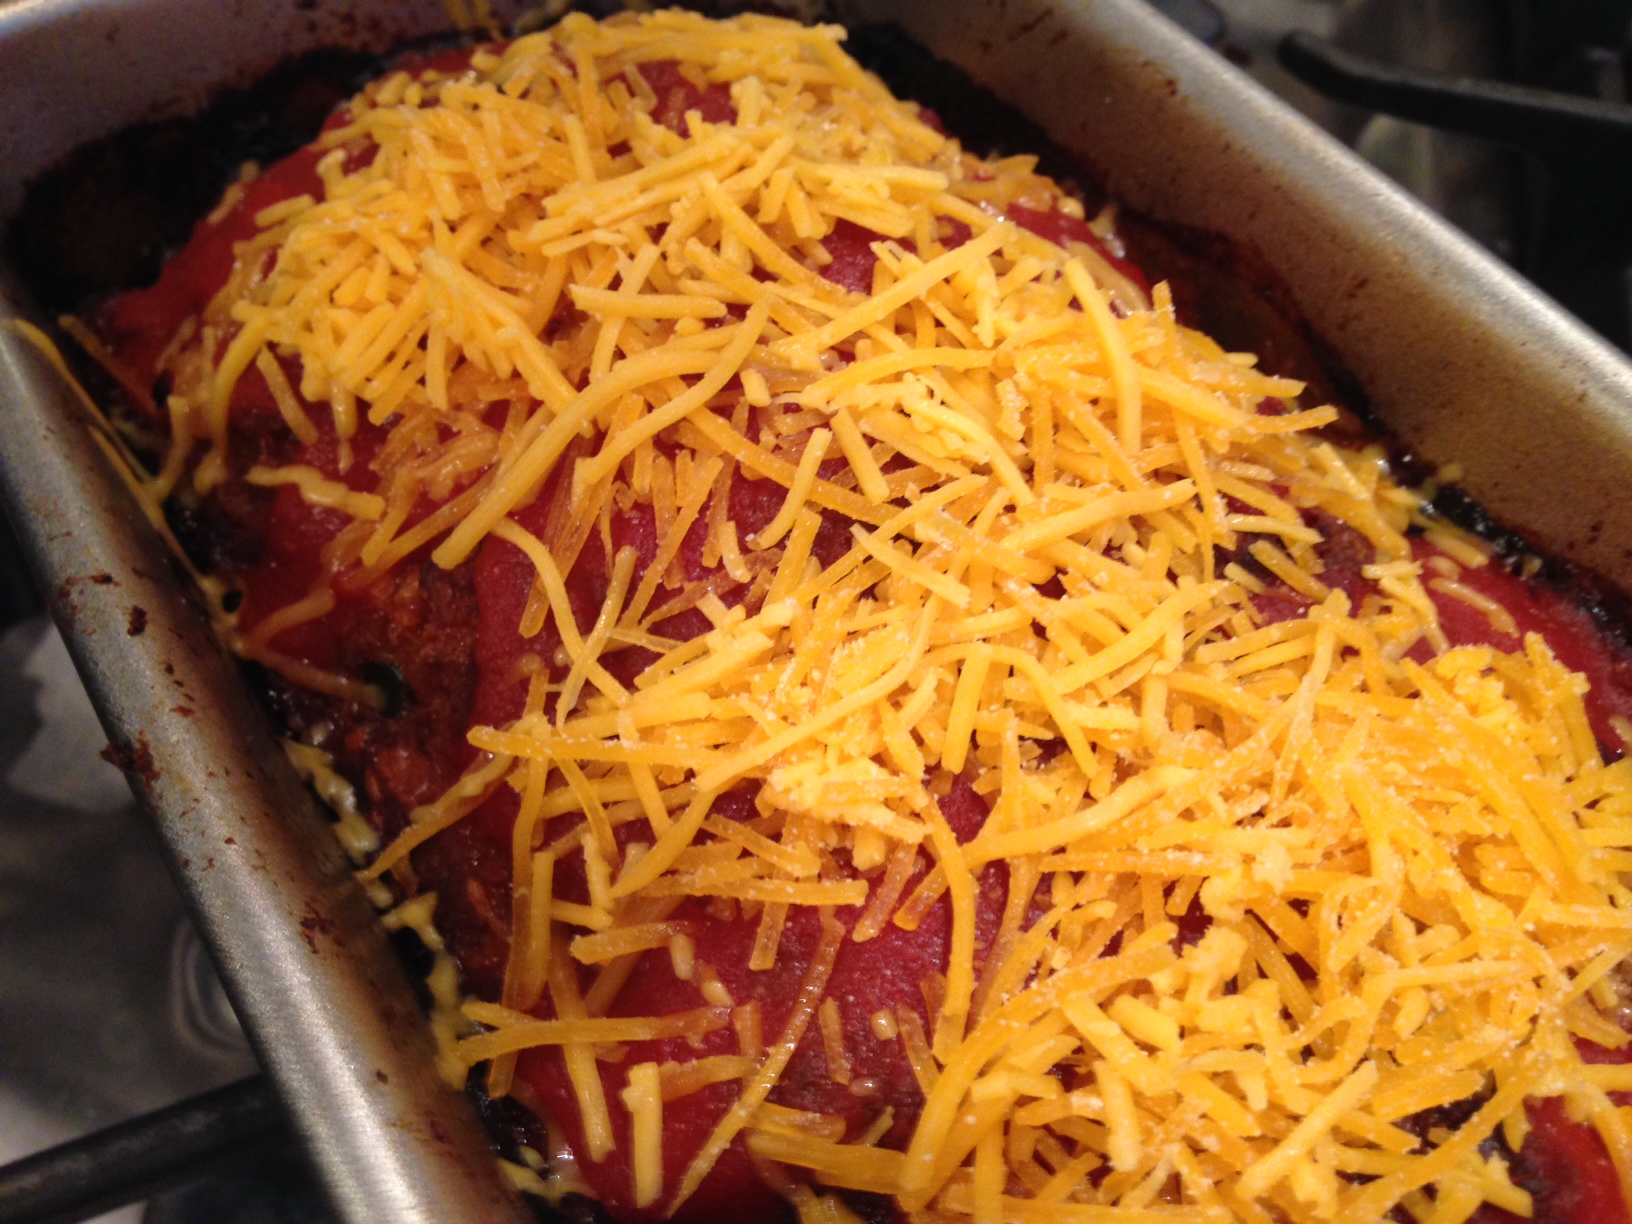
Mexican Meatloaf
Plan Z Phase: This is a Z3 (ZReboot) recipe.
Servings: Serves 4
Ingredients:
- 1-1/2 lb ground sirloin or ground beef (your choice)
- 1/2 cup of bread crumbs
- 1 ½ Tbl of meat rub. Choose your favorite. I used Cajun.
- 1 tsp of ground cumin (optional. This gives a smokier flavor)
- 1 egg
- ½ cup of tomato sauce + 1/4 cup (buy the 8 oz can)
- 1 ½ Tbl of tomato paste
- ½ cup of poblano pepper dices (or green pepper if you don't like poblanos)
- ½ cup diced onion
- 1 cup of shredded cheddar + a little more for the top
Instructions:
Preheat your oven to 350 degrees.
In a large bowl, combine the beef, bread crumbs, meat rub, cumin, egg, 1/2 cup of tomato sauce, tomato paste, pepper bits, diced onion and 1 cup of cheddar chees.
Mix. I use my hands and just get it all mixed up.
Put in your loaf pan. Press down lightly. I press a bit more on the sides so it mounds on the top.
Bake at 350 degrees for 1 hour. At the 1 hour point remove the meatloaf and pour on the remaining tomato sauce. Put back in the oven for 15 more minutes. Then remove and sprinkle on the last of the cheddar cheese.
Let sit for a few minutes and serve slices.
Enjoy!
Cheers,