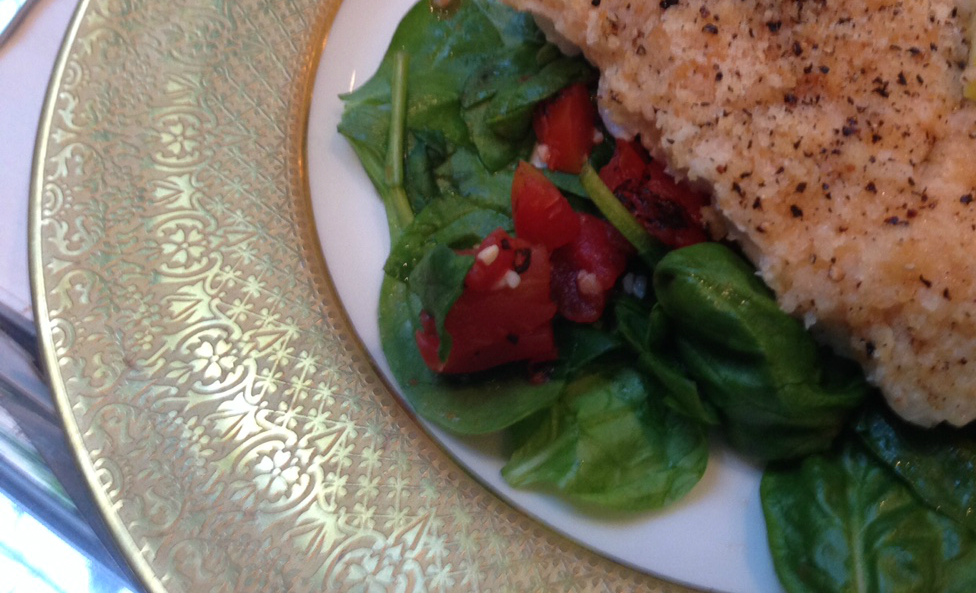
Spinach Sauteed with Garlic and Chopped Tomato
Plan Z Phase: This is a Z2 (ZReduction) recipe. This is quick cooking at its best…or novice cooking for those who are just discovering their talents in the kitchen.
Servings: Serves 2 but can be multiplied easily
Ingredients:
- 1 bunch of fresh spinach
- ½ cup of tomatoes, diced. You can use fresh tomatoes from the garden or farmers market but when out of season, canned, diced tomatoes will work just fine.
- ½ tsp of minced garlic (jar garlic will work but fresh will be best)
- ¼ cup of vegetable broth
Instructions:
Get out a medium-sized saute pan. Cover the bottom of the pan with a shallow layer of vegetable broth. If it takes a little more to cover your pan, don’t worry. Most of it is going to bubble off.
Add the tomato bits and the garlic. Heat on medium-high until it’s bubbling. Let it go until it’s starting to boil off. Then add a nice handful of spinach per person. Simply toss to coat and wilt the spinach. You want to serve immediately so it doesn’t turn into spinach slop. Some of the leaves will not be wilted, and others will.
Season with grated sea salt and pepper if you choose.
If you like your spinach totally cooked, no matter. Your spinach will just curl up and be a little pile instead of a bigger one.
If you are doing this for more people you might need more vegetable broth and you might want to do it in batches.
I serve this spinach side dish with my crunchy top cod.
Enjoy!
Cheers,
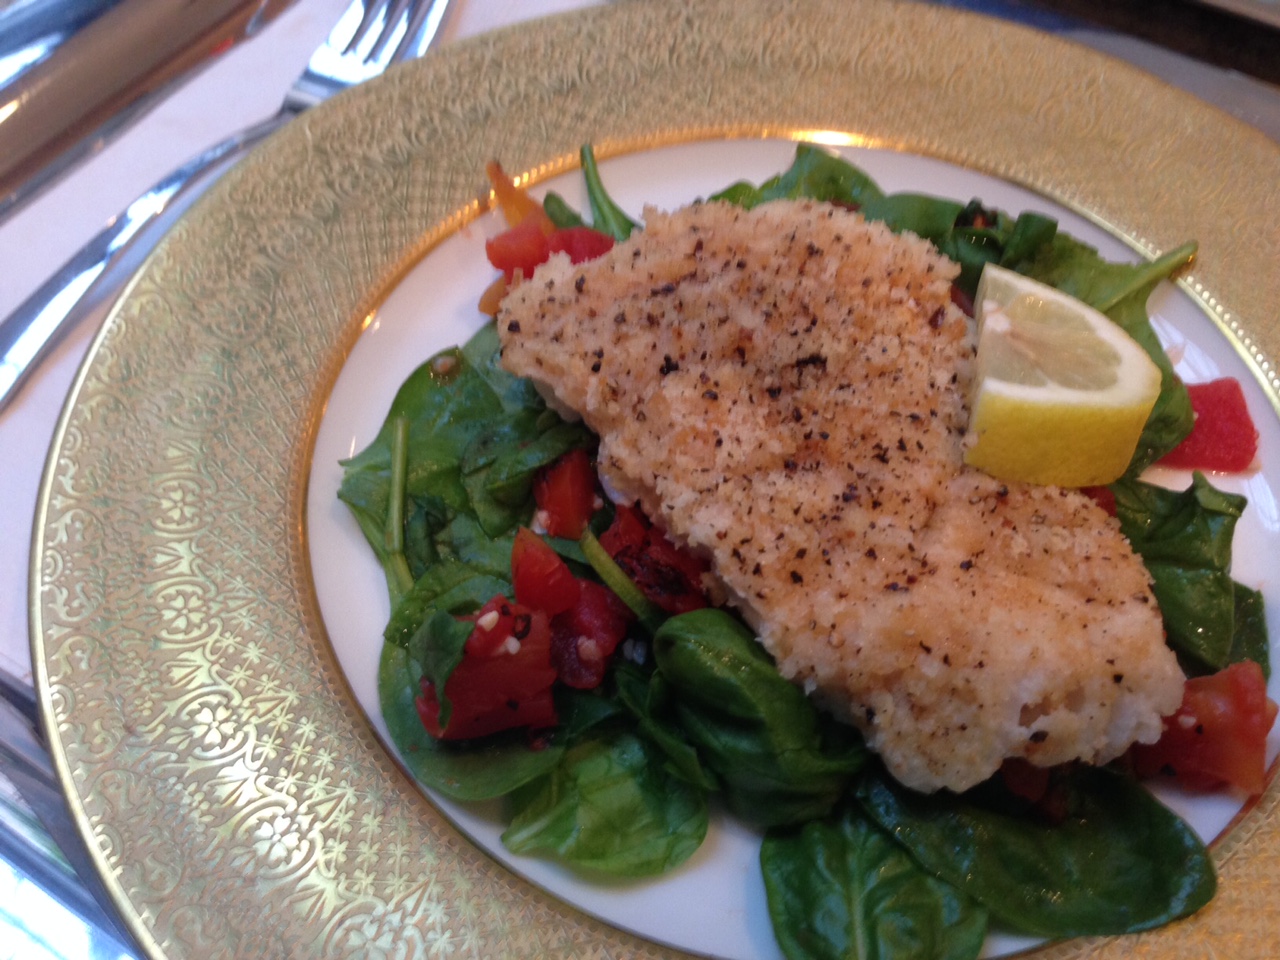
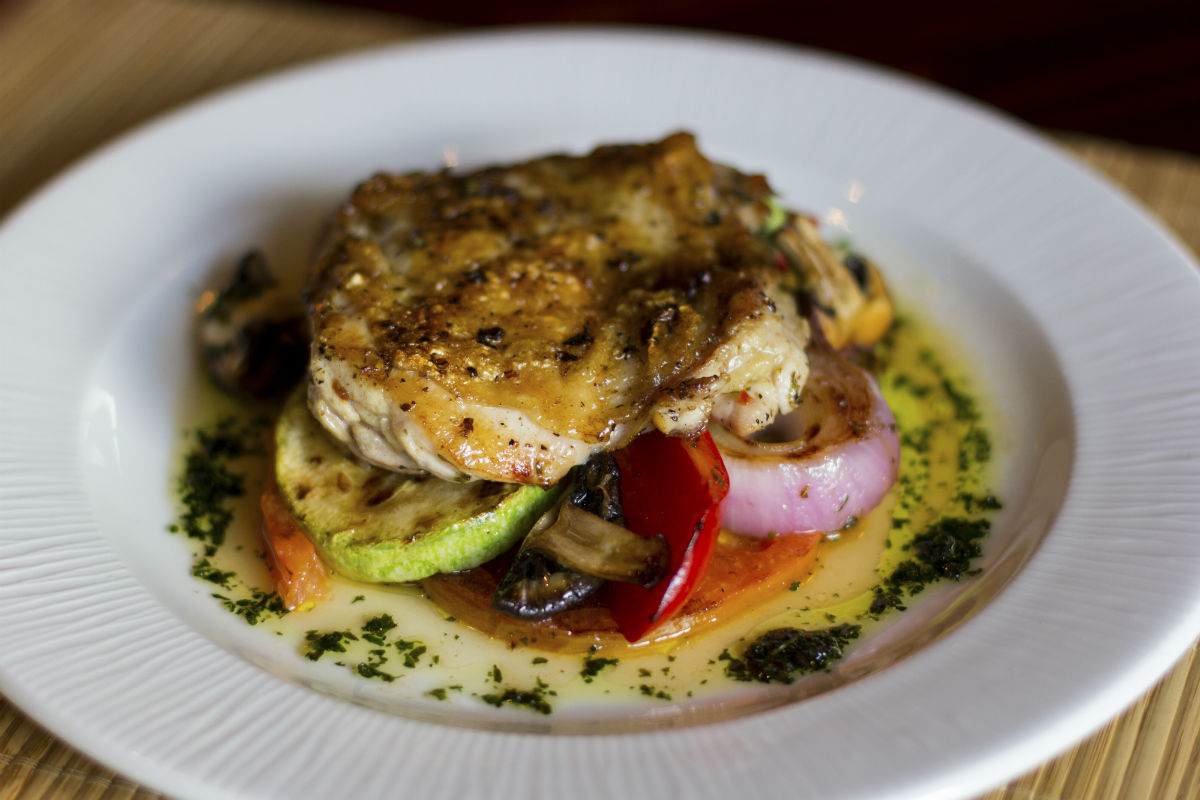
Crunchy Top Cod
Plan Z Phase: This is a Z2 (ZReduction) recipe. This dish takes no time at all. All you have to do is crust it and toss it in your oven. Come back later, and your entrée is ready! I served mine with the my sautéed spinach with garlic and tomato. You could alternatively pick the spicy-sweet green bean medley. Or you choose.
This can also be made with any other meaty white fish. That might include tilapia, whitefish, halibut or even sea bass. The tilapia is the most budget-conscious. The tilapia won’t take as long to cook either, since it’s thinner.
Servings: Serves 4
Ingredients:
- olive oil spray
- ¼ cup of bread crumbs
- ¼ tsp of garlic powder (or to taste)
- 4, 6-8 oz portions of cod (no skin)
- 2 Tbl of lemon juice
- lemon slices for garnish and drizzling (optional)
Instructions:
Preheat your oven to 400 degrees.
In a small bowl, combine your crumbs and garlic powder.
Spray the inside of your ovenproof pan. Place the fish filets in the pan. Drizzle on your lemon juice. Then spray the top of the fish. Sprinkle on your crumb mixture and press them lightly with your fingers so they stick. Then spray the surface again. This last spray is what causes the crumbs to crunch up and brown during baking.
Place in the oven and bake for approximately 20 minutes or until the fish will flake with a fork or a crack forms. You just want to make sure the fish is no longer opaque in the middle.
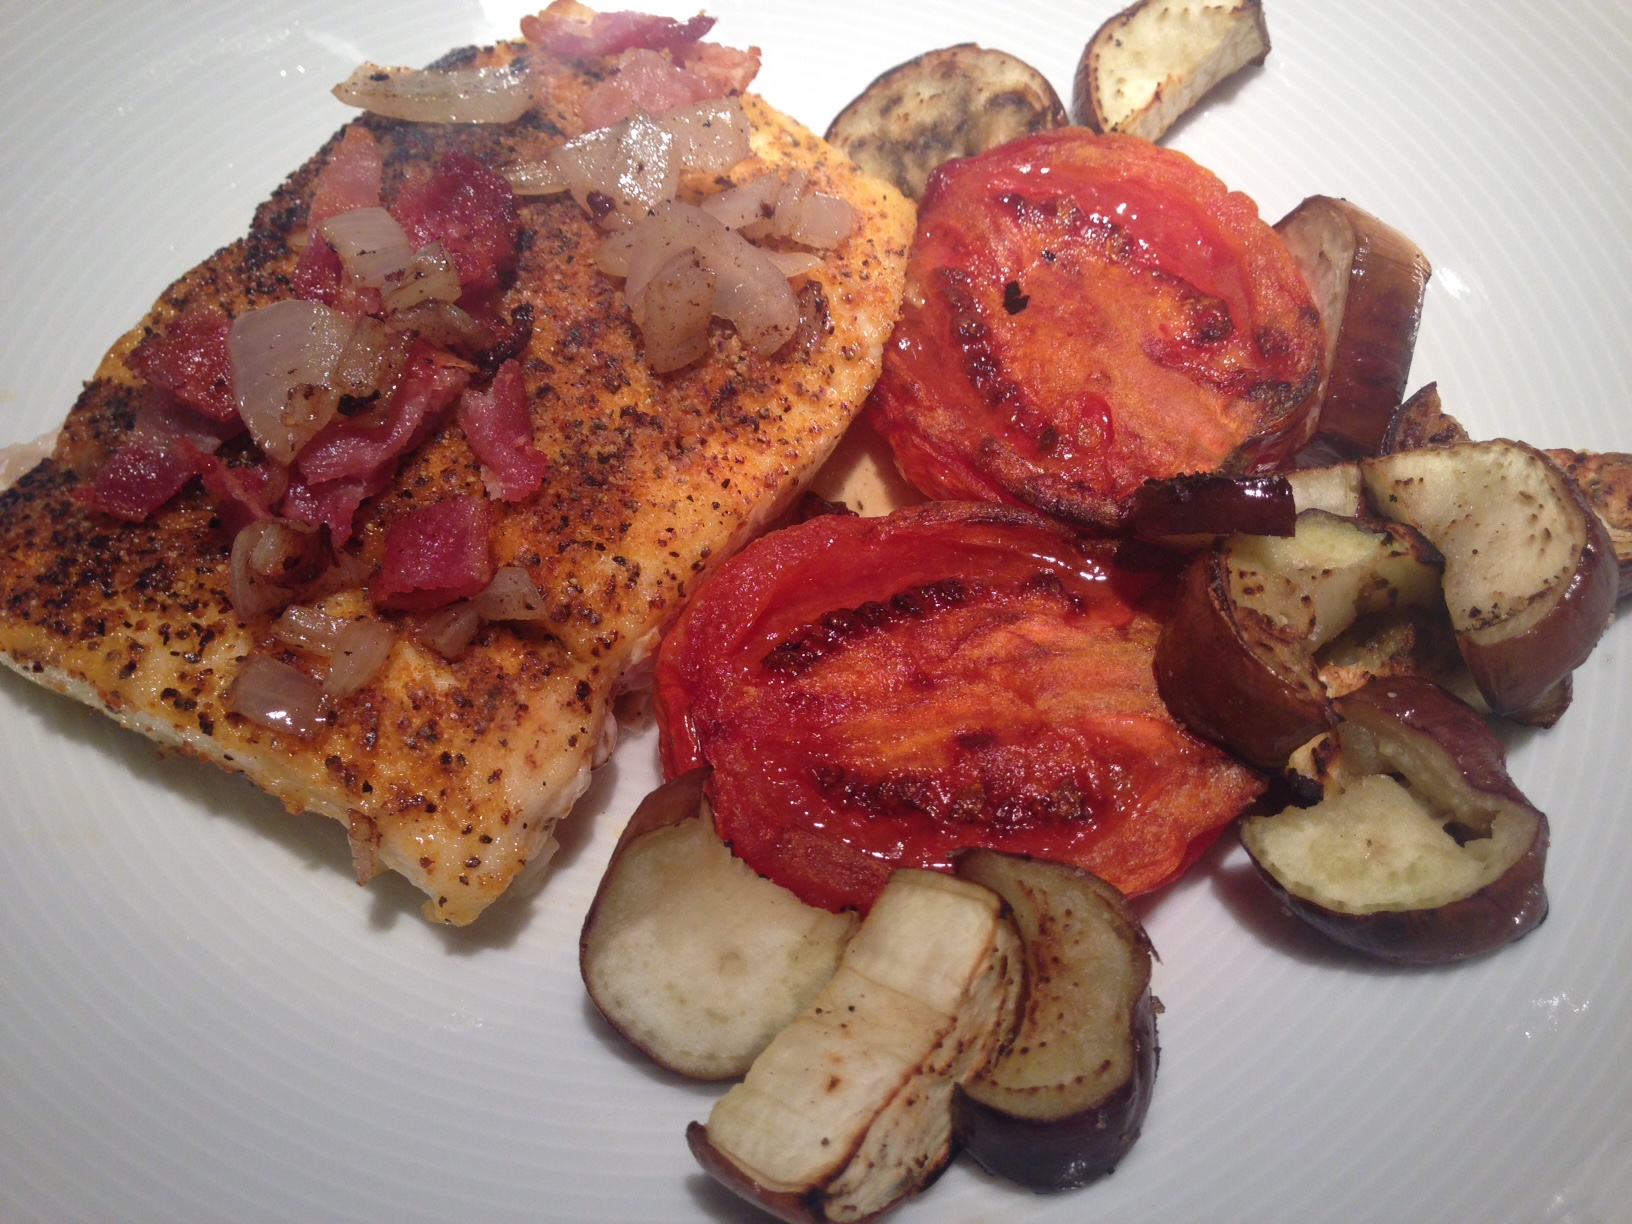
In the picture the fish is served over spinach sauteed with garlic and tomato. Or choose your own side dish like my spicy-sweet green bean medley.
Note: This is your crunch portion for this meal. No side crackers or breadsticks necessary.
Enjoy!
Cheers,
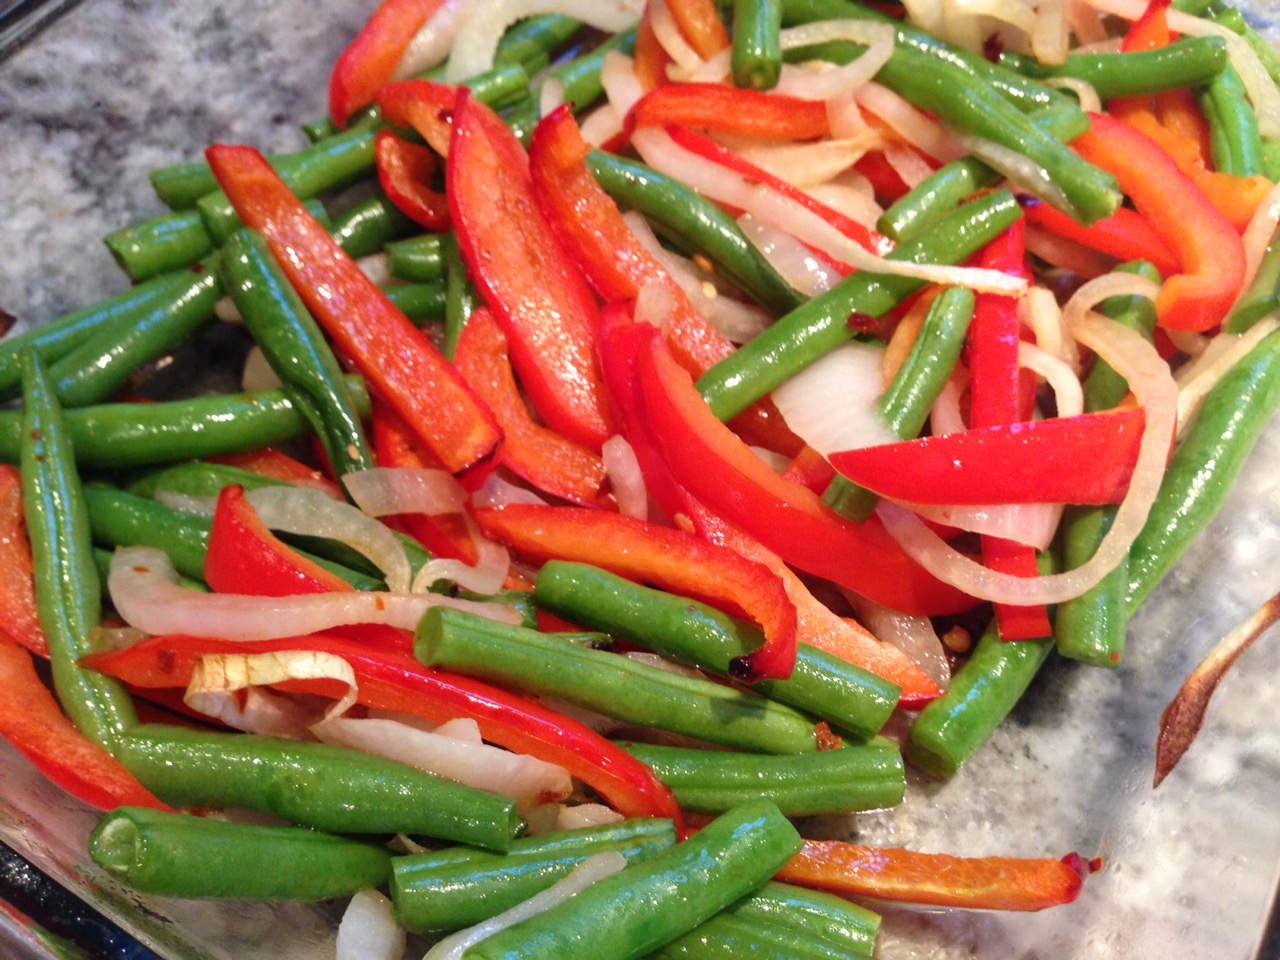
Spicy-Sweet Green Bean Medley
Plan Z Phase: This is a Z2 (ZReduction) recipe. Add this zippy side dish to your favorite piece of protein for a vitamin packed veggie punch.
Servings: Serves 4 but can be doubled or multiplied easily. Serving size one cup for ZReduction.
Ingredients:
- 3 cup of green beans. Trim them and cut them to a size you like.
- ½ tsp of Truvia
- 2 Tbl of Bragg’s Aminos or Coconut Aminos
- 1/2 teaspoon dried, crushed red pepper
- 1 medium-size red bell pepper, sliced into strips
- 1/2 medium-size sweet onion, sliced in half top to bottom and then cut into narrow half moons
- grated sea salt to taste
Instructions:
Spray an oven-proof pan with olive oil spray. Put in your prepped green beans, onion and red pepper. Mix them up and spray with olive oil. Put in your oven to roast 12 – 15 minutes or until the beans are done to your liking. Depends on your oven temp.
While they are roasting, in a small bowl, add the Truvia, Aminos and crushed red pepper. Stir to get the Truvia to dissolve and just let it sit.
When the bean mixture comes out of the oven, drizzle on the sauce and stir.
You are ready to serve.
Serve with any grilled or roasted protein.
Enjoy!
Cheers,

Jamie Oliver: Teach Every Child About Food
Watch Chef Jamie Oliver’s TED Talk on what kids get to eat at school and beyond. It’s frightening. Sharing powerful stories from his anti-obesity project in Huntington, West Virginia — and a shocking image of the sugar we eat — TED Prize winner Jamie Oliver makes the case for an all-out assault on our ignorance of food.
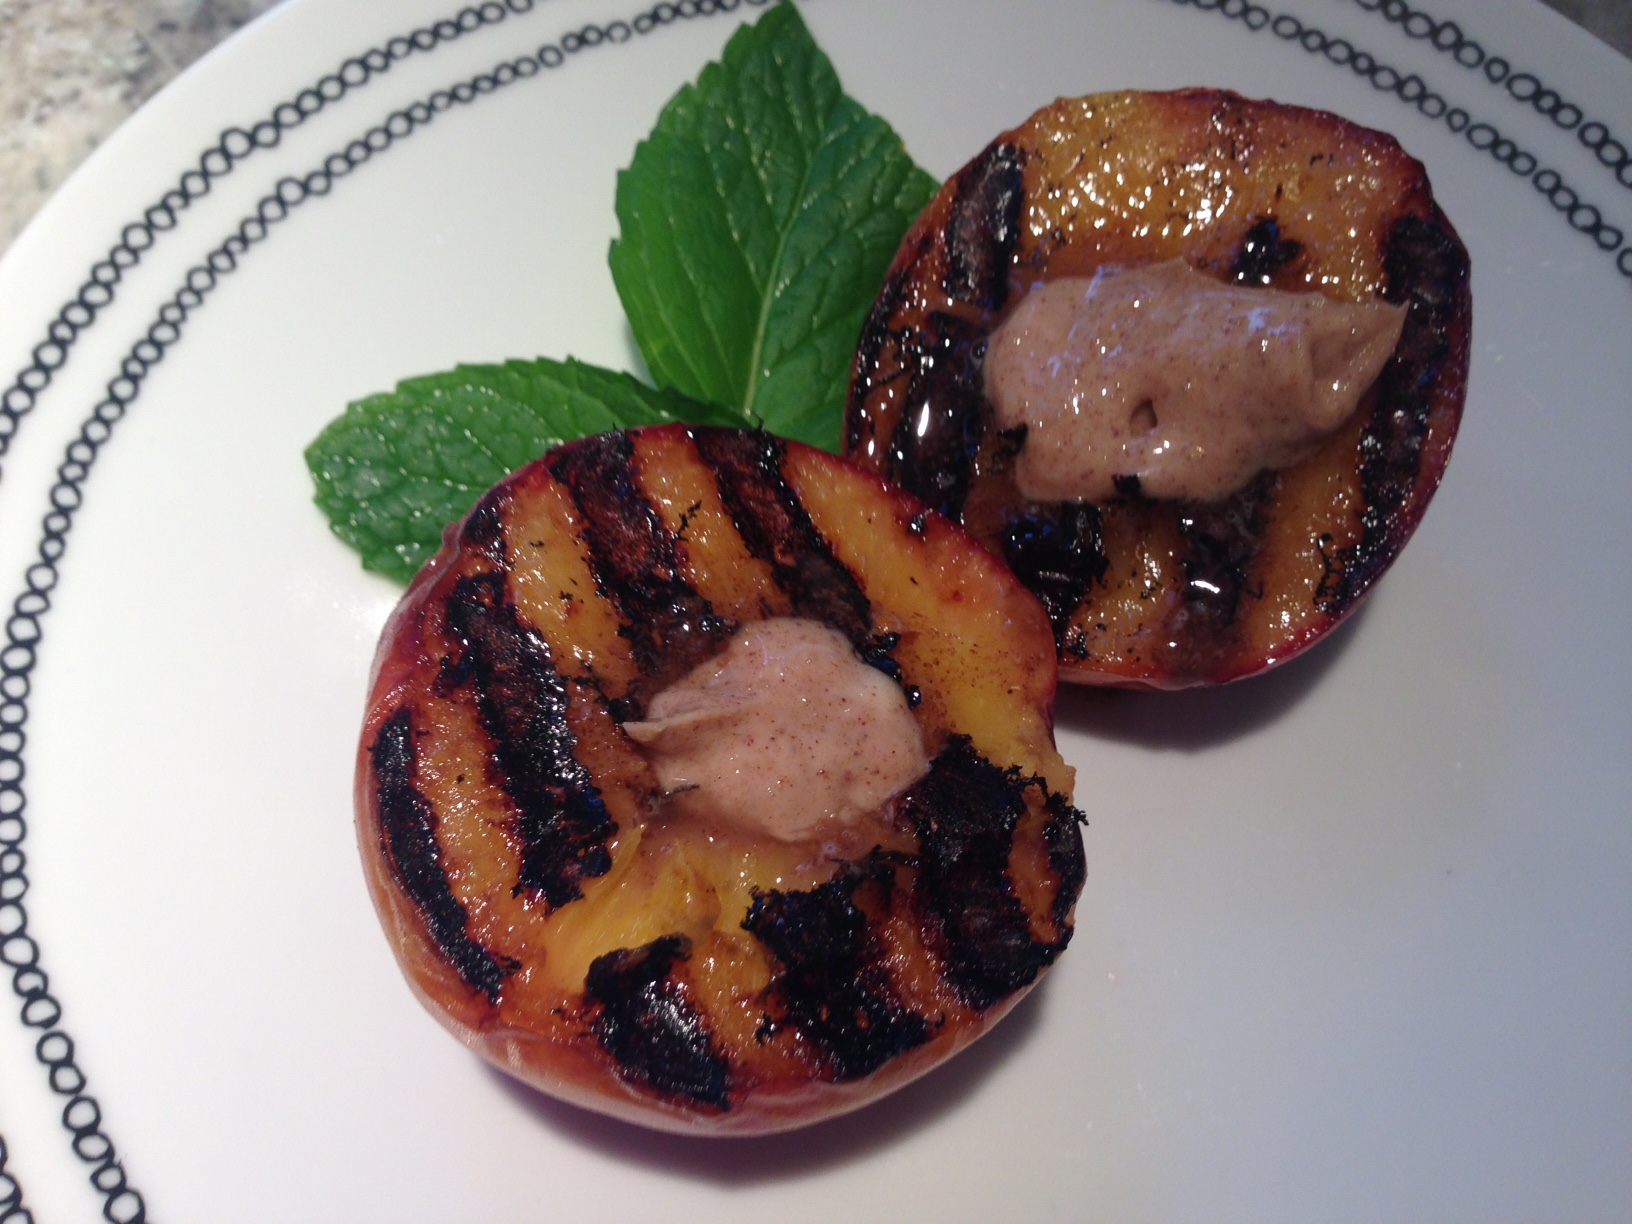
Grilled Peaches with Cinnamon Butter Sauce
Plan Z Phase: This is a Z3 (ZReboot) recipe. I adapted this recipe for Plan Z from one of Bobby Flay’s ideas. I love a good grilled peach in the summer. Even if you have a crowd over for a barbecue you can grill up a bunch of these in a jiffy and everyone will enjoy a healthy dessert.
Servings: Serves 4 – 8 and can be doubled easily. The portion depends on whether you serve each person 1 or 2 halves. I think one is plenty but if you set these on a platter for the crowd to consume, they might take two. They are that good.
Ingredients:
- ½ stick of butter, room temperature
- ½ tsp of cinnamon
- 1 – 2 tsp of Truvia. This will be to taste.
- a pinch of grated sea salt
- oil spray (I use butter flavor or olive oil)
- mint leaves for garnish (optional)
- 4 fairly ripe peaches, cut in half and pits removed
Instructions:
First up is to make the topping. Put the butter, cinnamon, Truvia and salt in a bowl and stir. You can use this soft or put it in the fridge to firm up. If you serve it cold, you can use a melon baller to make little balls of butter topping. Either way works.
If you cut the peach in half across the belly the pits remove fairly easily. Just work your way around the pit with your sharp knife. Don’t cut through the pit. That makes your job harder. Just twist the two halves apart and lift out the pit.
Then just spray the flesh side and put them on the clean grill. Grill at medium high for about 3 minutes. Don’t mess with them a lot. If you just leave them, you get nice grill marks. As soon as they are hot they are done.
Put the peach halves on a platter or individual plates and serve with a small dollop of the sauce in the middle indentation. Garnish with mint leaves if you choose.
Enjoy!
Cheers,
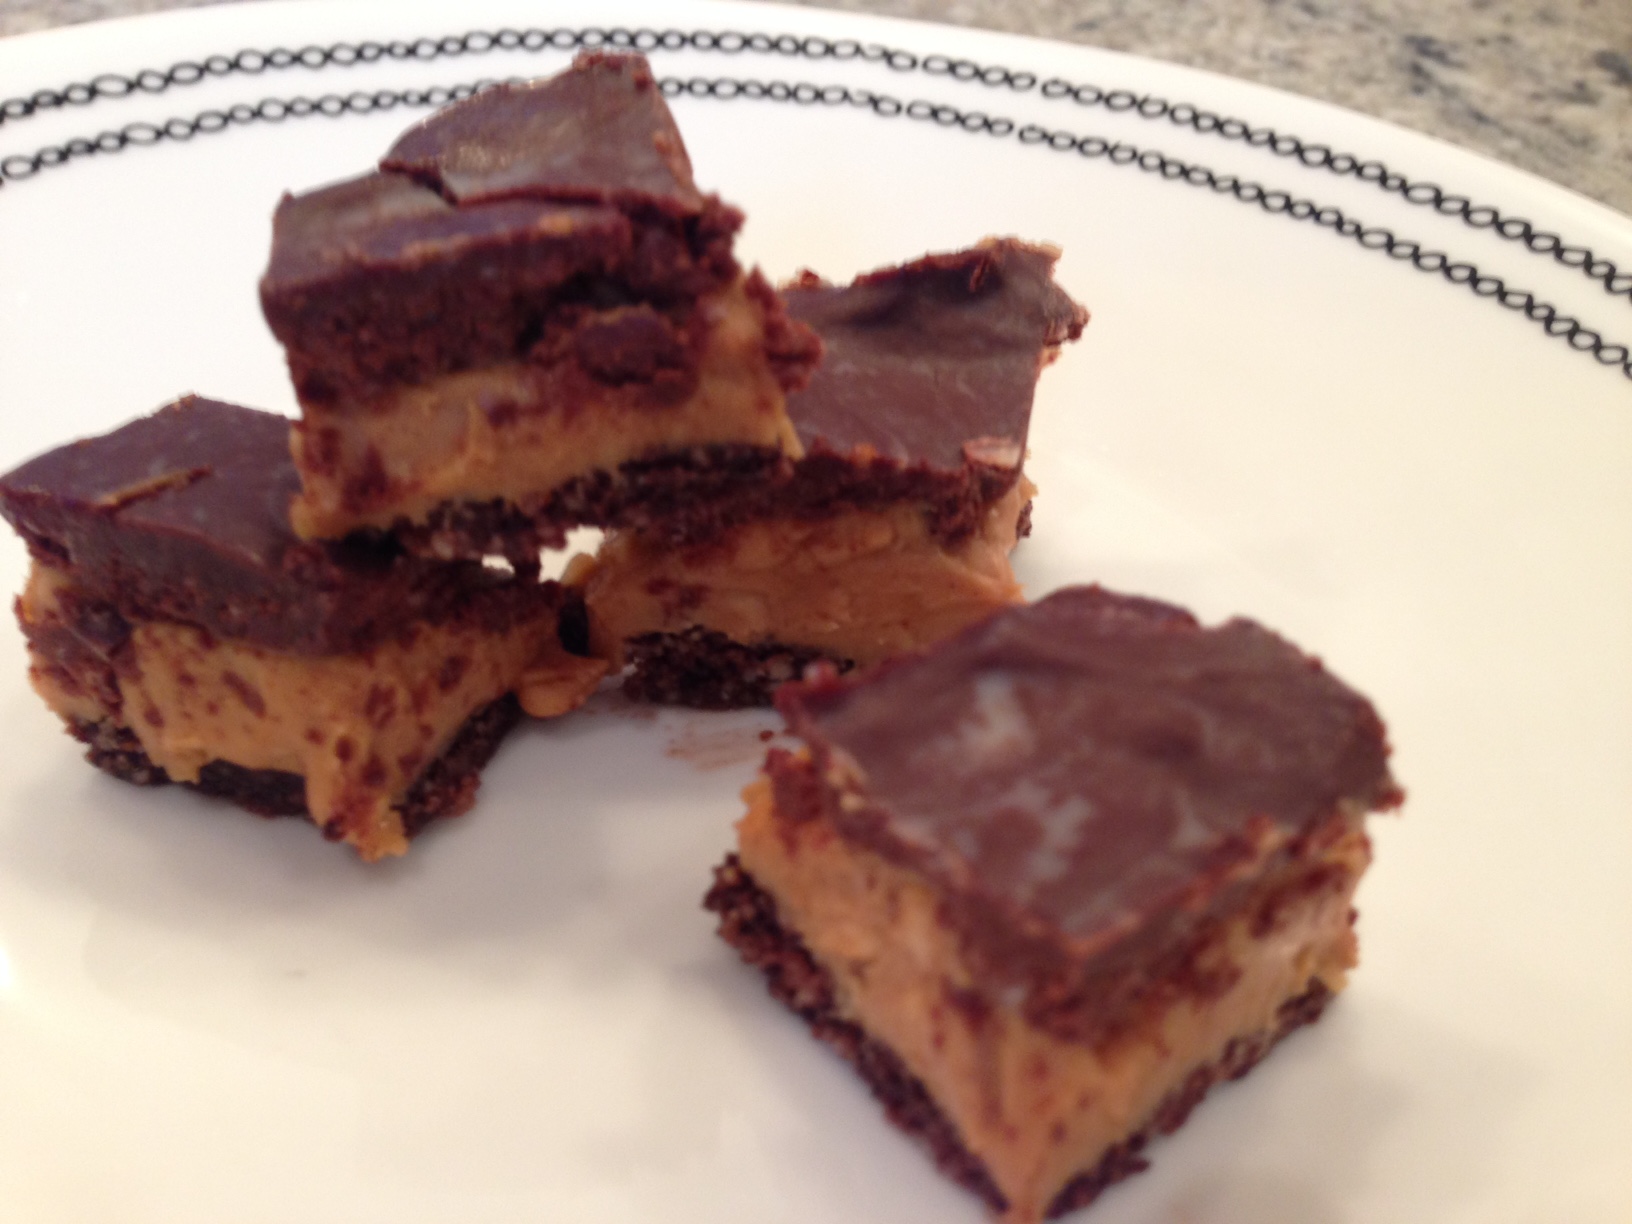
Chocolate Peanut Butter Squares
Plan Z Phase: This is a Z3 (ZReboot) recipe. The sugar has all but been taken out of these little treats. And that’s the operative word. Little. Neither kids nor adults need big treats. One or two of these can satisfy that craving in anyone. They are divine. Serve one to your kid as a treat after dinner or set out a platter of them at a dinner party. The package of two Reese’s Peanut Butter Cups has 24 grams of carbs. One of these has 4.9 grams of carbs
Servings: A serving is 1 square
Ingredients;
Bottom layer
- ¾ cup of ground almond meal
- 2 Tbl of cocoa powder (use the unsweetened version)
- 1-1/2 Tbl of Swerve or ZSweet (order these sugar substitutes on line)
- 1 Tbl of water
- pinch of grated sea salt
Middle layer
- ½ cup of natural peanut butter. I try to find the unsweetened, emulsified kind. Whole Foods makes a great one. Or at worst I use Skippy Natural. They make one with less sugar and less salt now.
- 2 Tbl of melted coconut oil (They also make a coconut oil now that is already melted and shelf stabilized. Look for it by the other oils.)
Top layer
- 3-1/2 oz of high quality chocolate that’s 70% cacao or higher, minced
- 3 Tbl of melted coconut oil
Instructions:
Line a standard bread pan with parchment paper.
In a bowl mix your bottom layer ingredients. Stir them up really good so the dough gets moist. Press the dough into the bottom of the loaf pan and place it in the freezer to set for about 10 minutes.
Make your middle filling. You can even use the same bowl. Stir the peanut butter and the coconut oil. I put a pinch of grated sea salt in here too. Just a pinch. The commercial peanut butter cups are quite salty so this sort of mimics the same effect. Take the pan out of the freezer after it has set, and gently spread the middle layer on top. Return to the freezer again. This time I let it set more like 30 minutes or it’s hard to put on the top layer.
You need your chocolate minced really fine. Take your time and get it all chopped up really well because you want it to melt quickly. Gently heat the coconut oil. Add the chocolate and stir until smooth and creamy. Take the pan out of the freezer again and drizzle on the top. Spread it gently if necessary.
This time I put the pan in the refrigerator and come back an hour or two later. Pull the paper up with both hands and remove your creation from the pan and put it on a cutting board.
I now cut the dessert into 1” (or maybe a little bit smaller) cubes.
Store them lightly covered with plastic wrap in the refrigerator. You should get at least 15 – 20 cubes from one pan. Plenty for your peanut butter cravings. So rich and creamy. Try to eat just one.
Enjoy!
Cheers,
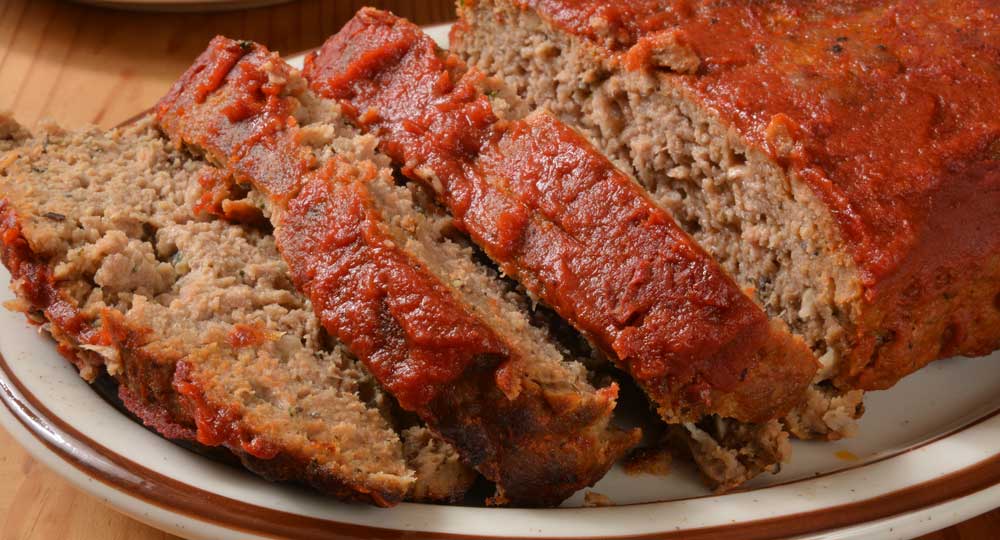
My Mom's Meatloaf
Plan Z Phase: This is a Z2 (ZReduction) recipe. This is very close to my mother's meatloaf recipe. I used to serve this with mashed potatoes and corn when I wanted comfort food. Not Anymore! I also used to say that if I ever ended up on death row and they asked me what I wanted for my last meal, this would be it. It’s such a BIG YUM and brings back fond memories.
One of the times my husband was out of town, I had a "meatloaf dinner party." I served this to a bunch of friends. Boy, were they surprised! All comfort food on the menu. They loved it! And the conversation through the night was all about their favorite comfort foods and childhood favorites. Try it some night. It's a fun time.
Servings: Serves 6
Ingredients:
- 1-1/2 pounds of lean ground sirloin
- 1/2 cup dry bread crumbs
- 1 egg
- 1/2 cup minced onion
- 1 tsp salt
- 1 Tbl Worcestershire sauce
- 4 ounce can of tomato sauce (Hunts is a good one with no sugar)
Instructions:
In a large bowl, toss in all ingredients except the tomato sauce. Mix thoroughly with your clean hands. You get to get all gooey doing this one. Spread the mixture in an ungreased loaf plan. You can mound the meatloaf on top so it looks like a bread loaf, if you like.
Bake at 350 degrees for 1 hour. At the 1-hour point, open the can of tomato sauce and pour a layer on top. If you like lots of sauce, you can use the whole can. I usually only use about half. Bake 15 minutes more.
It's ready to serve. This travels well for a slice for your lunch at work. My sister used to love cold meatloaf. For my tastes I’d head for the microwave to heat it up.
Enjoy!
Cheers,
Beef Stroganoff
Plan Z Phase: This is a Z3.5 (ZReboot 3.5) recipe. You can have your stroganoff and eat it too! Most stroganoff recipes are served over rice or a big pile of noodles. You don’t have to do that. You have other choices:
- You can serve this on a plate with nothing underneath and a green vegetable or salad, or both.
- You can serve it over noodles or rice but keep your carb portion to just ¼ cup cooked --and don’t do it often.
- You can serve it on a plate or in a bowl over a pile of fresh baby spinach.
Servings: Serves 4
Ingredients:
- 2 pounds of top round steak
- grated sea salt and pepper to taste
- 3 Tbl of butter, divided
- 1 medium onion sliced into half rounds or chopped
- 2 Tbl of flour. I use gravy flour so it doesn’t clump and I can use less this way.
- 12 ounces of beef broth/stock. I use low sodium so I don’t get an overload of processed salt. Just season with grated sea salt.
- 2 Tbl of Worcestershire sauce
- 2 tsp of mustard (your choice)
- 8 – 12 ounces of fresh, sliced mushrooms
- 4 ounces of cream cheese
- 1/3 cup of sour cream
Instructions:
Cut any large fat pieces off of the meat. Then slice into strips or large bite chunks. Season with sea salt and pepper. Melt 2 Tbl of the butter in a large saute pan. Put in the meat and brown it on both sides. You don’t need to cook it through but get some nice brown edges. When done, transfer the beef to a medium soup pot.
Don’t wash the pan. Just add another Tbl of butter and add the onions and the mushrooms. Cook them both until they just begin to brown. Stir regularly. Again, you don’t have to cook them through. Just get them going so they get a bit of color. Then sprinkle on the flour and stir. Now add those to the pan with the meat too.
Pour in the beef broth. Bring to a boil. Then turn the heat down to a low simmer. Add the Worcestershire and the mustard. Cover and simmer on low for about 45 minutes when the meat will be more tender and all will be cooked through. Keep an eye on it. I check it every 15 minutes to make sure my liquid is not totally boiling away. I have to caution you on this because our stoves all operate a little differently.
Turn heat off. Taste to see if you want more sea salt and pepper. Then add the sour cream and the cream cheese. Stir around until it gets all melted and smooth.
Serve with your choice from the recommendations above.
Enjoy,
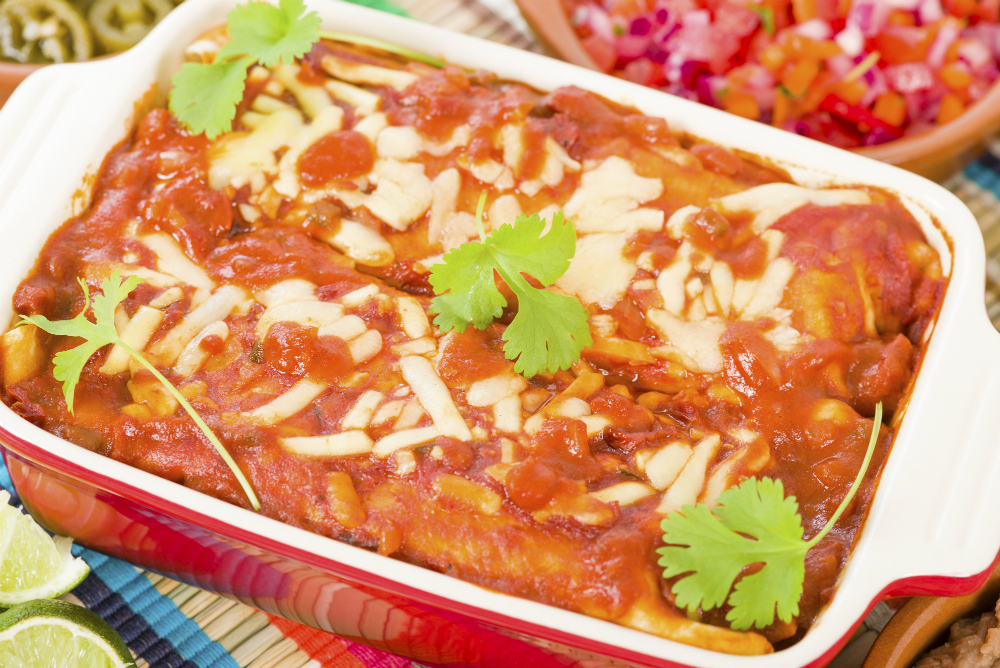
Chicken Enchilada Lasagna
Plan Z Phase: This is a Z3.5 (ZReboot) recipe. Dieter and KLSS Star 106 DJ Harry O stopped by Plan Z headquarters this weekend. Harry, who has lost 150 pounds on Plan Z, brought with him a fantastic lasagna recipe. It tastes just like the homemade version we all love, but without the additional carbs.
Servings: Serves 4-6
Ingredients:
- 4 chicken breasts
- 2 2.8" low-carb flour tortillas
- 2 10-oz cans of enchilada sauce
- 1 20-oz can of stewed tomatoes. I used the Rotel brand with green chilies and cilantro for the extra spice, but you can use your favorite
- 8oz container of Marscapone cheese (this is a thick, spreadable Italian cheese similar to cream cheese)
- 1/2 cup Mexican cheese blend
- 1/2 cup Mozzarella Cheese
- 1 tsp cumin
- whisper of cayenne pepper
Instructions:
Preheat the oven to 350 degrees.
Place your 4 chicken breasts in a large pot. I recommend using 2 pots and dividing the breast up evenly. This will avoid overcrowding the pot and increasing your cooking time. Cover the breasts completely with water. Turn your heat to medium-high and bring to a boil. Reduce the heat to medium-low, cover the pan, and simmer until your breasts are no longer pink. About 15-20 minutes. Once your breasts have cooked through remove from the water. Pat them dry with paper towels and let cool.
While the chicken is boiling add the 2 cans of enchilada sauce, 20-oz jar of stewed tomatoes, and 8-oz container of Mascarpone cheese into a pan. Heat on medium-low. Just until all the flavors have warmed up and melded together.
Get a 9X12 baking dish ready. Coat the bottom with olive oil spray.
Now it is time build!
Layer your tortillas first on the bottom of the pan. Follow with the chicken. Get creative here. Now that your chicken is boiled it should easily pull apart. You could shred the chicken for this layer. Cut it into cubes. Or you could get fancy and butterfly the breast. To do this place your chicken breast on a cutting board. Starting on the thicker side cut horizontally through the breast, but stop before you slice all the way through. You can then unfold the meat and it should resemble butterfly wings.
On top of the chicken add a dash of cayenne pepper and a sprinkle of cumin.
Sprinkle the Mexican cheese blend over the spiced chicken and add the tomato-Marscarpone mixture on top.
For the final layer cover everything with mozzarella cheese.
Place the lasagna in your oven and back for 30 minutes. I was surprised that I never drained the tomatoes and it still didn't turn out soupy. If your lasagna has any excess liquid after cooking, though, feel free to drain that off.
Enjoy!
Cheers,
Quick Grilled Chicken and Veggies 4 Ways
Plan Z Phase: This is a Z3 (ZReboot) recipe. This simply grilled chicken dish can be prepared in a variety of different styles--from French and Italian to Mexican and Asian. It makes for a perfect excuse to blow the dust of your grill and say hello to summer.
Servings: Serves 4. Can be doubled or tripled easily.
All 4 versions of this recipe have chicken in common. Then each has its own marinade, veggie combo, and dressing for the veggies. So you can be hungry for any option and have a quick, easy meal on the grill. Use a recipe like this one for a quick weeknight meal or for friends and family gathering on the weekend. Try one or all the different styles.
Ingredients:
- 4 boneless, skinless chicken breast portions
- Veggies. Choose the ones you like. I’d make sure if you are just serving veggies and meat that you have about 1.5 cups of veggies per person. You don’t need to use all of the veggies on the list for your grilling choice. These are just veggie suggestions that will fit the theme of French, Italian, Mexican or Asian.
Instructions:
The first thing to do is to pound down the chicken breasts. By making them thinner they cook faster on the grill. People worry about getting chicken done on the grill and not drying it out or burning it. This works great.
Take a large ziplock baggie. Put each piece of chicken in, one at a time. Pound with your meat mallet until the chicken is ½” thick or less. The thinner the breast is, the faster it will cook but ½” is enough.
Then you are going to put your chicken in your marinade. For richer flavor you can leave the chicken in the marinade for up to 4 hours. But if you are in a hurry, even 15 minutes will give you a tasty chicken. I know. Mine never gets to stay in the marinade long.
In a small bowl, mix your marinade. Choose either: French, Italian, Mexican, or Asian (see recipes below).
Put the chicken in a container (a 9" x 13" pan works great). Pour the marinade over and toss the chicken around so it gets fully covered. Let it sit in the refrigerator for the flavors to meld. If you are going to let it sit in there long, cover it so your whole refrigerator doesn’t end up smelling like marinade.
While the chicken is marinating you can cut your veggies. You’ll want them in big, bite-sized chunks. Spray them with olive oil spray to prep them for the grill.
Heat your grill to medium-high. Take the chicken out of the marinade and place it on the grill rack. Cook approximately 4 minutes per side depending on how hot your grill is. Don’t be tempted to mess with them too much. If you leave them alone you get those coveted grill marks. Cut into the thickest part of a piece of chicken to make sure no pink remains, but they should still be juicy on the inside.
While the chicken is cooking you can also grill your veggies. You’ll want a grill basket or grill tray so the veggies don’t fall through the grill gaps. Season your veggies with grated sea salt and pepper. Grill right along the chicken. These you can stir often to get them evenly cooked. Depending on your grill, they should get done about the same time.
Remove the chicken from the grill. Set on a clean platter.
Remove the veggies from the grill and put them in bowl. You’ll add your dressing and stir them around so the veggies get lightly coated. You can always add more dressing if you want.
If you are cooking for a crowd and not everything will fit on the grill at the same time, keep in mind this dish is really good served room temperature too.
Marinades, Veggies, and Dressings
French marinade
- ½ cup of olive oil
- 2 Tbl of fresh squeezed lemon juice
- 2 Tsp of Dijon mustard
- ½ tsp of minced garlic or a sprinkle of dry garlic will work too
- 1 tsp of minced, fresh tarragon or ½ tsp of dried tarragon
- ¼ tsp of grated sea salt or to taste
- fresh ground black pepper to taste
French Veggie options
- asparagus
- shallots
- onions
- scallions
- green beans or hericot verts (French beans)
- button mushrooms
- cherry tomatoes (put these on your grill at the end of cooking)
- bell peppers (any colors)
French Dressing Options
- balsamic vinaigrette
- French vinaigrette
- Champagne vinaigrette
- Or your favorite French dressing. I’d would not use the orange French dressing. Too much sugar.
Italian marinade
- ½ cup of olive oil
- 2 Tbl of fresh squeezed lemon juice
- 2 Tsp of Dijon mustard
- ½ tsp of minced garlic or a sprinkle of dry garlic will work too
- ½ tsp of Italian seasoning blend
- ¼ tsp of grated sea salt or to taste
- Fresh ground black pepper to taste
Italian Veggie options:
- Zucchini
- Summer squash
- Eggplant (I use baby eggplant or Chinese. They have fewer seeds)
- Onions
- Scallions
- Button mushrooms
- Bell peppers (any colors)
- Cherry tomatoes (put these on your grill at the end of cooking)
Italian Dressing options (1 – 2 Tbl)
- Balsamic Vinaigrette
- Any Italian dressing
- Caesar dressing
Mexican marinade
- ½ cup of olive oil
- 2 Tbl of fresh squeezed lemon juice
- 2 Tsp of spicy mustard (your choice)
- ½ tsp of minced garlic or a sprinkle of dry garlic will work too
- 1 tsp of dried cilantro or 2 tsp of minced, fresh cilantro
- A dusting of cayenne (or to taste)
- ¼ tsp of grated sea salt or to taste
- Fresh ground black pepper to taste
Mexican Veggie options
- Onions
- Button mushrooms
- Bell peppers (any colors)
- And other mild Mexican pepper such as poblano or California yellow
- Peeled tomatillos
- Scallions
Mexican dressing (1 – 2 Tbl)
- Spicy ranch or regular ranch
- Salsa
- Balsamic vinaigrette
- Avocado based dressing
- Green goddess dressing
- Buttermilk dressing
Asian Marinade
- ¼ cup of olive oil
- ¼ cup of Bragg’s Aminos
- 2 Tbl of fresh squeezed lemon juice
- 2 Tsp of Dijon mustard
- 1 tsp of ground ginger
- ½ tsp of minced garlic or a sprinkle of dry garlic will work too
- 1 tsp of dried cilantro or 2 tsp of minced, fresh cilantro
- A dusting of cayenne (or to taste)
- ¼ tsp of grated sea salt or to taste
- Fresh ground black pepper to taste
Special note: As an option you can also add a tsp of sesame seed but SAVE the sesame seed until the chicken is cooked and then sprinkle it on. If you put it in the marinade you’ll likely scorch the seeds as the chicken grills.
Asian Veggie options
- Pea Pods (snow peas)
- Boy choy
- Napa cabbage
- Broccoli
- Red Thai chilies (Watch out. These are HOT)
- Celery
- Green beans
- Snap peas in their pods
- Onions
- Cherry tomatoes (save to put on at the end of grilling)
- Bell peppers (any colors)
Asian Dressing (1 – 2Tbl)
- Any vinaigrette with a Tbl of Bragg’s Aminos added
- An Asian Sesame salad dressing (try to find low sugar)
- Buttermilk dressing
- Green goddess dressing
If you're new to marinating here's a helpful video that covers the basics.
Enjoy!
Cheers,
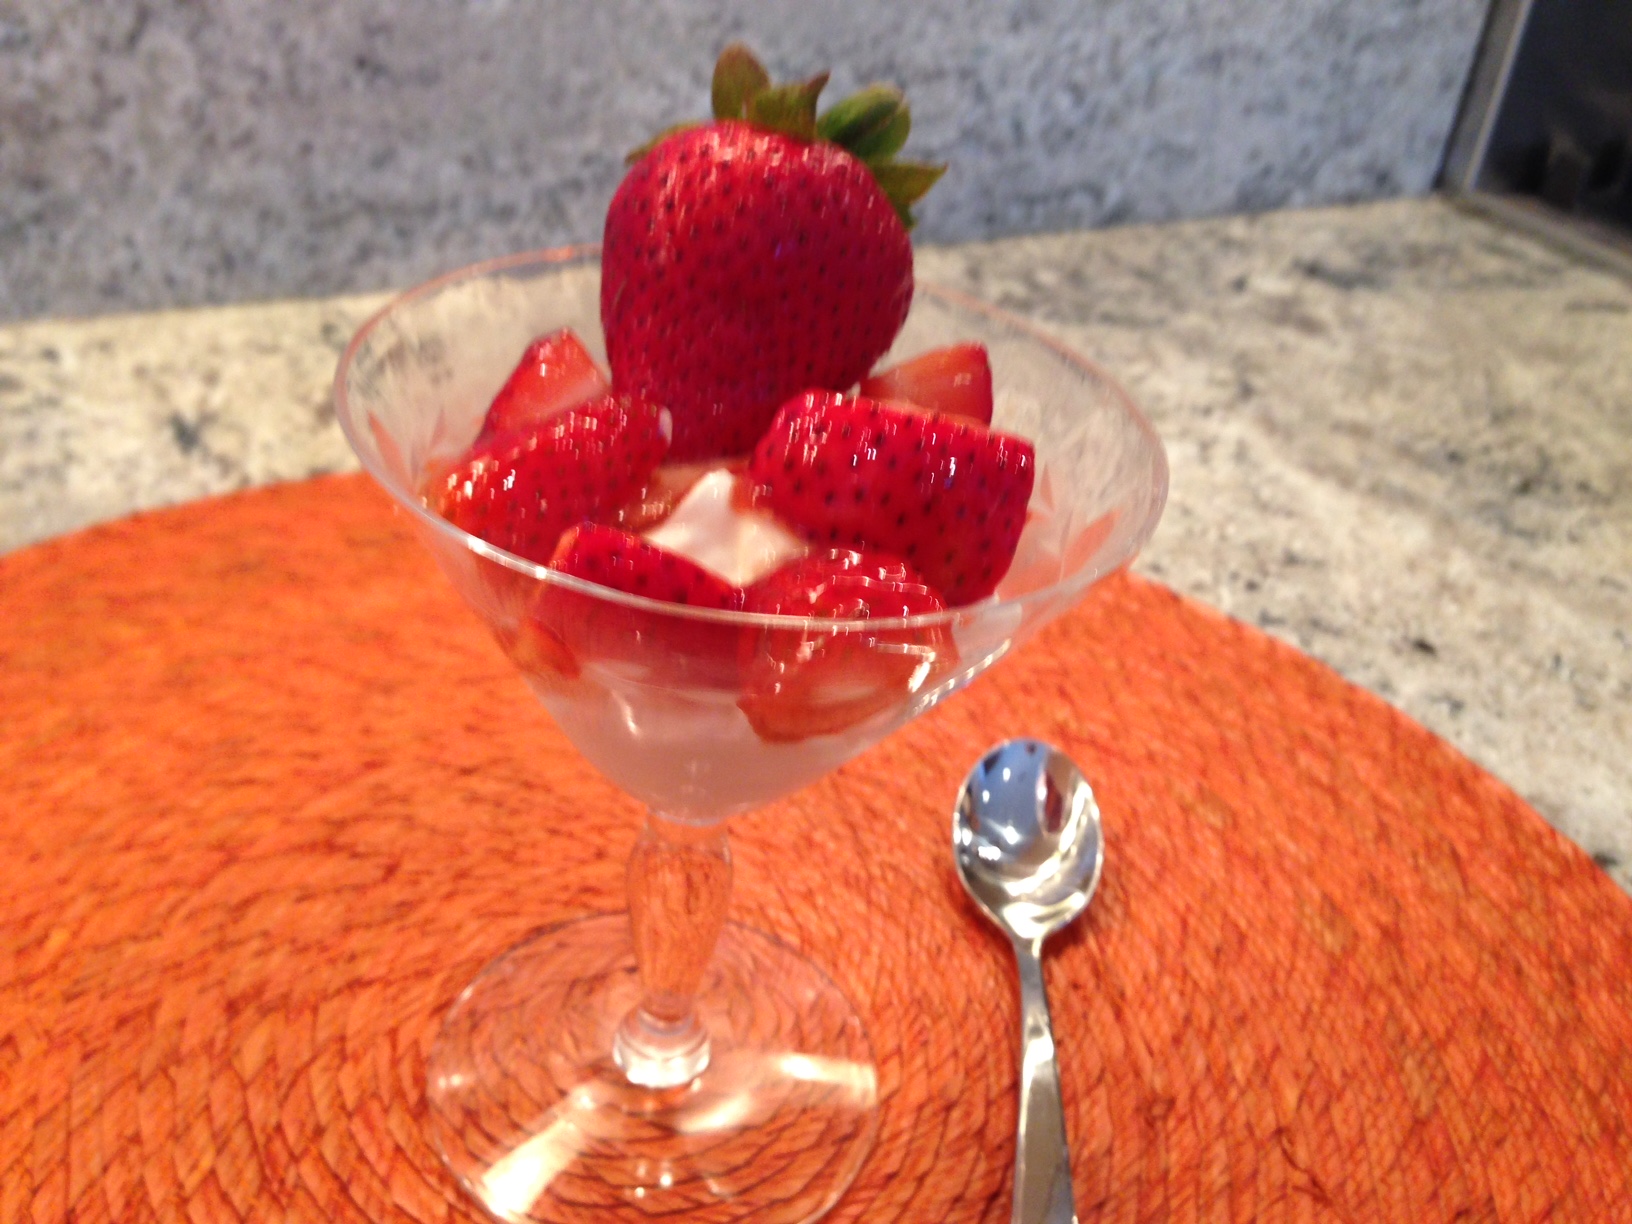
Ricotta Cream with Strawberry Compote
Plan Z Phase: This is a Z2 (ZReduction) recipe. For anyone wondering if Chris, VP Anger eats cake, the answer is not very often; and never a whole piece. Chris’s favorite flavor is lemon, so for over 30 years now I have made him a new lemon dessert every year for his birthday. Has there ever been a lemon cake? Sure. Has there been one since the inception of Plan Z? Nope.
This super-simple, light and dreamy dessert is easy enough for a weeknight treat and fancy enough to serve to a dinner party. As it’s portioned out here, it’s not a large dessert. People compliment me all the time now on how I serve smaller desserts after a dinner party. They appreciate a nice, light treat instead of a big piece of cake.
Little kids will lap this up like an ice cream sundae!

Servings: Serves 4 or can easily be doubled for larger portions or 8 smaller portions like the one pictured
Ingredients:
- 8 ounces of whole milk ricotta (find it by the cottage cheese)
- 2 – 4 tsp of Truvia. You put in the amount based on your tastes so start with less and see if that does it for you and your guests. You can always add more.
- 1 tsp of finely grated citrus zest. You can use lemon or orange. Use your mandolin or rasp to grate it very fine.
- 1 quart of ripe strawberries
Instructions:
In a medium bowl add the ricotta, the sweeteners and the zest. Mix with your electric mixer until fluffy. This will take less than a minute.
Spoon your mixture into serving dishes. I have antique champagne glasses. You can also find cute little bowls at Cost Plus or thrift stores. The whole idea is for a smaller portion but fill the vessel nicely.
If you are not going to serve it right away, my trick is to cover the containers with little zip lock baggies. You can even re-use the baggies later.
When ready to serve, you’ll put on your compote.
To make the compote, clean and chop your strawberries into bite-sized chunks. You can save a few beautiful whole strawberries for garnish if you’d like. In a small bowl add the cut up strawberries and a dusting of Truvia. Leave the strawberries to macerate (soak up the sugar and juices) for 15-30 minutes.
To serve add the strawberry compote on top of your ricotta mixture. Voila! The perfect Plan Z birthday treat.
Enjoy!
Cheers,

11 Foods That Put You In A Bad Mood
This article was reposted from The Daily Meal
We all know the importance of eating healthy to maintain our physical well-being, but it is also important to keep in mind our mental health when choosing what we consume. Certain foods can trigger grouchiness, inhibit mental acuity, or even contribute to serious mental disorders. All parts of our body are connected and it is as necessary to make head-healthy choices as it is to make heart-healthy ones.
It won’t come as a shock that the first step to avoiding bad mood foods is to keep consumption of processed foods to a minimum. Dr. Nancy Hoffman, PsyD and neuropsychologist with Kaiser Permanente of Northern California, also warns us to watch our sugar intake, as too much sugar “will cause your blood sugar to spike and leave you feeling better temporarily, but then the body over-produces insulin and your blood sugar plummets, leaving you feeling worse than you did before… Low blood sugar can make you feel cranky and down in the dumps until you eat or drink something that causes it to rise again.” This encourages a cycle of unhealthy eating that can be seriously detrimental to your overall physical and mental well-being. But what about health foods?
It is possible that even when we think we are making healthy choices, we are eating foods that contribute to bad moods. It is important to take into consideration sugars, omega-6 fatty acids, and additives when choosing our meals. Nuts are obviously more nutritious than potato chips, but salted nuts still have high levels of sodium and, in some cases, may contain MSG. Choosing tea over soda during your three o’clock slump at work is more healthful, but if you have already consumed high levels of caffeine that day, black or green tea can contribute to headaches and irritability. As in all dietary choices, it is best to take the time to be informed about what you put into your body, what kinds of ingredients go into what you consume, and how they will affect you. Eat well, stay healthy, and be happy!
View slideshow on The Daily Meal
Soda

Everyone knows that these sugary drinks are not considered healthy, but did you know that the post-soda “crash” can lead to irritability? Sodas contain simple carbs that are absorbed into your bloodstream immediately, giving you a brief energy boost before both your blood sugar and mood plummet.
Bottled Fruit Smoothies and Juices

Many people reach for bottled fruit drinks as a healthier option, but you need to check the label on these deceptive drinks. They average about 20 grams of sugar per serving and can cause an energy crash, resulting in a sullen mood, similarly to sodas’ negative effects.
Non-Organic Fruits and Veggies

Neurotoxins are chemicals that can damage the nervous system and brain, leading to depression, mood changes, and other kinds of brain damage. According to the Pesticide Action Network, some neurotoxins can be traced to some pesticides used on the foods we consume. Buying organic fruits and vegetables can help decrease the likelihood that you’ll consume neurotoxic pesticides.
Salted Nuts

Packaged salted nuts contain extremely high levels of sodium and may also even have questionable additives, such as MSG. Consumption can lead to side effects like mood swings, anxiety, and headaches in those with sensitivities to these additives.
Agave Nectar

A major selling point of agave nectar is that it does not raise blood sugar, but it does contain high levels of fructose. Consumption of fructose can lead to weight gain, as well as increased risk of depression and mood disorders.
Deli Meats

Deli meats are often made up of cheap cuts of animals that are not fed natural, healthful diets. They are also injected with nitrates, dyes, and other preservatives that can be linked to side effects like migraines, mood disorders, and increased risk of depression.
Egg Whites

The Harvard School of Public Health says that eggs are making a comeback. Many choose egg whites in an attempt to opt for the healthier version, but without the yolk, this brain food loses most of its nutritional value. Don’t forgo the yolk, or you’ll miss out on miss out on the mood regulation and energy boost that eggs can provide.
Potato Chips

Much like soda, no one is reaching for potato chips and thinking that they’re healthy, but shouldn’t your guilty pleasure at least put you in a good mood? Chips are fried in oil full of omega-6 fatty acids, which block the mood enhancers found in omega-3s and can bring down your happiness quotient.
Canned Soup

Canned soups contain some of the highest levels of bisphenol-A (or BPA) on the market. This chemical is linked to disorders such as depression and anxiety. When it comes to soup, choose other kinds of packaging over cans, as they can lead to large spikes in BPA levels.
Soy Yogurt

Another “healthier” alternative, soy yogurt packs higher levels of omega-6 fatty acids than its full-fat, dairy yogurt counterpart. These omega-6s undo all the mood-boosting goodness of omega-3s found in your diet.
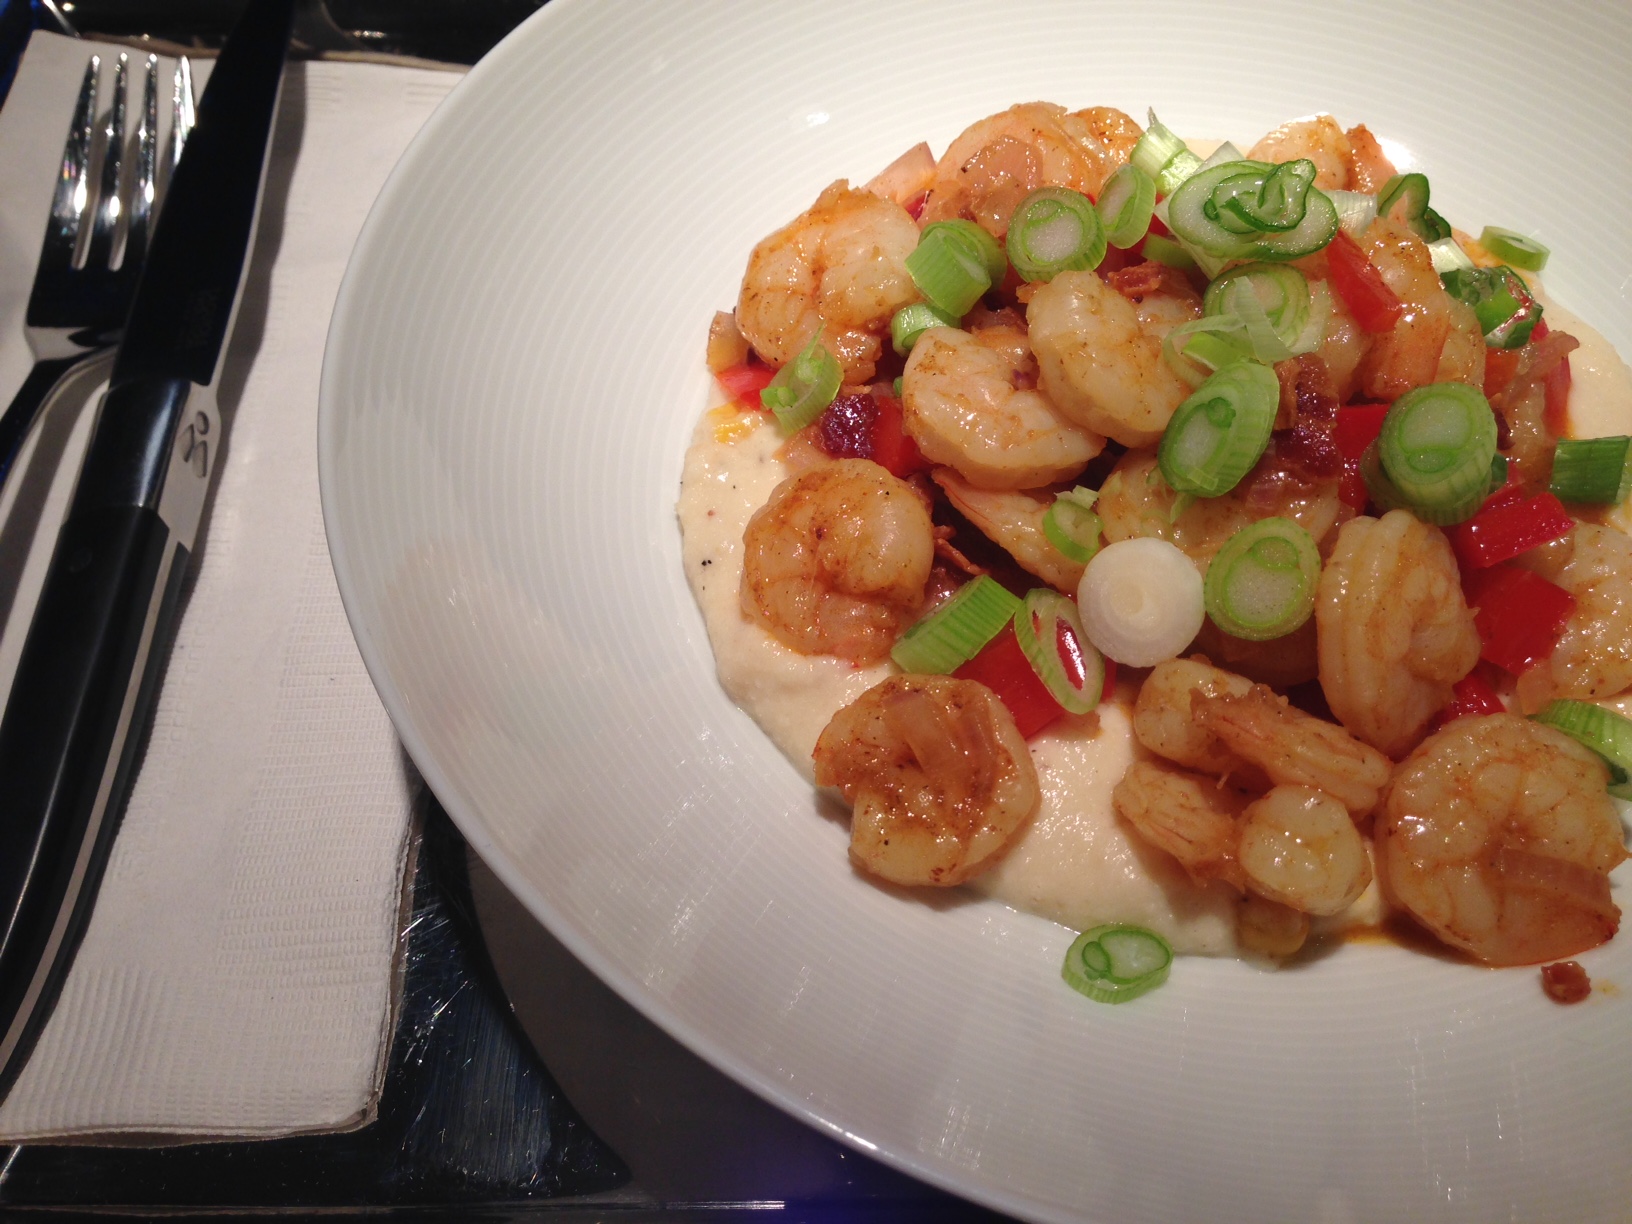
Shrimp and "Grits"
Plan Z Phase" This is a Z3.5 (ZReboot 3.5) recipe. My husband loves shrimp and grits. His mother was from Arkansas and they ate grits often. Trouble is grits are very high carb. Traditional grits are made from cornmeal. I took an inspiration recipe and came up with my own version of shrimp and grits. There is just enough corn in here to help you get the corn flavor without the cornmeal. And there’s enough cheese in here that even though you’ll be using almond meal (aka almond flour) for your grits base, you won’t taste the almond.
Servings: Serves 2. Can be doubled easily.
Ingredients:
- 1 pound of shrimp. I used cooked shrimp and just removed the tails. You can use fresh shrimp or cooked. And you can use any size you choose. I used smaller ones because they were on sale that day.
- 2 tsp of Cajun seasoning. You can find seasoning blends in the spice section. Try to find one with no sugar.
- 1 cup of super fine ground almond flour
- 1 cup of water
- grated sea salt to taste
- 1/3 cup of canned corn, drained
- 1 cup of grated cheese. I used white cheddar but you can use orange, too.
- 4 pieces of bacon cooked crisp and chopped
- 1 tsp of butter
- ½ cup of minced shallot
- 1 red bell pepper, diced
- 2 Tbl of whiskey (optional)
- ½ cup of chopped green onion for garnish
Instructions:
Sprinkle shrimp with Cajun spice and set aside.
For the grits: Mix the almond meal, a dash of grated sea salt and the water in a small sauce pan. Bring to a low boil and cook for 1 – 2 minutes. The grits will thicken a bit and might bubble and spit, so be careful. Remove from heat and stir in the cheese until it melts. Add the corn and stir again.
In a saute pan melt the butter and add the shallot and red pepper. Cook until soft but not yet brown. Just a minute will do it.
Turn to medium high and add the shrimp. If you are using cooked shrimp all you’re doing is heating them up. If you are using raw shrimp you’ll need to cook them about 3 minutes (depending on what size you chose) to get them cooked through. Add the bacon bits. Stir.
Then if you’re using the whiskey turn off the heat and add it. Stir until most of it dissolves. Only takes a minute or less.
To serve: Stir your grits one more time to fluff them up. Put a portion of grits on the plate or in a bowl and pour on the shrimp. Top with the green onion bits for garnish and a bit of zip.
Enjoy!
Cheers,
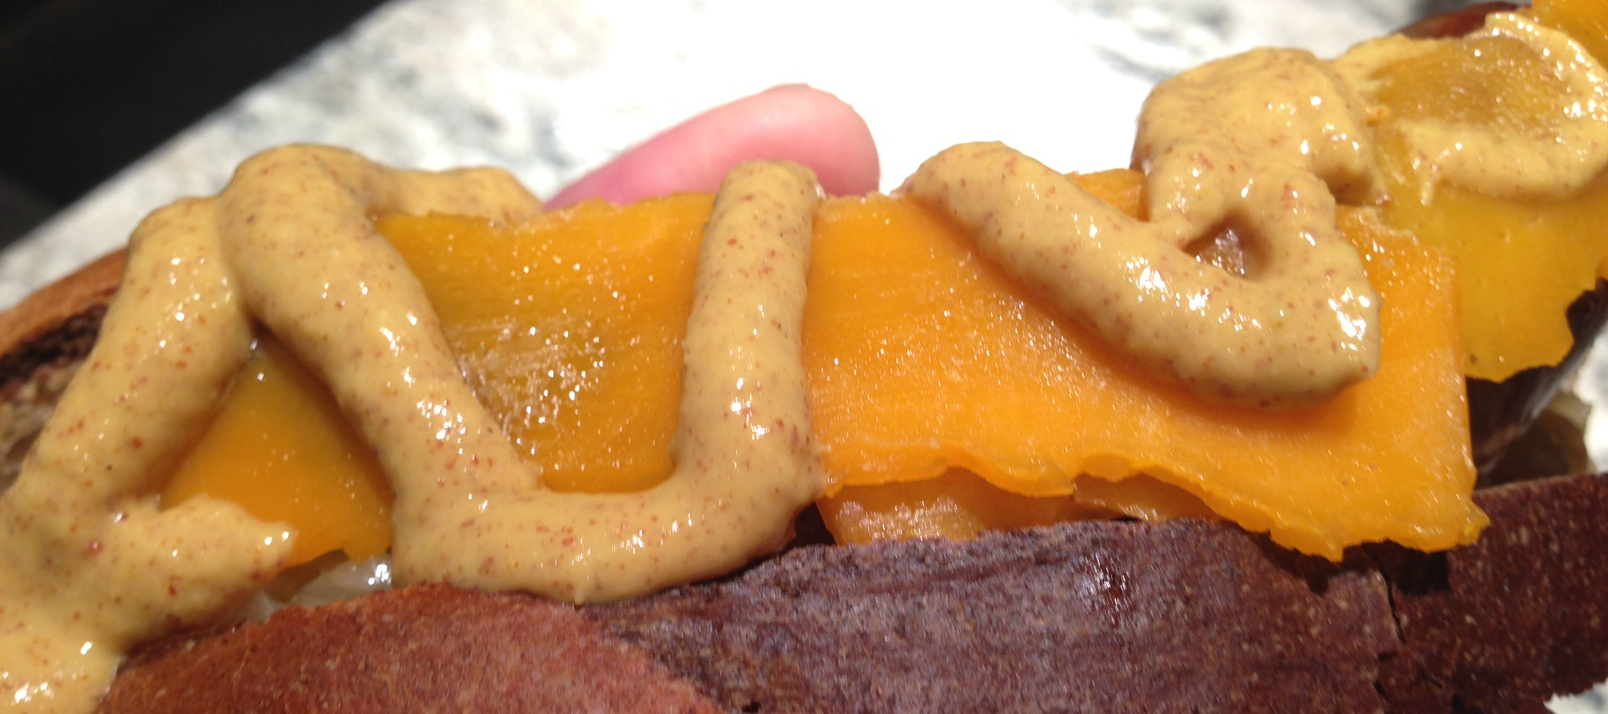
Badger Brats
Plan Z Phase: This is a Z3.5 (ZReboot 3.5) recipe. I made this ‘good luck’ recipe for the Championship Final for basketball. The Wisconsin Badgers played the Duke Blue Devils. Brats are such a Wisconsin thing it seemed like a great theme.
Well, the brats didn’t bring any luck to the Badgers, but neither did watching the game from our lucky red sofa! Badgers lost. That doesn’t take away from the flavor of the brats though. They are a BIG YUM.
If you decide to have a second one, skip the bread. Just pile the stuff on your plate and use your fork.
Servings: Serves 6
Ingredients:
- 6 bratwurst (Wisconsin brats will be a big hit if you can get them)
- 1 bottle of beer (You choose your beer. The darker the beer the more the beer flavor will seep into the brats so keep that in mind. You’re not going to actually drink the beer so don’t worry about the carbs.)
- 1 large onion, thinly sliced
- olive oil for onions and for cooking the brats)
- 2 Tbl of butter, divided
- 6 pieces of rye bread (You choose your rye. I used a marbled version.)
- coarse mustard (German mustard preferred, or they make a yummy brat mustard too)
- 6 slices of Wisconsin cheddar cheese
Instructions:
Put your brats in a medium sauce pan. Pour the beer over them. Then put in just enough water to cover the brats. Bring to a boil and lightly boil the brats for 12 minutes. This will cook them so when you go to grill them or pan fry them you’re doing that just to get them browned and not worrying about whether they got cooked. If you want your onions to have a bit more flavor, you can put them in the pan with the brats too. I prefer to saute my onions so they have a buttery flavor.
When the brats are cooked, drain off the liquid. You can do this part ahead and store them in the fridge if you want.
Fire up your grill or get your saute pan ready. Grill or pan fry your brats until they have a nice, brown crust on the outside. If you have stored them in the fridge you also need to make sure you leave them on the heat long enough to get good and hot.
I use a separate saute pan to cook my onions. Put in 1 Tbl of butter and 1 Tbl of olive oil. Cook the onions on medium high until they are just beginning to brown. Stir often to keep them from sticking. Set aside.
Butter one side of your bread slices. Grill one side of the bread or crisp it up in a pan if you’re not using the grill. You only want to crisp up one side so you can still fold your bread to wrap it around the brat.
Take your bread, crispy side out. Top it with onions. Then add your hot brat. Cover it with a folded slice of cheddar and top it off with a drizzle of mustard. Hold in your hand and bend it all to fold around the brat. And bite.
Enjoy!
Cheers,
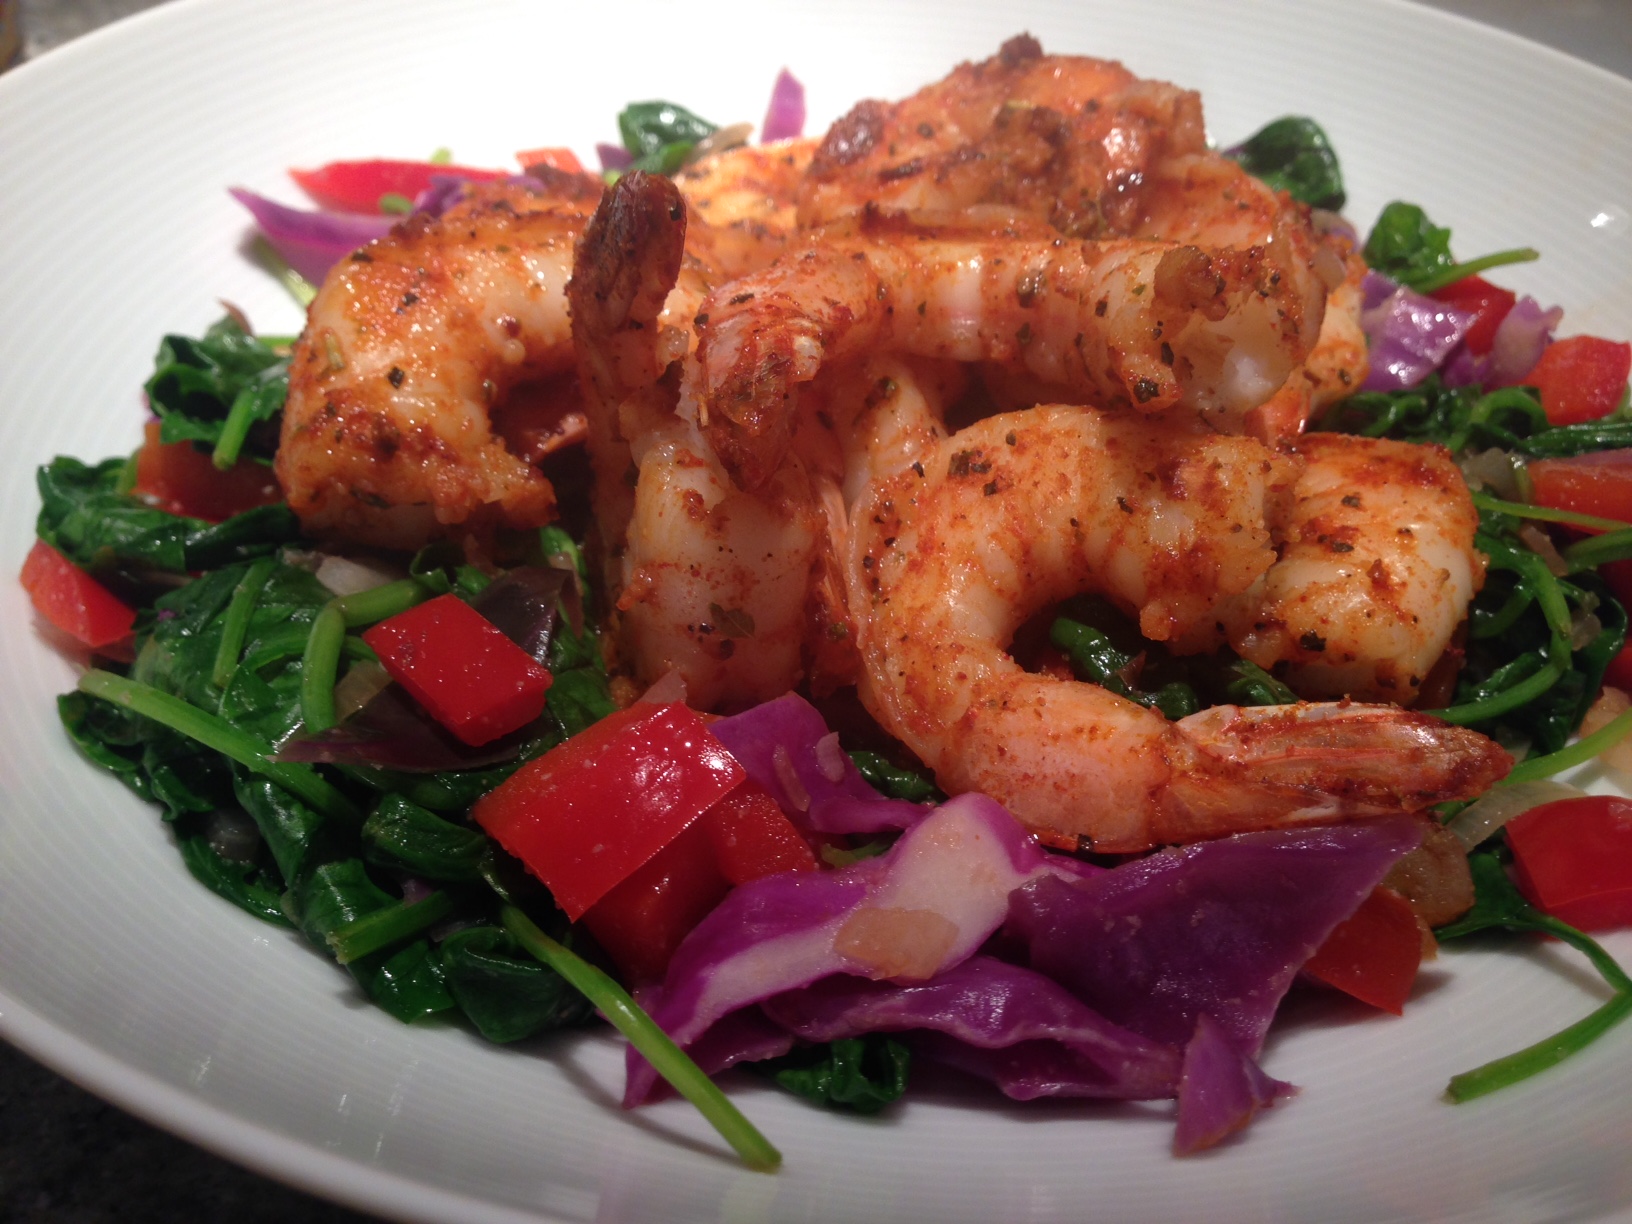
Cajun Shrimp and a "Mess of Greens"
Plan Z Phase: This is a Z2 (ZReduction) recipe. This is a colorful dish that’s also healthy. Fresh and fancy enough to serve to company. No one will miss rice. Easy for a weeknight too.
You can make this with any kind of greens. I like mine tender, so I use baby spinach. You can also use collards, mustard greens or any others you like. Those latter options are more traditional southern greens. They will have to be cooked longer (and use more broth) to get them tender but they are certainly an option.
I was walking through the produce section wondering what else I could put in this dish to make it colorful and stay within the diet bounds. It dawned on me to buy just a cup of shredded cabbage from the salad bar. That worked great. Per pound it cost me more but I didn’t have to buy an entire cabbage just to get one cup! Bonus!
For an optional dipping sauce look below the recipe. *
Servings: Serves 2
Ingredients:
For the shrimp:
- Up to 1 pound of cooked shrimp. I used the medium ones (15 – 25 count). You can use whatever size you like. You can also buy uncooked shrimp and peel and devein. They are cheaper but more work. I leave the tails on while they cook. Some people eat the tails. I don’t, but I think they are pretty. I cut them off as I eat the dish and set them aside. 6 - 8 ounces of shrimp per person is PLENTY.
- 1 tsp of paprika. I used sweet smoked. You can use hot or even regular
- 1 tsp of Italian seasoning
- 1 tsp of sea salt
- ¼ tsp of black pepper
- ¼ tsp of cayenne (Or to taste. This was plenty spicy for me.)
- olive oil spray
For the “mess of greens”
- 4 large handfuls of spinach (1/2 pound package)
- 1 cup of shredded purple cabbage
- 1 cup of minced shallots or onions
- 1 bell pepper, diced (I chose red)
- ½ cup of vegetable broth (varies)
Instructions:
In a large baggie, put in your shrimp and your spices. Set them aside.
In a large saute pan spray in some olive oil spray. Add the shallots, pepper and cabbage. Begin to saute them so they start to loosen up. Then add the broth and garlic powder. Saute for a couple of minutes, stirring it, so the veggies start to cook. Then pile in the spinach. You may need to do the spinach in batches based on how large your pan is. You can wilt it or you can cook it down. Your choice. Just keep tossing it with a tong so it all gets hot. If you run out of vegetable broth just pour in a little more.
While this is going on you can heat your shrimp. Since they are already cooked (if you are using cooked ones**) you just need to heat them on medium-high for a few minutes until they are warmed through. I did this on my grill pan but I didn’t get grill marks on them in that amount of time so it really doesn’t matter what kind of pan you use. Spray the pan. Pour the shrimp out of the bag and onto the cooking surface. Saute until heated.
**If you are using raw shrimp they will need at least 3 minutes on medium high to fully cook. Heat until they are cooked through and no longer opaque.
To serve, pile the veggie mixture on the bottom of the bowl or plate and mound the shrimp on top.
Optional Dipping Sauce: This dish is great as is but if you have room in your food allotment and want a dipping sauce this will work really well:
- Per person… put 2 Tbl of mild mustard (like Dijon) into a small bowl with 1 Tbl of mayo. Mix. This will tame down the spiciness of the shrimp. Dip or use as sort of a dressing.
Enjoy!
Cheers,
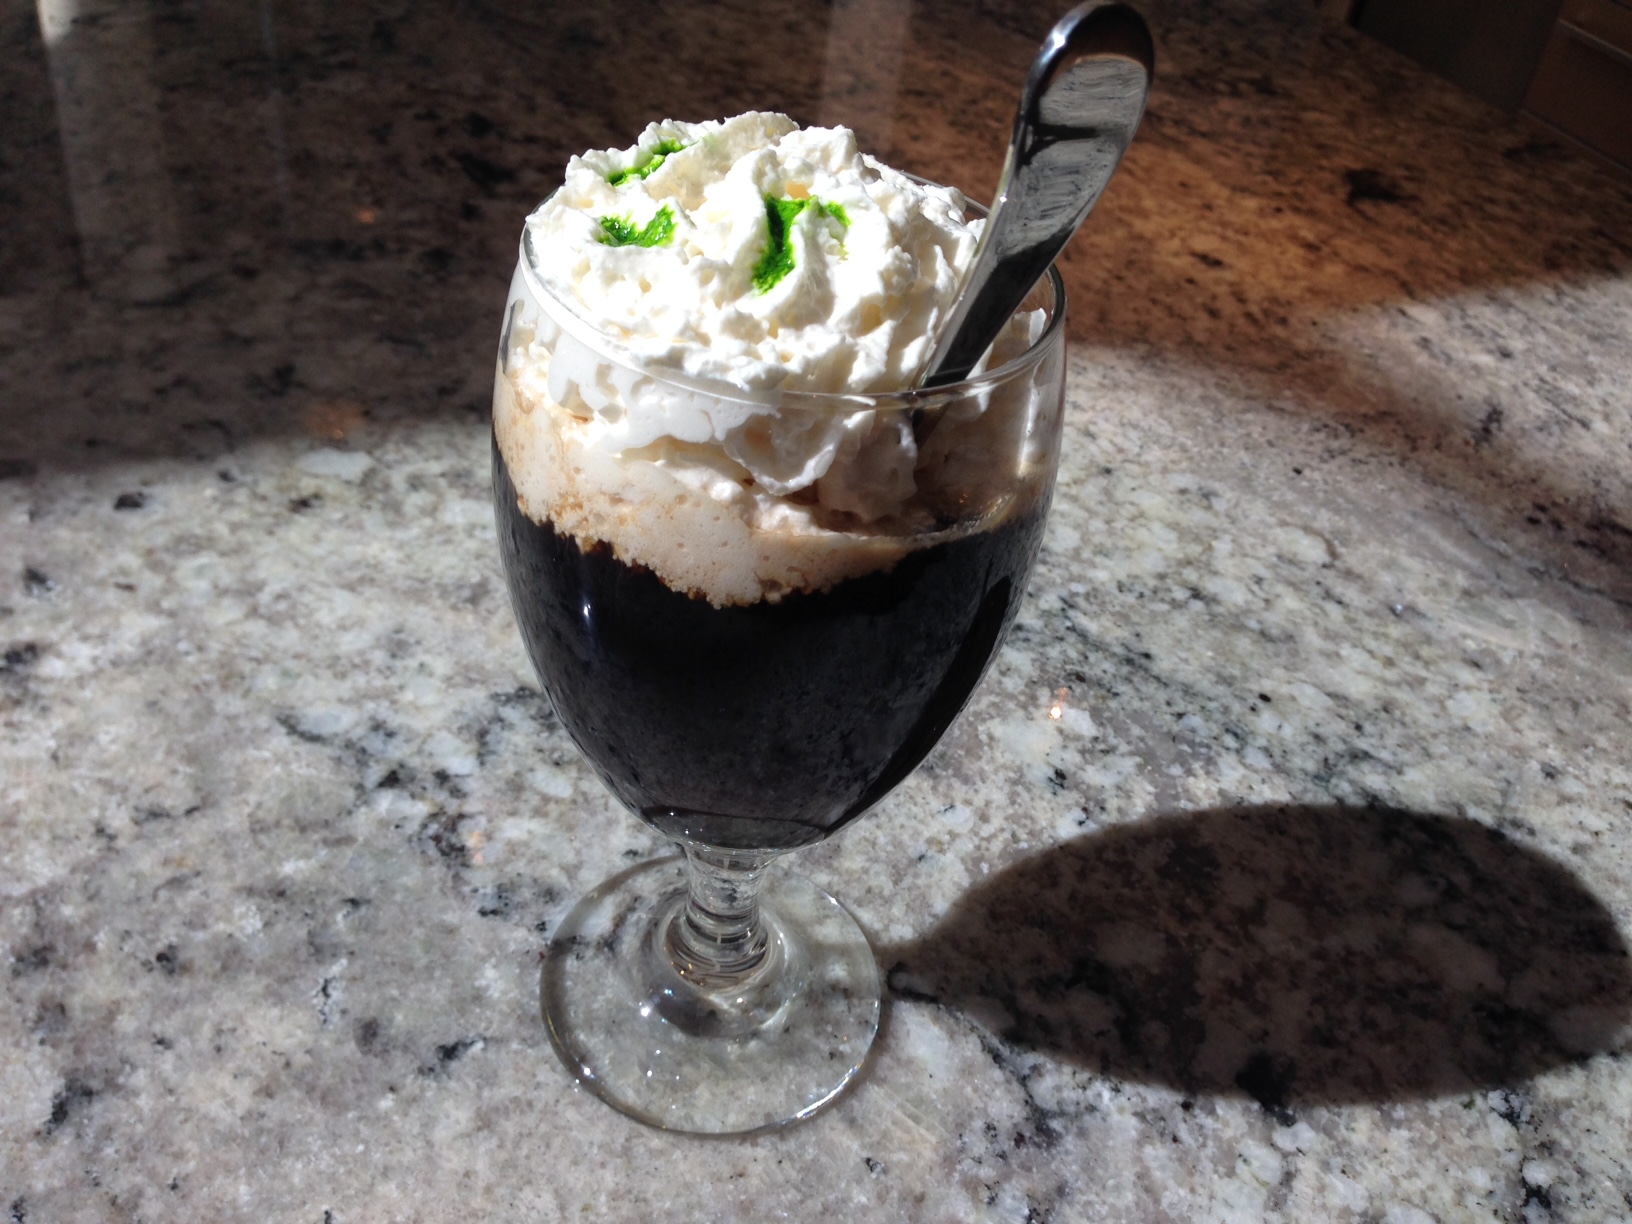
Irish Coffee - "Zolafied Version"
Plan Z Phase: This is a Z3 (ZReboot) recipe. Celebrate St. Patrick's day the Zola way! Wake up with this deliciously creamy and slightly boozy coffee concoction.
Servings: Serves 1
Ingredients:
- 1 cup of brewed coffee. You can do regular or decaf.
- 1 shot of whiskey. Traditionally you’d use Jameson Irish Whiskey but you can choose your favorite).
- whipping cream sweetened with Truvia and vanilla
- a little green food coloring (optional)
Instructions:
Put a spoon in a footed glass (Actually you can make this in any cup or glass. The tradition is to use a glass mug or a glass like this one). You put the spoon in there to absorb much of the heat as you pour the coffee into the glass mug. It’s less likely to break this way.Be careful. Don’t be in a rush to pour it in.
Add your shot of whiskey. Stir.
Top with the sweetened whipped cream and a couple of drops of green food coloring for fun.
Enjoy!
Cheers,
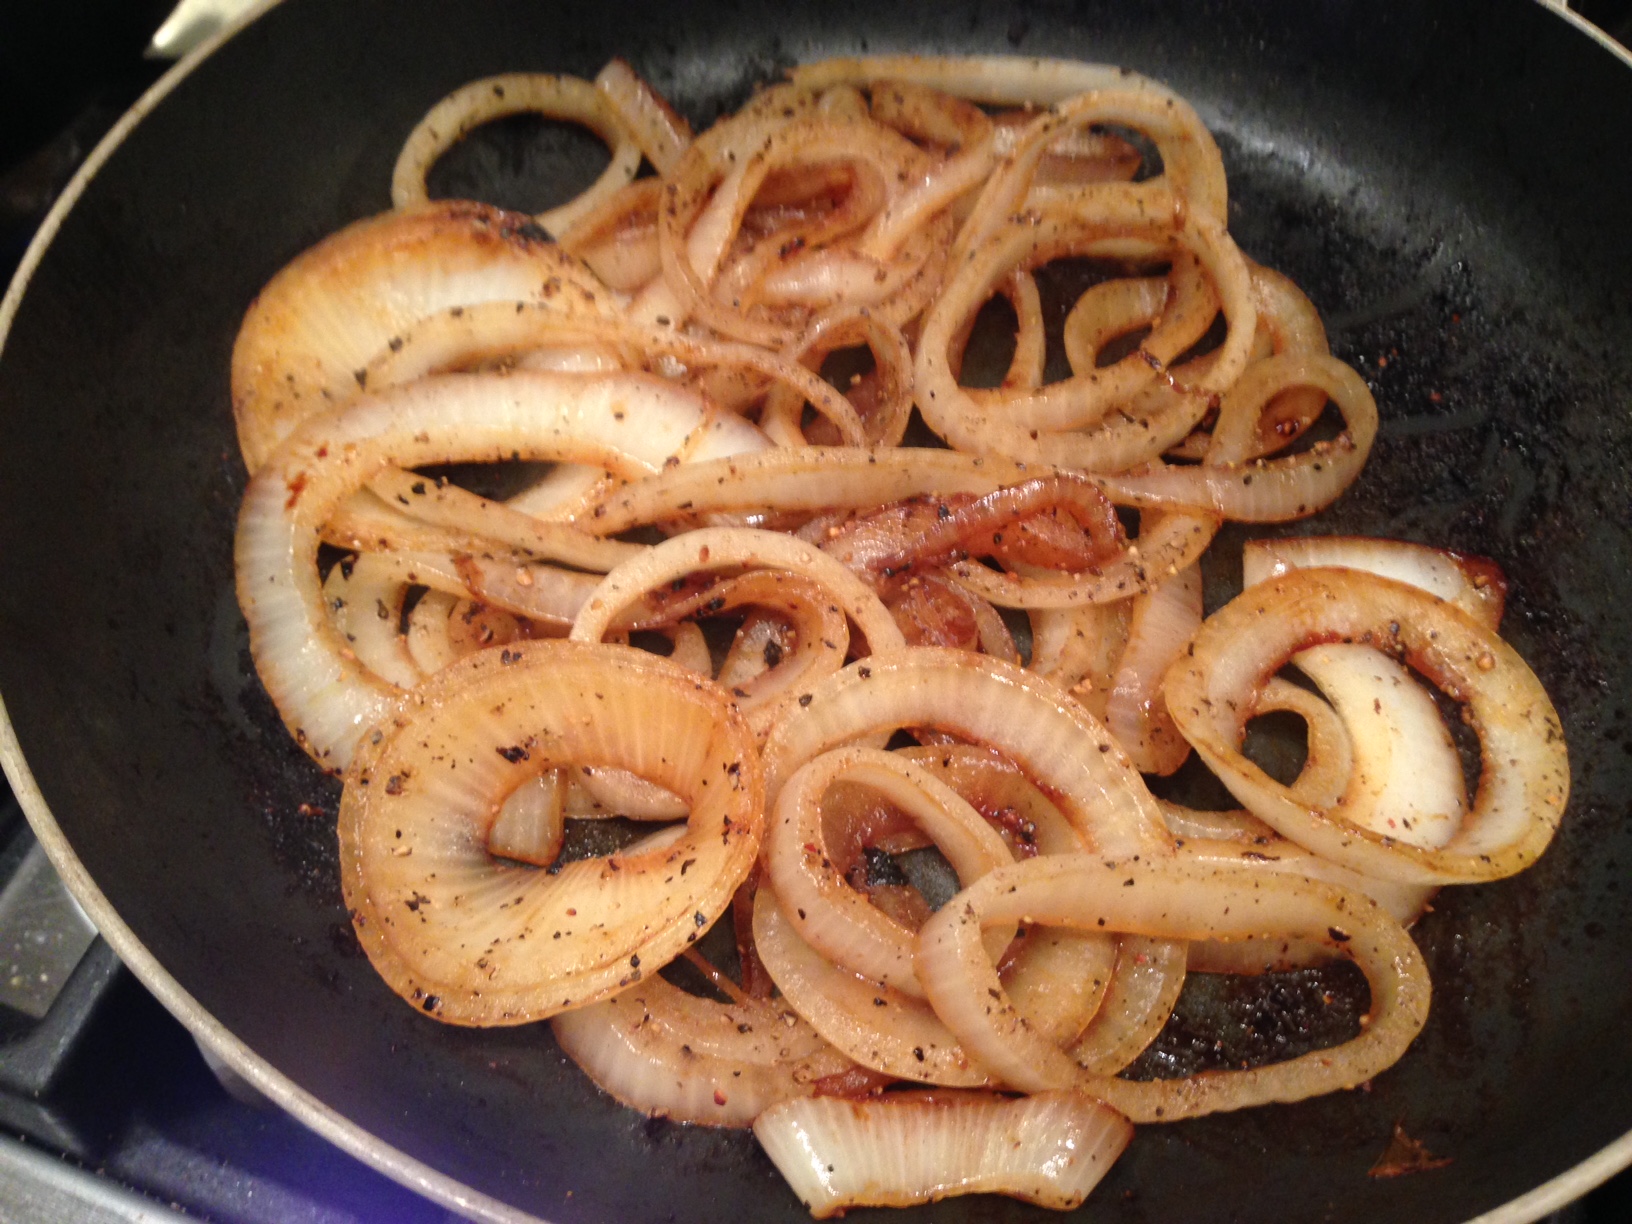
Beefy Peppered Onions
Plan Z Phase: This is a Z2 (ZReduction) recipe. This side dish will make just about any man’s day. Think of pairing it with a small steak or a grilled chicken breast. Try it with my perfect tenderloin steak for a yummy meal.
Servings: One serving is up to 1 cup
Ingredients:
- 2 large onions (you choose white, yellow or Vidalia)
- olive oil spray
- ½ cup of beef or vegetable broth (and maybe more)
- grated fresh black pepper
Instructions:
Slice your onions; how thickly you slice them is up to you.
Heat your large saute pan. Put in the onions and spray them with the olive oil spray. Stir them up. Pour in your beef broth. Cook on a low boil so they onions will soften up and the broth will begin to boil down. Stir with a tong fairly regularly so no onions burn the bottom of the pan. If your onions aren’t yet done to a softness you like you can add more broth and boil them down again. At the end there will be very little broth left in the pan. It will have either soaked into the onions or evaporated. Grate pepper on them to your taste.
These are quick and easy.
Your serving size will depend on whether you’ve having another vegetable with dinner or not.
My husband loved these.
I put them in Zola To GO! because they will reheat really easily served aside any protein. I think they go great next to my perfect tenderloin steak.
Enjoy!
Cheers,
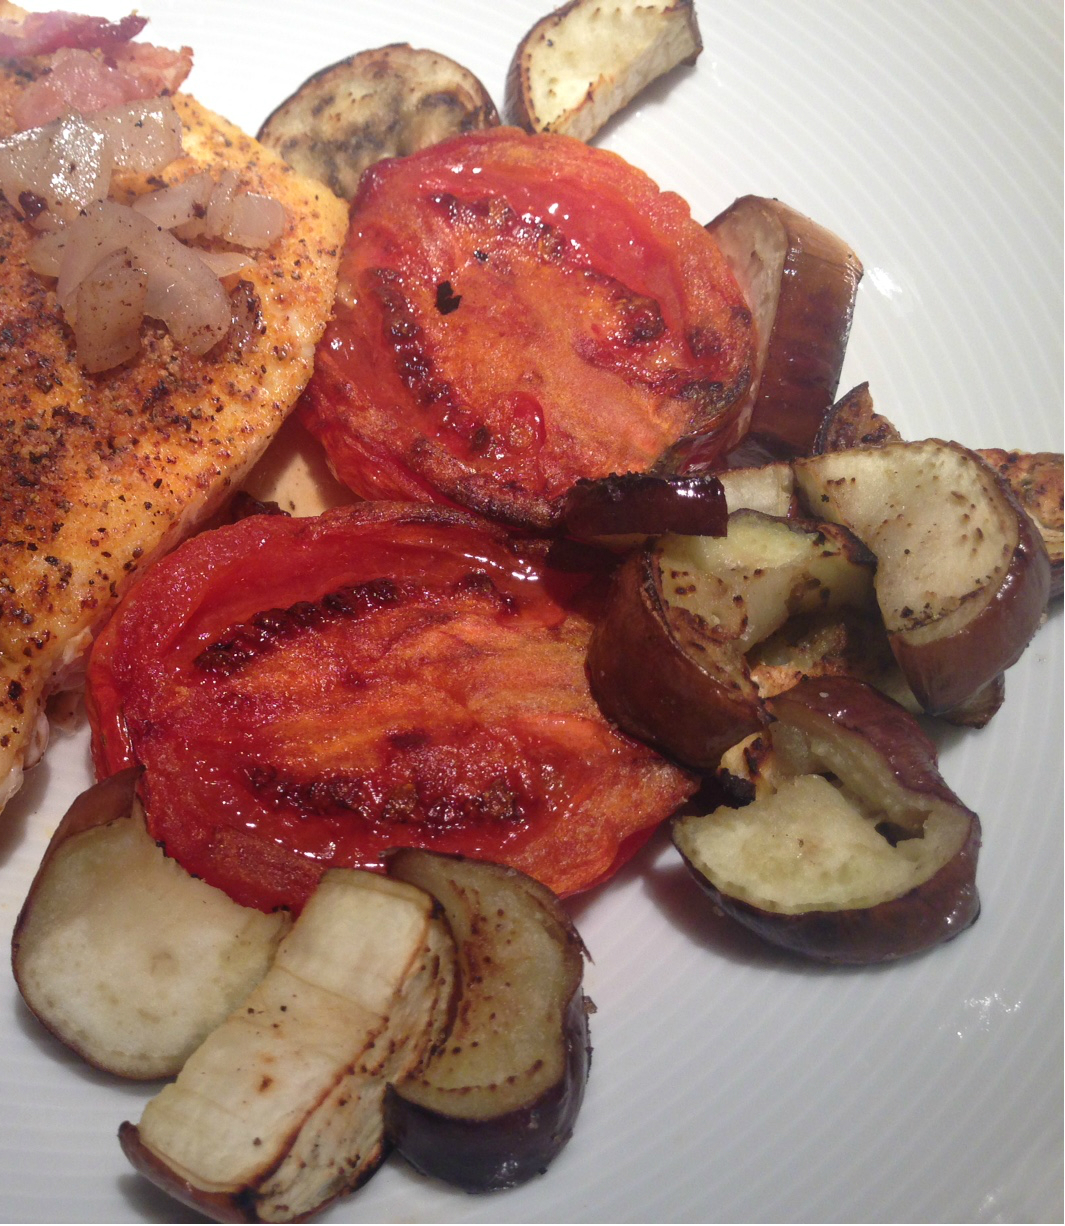
Roasted Plum Tomatoes with Chinese Eggplant
Plan Z Phase: This is a Z2 (ZReduction) recipe. Roasting the vegetables really brings out lovely caramelized flavors in the eggplant and tomatoes. Try pairing this side dish with fish for a light and tasty meal.
Servings: Serves 2
Ingredients:
- 2 plum tomatoes
- 1 Chinese eggplant (that’s the long skinny ones. You don’t need to peel the skin. Just cut off the ends)
Instructions:
Cut your plum tomatoes top to bottom. Then cut the eggplant into circles and cut the circles in half to form half-moons. Spray the moons with olive oil and sprinkle with grated sea salt
Place the plum tomatoes in an ovenproof pan lightly oiled with olive oil spray. Season with grated sea salt and pepper to taste.
Put them in the oven and roast them for 15 minutes. Then add the eggplant and plan to roast both 30 more minutes or until the eggplant begins to brown. They can even be in the same pan.
The idea with the tomatoes is to get them wilted and quite cooked. Sometimes they even get flecks of blackened tomato on top. This is actually my favorite part! Don’t let that scare you.
When I am roasting the eggplant after about 15 minutes I take it out and stir it so it cooks evenly. The eggplant can be tricky. You don' want to undercook it or over-cook it, but flecks of blackened skin on those are not bad either. Take a peek at the picture. These turned out just right.
Not beautiful, but the vegetables had a nice rustic flavor. If you are in ZReboot, serve with my halibut with shallots and bacon. I lose a pound every time I eat something like this for dinner.
Enjoy!
Cheers,
Halibut with Shallots and Bacon
Plan Z Phase: This is a Z3 (ZReboot) recipe. They say everything goes better with bacon. From the sounds coming out of my husband when he took his first bite I’d say that’s on target. He loved this dish.
Servings: Serves 2
Ingredients:
- olive oil spray
- 2 pieces of halibut fillet, 6 – 8 oz each
- 1 tsp of corn starch
- 1 tsp of seasoning salt or your favorite rub.
- ½ cup of diced shallots
- 2 slices of bacon cooked crisp and diced
Instructions:
Preheat oven to 400 degrees
Spray your fillets. Then sprinkle on your rub. Spray again. Sprinkle fillet with corn starch. Then bang off as much cornstarch as you can. You can toss it in a colander or you can sort of spank it from the back. You want a light dusting to stick. If you want you can add more rub on top.
Set aside.
In order to have this all come together at the same time I started by cooking the bacon. While the bacon cooks you can cut up your shallots.
Spray the pan the halibut is going to cook in. Make sure it’s ovenproof for high temperatures. (I use cast iron so it can easily go from the cooktop into the oven). Spray the tops of the fish fillets again, put them in the pan and sear on medium high for 3 minutes. (It’s good to heat the pan first.) Turn the fish over and put in the oven to roast about 10 minutes or until they are cooked all the way through.
When your bacon is crisp remove it from the pan and drain on paper towels, but don’t throw away the bacon grease! Cook the shallots in the grease until they are loose. Just 2 minutes or so. Drain those on the paper towel too. Cut bacon into large bits.
To assemble, place your fillets on the plate and top with the shallots and bacon sprinkled on. For a sensational, super-easy side dish pair with my roasted plum tomatoes and Chinese eggplant.
Voila.
Enjoy!
Cheers,
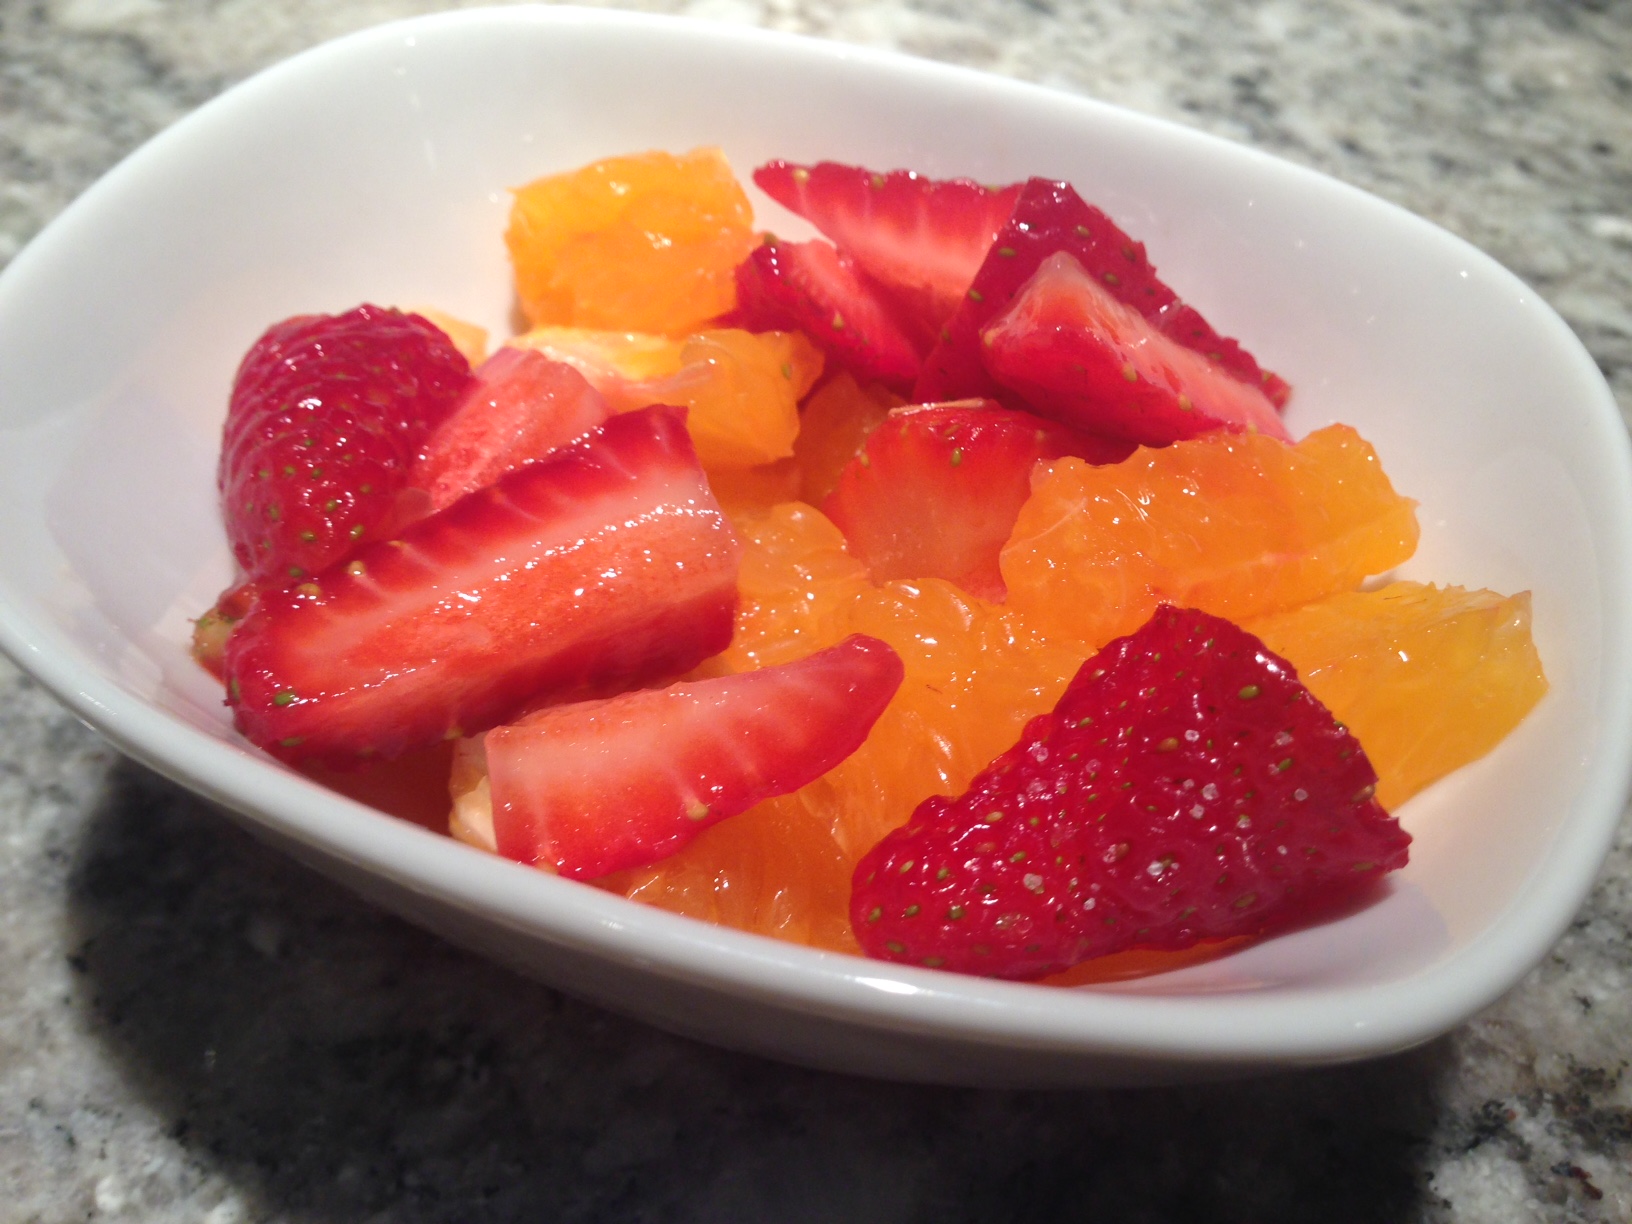
Orange-Strawberry Dessert
Plan Z Phase: This is a Z2 (ZReduction) recipe. Combining the tartness of strawberries with the citrusy tang of oranges, this creation makes for a refreshing and super simple dessert.
Servings: One serving is up to one cup
Ingredients:
- 1 lb of strawberries, hulled and cut into quarters
- 2 large oranges (You can also use drained and rinsed mandarin oranges for this dessert, or for this one I used the new Sumo Mandarins that you can find fresh in some grocery stores. They are huge for mandarin oranges and are very juicy.)
- ½-1 tsp of Truvia
- 1 tsp of chopped mint (optional)
Instructions:
Wash and prep your strawberries. For the orange you can just peel it and cut the segments into bite-sized pieces, or, if you hate pith (the white part that coats the orange segments as much as I do) you’ll peel the orange using a paring knife. I cut the peel and the pith off at the same time. I might waste a bit of orange flesh but not much.
Put the cut up orange pieces and the strawberries in a bowl. Sprinkle on the Truvia. If you want to make it a little fancier, add the mint and stir.
Leave in the refrigerator to macerate (combine flavors and get juicy) while you are having dinner.
Serve in a pretty bowl with a spoon or a fork. If there is juice in the bottom of your bowl, feel free to sip it.
Enjoy!
Cheers,