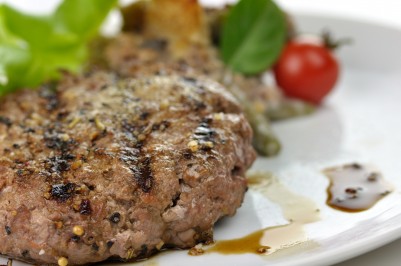
Burgers with an Indian Influence
Plan Z Phase: This is a Z3.5 (ZReboot 3.5) recipe.
Ingredients:
- 2 pounds of ground round or sirloin
- 4 buns (hamburger size or even sub buns will work)
- 4 1/4-inch onion slices
- 1/2 tsp of cumin
- sprinkle of cayenne to taste
- sprinkle of black pepper to taste
- 3 Tbl of Major Grey chutney
Instructions:
Form four patties from your beef. Thick or thin is up to you. Make them the shape of the bun you choose. Sprinkle on the cumin, cayenne and black pepper. Grill the hamburgers and the onion slices on a grill sprayed with oil; alternatively, spray the burgers and onions before you put them on the grill. Toast the buns to a golden brown. You can do this on the grill, too. Spread the chutney on the bottom half of the burger buns. Stack on your hamburger and top with the onions.
Enjoy!
Cheers,
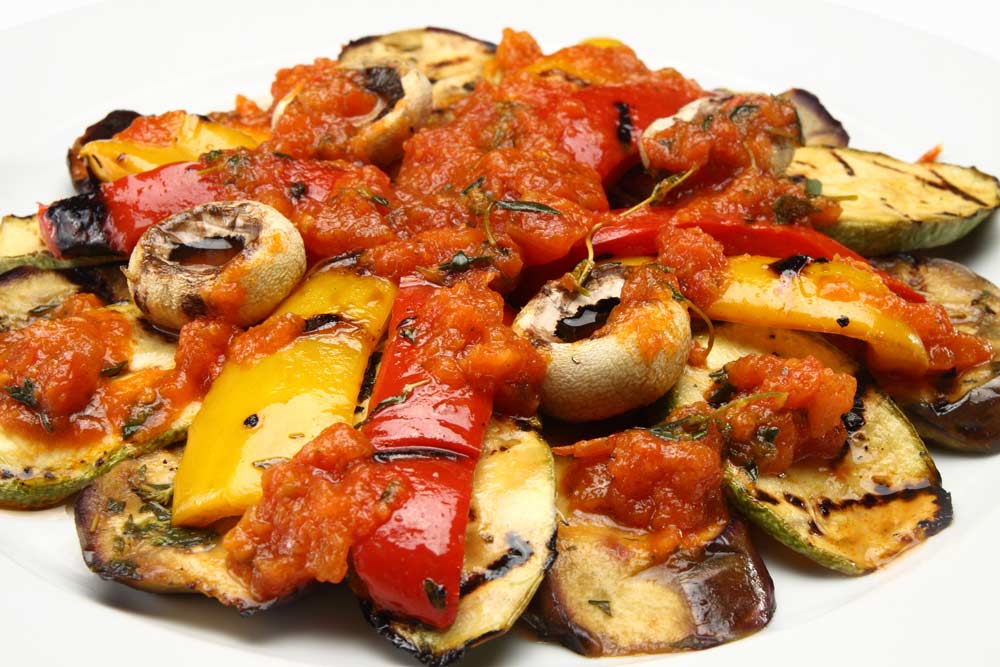
Grilled Veggies with Pasta Sauce
Plan Z Phase: This is a Z3.5 (ZReboot 3.5) recipe. For this recipe let's get out the grill. This pasta sauce tastes so fresh. It's really worth the effort to grill the veggies.
Servings:
Serves 2. Can be doubled.
Ingredients:
The Veggies:
- olive oil spray
- sea salt
- 1 small eggplant cut into chunks (If you use Japanese eggplant the skin definitely does not need to be removed and you won't have to worry about seeds. If you use a regular eggplant peeling the skin is optional. I don't do it but I do remove the center to get rid of the seeds.)
- 1 large onion cut into 6 wedges
- 1 yellow bell pepper cut into strips
- 1 red bell pepper cut into strips
- 1 zucchini cut into wedges (think large French fries)
- handful of mushrooms (optional)
Sauce
- 1 Tbl olive oil
- 6 plum tomatoes diced
- 4 garlic cloves, minced
- 2 tsp shallots diced
- 2 tsp Italian spices
- 1/4 tsp salt
- pinch cayenne
Pasta
- 1 cup of pasta (cooled) - about the size of your hand.
- You can skip the pasta and just have the veggies and sauce (Best Choice)
- You can serve it over any kind of pasta noodles that you like but just keep the portion of pasta to 1/2 cup
- You can serve the grilled sauce along side a piece of meat
Instructions:
Grilling the veggies:
Spray the veggies with olive oil spray. Lightly sprinkle with grated sea salt (kosher salt will work, too).
Heat the grill to medium and begin grilling the veggies. You can put them directly on the grill or in a grill pan. You want to fully cook the veggies; even a tidbit blackened on the edges. This gives them a full, rustic flavor. As each veggie gets done just put it on your platter. When they are all grilled, put the platter (oven proof) in the oven set on warm to hold them until you are ready to serve.
On the Stove
Put all of the sauce ingredients in a saute pan. Heat on medium until bubbling and then keep on low for up to 15 minutes to thicken the sauce to your liking.
While your sauce is bubbling, heat water in a large pot until boiling. Use enough water to cover the pasta you have chosen. Then follow the directions on the package to cook your pasta.
Put your pasta in the bottom of a pasta bowl or on a plate. Place sauce on the pasta and top with the veggies.
Enjoy!
Cheers,
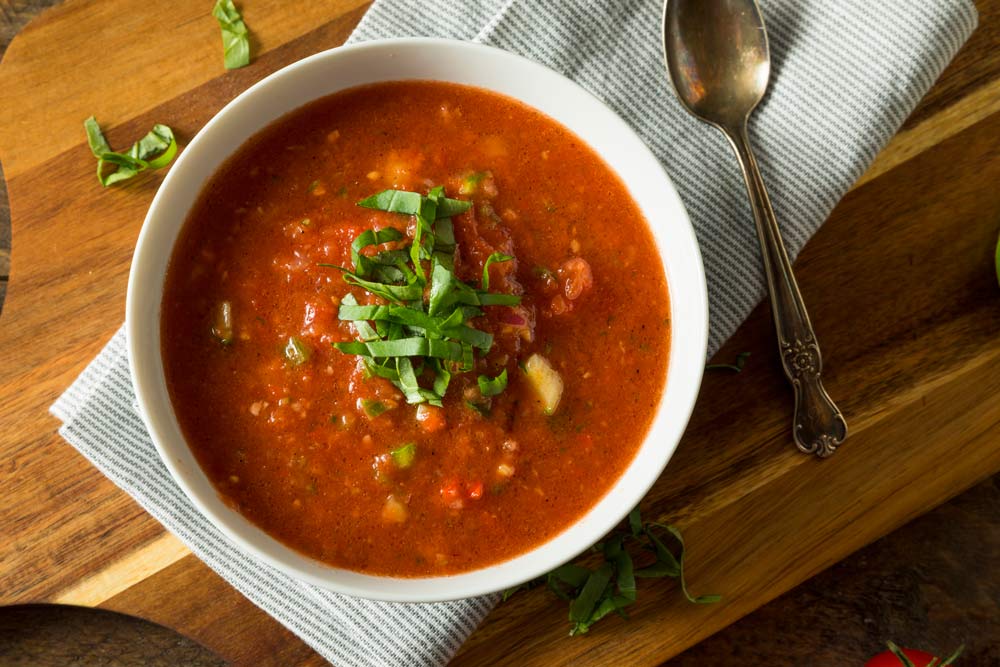
Fresh Sauce with Pasta or Protein
Plan Z Phase: This is a Z3.5 (ZReboot 3.5) recipe. There's a thing called a "fresh" sauce in Italian cooking. It just means the ingredients are fresh and you never heat them up. You chop the ingredients, let them macerate for a while so they blend and soften, and then you put them on top of pasta or a piece of grilled meat or fish. You can easily double it if you have more mouths to feed.
The feeling in your mouth is sort of like the cold tomato and lettuce in the BLT. Here you're putting a cold or room temperature sauce on top of warm pasta or protein. The juxtaposition feels refreshing in your mouth on a hot day.
This is a great vegetarian entrée. You can serve with a side salad, too.
You can also use this dish as a side. Served with a piece of grilled chicken, it makes a fun meal. Even a piece of grilled fish would be good. A halibut or sea bass come to mind.
Servings: Entrée for 2, easily doubles.
Ingredients:
- Angel hair pasta for 2, that's a total of 1 cup cooked. (Follow box suggestion for portions and cooking instructions.) Most angel hair pasta takes just 3 to 4 minutes to boil, so you won't have a hot pot on your stove for long. You can use any pasta you choose. The angel hair delicacy just seems to taste better when it's hot outside.
- 5 ripe plum tomatoes, chopped (The secret here is FRESH, RIPE tomatoes.)
- 2 tsp garlic (Jar garlic will work but fresh will give your dish more "bite.")
- 1 large shallot, minced
- a sprinkle of cracked red pepper (optional) (The kind some folks put on pizza.)
- 6 Tbl olive oil (divided)
- salt and pepper to taste
- 8 fresh basil leaves cut into chiffonade (Chiffonade is explained below.)
- 1 cup grated Parmesan cheese
- 1/2 cucumber, minced (optional)
Instructions:
Up to a few hours ahead
In a medium bowl, place your tomatoes, garlic, shallot, cracked red pepper, cucumber and 3 tablespoons of olive oil. Mix thoroughly. Grate your salt and pepper over the mixture and mix again. You want some salt to bring out the flavor in the tomatoes. How much is up to you. The cracked red pepper is optional but gives the sauce extra zip. If you use the cracked pepper, you probably don't need much black pepper.
You want this mixture to sit now for up to a few hours. You can put it in the refrigerator if you like the idea of COLD sauce, or you can leave it on your kitchen counter. The flavors will meld during this time and you'll have a nice, chunky sauce.
When getting ready to serve cook your pasta ...
While the pasta is cooking, you are going to make your chiffonade. This is a French term for "little ribbons." Stack the basil leaves on top of each other. Then use a sharp knife to cut them into little thin ribbons. That's your chiffonade. Stir this into your tomato mixture.
Drain your pasta and put in a large serving bowl. Pour on the rest of the olive oil and stir in the Parmesan. Mix it up really well. Put a portion of pasta on each plate and spoon on the sauce. You're ready to eat.
Put your pasta in the bottom of a pasta bowl or on a plate and place sauce on the pasta.
Enjoy!
Cheers,
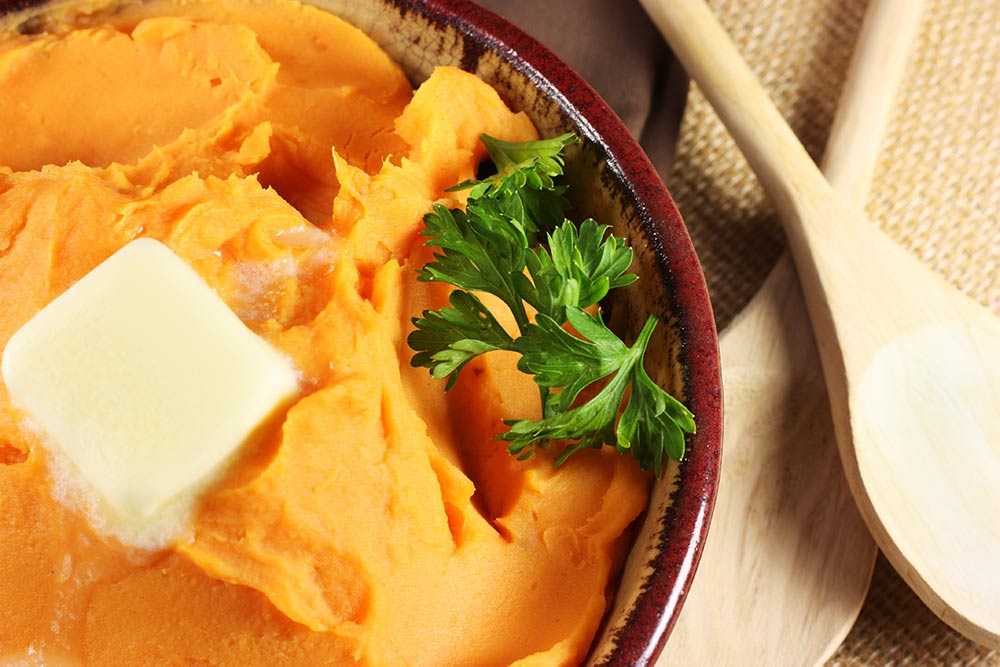
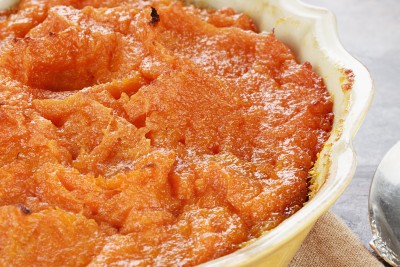
Sweet and Spicy Mashed Yams
Plan Z Phase: This is a Z3.5 (ZReboot 3.5) recipe. I went a bit nuts the other day and made up this version of a spicy mashed yam. Whenever I get a hankering for mashed potatoes I go get yams. Yams are the lowest glycemic index potato available in the US. They come in at 37. I was delighted with the outcome of this recipe. I hope you enjoy it (in moderation) too. Be sure to get yams. Sweet potatoes have a higher glycemic index of 54. Super simple. Super special. BIG YUM.
Servings: Serves 4 (can easily be doubled)
Ingredients:
- 2 medium yams
- ½ tsp of chili powder (or to taste)
- 4 Tbl of butter
- a bit of grated sea salt
- cayenne dusting (to taste)
Instructions:
Heat oven to 350 degrees. Put your yams on a cookie sheet and poke them with a sharp knife to open up some air holes.
Bake for approximately 60 minutes or until the yams are very soft when you poke them with a sharp knife. Cut the yams in half and squeeze out the yam flesh into a bowl. Throw away the skins.
Add the butter and chili powder. Grate some sea salt on top and a dusting of cayenne. Mix.
Now taste them and see if you want them spicer or smokier. Add cayenne for more spicy heat. I did two dustings of cayenne. I liked the sweet potato with the zip. If you want smokier flavor add a bit more chili powder.
These go great with any Mexican-style meal or with anything grilled. I don’t eat them often. They are a special treat.
A portion is ½ cup.
Enjoy!
Cheers,
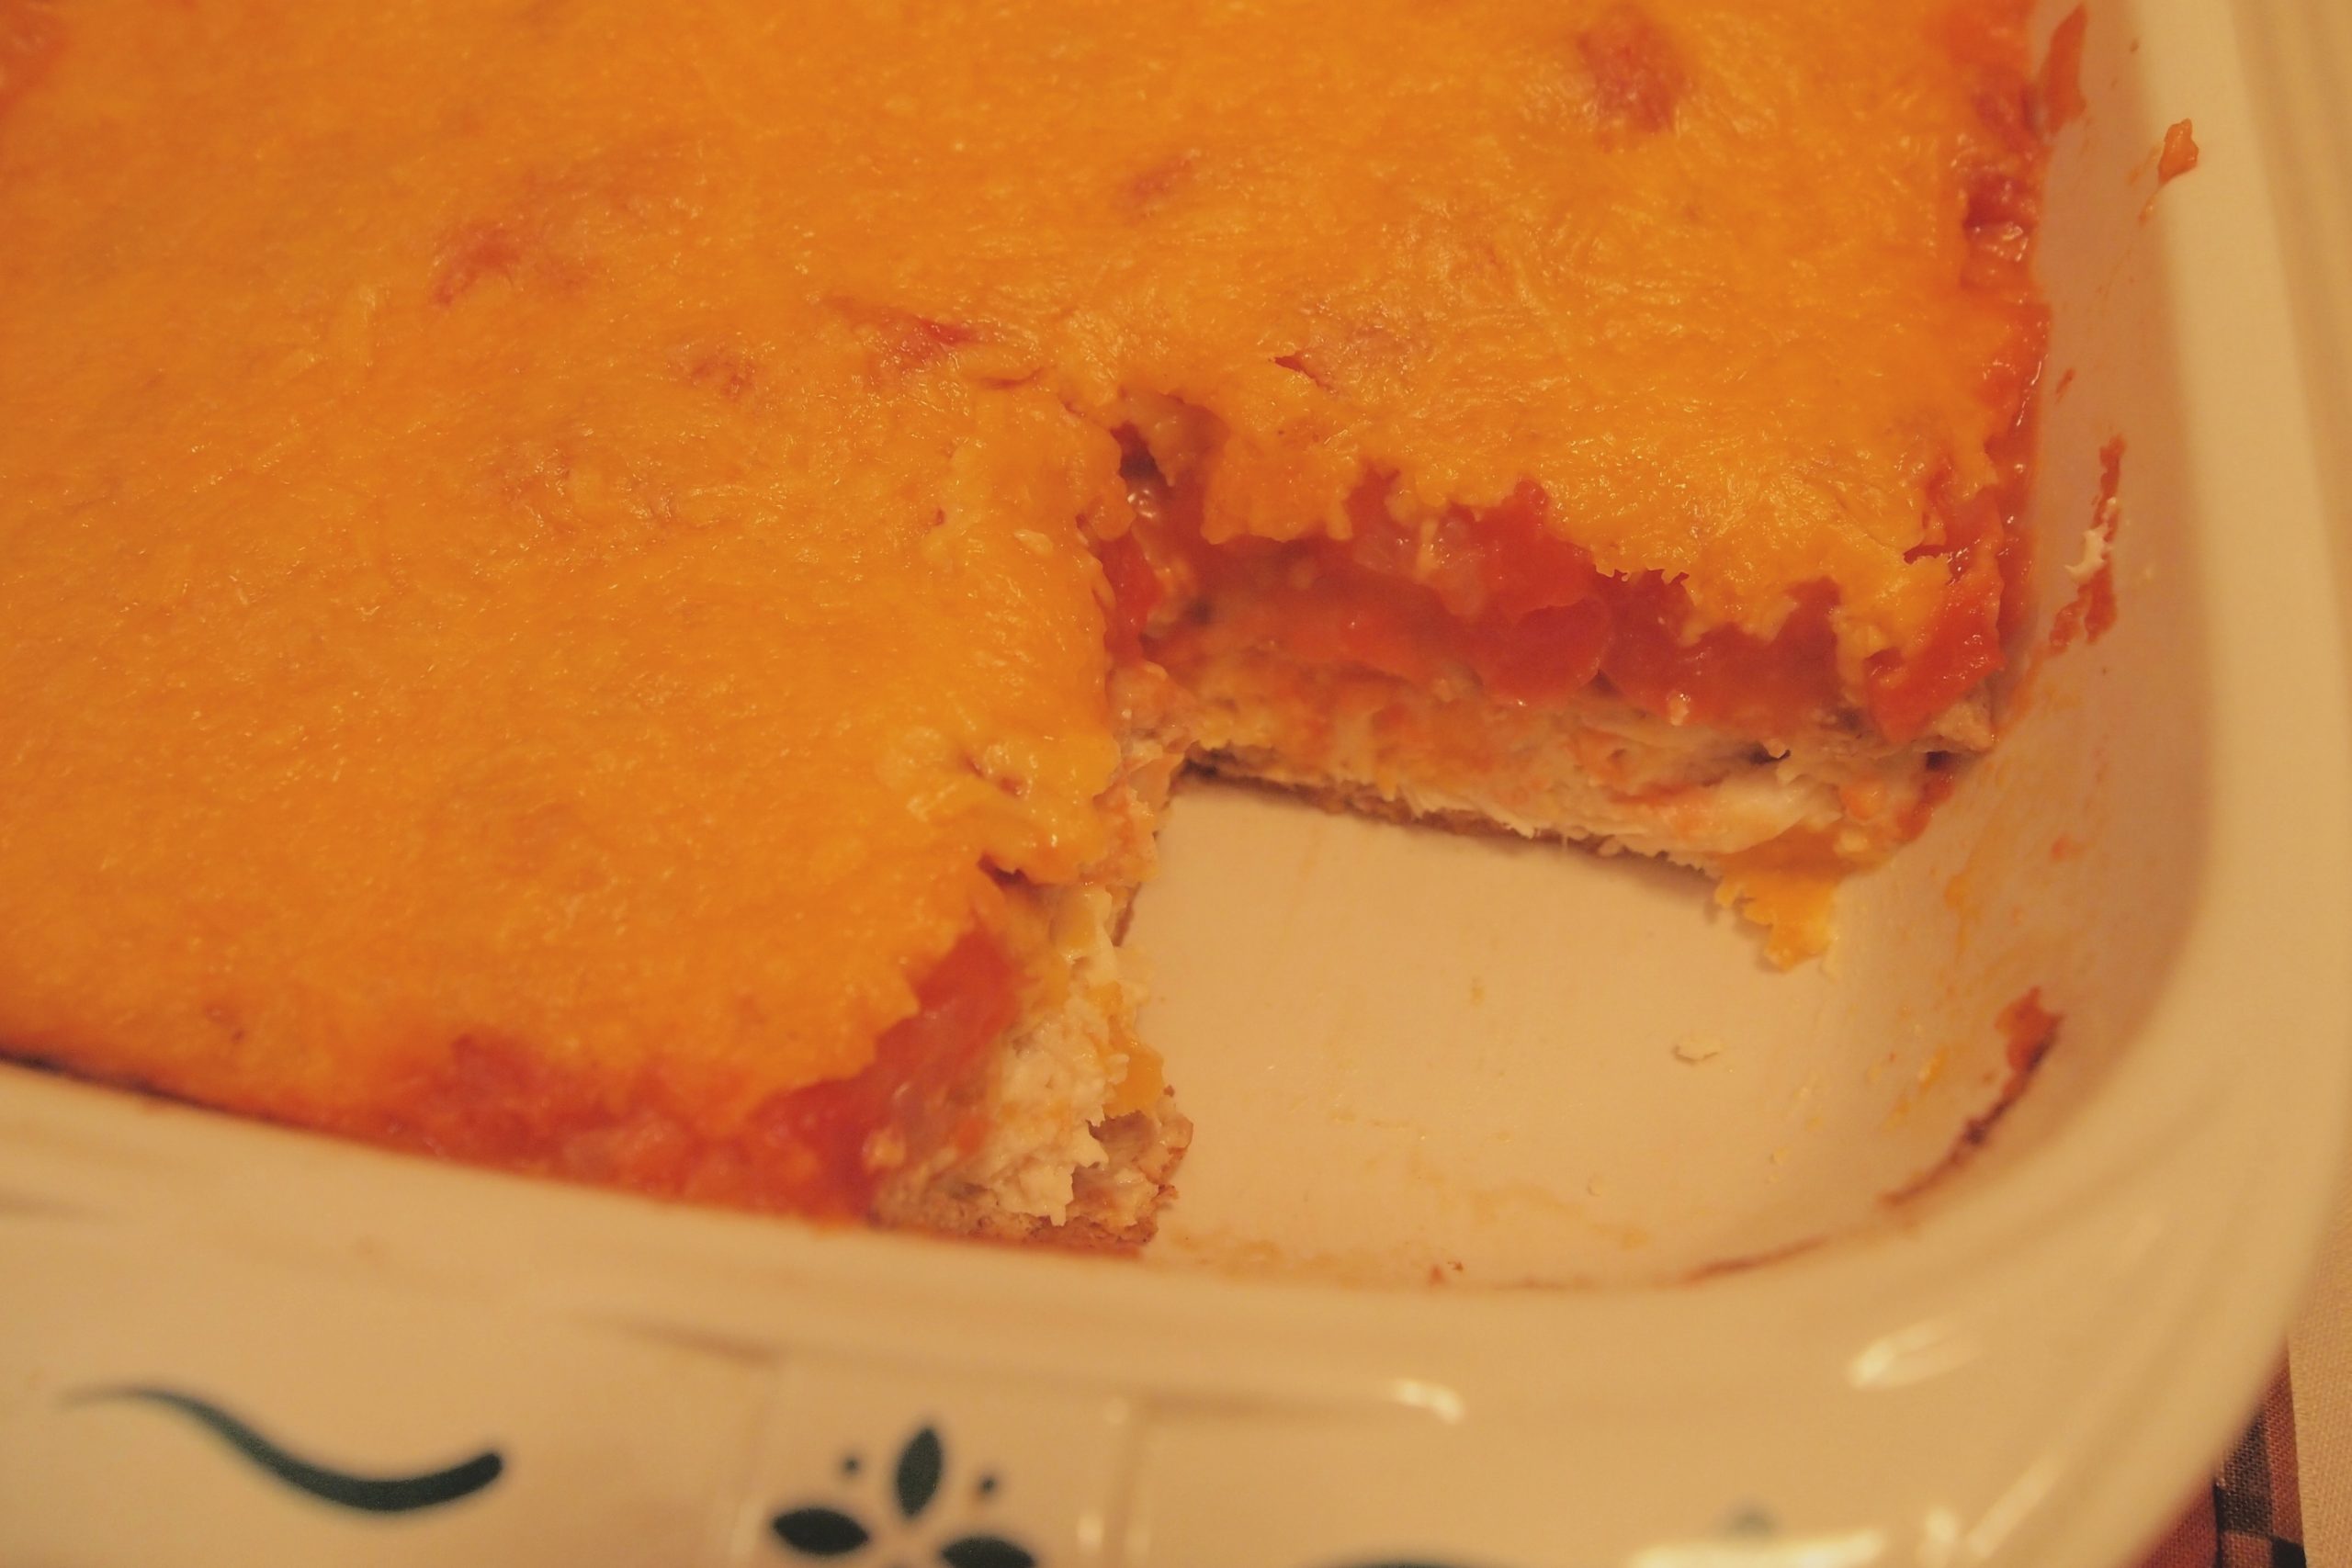
Chipotle Sweet Potato Casserole
Plan Z Phase: This is a Z3.5 (ZReboot 3.5) recipe that was contributed by Plan Z dieter David. Zola says keep the portion small to keep your carb count down.
Servings: Serves 4
Ingredients:
- 3 – 4 medium sized sweet potatoes
- 1 quart heavy cream
- 1 – 2 chipotle peppers (in adobo sauce). Add more if hotter dish is desired.
- butter
Instructions:
Preheat oven to 350 degrees.
Butter a 13" x 9" baking dish.
Peel and slice sweet potatoes (use food processor if available). Layer in buttered baking dish.
Pour cream into blender and add peppers with some of the adobo sauce. Mix well until mixture turns pink. Pour over potatoes.
Dot top with butter. Cover with aluminum foil. Bake for 1 hour. (Cream may bubble over during cooking so you may want to put baking sheet in oven to catch any spills.)
Test for doneness by piercing potatoes with fork. They should be soft – if not, remove foil and cook until soft.
Enjoy!
Cheers,
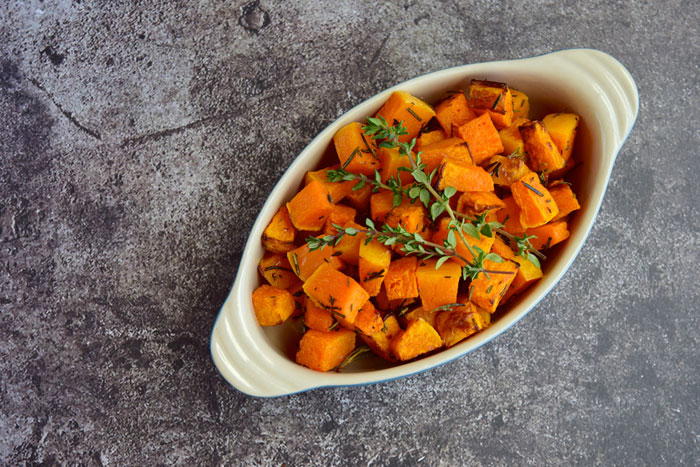
Butternut Squash Roasted in Coconut Oil
Plan Z Phase: This is a Z3 (ZReboot) recipe. This recipe is SUPER simple and SUPER BIG YUM! I don’t crave potatoes anymore but I can develop a craving for this stuff!
Butternut squash does have some carbs. 19 grams in a cup. Compare that to mashed potatoes at 39 grams and you can easily see the better choice. And once you’ve been eating low carb for awhile this stuff tastes like candy! Perfect for an Easter side dish.
Coconut oil is amazing stuff. Order online or buy it in a gourmet grocery. Some grocery stores carry it in the international section. It will look like shortening. It is nothing like Crisco but it is shelf-stable, white, and in a jar. When warmed, coconut oil melts and looks like clear oil. Coconut oil is very good for you and the taste lends just the right amount of sweetness without going overboard. You can use coconut oil in lots of recipes. When you want a hint of sweetness reach for coconut oil.
Servings: Serving size is one cup. Total servings will depend on the size of your squash.
Ingredients:
- 1 large butternut squash. I try to look for the ones with the longest necks. The longer neck means you get plenty of squash flesh without having work around the seeds and fibrous part
- 1/2 C coconut oil
Instructions:
Peel your squash. I use a regular vegetable peeler. Cut off each end. Be careful. Cutting squash can be dangerous.
Cut the non-fibrous portions of the squash into 1/2-1” cubes. Put them into an oven-proof pan. Try to use a pan big enough for all the cubes to sit without too much crowding.
Add the coconut oil. Stir it around. If the coconut oil is hard, don’t worry. As the coconut oil warms in the oven you can bring the pan back out and stir the cubes around and coat them in the oil.
Sprinkle with grated sea salt.
Roast at 375 degrees for 45 min to one hour. I turn mine at the 30-minute point. I also like mine to get browned on the edges. The longer they are in there the more caramelized they get and the sweeter they will be.
This is ONE dish that tempts me to nibble at it even before I put it on the plates. You can catch me popping a cube in my mouth while I’m stirring a sauce that goes with the entrée. It’s THAT good.
Enjoy!
Cheers,
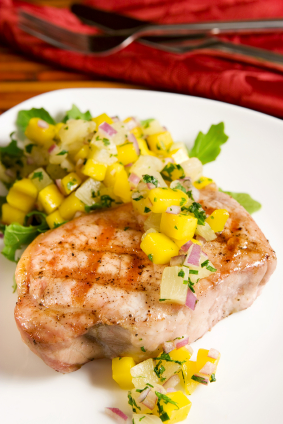
Pork Loin Roast with Chunky Mango-Peach Chutney
Plan Z Phase: This is a Z3.5 (ZReboot 3.5) recipe. Today’s recipe is great for warm weather. Eating fruit with meat just feels like summer. You can bake or grill this pork loin. You can serve the chutney warm, room temp or cold.
Servings: Serves 4 – 6
Ingredients:
- 2 lb pork loin roast or two 1 lb pork tenderloins
- olive oil spray
- Italian spice blend
- black pepper
For the chutney:
- 1 Tbl of olive oil
- 1 medium chopped sweet onion
- 1 tsp of minced garlic
- 1 lb of cubed mango. Fresh or frozen will work.
- 1 lb of peach chunks. Fresh or frozen will work.
- 1 Tbl of light brown sugar
- ¼ cup of apple cider vinegar
- 1 tsp of ground coriander
- 2 tsp of ground ginger
- 1 tsp of ground cinnamon
- 1 tsp of ground mustard
- ¼ cup of raisins or dried cranberries(your color choice)
- 1 red bell pepper, seeded and diced
- pinch cayenne (optional)
Instructions:
Preheat oven to 375 degrees or light your grill.
For the pork:
In a small roasting pan, spray the bottom with olive oil spray. Set roast, fat side up in the pan and spray the top. Sprinkle with Italian mix to your taste and grate fresh black pepper on top. Set in oven pre-heated at 375 degrees. Roast for 40 minutes, with a meat thermometer poked into the middle, and then check the temperature. You want to remove the pork when the thermometer reaches 160 degrees. Then let rest 10 minutes outside of the oven before cutting. This will allow for juicy pork but no pink in the middle. If you are doing pork tenderloins they will take less time to cook. Check the temperature on them at 20 -25 minutes. If you are able to control the temperature on your grill they should take about the same amount of time to cook.
For the chutney:
While the pork is in the oven you can make the chutney. This is very easy. Put the olive oil, onion and garlic in a medium saucepan. Saute on medium high for about 5 minutes to loosen up the onion. Then add the rest of the ingredients and continue to cook on medium low for up to 15 minutes. Stir often. Unless the fruit was frozen when it went into the pan, I often don’t cook this for the full 15 minutes. It’s really up to you. You get to decide how chunky you want your chutney to be. The longer you cook it the mushier it will get. If you like your chutney to be more like a sauce you can puree the final product in your blender. I like mine chunky. When it’s warm outside and you serve the hot meat with the cold chutney it’s nice to have larger pieces of cold, juicy fruit. If you are making this in cooler months, the warm chutney with the ginger and cinnamon infused in it gives your cheeks a nice glow and a wonderful smell in your kitchen.
Slice the pork on the plate and spoon the chutney over the top or to the side. Other options include serving this with chicken or fish.
Enjoy!
Cheers,
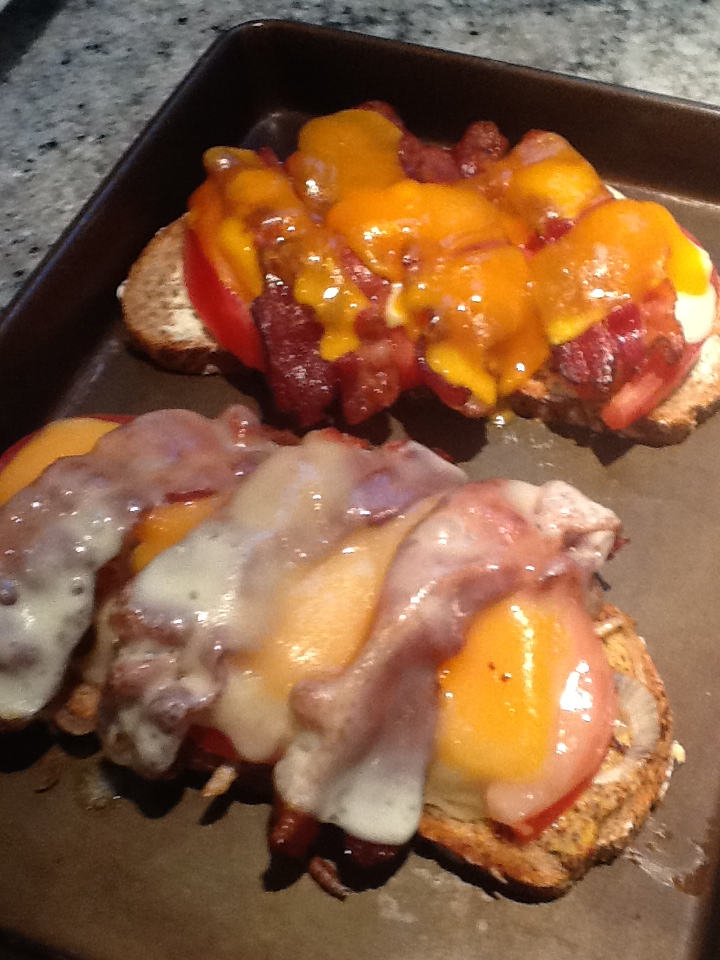
Open-Face Grilled Cheese Sandwiches
Plan Z Phase: This is a Z3.5 (ZReboot 3.5) recipe.
Serving Size: Serves 1
Ingredients:
Cheese options: You can really use just about any melt-able cheese you want but here’s a list of some of my favorites:
- Cheddar, swiss, emmenthaler provolone, boursin, gruyere, pepper jack
- a sliced, ripe tomato
- onion slices, raw or sautéed
- Other basic ideas: avocado slices, pre-cooked bacon, guacamole, mustard, mayo, thousand island dressing, coleslaw from the deli. You know this list can go on forever and as far as your culinary imagination will take you.
- butter for your bread
Standard assembly and baking instructions:
Preheat oven to 400 degrees.
First thing I do is fry my bacon to a nice crisp and set that aside. I also sauté a few onion slices for my husband’s sandwich. I get things like that done ahead so I can assemble and bake the sandwiches in an organized fashion.
I melt a few tablespoons of butter (depends on how many sandwiches I’m making). Spread a smear of butter on one side of the bread. Then I take out a large sauté pan and brown the bread on the buttered side. Transfer them, butter side down to a cookie sheet.
Let cool just long enough so I can handle them. Then I put on any kind of smear I want. My husband gets his mustard. I smeared some boursin cheese on mine.
Put on sliced items. I added the tomatoes to mine and the onions and tomatoes to his. Put on one layer of cheese. Pop them in the oven until these items are hot. That might take about 10 minutes max. Then I add the bacon and another layer of cheese. Pop them back in the oven til the top layer of cheese melts. I find if I try to do all of that in one trip to the oven the top cheese will melt off so doing it in two stages is a good idea.
Remove them from the cookie sheet, put on a plate and eat.
Enjoy!
Cheers,
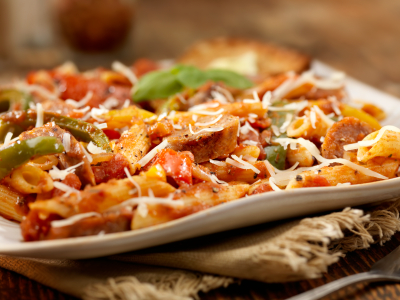
Baked Pasta with Sausage, Tomatoes and Mushrooms
Plan Z Phase: This is a Z3.5 (ZReboot 3.5) recipe. This dish can be made a day ahead and re-heated.
Servings: Serves 8 and can be easily doubled.
Ingredients:
- 8 oz of pasta, your choice. I like penne or bow ties best for this dish. Keep the pasta to a minimum. Just enough to cover the bottom of a 9" x 13" dish is fine.
- 2-3 pounds of Italian sausage. You can also use loose sausage (not in the casing). I used a combo of mild Italian and sundried tomato/basil sausages for one version and hot Italian sausage for the other. Cut the sausage into 1/4" slices or break up the loose meat into bite-sized pieces.
- 3 Tbl olive oil
- 1lb sliced mushrooms. Button mushrooms or exotic, your choice.
- 2 cups diced Vidalia onion
- 2 Tbl butter
- 1 cup diced fresh basil
- 1 Tbl Italian spice blend
- 4 cloves garlic diced (jar garlic, again, is fine. 4 tsp)
- 1 cup dry white wine
- 2 cups diced tomatoes. I used organic tomatoes in a can.
- 1 cup crushed tomatoes. I used Muir Glen organic fire-roasted tomatoes in a can.
- 1 cup Parmesan or Asiago-Romano, finely grated
- 2 cups shredded mozzarella
Instructions:
Cook the pasta according to box instructions. Drain and put in a 9" x 13" ovenproof pan. Brown the sausage in the olive oil until the edges are browned and there is no longer any pink in the middle. This will take about 5 - 7 minutes on medium high. Stir often.
Remove the sausage but leave the drippings in the sauté pan. Add the mushrooms, onion and butter. Cook until mushrooms and onion are soft. 5 minutes should do it. Add the basil, Italian spices and the wine. Cook down on medium high until most of the liquid is gone.
Add the diced tomatoes, the crushed tomatoes and garlic. Heat until all ingredients are warmed. Pour this combination and the sausage in with the pasta. Stir until well blended. Now add the cheese and stir again until well blended.
If your making this dish ahead of time, allow the ingredients to cool. This can now be covered in plastic wrap and stored in the refrigerator until you want to heat it and serve. DO NOT cover with aluminum foil. The tomatoes eat holes in the foil and you have a spoiled dinner.
When ready to cook remove plastic wrap, and cover with aluminum foil. Heat at 350 degrees for 30 - 45 minutes until piping hot.
Enjoy!
Cheers,
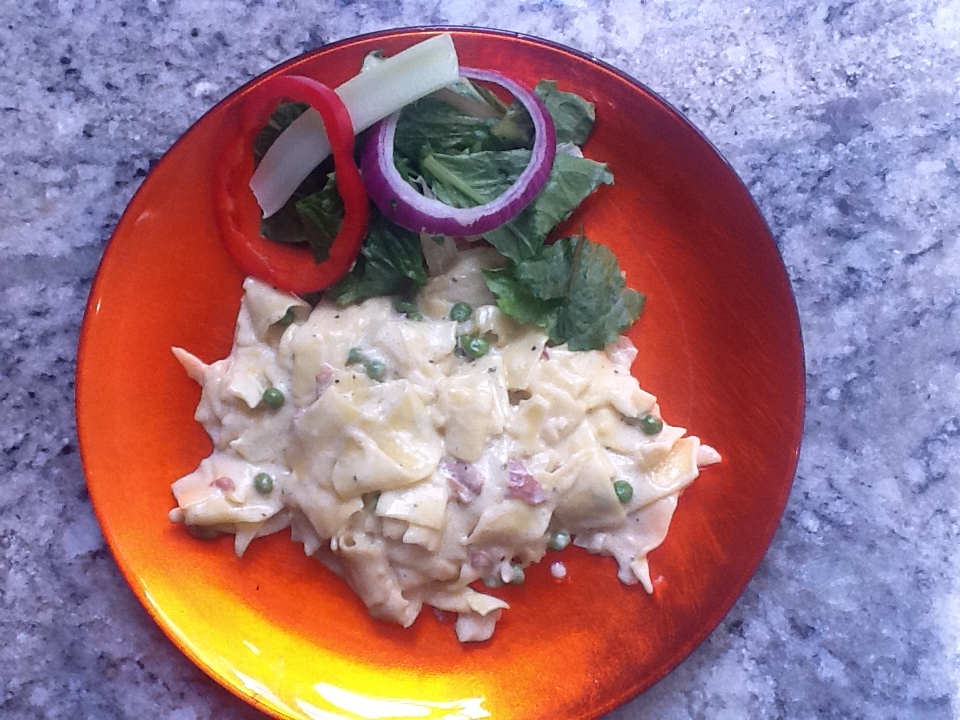
Spring Pasta
Plan Z Phase: This is a Z3.5 (ZReboot 3.5) recipe. My favorite pasta is papardelle. I don’t have pasta very often (maybe 4 times a year at most) so when I do, I go all out and do a cream sauce to counteract the glycemic uptake of the pasta. I don’t eat peas very often either so this dish is a real spoil in my book. It just tastes like spring to me. I hope you enjoy it.
Servings: Serves 4
Ingredients:
- 1 package of papardelle (if you cannot get papardelle, any wide noodle will do. This is just a special wide noodle made with semolina flour. You can use fettuccine too. It’s just skinnier than papardelle).
- 1 large shallot minced
- 1 Tbl of butter
- 1 package of prosciutto
- 1 package of boursin cheese – garlic/herb flavor
- ½ cup of whipping cream (or more to taste)
- ¾ cup of frozen baby peas
- ½ cup of grated romano cheese
- grated pepper to taste
- ½ cup of grated Parmesan
Instructions:
To start off, bring a large pot of water to boil for the pasta. This dish comes together VERY FAST so the pasta will be the thing that takes the longest to cook. Papardelle takes 13 minutes to cook. When the water is boiling add the dried pasta and set your timer. Then make the sauce.
Remove the prosciutto from the package. Each piece of prosciutto will be separated by a paper or plastic sheet. Just pull them apart. When you have them all separated just chop the prosciutto.
In a large sauté pan add the butter and minced shallot. Cook on medium to loosen the shallot and get it cooking. Then add the prosciutto. The prosciutto is ‘cooked’ so you don’t have to cook it but I like my prosciutto in this case to get a bit of a browning to almost crisp it up. Sort of like loose bacon.
When the prosciutto is ready add the boursin cheese and the cream. The flavored boursin already has plenty of garlic and herbs in it so you don’t need to add anything more. The prosciutto has plenty of salt so don’t add any. Just add cracked black pepper. As the cheese melts and the cream starts to heat, add your frozen peas and the Romano. Just cook on medium low to make the cream sauce and thaw the peas. You can add more cream if you like a smoother sauce or if it gets too thick.
When the pasta is done, drain it and add it to the sauce. Stir. You’re ready to serve.
Garnish with some grated parmesan and sit down to heavenly food. Add a side salad if you want and you’re all set.
Enjoy!
Cheers,
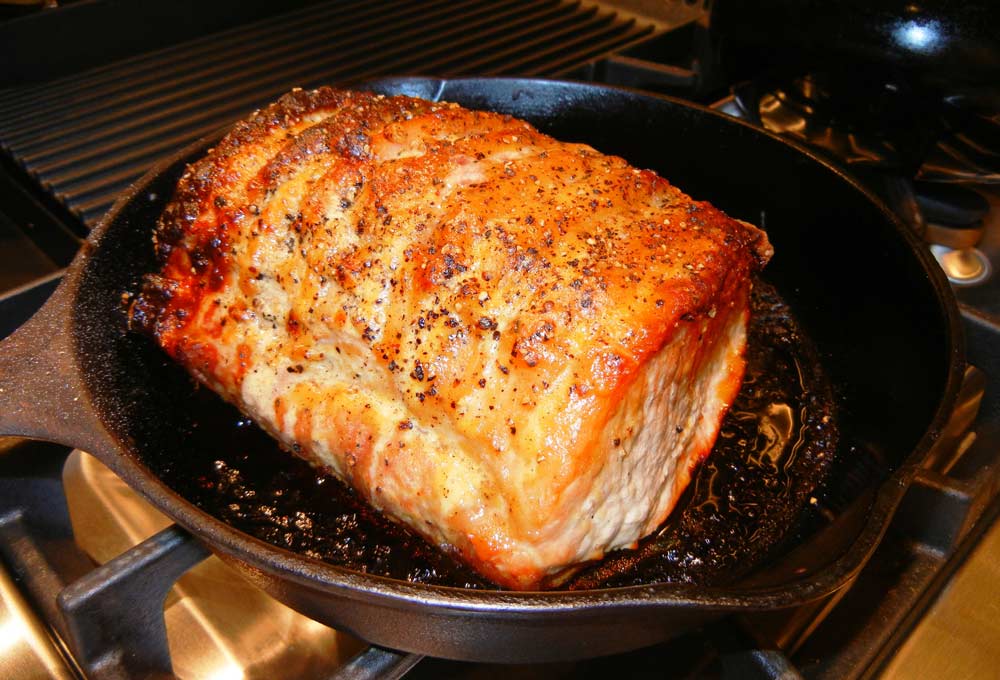
Sweet and Peppery Pork Roast
Plan Z Phase: This is a Z3.5 (ZReboot 3.5) recipe. This is a lovely twist on a regular pork loin roast. There is little honey in this and by Z3.5 your liver is operating properly again and will tolerate this bit of natural sugar with no problem.
Serving Size: Serves 6
Ingredients:
- 3 lb pork loin roast
- 2 Tbl of honey. Get a good, all natural honey.
- 2 Tbl of Dijon mustard
- black pepper to taste
- sea salt to taste
Instructions:
Preheat your oven to 375 degrees.
Turn the pork roast fat side up. Take a sharp knife and score it about every half inch just into the meat about a quarter inch.
In a small bowl combine the honey and Dijon mustard. Stir to blend well.
Put the roast in your roasting pan. Spread the honey-mustard combination across the top of the roast and down into the cracks. I use a pastry brush for this job but you can do it with a spoon too. Then grate on salt and pepper to taste. An extra grate or two of pepper will provide the peppery bit of flavor to this dish.
Roast your meat for approximately 30 minutes per pound. I use a meat thermometer and stop the cooking at between 155 and 160 degrees. This leaves the meat juicy and slightly pink. If you like your pork more well done you can leave it in up to 190 degrees. The cooking time will vary a bit based on how large your roast is.
You should get at least six 1/2” slices. For most one slice is enough of a portion.
Enjoy!
Cheers,
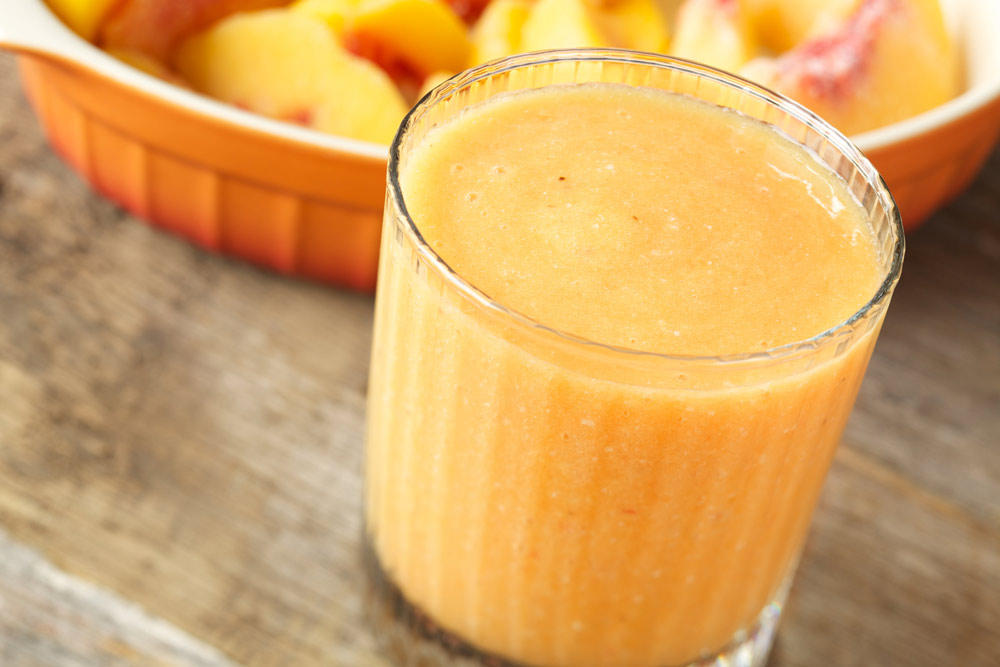
Peachy Orange Slush
Plan Z Phase: This is a Z3 (ZReboot) recipe that was contributed by Plan Z dieter Nancy. She's a true Plan Z veteran dieter!
Servings: 8 Servings
Ingredients:
- 4 peaches (washed and cubed with skin left on)
- 4 oranges (juice squeezed out and reserved)
- 2, 6 oz cartons of Greek full fat yogurt
- 2 cups water
- ½ tsp vanilla
- dash of nutmeg
Instructions:
Put peaches in blender and blend well. Add orange juice, yogurt, water, vanilla, and nutmeg. Blend well. May put in freezer for a refreshing treat later. If you freeze it you’ll need to let it thaw a bit to get it to loosen up but it will give you a frosty experience.
Enjoy!
Cheers,
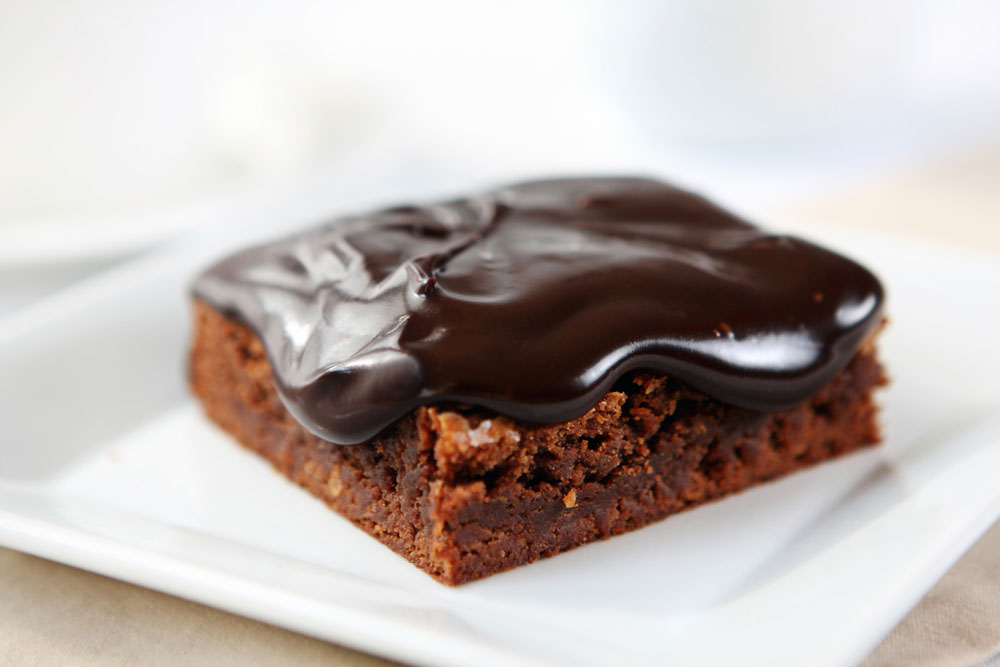
Deep Chocolate Bars
Plan Z Phase: This is a Z3.5 (ZReboot 3.5) recipe. One of the most decadent offerings of Plan Z. This bar tastes more like a deep chocolate cake than a brownie. It will satisfy your craving for chocolate for sure. Serve this after a simple weeknight meal or even at the fanciest party. A 2” square is all you’ll need to feel spoiled. You’ll never believe this is healthy diet food. I promise.
Serves: Serves 9 – 2” bars
Ingredients:
For the bars
- ¼ cup of unsweetened cocoa powder
- 2 ounces of high quality bittersweet chocolate that has 70% - 72% cacao content, chopped fine
- 1/3 cup of very hot water
- ¼ cup of kefir (goat milk) or buttermilk if you can’t find kefir
- 6 tsp of Truvia
- ¼ cup of coconut oil (you can heat this slightly to get it to be clear oil)
- 2 large eggs
- 2 tsp of organic vanilla
- 1/3 cup super fine ground almond meal (almond flour)
- 1/3 cup regular white flour
- 1 Tbl of corn starch
- ½ tsp of xanthan gum (You find this in the health food section. It’s good for low carb baking.)
- ½ tsp of baking soda
- ¼ tsp of sea salt
For the frosting
- 3 oz of high quality bitter chocolate that has 70% - 72% cacao content, chopped fine
- 3 oz of whipping cream
Instructions:
In a small heatproof bowl put the cocoa powder, chocolate and water. Stir until the chocolate is completely melted and smooth. Add the kefir and stir again. Set aside to begin to cool.
In a large bowl, add the egg, the Truvia and the coconut oil with the vanilla. Beat until smooth. If your coconut oil is hardened you might have to whip a bit longer to get it to blend in or heat it in advance – slightly – to get it to become clear liquid,
Add the chocolate mixture and blend again.
Now add the dry ingredients. Turn on mixer and blend. Leave mixer running one full minute. Make sure you have scraped down the sides to incorporate all ingredients. Do final blending.
Pour batter into a 9” square or 9” round pan that has been sprayed with baking spray (alternatively lightly butter the pan and sprinkle in a bit of flour to dust the pan). The ideal would be to use a pan with removable bottom but if not you’ll just serve your bars from the pan rather than taking it out to display on a cake plate.
Bake at 350 degrees for 18-20 minutes. The batter will not rise much. It will be about 1/2 “ thick. Might be a bit lumpy too. This will die down. Test for doneness with a toothpick. If the pick comes out clean the bars are done.
Let cool in the pan on the counter. Either remove the baked result to a platter to frost it or frost in the pan.
To make the frosting:
Heat the cream in a small sauce pan on medium high just until bubbles form around the edges of the pan. Do not bring to a full boil. When the bubbles appear, take the pan off of the heat and add the chocolate pieces. Stir until smooth and creamy. Spread on the cooled bars.
Serve plain or with Sweetened Creme Fraiche Dessert Sauce. Can also serve with whipped cream and/or berries.
These bars are approximately 150 calories each and contain approximately 8 grams of carbohydrate per bar without the sauce, whipped cream or berries.
If you want flavored frosting you can add things like peppermint flavoring or orange or even raspberry. Just a tsp will do it. Chocolate mint for the holidays. BIG YUM.
Enjoy!
Cheers,
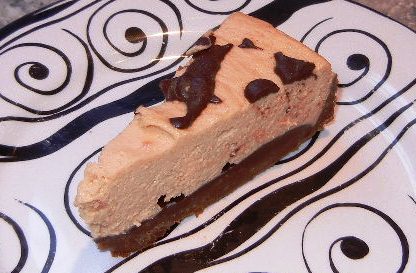
Chocolate Crusted Peanut Butter Tart
Plan Z Phase: This is a Z3.5 (ZReboot 3.5) recipe. I recently devised this fabulously divine peanut butter tart so maybe you’ll want to whip one up. It’s light, creamy, rich and perfect for family and friends. Easy too! When special occasions come up (like birthdays), don’t think cake. Think this!
Servings Size: 8 servings or more. This is really rich so instead of a piece that’s 3” wide at the back is probably enough.
Ingredients:
For the crust
- 2 cups of chocolate cookie crumbs (You can use Famous chocolate cookies or there are organic cookie options too that are just chocolate wafers). You just whiz them in the food processor or put them in a large baggie and crush them with your rolling pin.
- ½ cup of melted butter
For the bottom layer
- 4 oz of bittersweet chocolate diced (65% cacao or up to 85%). The higher the number the deeper the chocolate flavor – less sweet
- 3 oz of whipping cream
For the peanut butter layer
- 8 oz of cream cheese (softened)
- ¼ cup of Truvia
- 1 cup of smooth peanut butter
- 3 cups of whipped topping or cream. You can whip your own cream and sweeten with 2 tsp. of Truvia and 2 tsp of vanilla. Make 3 cups of finished cream. OR you can buy Truwhip. This is like Coolwhip but it’s made with Truvia. It does have other natural sweeteners in it. At ZReboot 3.5 your liver can handle some sugar like this. Just don’t overdo it.
Optional top decoration
- 4 oz of bittersweet chocolate (65% cacao or up to 85%)
- 3 oz of whipping cream
Instructions:
You’ll need a 9” tart pan with removable sides. I use a cheesecake pan so the outside edge is smooth. Combine the cookie crumbs, and melted butter in a bowl. Mix with a fork until the crumbs are all wet with butter. Pour this mixture into the bottom of the tart pan and flatten it with your fingers. Gather some of the crumbs up along this sides and press them firmly to you make a 1” (or so) rim on your tart. Make room for the tart pan in your freezer and put it in there for 15 minutes to harden it.
While it’s in the freezer, make your bottom layer. In a small sauce pan, carefully, and slowly melt the chocolate and cream. Stir constantly. This will only take a couple of minutes on medium low. Even before the chocolate is fully melted take it off the heat. The heat of the pan and the hot cream will continue to melt the chocolate. If people make a mistake here, it’s keeping the pan on the heat too long and your chocolate will overcook and stick to the bottom of the pan or become grainy.
Take the tart crust out of the freezer and spread this layer over the crust bottom. Don’t try to get it up the sides. That’s not necessary. Return the pan to the freezer for up to 15 minutes more; or until the chocolate has hardened.
While this is happening make your peanut butter filling. In a bowl beat the cream cheese, Truvia and peanut butter until fluffy. Add the whipped topping and beat just until mixed.
Take the tart out of the freezer and spread the peanut butter mixture on top. Smooth the top with a spatula and lightly cover with plastic wrap and put it in the refrigerator. You can do this a day ahead of serving or chill for at least 3 hours. On the day you’ll serve it, remove plastic wrap and take a very sharp knife and carefully work it around the rim of the tart. You need to do this to loosen the sides of the tart away from the metal rim before you spring the pan open. Because the tart is cold this takes some pressure and some patience. It’s worth this extra step though so you don’t break the crust trying to get it out of the pan.
Display on a pretty platter.
Then make your final topping or plan to serve plain. Melt the chocolate and cream, and this time use a small spoon to take the chocolate mixture out of the pan and drizzle it around the edges of the tart. I do this in a swirl pattern to decorate the tart. I leave the middle 2 or 3” plain so the drizzle decoration looks like a chocolate-swirl wreath around the sides. You can leave the tart out of the refrigerator for up to a couple of hours before serving it; depending on how hot it is in your area. I like to leave it out at least 15 minutes so the depth of flavor comes out. If you serve it too cold it tastes too much like refrigerator cold. I don’t like to serve this sort of dessert right out of the refrigerator because I think it tastes better if it’s just cool and not cold. Cut with a sharp knife and serve. You’ll hear MMMM and YUM from all who taste it.
Enjoy!
Cheers,
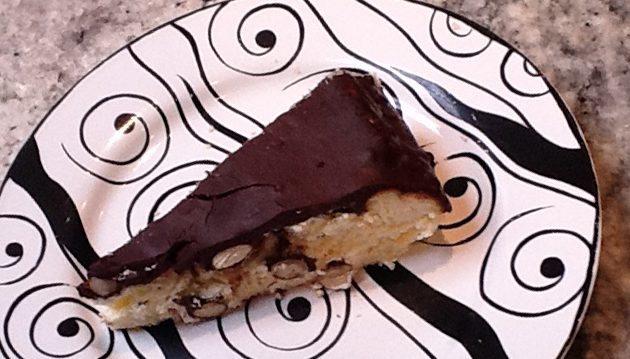
Almond Joy Cheesecake
Plan Z Phase: This is a Z3.5 (ZReboot 3.5) recipe. The design of this recipe was a challenge. I don’t mind admitting it. A lot of things went through my head so I will share them with you here, in case it means making adjustments to the recipe for your own tastes. If you are making this recipe to share with friends and family who have not experienced Plan Z, it might have an effect on how you put this together. I’ll explain near each ingredient.
Servings: Yields 12 servings or more
Ingredients:
For the Filling
- 32 ounces cream cheese
- 8 tsp of Truvia (I always try to keep the Truvia down as much as possible. Reason is when heated Truvia can end up with a metallic aftertaste. It’s not the perfect sweetener but it’s the best we have. I started with 5 tsp and ended up with 8. You should know that with even 8 it’s still not a sweet cheesecake. It’s sort of sweet but if you are serving this to others you might add 3 or 4 more tsp. If you don’t need it, don’t put it in.)
- 4 large eggs
- 1/3 cup flaked, sweetened coconut (I wanted to keep the sweetened coconut to a minimum. You really need the sweetened stuff for this recipe cuz you are not adding a bunch of sugar. Unsweetened coconut is intense in flavor and I don’t mean that in a sweet way. So I opted for a minimal amount of the kind we are all used to. This won’t be enough for some. It’s designed to give you ‘essence’ of coconut; not full on coconut).
- 1 Tbl coconut extract ( you can add a bit more of this if you want to but it can start to taste fake and this is an artificial sweetener and I want you to get exposed to as little as possible now that it’s been cleaned out of your system with Plan Z).
- 2 tsp organic vanilla. Because I was not putting in a lot of coconut I put this in to smooth out the flavor. I was going for a creamy cheesecake mouth feel.
- 1 cup roasted and unsalted almonds
For the Topping
- 8 oz of dark chocolate (70% or 72% cacao), diced. The more intense chocolate cuts down the carbs and tastes more authentic.
- 3/4 cup whipping cream
- 1 1/2 teaspoons organic vanilla extract
Instructions:
Preheat your oven temperature to 325 degrees.
For the Filling
Lightly grease a 9” springform pan. I use butter spray.
Using your electric mixer, beat cream cheese and Truvia in large bowl until smooth. Add the eggs. Beat just until blended and then scrape down the sides so all of the stuff stuck to the sides gets to the middle of the mixer bowl. Now turn on medium high and let run until the mixture is smooth. Add vanilla and coconut extract and mix a few seconds til it’s incorporated. Stir in coconut. Lightly grease your 9” round springform pan. (I use butter spray). Pour mixture in prepared pan. Bake until cake is puffed and no longer moves when pan is shaken, about 1 hour and 15 minutes at 325 degrees. Cool completely on rack.
For the Topping
You are going to make a ganache here. Very simple candy frosting that will taste just like the top of an Almond Joy bar.
In a small pan heat cream til just bubbling around the edges. Watch closely. Take off heat. Add diced chocolate and stir til smooth. Use a whisk. Stir in vanilla and let cool down some. You want it cooler but not so cool that you can’t pour it. Then top the cheese cake with a scattering of almonds and pour chocolate topping over. You can pour it over the middle only or let some drizzle down the sides. Let set in refrigerator. You want it to turn back to candy on top. Cool for hours or even overnight.
Take out 15 minutes ahead of serving time. Cheesecake always tastes better if you let it sit on the counter and warm up a tad before you cut it.
This recipe is designed for pieces that are maybe 1.5” wide at the back. Not a huge, regular American portion. Don’t plan to eat this every meal until you finish it off either. This is a TREAT. Not a regular thing. Moderation is called for with this recipe.
P.S. I had people at a dinner party rate this recipe. None of them except me and my husband had done Plan Z. Some thought it was perfect. They liked having a base of the cheese cake that was less sweet because they got enough sweetness from the chocolate topping. One person definitely protested that it was not sweet enough. You judge and be sure to rate the recipe.
Enjoy!
Cheers,
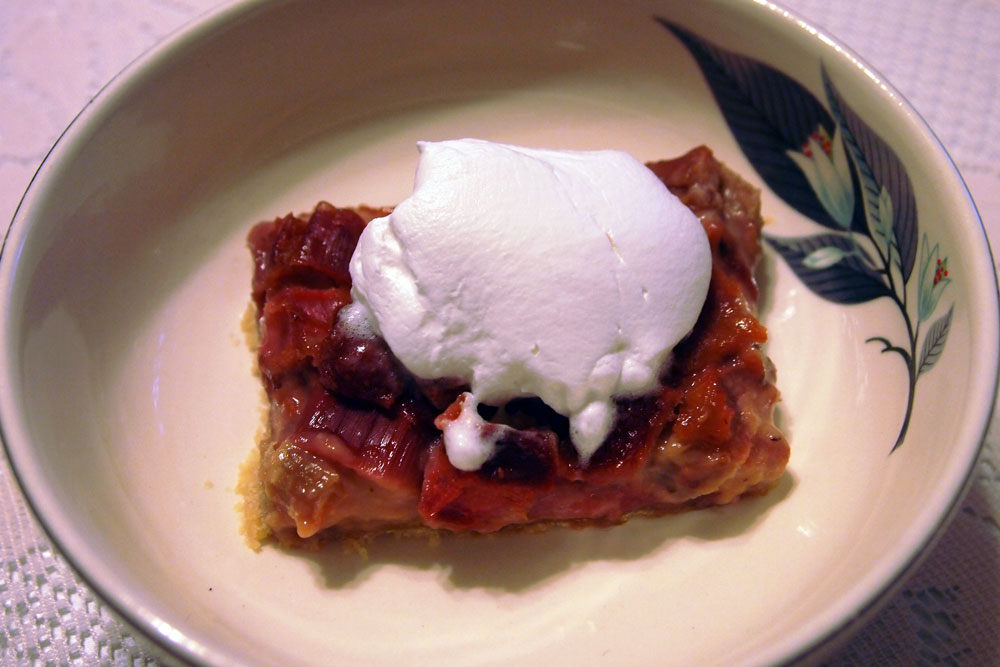
Strawberry Rhubarb Bars
Plan Z Phase: This is a Z3.5 (ZReboot 3.5) recipe. Photo submitted by Plan Z Dieter Nancy.
This is a wonderful, sweet treat. I cut the flour in half so we would still have a gluten element to hold the crust together but dropped the glycemic index considerably by using coconut flour for the other half. This won’t make the crust taste like coconut. It just makes it taste sweet.
Serves:
Serving size, one 2” square with topping. One pan makes 15 servings.
Ingredients:
For the Crust
- 1 cup of coconut flour
- 1 cup of regular white flour
- 1 cup of cold butter
- 1 Tbl of Truvia
For the Filling
- 5 cups of thinly sliced rhubarb
- 2 cups of sliced strawberries
- 1/3 cup of Truvia
- 1 tsp salt
- 8 egg yolks
Topping
- TruWhip or whipped cream
Preheat oven to 350 degrees. Put the flour, butter and Truvia in your food processor. Blend until the mixture resembles coarse crumbs. Press the crumbs into the bottom and up the sides of a 9" x 13" baking dish. Bake for 15-17 minutes or until the crust just starts to get a light tinge of beige.
While the crust is baking you can assemble the filling. In a large bowl mix the egg yolks, Truvia, and salt. Stir thoroughly. Then add the rhubarb and strawberries. Mix and pour on top of the baked crust.
Return to the oven and bake for 50 – 60 minutes more so the filling gets set.
When cool, store in refrigerator. Cut into squares and serve topped with Truwhip (this is like Cool Whip but sweetened with Truvia) or homemade whipping cream sweetened with Truvia.
Enjoy!
Cheers,

Rhubarb Compote
Plan Z Phase: This is a Z3.5 (ZReboot 3.5) recipe.
Servings: Serving size 1/3 cup
Ingredients:
- 1 pound of fresh rhubarb, chopped (frozen would work too - make sure there is no sugar added)
- 1 cup of water
- 5 tsp of Truvia
- 3 tsp of organic vanilla
- 1 Tbl of maple syrup (optional)
Instructions:
Put all ingredients in a medium sauce pan. Cook on medium until it gets to the texture you like. You can cook it til it’s soft and chunky or keep right on going until it dissolves to mush.
Serve this on top of SO Delicious vanilla ice cream (portion size ½ cup of ice cream) or on top of dieter Amy’s almond pound cake. Or eat plain with whipped cream on top.
Enjoy!
Cheers,
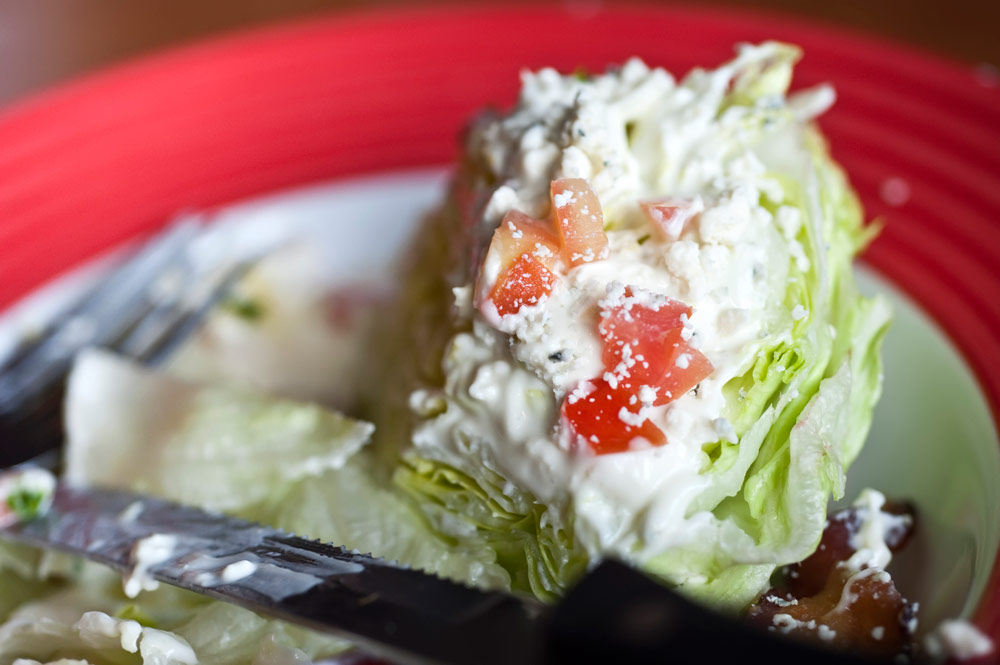
Blue Cheese Dressing
Plan Z Phase: This is a Z3 (ZReboot) recipe. This dressing is a wonderful addition to Plan Z offered up by dieter Nancy. PLEASE KEEP IN MIND that fresh dressings do not keep like the ones in the store that contain all of the preservatives. Plan to use this up in just a few days. Keep refrigerated at all times too.
Servings: Yields approximately 1 cup
Ingredients:
- ½ cup mayonnaise. Try to find one made with olive oil.
- 2 oz sour cream
- 2-3 oz crumbled blue cheese
- 1 Tbl lemon juice
- clove of garlic, crushed
- 1 tsp of onion powder
Instructions:
Blend well in blender.
Delicious to use on salad. You can add extra blue cheese, too for a chunky effect.
Enjoy!
Cheers,
Sour Cream Enchilada Casserole
Plan Z Phase: This is a Z3.5 (ZReboot 3.5) recipe. You can make these with chicken as recommended in the recipe ingredients or you can make it with leftover turkey from the feast, pork roast that has been chopped up or shredded or even cooked ground sirloin.
Servings: Serves 6 – 8 as an entrée. 10 for smaller buffet portions.
Ingredients:
- 1 Tbl of olive oil
- 2 Tbl of minced garlic (jar garlic will work for this dish)
- 1 onion, chopped
- 1 jalapeno minced
- 1 Tbl of flour (I use gravy flour)
- 1 cup of organic chicken broth
- 28 oz of diced tomatoes, drained
- 1-1/2 cups of sour cream
- 2 cups of cheddar cheese divided
- 3 large skinless chicken breasts poached and shredded
- 4, 8” flour tortillas. You can find low carb tortillas and they taste just as good.
- olive oil spray
Instructions:
This recipe calls for shredded chicken breasts. If you are using whole chicken breasts to make your shredded chicken, here's what you'll need to do: put your chicken breasts into a large sauté pan. Cover them with water and poach on medium-high for 15 minutes until no pink shows in the chicken. Shred the breasts with two forks (use one to hold the meat in place and the other to slowly pull the chicken apart) or you can just chop the meat into small pieces.
Preheat oven to 350 degrees.
In a large sauté pan on medium heat add the tablespoon of olive oil. Then add the onion and the garlic as well as the jalapeno. Cook on medium until the veggies soften. Add the flour. Stir. Then add the chicken broth and the tomatoes. Cook on medium to evaporate most of the liquid. This will take 5 – 10 minutes. Stir periodically. You can use this time to shred your meat.
When ready to assemble:
Spray a 9" x 13" ovenproof casserole dish with olive oil spray. Place two tortillas in the bottom and up the sides of the casserole dish. You can have the flavor of enchiladas with a LOT fewer carbs doing it this way. In a mixing bowl add the meat, one half cup of the cheese and the sour cream. Mix well. Layer that mixture in the casserole dish on top of the tortillas. Then add the next two tortillas the same way. You are encasing the sour cream and meat mixture to separate it from the sauce.
On top of that tortilla layer pour on the tomato sauce mixture. Then top with the last cup of cheese. Spread it across the tomato sauce. Bake for 30 minutes until bubbly.
When it’s done, remove it from the oven and let it sit for 10 minutes so it firms up. That way when you cut it the squares will hold together better.
Enjoy!
Cheers,
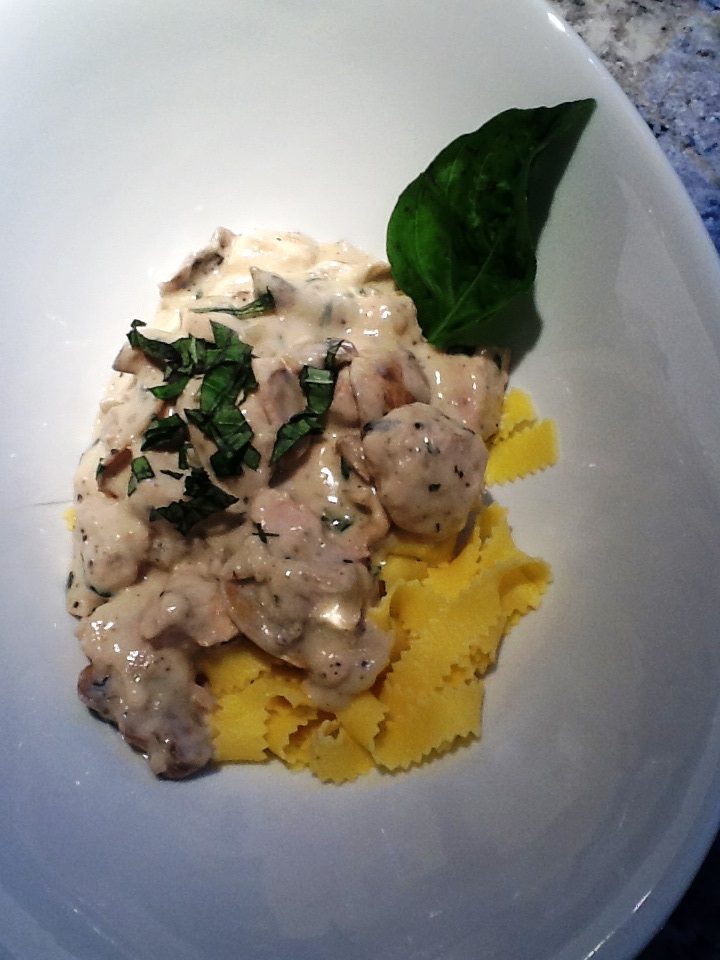
Basil Cream Chicken
Plan Z Phase: This is a Z3.5 (ZReboot 3.5) recipe.
I adapted this dish from one I saw in a recipe site. I had to change it quite a bit to “Zola-fy” it but it was just so decadent and creamy I had to share. You can do pasta with this dish as long as you don’t do it very often. I eat a cup of pasta about 4 times a year. That’s it. Most times I put the pasta in the bottom of a bowl and put the sauce on top. By the time I get to the pasta I’m usually pretty full so I barely eat any of the noodles. That’s a good habit I have built and it has served me well.
*cooked fettuccini. If pasta isn’t your thing you can serve this over a cup of shredded, cooked zucchini to keep it low carb or even a half cup of mashed potatoes. Just treat the mashed potatoes the same as you would pasta; sparing portion sizes and not often.
Serving Size: Serves 4
Ingredients:
- 1 pound of boneless chicken breast but into cubes.
- 1 cup of minced shallots (if you can’t get shallots, sweet yellow onion will do)
- 1 pound of sliced, fresh mushrooms. You can choose how fancy you want to get. I used half button mushrooms and half shitake)
- 2 Tbl of olive oil
- 3 Tbl of butter
- 1 Tbl of flour
- 2 cups of chicken broth
- 1 cup of whipping cream
- 3 Tbl of minced fresh basil
- ¼ tsp of grated fresh pepper
- 1 tsp of grated sea salt (or to taste)
- ½ cup of grated parmesan cheese
Instructions:
In a large sauté pan heat the olive oil and cook the chicken cubes, mushrooms and shallots on medium high until no pink remains in the chicken. Stir often to keep them from sticking.
While this is going on you can take out another sauté pan and add the butter. Stir in the flour and then add the chicken broth and the cream. Stir. Cook until the sauce starts to thicken. Then add the salt, basil and pepper. Taste and continue to cook until it’s a thickness you like. Adjust seasoning to your palate.
Combine the chicken mixture with the cream mixture and you’re ready to serve. You can stir the Parmesan into the mixture or serve it on top. Your choice.
Serve over pasta, zucchini or potatoes. If you are looking for a great casserole you can put a layer of pasta in the bottom of the casserole and stir the chicken in on top. Serve warm on the buffet.
This also reheats well in the microwave at work!
Enjoy!
Cheers,