
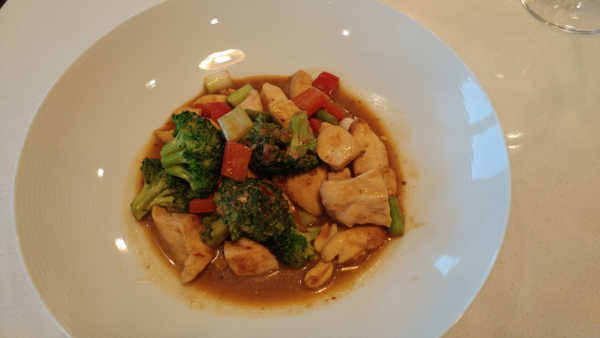
Sichuan Stir-Fry Chicken
Plan Z Phase: This is a Z3 (ZReboot) recipe.
Servings: serves 3 - 4. Can be doubled easily.
This is a “clean out the vegetable drawer meal.” You can take many different vegetables and chop them up to add to this meal. I’ll give you the basics on how to make the chicken dish and then I’ll list the veggies I used. You can let your imagination run wild.
This is very much like kung pao chicken you’d find on an Asian menu. There is some zip to it but you can decide how spicy you’d like yours. Don’t be intimidated by the ingredient list. This comes together fast.
This dish would also be nice made with narrow strips of steak.
Marinade:
- 2 Tbl of Coconut Aminos or Braggs Aminos
- 2 Tbl of sake (if you don’t like alcohol, you can just leave this out)
- 1 tsp of cornstarch
- 1 tsp of sesame oil
- 1 large, skinless chicken breasts cut into cubes or a package of chicken tenders cut into bite-sized pieces.
Mix your marinade and then add the chicken. Stir. Put in your refrigerator and let the flavors meld for about 30 minutes.
Now you’re ready to make the chicken, the sauce and assemble:
- 2 Tbl of ghee or olive oil
- ½ cup of chicken broth or bone broth
- 2 – 3 Tbl of Coconut Aminos or Braggs Aminos
- 2 Tbl of sake (again, this is optional)
- 1 Tbl of Worcestershire sauce
- 1 tsp of cornstarch
- 1 tsp of sesame oil
- 1 Tbl of minced ginger (jar ginger will work)
- 1 Tbl of minced garlic (jar garlic will work)
- ¼ tsp of hot pepper flakes (or to taste)
- 1 cup of dry roasted cocktail peanuts
Instructions:
In a large saute pan, heat your ghee or oil. Put in the chicken and cook on medium-high heat for about 5 minutes or until there is no pink left in the chicken. Remove the chicken and set it aside, but you can still use the same pan. You might need to add a bit more oil.
In a small bowl, combine the broth, aminos, sake, Worcestershire, cornstarch, and sesame oil. Stir and let it sit for a minute.
In the saute pan add the little bit more oil and your veggies. Begin to saute them. Add the ginger, the garlic and the pepper flakes. Saute a few minutes until the veggies are still a bit crisp but fairly well cooked. Pour the sauce on top and stir. Add the chicken and peanuts. Continue to saute until the sauce begins to thicken. Should only be a minute or two.
For this dish, the veggies I used were: broccoli florets, asparagus pieces, chopped red bell pepper, and green onion bites. Some others I think are winners are: other peppers, snow peas, carrot shreds (a few for color), celery, zucchini chunks, cherry tomatoes and more…
You are now ready to serve.
Enjoy!
Cheers,

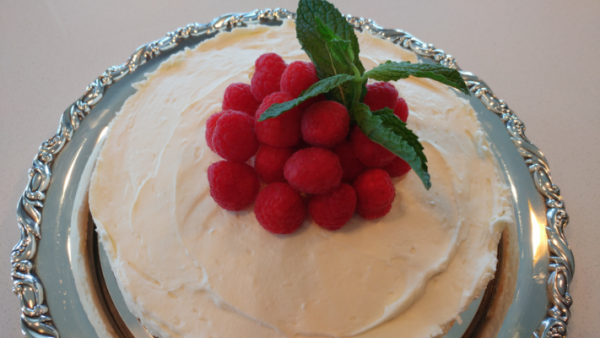
Lemon Mousse Torte
Plan Z Phase: This is a Z3.5 (ZReboot 3.5) recipe
Servings: serves 16
Every year I make a new lemon dessert for my husband’s birthday. This is #34. With each passing year, I am still challenged but I come up with something delightful every time. This is light, fluffy and super smooth. For a “fancy” dessert, this one is easy to make. Just take your time and follow the directions. You’ll need a few pieces of equipment too but nothing super expensive.
I splurged on this dessert using a cookie base and also some white chocolate. That’s why it’s listed as Z3.5. It’s still a pretty low carb dessert if cut into small pieces. I used the Keebler Sandies because they are one of the lowest carb cookies I could find on the shelves that would work for a crust. Super yummy result.
Ingredients:
- 1 1/2 cups of Keebler Cashew Sandies ground into crumbs (you can use a food processor for this but if you don’t have one you can put the cookies in a bag and crush them with a rolling pin (old style).
- 4 Tbl of melted butter
- 1 (.25 oz) envelope of unflavored gelatin
- 2/3 cup of freshly squeezed lemon juice
- 2 cups of whipping cream, divided
- 8 oz of white chocolate, chopped into small bits
- 3 (8 oz) packages of full-fat cream cheese, softened. (You can leave them on the counter for a couple of hours or unwrap and put them in a bowl and microwave on medium for about 15 – 30 seconds to soften them)
- ¾ cups of Swerve or ZSweet. These are new sugar substitutes you can order online. Either brand will work.
- *See below for garnish options
Directions:
Get out your 9” springform pan. Pour in your crumbs. Mix with the melted butter to form mushy crumbs. Spread them across the bottom of the pan to cover the bottom and maybe a tad up the side. To make this process easier and less messy, I spread a piece of cling wrap over the top and use that to sort of slide the crumbs around so they can spread evenly across the surface.
Set aside.
In a small bowl, add the lemon juice. Sprinkle the gelatin over the top and stir to combine. Then let that sit. Bring a half cup of whipping cream to a low boil in a small saucepan. Just heat it enough so it begins to bubble on the sides. Remove from the heat and put in the white chocolate bits. Wait a minute or so for the chocolate to get heated and then stir it with a small whisk or fork until it’s smooth melted chocolate. Now mix in the gelatin mixture and set aside to cool down a bit. In another bowl, beat the other 1.5 cups of whipping cream until they form stiff peaks. Don’t overbeat or it becomes butter. Set aside.
In yet another bowl (sorry about all the dishes) beat the cream cheese with the sweetener until it’s fully blended. Slowly blend the white chocolate mixture into the cream cheese mixture. Carefully fold the whipped cream into the cream cheese mixture. Make sure you fold gently and thoroughly. The result will be a creamy color; not a bright yellow. If you want a brighter yellow you could add a few drops of food coloring but that’s just added chemicals.
Pour into your prepared pan on top of the crust. It will fill the pan pretty full. Might even have a bit leftover to taste test while it is still dreamy-soft. Level it off with a knife. Cover the whole thing with plastic wrap and chill it for at least 6 hours. It can even stay in the fridge overnight. Sort of like a cheesecake, this dessert continues to build with time.
Leftovers will keep for a few days before the crust will get kind of mushy, but it will still taste delightful.
When you go to serve, I suggest you remove it from the refrigerator for about 15 minutes before you cut it. Let it soften just a tad. Then slide a sharp knife around the edge of the pan to loosen it. Pop the ring mold to reveal your dessert. Cut it into 1.5” pieces with a sharp knife. Be sure to cut down through the crust and maybe use a small spatula to get under it so each piece will come out whole.
*You can garnish all kinds of ways: Choose one or more:
- Whipped cream dollops
- Slices of lemon
- Raspberries piled high or around the sides
- Mint garnish with any of the above
Enjoy!
Cheers,
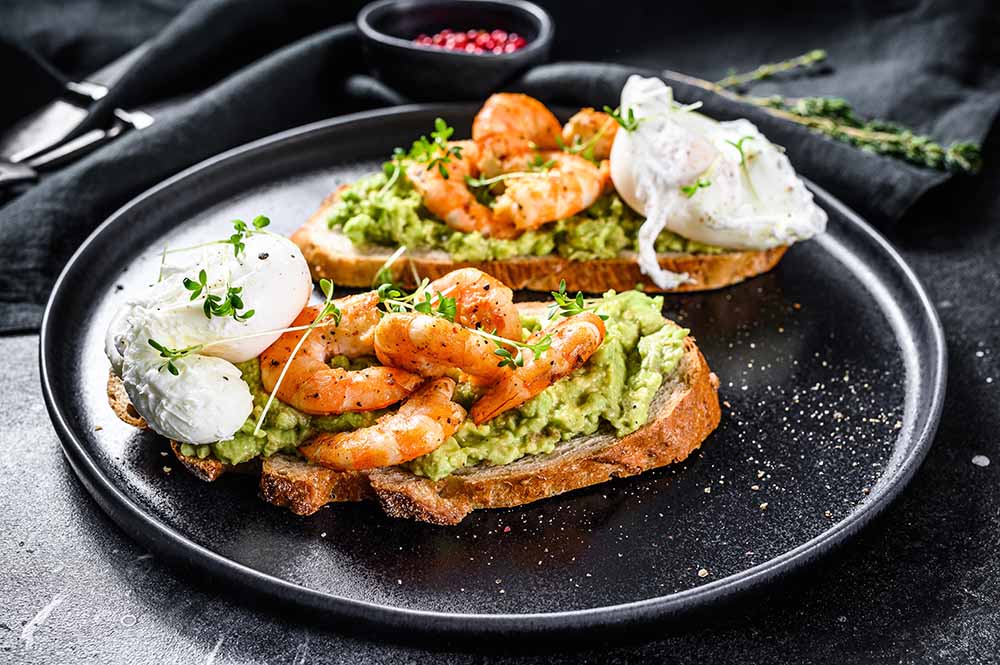
Mexican Avocado Toast
Plan Z Phase: This is a Z3.5 (ZReboot 3.5) recipe
Servings: Serves 2. Can be doubled easily.
Avocado toast is all the rage in hip restaurants. There are a zillion different variations; most of them served as a breakfast, light lunch or an appetizer. Basically, it’s toast with smashed avocado spread across it and then assorted toppings. I came up with this version for dinner on a day when my husband was craving guacamole.
This is super easy to make and comes together in about 10 minutes. Just be sure to have everything prepped so you can enjoy the cool guacamole with the hot shrimp on top.
For the Shrimp
- ½ pound of cooked shrimp. Remove the tails. You can get whatever size you like, but for this dish I use fairly small ones.
- ½ tsp of paprika. I used smoked Hungarian but you can choose your favorite
- ½ tsp of Italian seasoning
- ½ tsp of grated sea salt (or to taste)
- ½ tsp of black pepper
- ¼ tsp or just a dusting of cayenne (to your taste)
- 2 Tbl of butter or ghee
In a medium bowl, add the shrimp. Sprinkle on the seasonings and stir. Set aside for up to 10 minutes to meld the flavors. I’ll come back to further cooking instructions after I lay out the ingredients for the toast.
For the Toast
- 2 pieces of bread. I use a low carb bread made by Julian Bakery. Look for it at your favorite store or use any bread you want. Just be sure your weight is stabilized before indulging and don’t do it too often.
- 1 Tbl of butter or ghee
- 1 cup of pre-prepared guacamole. Most grocery stores offer fresh guacamole in their produce departments now. I get the mild guacamole because the shrimp are going to be on the spicy side.
- 1/3 cup of shredded cheese (optional)
- poached or fried egg (optional)
For the assembly:
First you will heat your shrimp. Melt the butter in a medium sauté pan. Put in the shrimp and heat on medium. They are pre-cooked so all you really need to do is heat them up. Toss them around a couple of times to get both sides coated in butter. Once they are warm, remove them from the heat.
If you are adding an egg on top, make that now, too. Sometimes I'm in the mood for a soft-poached egg. Sometimes I want my egg fried hard. Sometime I don't want an egg at all. You decide.
While the egg is cooking, you can prep your toast. If you have a toaster you can use that and then butter one side of the bread. I don’t even have a toaster anymore so I spread melted butter on the bread and crisp it up in a frying pan, butter side down. That way it gets crispy on one side and hot. You choose.
Take your toasted bread and put it buttered side down on a plate. Spread about a ¼-1/2 inch (or more to your taste) of guacamole on top of the toast. Then arrange your shrimp and egg on top of the guacamole. While they are still hot, sprinkle on the cheese and serve.
The juxtaposition of the hot shrimp and the cold guacamole with some gooey is just divine.
Enjoy!
Cheers,
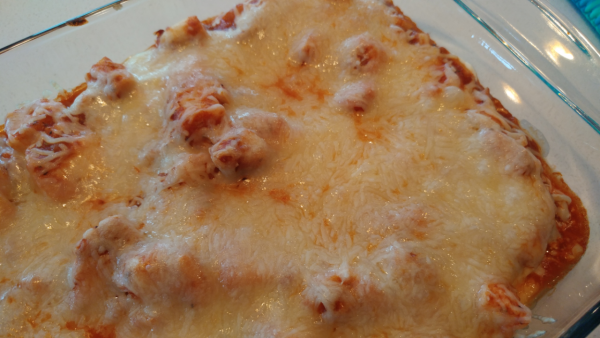
Cajun Chicken Casserole
Plan Z Phase: This is a Z3.5 (ZReboot 3.5) recipe.
This dish is a combination of my recipe for Chicken Mamou and a casserole. Chicken Mamou is a traditional Cajun dish. “Mamou” is their word for Grandma, so this is true comfort food.
There is a pasta addition to this casserole that can be used when you’ve stabilized your weight and are in Z3.5. I never recommend eating pasta on a regular basis. Every few weeks is fine if you keep the amount of pasta low. All of my recipes will be small amounts of pasta if it’s included. Look for other options to vary the dish below.
Ingredients:
- olive oil spray
- 1 package of chicken tenders
- 2 cups of cooked pasta. Traditionally the pasta in chicken Mamou would be angel hair. I like angel hair because you can break the pasta in half to make it easier to eat. It also feels like you are eating more pasta when in fact you’re not. The number of noodles makes it feel like more. You don’t need much pasta; just enough to cover the bottom of the oven-proof pan.
- 1 Tbl of olive oil
- 1 cup of chopped onion
- 1 tsp of minced garlic (jar garlic will do)
- ½ tsp of Italian seasoning
- ¼ tsp of red pepper flakes (or to taste)
- ½ tsp of ground black pepper
- 15 oz. of diced tomatoes (can) or tomato sauce (can) will work too. Just decide your favorite
- 1 Tbl of Worcestershire sauce
- 1 Tbl of Cajun seasoning (or to taste)
- ½ cup of whipped cream cheese
- ½ cup of sour cream
- 1 cup of Monterrey jack cheese, shredded
Directions:
In your 9 " X 9 ” ovenproof pan, spray in the olive oil. Put in the chicken tenders and bake at 375 degrees for 15 – 20 minutes or until done. When they are no longer pink, you can take them out and chop them into bite-sized pieces. Don’t wash the pan. You can use it when you assemble the casserole.
Get your water boiling and make your pasta.
While that’s happening, you can get the rest of the casserole ready to rock. Take out a medium saute pan. Add the oil and then add the onion. Saute the onion until it’s done and then add it to a bowl. Add the seasonings up through the Cajun seasoning and add the tomatoes to the bowl. Stir it all up.
In another bowl add your pasta and mix it with the cream cheese and the sour cream. Stir to mix it all up into a wonderful coated goodness.
Assembly. Put the pasta in the bottom of the 9 " X 9 " oven-proof pan. Layer on the chicken. Now cover that with the red sauce mixture.
Top it all with the Monterrey jack cheese. Bake in a 350-degree oven for about 20 minutes to heat it through and melt the cheese.
Other options:
You can make this dish totally pasta-free. Add a couple of handfuls of baby spinach to the bottom of the casserole instead of the pasta. You can even add in some other veggies; like bell peppers or zucchini chunks. They would taste great mixed in the white sauce or just plain.
You could alternatively make zucchini noodles and use those instead of pasta. Use your imagination and make this YOUR comfort food.
Email me or add your own ideas to the ratings section on the recipe page.
Enjoy!
Cheers,
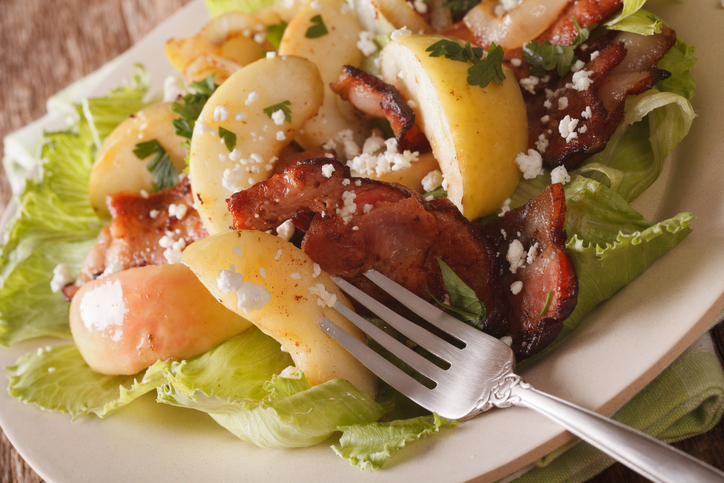
Bacon-Apple Chicken Salad
Plan Z Phase: This is a Z3 (ZReboot) recipe.
Everything’s better with bacon. Right? Enjoy this crunch-filled chicken salad. If you want even MORE crunch you can consider adding some chopped celery to the mix too.
Servings: Serves 4
Ingredients:
- 1 whole rotisserie chicken from the deli (I get a plain one). Pull it apart and cut the meat into cubes. Toss the skin and the carcass. You’ll end up with about 4 cups of chicken.
- 1 bunch of green onions, chopped. (wash, trim and chop white and light green parts only)
- 1 large apple, chopped. (I use a big red variety and don’t peel it, just wash and chop and toss the core)
- 5-6 pieces of bacon cooked crispy
- 1 cup of mayo (approximate; depends on how creamy you like your chicken salad)
- Sea salt and pepper to taste. I use lots of pepper.
- I also dust my chicken salad with a whisper of cayenne. Not to make it hot. Just to give it a little brightness.
Instructions:
Put all of the ingredients in a bowl and stir.
Serve on top of a salad or toast one piece of a low-carb bread, butter it and serve open-face. Julian’s Bakery makes a nice low-carb whole wheat. I don’t eat it often but when I do I feel spoiled.
Enjoy!
Cheers,
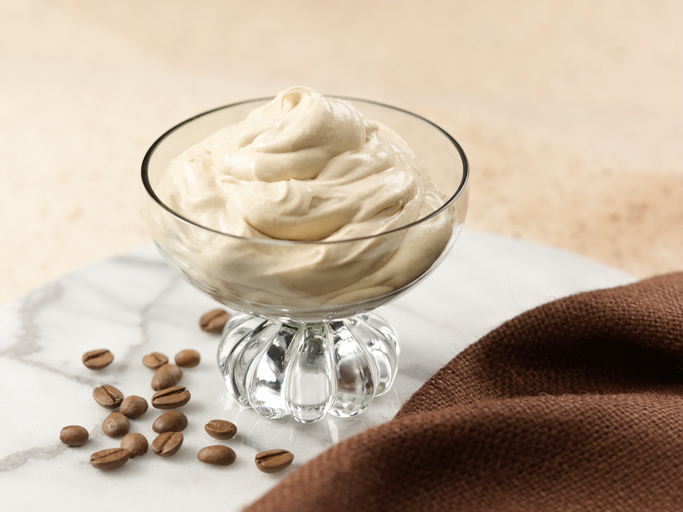
Java Fluff
Plan Z Phase: This is a Z3 (ZReboot) recipe.
So maybe you just got to ZReboot. You’re craving something smooth and creamy. You want something that tastes as good at that gelato shop downtown, but you’ve learned the sugar is not a great idea. In steps this dessert.
If you are a coffee-flavored dessert lover, your dream boat just docked!
Servings: This will make about 3 scoops of wonder but you can easily double the recipe for more people.
Ingredients:
- 1 block of full-fat cream cheese, room temp. If you don’t have time to let it come to room temp you can take it out of the package, put in a bowl and microwave on high for 15 seconds and that will soften it up.
- 1 Tbl of instant coffee (or instant decaf) dissolved in ¼ cup of water. Just let it sit and it will “brew.” I let it set overnight but you don’t have to. Just give it a good 15 minutes or more.
- 2 tsp of vanilla
- 3 – 4 tsp of Truvia
Directions:
Put the ingredients in a medium bowl and whiz with your hand mixer until it’s fluffy.
Then cover the surface with plastic wrap and put in the refrigerator to chill and firm up. Scoop with an ice cream scoop into your favorite bowl (I use a medium scoop instead of the large one). This tastes so rich you won’t need a big portion.
Enjoy!
Cheers,
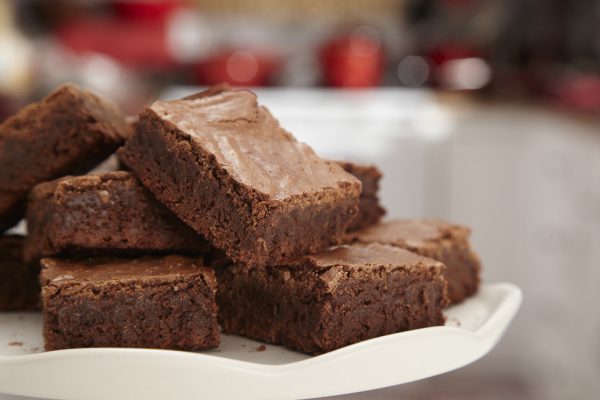
Brownies "Palmer House Style"
Plan Z Phase: This is a ZReboot 3.5 (ZReboot 3.5) recipe
I found this recipe in some historical information I received. Since I love brownies and my family history has some connection to the Palmer House, I thought I’d get this typed up and shared. I did convert it so it’s Zolafied. This is a VERY old recipe… in fact, this is the FIRST recipe for brownies. Brownies were first invented at The Palmer House Hotel in 1893. So these won’t be like the ones in a box mix. These are denser. And they are less sweet than what we are familiar with today. But we can all adapt… and appreciate the original. I hope you’ll try them.
Servings: Makes about 20 brownies. 1 serving per person
Ingredients:
- 7 oz of dark chocolate. Use 70% cacao or even a bit higher
- 8 oz (2 sticks) of butter cut into small pieces
- ½ cup of ZSweet. (Order online. Important you use this or Swerve. They bake well and don’t taste tinny). If your family likes SWEET you can start them off by using ¾ cup and then try to cut them back.
- 4 eggs
- ¼ cup of flour (you are spreading this small amount over a whole pan of brownies so it’s not much)
- 1-2 tsp of vanilla (I love extra vanilla)
- ½ cup of chopped walnuts
Directions:
Preheat your oven to 350 degrees.
Melt the dark chocolate. I use a double boiler but if you’re good with a microwave you can melt it that way. Add the butter bits to the hot chocolate so they melt. Stir to mix them in and the butter will melt fast. Set aside to cool for a few minutes.
In a bowl, add the ZSweet, and flour. Mix. Add the chocolate and stir for 4 – 5 minutes. (They didn’t use a mixer in those days and this actually works better).
Add the eggs and vanilla to the chocolate mixture. Stir to combine.
Spray a 9 X 13” baking pan.
Pour the brownie mixture into the pan.
Sprinkle your walnut bits on top.
Bake at 350 for about 25-30 minutes. Look for a bit of crust to have formed along the edges. If you want to follow the old directions you’ll now turn off the oven and let them sit in the oven for 10 more minutes (optional).
Let cool on the counter and cut to serve.
Another tidbit of history…. In the old days, they melted apricot jam in hot water to make a glaze. They’d glaze the brownies so they would not spoil so fast. We have refrigeration and air-conditioned houses so I left this step off. I serve these unfrosted. If you want to frost them… check out my French Ganache recipe. Make a batch of that and spread it while it’s fairly warm so it’s sort of runny. As the frosting cools it will become firmer. Store brownies in the fridge if you frost them. If you do not frost them you can just cover the pan with foil.
Enjoy!
Cheers,
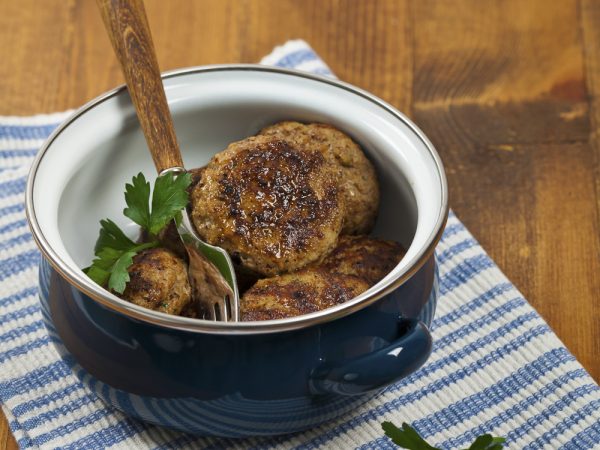
Italian Burgers
Plan Z Phase: This is a Z2 (ZReduction) recipe.
This is a great way to spice up a plain burger. Make it Italian-inspired. I found a recipe online and it just about perfectly lines up with Plan Z.
To make this burger taste extra special, consider topping it with a soup spoonful of spaghetti sauce. You can find one with no sugar in the spaghetti sauce aisle. Just be prepared to read a lot of labels before you find one with no sugar, or I suggest you grab the Rao’s brand. I know that one has no sugar. Just subtract a bit of your veggie portion to compensate for the sauce.
You can grill these outside or in a grill pan in the house.
Servings: serves 2 – 3 depending on how big you make your burgers.
Ingredients:
- 1 pound of ground sirloin (93% lean or more)
- 1 Tbl of Worcestershire sauce
- 2 tsp of garlic powder
- ½ cup of minced onion. I used shallot but you can use either shallot or regular onion.
- A grate of sea salt to taste
- A grate of black pepper to taste
- ½ tsp of Italian seasoning
Instructions:
Mix all of this into the ground sirloin in a bowl. Really get your hands into it and mix in the ingredients. Then form into three 6 oz. patties or 2, big, 8 oz. ones.
Let them sit for at least 30 minutes to meld the flavors. You can even make them in the morning and put them in the fridge. They will have full flavor when you come home to make them.
Spray both sides of your burger and heat your pan or grill. Grill 3 – 4 minutes per side depending on how you like your burger. This will make them medium-ish.
Don’t mess with them a lot. The more you press on them and flip them around, the tougher they become. Just let them cook.
Serving ideas: You can have raw or cooked onion, tomato, and lettuce with these. You can top with mustard or a bit of ketchup. Don’t forget the spaghetti sauce idea too.
Enjoy!
Cheers!
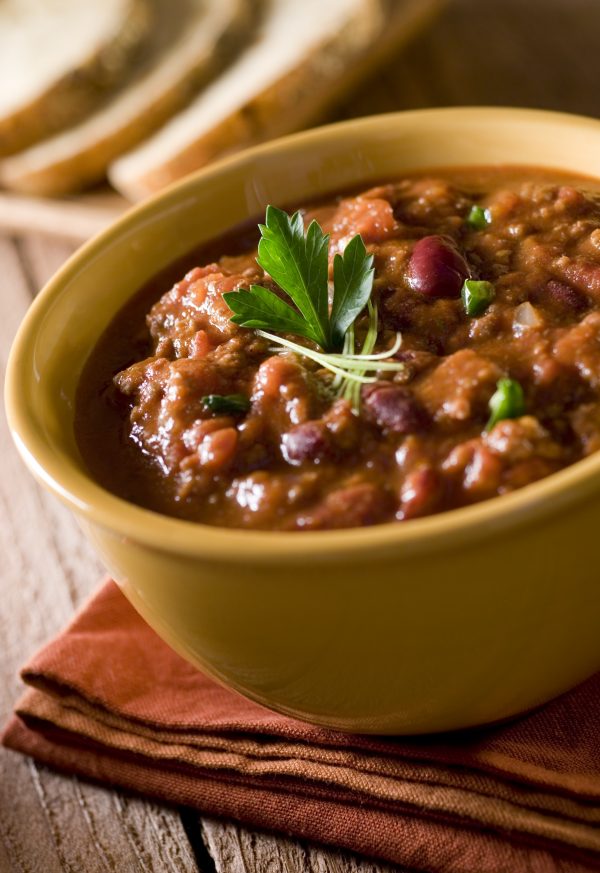
Chili with Beans
Plan Z Phase: This is a Z3.5 (ZReboot 3.5) recipe
Servings: Serves 4
This is a simple chili. It’s a takeoff from an old Betty Crocker recipe. Can’t get much simpler than that!
You can always add more spice. This was enough for me but you can have the hot sauce standing by if you want more heat. You could also add more veggies like bell peppers and even jalapenos for more kick. Just take it easy on the beans and you’ll be okay. If you gain, back off.
Ingredients:
- 1 Tbl of olive oil
- 1 medium onion, chopped
- 1 lb of ground beef
- ½ tsp of garlic powder
- 1 Tbl of chili powder
- 2 tsp of oregano
- 1 tsp of cumin
- grated sea salt and pepper to taste
- 1 can (15 oz) of diced tomatoes. I used fire roasted by Hunts. You choose your favorite
- ½ can of Bush’s Chili Hot Beans. I used the medium heat version. I choose Bush’s because they have a lot of gravy in them. It’s not so many beans that are really the secret but that you have the gravy/bean taste throughout the chili. This helps with that rather than just plain canned pinto beans.
Directions:
In your medium soup pot, add the oil and then the ground beef. Begin to cook it on medium. Break it up into bite-sized pieces. Then add the onion and the garlic powder. Cook, stirring often until the meat is totally cooked through.
Add the rest of the ingredients. Bring to a boil and then turn down to simmer on low for 15-20 minutes to meld the flavors. Stir it once in a while.
Serve.
You can put leftovers in the fridge. Often it tastes even better the next day. This transports to work really well too. Just reheat in the microwave.
Enjoy
Cheers,
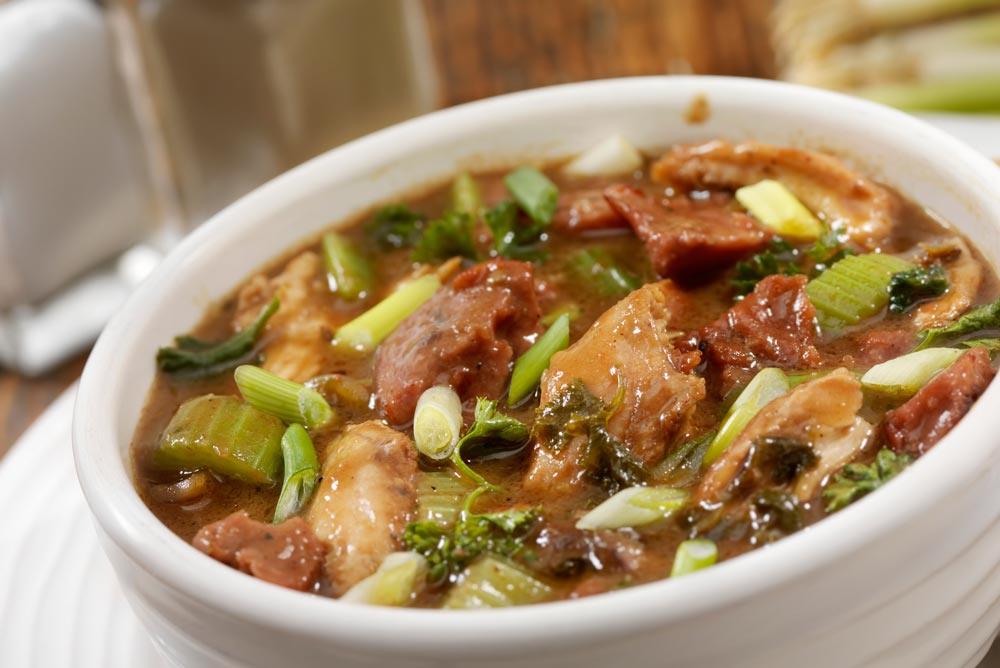
Sausage Chicken Gumbo
Plan Z Phase: This is a Z2 (ZReduction) recipe
This tastes authentic without all the cooking time. Cajun cooking: BIG YUM. If you are in Z2 you are not going to add the flour or oil. You’ll just spray the bottom of the pot and add the veggies. You’ll also skip the mushrooms but don’t fear, this will taste great anyway.
This comes together in a flash and tastes just as good as the recipes that cook for hours.
Servings: Serves 4. Serving size is 1-1/2 cups and includes your veggie and protein portion for this meal.
Ingredients:
- 1 Tbl olive oil (If in Z2 just use olive oil spray)
- 2 tsp of flour (Skip if in Z2)
- ½ green bell pepper, chopped
- ½ medium onion, chopped (You choose your favorite onion). ½ -3/4 cup total
- 4 oz of sliced mushrooms (Skip these if in Z2)
- 1-1/2 cups of cooked chicken, shredded or chopped (If your grocery store has a salad bar section, they usually have cooked chicken ready to go. Otherwise this is about 2 small chicken breasts cooked or one larger one)
- 2 Aidell’s Cajun sausages cut into coin-sized slices. (I cook these to brown the sides a bit before I add them but it’s up to you)
- 1-2 cups chicken broth (Depends on how soupy you like your gumbo)
- 1 stalk of celery, chopped
- 1 can (14.5oz) of diced tomatoes (You can choose the ones with onion and pepper added for more zip)
- 3 tsp of Worcestershire sauce
- 3 tsp of minced garlic (Jar garlic will work)
- 1 tsp of Bragg’s aminos or coconut aminos
- grated sea salt and pepper to taste
- 3+ dashes of Tabasco (Remember you can always add more to your taste)
Optional
- chopped green onion for garnish
Instructions:
Heat the oil in a medium saucepan. Add the flour and stir. Cook, stirring regularly until it begins to brown. This the process called making a roux. Very common in southern cooking.
Add the pepper, onion, and mushrooms. Cook until they are all soft. Stir often.
Add everything else. Bring to a boil and then turn it down to simmer. Cook 20 minutes to meld the flavors. Stir regularly so it doesn’t get stuck to the bottom of the pan. Garnish with chopped green onion.
*If you are a fan of okra or file powder, you can add some okra (maybe a cup, sliced) along with the veggies. You dust file powder on top at the end of cooking. That’s a Cajun tradition. They go through a lot of file powder in a Cajun household. I bought it once but then it just sat in my cupboard for years. I’d not do it again, but if you want to be “official” you might consider it.
Enjoy!
Cheers,
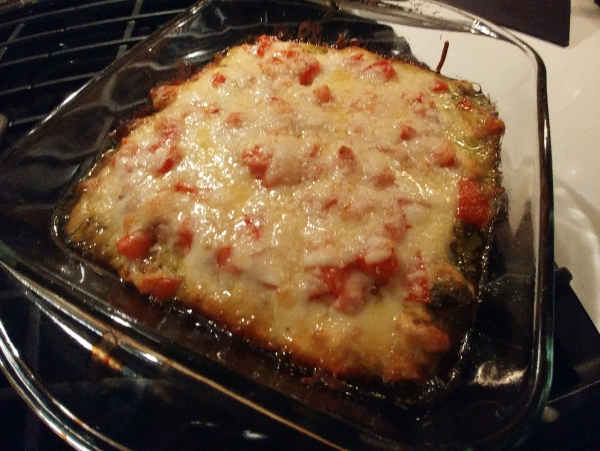
Italian Chicken Pesto Bake
Plan Z Phase: This is a Z3 (ZReboot) recipe
This makes cozy comfort food. You can put it together pretty fast and pop it in the oven so you can do other things while dinner finishes up. I like dishes like this because it gives me time to load the dishwasher with the cooking tools and the kitchen is cleaned except for the actual eating dishes before I even sit down for the meal. Perfect dish for a potluck too.
Z3.5 with pasta added
Servings: Serves 4 and can be doubled to fit in a 9 ” X 13 ” casserole
Ingredients:
- 1 package of chicken tenders, cubed
- 1 Tbl of olive oil
- ½ cup of chopped onion or shallots
- ½ cup of mascarpone cheese (if you don’t want to use this you can use cream cheese)
- 1/3 – ½ cup of prepared pesto (or make homemade). (Prepared pesto can be found in the Italian section in little jars or sometimes there is fresh pesto in produce). Amount is to your liking
- Sea salt and pepper to taste. I also add a light dusting of cayenne to brighten the flavor (optional)
- 2 Roma tomatoes, diced
- 1.5 cups of shredded mozzarella (or I used a mozzarella/provolone combo)
- ½ cup of grated parmesan
- Optional: A cup of cooked pasta (your choice of noodle. I used angel hair.) You only need enough to cover the bottom of the casserole. This keeps the carbs to a minimum. Or you can spiral slice a zucchini into noodles. If you use zucchini you can consider this your Z3 recipe. Z3.5 is only if you use pasta. Lastly, this can be made with no addition to the bottom of the casserole. All versions will taste great.
Directions:
Preheat oven to 375 degrees
Spray the bottom of your 9 ” X 9 ” oven-proof casserole dish. (Round works too)
Get the pasta cooking if you are going to use it. While it boils you can work on the rest of the meal.
In a medium saute pan add the olive oil, and the chicken. Cook chicken for about 10 minutes or until it’s almost cooked through. Add the onion and continue sauteing until the chicken is completely cooked. Add the mascarpone and melt it on medium-low. Stir it around in the chicken to make it saucy. Season with salt, pepper, and cayenne.
Assembly:
If you are using pasta, put the cooked and drained pasta in the bottom of the casserole. Layer on the saucy chicken. Then spread the pesto over the top of the chicken. Add ½ of the mozzarella and ½ of the tomato. Then layer on the rest of the mozzarella and the last of the tomato.
Bake at 375 degrees for 20 minutes. Then add the parmesan cheese on top and bake 10 minutes more or until it just starts to brown up a bit. Take the casserole out of the oven and let it sit to cool for about 10 minutes before you serve. Otherwise, you might burn your mouth and not enjoy it nearly as much.
Enjoy
Cheers,
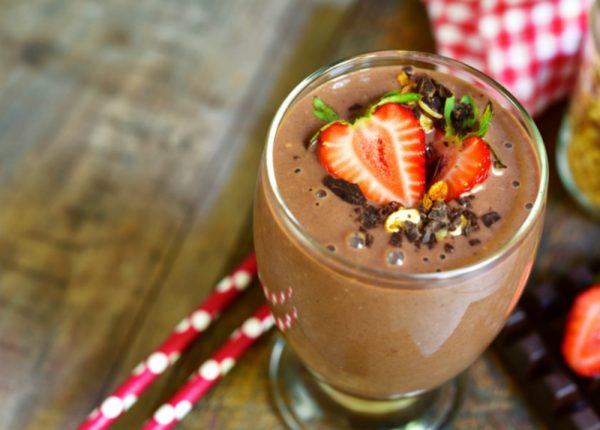
Cocoa-Fruit Superfood Smoothie
Plan Z Phase: This is a Z3 (ZReboot) recipe. Adding the almond butter and peanut butter makes it smooth and delicious. Almost a chocolate peanut butter cup, but exceedingly good for you.
Servings: Serves 1
Ingredients:
- 2 cups of unsweetened Almond or Coconut Milk
- 2-4 Tbl unsweetened Whey Protein or Hemp Protein or Rice Protein
- 1 Tbl ground flax seeds
- 1 Tbl organic cacao powder
- 5 drops of liquid stevia
- 1/3 cup of frozen organic berries (strawberries, raspberries, blueberries, blackberries or mixed berries)
- 1 Tbl unsweetened almond or peanut butter (optional)
Instructions:
Pour almond milk into Magic Bullet or blender. Add the rest of the ingredients in order.
Put the frozen berries in last. Blend for at least 60 seconds.
The best advice I’ve gotten from the smoothie books is to eat your smoothie.
Take a sip and chew it. You’ll have chia seeds and flax seeds. Your saliva will start the digestion process.
Plan on savoring it for at least 15 minutes instead of slamming it.
I add more protein powder on the day of and day after my weightlifting workout.

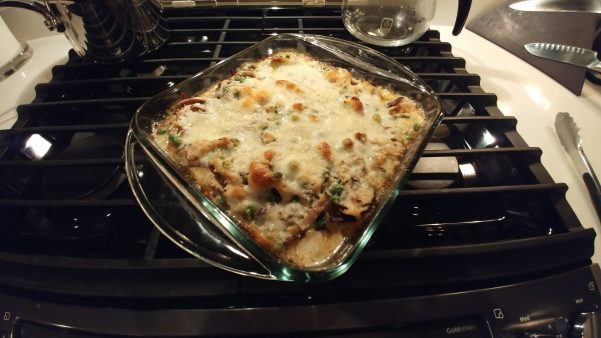
Salmon Casserole
Plan Z Phase: This is a Z3.5 (ZReboot 3.5) recipe
I’m on a real comfort food kick but I have to tell you it’s not affecting my weight. In fact, I ate this last night and lost over 1#. Your body will tell you if you’re going outside of the boundaries of what you can process safely. Just weigh yourself every day and stay on top of it. Pasta doesn’t have to be a no-no.
With this recipe, I’ve included about 25% of the pasta that would be in most similar recipes. That’s a big secret. Just cut it back. You won’t miss it. This casserole focuses on the veggies, the protein and the sauce.
This can be made with bay scallops or shrimp too.
Servings: Serves 6
Ingredients:
- 1/3 cup of dry pasta, cooked. I chose orzo for this recipe but you can choose your favorite. You don’t need much. Just enough to cover the bottom of a 9 " X 9 " casserole dish.
- 12 oz of cooked salmon* broken into bite-sized pieces or shredded chunks. You can do this with a fork.
- 2 cups of shredded cheese. I used a combo of mozzarella/provolone/parmesan. You can switch it up to meet your preferences. Cheddar, fontina, gruyere would all be good options too.
To make the sauce
- 4 Tbl of butter
- 1 cup of minced onion or shallot
- 6 – 8 oz of sliced mushrooms. I used shitake but button or cremini will work too.
- 1.5 cups of whipping cream
- 2 tsp of seasoning. (Pick one. You can choose Italian seasoning, Cajun, dill or even tarragon for a French flair. Whatever seasoning you use will dictate a different flavor to your casserole)
- grated sea salt and pepper to taste
- ½ cup of frozen baby peas
Instructions:
In a pot of boiling water cook your chosen pasta according to package directions. Drain.
While the pasta is cooking you can make your sauce.
In a large saute pan, melt the butter. Add the onion and the mushrooms. Cook until they wilt. Stir often. Add your seasoning and the cream. Add your salt and pepper to taste. Turn up to a slow bubble. Stir often and watch the cream start to thicken. Don’t let it boil over. Turn it down if it gets bubbling too much. This will only take about five minutes and your cream will start to thicken up. Add your peas and turn it off.
Now assemble your casserole.
Spray the bottom of your casserole dish. Add the pasta. Put your cooked salmon (or other choice) on top.
Sprinkle half of your cheese mixture on top of the salmon. Pour all of your sauce over the cheese. Then top with the rest of the cheese.
Pop this in your oven at 350 degrees for 25 minutes or until you get a little bit of browning to the cheese. Let sit about 10 minutes before you serve so you don’t burn your mouth.
*To roast salmon quickly. Set oven to 400 degrees. Place salmon in an oven-proof pan and let it roast for approximately 20 minutes for salmon to be cooked through. Then just place it on a cutting board and shave off the protein with a fork. Toss the skin. You could also use canned salmon for this dish. I’m just a fan of fresh.
Enjoy,
Cheers!
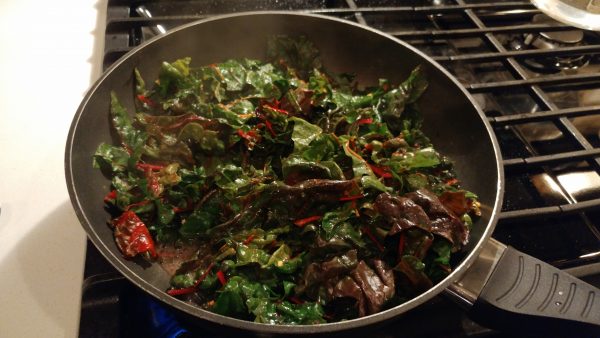
Braised Greens with Toasted Pine Nuts
Plan Z Phase: This is a Z3 (ZReboot) recipe
A Quick and simple side dish. And so healthy.
Ingredients:
- 12 oz of greens. I used Swiss chard because I think it’s so pretty, but you can also use things like kale, collard greens or even spinach. Clean the greens before you cook. Remove stems. Cut or tear the greens into 2” (or so pieces)
- 1 tsp of olive oil
- 1 tsp of minced garlic (jar garlic will work fine)
- 1 cup of chicken stock or bone broth
- 1 Tbl of apple cider vinegar
- ¼ tsp of hot pepper flakes or to your taste
- 1/2 cup of toasted pine nuts*
Directions:
In a large saute pan add your olive oil. Add the garlic and saute for just a few seconds. Add the greens and saute for a minute or more. Lightweight greens will only take a minute.
Then add the chicken stock or bone broth, the cider vinegar and the pepper flakes. Cover and cook the greens until they are tender. The lighter greens will cook faster. Hearty things like kale will take a little longer.
Take off the heat and stir in your pine nuts.
Serve hot.
*to toast pine nuts.
All you need is a clean saute pan. Put in the pine nuts and heat them on medium-high until they start to brown on the edges. Stir them regularly to keep an eye on them. One second they will be toasted the next they will burn. This will only take a few minutes to keep a close eye.
Enjoy
Cheers,
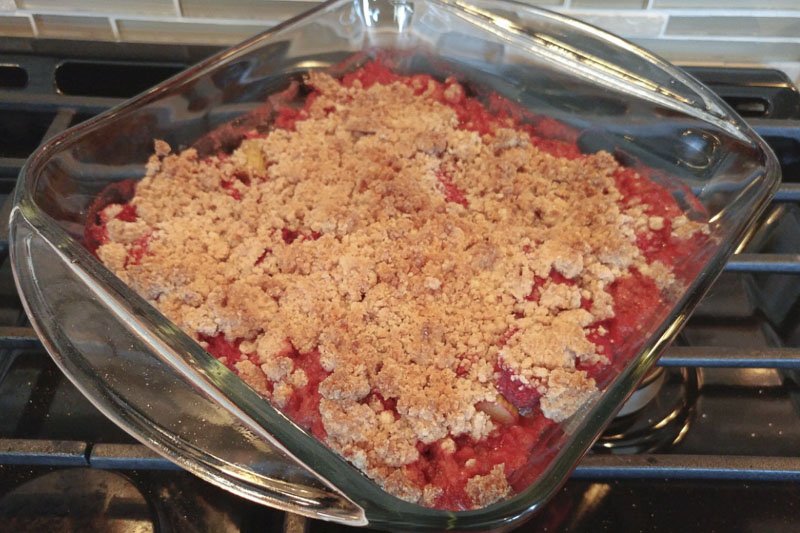
Strawberry Rhubarb Crisp
Plan Z Phase: This is a Z3.5 (ZReboot 3.5) recipe
Rhubarb is a summer favorite. 1 pound makes about 2 cups cooked, and the redder the stalk the sweeter it will be, so take a good look while you’re in the grocery store to get the sweetest bunch you can find. My version here is perfect for ZReboot 3.5 and ZLife, sweetened with stevia, and you have your options of flour to make the crumbly aspect of it.
Servings: Serves 6-8 people
Ingredients:
- 3-4 cups of fruit, ½ rhubarb, ½ strawberries. You can use the frozen kind if they don’t have any added sugar. If you go that route make sure to buy them pre-sliced!
- ½ tsp grated sea salt
- ½ cup ZSweet or Swerve (granulated Stevia sweetener)
- 1 1/2 cup flour – (either coconut, almond or regular flour will work)
- ½ tsp cinnamon
- ½ tsp nutmeg
- 1/3 cup melted butter
Directions:
Preheat your oven to 350 degrees and set out a 9” x 9” baking pan.
Begin by chopping the rhubarb into ½ inch pieces or slightly smaller chunks and spreading it across the pan. If you’ve bought fresh strawberries, cut the tops off and slice them top to bottom thinly, but not so thin that they don’t hold together. This is where buying pre-sliced strawberries can be a real time saver. Just make sure they don’t have any sugar added to them! Add the strawberries to the pan and then sprinkle the salt evenly over the fruit.
Mix everything else -- the flour, ZSweet, spices, and butter in a medium-size bowl till it’s crumbly or a bit lumpy. Spread this across the top of the fruit as a layer and bake at 350 for 40-50 minutes. The crust should cook through and fruit will be soft and gooey. Remove and let cool for about 10 minutes to enjoy warm.
Enjoy!
Cheers,
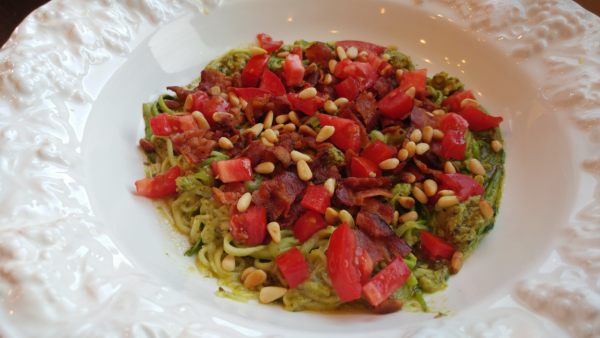
Zucchini Noodles with Avocado-Pesto, Bacon and Chopped Tomato
Plan Z Phase: This is a Z3 (ZReboot) recipe
This dish is rich and satisfying. When you get to ZReboot your body craves fats and the bacon and avocado are the perfect combo. Eat this anytime!
Servings: Serves 4
Ingredients:
- 2 small-to-medium zucchinis, spiralized to make noodles
- 2 Tbl of olive oil or ghee
For the sauce:
- ½ of a ripe avocado (Remove pulp from the shell and discard the pit. Save the rest for another dish).
- 3 Tbl of pesto (pre-prepared or homemade)
- grated sea salt and pepper to taste
- up to 3 Tbl of olive oil
Toppings:
- 6 pieces of bacon, cooked crisp and chopped into chunks
- 2 plum tomatoes, diced, or one small, regular tomato
- 3 Tbl of toasted pine nuts*
Directions:
Spiralize your zucchini and set aside.
In a blender (small Bullet blender, a small food processor or even with a fork in a small bowl, if necessary), add your sauce elements. Depending on your avocado and blender power you might or might not need to add extra oil to get the sauce to blend. Just add enough to get it all to liquify. For me, this took opening the blender and mashing the avocado down with a fork a couple of times. It all works out. You can even leave it a little lumpy. Not a problem.
This dish comes together fast as you cook the noodles, so have everything ready.
In a large sauté pan add the oil or ghee. Heat on medium. Add the noodles and toss regularly to cook on medium; just until they are heated and wilt. You don’t want them all falling apart. They are good a little al dente; just like regular pasta.
Transfer the cooked noodles to a big bowl and add the avocado pesto. Toss until the noodles are all covered.
Serve in bowls or on plates. Top with chopped bacon, tomato and pine nuts.
Serve and eat right away. Because the pasta is the only hot part, it can cool off fairly fast. If that becomes an issue, microwaving the dish on high for 30 seconds does the trick to heat it all back up.
*Toasting pine nuts is easy. Just take out a clean, small sauté pan. Put in the pine nuts and heat on medium high until they begin to brown. Take off heat immediately and let them sit. Remove from the pan when they have gotten to your desired amount of brown. I only toast one side but you can toss them around during cooking if you prefer.
Enjoy!
Cheers,
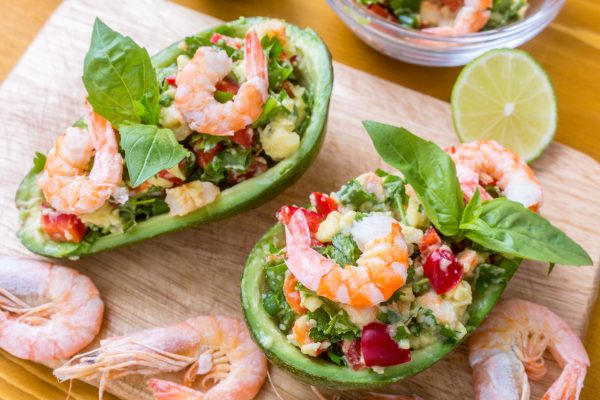
Shrimp Stuffed Avocado
Plan Z Phase: This is a Z3 (ZReboot) recipe
Great on a hot day or evening. Lite dinner with family or guests. Can be served totally cold if that’s more convenient. Just be sure to cut the avocados within a half-hour of serving so they don’t turn brown. The other mixture can be made ahead if you’d like. This can also be made with just about any fish or seafood that you cook ahead. Scallops, halibut, sole and more.
Servings: Serves 2
Ingredients:
- ½ pound of small, cooked shrimp. (31-40 count) I take the tails off and cut them into thirds.
- your favorite meat rub or spice mix. For this one, I use Cajun or Mexican. Approx. ½ tsp.
- 1 Tbl of ghee or butter
- 2 Tbl of plain yogurt or mayo
- 4 green onions, diced. White and light green parts only
- ½ red bell pepper, diced
- 1 Tbl of Worcestershire sauce
- grated black pepper to taste
- a dusting of garlic powder
- grated sea salt to taste
- 1 ripe avocado, halved, take out the pit and toss.
Instructions:
The first thing I do is prep the avocado. Slice off a little bit of the bottom of each side so they lay flat. Then grate a little sea salt over the cut side and set aside.
This all comes together really fast, so if you want your shrimp warm as you serve, have everything ready to go. If you don’t care, (and it tastes great any temp) just follow along and you’ll still be happy.
In a medium bowl, add your diced onion and bell peppers. Mix with the yogurt, Worcestershire, garlic, and pepper. Set aside for the moment.
For the shrimp:
Take out a saute pan. Add the ghee or butter and melt. Add the shrimp pieces. Dust with the rub or spice mixture. The shrimp are already cooked, so I just toss them around so they get hot. Toss the shrimp into the bowl with the dressing mixture. Toss until fully combined.
Put your avocados on plates. Top with the shrimp mixture. The extras will cascade off the sides. This is a good thing.
Serve and Enjoy!
Cheers,
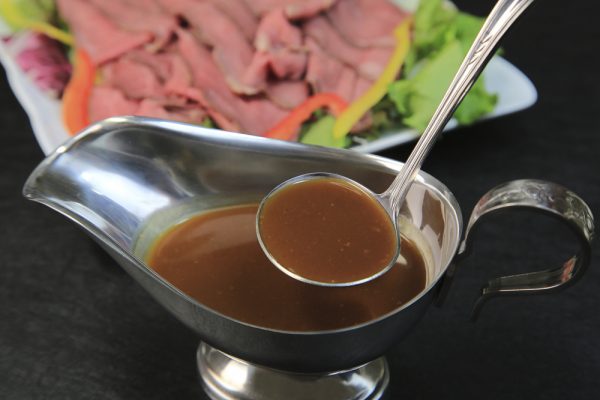
Aujus (Sauce for Beef Dishes)
Plan Z Phase: This is a Z2 (ZReduction) recipe
Aujus is just a fancy name for the sauce they give you to eat with Prime Rib. It can also be eaten with any kind of beef cut; a steak, or even roast beef.
This is a super simple version I made up for a quick weeknight meal. It only takes a few minutes to make and really ramps up the flavor of your beef cut.
Servings: Serves 2. Can be doubled or tripled easily
Ingredients
- 5 cups of low sodium beef broth (I season with my own sea salt so I get healthy salt instead of processed salt which doesn’t do your blood pressure any good)
- 2 tsp of Worcestershire
- ¼ tsp (or to taste) of garlic powder
- grated sea salt and pepper to taste
Directions
Take out a small saucepan. Add the broth. Turn your burner on medium high and bring it to a boil. Then turn down so it just bubbles. You don’t want to boil it so fast that it rises up above the edge of the pan.
Boil this down until it’s about half of the volume. This will take about 10 minutes depending on your stove. Just keep an easy eye on it while you do something else in the kitchen.
When it’s boiled down, add the rest of the ingredients and just boil another minute to meld the flavors. Stir.
I serve this in little bowls on the side for dipping. You can also drizzle it over your beef. It’s also tasty with your veggies you’ll be serving on the side.
Enjoy!
Cheers,
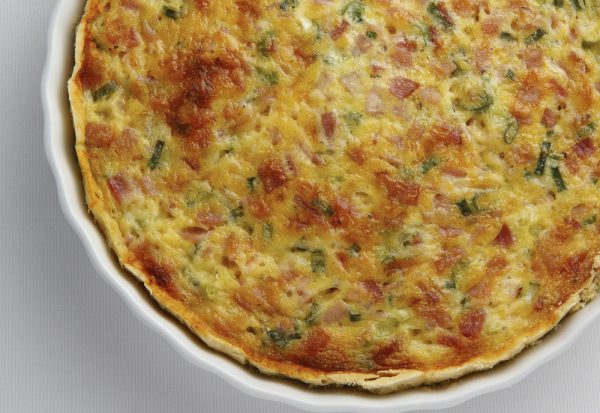
Veggie Drawer Quiche
Plan Z Phase: This is a Z3 (ZReboot) recipe
Everybody needs the perfect recipe that uses up the little leftover bits of vegetables you have in the drawer. Instead of letting them go to waste, you can whip up this quiche. I served it for dinner. You can serve it for breakfast, lunch or dinner! Some people even like it room temperature or cold.
Servings: Serves 6-8 people
For the crust:
- 2 cups of super ground almond flour (Bob’s Mill is a good brand)
- ½ cup of butter, melted
- ½ tsp of ground sea salt
- a sprinkle of pepper
Directions:
Put all of these items in a bowl and stir with a spatula until it all sticks together.
Take out a 9” pie pan. Plop the dough ball into the pie pan and maneuver it around with your fingers until the dough covers the bottom of the pan and a bit up the sides; maybe a ½ inch or more.
Bake the crust for 10 minutes at 350 degrees. Check to see if any of it has puffed up. If it has you can squish it back down with the back of a spoon. Then return to bake about 6-8 minutes more. You want to keep an eye on it and take it out when it’s light brown. It will turn dark quickly so do keep an eye on it. Let it cool on the counter while you make the filling.
Filling
- 1 cup of unsweetened almond milk
- 5 large eggs
- A grating of sea salt and pepper
- A wisp of cayenne for spark (optional)
- 1 pinch of ground nutmeg
- 4 – 8 slices of bacon, cooked and chopped (depends on how meaty you want your quiche)
- 1 cup of shredded cheese. Swiss is traditional but you can also use cheddar or any other block cheese.
- 1 – 2 cups of veggie bits. Mine had onion, red bell pepper, and broccoli bits. Just about any veggie will work. Use your imagination and what’s left in the drawer.
Filling Directions:
In a medium bowl, add your eggs, milk, and seasonings. Put your veggie bits and the bacon bits on the bottom of the crust.
Mix the eggs and milk with a whisk to blend it all up. Pour that mixture over the veggies and the bacon. Sprinkle on the cheese.
Carefully transfer it to your oven and bake for about 35 minutes; until the middle doesn’t jiggle. Let it cool on the counter for 5 – 10 minutes which will help it set up. Cut into wedges and serve.
Enjoy!
Cheers,
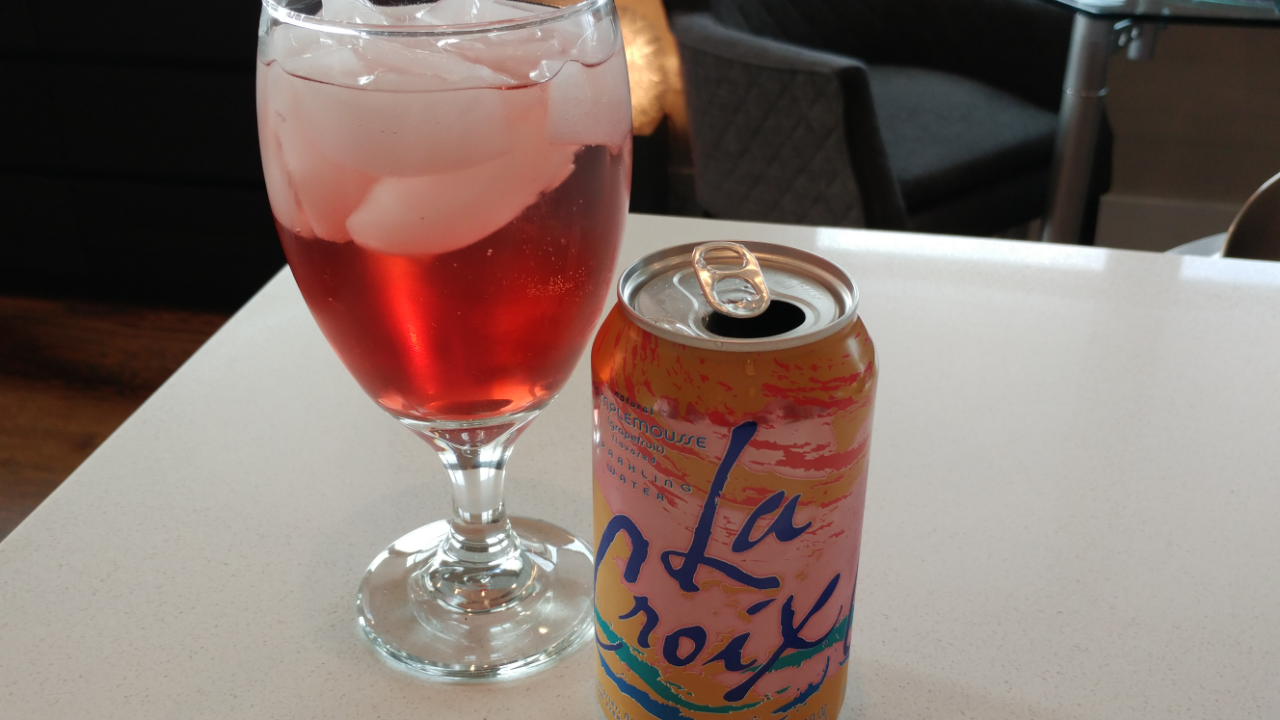
Raspberry Grapefruit Sparkler
Plan Z Phase: This is a Z2 (ZReduction) recipe.
This is a drink you can make in a pitcher and enjoy all during ZReduction. I don’t usually like grapefruit at all, but LaCroix makes a grapefruit fizzy water that is just delightful. I use it to make this drink or I drink it plain over ice too.
Ingredients:
- 6 packets of Raspberry Zinger tea. (This is an herbal tea. No caffeine)
- water
- LaCroix, grapefruit flavor
Directions:
Get out a big pitcher. Put in your tea packets and fill the pitcher with water. Let it steep for at least 4 hours or even overnight. You can refrigerate it or leave it on the counter. Remove the packets. You now have your iced tea. You can drink this by itself over ice or you can make the Raspberry Grapefruit Sparkler.
To make the sparkler. Just add ice to a glass. Fill it half full of raspberry zinger tea and then fill it the rest of the way with Grapefruit LaCroix.
Enjoy!
Cheers,