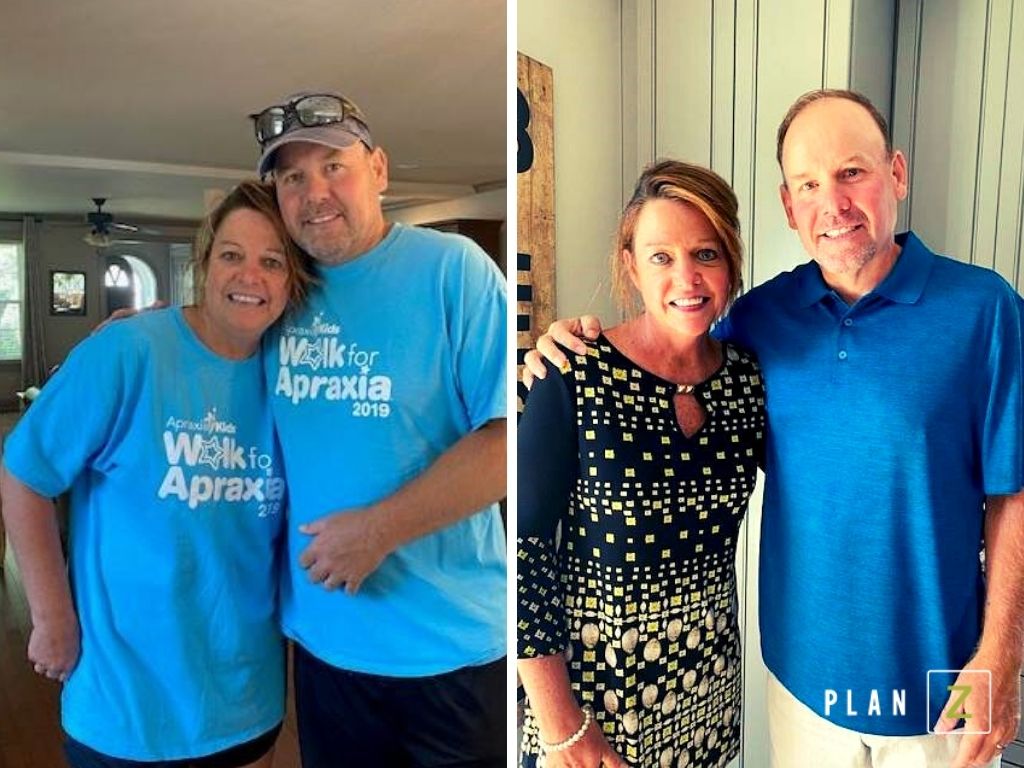
Husband and Wife Lose 130 Pounds Together
James and Peggy are husband and wife educators from Owensboro, KY. They're intelligent, health-minded, and very active. Unfortunately, they were also overweight -- and couldn't seem to combat the pounds that gradually crept on over the years.
Something wasn't right. James owned a lawn care business and played basketball once a week. He was on his feet all day long. Peggy was clocking in over 20,000 steps a day. She did cardio 5 days a week. They were constantly exercising and reducing their caloric intake, but they couldn't lose that extra weight no matter what they tried. Peggy was beyond frustrated. In a moment of frustration, she stood up and said to her husband, "I don't care what it costs, we've GOT to do something!!!"
James and Peggy joined Plan Z together. Even with very different dietary needs (Peggy is a vegetarian and James is a carnivore), they successfully lost 130 pounds between them. James, who was used to waking up at 5 am to exercise before he went to work, says:
"It was probably the easiest weight that I've lost...the only effort I had to put into it was the cooking."
Peggy spent the last 20 years following the food pyramid, eating low-fat foods, consuming diet sodas, dousing her tea with SweetN’ low, and obsessing over cardio-based exercise thinking these efforts would help her manage her weight. These strategies never helped her lose weight. In fact, she was steadily gaining each year. It only took her nine months to lose 50 pounds on Plan Z.
Besides the incredible weight loss, Peggy experienced numerous health benefits. James told us that before Plan Z, his wife would wake up five, six, or even seven days a week with a migraine. Incredibly, Peggy hasn’t woken to a single migraine since she started Plan Z in April of 2020. She told us in her interview:
“Just my energy level, my mind clarity, my no headaches…I just feel so much healthier, and it’s what I’m putting in my body.”

After returning to work from shutdowns and school closures during the pandemic, James and Peggy’s coworkers were blown away by their transformation. Everyone wanted to know their secret. They both looked fantastic. And when curious friends heard what the costs for Plan Z were, they were shocked again. James said, "They thought I was [going to] say $2000.”
Plan Z is fast, effective and affordable. Peggy will tell you that, “The money is no object for your health.” And Plan Z is the diet to end all diets. Just take it from James. One of the things he loves about Plan Z is that it's not designed to keep you coming back forever. “When you’re done, you’re done.”
There are even more reasons to try Plan Z today. Listen to the full interview below to hear them for yourself!
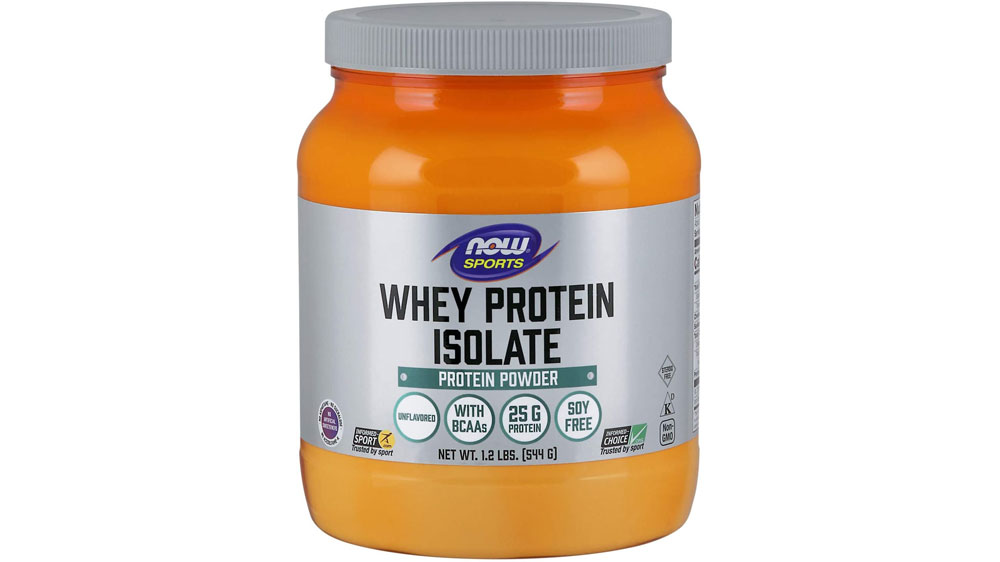
Whey Protein Isolate
NOW Whey Protein Isolate is a high-quality protein that is both bioavailable and easily digested. Whey protein has naturally occurring branched-chain amino acids (BCAAs). NOW Whey Protein Isolate is ideal for active individuals. Whey protein is considered to have the highest biological value (BV) of any protein source - superior in essential amino acid content to beef, milk, casein, or soy.
- Same trusted quality with a brand new look! Packaging may vary
- UNFLAVORED PROTEIN POWDER WITH BCAAs: NOW Whey Protein Isolate is a high-quality protein that is both bioavailable and easily digested. Mix one level scoop into your daily smoothie for 25 g of protein per serving (Quality GMP Assured, Kosher with Dairy, No Artificial Sweeteners, Non-GMO, Steroid Free, Soy Free, Keto Friendly)
- GMP Quality Assured: NPA A-rated GMP certification means that every aspect of the NOW manufacturing process has been examined, including our laboratory/testing methods (for stability, potency, and product formulation).
- Packaged in the USA by a family-owned and operated company since 1968

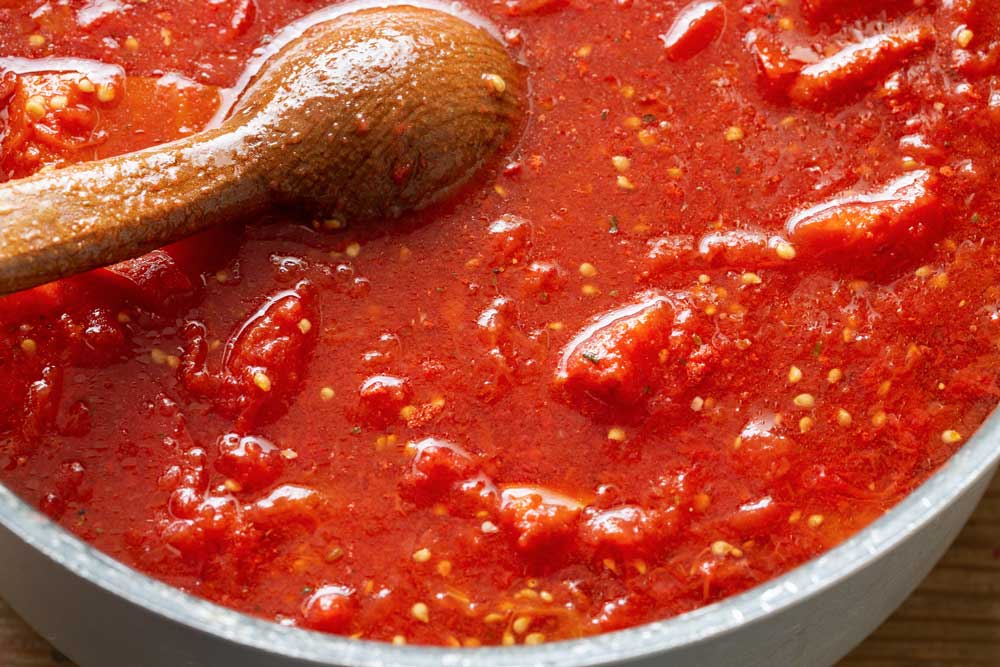
Roasted Tomato Sauce
Plan Z Phase: This is a Z2 (ZReduction) recipe.
Servings: Serves 4. Can be easily doubled. One serving includes 1 Tbl of your oil allotment for the day.
This is a super-easy way to make a full-flavored tomato sauce. You can serve with Zoodles (zucchini noodles) or a small amount of pasta. You could use this as a meatball sauce or even on a pizza. Think of all the things you like to have with tomato sauce, and this might become your “go-to” sauce. Tastes soooo good homemade. You can make larger batches and freeze them in portions, too. You’ll think you’re eating at an Italian Grandma’s house when you taste this.
Ingredients:
- 8 peeled garlic cloves
- ¼ cup of butter (1/2 of a stick) cut into bits
- 28 oz can of whole, peeled tomatoes (I use Marzano brand)
- 1/8 of a tsp of red pepper flakes (you can leave these out if you don’t want any zip in your sauce)
- A grating of sea salt and fresh pepper
- Finely grated parmesan for serving
Instructions:
Heat your oven to 425 degrees.
Get out your 9 X 13 ovenproof pan. Empty the tomatoes into the pan and squeeze them with your fingers or poke them with a fork to sort of break them up. Add the butter bits and the garlic cloves. Toss them around so it’s nicely mixed up. Add the optional pepper flakes and the salt and pepper. Stir.
Roast the tomato mixture for about 20 minutes. Then open the oven and stir them up. Roast another 20 minutes until the sauce is chunky-wonderful.
Using a potato masher or a folk break up the roasted tomatoes and the garlic cloves until the whole mixture looks like chunky tomato sauce. The roasted tomato and the caramelized garlic will fill your kitchen with good smells.
You are ready to serve, or do what you're going to do with it. Pour over roast chicken or zucchini noodles. Dust with the parmesan cheese and dig in.
You can keep this in your refrigerator for a few days. Make ahead and just reheat when you assemble the meal. Or freeze portions for later use.
Enjoy!
Cheers,
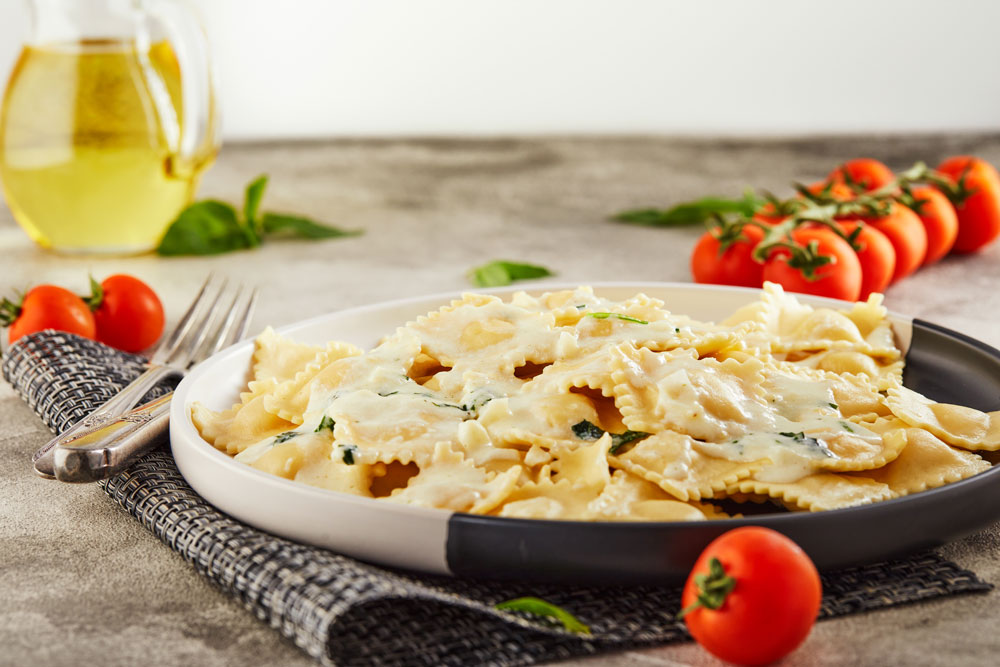
Creamy Ravioli
Plan Z Phase: This is a Z3.5 (ZReboot3.5) recipe.
This whole dinner comes together in about 15 minutes. There are just days when you can’t make everything from scratch. You need something you can get on the dinner table quickly. This dish uses pre-made ravioli. Yeah, it’s a processed food but many of them now are fresh and even organic. You can get away with this once in a while after your weight stabilizes. This is not a weekly thing. Don’t get cocky or weight will start piling back on.
I made this very saucy. The sauce is high in fat which helps with satiety. You don’t need a lot of ravioli. Even if I am hungry, I only allow myself five or six. I cut them into pieces, so I don’t eat a whole one each bite.
Servings: Serves 2-3
Ingredients:
- 10-12 oz of ravioli. Find it in the refrigerated section. The packages vary in size, so I gave you a range. Most flavors will work: sausage, mushroom, or even straight cheese.
- 1 Tbl of olive oil
- 1/4 cup of unsalted butter
- 2 Tbl of minced garlic
- 1/2 tsp Italian seasoning
- 1/8 teaspoon of cayenne (optional)
- 2 cups of heavy cream
- 1 1/2 cups of grated parmesan
- 1/2 cup of white wine. I used chardonnay but most unsweet ones will work. If you don’t drink you can use vegetable broth.
- 2 cups of fresh baby spinach
- 6 ounces (~1/2 C) of sundried tomatoes. Buy the ones in oil that come in strips. Loosely chop them into little bits.
Instructions:
Get your water ready and put it on high. When it comes to a boil, you’ll be ready to put in your pasta. Add a drizzle of olive oil to the water and stir when you put in the pasta. Follow the directions on the package for cooking time.
While the ravioli is cooking you can make your sauce. You can even start your sauce before you put the ravioli in the boiling water. That will speed things up. In a large saute pan, add one tablespoon of olive oil and all the butter. Once the butter is melted, add the Italian seasoning and the cayenne. The cayenne just gives the sauce a little brightness. It does not make it spicy unless you add more. Add the garlic to the pan and cook for another minute. Don’t burn the garlic.
Add the wine/broth to the pan and simmer for two to three minutes, then stir in the cream. Bring it to a gentle bubble. You want it bubbling so it will reduce but you don’t want it to boil over. Whisk often. Cook another six to eight minutes. Reduce heat to low. Add the parmesan cheese and stir it in till it melts and makes the sauce all yummy gooey.
Add the spinach and sundried tomatoes. Gently stir the sauce and then carefully add the cooked and drained ravioli. Stir carefully so all of the ravioli gets plenty of sauce. Serve while it’s hot.
Enjoy!
Cheers,

French Scalloped Potatoes
Plan Z Phase: This is a Z3 (ZReboot) recipe.
Potatoes can be dangerous to your weight if eaten too often or too much in one sitting. The good news is if you make the dish early in the day or the day before and refrigerate it they become what is called resistant carbs. That means they digest slower in your system so your blood sugar does not spike nearly as much. You can just reheat and eat.
If you will be eating them right out of the oven just keep your portion smaller. Maybe a half cup. Savor it and as long as your weight is stabilized you should be okay. Just don’t do it too often.
Servings: Serves 6.
Ingredients:
- 3 Tbl of butter
- 1 cup of finely chopped leeks, shallots, or Vidalia onion
- 2 tsp of garlic powder
- 2 tsp of fresh thyme, minced
- 2 cups of heavy cream
- 1/2 tsp of grated sea salt
- 1/2 tsp of grated pepper
- 4 cups of sliced potatoes. I use my mandolin to slice them thinly.
- 1 cup of grated Gruyere cheese
Instructions:
Preheat the oven to 350 degrees. Spray your 9" X 9" baking dish with olive oil spray.
In a medium saucepan add the butter and heat on medium-high. When butter is melted add the leeks, garlic powder, and thyme. Cook for two minutes.
Stir in the cream and add the salt and pepper. Bring to a low boil and lower the heat to simmer until the mixture starts to thicken. Stir often and don’t let it boil over. This will take about five minutes.
Add the Gruyere and stir until it melts in. Add the potatoes and stir again. You might need to do this in a bowl, depending on how big your saucepan is.
Spread the potatoes in the baking dish. Bake for about an hour or until potatoes are done and lightly browned on top. I check mine with a sharp knife to make sure they are cooked through.
Enjoy!
Cheers,
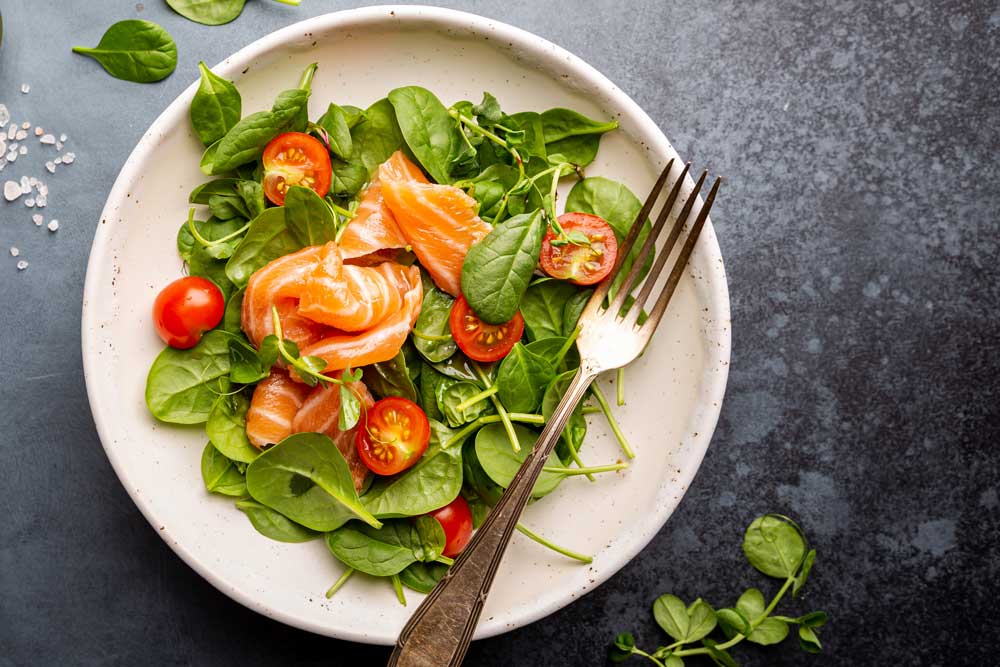
Smoked Salmon Salad
Plan Z Phase: This is a Z2 (ZReduction) recipe. Plan Z Coach, Jen contributed this recipe. She loves smoked salmon and wanted to share this recipe." Such an easy salad to make, and so delicious, too! Since leafy greens are unlimited you can double (or triple) the amount of greens used in this recipe if you want. I wanted my salad to have more salmon flavor so I went easy on the greens."
Servings: Serves 2
Ingredients:
- cured or smoked salmon (4 oz per person is enough - it has quite a strong flavor)
- 2 large handfuls of the leafy green of your choice (I used baby spinach and threw in a handful of watercress for good measure)
- 1 cup of cherry tomatoes
- your favorite vinaigrette
Optional add-ons:
- green onions
- capers
- hard-boiled egg
- lemon wedge
Instructions:
The easiest salad prep in the world. Wash your salad greens, cut tomatoes in half, lay slices of salmon on the top and drizzle with your favorite dressing. Tip: if you set your ingredients out for 10 minutes before making your salad it will take the "refrigerator cold" edge off your salad when you put everything together. The flavors will meld better, and it won't be so "frigid" on your tongue. Top with a little salt and pepper, you're ready to eat. If you are looking to make it a little more special, you can add green onions (or even thinly sliced red onion if you don't mind onion-breath afterwards), capers, a lemon wedge or a boiled egg.
Enjoy!
Cheers,

Creamy Cajun Shrimp and Sausage “Stew”
Plan Z Phase: This is a Z3(ZReboot) recipe.
I’ll admit it. I found this inspiration recipe online. I did not have to change it up much to Zola-fy it. I did change it enough to make it qualify as an original, but the developers were definitely on the right track.
Servings: Serves 4
Ingredients:
- 1 lb of medium-large shrimp. You can buy cooked to speed things up or cook them yourself. They do need to be peeled and deveined. You can pay extra for that or do it yourself.
- 2 Aidell’s Cajun sausages. These are already cooked but you’ll put them in when you cook the shrimp so they can crisp up on the edges a bit. Cut them into coin-sized pieces, sort of like a slightly thicker nickel.
- 2 Tbl of Cajun seasoning
- 3 Tbl of olive oil (divided)
- 1 Tbl of butter
- 1/2 cup of diced Vidalia onion (sweet)
- 1/2 of red bell pepper, chopped
- 1/2 of yellow bell pepper, chopped
- 3 tsp of garlic. I used jar garlic. It works just fine in this recipe.
- 1/3 cup of low sodium vegetable broth
- Grated sea salt and pepper to taste
- 2 cups of heavy cream
- 1/2 cup of grated parmesan cheese
Optional:
Instructions:
In a bowl, add the shrimp and the sausage. Drizzle on two tablespoons of olive oil and sprinkle on the Cajun seasoning. Toss to fully combine.
Heat a large sauté pan and add the other tablespoon of olive oil. Cook the shrimp and sausage for five minutes. You’ll need to toss them often so the shrimp get cooked. You don’t want any grey remaining in the shrimp. Transfer the cooked shrimp and sausage to a bowl and cover. Set aside.
In the same pan, add the butter (no need to wash the pan). Add the onion and the bell peppers. Cook for two to three minutes until they loosen up. Add the garlic and cook another minute. Pour in the vegetable broth and get the sauce bubbling a bit so it starts to cook down.
Adjust the seasoning with your sea salt and pepper. Add the cream. You want it simmering again so it will bubble and start to reduce. Stir often. This might take about five minutes. Add the parmesan and that will thicken it even more. Stir until the cheese is melted and incorporated. Get the sauce to a creamy thickness you like. Then add the shrimp and sausage back in. Heat until you’re sure those things are hot too.
Serve. I just had this in a bowl like a stew.
*You could also make some zucchini noodles (Zoodles) and serve them over your pasta substitute.
Enjoy!
Cheers,

Roasted Lemon Chicken
Plan Z Phase: This is a Z2 (ZReduction) recipe. When you are in the ZReduction portion of Plan Z you will not be eating the skin of the chicken or any of the dark meat. Breast meat only! But if you have a family, they can eat the rest and keep you from being tempted to gnaw on a leg or a thigh. The only difference between Z2 and Z3 with this recipe is the cut you can eat. Otherwise, the Z2 folks can even have a bit of gravy.
Servings: Serving size 6 - 8 oz of breast meat - One chicken will serve 3 – 4
Ingredients:
- 1 whole chicken (3 – 4 lbs)
- 2 lemons, each cut in half
- 1 Tbl of your favorite dried herb or meat rub mixture. If you like a lot of seasoning, you can use more (up to 3 Tbl). If you use a lot, make sure there’s no salt in your spice blend or your chicken will be salty!
- salt and pepper
- 4 Tbl of cream
- olive oil spray
Instructions:
Remove the giblets from the chicken and toss or reserve for another use. Rinse out the chicken. Place one of the lemons inside the chicken cavity. Just push the pieces in. Put your chicken in an oven-proof pan. I use cast iron.
Squeeze the other lemon on top of the chicken and let it drizzle down.
Then lightly spray with olive oil and sprinkle (or rub) on your herb mixture.
Roast in your oven at 400 degrees for 30 minutes. Then turn down and roast at 325 until it registers 170 degrees or higher on your meat thermometer. The rule of thumb is about 30 minutes per pound to cook it all the way through.
Let the chicken sit outside the oven in the pan for 10 minutes before carving.
Once you take out the chicken, you can make a bit of gravy with the drippings. Keep in mind the drippings are fat from the chicken so if you are on Z2, don’t eat more than 1 – 2 Tbl of the gravy.
For the gravy:
Remove the chicken from the juices and pour into a small saucepan adding 4Tbl of cream. Heat on medium-low. Be sure the pan can handle the heat of the stove or put it in another pan that can. Stir often until slightly thickened. This will make a lemon cream gravy. It’s wonderful. You never need flour to make gravy. Forget that forever. Just use cream. It will thicken so you don’t need flour. If you continue to heat it, the cream will thicken even more so either take it off the heat or add water or chicken broth to thin it out.
When on Z2, also remember this will eat up part of your cream allotment for the day.
Enjoy!
Cheers,
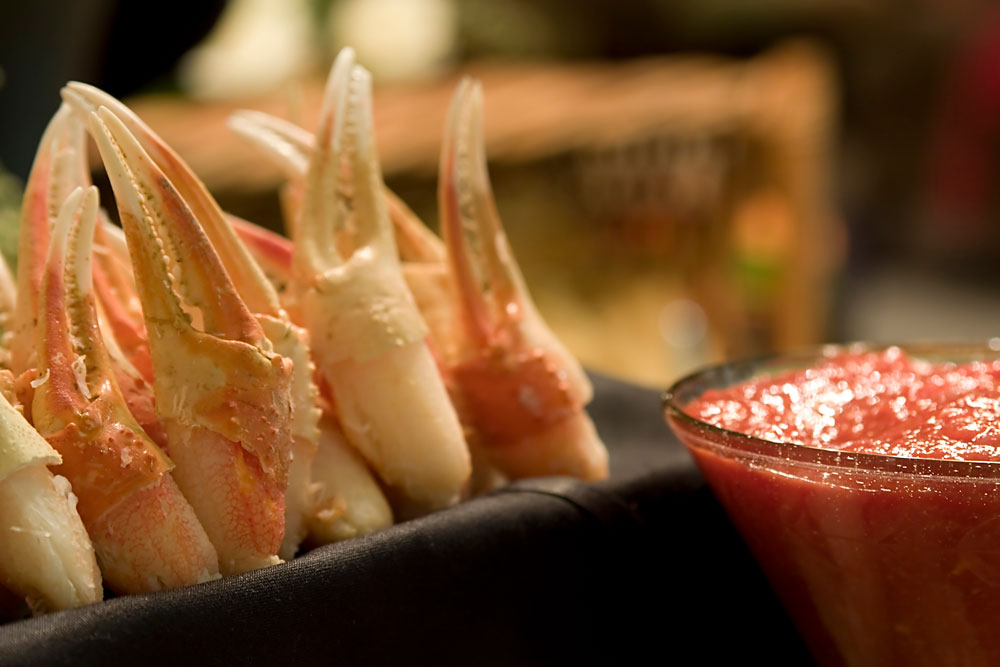
Seafood Dipping Sauce
Plan Z Phase: This is a Z3(ZReboot) recipe.
My associate, Jennifer, brought me a recipe for dipping sauce. It was recommended that it be served with crab legs. I loved the idea of the sauce. Their recipe made way too much sauce, so I adjusted some items to make it more reasonable without having to invite a crowd to eat crab legs.
When I served it, I paired it with crab cakes. YUM. I can also see this being served with seared scallops. It will make a fun substitute for a cocktail sauce with shrimp too.
Servings: Makes about a cup.
Ingredients:
- 1 Tbl of olive oil
- 2 Tbl of butter
- 3 tsp of minced garlic (Jar garlic will work.)
- 1/2 of a serrano chile, stemmed, seeded, and diced (Careful! Wear gloves if you need to.)
- 1/4 cup of onion
- 2 tsp of chili powder
- 1/2 tsp of smoked paprika (In my opinion this is the secret to this sauce.)
- 8 oz of crushed tomatoes (Save the other half of the can for another use.)
- Ground sea salt and pepper to taste
- 1 Tbl of fresh lemon juice
Instructions:
Heat butter and olive oil in a saucepan. Add the garlic, chile, and onion. Cook on medium-high until the onion softens. Three or four minutes will do it.
Stir in the chile powder, paprika, crushed tomatoes, salt, and pepper. Cook on medium-low until the sauce begins to thicken. Stir often. Transfer the mixture carefully to your blender. Let it sit until it cools. Add the lemon juice and whiz until blended. You can store it in the fridge until you want to serve it. It can be served warmed or cold.
Enjoy!
Cheers,
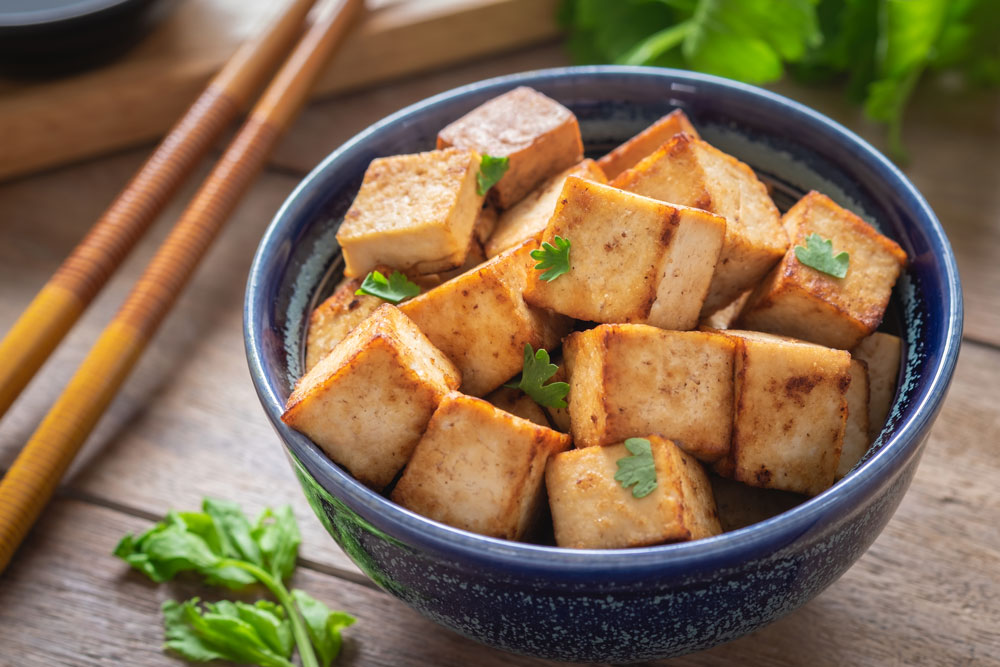
Air Fryer Crispy Tofu
Plan Z Phase: This is a Z3.5(ZReboot3.5) recipe.
Dieter Claire brings us this fabulous recipe for air-fried tofu and veggies. She took the Plan Z General Tso recipe’s sauce and combined them to make a mighty tasty dish. Thank you, Claire!
Servings: Serves 4.
Ingredients:
- 1 pkg Extra Firm Tofu
- 2 Tbl Bragg's Aminos
- 1/2 tsp. Garlic Powder
- 1 tsp Sesame oil
- 2 Tbl Cornstarch
- Assorted veggies
- Plan Z General Tso Sauce or any approved sauce you like.*
Instructions:
Drain fluid from tofu packaging and cut tofu into one-inch cubes. Drain cubes on paper towels. I tend to not plan ahead so I press lightly on cubes with paper towels to absorb as much liquid as possible. The key to tasty tofu is to get rid of the excess liquid so it can absorb the marinade/sauce. Place cubes in a bowl.
Mix together Bragg's, garlic, and sesame oil. Pour over tofu. Toss gently to coat all pieces. Let sit for five to twenty minutes. No time to wait? Move on to the next step - it will be OK.
Measure cornstarch into a sifter. Sift over cubes, toss gently, and sift some more. The key is to aim for an even-ish coating.
Preheat air fryer to 400 degrees. When ready, place cubes in a single layer. Cook for 15 minutes, turning cubes over at the halfway point. Aim for a golden color.
Remove from air fryer basket and place in a covered bowl to keep warm.
Cook your veggies in the air fryer too! Spritz with olive oil. It takes about five minutes at 360 degrees to tender-crisp onion slices and peppers.
*While your tofu is cooking make your General Tso sauce or other sauce. I added extra grated ginger and fresh garlic to mine to make it spicier.
Enjoy!
Cheers and thanks again, Claire!
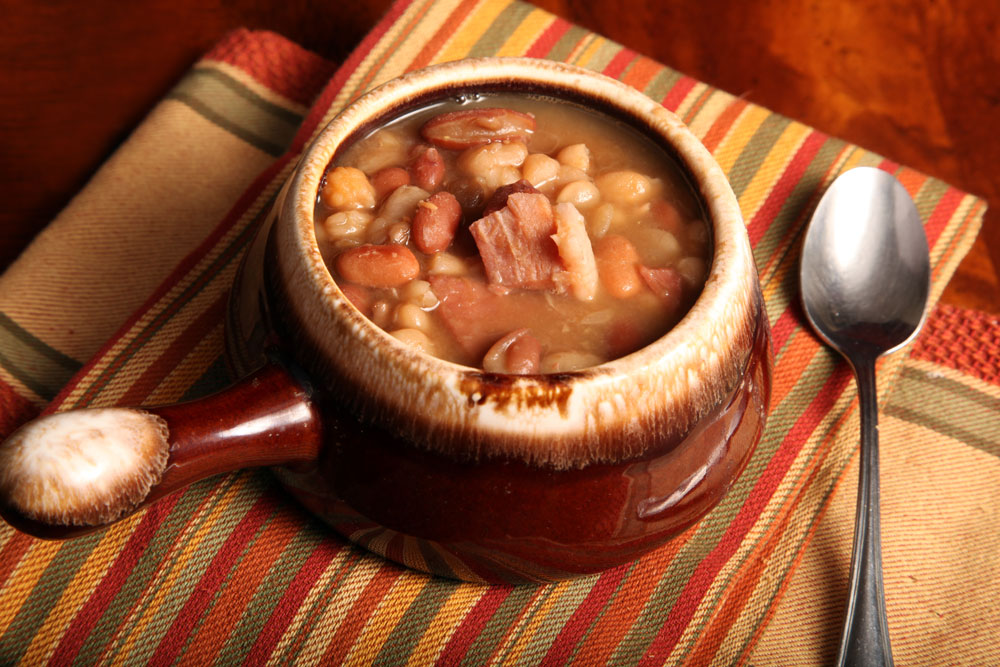
Quick Ham and Bean Soup
Plan Z Phase: This is a Z3.5(ZReboot3.5) recipe.
Normally, I’d call this Bean and Ham Soup but when you’re cutting carbs it’s better to up the ratio of protein and veggies and take it easy on the beans. This tastes a lot like my mom’s navy bean soup, and it took her all morning to make; starting with the leftover ham bone. This is quick and easy and makes a nice weeknight dinner.
Servings: Serves 4 in bowls.
Ingredients:
- 2 Tbl of butter
- 1 Tbl of olive oil
- 1 cup of celery bits (Rather than dice them, I leave them a little larger.)
- 2 cups of carrot bits (Same here…my bits are more like ½” pieces.)
- 1 cup of diced onion
- 2 15 oz cans of navy beans
- 4 cups of chicken broth (I use organic low sodium.)
- 2 cups of cubed ham (I buy a small breakfast ham, trim off the outer layer, and just thick slice it and then cut the slices into bite-sized cubes.)
- 1 tsp of chili powder (My mom would leave this out.)
- ½ tsp of garlic powder
- 1 bay leaf
- Grated sea salt and pepper to taste
Instructions:
Put the butter and oil in your soup pot and turn on medium-high heat. Add the celery bits, carrot bits, and onion. Saute until they are all loosened. I don’t cook them all the way through. I want a little extra bite. Open your beans. Drain and rinse them and add them to the soup pot. Add the chicken broth and cubed ham along with the chili powder, garlic powder, and bay leaf.
Stir and bring it all to a boil. When it’s boiling, turn it down to medium and let it simmer. You can cook this in as few as 15 minutes and serve it. I like ook mine for an hour or so. I want the beans to break down a little bit so the broth gets thicker. They sort of shed their outer layer a bit and the soup gets a creamier texture. Stir thoroughly every 15 minutes. That helps with the creamier texture goal.
Add the salt and pepper at the 30-minute point. If you opt for a quick cook time, add the salt and pepper five minutes before removing from heat. Taste and let that get incorporated. Depending on how salty your ham is you might not need much.
Take the bay leaf out of the soup before serving and toss it.
Serve the soup in bowls or large mugs.
Enjoy!
Cheers,

Cheesy Onion Soup (EASY)
Plan Z Phase: This is a Z3.5(ZReboot3.5) recipe.
This is a SUPERFAST soup to get a meal on the table in record time. This should only take you about 20 minutes. Serve with a piece of protein or do what I did and serve it with a few pieces of crispy bacon. I also made a few homemade garlic croutons to put on top. It tastes like an onion soup, just cheesy.
Servings: Serves 4
Ingredients:
- 1 large onion, chopped
- 4 Tbl butter
- 2 Tbl all-purpose flour
- 1/2 tsp grated sea salt (or to taste)
- Pepper to taste
- 2 cups of half & half
- 2 cups of whipping cream
- 2 cups shredded cheese (I used 1 cup of cheddar and 1 cup of Colby Jack.)
- Tabasco or other hot sauce optional.
Instructions:
In a large saucepan, saute the onion in butter on medium-high until it begins to caramelize. Just when it starts to brown, add the flour, sea salt, and pepper until blended. Gradually add the half & half and the whipping cream. Bring to a boil; cook and stir for two minutes or until it begins to thicken.
Stir in cheese until melted. If the soup gets too thick you can always add a bit more half & half or some broth from the fridge. Stir it in and heat.
You are ready to serve. Add a bit of hot sauce for zip if you want.
Enjoy!
Cheers,
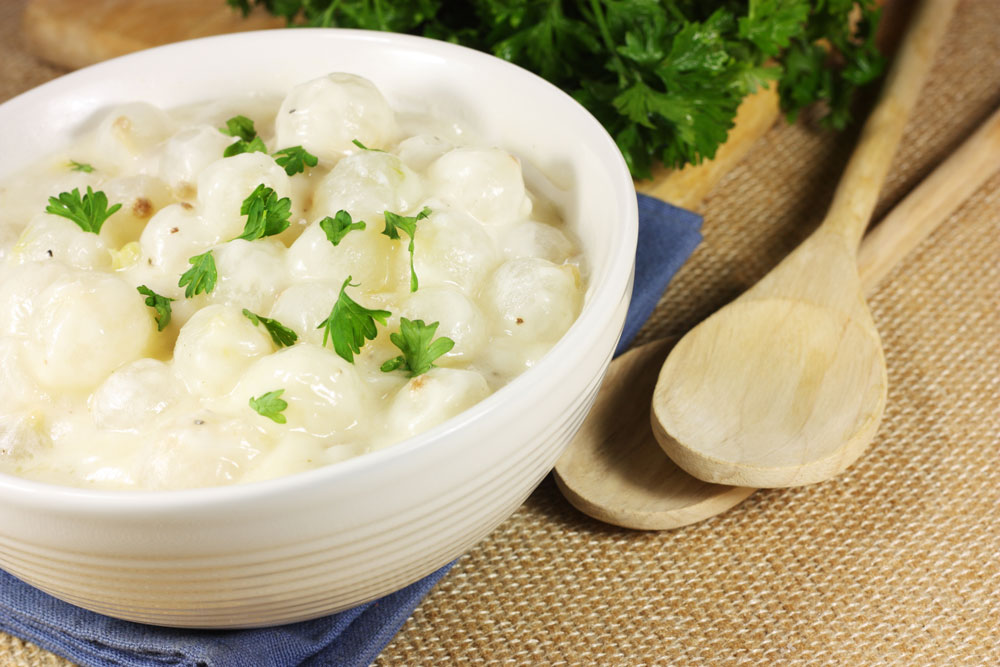
Creamed Onions with Raisins
Plan Z Phase: This is a Z3(ZReboot) recipe.
This is one of my husband’s favorite holiday recipes. His first wife had her family recipe. I did some digging online to find heritage recipes (from the 1950s) that seemed close and came up with this.
Servings: Serves 6 – 8. Can easily be doubled.
Ingredients:
- 2 14 oz bags of small pearl onions (You can find these most often in the freezer section with the vegetables. It saves a LOT of time buying them frozen and letting them thaw before you make this dish. If you buy small onions with the skins on you have to add a whole procedure to boil them and get the skins off.)
- 3 cups of water (Or just enough to cover the onions.)
- 1 tsp grated sea salt
- 6 Tbl butter
- 6 Tbl of flour (You can use gravy flour if you have it.)
- 1-1/4 cups water from boiled onions
- 2-1/4 cups cream
- 1/4 cup seedless raisins
- 1/4 cup dry sherry
- dash paprika
Instructions:
Cover the onions with hot water and add the salt. Boil until cooked; approximately 15 minutes. Drain, reserving one and one-quarter cups of the water from the onion pot. Set the onions aside while you make the sauce.
Melt the butter in a medium-sized saucepot over medium heat. Mix in the flour and stir until bubbly. Add the onion water and cream. Bring to a boil and simmer for five minutes, stirring pretty much constantly. You want the sauce to begin to thicken but you don’t want it sticking to the bottom of the pan. Then add the onions and cook five minutes more while the sauce continues to thicken. Keep stirring!
Put the sherry and the raisins in a microwavable bowl. Heat on high in the microwave for 30 seconds. Let stand for five minutes. Add this to the sauce with the drained onions. Heat but do not boil. Serve with a dusting of paprika.
Enjoy!
Cheers,
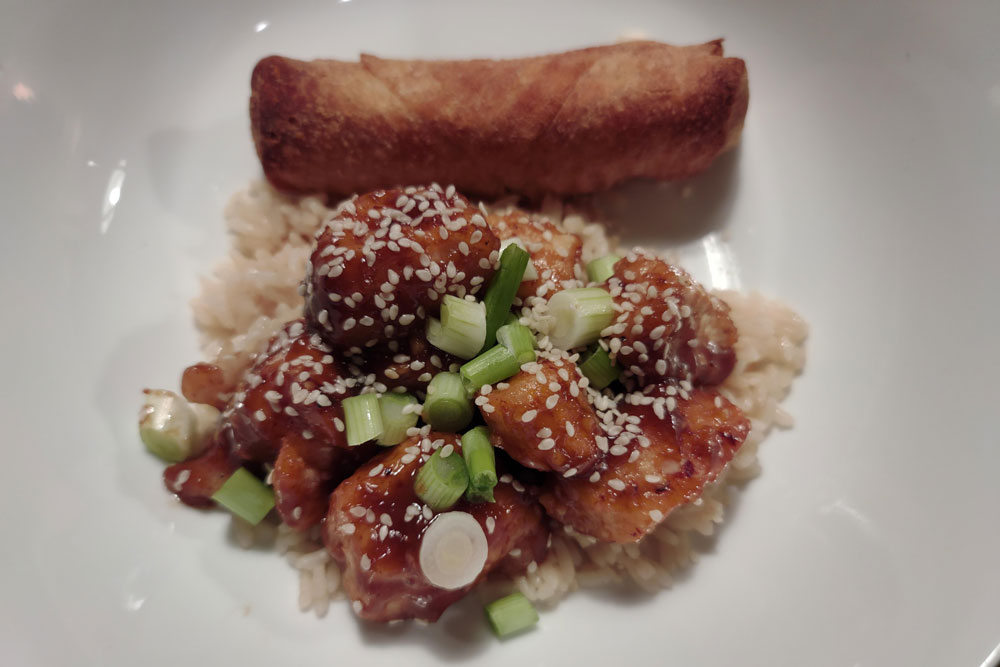
General Tso’s Chicken
Plan Z Phase: This is a Z3 (ZReboot) recipe.
I finally looked up how to say this name… it’s pronounced SO.
So, let’s make it. This is a very popular Chinese take out item that you can easily make at home. You can also follow these instructions and make it much lower carb than the one from the restaurant. There are seven grams of carbs in a tablespoon of cornstarch. On the surface that might seem bad, but most of the cornstarch in the recipe will be shaken off and rinsed down your drain. The cornstarch does help give the chicken the trademark crispiness.
Servings: Serves up to 4 depending on hunger levels. I serve with just a half cup of cooked rice per person. You don’t need a big pile of rice to get the “experience." Serve it with a colorful vegetable, and get more impact for your dish. I recommend steamed or roasted broccoli. I splurged and served mine with one small veggie eggroll.
Ingredients:
- 1 lb of chicken breast cut into bite-sized chunks about 1” in diameter
- 1/4 cup of cornstarch
- Peanut oil for frying (Peanut oil has a higher flashpoint so it won’t burn as easily as other oils.)
- 2 Tbl of minced ginger (Jar ginger can work.)
- Red chili flakes to taste (I use very little and let my husband add more when he goes to eat his portion. That way no one gets too much heat.)
- 2 tsp of minced garlic (Jar garlic can work.)
The sauce:
- 3 Tbl of rice wine vinegar
- 2 Tbl of coconut aminos, or Braggs aminos, or last choice: soy sauce (The others taste the same and are MUCH healthier for you.)
- 2 tsp of hoisin sauce (This is sugary but you are using very little. Only 7 grams of carbs per Tbl so it’s not bad.)
- 1/4 cup of water
- 1 tsp of cornstarch
Optional:
- garnishes might include a dusting of sesame seeds and diced green onion
Instructions:
I take out a ziplock baggie and place the chicken chunks inside. Put in the cornstarch and toss it around. Set that aside while you make the sauce.
In a small bowl, add the rice wine vinegar, aminos, hoisin sauce, water, and cornstarch. Whisk to blend. Set aside.
In a high-sided saucepan add enough peanut oil to bring it up to achieve a two-inch depth. Heat on medium-high until it’s ready to fry. I check when it’s ready by flinging just a few drops of water off my fingers into the oil. If it spits back, it’s ready. Careful. Maintain oil heat on medium-high for even cooking.
Now you’re ready to fry. I first take out my large sieve (or colander) and position myself with the sieve over the sink. I empty the contents of the baggie with the chicken into the sieve and then shake it over the sink so any excess cornstarch falls into the sink for disposal. (You can also do this over a garbage can if you prefer.)
Fry the chicken in the oil across two batches. If they are not crowded they will get crispier. Cook until brown. Set aside on paper towels to drain while you cook the second batch.
Once the chicken is fried, you’ll drain off all of the peanut oil except one tablespoon. Be careful while doing this. I transfer it to a can and let it cool before I dispose of it. I even let it sit overnight in the can in the sink.
Set the pan back on the heat and add the garlic, chili flakes, and ginger. Heat for about 30 seconds until you can smell the garlic and ginger. Add the chicken and toss. Then add the sauce and toss some more until the sauce thickens. Might take another 30 seconds.
Serve immediately – while the chicken is still crispy. Garnishes get added right before serving.
Cheers!

"This is crazy!"
Dieter Paul from Janesville Wisconsin lost 48.5 pounds in 50 days with Plan Z.
Like most people, Paul was skeptical of a low calorie or reduction style diet. What finally tipped the scale for Paul was learning that Plan Z offered a system for weight loss that didn't require exercise. Paul suffers from spinal stenosis, a condition that results from the narrowing of the spinal column and can cause pain, numbness, and muscle weakness. To qualify for surgery to combat this condition, he needed to lose 130 pounds. Fast forward 50 days and Paul is already more than a third of the way to his goal! He was shocked at how it has “been remarkably easy.”
He also said, “I was just shocked…I’m not doing any exercise, I’m just eating food and [the weight is] melting off.”
Tap the green circle below to find out why Paul's interview is one of our favorites.
While the excruciating effects of his condition still plague him, Paul has been able to alleviate a lot of joint and back pain from his weight loss. Each day brings him closer to his goal and closer to qualifying for his surgery. Thanks to the education he received from Plan Z, Paul now has the tools to transform his lifestyle so that he never has to diet again.
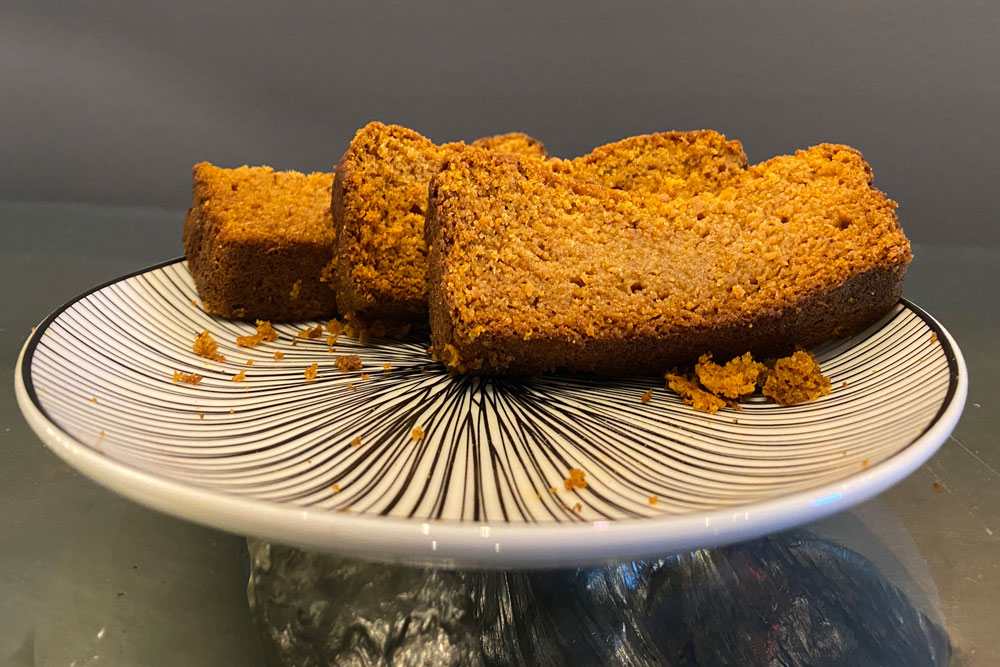
Pumpkin or Sweet Potato Bread
Plan Z Phase: This is a Z3.5 (ZReboot3.5) recipe.
Everyone loves pumpkin, right? Well, how about a tea bread that’s made with pumpkin? Sort of like banana bread. Or even make it with sweet potato puree. I am finding that now that I live in the South, I can buy sweet potato puree in the grocery store (Right next to the pumpkin puree). Or here’s an idea… when you do a holiday dinner, roast up a few extra sweet potatoes and puree them. You’ll need a scant two cups of puree to make this bread. Sweet potatoes aren’t just for casseroles anymore. They can also feed your guests at breakfast or brunch.
Servings: 12. My suggestion is to cut each loaf into six slices. This recipe makes two loaves. Since one can of puree makes two loaves, why not? They freeze well and make great gifts for a host/ess. When you’re invited to dinner, you can bring your host/ess a breakfast offering!
Ingredients:
- 1 stick of butter, melted (1/2 cup). Just melt it in the bowl in the microwave and proceed.
- 1/2 cup of coconut oil, melted. You can buy a version now that is not solid. It’s already in the bottle, liquified.
- 1 1/2 cups of sugar substitute. I use ZSweet or Swerve. You can find them in some stores now or order online.
- 2 large eggs
- 1 15 oz can of pumpkin or sweet potato puree (Or two cups of puree if you roast your own)
- 1 cup of regular white flour
- 1 1/2 cups of finely ground almond flour. Bob’s Mill makes a great version. Be sure to get a fine grind.
- 1 1/2 tsp of baking powder. Be sure it’s fresh. It loses oomph after six months.
- 1 tsp of grated sea salt
- 1/2 tsp of baking soda
- 2 1/2 tsp of pumpkin pie spice. This is the mixture all ready to use. Find it in the spice aisle which saves you buying all the individual ingredients.
Instructions:
Preheat your oven to 350 degrees.
Spray and line two regular-sized bread pans. You can use olive oil spray or coconut oil spray. Line them with a sheet of parchment paper cut to size. I find I can use one piece of parchment paper the width of the pan and cut that into two pieces to line both pans.
I make this recipe in one bowl. When you do that make sure you spread your dry ingredients on top. Don’t just dump them in. You want them to be equally mixed throughout the batter. This is my lazy way of doing it, but it makes fewer dishes to clean and I get it in the oven even faster.
Put the melted butter, coconut oil, sugar substitute, two large eggs, and the pumpkin (or sweet potato) puree in a large bowl. Mix with your mixer until fully incorporated. Scrape down the sides and mix one more time. Then add all the dry ingredients. As noted above, make sure the flours and the baking powder/soda get well spread out as well as the spice mixture. You can also mix all the dry ingredients in their own bowl and then incorporate them with the 'wet' ingredients. Use your mixer again to get it all mixed and distributed. Scrape down the sides one more time, mix a bit more and you are ready to go.
Pour the batter into the two prepared pans. Use a spatula to spread the batter evenly into all the corners.
Bake at 350 degrees for approximately 50 minutes. Check with a toothpick. If the pick comes out clean it’s done. Don’t expect it to rise much. It won’t. Let sit in the pan for at least 30 minutes before you try to turn it out. It will be moist and you don’t want it to fall apart. Then let cool and wrap to preserve. Each loaf should give you at least six slices depending on how thick you slice them.
Enjoy,
Cheers,

P.S. After you make it the first time you can consider experimenting. A half-cup of mini-chocolate chips might be the star of your next batch. Who knows?
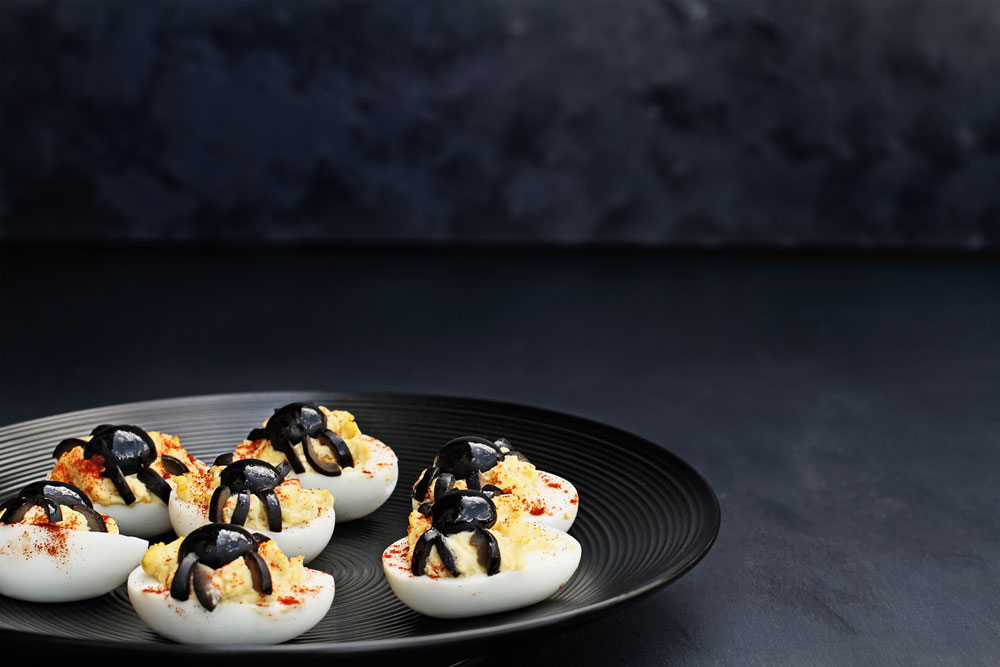
Devil's Eight Legged Eggs
Plan Z Phase: This is a Z3 (ZReboot) recipe.
Here’s an idea from the Plan Z kitchen. Use this classic recipe and add a spooky twist for a hauntingly delicious Halloween snack.
Here’s my mom’s recipe for deviled eggs, and some suggested variations to add some splash and pizzazz.
Servings: Serves 6
Ingredients:
- 6 hard boiled eggs, peeled and cut in half lengthwise
- ½ half tsp sea salt, grated
- ½ half tsp dry mustard
- ¼ cup minced onion
- ¼ cup diced celery
- ¼ tsp pepper (or to taste)
- 3 – 4 Tbl mayonnaise
- paprika
- diced chives
- black olives
Instructions:
Remove the yolks from all egg halves and put the yolks in a bowl. Set aside the white “boats.” Mash the yolks gently with a fork. Add the other ingredients. Stir. Fill the egg white “boats” using a teaspoon, Be gentle. Mound the mixture. Sprinkle on the paprika and chives and you are ready to serve.
I checked out several sources and found all kinds of ways to jazz up your deviled eggs. You can add any, or an assortment, of these extra ingredients and make your deviled eggs more modern. Experiment. Maybe even divide the filling and make two different flavors.
 For our Arachnid variation:
Rinse your olives and pat them dry. With a sharp pairing knife cut the olive in half. Take one of these halves and cut it horizontally into three small strips or sections. The strips will turn into spider legs and the halved pieces form the bodies. Press the body firmly into the yolk mixture and then attach legs on each side. It's difficult to achieve eight legs so, three on each side will have to do!
Here are some other flavor options to try:
- 2 tsp diced chipotle peppers
- 2 oz salmon roe
- ¼ cup bacon bits
- 1 Tbl horseradish (fresh or sauce)
- Snipped parsley
- 3 tsp capers, chopped
- 3 Tbl diced olives
- or even add in herbs and spices like: tarragon, garam masala, curry powder, cayenne or Italian spice mix
- 1/3 cup shredded Cheddar, smoked Swiss or blue cheese
Enjoy!
Cheers,
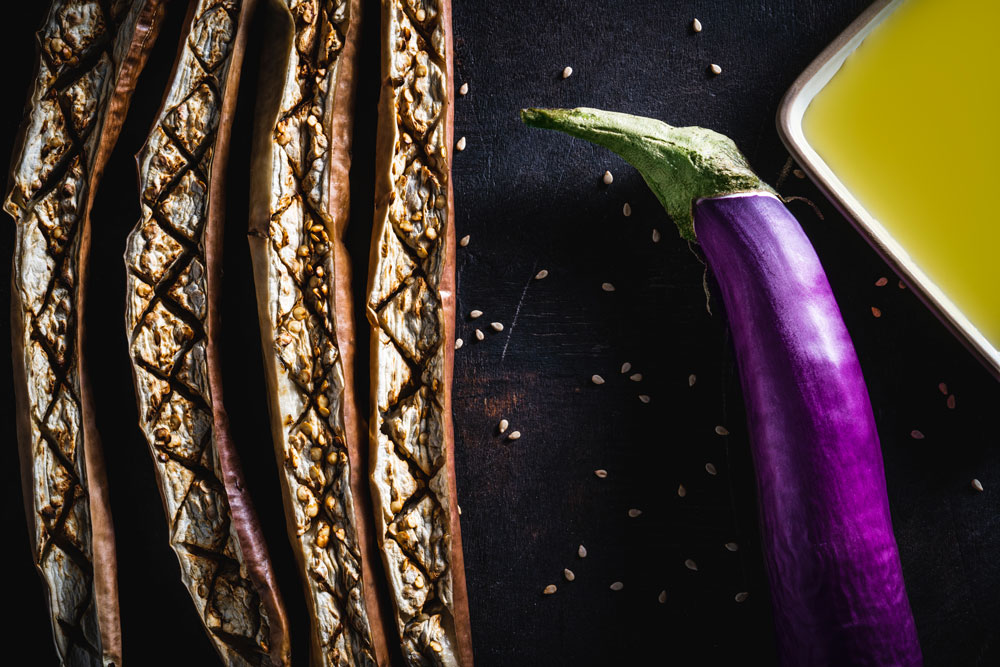
Grilled Eggplant
Plan Z Phase: This is a Z2 (ZReduction) recipe.
When you are on ZReduction you are allowed to eat Chinese Eggplant. Please do not confuse Chinese eggplant with regular globe eggplant. The globe eggplant will stall your weight loss. Those are the fat ones. See the images below to help you make the distinction. And consider reading this great article by Sheela Prakash before your next visit to the grocery store.


I have decided the grilled eggplant tastes better than potato chips! Even better than French fries! And it’s so easy.
Servings: Serves 2
Ingredients:
- 1 Chinese eggplant
- sea salt
- olive oil spray
Instructions:
Cut your eggplant in half crosswise. Then cut those sections the long way to make four pieces.
Spray them immediately with a bit of olive oil. You have to cook eggplant right away or it will get brown and mushy. Then sprinkle the pieces with sea salt. A generous grate of sea salt will be good.
Place the eggplant flesh-side down on the grill or your grill pan. Cook on medium high until you have some nice, golden stripes. This will only take a minute or two. Then turn the eggplant over to the skin side and grill that too. You want the eggplant to be moist. Just don’t grill it until it falls through the cracks.
I love it hot but cooled off is okay too.
Enjoy!
Cheers,
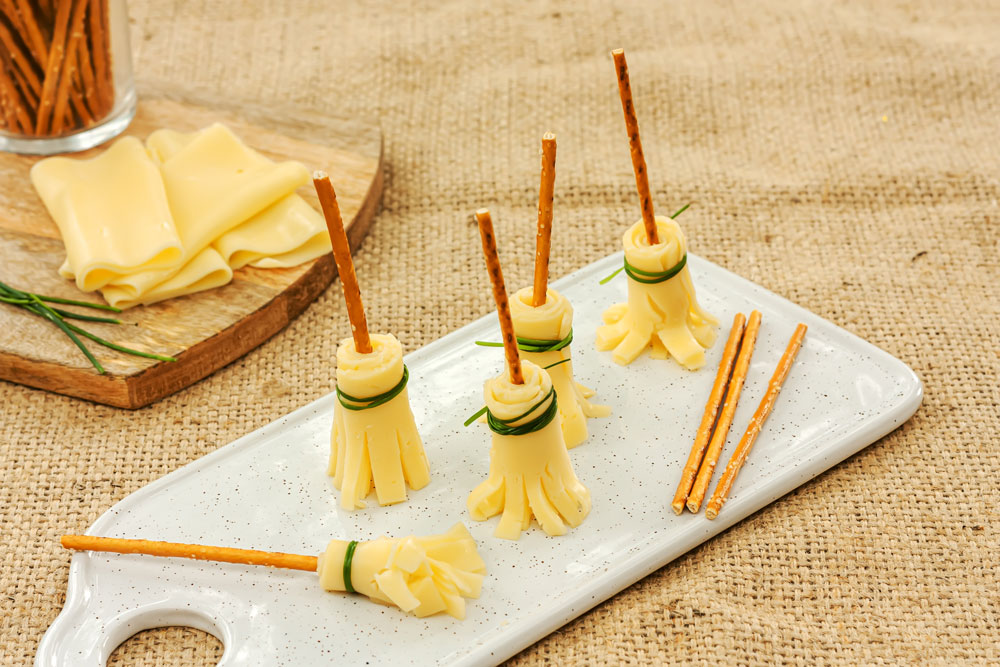
Edible Witch's Broom
Plan Z Phase: This is a Z3.5 (ZReboot3.5) recipe.
Here’s an idea from the Plan Z kitchen. This inspiration recipe offers an easy and interactive way to add a little magic to your meals around Halloween!
Ingredients:
- chives
- deli-sliced cheese: you can use any kind but softer cheeses like gruyere, American and muenster work best. Or you can use string cheese. Cut each piece in half and "fray" the edges.
- pretzel sticks
Instructions:
Step 1
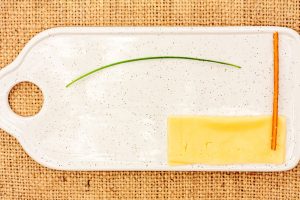
Clean and trim the chives. Place one of each ingredient on a cutting board as shown. You may need to re-shape the cheese slice to resemble a long rectangle.
Step 2

Roll the cheese around the pretzel stick. Squish the cheese together a little bit so it doesn't unroll. Softer cheeses at room temperature are easier to work with. Then wrap the chive around the cheese. On the last loop, wrap the chive around itself and pull snug. Keep in mind - the chives are for decoration. They are not supposed to keep the broom together. The soft cheese does that on its own.
Step 3
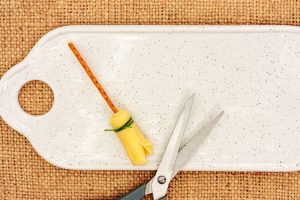
Cut vertical strips into the cheese to achieve the look of a witch's broom. The length of these cuts should be no longer than half the length of cheese.
Share and enjoy!
Cheers,
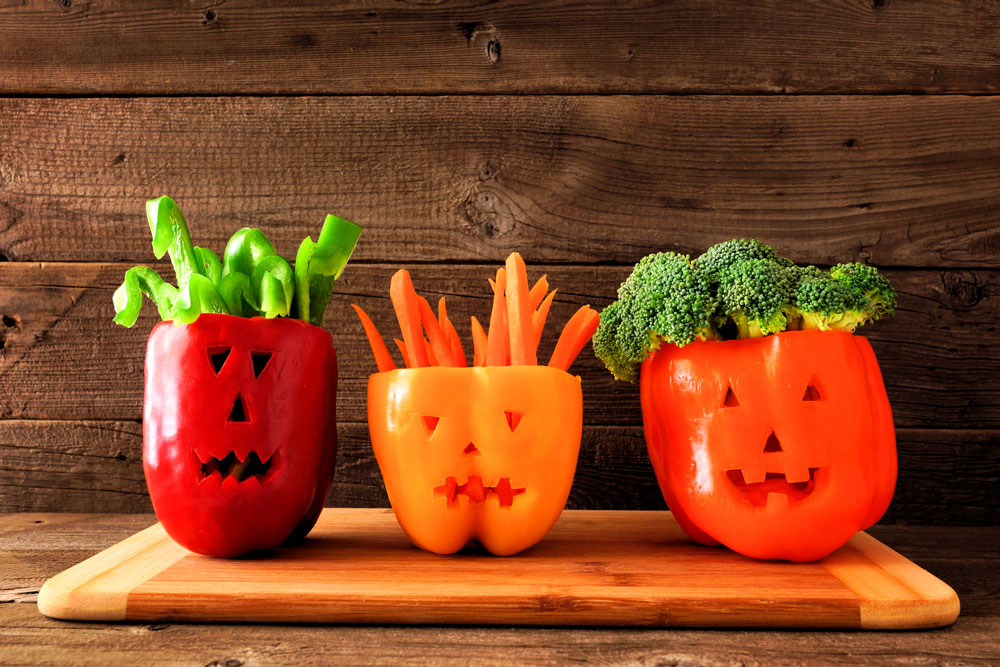
Spooky Snacks
Plan Z Phase: This is a Z3(ZReboot) recipe.
Here’s an idea from the Plan Z kitchen. Use this as Halloween inspiration to create your own deliciously spooky snacks!nThere are so many ways to spin this. The best part? No candy required.
Ingredients:
- Large bell peppers
- finger-friendly veggies: carrots, cauliflower, broccoli
Instructions:
Wash all your vegetables.
Using a sharp knife, cut a straight line across the top of each bell pepper decapitating it (insert wicked laugh here). Clean out the white membranes and seeds. Then cut jack-o-lantern like faces into each bell pepper.
Now, fill each bell pepper with the finger-friendly veggie of your choosing!
Looking for something a little more exciting for adults? Why not stuff these peppers with guacamole or spinach and artichoke dip?
Enjoy!
Cheers,