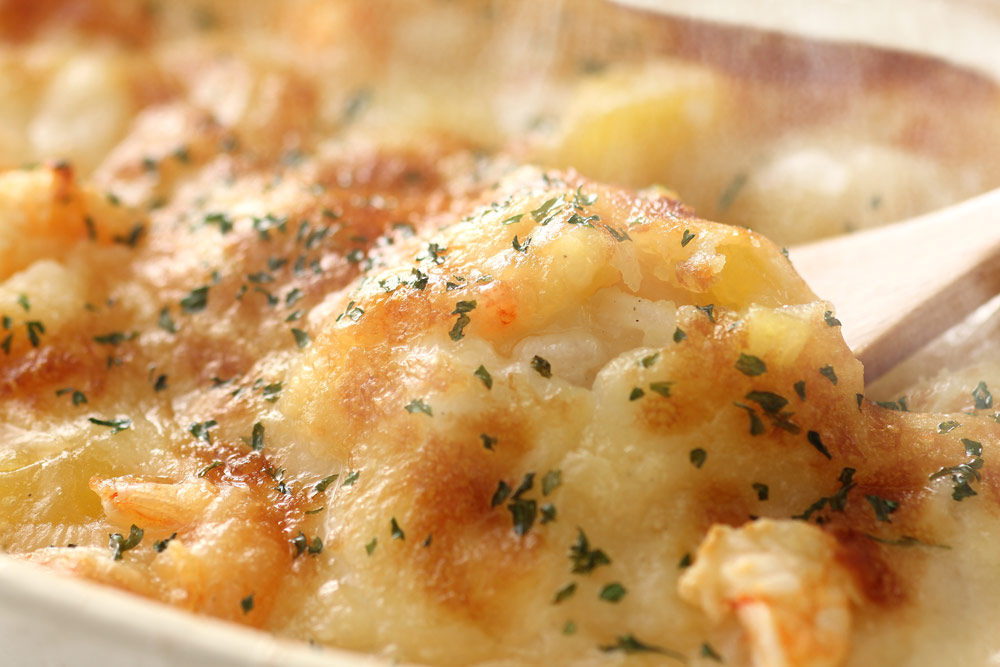
Shrimp and Mushroom Casserole
Plan Z Phase: This is a Z3 (ZReboot) recipe.
Servings: Serves 2.
This is elegant comfort food. It’s sort of like the American version of the French dish called Coquilles St. Jacques. That one is scallops and mushrooms.
Ingredients:
- 1 lb of cooked shrimp. You choose the size. Remove tails unless you like to eat them.
- 2 Tbl of butter
- 2 Tbl of regular flour
- 1 egg yolk slightly beaten
- 1/2 cup of chicken broth
- Grated sea salt to taste
- A dusting of cayenne to taste (or you can leave it out)
- 1 Tbl of lemon juice
- 2 Tbl of bourbon (optional)
- 1/2 cup of grated cheddar cheese
- 1/2 lb of fresh mushrooms
- A dusting of breadcrumbs
Instructions:
Preheat the oven to 350 degrees.
Melt butter, add flour and cook, stirring for a few minutes. You are making what’s called a roux. With a wire whisk stir in the egg yolk and the chicken broth. Add salt and cayenne and cook until it thickens. Slowly add the lemon juice, bourbon and cheese. Saute the mushrooms in another pan until they begin to brown. Add the mushrooms and the shrimp to the sauce.
Transfer to a 9” x 9” oven proof dish. Dust on a light coating of breadcrumbs. Bake in the oven for about 20 minutes.
This is not a drop dead, pretty presentation. It’s comfort food. If you want it to look fancier, you can bake it in 5” round ramekins and it will present like individual casseroles.
Enjoy!
Cheers,
Gault's Tomato Ketchup 100% Sweetened by Vegetables
- Gault’s is the worlds first ketchup that's sweetened with 100% New Zealand vegetables
- It's full-flavored and tastes just like good old-fashioned ketchup, because it’s made using vegetables and tomatoes sourced from New Zealand’s backyard.
- No Added Color and no Preservatives
- No Artificial Sweeteners, 99% Fat Free
- No artificial flavors and our ketchup is corn and wheat free

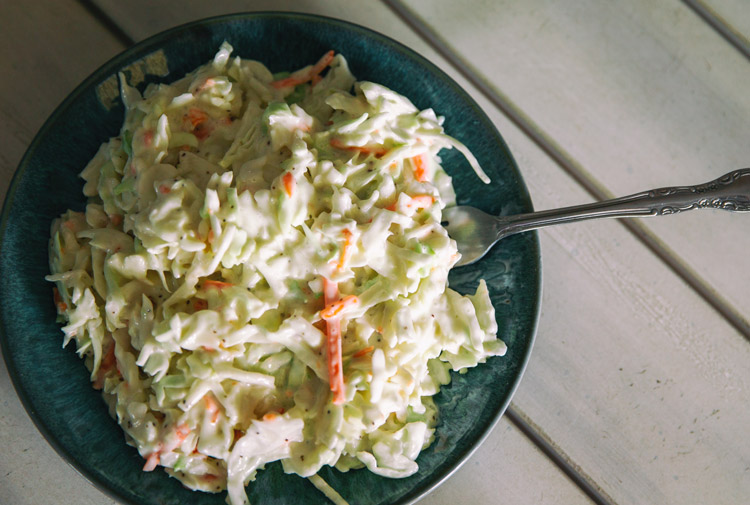
The Secret Slaw
Plan Z Phase: This is a Z3 (ZReboot) recipe.
Servings: Serves 4 – 6.
If you go to find inspiration for a coleslaw recipe like I did, you’ll see several pop ups that claim to be the secret recipe from Chick-Fil-A. Turns out the restaurant chain took coleslaw off the menu and everyone went into a panic.
As I did my research, the funny thing I noticed is that all those slaw recipes claiming to be Chick-Fil-A’s secret recipe are all different! So I used one of those and changed it up to make it mine; I Zolafied it. First thing I did was take out the sugar. The result is a sweet coleslaw that tastes just like my favorite from childhood. Hope you like it.
Ingredients:
- 3/4 cup of mayonnaise. I use mayo made with avocado oil. It’s healthier. Read a few labels and I bet you’ll find one.
- 3 tsp of vinegar. I used champagne vinegar but any white one will work. You just want a little tang.
- 2 Tbl of Swerve or ZSweet. You can order these fabulous sugar substitutes online.
- 1/4 tsp of dry mustard (or to taste)
- 1/4 tsp of grated sea salt
- 1 bag of coleslaw (shredded cabbage). I found a new one that was called angel cut. That means it has thinner shreds. Any will work, though.
- 1/2 cup of shredded carrot (some bags of shredded cabbage already come with carrot in them. If that’s the case, you don’t need to buy more.
Instructions:
In a medium bowl add the mayo, vinegar, sweetener, mustard and sea salt. Mix until it’s all incorporated and smooth. Add the shreds and stir it all up with a spatula.
It’s almost ready. Coleslaw does benefit from some time in the refrigerator for the flavors to meld. Try to let it rest in the fridge for 2 hours or more. Store in an airtight container. It won’t last long though. This stuff is great!
Enjoy!
Cheers,

Sweet Tea (the no sugar way)
Plan Z Phase: This is a Z2 (ZReduction) recipe.
The average recipe for sweet tea contains 8 cups of water and a cup of sugar. A single cup of sugar contains an astonishing 200 grams of carbohydrates! Most humans can’t eat more than about 80 grams of carbs per day before they’d be setting themselves up for weight gain.
So, let’s say you drink just ONE glass of sweet tea a day. That one glass is probably 12 ounces. That’s about 37 grams of carbs in that one drink. And who has just one? Not many.
The good news is you can have your sweet tea and drink it, too. I’ve come up with a new recipe and had it rated and perfected at a party at my home last night.
Servings: Serves 6
Ingredients:
- 10 cups of water. I try to use filtered water.
- 6 – 8 tea bags (The Luzianne’s are double bagged so keep that in mind). The number of bags used depends on how bold you want your tea flavor.
- Liquid stevia to taste
- Lemon wedges, for serving (optional)
Instructions:
Fill your pitcher with the water and drop in the tea bags. Gently push them down a bit so the whole surface gets wet but don’t worry about the fact that they are floating on top. They will make their magic anyway. Be sure not to poke any holes in the bags or you’ll end up with gritty tea.
Put the filled pitcher in the refrigerator and let it sit overnight (or approximately 8 hours).
After the 8 hours is up your tea will be fully “brewed.” You can take out the tea bags and serve. Optionally you can leave the bags in but as time passes you’re more likely to have a bag leak tea into your brew so I prefer to take them out and toss them.
Pour a glass and then sweeten with stevia drops. Serve with lemon wedges.
Enjoy!
Cheers,

Making Sweet Tea
I’m not a fan of iced tea but a whole lot of people are. It’s especially popular in the South. Sweet tea and unsweet iced tea are on the menu at every restaurant.
Obesity is also a bigger issue in the South than most of the rest of the country. Some of that obesity challenge comes when you consume a lot of sweet tea.
I did my research. The average recipe for sweet tea contains 8 cups of water and a cup of sugar. A single cup of sugar contains an astonishing 200 grams of carbohydrates! Most humans can’t eat more than about 80 grams of carbs per day before they’d be setting themselves up for weight gain.
So, let’s say you drink just ONE glass of sweet tea a day. That one glass is probably 12 ounces. That’s about 37 grams of carbs in that one drink. And who has just one? Not many.
The good news is you can have your sweet tea and drink it, too. I’ve come up with a new recipe and had it rated and perfected at a party at my home last night.
I’ve tried lots of ways to brew tea, but my favorite is the simplest. It doesn’t even require turning on a burner. I “brew” my iced tea in the refrigerator.
Another simple way to “brew” iced tea is called sun tea. I used to employ this method when I was younger and foolish enough to sunbathe. My friends and I would lay on the deck all afternoon, chatting and reading. We’d set a pitcher in the sun on the deck filled with water and tea bags. Sometimes we’d be out on that deck for up to 8 hours and the tea would be ready when we were done.
In doing my research on iced tea I found this disturbing piece written by a food blogger about sun tea.
What’s Wrong with Sun Tea
“While sun tea has long been a favorite summer drink, there are concerns about brewing tea for a long time in the hot sun. The primary reason for concern is that the heat and rays from the sun can cause bacteria to grow in your tea. If you ever noticed long strands in your sun tea, that’s bacteria.
This is particularly true if you are like many sun tea brewers and allow your tea to steep for many hours. Three or four hours is the recommended maximum. Refrigerator tea might take a little longer to brew, but the results are the same. You can also feel good about serving this safe tea to your family and friends.”
So, if I ever thought about going back to brewing sun tea this little tidbit has caused me to give up that idea -- forever.
Another thing I’ve learned is it matters what tea you buy. In the South there is a favorite brand called Luzianne.

They sell Luzianne’s at pretty much every grocery store in the South. I had never heard of it before I moved to Chattanooga. Of course, I bought some.
The other popular brand around here for making iced tea is Lipton. That one I know from up North, too.
I’m sure there are others that make great iced tea. You can discover which one works best for you.
I think another important element in making iced tea is the pitcher. I have a favorite made by Anchor.
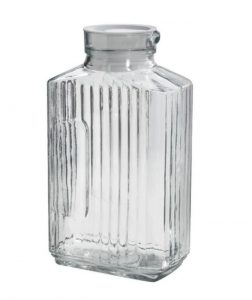
I found it at Target. It’s not expensive. It has a top that seals perfectly. It doesn’t take up much room in my refrigerator and it has a handy handle/grip. This one holds a full 12 cups.
In order to make sweet tea that has no sugar I am going to recommend that you sweeten each glass of tea individually. At the party last night, I had each guest take the bottle of stevia sweetener (I used a new Truvia liquid sweetener) and sweeten their own tea. Remarkably the amount of sweetener required to sweeten the tea to individual preferences ranged from one tiny squirt up to 4 squirts. That’s a big range. You can also buy liquid stevia that has a dropper. I think that solidifies that I’m not going to be sweetening the tea by the pitcher, but rather set out a liquid stevia sweetener and let them do it themselves. Just takes a second.
So enjoy your sweet tea, regular or decaf, and feel safe that you’re not over-consuming the calories and carbohydrates.
Cheers!
![]()
Sweet Tea (The No Sugar Way)
The good news is you can have your sweet tea and drink it, too. I’ve come up with a new recipe and had it rated and perfected at a party at my home last night.
I can do anything for 50 days
“I was just so much lighter. It was like the wind was at my back and I was thrilled.”
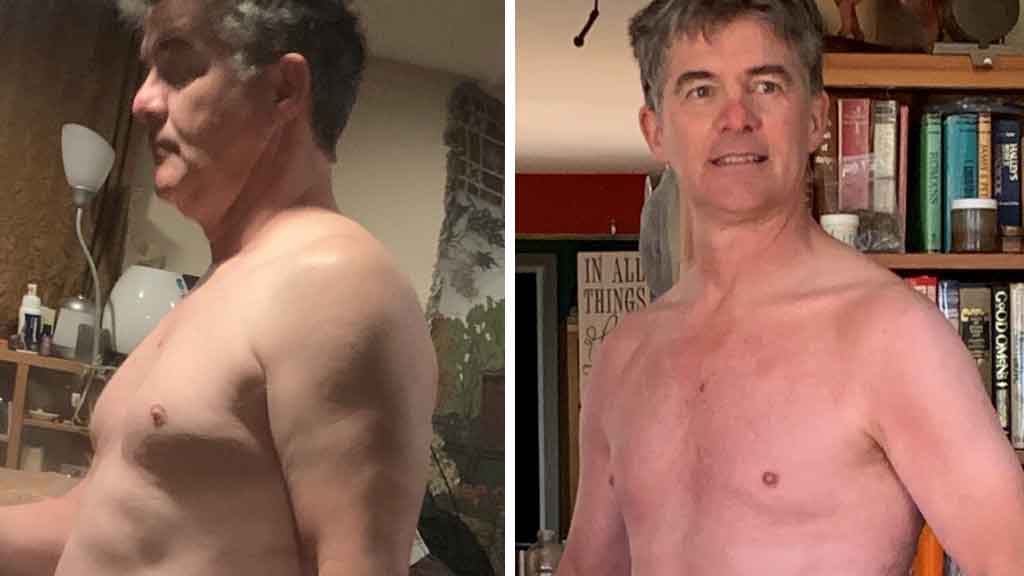
Like most of our dieters, Dieter Grant heard about Plan Z on the radio. Unlike most of our dieters, he hasn’t done much dieting in the past. So when Grant finished Plan Z he was pleasantly surprised by how much weight he lost. During his interview, he told us, “I kept having to re-set my goals, it was working so well.”
Dieter Grant wanted education on better eating. What he received was so much more: shockingly simple and delicious recipes, improved lab results, and an everlasting grin. Oh, and much less snoring!
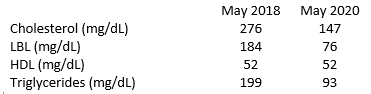
Take a look at his lab results below.
Grant achieved our average weight loss of 31 pounds in 50 days. He developed a really catchy mantra to keep him focused on his goal, his landmark on the horizon.
“50 days is going to happen anyway. How do you want to look at the end of it?” And, “I can do anything [for] 50 days.”
Tap the image beneath to hear more charming tales from Dieter Grant.
One of the things that makes Plan Z so successful is the unlimited inspiration for fresh, home-cooked meals. Our dieters have access to over 900 recipes to choose from and we keep adding more! Dieter Grant didn't have to repeat a meal for more than two or three weeks. One of his favorite recipes is Zola's Asian Balsamic Glazed Salmon. Maybe it'll be your next favorite, too.
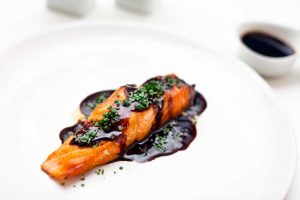
Asian Balsamic Glazed Salmon
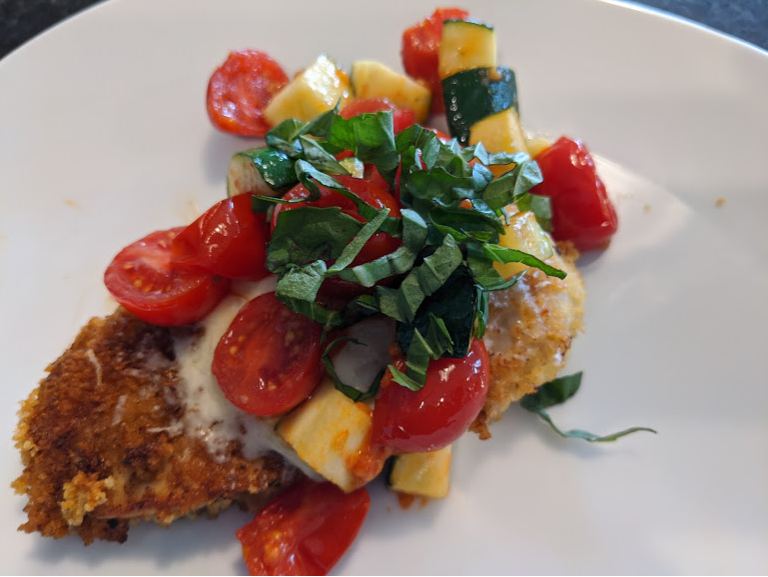
Crispy Chicken with Summer Sauce
Plan Z Phase: This is a Z3.5 (ZReboot 3.5) recipe.
Servings: Serves 4.
This dish will remind you of chicken Parmesan but this has a lighter sauce made with summer veggies. It's easy to make and can be fancy enough to serve at a backyard party. Of course, you can eat this during the cooler months too.
Ingredients:
- 4, 4oz chicken cutlets (Cutlets are thinner slices of chicken breast. Sometimes they are sold as just “thinly sliced chicken breast” on the label. If you are careful you can also cut the cutlets yourself by slicing regular chicken breast pieces in half the long way.)
- A light dusting of grated sea salt and pepper to taste
- 3/4 cup of breadcrumbs. I use Panko for more crunch.
- 2 Tbl of butter
- 1 Tbl of olive oil
- 1 large egg lightly beaten
- 1/2 cup of shredded mozzarella cheese
- 2 cups of zucchini cut into chunks
- 1-1/2 cups of cherry tomatoes sliced in half the long way
- 2 tsp of minced garlic. (Jar garlic will work just fine)
- 3 Tbl of fresh basil chiffonade. Chiffonade just means you slice the basil into thin strips.
Instructions:
Preheat your oven to 400 degrees.
In a large saute pan add your half of your butter and all of your olive oil. Heat on medium high to melt the butter but don't let it burn. Just melt and heat. While that’s melting you can go to the next step.
Put your egg in a shallow bowl and whisk it to break it up.
In another plate or shallow bowl add the panko/bread crumbs.
Dust your chicken pieces with grated sea salt and pepper. Place your small bowls in an assembly line then gently dip both sides of your chicken pieces in the egg and over to the breadcrumbs to cover. Transfer each piece of chicken to the saute pan and cook on medium to medium-high heat for three to five minutes on each side to brown them. Don’t pester them. If you move them around a lot the breading can come off. Transfer them to a cookie sheet sprayed with olive oil.
Put them in your 400 degree oven and bake them for about 12 minutes or until no pink remains. This is a pretty good estimate, but it depends on how thick your chicken pieces are. Butchers don’t have a lot of consistency in this area. When you decide they are done just place a small portion of the grated mozzarella and top and let it melt on the chicken in the hot oven.
While they are baking you can make your sauce. Heat one tablespoon of butter in a saute pan. Add the zucchini first and begin to cook it so it starts to get softer. Add the garlic and the cherry tomatoes. Cook until the tomatoes are warm and just starting to break down. Stir often. This won’t take long. You can just take them off the heat until the chicken is ready.
To serve, place a chicken piece on the plate. Cover with a portion of the summer sauce of zucchini, garlic and tomato. Then top with the fresh basil chiffonade.
Enjoy!
Cheers,
Lakanto Monkfruit Sweetener
Lakanto Monk Fruit Sweetener is the only zero-calorie, zero-glycemic sweetener that is just like sugar. It is made from monk fruit which was used for centuries in eastern traditional herbalism to increase chi and well-being, earning it the nickname “The Immortals’ Fruit”. We still grow and harvest monk fruit for Lakanto in the same pristine area and according to traditional and environmental methods.
- TASTES JUST LIKE SUGAR: Contains zero net carbs, zero calories, and is zero-glycemic. Perfect for cookies, coffee, desserts, and other sweet, sugar-free treats.
- 1:1 SUGAR REPLACEMENT: Lakanto Monkfruit Sweetener matches the sweetness of sugar, helping you fill your kitchen with a healthy cup-for-cup alternative to ordinary baking and cooking ingredients.
- LIFESTYLE FRIENDLY: Works with ketogenic, diabetic, candida, paleo, vegan, low-carb, low-sugar, non-GMO, and all-natural diets.
- CLASSIC, GOLDEN & POWDERED: Golden Lakanto is a brown sugar substitute, Classic White is a white sugar substitute, and Classic Powder is a powdered sugar substitute.
- INGREDIENTS: The perfect mix of monk fruit extract and erythritol with no fiber, no maltodextrin, and no artificial flavoring or sweeteners.


Win-Win
Meet Dieter Winslow (nickname "Win"). He’s an old friend of our VP of Anger Management, Chris Lytle. Win’s decision to lose weight was triggered by the scale when it read 199 pounds. He was determined to not reach 200 pounds or buy new clothing. At first, his goal was to lose a couple pounds a month. After a little prodding from an old friend, Win set his sights a little higher and purchased plan Z. Instead of a couple pounds a month, he lost a couple pounds a week. In fact, Win lost a total of 37 pounds with Plan Z!
“Really the diet has helped so much. It’s educated me. The spray has been fantastic.”
Along with feeling lighter, Win is also eating smarter. He told us, “The whole diet taught me how to eat.” Win learned all the ways sugar can hide in ingredient labels and once he started paying attention to ingredient labels, he realized sugar was everywhere. It's shocking to learn that most of processed foods are made from wheat, corn sugar and soy.
He provides a few more great tips in his interview too. Have a listen below.
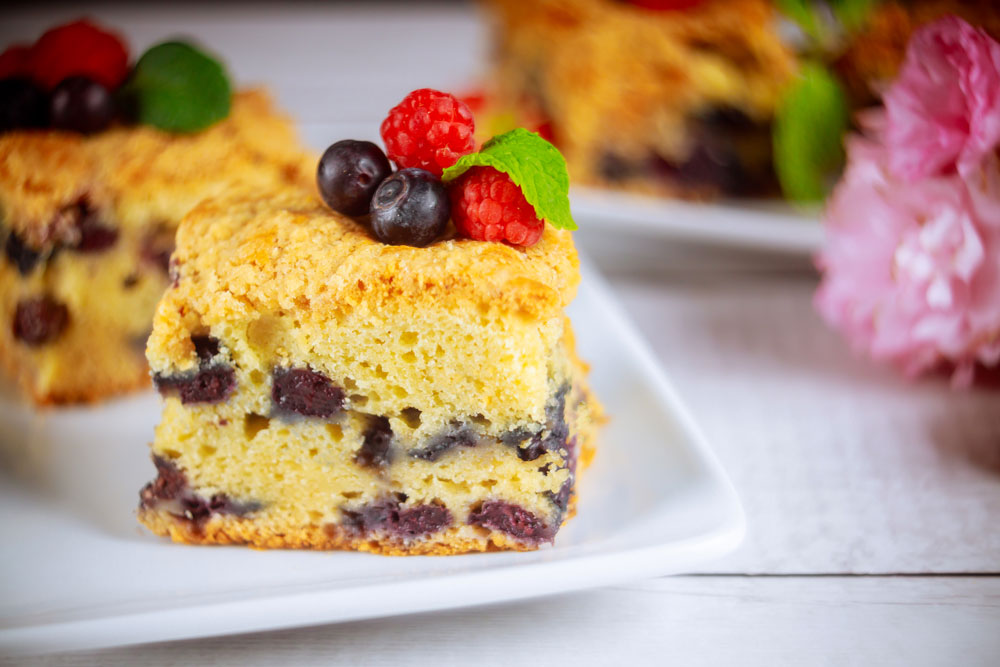
Low Carb Berry Coffee Cake
Plan Z Phase: This is a Z3.5 (ZReboot3.5) recipe.
Servings: Serves 4 – 9 depending on how big you cut the pieces. Try to make them smaller. This is a treat.
For breakfast in the morning or with a cup of tea in the afternoon, this low carb coffee cake hits the spot. I made mine with blueberries fresh from the garden, but most berries will work.
Ingredients:
For the cake:
- 1/2 cup of sugar substitute. I use Swerve or ZSweet. Order online. These work better than Truvia because they don’t have any aftertaste.
- 1/4 cup of softened butter
- 1 egg
- 2 tsp of lemon zest (I used dry from my spice drawer)
- 1/2 cup of regular white flour
- 1 cup of almond flour
- 2 tsp of baking powder
- 1/4 tsp of salt
- 1/2 cup of whipping cream
- 1 1/2 cups of fresh berries. Blueberry, blackberry, raspberries, or sliced strawberries.
For the topping:
- 1/4 cup of butter softened (NOT MELTED)
- 2 Tbl of brown sugar
- 1/4 cup of sugar substitute like Swerve or ZSweet
- 1/3 cup of almond flour
- 1/2 tsp of ground cinnamon
Instructions:
Preheat oven to 350 degrees
Spray an 8" X 8" ovenproof pan.
In a large bowl add the sugar substitute, butter, egg, lemon zest. Beat this with your mixture until it’s fairly fluffy and fully combined. Turn off mixer. Add the flours. Scatter the baking powder over the top of the flours. Add the salt and cream. Stir this mixture with a spatula until it’s all mixed. Add the berries and gently fold them in using the spatula. Pour the batter into the baking pan and spread it toward the edges.
Mix the topping ingredients in a small bowl using a fork. You want crumbles when you are finished. Sprinkle the topping over the batter in the pan. Bake 40-45 minutes or until a toothpick comes out clean. (Try to poke it where there are no berries so you can see if the toothpick really is clean and the cake is fully cooked. Should be moist and fairly fluffy). A coffee cake made with almond flour won’t be as light as one with just regular flour but it still tastes marvelous.
Enjoy!
Cheers,

Potatoes Brabant - Air Fryer
Plan Z Phase: This is a Z3.5 (ZReboot3.5) recipe.
Potatoes Brabant are super-easy to make in an air fryer. The dusting of grated Parmesan cheese helps keep the glycemic uptake down so your blood sugar won’t spike. I don’t make these often, but they are a real treat when I do.
Servings: Serves 2. Can be doubled easily.
Ingredients:
- 3 or 4 small yellow potatoes. (2-3” in diameter)
- 4 Tbl of grated Parmesan cheese (or to taste)
- Grated sea salt and pepper
Instructions:
Wash and dry your potatoes. You don’t even need to peel them. Cut them into small cubes, maybe 1/2” across.
Spray your air fryer basket with olive oil spray. Put in the potato bits. Spray them again with olive oil and toss. Do this over the sink in case it drips. Cook the potatoes at 400 degrees for 20-25 minutes.
They will be crispy on the outside and perfectly tender in the middle.
With some air fryers, it is a good idea to toss them half-way through so the ones on the bottom get crispy too. My air fryer has a shallow basket, so I don’t need to do that.
Dust with grated Parmesan, season with grated sea salt and pepper and serve.
Enjoy!
Cheers

Banana Peanut Butter Bars
Plan Z Phase: This is a Z3.5 (ZReboot 3.5) recipe.
This recipe is similar to one posted on a Paleo site. I adjusted it for Plan Z Dieters, changed it to banana peanut butter bars, but I didn't have to do much.
The best news is Bob’s Mill has come out with a “superfine” grind almond flour. It’s so smooth, it’s very much like wheat flour, only a yellow-ish color. It makes baked goods so tasty you’d hardly tell the difference. The older almond flour was denser so bars and cookies were less fluffy. This stuff is spot on and I use it for all of my baked goods now that call for almond flour.
Servings:
Serves 12 or so, depending on how large you cut them. A smaller one makes a great treat but if this is going to be breakfast before school for a little one, I’d give them a bigger piece.
Ingredients:
- ¾ cup blanched almond flour (Use Bob’s Mill, superfine grind almond flour/meal)
- ¼ cup coconut flour (You can get this in the grocery store or order online)
- ½ teaspoon baking soda
- ¼ teaspoon grated sea salt
- ¾ cup mashed ripe banana (about 2 medium)
- ½ cup unsweetened natural peanut butter. I get mine at Whole Foods (365 brand) because it’s not oily
- ¼ cup melted coconut oil, melt it in the microwave and let it cool down a bit to pour
- 3 eggs
- 2 tablespoons raw honey
- 2 teaspoons vanilla
- ¼ cup mini chocolate chips (optional), or cut up a dark chocolate bar into bits for lower carbs and richer flavor
Instructions:
Preheat oven to 350° degrees. Grease a 9" x 13" inch baking pan. You'll need it later.
In a mixing bowl, whisk together the almond flour, coconut flour, baking soda, and salt.
Add the banana, peanut butter, coconut oil, eggs, honey, and vanilla and beat with an electric mixer until well combined.
Stir in the chocolate chips.
Spread the batter evenly in the prepared pan. Bake for 20 minutes or until done in the center. Cool before cutting. You can also gently reheat these for a warm treat/breakfast bar.
Enjoy!
Cheers,
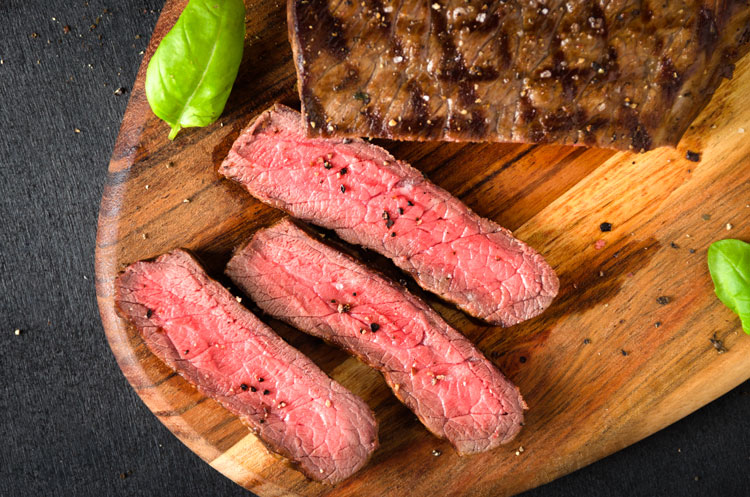
Marinated Flank Steak - Air Fryer or Grill
Plan Z Phase: This is a Z3.5 (ZReboot3.5) recipe.
Servings: Serves 2- 3. Can be doubled easily to feed a family or a small party.
Flank steak needs to marinate to give it full flavor and to make it tender. We all love the price of flank steak compared to higher-priced cuts like beef fillet. It just needs a little attention to make it shine. I cooked this in my air fryer but if you don’t have one you can just toss it on the grill and follow the same basic instructions.
I have a new fave in the honey department. I found this sweetener at my grocery store when I was looking for honey. I haven’t had a bottle of honey in my cupboard in years so this was a pleasant surprise. The honey makes a big difference in this marinade. It really made the steak taste special.
Ingredients:
- 1/3 cup of olive oil
- 2 tsp of powdered garlic
- 2 Tbl of red wine vinegar
- 3 Tbl of Honey 50. If you can’t find this, I’d go with 2 Tbl of a good farmer’s market honey.
- 1 lb of flank steak
Instructions:
In a large baggie put in the oil, garlic, vinegar and honey. Stir the ingredients around by squishing the bag with your hands until it’s all mixed up. Add the flank steak and zip it shut. Swirl it around from the outside to distribute the marinade. Let set in the zipped bag in your refrigerator for at least 4 hours or longer if you can.
Lightly spray the bottom of your air fryer basket with olive oil. Place the steak in the basket and cook in your air fryer for 15 minutes on 400 degrees. Let the steak sit on the counter for 10 minutes for the juices to reabsorb. Air fryers are not all the same so you may need to adjust according to your appliance.
Slice the flank steak on the bias (across the grain) into narrow slices and serve.
Enjoy!
Cheers,
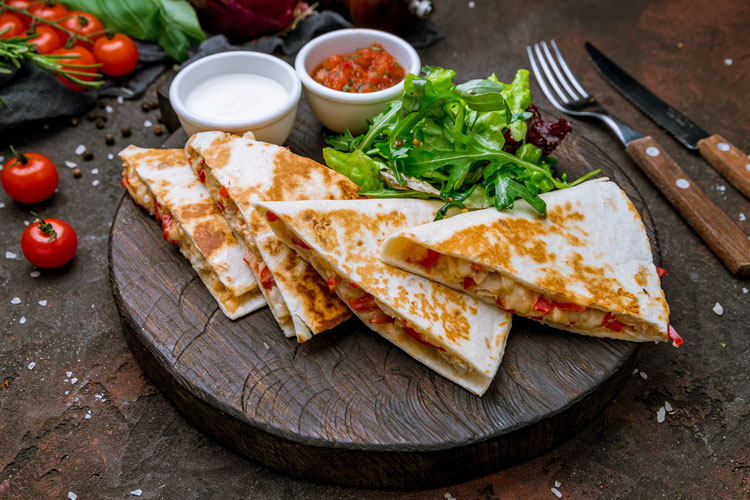
Low Carb Foldover Quesadilla
Plan Z Phase: This is a Z3.5 (ZReboot3.5) recipe.
Servings: Serves 4.
These 10” foldover quesadillas are plenty big for lunch or a lighter dinner. I’m writing this up like you are choosing your items from a buffet. I have done these with a crowd at a party and laid out all the ingredients. Each person took a plate, a tortilla and went around placing their ingredients on the tortilla. Then they brought them to me to grill. I could do a few at a time. It made a fun time to sip a drink while each person’s quesadilla cooked. I have given instructions here for how to bake them too.
Hint: if you place some cheese on the tortilla before you choose your ingredients and then put more cheese on top before you close up your quesadilla the cheese will melt and act like a glue to make them easier to flip on the grill. In the oven, no flipping necessary.
Ingredients:
- 1 package of LOW CARB 10” tortillas
- 3 cups of cooked protein: shredded chicken or pork, chopped steak or shrimp or go vegetarian.
- 5 Tbl of cheese: Monterrey jack, cheddar or any Mexican blend (You can even go wild and include blue cheese crumbles. They just won’t be traditional Mexican.)
Choose your veggies:
- chopped bell peppers (any color),
- sliced jalapenos
- chopped onion
- chopped tomato
- cooked corn kernels
- green onion
- minced chipotle peppers in adobo sauce
Other fillings or side elements:
- beans (pinto or black beans might be fun)
- Guacamole
- sour cream
- salsa
- pico de gallo
- hot sauce
- Shredded lettuce is a tradition too.
Optional seasonings (You might set out a set of spices that people can dust on their filling):
- cumin
- smoked paprika
- cayenne
Instructions:
Preheat your oven to 400 degrees.
Put your 10” tortilla on a plate. Place some shredded cheese on one half of the tortilla. A couple tablespoons will do it. Then top with whatever else you want in your quesadilla. Shoot for maybe a half cup at the most of protein and veggie mixture and/or beans, etc. Dust with your seasonings and add a couple more tablespoons of grated cheese (you can even do two different cheeses!) Fold over the other side of the tortilla to sort of seal it. Squish down with the palm of your hand or a spatula.
Spray the cookie sheet with olive oil. Lay on the folded over quesadillas. Remember whose is whose. Even make a note on a piece of paper if you need to.
Spray the tops of the quesadillas with more oil. Bake for 15 – 25 minutes or until they are as brown as you like them. I like mine almost a mahogany brown, so mine are definitely in the oven a long time. I like crispy. Remove the cookie sheet from the oven and remove the quesadillas with a spatula to the plate. Or cut them into wedges to serve.
Garnish as you desire with items from above.
Enjoy!
Cheers,
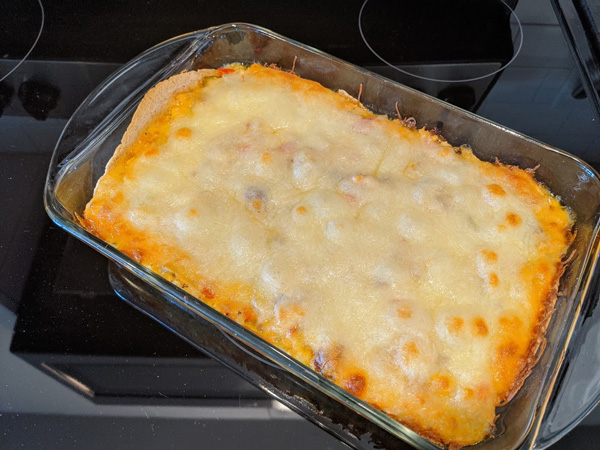
Upside Down Tamale Pie
Plan Z Phase: This is a Z3.5 (ZReboot3.5) recipe.
Servings: Serves 6.
In a regular tamale pie the cornbread is usually on top, like a crust. This low carb tamale pie actually has NO CORN in it. I call it Upside Down because in this recipe the “cornbread” is actually on the bottom. I found this recipe on-line, but I can’t see whom to give credit. I also Zolafied it to make it a bit easier to make. It’s not a super pretty dish to photograph but it tastes authentic without all the carbs.
Ingredients:
- 1 lb of chicken tenders, trimmed of the white membrane
- 6 Tbl of butter, melted
- 1/3 cup of heavy cream
- 3 large eggs
- 4 ounces of diced green chilies (one small can)
- 1/2 cup of coconut flour (If your store does not have it you can order online. It's great to have around to sub for regular flour in many recipes.)
- 1/2 tsp of grated sea salt
- 1/4 tsp of baking powder
- 1/2 cup of enchilada sauce (I used red sauce from a small can)
- 1 Tbl of taco seasoning (I just use an equal mix of cumin, smoked paprika and a sprinkling of cayenne. Most taco mixes in a pouch have other stuff and preservatives in them.)
- 1 cup of grated cheddar cheese
Optional toppings:
- Hot sauce, sour cream and avocado slices
Instructions:
Preheat the oven to 350 degrees.
In a 9 X 9” ovenproof pan spray with olive oil and then put in your trimmed chicken tenders. Bake them for 20 minutes or until no pink remains. Remove them from the oven to cool and then shred the meat with two forks.
While the chicken is baking or cooling you can make your filling. Spray a 9” pie plate with olive oil spray or coconut oil spray.
To make the "cornbread" add the melted butter, cream, and eggs in a mixing bowl. Thoroughly mix with a whisk to combine. Add the green chilies, coconut flour, salt and baking powder. Stir well. Spread the mixture in the bottom of the 9” pie plate. Bake at 350 degrees for 15 minutes. The “cornbread” will be just set but a little wiggly in the middle.
Use a fork to poke holes all over the “cornbread”. Pour the enchilada sauce over the “cornbread”. Toss the taco seasoning elements into the chicken. Distribute the shredded chicken over the “cornbread” and sauce. Sprinkle on the grated cheddar.
Return to the oven at 350 degrees for 10-15 minutes to heat the meat and melt the cheese.
Let it set outside the oven for a few minutes so it will settle. This will not likely cut into even pie wedges. I opted to just scoop it out with a spoon. You decide.
Serve with your optional toppings.
Enjoy!
Cheers,
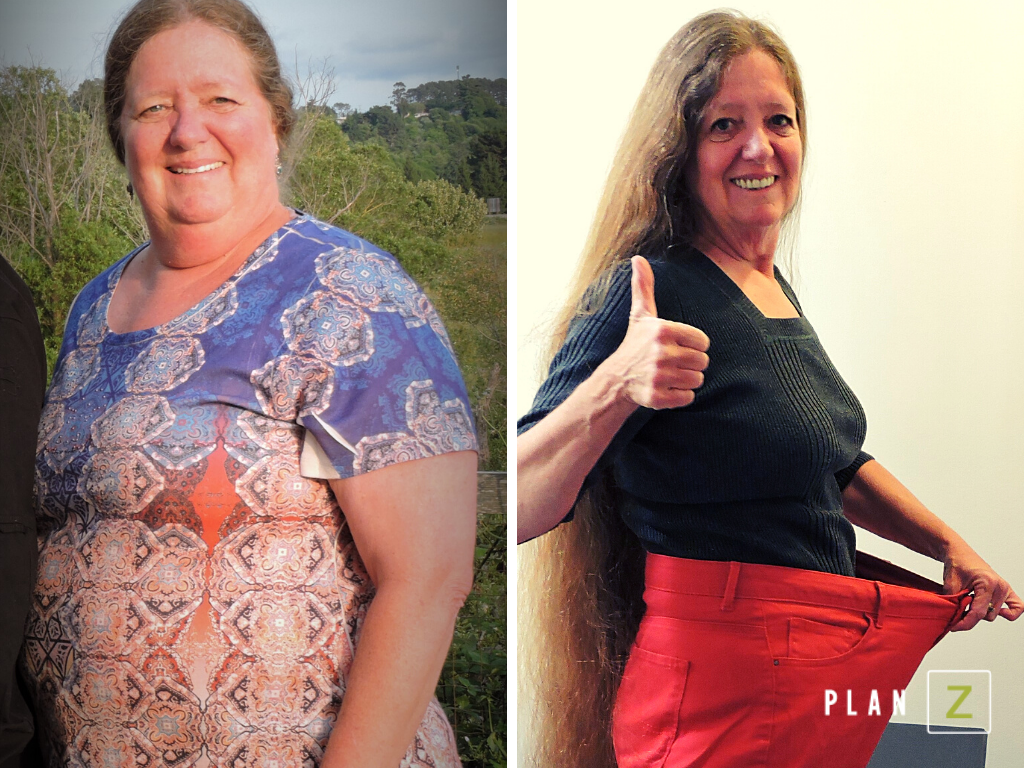
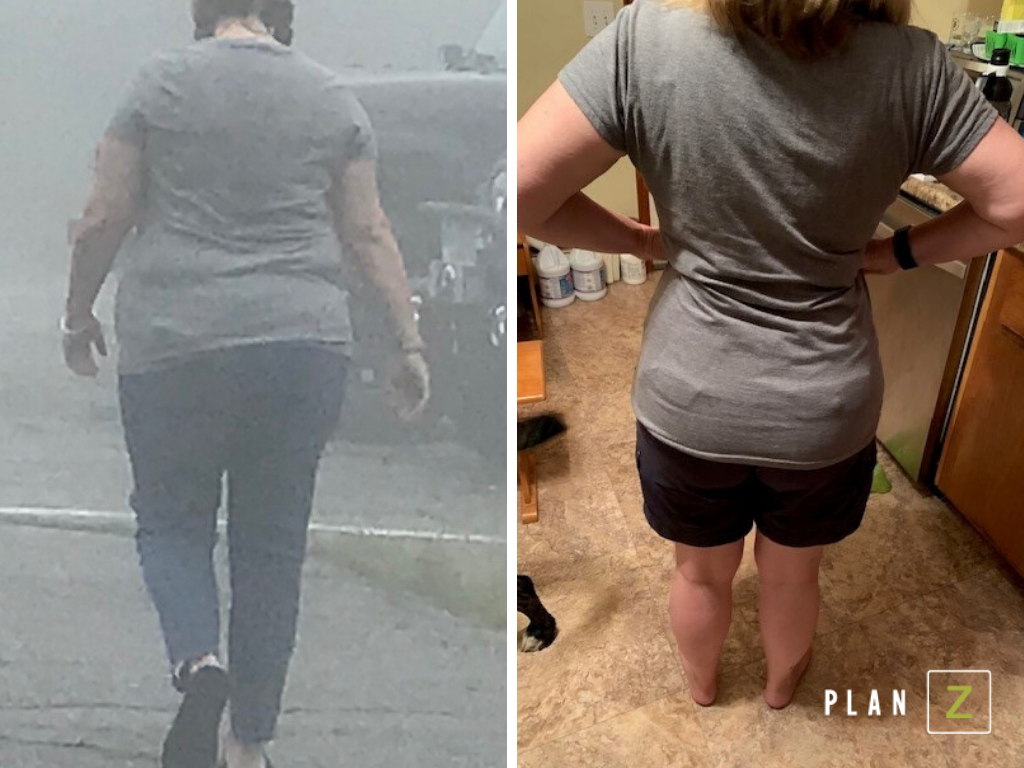
The Closet Dilemma
Dieter Kate from Garberville, CA experienced dramatic weight loss with Plan Z. When Kate started to approach a larger clothing size she decided she would invest in a healthier future with Plan Z instead of a new wardrobe. Now she’s facing a new issue with her closet:
“The hardest part of this diet, for me, has been keeping clothes in my closet that fit.”
Kate was expecting to struggle through the program but was shocked at how easy Plan Z was.
“It’s really been easy. You just follow the diet. You follow the plan and it just comes off.”
With Plan Z the recipes are endless. Kate told us, “The recipes are amazing. I have not come across one recipe yet that I turn my nose up at. They are all very good.”
She's lost 81 pounds so far and is working to hit 100. Her incredible transformation has inspired others to follow in her shoes and after listening to her interview you may find yourself inspired too.
Listen to her rave review below.
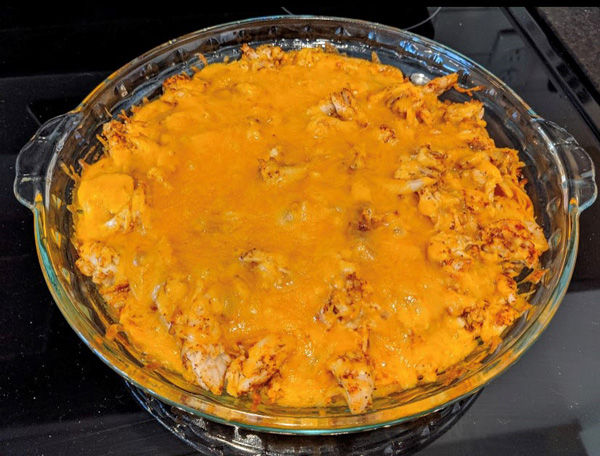
Chicken Enchiladas Suizas Casserole
Plan Z Phase: This is a Z3.5 (ZReboot3.5) recipe.
Servings: Serves 3. Can be double easily and baked in a 9 X 13” casserole.
This is my favorite dish to order in a Mexican restaurant. Trouble is they wrap it in several rolled-up tortillas. This is much better for you if you make it with one tortilla and do it as a casserole. Just as yummy.
Ingredients:
- 1 package (approx. 1 lb) of chicken tenders. Trim off the white membranes
- 2 Tbl of butter
- 1/2 cup of chopped onion
- 1/2 cup of chopped green bell pepper
- 1/2 cup of chopped red bell pepper
- 2 cups of shredded cheddar
- 3 Tbl of diced green chilies
- 1/2 cup of green salsa (salsa verde)
- 2 tsp of cumin
- 2 Chipotle peppers in adobo sauce, minced
- Grated sea salt and pepper to taste
- 1 large low carb tortilla (12”)
- 8 ounces of Monterey Jack cheese
Instructions:
Preheat oven to 350 degrees. Spray your 9 X 9” pan with cooking spray. Put in the chicken tenders and place in the oven to bake for approximately 20 minutes or until you cut into them and there is no pink. Take them out of the oven and set them aside to cool. Wash out the pan and start the making of the rest of the filling.
Melt the butter in a sauté pan over medium heat. Then add the onion and bell pepper bits and sauté until they are loose.
Take two forks and shred the chicken tenders.
Now it’s time to get ready to assemble.
Get out a large bowl. Add the shredded chicken, the onion and pepper bits, the cheddar cheese, chili peppers, green salsa, cumin, chipotle peppers and salt and pepper. Stir with the spatula until completely mixed up.
Spray your 9 X 9” oven-proof pan with olive oil spray. Press one of the low carb tortillas into the bottom of the pan and slightly up the sides. Then pour the chicken mixture on top. Spread it so it covers the tortilla. Top with the Monterey Jack cheese.
Top the casserole with aluminum foil and bake it for 30 minutes. Take it out of the oven and remove the foil. You can serve it as is or you can turn on your broiler and put it back in for a few minutes to broil the top and have a slightly crispy top.
Let it sit to rest for at least 10 minutes before you cut it. You want it to settle and if you try to eat it too soon, you’ll scald your mouth. Cut with a sharp knife and use a spatula to take it out of the pan.
Enjoy!
Cheers,
I feel 110% better
We interviewed Dieter Melissa during her last few days of ZReduction. She works for a home care agency and has been in the medical field for her entire adult life. This kind of job requires 12-hour shifts and made it hard for Dieter Melissa to maintain a healthy diet.
Melissa told us, “You start working 12 hour shifts and you tend to forget to eat…You go to the snacks; you go to the things that are completely and utterly unhealthy.”
Dieter Melissa claims her biggest weakness was sugar and chocolate,
“...One of the main reasons I wanted to do this diet is because my biggest weakness was sugar and chocolate and anything that was very sweet. So, to detox from all of that and now not even have a craving for it is amazing to me.”
The first few days of ZReduction were hard for her. Detoxing from sugar and artificial ingredients is difficult and sometimes nauseating. However, the support, flexibility and fabulous recipes provided by Plan Z carried her through the 48 days of ZReduction and provided the wonderful results depicted above.
Listen to Dieter Melissa’s interview and you’ll learn how “taking out the nasty stuff” like processed foods, excess sugar and artificial preservatives can help you combat stress and anxiety.
“I don’t have the aches and pains that I used to. I wake up very refreshed. I feel 110% better.”
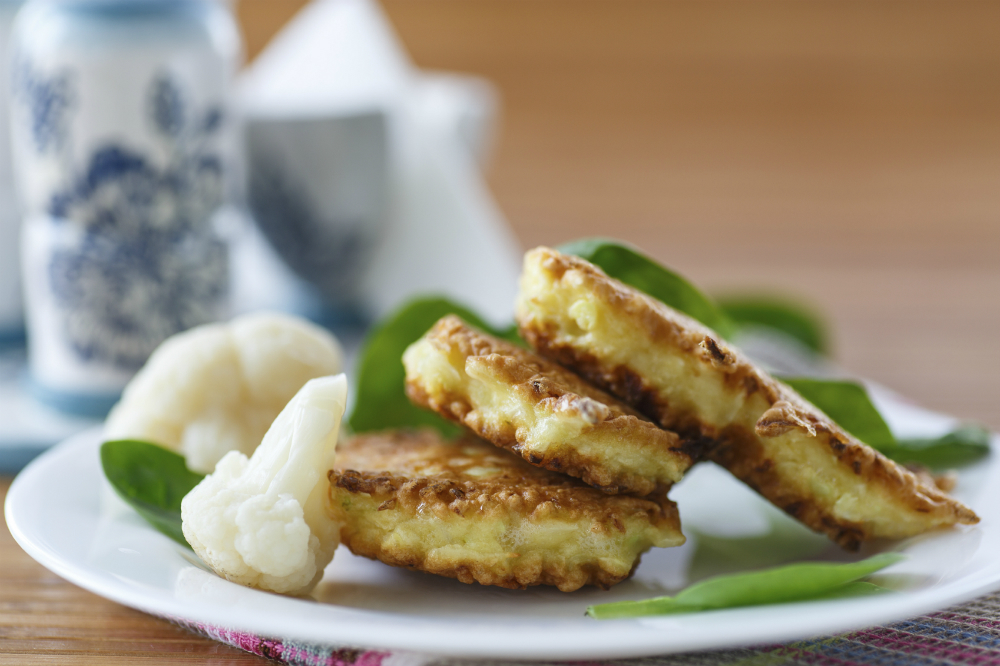
Cauliflower Pancakes
Plan Z Phase: This is a Z3 (ZReboot) recipe.
When I get a hankering for potatoes I always try to think of a healthy low carb alternative first. As CEO and Chief Dieter of Plan Z Diet we're going forward to normal. The other day, potato pancakes came to mind so I immediately thought that maybe they could be made with cauliflower. Turns out they can! I did my research and then made up my own recipe. These are simple and quick, too.
Servings: Serves 4 as a side dish
Ingredients:
- 1 small to medium head of cauliflower. Trim it and cut into small florets. Cut off the leaves and the bigger parts of the stems.
- 2 large eggs, lightly beaten with a fork in a medium bowl
- ½ cup of shredded cheese. Mozzarella or cheddar will work great.
- 2 Tbl of grated parmesan cheese
- 1 medium shallot, minced (or ¼ cup of any onion)
- ½ tsp of garlic powder (optional)
- grated sea salt and pepper to taste
- a pinch of cayenne for brightness (optional)
- if you want to make your cauliflower pancakes more flavorful, you could add cumin and/or chili powder
- olive oil for frying
Instructions:
Put your cauliflower florets in a food process and rice them up. That means pulse the machine until the cauliflower bits resemble rice.
You have your beaten eggs in a bowl. Add the cauliflower and your other ingredients. Stir until well blended.
Heat a tablespoon or two of oil in a frying pan. I try to use a big frying pan so I can get them all cooked in one batch or you can do them in batches and keep the cooked ones warm in your oven.
Use a ¼ cup measuring cup and scoop your cauliflower mixture and gently place it in the hot oil. Just like making breakfast pancakes. Pat down the blob of batter with the back of your measuring cup. Cook on medium. They will bubble a bit. That’s good. Don’t mess with them. You need them to cook nicely and get a brown crust. If you cook them too fast they will burn. If you flip them too fast, they will fall apart. But even broken ones taste good. So don’t fret. They should take about 5 minutes per side depending on how hot your stove cooks.
If you are doing more than one batch, you’ll need to add oil in-between batches. I like mine a bit on the darker, crisper side; which you’ll notice in the picture.
Enjoy!
Cheers,
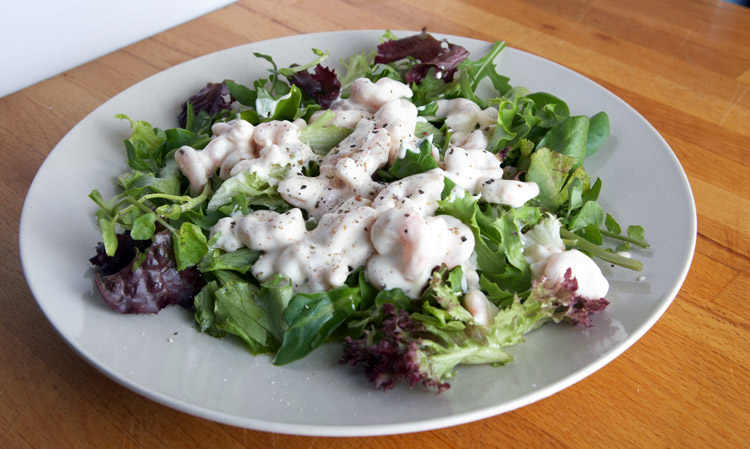
Shrimp Salad
Plan Z Phase: This is a Z3 (ZReboot) recipe.
Servings: Serves 3. Can be doubled easily.
This comes together in a FLASH. When it’s hot outside and you want something easy but on the gourmet side, this hits the spot. You can serve it at a luncheon or a light dinner.
Ingredients:
- 1 lb of cooked shrimp. I use the larger ones. Rinse, remove tails and cut into bite-sized pieces. If you use smaller shrimp you can use them whole.
- 1/3 cup of diced green onion, white parts and light green parts
- 3/4 cup of diced celery
- 1/2 cup of mayonnaise
- 1 tsp of lemon zest (the dry in the jar will work)
- A light dusting of cayenne (optional)
- Lettuce leaves (optional) I use butter lettuce or bib lettuce
Instructions:
Once you’ve prepped your cooked shrimp this all comes together. Put the shrimp pieces in a medium bowl. Add all the other ingredients except the lettuce leaves. Stir thoroughly to combine. Serve on top of lettuce leaves.
Enjoy!
Cheers,