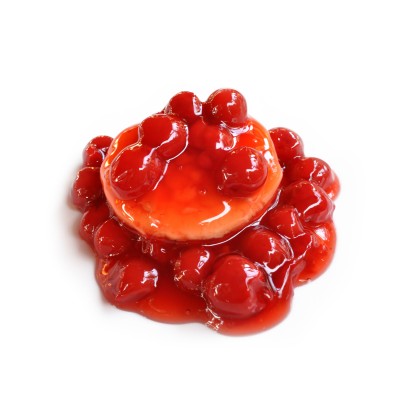
Jubilant Cherries
Plan Z Phase: This is a Z3 (ZReboot) recipe.
VERY IMPORTANT:
Cherries that are a YES/Caution are Montmorency cherries. They are the same ones used in pies. If you buy a can of them they will say “TART” on the can and packed in WATER. DO NOT use ones packed in heavy syrup.
Bing cherries AND Queen Anne Cherries are a HUGE NO! They are very high carb. Twice as high as Montmorency cherries.
If you think you might get confused err on the side of caution and do NOT eat cherries.
Servings: Serving size 1/3 cup, cooked
Ingredients:
- 2 cans of TART (Montmorency) cherries packed in WATER only (You can also use fresh or frozen Montmorency cherries. These are the ones sold in Door County, WI for example)
- 2 Tbl of cornstarch dissolved in ¼ cup of water
- 2 tsp of organic vanilla
- 4 tsp Truvia
- ½ - 1 tsp of almond flavoring
Instructions:
Put the ingredients in a pan and bring to a low boil, stirring often. (If you use fresh cherries you’ll need to add a cup of water to make up for the liquid in the can.) Boil at a slow bubble until the cornstarch kicks in and you get a thick sauce. Tastes just like pie filling. The color will be more pale because you will not be pouring in a bunch of red dye. You don’t need those chemicals in your system.
In ZReboot you can eat these cherries on top of a small portion of ice cream. SMALL portion is 1/3 cup. I highly recommend the ice cream by SO Delicious (NOT SOY Delicious). SO Delicious ice cream is made with coconut milk instead of cow milk. Your digestive system will thank you for it and I bet you won’t even notice the difference. The ice cream is not a real need. You can also eat these cherries over sweetened mascarpone (or cream cheese) and have a delightful Z3 dessert. Another idea would be to eat some of these over the almond pound cake. Big YUM!
Enjoy!
Cheers,
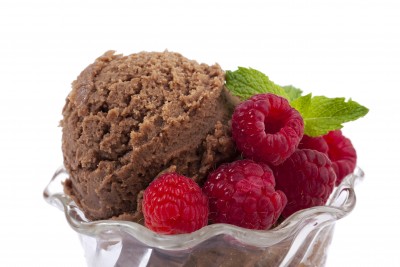
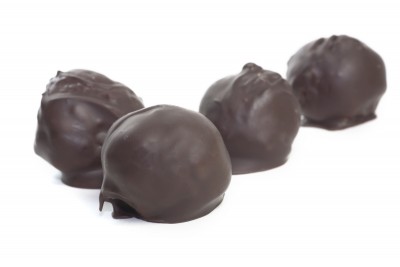
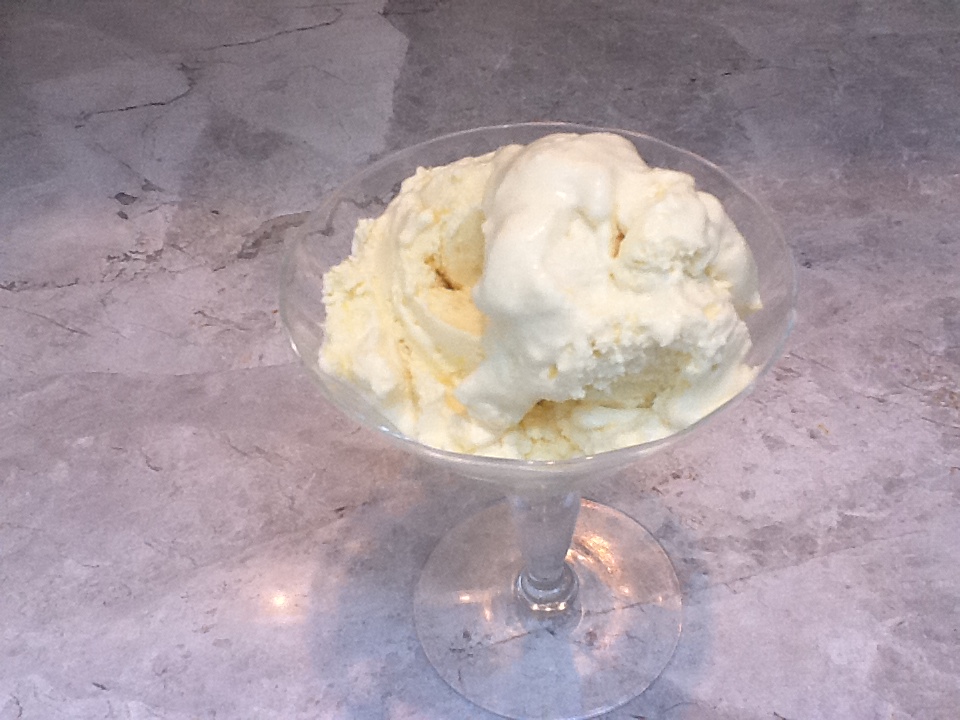
Rich Chocolate Ice Cream
Plan Z Phase: This is a Z3 (ZReboot) recipe.
Servings:
Ingredients:
- ¾ cup of unsweetened cocoa powder, sifted
- ¼ cup of Truvia
- 1 cup of half and half
- 2 cups of heavy cream
- ½ Tbl of organic vanilla
Instructions:
In a medium bowl sift in your cocoa powder. Dispose of any big lumps. Add the other ingredients and stir with a whisk for a few minutes until the Truvia gets well blended and dissolves. (If you want to speed this up you can also do this with a mixer.)
Pour the mixture into your ice cream maker and follow the manufacturer’s instructions for the freezing process.
If you have the same Cuisinart ice cream maker that I do, you can ignore those instructions about putting the mixture in the refrigerator to chill. It works the same if you freeze it right away. With this ice cream maker in 15 – 20 minutes you have ice cream ready to eat.
Enjoy!
Cheers,
Italian Almond Cake
Plan Z Phase: This is a Z3 (ZReboot) recipe that was submitted by Plan Z dieter Nancy.
Servings: 8 servings
Ingredients:
- 5 eggs, separated
- ½ tsp salt
- 1 tsp organic vanilla
- 1 tsp almond flavoring
- zest and juice of a lemon
- 10 tsp Truvia
- 2 cups of super fine ground almond flour
- powdered ZSweet for dusting (optional)
Instructions:
Preheat your oven to 350 degrees.
Grease springform pan (or a 10" round cake pan). It is easier if you then line the pan with parchment paper.
Beat egg yolks until light in color then add the rest of the ingredients except the egg whites.
In a separate bowl, beat the egg whites until they form a soft peak. Add 1/3 of the beaten egg whites to the other mixture and mix well. Add the rest of the egg whites and put in the greased pan.
Bake for 30 minutes or until toothpick comes out clean. Cool completely before removing from the pan. If you want, you can dust with powdered ZSweet for added sweetness.
Enjoy!
Cheers,
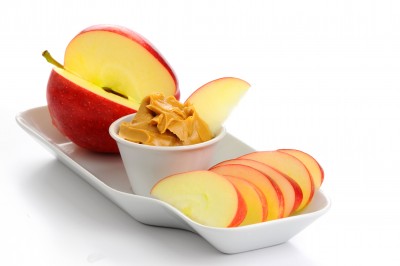
Peanut Butter Fruit Dip
Plan Z Phase: This is a Z3 (ZReboot) recipe contributed by Dieter Victoria. Victoria told us 'With Memorial Day weekend right around the corner, I was trying to come up with a fun ”dip” for apples (instead of caramel), the following sounds a little weird, but it is so delicious with apples or strawberries.' Super easy!
Ingredients:
- 1/2 cup of sour cream
- 1/2 cup of peanut butter (Unsweetened organic)
- 1/2 tsp of Truvia (you can add more depending on taste)
Instructions:
Put all ingredients in a bowl and stir up! No need for a mixer or anything!
Serve with your choice of apples, strawberries or celery.
Enjoy!
Cheers,
Peanut Butter Balls
Plan Z Phase: This is a Z3 (ZReboot) recipe. This treat is the PERFECT answer to staying out of your kid’s Easter basket. This candy is amazingly luscious. So decadent. Eat them in moderation and you can have your candy and eat it too! This recipe was contributed by Dieter Lori. Her husband is a beekeeper; hence the honey. And Lori is the honey who brought us this amazing treat.
I have to guide you a little bit in telling you to follow her recipe exactly. I tried the recipe several different ways including using unsweetened peanut butter in one version and NONE of my variations turned out anywhere near as good as following this just the way she designed it. Measure carefully and follow the instructions.
Here’s how I made them:
Servings:
Ingredients:
- ½ cup of roasted-salted peanuts
- ½ Tbl of peanut oil
- 1 Tbl of honey
- sea salt to taste
- coating
- 4 oz of dark chocolate
- 2 oz of whipping cream
Instructions:
In a small food processor combine the peanut butter ball ingredients to form a thick paste. Refrigerate until cold. Then remove blobs using a small spoon scoop out a portion and roll it in the palm of your hand to round it. You’re making little balls about ¾” in diameter. Make small balls so you can have 2!
Put the rounded balls on a cookie sheet and put them back in the refrigerator to chill again for 30 minutes.
In a small container melt the chocolate and cream to make the coating.
To keep the carbs low, what I did was poke each peanut butter ball with a tooth pick dipped in chocolate and then dipped the bottom of the peanut butter ball in the chocolate coating. This way I had peanut butter balls that were coated on the bottom with a chocolate dot on top. You’ll probably have extra chocolate coating. You need enough to dip them in so it leaves extra.
Chill, covered, until ready to serve.
They won’t last long in most houses.
By the way, when I tried to double or triple the recipe it didn’t work. I got peanut butter mush so I recommend you make each batch separately.
These are a majorly BIG YUM.
Enjoy!
Cheers,
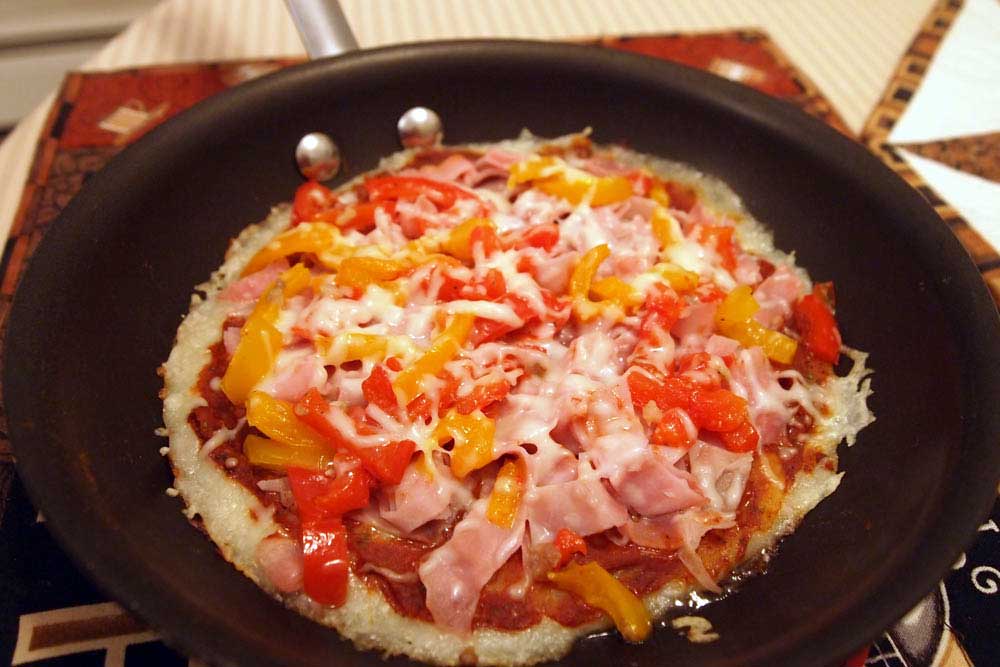
Pizza Zola Style
Plan Z Phase: This is a Z3 (ZReboot) recipe. See notes below about Z3 toppings. Photo submitted by Plan Z dieter Nancy.
Servings: Makes 4 "normal" sized pizza slices
Ingredients:
- mozzarella
- pizza toppings
- any Z3 (ZReboot) approved toppings such as: ground beef, green peppers, onions, bacon, ham, pineapple (caution), see Zola manual for more ideas on Z3 approved veggies and meats
Instructions:
In a large NON-STICK sauté pan, put in a ½” thick layer of shredded mozzarella cheese. The exact amount depends on how large your pan is. In a large (12”) NON-STICK sauté pan would be about 2 cups. Heat the pan to medium. The cheese will begin to melt. Just let it sit and continue to melt on medium. Don’t stir. Don’t touch.
When the pizza starts to get a golden rim around it, begin to inch your spatula under the edges. Go all the way around the pizza to keep it from sticking. Just be gentle so you don’t poke a hole in it. After you inch the spatula around the edge you can add your toppings. You don’t want too much or too many toppings because it will weigh the pizza down and it won’t cook thoroughly. Just keep it to three ingredients and leave spaces around the items rather than pile them all up.
Continue to cook the pizza on medium until the bottom is a golden brown. The cheese on the top will be all melted and your ingredients will stick to the cheese. This takes a good 5 – 8 minutes. You’ll be drooling from the smell but contain yourself.
Gently coax the pizza out of the sauté pan and onto a cutting board. The spatula can be eased underneath and tilt the pan so it slides out.
Let the pizza sit on the cutting board for at least five minutes while it begins to cool. The amazing thing is the cheese will stiffen and your pizza will act like it has a crust when it has none. Cut with your pizza cutter and eat with a fork or pick up pieces and eat just like you would if there were a crust.
I got this idea from an internet recipe. I hope you love it.
Enjoy!
Cheers,
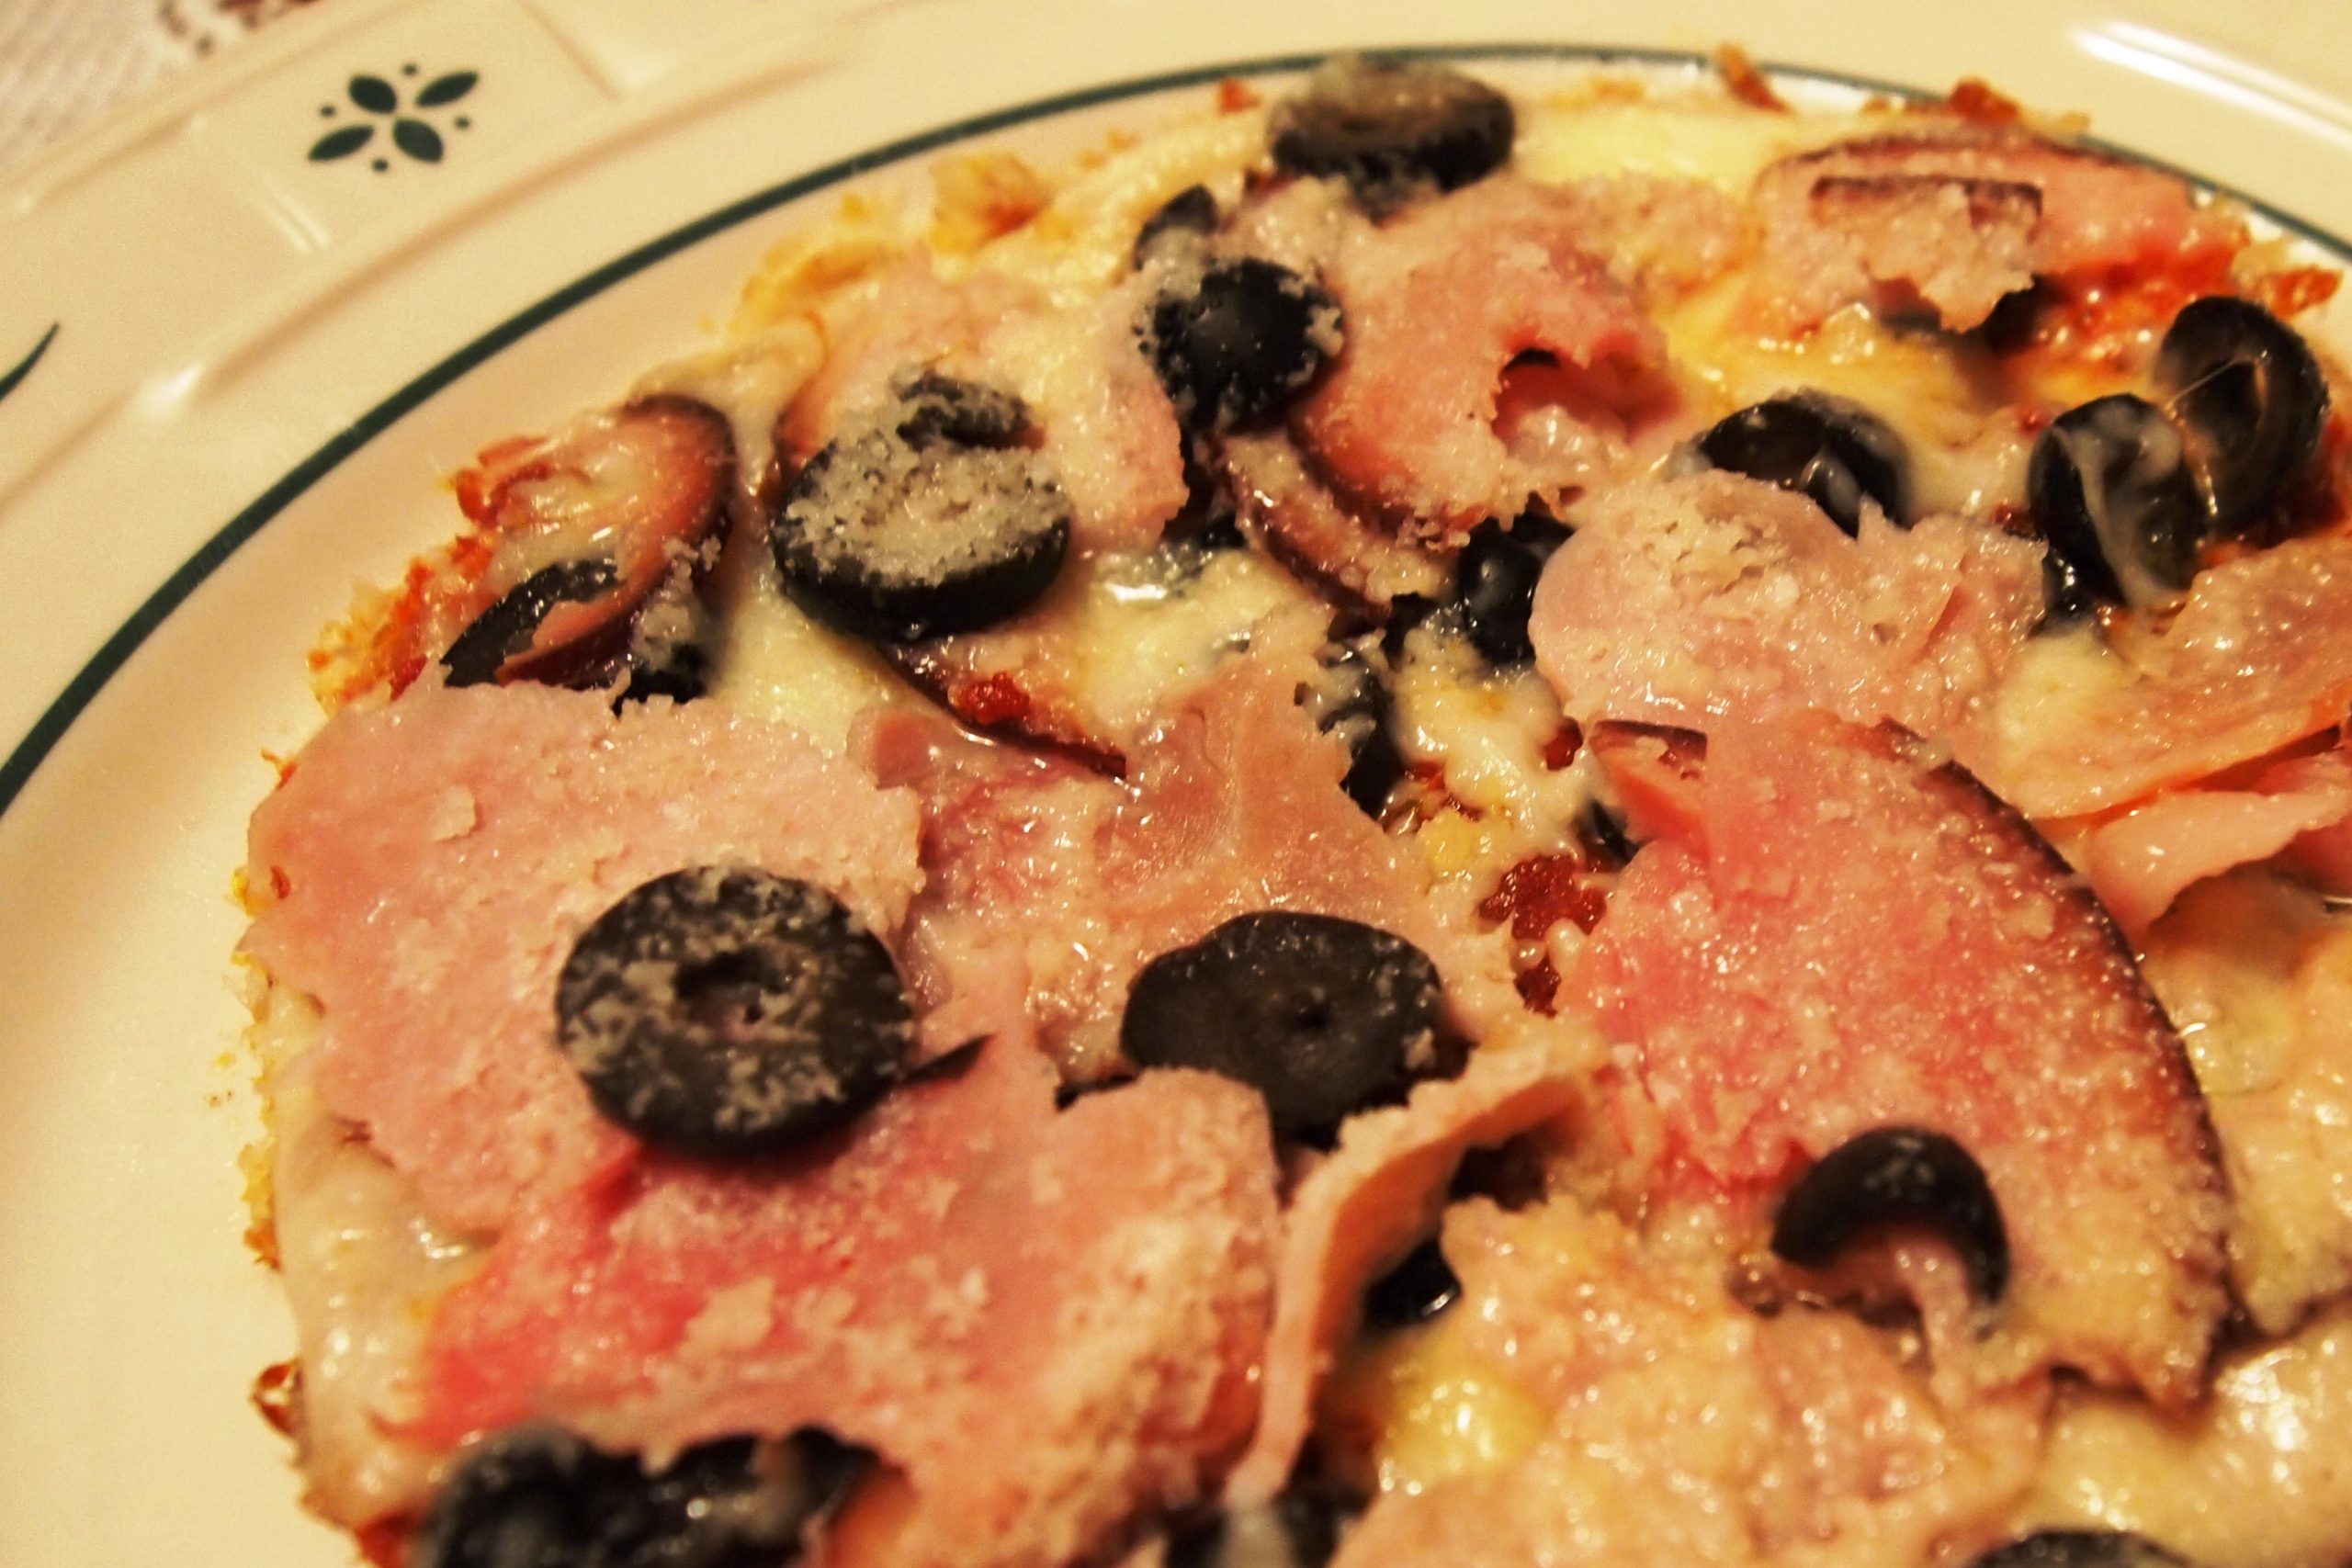
Pizza
This is a Z3 (ZReboot) recipe submitted by Plan Z participant, JoAnn.
JoAnn says, "Here's something I tried today. Since I only cook for one I'm not sure how it would work to make for 2 or 4. I used a non-stick 8" fry pan. All ingredients should be prepped before the final assembly. Please feel free to make any adjustments you think would be appropriate."
Servings: Serves 1
Ingredients:
- 1/4 c chopped onion
- 2 grissini sticks, crushed
- 1-1/2 slice medium thick slice provolone (deli)
- 3 Tbl pizza sauce, no sugar, no additives
- 3 slices deli pepperoni
- 1/4 cup shredded mozzarella
- 2 Tbl fresh grated Parmesan
- 2 Tbl sliced black olives
Instructions:
Warm fry pan on medium to medium low heat then spritz with olive oil spray.
Add onion and let cook until softened. Remove to dish.
Spritz pan with olive oil spray again. Spread crushed grissini across bottom of pan.
Add Provolone cheese (this should just cover bottom of pan. Add pizza sauce, onions, black olives.
Sprinkle with mozzarella cheese and then top with Parmesan cheese.
I covered the pan the last minute to help the top cheese melt.
Loosen edge of pizza and then slide onto plate. Serve with fresh salad.
The calories on this came in at approx 531 calories, 18 carbs.
I look forward to trying with browned ground sirloin and mushrooms.
Enjoy!
Cheers,

Orange Crème Anglaise
Plan Z Phase: This is a Z3 (ZReboot) recipe. This is a perfect dessert sauce. Goes really well with chocolate so you can serve it with any of the chocolate cake recipes or even pound cake. What a restaurant will do is put a small pool of this under the dessert served.
Serving Size: Serves 6 - 8
Ingredients:
- 2 cups heavy cream
- 1 cup milk (non skim)
- 4 tsp of Truvia
- 6 egg yolks
- 2 tsp vanilla
- ¼ cup of Triple Sec or Grand Marnier (if you do not cook with alcohol substitute water with 2 tsp of orange flavoring added. You can use orange stevia drops too).
Instructions:
Scald half of the cream and half of the milk in a small saucepan. This means I heat it just until I see the tiny bubbles forming on the rim of the pan.
In a bowl, whisk the Truvia and the egg yolks together. Slowly (and I mean SLOWLY) whisk the scalded cream into the egg yolk mixture. If you add the egg faster than in a slow stream you will end up with scrambled eggs. Big yuk. So take your time. Now you are going to return the entire mixture, and the second half of the milk and cream, back into the saucepan and start to heat it. You do need to cook it, but slowly. Cook over low heat (do not boil), until the mixture thickens. I stir with a spoon the whole time, very slowly. I can start to feel it thicken and when it coats the back of the METAL spoon without running off I know it is done. This takes about five minutes. This is really a guess because it depends on what size of burner you have it on, but this is a guide.
Take it off the heat. You can strain it now if you want to. I do not do this unless I see any lumps appear. You may have some coating the bottom of the pan. Don’t disturb that. That is over-cooked sauce. Just toss it. Then add your vanilla and Triple Sec and stir again. Let it cool down some and then store it (covered) in your refrigerator until ready to serve. I take it out of the refrigerator while I am clearing the dinner dishes just so it warms up a tad. It will still be cool but bringing it up from refrigerator temperature makes the taste stand out even more.
Enjoy!
Cheers,
Frozen Raspberry Swirl
Plan Z Phase: This is a Z3 (ZReboot) recipe contributed by dieter Darlene. Big Yum!
Ingredients:
Crust:
- 2/3 cup fine ground almonds
- 2 tbs butter, melted
- 1 tsp Truvia
Filling:
- 3 eggs, separated
- 1/4 cup plus 1 Tbl water (to be divided)
- 12 tsp Truvia (to be divided)
- 1/8 tsp salt
- 1/8 tsp cream of tarter
- 8 oz pkg of cream cheese
- 1-1/2 cups Truwhip
- 10 ounces of unsweetened raspberries (frozen or fresh)
Instructions:
Sweeten raspberries with Truvia to taste and set aside.
To make the crust, combine almonds, butter and truvia in a small bowl. Press into an 11 in x 7 in dish coated with olive oil cooking spray. Refrigerate while preparing the filling.
In a small, heavy saucepan, combine egg yolks. 1/4 C water, 6 tsp of Truvia, and salt. Cook stir on low heat until mixture reaches 160 degrees or is thick enough to coat the back of a metal spoon. Cool quickly by placing pan in ice water. Sir for 2 minutes.
In another saucepan, combine egg whites, cream of tartar 1 Tbl of water and 6 tsp of Truvia. With a portable mixer, beat on low speed until mixture reaches 160 degrees. Transfer to a small bowl and beat on high until soft peaks form.
In a large bowl, beat cream cheese until smooth. Gradually beat in egg yolk mixture. Fold in Tru whip then egg white mixture. Drain raspberries reserving 3 Tbl of juice. Crush half of the raspberries with 1 Tbl of juice.
Take the crust out of the refrigerator, spread 1/3 of cream cheese mixture over crust. Spoon half of the crushed berries over the top. Repeat. Using a knife, swirl the raspberries through the cream cheese. Top with the remaining cream cheese mixture. Sprinkle the rest of the raspberries on top and drizzle with the remaining juice. Cover and freeze. Remove from the freezer 15 minutes before serving.
Enjoy!
Cheers,
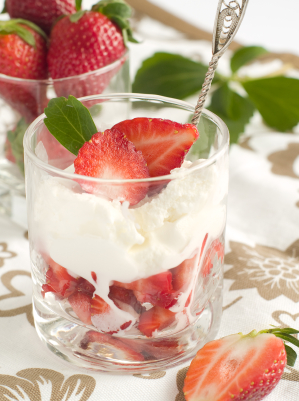
Crustless Strawberry Cheesecake
Plan Z Phase: This is a Z3 (ZReboot) recipe. If you are diabetic this should make your nutritionist and your insulin count pretty darn happy. And you and those you share this with will be happy, too.
Servings: Serves 4
Ingredients:
- 8 oz mascarpone cheese (Italian cream cheese. It’s lighter than US cream cheese, but if you cannot get mascarpone you can use American cream cheese)
- 3 cups of strawberries, divided. 1-1/2 cups would be cut into bits. 1-1/2 cups would be cut into halves.
- 1 tsp lemon juice
- 1 tsp vanilla
- 1 tsp of stevia (Truvia or Purevia)
Instructions:
In a medium bowl with your mixer, whip the cream cheese with the lemon and vanilla. You just want to get it mixed up really nicely and it will become slightly fluffier. Add the strawberry bits and mix those in until combined.
Get out a fancy glass or dish to serve this in. Divide what’s in the bowl into 4 portions. I use the antique champagne saucers I have that are on stems. They make a really pretty presentation.
Cover with plastic wrap and put in your refrigerator until you are ready to eat them.
Put the other strawberries in a bowl with the stevia. Stir. These strawberries will macerate and become very juicy.
Serve strawberries on top of the cheesecake mixture when you are ready to eat.
Enjoy!
Cheers,
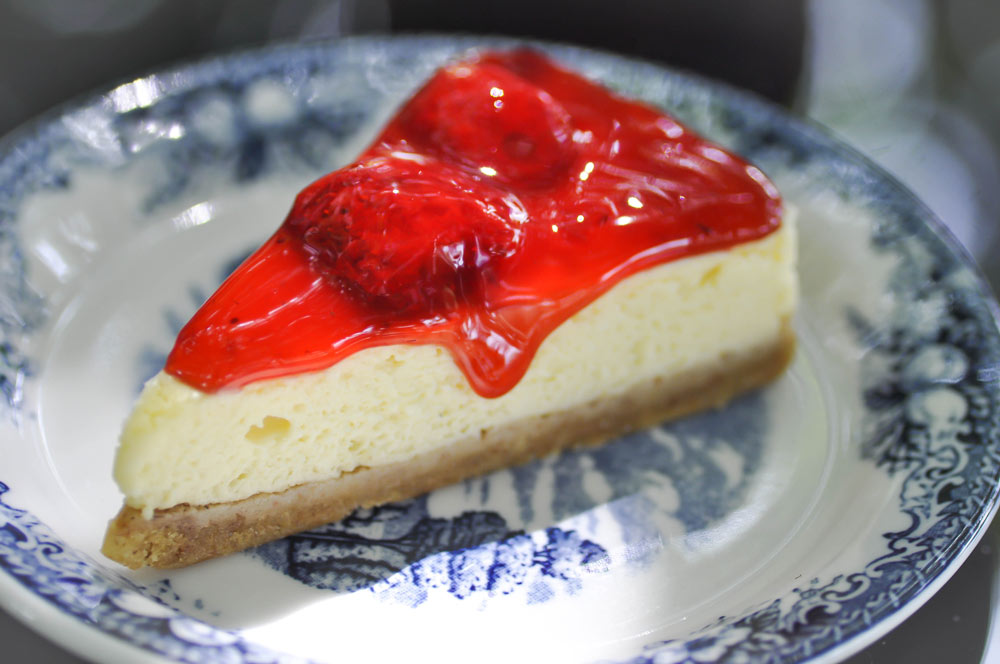
The Secret Ingredient Cheesecake with Strawberry Topping
Plan Z Phase: This is a Z3 (ZReboot) recipe. This is one of the moistest, most intense cheesecakes I have ever made. The recipe was adapted from one I saw in a House Beautiful magazine. I can’t take full credit. I did have to change it a lot to Zolafy it though. I hope you love it as much as I did.
I originally made this cheesecake for a special guest and her friends. Dieter Nancy won our dinner with Zola contest. I was supposed to make her a full dinner but I was truly under the weather with a horrible cold so I could only muster dessert. We took the gang out to dinner and brought our own dessert to the restaurant. The restaurant did not complain. They happily served it to us knowing we were all on a no-sugar diet. Even a few of the waiters got to share a couple of extra pieces. Thank you to Nancy for making the trip and bringing along some fun folks!
The secret ingredient is goat cheese. Don’t tell your guests it’s in there. Just let them guess. Kinda fun.
Servings: 8 – 10 servings
Ingredients:
For the cake:
- ½ cup of chopped pecan pieces
- 4 oz of cream cheese (full fat), room temperature
- 4 oz of goat cheese, room temperature
- 1 pint of sour cream (full fat)
- 3 eggs
- 5 tsp of Truvia
- juice of one lemon
- 1 tsp of organic vanilla
For the topping:
- 2 cups of strawberry slices
- 2 tsp of Truvia
- juice of 1 lemon
- 2 oz of Grand Marnier (if you don’t cook with liqueur you can use water or add a bit of orange flavoring or orange stevia drops).
Instructions:
For the cake
Preheat your oven to 325 degrees.
Take out your 9” springform pan. Lightly spray the bottom of it with olive oil spray. Spread across the pecan pieces. Wrap the bottom of the pan and up the sides with aluminum foil to protect the cheesecake.
Put the rest of the ingredients in your food processor and process until smooth. Scrape down sides half way through if necessary. (If you don’t have a food processor you can do this in a bowl with a mixer too).
SLOWLY pour the cheesecake mixture over the pecans. I say do this slowly and evenly so it doesn’t disturb the pecans. If you do it too fast some of the pecans will end up floating further up to the top. That happened to me and it’s not a big deal, but if you want your pecans to stay at the bottom you have to do this slowly.
Now you are going to make a water bath for your cheesecake. Put the wrapped cheesecake in a pan that’s larger than the 9” springform pan. Add water until it comes half way up the sides of the pan. Do NOT exceed the height of the aluminum foil or the water just might get into the cheesecake.
Carefully transfer to the oven and bake for 45-50 minutes. The cheesecake will still be slightly jiggly. Carefully remove the cheesecake from the water bath and leave on the counter for 45 min – 1 hour to cool. Then transfer to your refrigerator.
For the topping
While the cheesecake is baking or cooling you can make your topping. This topping can be made with other berries besides strawberry but I assure you the strawberry is a hit.
Put ingredients (see ingredients list above) in a small sauce pan and heat until it just begins to bubble. Turn off. The sauce will be watery in texture with the strawberries for balance.
Hold the sauce, if possible, in the refrigerator separate from the cheesecake. Spoon a small amount of sauce over each piece as you serve it. If you put the strawberries and sauce on top ahead of time you risk making the cheesecake mushier but I did that because I had to transport the cheesecake and it was just fine.
Enjoy!
Cheers,
Apricot Cream Dream
Plan Z Phase: This is a Z3 (ZReboot) recipe. This is one of the desserts I served on Saturday night for my 20/30 Martinis and Magic party. It was a huge hit and it was so simple!
Ingredients:
- 4 tsp of Truvia, divided
- 1 pint fresh apricots (or canned). Cut the apricots in half and take out the pit, then cut into chopped bits.
- 8 oz cream cheese, room temperature (light or regular will both work)
- 2 heaping Tbl sour cream
- 1 tsp vanilla
Instructions:
Before you begin you need to prepare the apricots. Put the cut apricots in a bowl with 2 tsp of the Truvia. Stir them around so you are coating the apricots. Let this sit on your counter or in the refrigerator for about 2 hours. This process is called macerating. You're getting the apricots nice and sweet.
In a medium bowl, put in your cream cheese, the sour cream, the vanilla and the other two tsp of Truvia. Beat until fluffy.
To assemble, drain the apricot bits and toss out the sweet juice. You won’t need it. Combine the apricots and the creamy filling. Put scoops of the mixture into your dessert bowls. In this case I used teeny martini glasses for a fancy party. This made mini desserts. I piped sweetened whipped cream on top.
Chill until ready to serve. Keep leftovers in the refrigerator.
Enjoy!
Cheers,
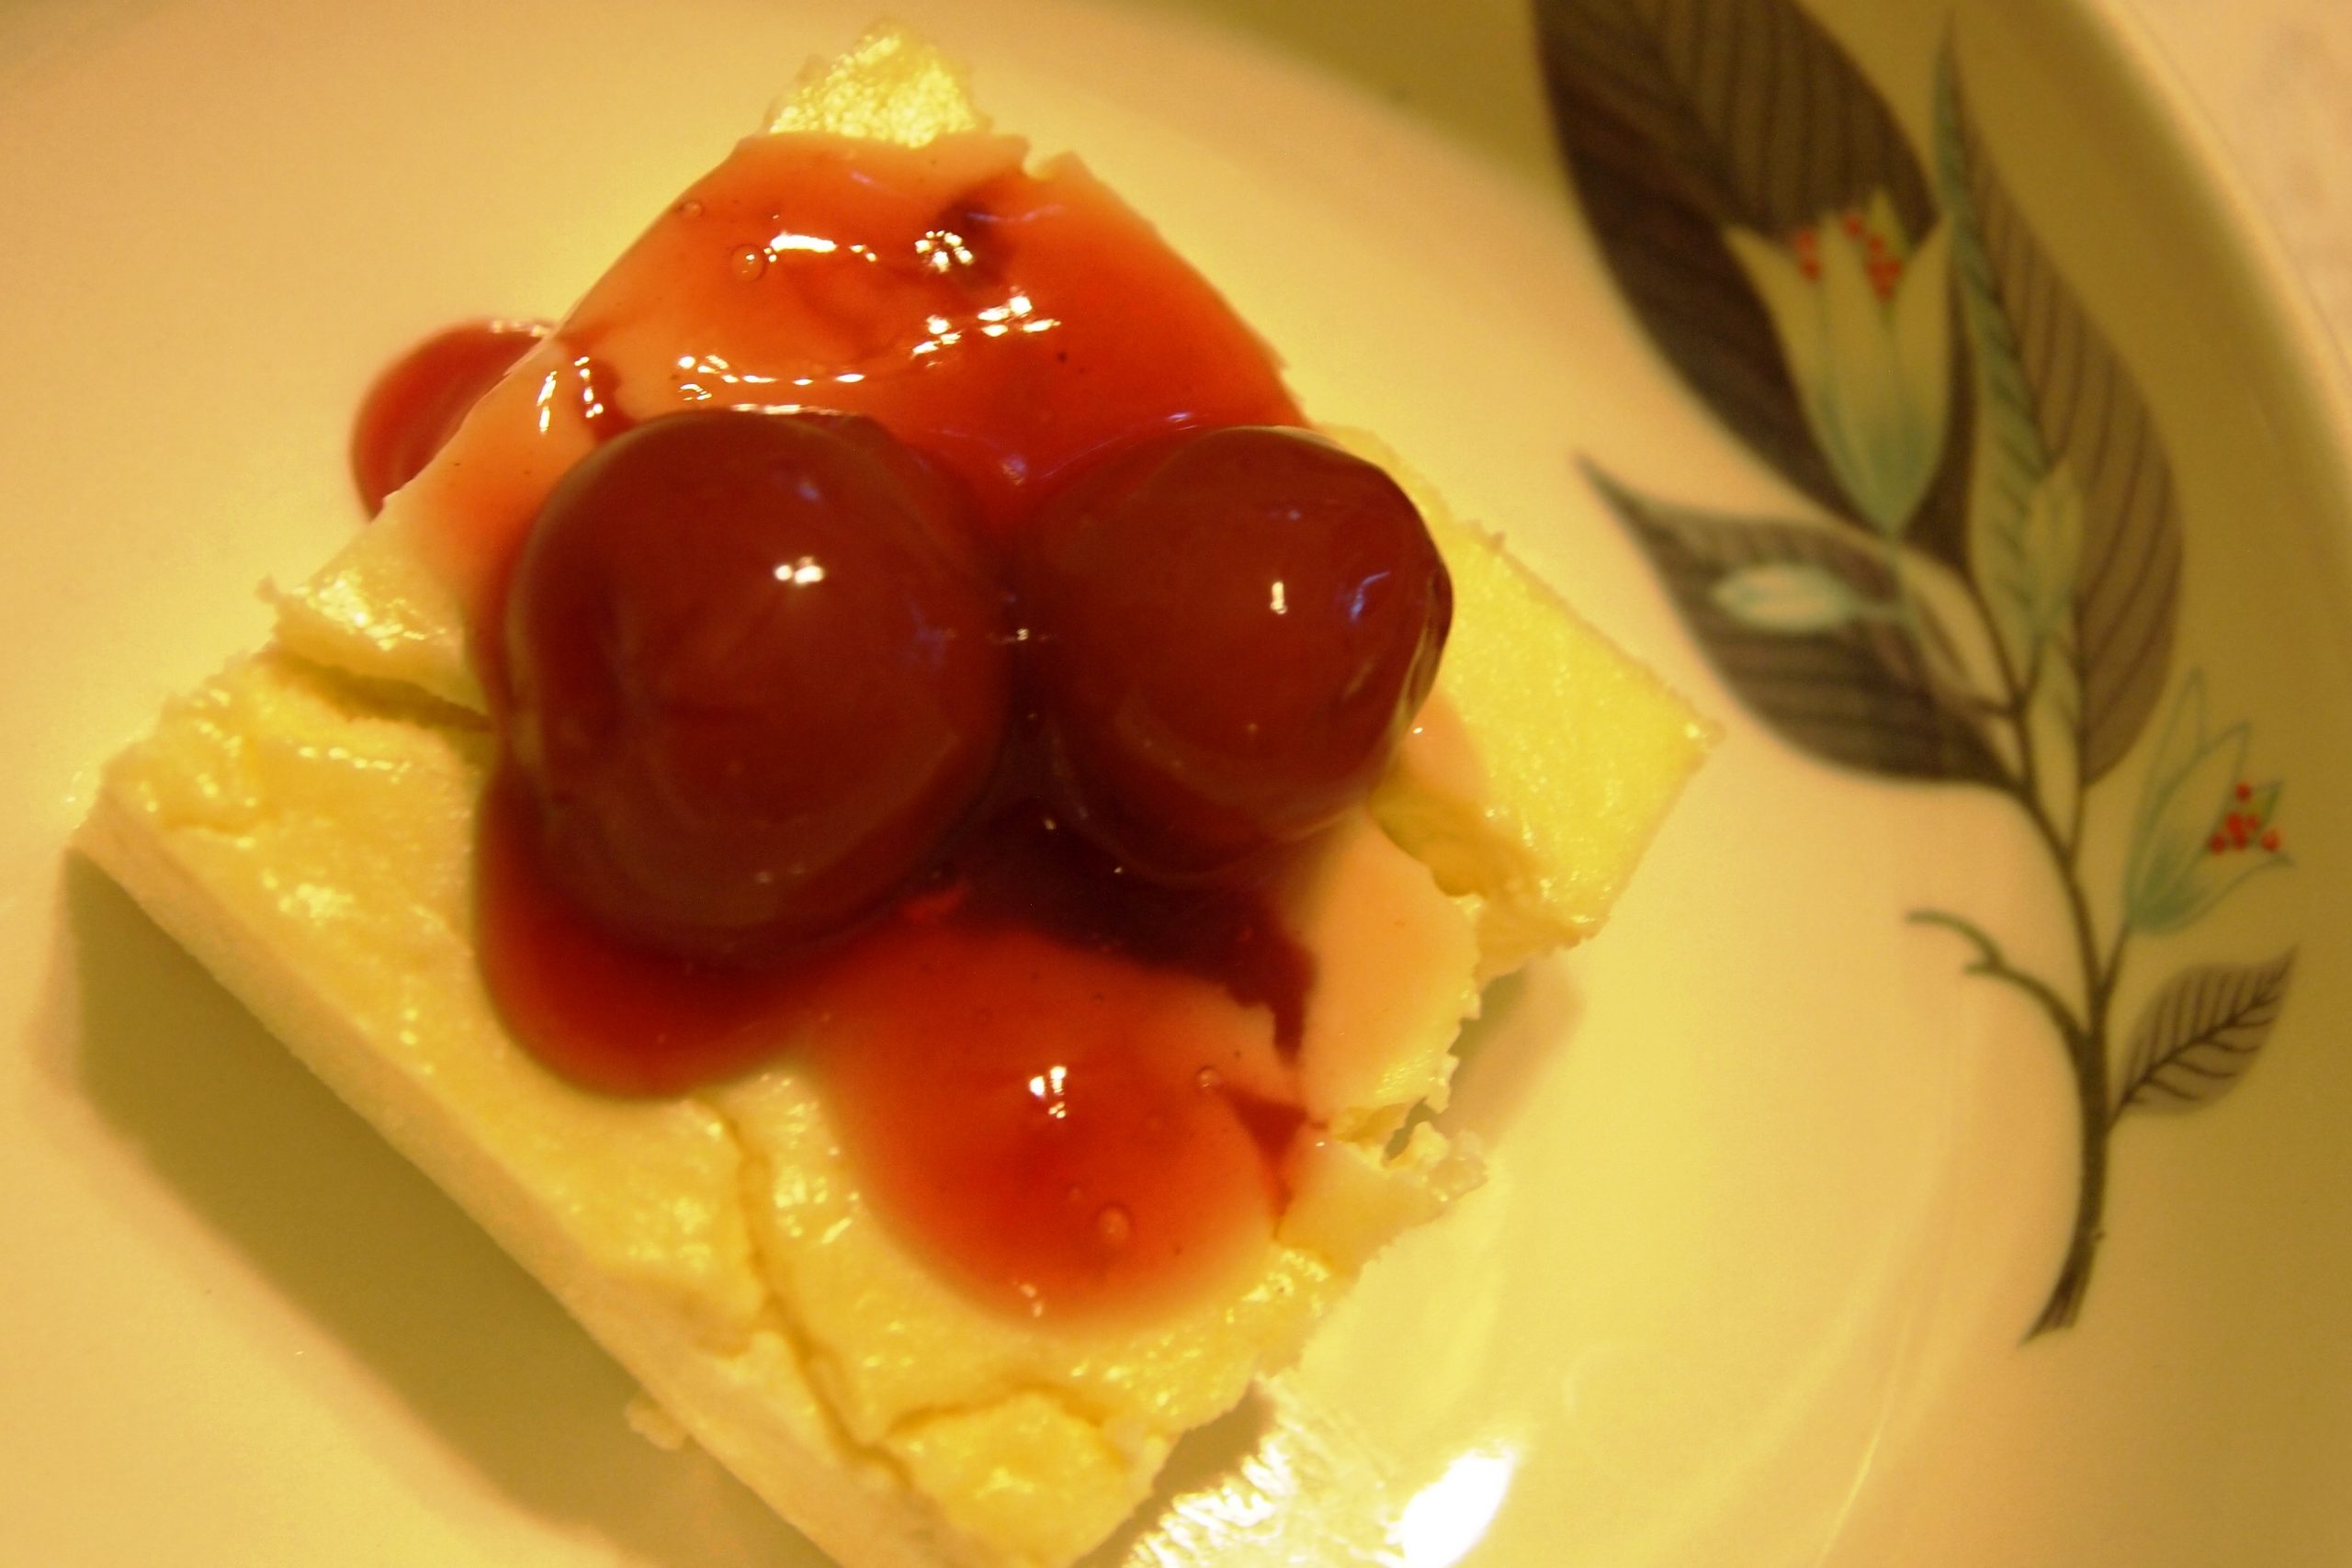
Snow White Squares with Tart Cherry Sauce
Plan Z Phase: This is a Z3 (ZReboot) recipe. Do you know that dessert from the cafeteria that looks like a creamy white cheesecake and has the bright cherry pie filling on top? That’s what I am trying to duplicate here; only this one is actually good for you. That old-fashioned dessert tastes great but it’s full of sugar and the red dye in the cherries is insane. Enjoy this version. I plan to serve this to company. It makes a great mid-week dessert too, and in a pinch it even works for a quick breakfast. Who can complain? It’s cheese, eggs and fruit! Keep your portion reasonable because of the amount of Truvia. A 2” square is plenty to satisfy. Photo submitted by Plan Z Insider Nancy.
Servings: Makes 9 squares.
Ingredients:
For the Snow White Squares:
- 2 eggs
- 6 tsp of Truvia
- 2 tsp of organic vanilla extract
- 1-1/2 cups of sour cream (use full fat sour cream)
- 2, 8oz packages of cream cheese (again use full fat cream cheese). Soften the cream cheese at room temp.
- 2 Tbl of melted butter
For the Cherry Sauce:
- 1 can (15 oz) of tart cherries packed in water
- 4 tsp of Truvia
- ¼ tsp of cinnamon
- ¼ tsp of almond flavoring
- 1 Tbl of cornstarch dissolved in 2 Tbl of water
Instructions:
Mix the eggs, Truvia and vanilla along with the cream cheese. Beat with your mixer until smooth. Add the sour cream and the tablespoon of melted butter. Mix some more until it’s all nice and smooth. Pour into a 9" x 9" oven proof pan. Bake approximately 30 minutes at 350 degrees. Check the pan at the 30 minute mark. You want it to look set but it will continue to firm up as it cools. It should not jiggle except maybe a tad in the middle. Cool and refrigerate. This is best served cold so give it a few hours before you serve it.
For the Cherry Sauce:
Put the can of cherries (liquid included) into a medium sauce pan. Add the Truvia, flavorings and the cornstarch dissolved in the water. Cook on medium – medium high until it begins to bubble. Stir often. When the cornstarch does its thing the sauce will begin to thicken. Take it off the heat. The sauce will continue to thicken up like pie filling as it cools. Now this isn’t the vibrant red that you’re used to. That just shows you how much red dye they add to the commercial version. This one will taste just as good. We just have to get over not having it be bright red.
You can serve this warm or cold. When I put it on top of the Snow White squares I serve it cold and I put it on after I cut the squares so it can drizzle off the sides.
You can also use this cherry topping on ice cream or even the almond pound cake recipe that dieter Amy contributed.
Enjoy!
Cheers,
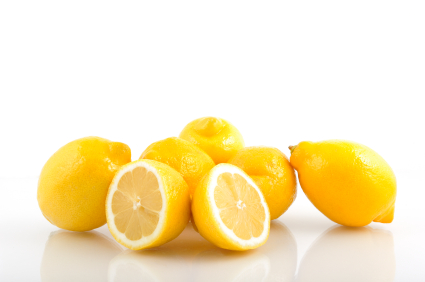
Lemon Gelato
Plan Z Phase: This is a Z3 (ZReboot) recipe. This is an authentic-tasting Italian Ice cream (gelato). Low carb and good for you!
Servings: Makes 1 Quart
Ingredients:
- 6 egg yolks
- 2 cups of whipping cream
- 6 lemons, juiced and zested. Your goal is approximately 1 cup of juice and a half cup of lemon zest.
- 2 cups of half and half (I am using half and half here to lighten the texture of the gelato; not to cut fat)
- ¼ cup of Truvia
- 2 tsp of organic vanilla
Instructions:
Stir egg yolks into the whipping cream in a medium bowl until the mixture is a smooth, light yellow. Set aside.
In a sauce pan on medium-high heat, combine the lemon juice, lemon zest, half and half and Truvia. Stir over the heat until the Truvia dissolves. This will only take a couple of minutes. Take off of the heat.
SLOWLY add ¼ cup of hot mixture into the cold mixture. You want to temper the liquid but be careful to do a small amount and slowly or you’ll end up with a lumpy, scrambled egg mixture.
After you’ve added the first quarter cup and stirred that in you can begin to add the rest. Again, do it slowly and stir constantly. Put the sauce pan back on the heat and cook until the mixture begins to thicken. I can tell it’s thickening when the bottom of the pan feels gooey against my wooden spoon. Another way to tell is if the sauce will stick to the back of a metal spoon. You want it to have begun thickening but don’t wait for it to get actually thick.
Pour the mixture into a heat-proof bowl, cover with plastic wrap and let it sit in the refrigerator until cold. You can even do this in the afternoon with the expectation of making the gelato after dinner.
Pour the cold mixture into your ice cream maker and follow the directions. With my Cuisinart machine all I have to do is put it in and turn it on. 20 minutes later I have wonderful Italian ice cream….gelato!
This rendition is a tart and flavorful gelato. You can also make it with less lemon juice if you want yours to be creamier than it is tart. My husband loves TART.
Enjoy!
Cheers,
Almond Dessert Sauce
Plan Z Phase: This is a Z3 (ZReboot) recipe.
Serves: 2 Servings
Ingredients:
- 1 cup of crème fraiche (find it in your cheese section. It tastes like extra creamy, mild sour cream)
- 1 tsp of almond flavoring
- ½ tsp of Truvia
Instructions:
Mix together. That’s all it takes. Serve over berries or with your favorite Plan Z dessert. You can also make a vanilla version of this by subbing vanilla for the almond flavoring.
Enjoy!
Cheers,

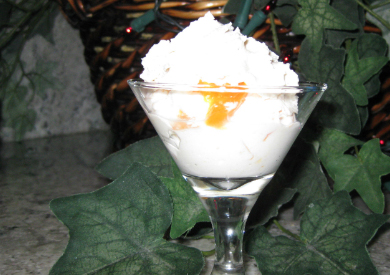
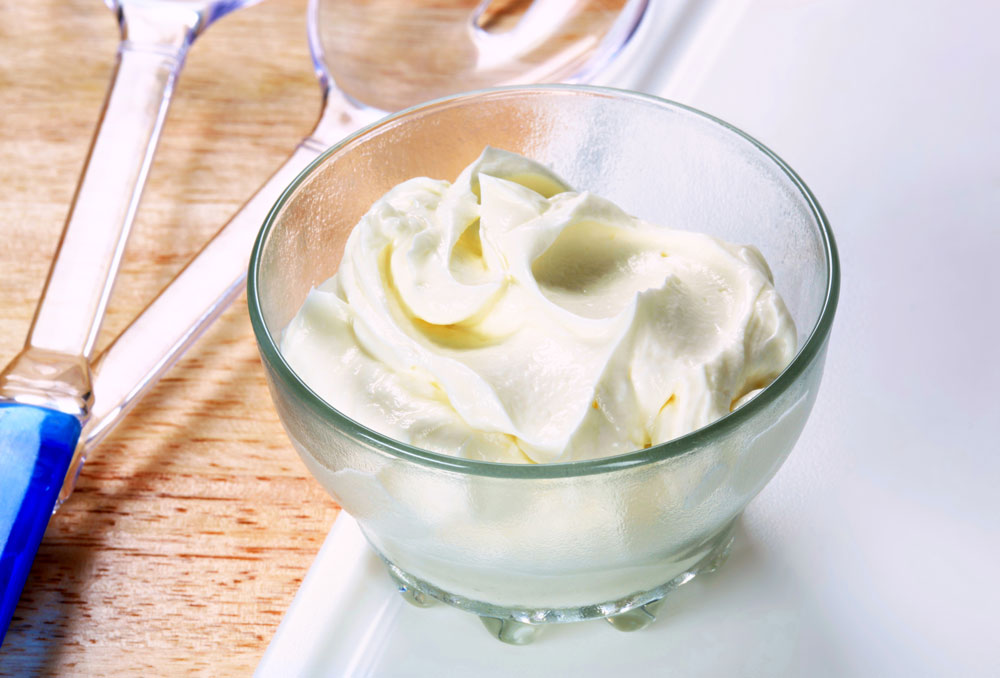
Dreamsicle Cream
Plan Z Phase: This is a Z3 (ZReboot) recipe. One of my favorite childhood treats was a Dreamsicle. That’s the orange popsicle with the vanilla ice cream in the middle. This Plan Z version comes pretty darn close. Close your eyes and remember your childhood.
Serves: Serves 3 – 4
Ingredients:
- 16 oz of mascarpone cheese (or cream cheese, full fat*). Mascarpone is a richer, smoother cream-style cheese. It’s the Italian version of cream cheese. Look for it in tubs in the cheese section.
- ½ of a large orange. Cut ALL pith away and just use the orange ‘insides’. This is about a half cup of orange pieces.
- 12-1/2 oz of mandarin oranges segments divided (packed in their own juice -- not sugar or syrup). If you cannot get mandarin oranges without syrup just be sure to wash and rinse them before using.
- 1 Tbl of vanilla
- 1 tsp of Truvia (stevia) Natural sweetener. Find it in the sugar section of your store
- mandarin orange segments for garnish
Instructions:
Take the cheese, orange, mandarin orange segments, vanilla and Truvia and put it in a food processor. Pulse until smooth. Put in pretty bowls or glasses and put back into the refrigerator to chill them before serving. Garnish with a few of the orange segments.
*If you use cream cheese for this recipe it’s less expensive but you might also need a bit more vanilla and/or sweetener to adjust it so it has the same yummy creaminess as it has with mascarpone. If you can swing the extra cost the mascarpone is worth it.
Enjoy!
Cheers,
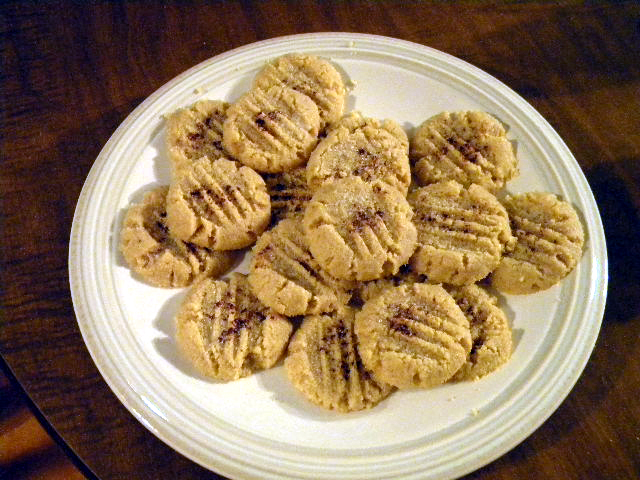
Almond Snickerdoodle Cookies
Plan Z Phase: This is a Z3 (ZReboot) recipe submitted by Plan Z dieter Amy.
Amy says, "Yep – I created a cookie! Even Kevin ate one and said “these are pretty good." They are soft and chewy but you will definitely feel like you are eating a cookie – I know I did – I ate two!"
Servings: Yields approximately 18 cookies
Ingredients:
- 2 cups super fine ground almond flour
- 10 tsp truvia
- 1 stick of butter, softened
- 1 tsp vanilla extract
- ½ tsp almond extract
- 1 tsp cinnamon
Instructions:
Preheat oven to 300 degrees.
Blend all ingredients together. It will take a few minutes to all blend and then will be a bit crumbly. I got all the butter incorporated with my electric hand mixer and then used my hands to finish the mixing.
Roll cookie dough into 1 inch balls (should make about 18 cookies) and place on greased cookie sheet.
Bake for 5 minutes and then press down slightly with a fork. Bake another 15 minutes and remove from the oven.
If you desire you can sprinkle the tops with a little extra cinnamon and truvia. Let cool completely on the cookie sheet. The cookies are fragile and if you remove before they have cooled they will crumble.
Enjoy!
Cheers,
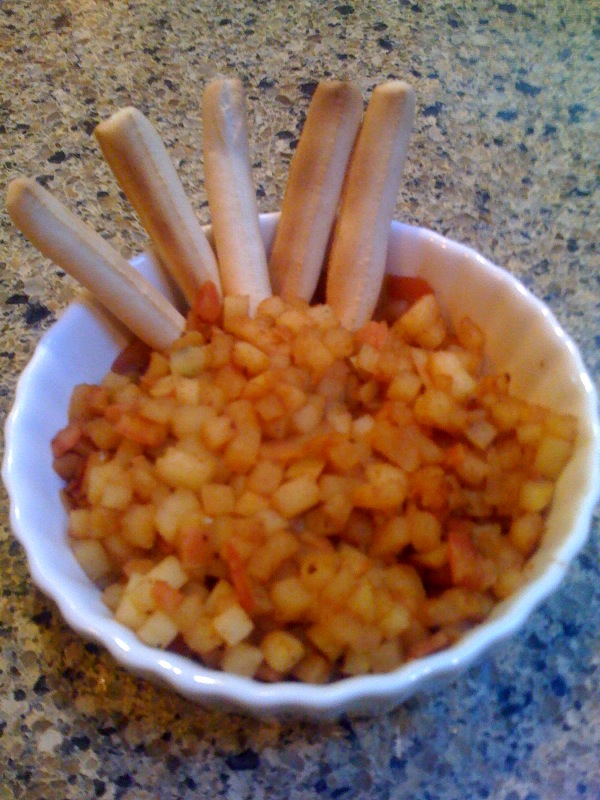
Karyl's Mock Apple "Pie"
Plan Z Phase: This is a Z3 (ZReboot) recipe. This recipe was created by Plan Z dieter Karyl. Thanks Karyl!
Serves: Serves 1
Ingredients:
- one large apple, peeled, cored and chopped into bits
- Saigon cinnamon sprinkle
- 4 small breadsticks (they act like crust)
Instructions:
Put the apple bits, sprinkled with cinnamon, into a microwavable bowl. Heat on medium for 90 seconds. Stir. Add your breadsticks. If you are on ZReduction, you can still enjoy this recipe, just use fewer breadsticks.
You can scoop up the apple with the breadstick if you want to get the taste of your "crust" at the same time you are chewing apple.
Enjoy!
Cheers,
Italian Lemon Tart
This is a Z3 (ZReboot) recipe. Based on an Italian pie that is traditionally made with ricotta cheese, I’ve made it smoother and more luscious by using mascarpone. Mascarpone is widely available these days. Look for it in the deli section or with the fine cheeses. It will be packaged in a carton.
P.S. You’ll probably never notice the crust is missing.
Servings: 6 servings
Ingredients:
- 1 pound of mascarpone (Italian cream cheese)
- 3 eggs
- 4 Tbl of lemon juice
- 10 tsp of stevia (Truvia is a great brand)
- 1 tsp of vanilla
- ½ tsp of lemon extract
- 3 drops of lemon food coloring (Optional. This just makes the yellow color stand out more.)
Instructions:
Separate the eggs into two bowls. First beat the egg whites until fluffy but not stiff.
In the other bowl, combine the rest of the ingredients. Whip on medium-high to get the mixture combined and smooth. Then carefully fold in the egg whites.
Butter a 9" x 9" oven proof pan. Pour in the mixture. Bake 30 – 35 minutes at 350 degrees. Look for a very light brown crust to start forming on the top. The tart will still look a bit jiggly in the middle. The only way to check to see if it’s done is to stick a toothpick in the middle and if the toothpick comes out clean it’s done. If it’s not, put it back in the oven for 5 minutes more and check again.
Chill the tart in the refrigerator for a couple of hours before serving. You want it completely cold.
Garnish with some fresh berries for color and a fine-looking dessert.
Note: If for some reason, your tart does not set up completely, don’t panic. You can serve this in dessert dishes like a pudding and put the berries on top. With Zola there’s always a Plan B when something goes wrong.
Enjoy!
Cheers,
Warm Pears with Brandy Cream
Plan Z Phase: This is a Z3 (ZReboot) recipe. This is not a large dessert but it’s so decadent that you don’t need a large portion.
Servings: 4 servings
Ingredients:
- 4 fresh, ripe pears
- 1 Tbl butter
- juice from half of a small lemon
- 1 tsp vanilla extract
- 2 packets of stevia
- 2 oz of brandy
- 1 cup of whipping cream
- 2 tsp of tiny chocolate chips
Instructions:
Peel pears and cut into wedges. In a saute pan, melt the butter and add the pears. Add the lemon juice and toss the pears on medium high heat for 3 minutes. Add the stevia and vanilla. Turn heat to medium and cook until pears are tender but not falling apart.
Remove the pears and keep them warm in the oven in a heat proof container.
Add brandy and cream to the juices in the pear saute pan.Cook on medium high just to get the cream bubbling lightly. Stir often and watch for the cream to begin to thicken. That’s when you know it’s ready to serve.
Serve pears with the brandy cream and sprinkle on just a few tiny chocolate chips. The chips will soften into a dreamy mass in the hot cream.
This is not a large dessert but it’s so decadent that you don’t need a large portion. Each person gets one full pear and a spoonful or two of the sauce.
Enjoy!
Cheers,