Insanely Good Marinade
Plan Z Phase: This is a Z2 (ZReduction) recipe.
My husband loves this marinade. I used to marinate steaks in just soy sauce and olive oil with a bit of Worcestershire sauce but not anymore!
Servings: This marinade is designed for 2 pounds of meat. Can be doubled easily.
Ingredients:
- ¼ cup of olive oil or ¼ cup of water. (I’m not really worried about the olive oil in this marinade. Most of it is going to stay in the baggie you’re using to marinate your meat but if you want to be a Z2 purist you can use water instead and then just spray the meat with olive oil spray before you cook it.)
- ¼ cup of balsamic vinegar
- ¼ cup of Worcestershire sauce
- ¼ cup of tamari or coconut aminos (instead of soy sauce)
- 2 tsp of Dijon mustard
- 2 tsp of minced garlic (jar garlic will work or even powdered garlic)
- Grated sea salt and pepper
Instructions:
Get out your little blender or you can even make this in a jar with a lid or the baggie you’re going to marinate your meat in.
Add all the ingredients and blend. If you’re using a baggie, zip it shut and shake. Shake your jar with the lid on if you’re using that tool.
Marinate your meat for up to 4 hours. The more tender the meat the less time you need to marinate it. The meat can be a cut of beef, chicken, or even pork.
When ready to cook, remove from the marinade and proceed as usual.
If you are in the mood for kebabs check out this recipe using the same marinade.
Enjoy!
Cheers,

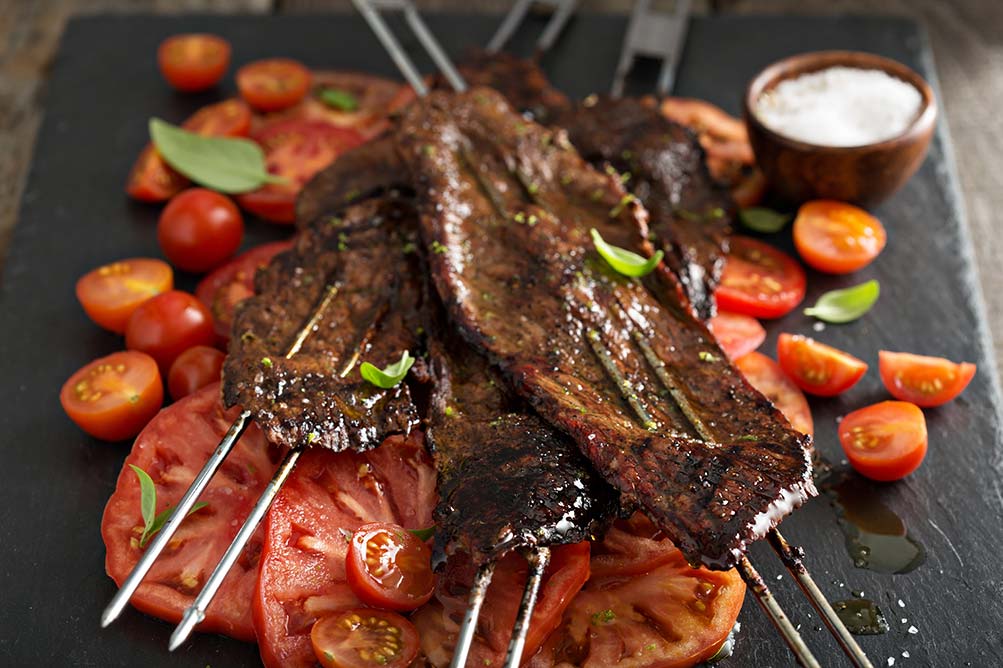
Steak Kebabs
Plan Z Phase: This is a Z2 (ZReduction) recipe. I finally looked it up. The piece says in North America we are supposed to use "kabob" because we want to spell it the way it sounds. In other countries, they use "kebab." On the Plan Z site, I have named them kebabs each time, so I thought I’d stick with that spelling.
Servings: Serves 4
Ingredients:
- One batch of Insanely Good Marinade
- Up to 8 oz per person of steak. I use tenderloin but any red meat allowed in Z2 can work. Cut into cubes about 1 inch or 1-1/2 inches across.
- 2 large onions cut into wedges. Red, white, yellow, or even pearl onions can work.
- 4 cups of other veggies of your choice allowed on Plan Z. Ideas: Bell peppers of any color, asparagus, cherry tomatoes, green beans, okra, artichokes, bok choy, eggplant, fennel, pea pods, hot peppers, tomatillo. You get the idea. This marinade does not taste specifically Asian. It’s just good. So you can go with an Italian-themed kebab or Asian or even just good ol’ American depending on what veggies you choose. Cut any larger veggies into bite-sized chunks.
Instructions:
Put the marinade in a large ziplock baggie. Add the meat. Marinate for up to 4 hours in the refrigerator. The more tender the meat the less marinating time you need. I’ve done as little as 15 minutes. (If you are using wooden skewers make sure they have been soaked about 30 minutes in water so they don’t burn.)
Now thread your meat and veggies in any order onto your skewers. Toss out the marinade in the baggie.
Grill or bake until the meat is done to your liking. For the grill, they will take less time. For baking, you’ll set your oven to 350 degrees and bake about 30 minutes for a slightly pink center to the meat. You can always check them sooner.
When they are done to your liking you are ready to serve. Depending on how you cut your veggies and arranged them on the skewers you might be having more than one kebab. Your meal on sticks!
Enjoy!
Cheers,
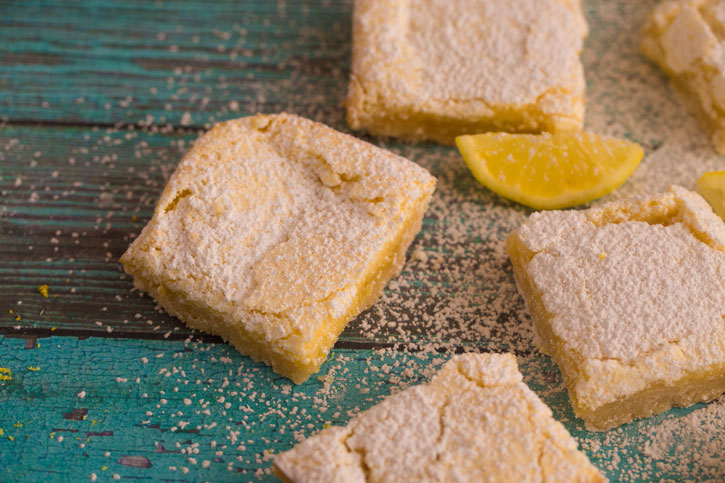
Lemon Bars
Plan Z Phase: This is a Z3 (ZReboot) recipe.
I found a recipe online for keto lemon bars. I "Zolafied them" and made them for a party. Wow. I did make a few changes to the recipe, so I am offering it to you now. These taste every bit as good as the sugar-filled ones. When I made these, I put them in a tart pan with a removable bottom and cut them into skinny wedges. You can do the same or bake them in a square pan and cut them into little bars.
Servings: Serves 16 – 20 cut into narrow wedges
Ingredients:
- 1/2 cup of butter, melted
- 1-3/4 cups of almond flour, divided (be sure to buy fine-ground almond flour)
- 1 tsp of vanilla
- grated sea salt
- 1 cup of powdered sweetener, divided (erythritol)*
- 3 medium lemons, juiced
- 1 tsp of dried lemon peel (or you can zest one of the lemons)
- 3 large eggs
Instructions:
Mix butter, 1 cup of the almond flour, ¼ cup of sweetener, vanilla, and a pinch of grated sea salt in a bowl. Press evenly into your parchment paper-lined baking dish or tart pan. Bake for 20 minutes at 350 degrees. Take out and let cool for 10 minutes.
In your blender, put in the lemon peel, lemon juice and the eggs. Also add ¾ cup of the sweetener, ¾ cup of almond flour and another pinch of grated sea salt. Whiz on medium for about 10 seconds to blend thoroughly.
Pour the filling over the crust and bake for 25 minutes.
Let them cool completely before cutting. Expect the filling to have minor cracks in it.
Optional: You can dust the top of the bars after they have cooled with a little more sweetener. Just put a couple of tablespoons of sweetener in a little sieve and dust it across the top. This way you can fill the cracks so they show less.
Hints:
If you bake these in a tart pan be sure to take a sharp knife and slice along the perimeter before you release the pan sides. This way the crust won’t stick to the pan and give you a mess.
If you want, you can store them in the refrigerator; keep them covered. They are delightful cold or room temperature.
*I buy Swerve or ZSweet online. They both make a powdered sweetener. Great for frostings and desserts like this recipe. If you don’t have powdered sweetener you can make your own by putting granular sweetener in your blender or food processor and whizzing it until it’s powdery.
Enjoy!
Cheers,
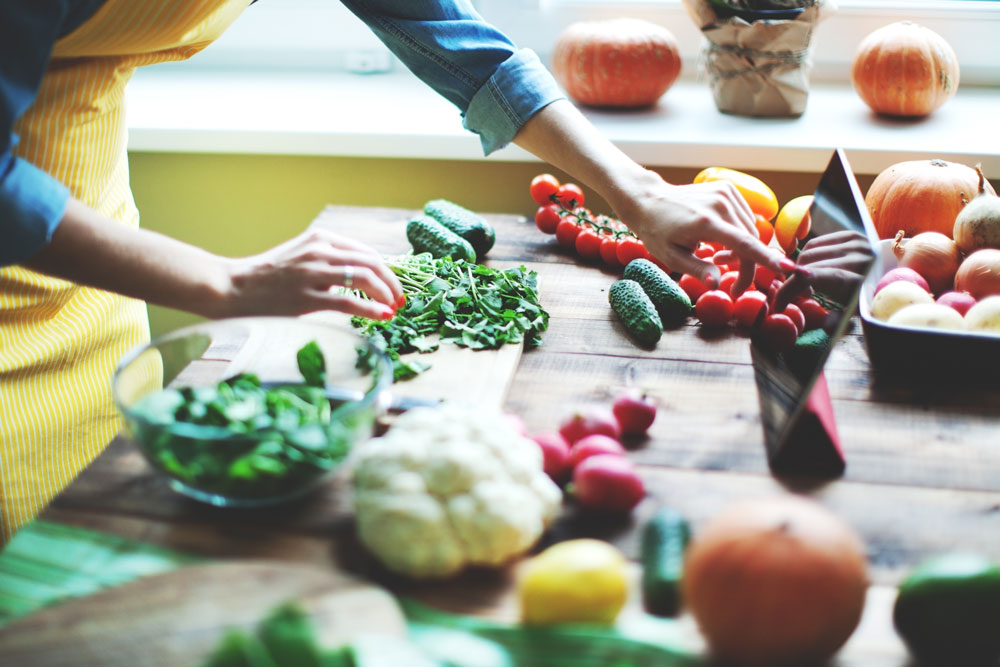
Someone’s in the Kitchen with Zola
Guest Contributor Chris is married to Zola. They have been married for over 40 years.
"No one is born a great cook," said Julia Child. "One learns by doing."
One of the “secrets” of losing weight on Plan Z is that you cook your own food. That puts you in control of everything that goes into your mouth.
You may have said to yourself, "I don’t have time to cook." The processed food companies are counting on that.
On the other hand, do you have time to spend in doctors’ waiting rooms? Because "the path to feeling good from day to day and staying clear of dialysis machines, heart stents and prescription pain pills runs through a place that’s long been a center point of human living—our own kitchens." Melanie Warner wrote that in Pandora’s Lunchbox: How Processed Foods Took Over the American Meal.
Staying healthy and out of doctors’ offices and hospitals is a big reason why I make the time to make dinner with Zola most evenings.
Zola’s mother told her, "If you can read you can cook." And Zola can really cook.
There are about a thousand recipes on the Plan Z Diet website. I've tasted every one of them. Usually, I’m Zola's prep cook. I wash vegetables, chop them and clean up behind Zola. It’s a nice way to spend time together.
Here are more thoughts about cooking that reinforce the need to do more of it.
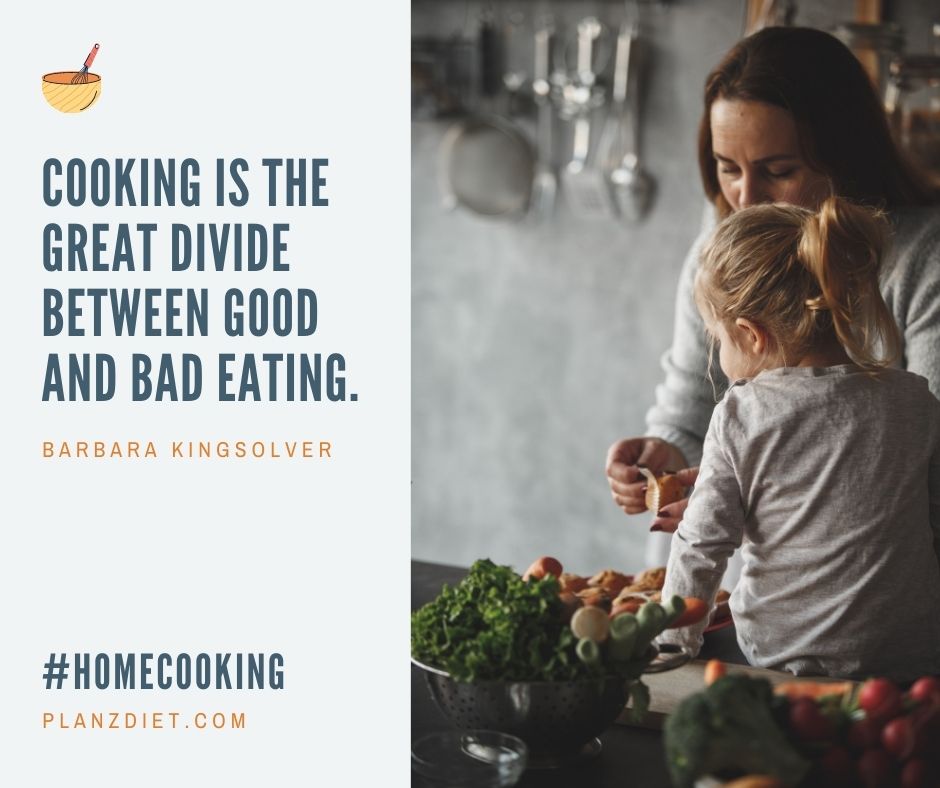
—Barbara Kingsolver, Animal, Vegetable, Miracle: A Year of Food Life
― Robert H. Lustig, The Hacking of the American Mind: Inside the Sugar-Coated Plot to Confuse Pleasure with Happiness
― Mark Hyman, M.D.
Most evenings I’m in the kitchen with Zola; watching and learning from her.
Last night I made Zola’s delicious mushroom and bacon soup for dinner all by myself. All I had to do was read and follow the recipe. I can read. And — what do you know? — I can cook. If you’ve read this far, I bet you can cook, too.

VP Anger Management
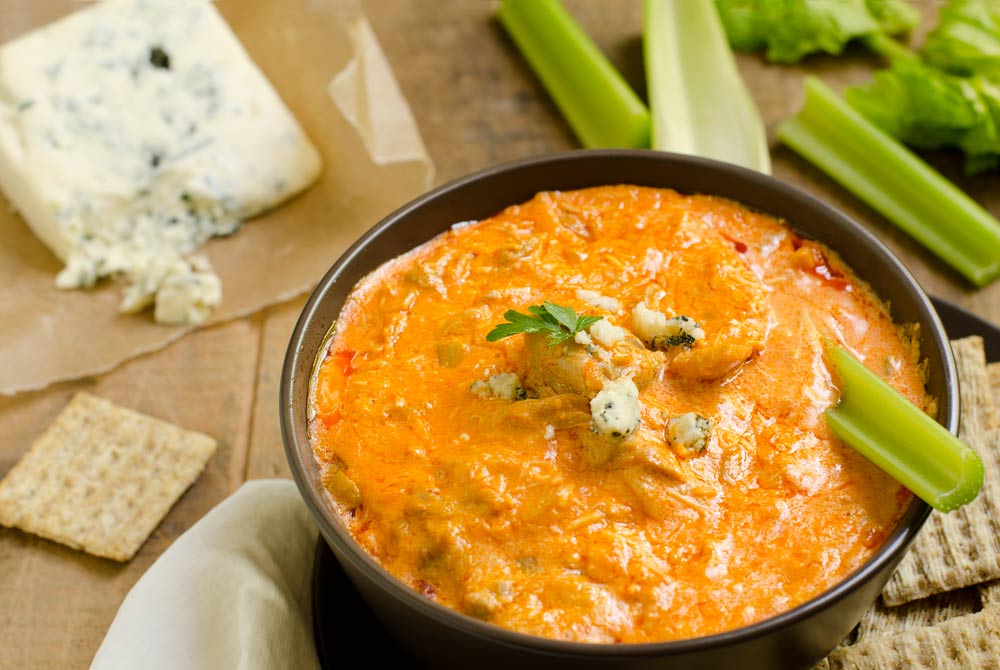
Hot Wing Dip
Plan Z Phase: This is a Z3 (ZReboot) recipe.
Most folks think of chicken wings as being a guy thing and even a sport fan thing but anyone can love this dip! I served it as a breakfast buffet item and it was hands down the dish that got the most comments and compliments. I think it was because it was so unexpected. The comments came from men and women alike but I must admit the guys were the ones who went gaga over this.
You can make a half order of this if you are serving a small group.
You can also prep this dish in advance and take it to someone else’s house to bake. Just leave the cheddar off until you are about to put it in the oven. Take it as a hosting gift!
This is a whole lot less messy than eating chicken wings without losing the pleasure.
When eating low carb and eating a dish like this, serve it with celery sticks and use the celery to scoop and eat.
Or, you can serve it with chips. Spoon your portion onto a plate and eat it by using the same chip over and over. Maybe you eat the chip every 4th scoop or something like that. Or if you’re like me you eat the first three chips and then switch to eating it with a fork. Never missed the chips.
Ingredients:
- 3 boneless, skinless chicken breast pieces (halves) (Or use a rotisserie chicken)
- 1 tsp of olive oil
- 1 Tbl of butter or ghee
- 2 large stalks of celery cut into dice
- 1 cup of diced onion
- 2 packages (8 oz) each of cream cheese. Use the full-fat version. Cut the cheese into small chunks.
- 1-1/2 cups of blue cheese dressing (find a high-quality one with large chunks or even add separate blue cheese chunks as another option)
- 1 cup of high-quality ranch dressing
- ½ cup of hot sauce. You can use your favorite hot sauce but you can also watch for brands that are designed for making hot wings. They will say “hot wing sauce” on the label. Frank’s is the most popular one in the US. The color is a brighter orange than some hot sauces and of course, all hot sauces vary in heat (spice) so you can start with less and taste test and work your way up.
- 12 oz of shredded cheddar
Optional:
- Taco chips, crackers and/or celery sticks for dippers.
Instructions:
Preheat your oven to 350 degrees.
In a large sauté pan you will poach your chicken. Just put the chicken in a pan and cover it with water. Cook on a low boil for 15 minutes or until there’s no pink remaining in the chicken. I flip them half way through to make sure they get fully cooked. Then you are going to take them out of the water and let them cool down a bit. Just pour the water out of the pan and wipe it down. You can use it again.
Then put in the oil and the butter with the onion and celery. Sauté on medium just until the celery and onion begin to wilt. You don’t have to cook them until they are mushy. Transfer them to a greased 9" x 13" inch heatproof pan.
Now it’s time to shred your chicken. Just hold one of the breasts down on a cutting board with a fork. Take the other fork and pull at the chicken to shred it. For this dish you want a pretty fine shred so sometimes you want to go back and pull the chunks apart so you get a good shred on all of the meat. Do this with all three chicken breast pieces and then transfer all of the shredded chicken to the 9" x 13" pan.
In a blender add the ranch dressing and the cream cheese. Blend until fairly smooth. Then add the blue cheese dressing and the hot sauce. Blend just until combined. You still want some chunks left. Taste and see if you want to add some more hot sauce. Transfer this dressing to the 9" x 13" inch pan and stir to combine all of the ingredients. If you are going for even more blue cheese flavor and are using separate chunks of blue cheese add that now and stir a bit more.
Cover the whole top with the grated cheddar.
Bake in your oven at 350 degrees for 30 minutes. It will come out very bubbly. Be careful not to burn yourself as you begin to eat it. You can serve this with chips, crackers or even celery sticks as scoops. You can also serve this with a bottle of hot sauce on the side for those that like to sprinkle more on and get the flamethrower effect.
If you have leftovers store them in the refrigerator. Reheat slowly or the cheese can separate and become oily. Still tastes good, but doesn’t look as creamy great.
Enjoy!
Cheers,
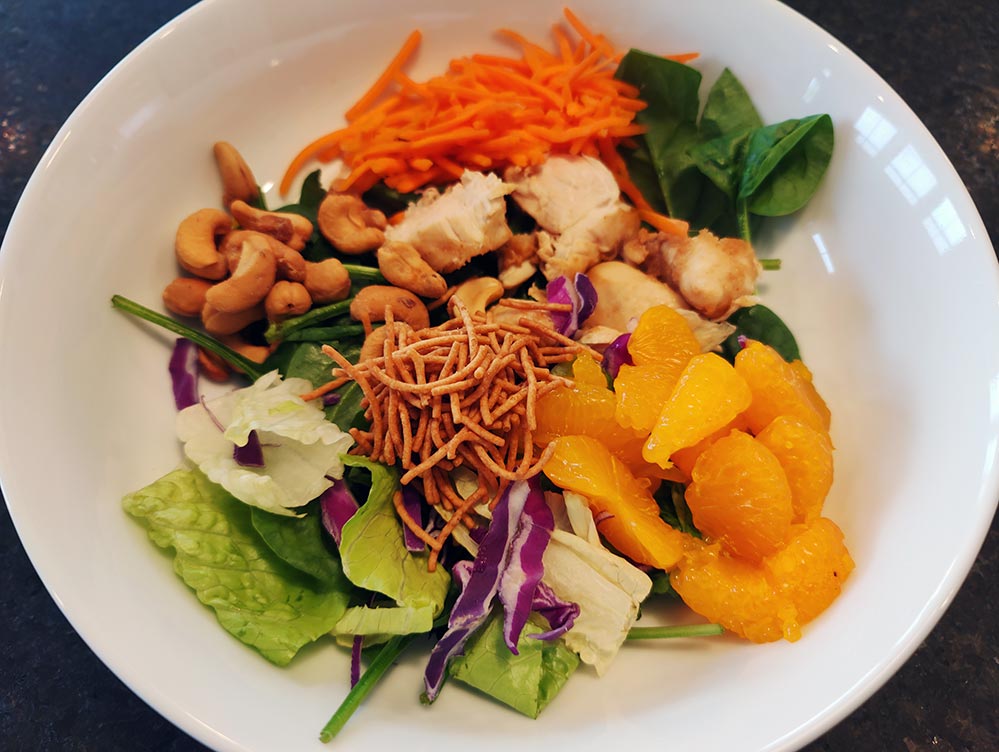
Crunchy Ginger Chicken Salad
Plan Z Phase: This is a Z3.5 (ZReboot 3.5) recipe. This light meal is especially good on a hot day.
Servings: Serves 4
Ingredients:
- 1/2 cup of cider vinegar. (Bragg’s Cider vinegar is a good one. Get the plain version.)
- 1/3 cup of brown sugar substitute (Swerve makes one. They sell it at Target and Walmart or you can order it online. It’s not in a lot of stores yet.)
- 1/3 cup of olive oil
- 2 Tbl of minced ginger (fresh or jar will work)
- 2 tsp of tamari or coconut aminos (better for you than soy sauce)
- ½ tsp of grated sea salt
- a dusting of cayenne (optional)
- 1 package of chicken tenders (trimmed) or 3 chicken breast pieces
- 1 bag of fresh baby spinach
- an 11 oz can of mandarin oranges (Find the ones packed in water or extra light syrup. If packed in syrup, rinse them off before serving.)
- 2 cups of shredded purple cabbage (I used a romaine/cabbage combo because I didn’t want to buy a whole cabbage. They were the size of volleyballs! The color of the purple in the salad is really pretty, though.)
- 2 cups of carrots, shredded (I bought a small bag, already shredded)
- 3 green onions, washed, trimmed, and cut into chunks
- 2 cups of chow mein noodles or thin, crispy Asian noodles
- 2 cups of salted, roasted cashews
Instructions:
In a small bowl or little blender, put in the first 7 ingredients. This is the makings of your marinade and dressing. Pour 1/2 of a cup of the marinade over the chicken in a container and put it in the fridge to marinate for at least an hour. Save the rest of the marinade to use as dressing. Just set it aside for now.
Preheat the broiler (or you can use your grill). Drain the chicken and toss the liquid in the container. (You don’t want to use this as dressing or you’ll risk food poisoning.) Put the chicken on a cookie sheet to broil it. Broil 5 – 6 minutes and then turn them over and broil 5 – 6 minutes more. You want to make sure there is no pink remaining in the chicken pieces. Cut them into chunks or shred them. Whichever you prefer.
To Serve:
You’ll see from the picture that I laid everything out on a cutting board and people could choose the quantities of each item on their own. In my bowl, I laid everything out like a traditional Cobb salad. That just means I divided the items into sections rather and piling them all together.
When your bowl is ready you can give the contents a light drizzle of the dressing you previously set aside.
Enjoy!
Cheers,
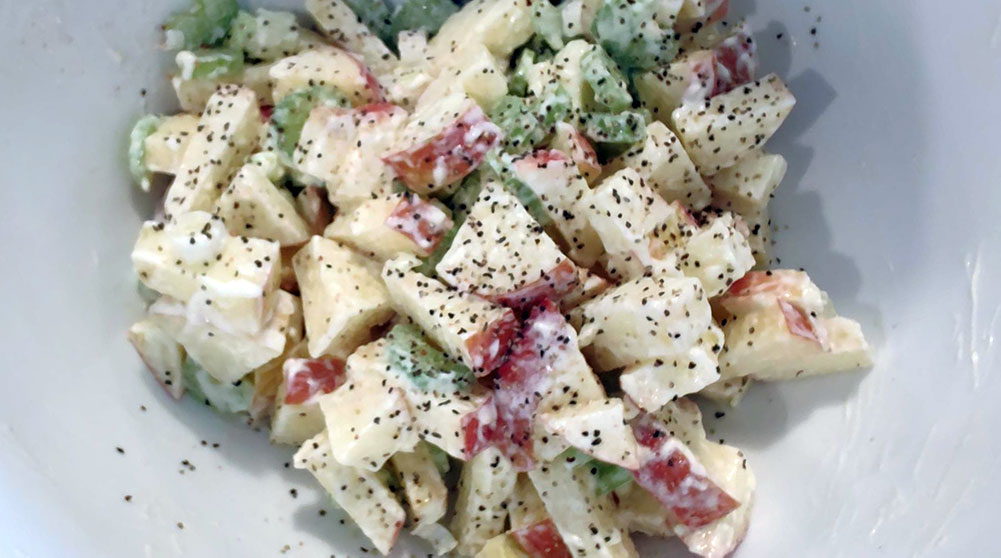
Waldorf Salad
Plan Z Phase: This is a Z2 (ZReduction) recipe. The other day I wanted a salad but was tired of lettuce. I thought of this. A traditional Waldorf salad has grapes or raisins and lots of walnuts -- but it doesn’t have to. This one worked great as a side dish. Be sure to cut your fruit portion for this meal in half.
Servings: Serves 2. Can be doubled.
Ingredients:
- 1 large Honeycrisp apple. Wash it and cut it into cubes. Don’t bother taking off the peel. That will give you more fiber and color.
- 2 – 3 green onions. Chop up the white parts and a little of the green.
- ½ cup of thinly sliced celery
- 2 Tbl of mayonnaise
- sea salt and pepper to taste
Instructions:
Put your apple, green onions, and celery in a bowl. Put in the mayo. Stir. Season with sea salt and pepper and stir again. You are ready to rock.
Enjoy!
Cheers,

I Scream, You Scream
I scream, you scream, we all scream for ice cream!
Remember that jingle?
When the cravings get tough, I think some people DO scream!
The good news is there is a way to enjoy ice cream and not gain weight.
Food companies are getting a clue that we want to have it all, but we know we can’t eat it all. So, they are making smaller portions. Ice cream bar minis are multiplying in the grocery freezer section. Many of the manufacturers are using higher quality ingredients, too, and leaving out all the artificial stuff.
You can in fact have a dessert every day if you keep your total carbohydrate count for the day under 20% of your total intake. Follow this rule of thumb: 20 grams of carbs (or less) in your dessert. 15 grams or less is better, but I do make a couple of exceptions.
So read the back of the box. If the carb count is under 20 grams, eat one. One per day should be safe. Just keep an eye on the scale...and scale back if you start to go overboard.
I went to the grocery store recently and found all kinds of new options. Here are the ones I'd like to feature.
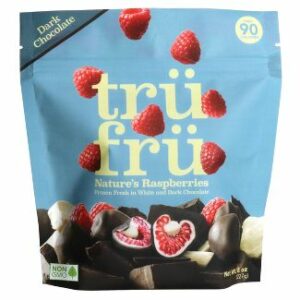
Tru Fru Hyper-Dried Nature's Fruit in Chocolate
These were the most unique. They are chocolate-covered frozen fruit bits. You can have a handful and still stay under 15 grams of carbs. They come in white chocolate and dark chocolate. The raspberry ones were the big hit in my house.
Carbs: 10 g
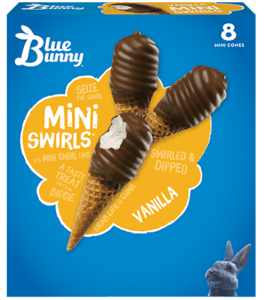
Blue Bunny Mini Swirl Ice Cream Cones
Mini ice cream cones hit the spot. They are big enough to satisfy the craving and even give you that crunch of the cone. The Blue Bunny ones come in some fascinating flavors. Your portion is one cone.
Carbs: 18 g

Drumstick Mini Drums Sundae Cones
Carbs: Vanilla or Chocolate = 7 g
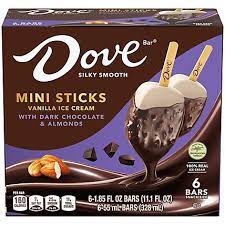
Dove Mini Sticks Ice Cream Bars
I had one of these recently. Ice cream bar on a stick. Mine was dark chocolate over vanilla ice cream covered in almond bits. Big Yum!
Carbs: 6 g

Talenti Mini Sorbetto Bars
And you are not just limited to ice cream. Sorbet on a stick anyone? Talenti is known to pack in the flavor, too.
Carbs: 8 g
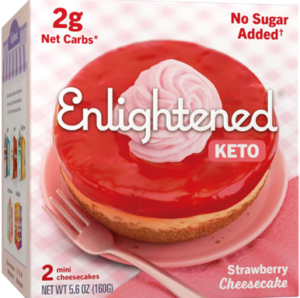
Enlightened has an entire line of KETO frozen treats.
With ice cream, cheesecakes, snackable cookie dough and fruit infusions, you are bound to find a favorite. Your portion is ½ of a cheesecake.
These come in 8 different flavors. My husband particularly liked the Enlightened KETO strawberry cheesecake.
Carbs:
Classic =18 g
Strawberry = 19 g
Caramel Chocolate = 18g
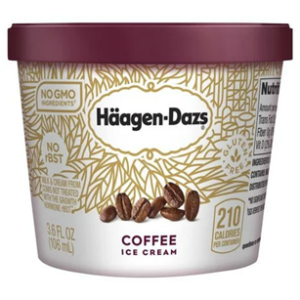
Haagen Daz has come out with a whole line of mini ice cream flavors. The coffee is to die for.
Carbs:
Coffee =13 g

Halo Top are KETO ice cream bars
So many flavors! I love the Peanut Butter Chocolate. Remember, you only get one delicious pop.
Carbs:
Peanut Butter Chocolate =14 g
Chocolate Cheesecake = 13 g
Sea Salt Caramel = 14g
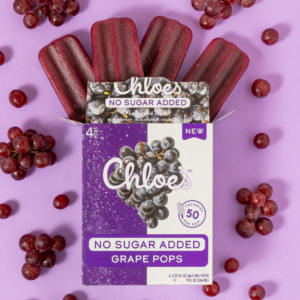
Chloe’s No Sugar Added Pops took me right back to my childhood.
Carbs
Strawberry = 9 g
Grape = 14 g

Klondike Mini’s
These come in 3 flavors: original, Reese’s mint, and double chocolate. I tried Reese's, of course, I did - peanut butter!
They have a mild peanut butter flavor and melt quickly. Next time I'd put it in a little bowl and eat it with a spoon so I can savor it better.
Carbs
Original =13 g
Reese's mint = 14 g
Double chocolate = 13g
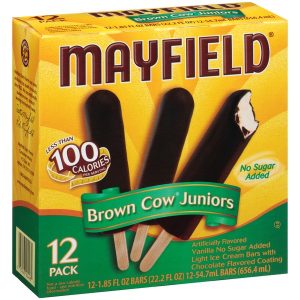
Mayfield’s Brow Cow Junior
Dean Foods makes Mayfield. I had never seen this ice cream brand until I moved to Chattanooga. If you live up north, you might find these under a Dean Foods label. The ice cream bar is just enough and reminded me of a Dilly Bar from when I was a kid.
Carbs: 8 g. You could almost have 2 per day!

Carb Smart Almond Bars
This Breyer’s product comes in a mini size. Don’t buy the big ones. Stick to the bite-sized version. The almond gives it a nice extra crunch if you are into that sort of thing.
Carbs: 13 g

Dole Dippers
These come in the cutest little packs. You get 4 per pack which is plenty to give you mighty satisfaction after dinner. They come in pineapple, banana and strawberry. Banana was the big hit in our family and the dark chocolate version is our favorite. We don’t eat a lot of bananas so we found this one to be special.
Carbs
Pineapple = 8 g
Banana = 13 g
Strawberry = 6 g

Magnum Minis
This is high-level chocolate eating. Belgian. They come in classic, almond, and double caramel. I made an exception to my normal 15 gram limit for the double caramel. It’s downright sinful.
Carbs:
Classic = 13 g
Almond = 15 g
Double caramel = 18 g
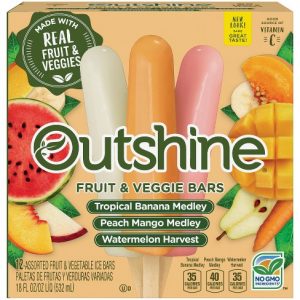
Outshine Bars
If you have someone on your home team who is not a big fan of ice cream but wants a mini-bar these are fruit bars of the right size. There is a variety pack with three flavors including a lime one. Be sure to read the ingredients on these. They have several variety packs, and some have the artificial sweetener sorbitol in them. You don’t want that. Believe it or not, regular sugar is better than that artificial stuff, and these come in at a very reasonable carb rate so the small amount of sugar in these is ok.
Carbs: 8 g
You can have your ice cream and live a healthy life. No need to scream.
Enjoy!
Cheers,

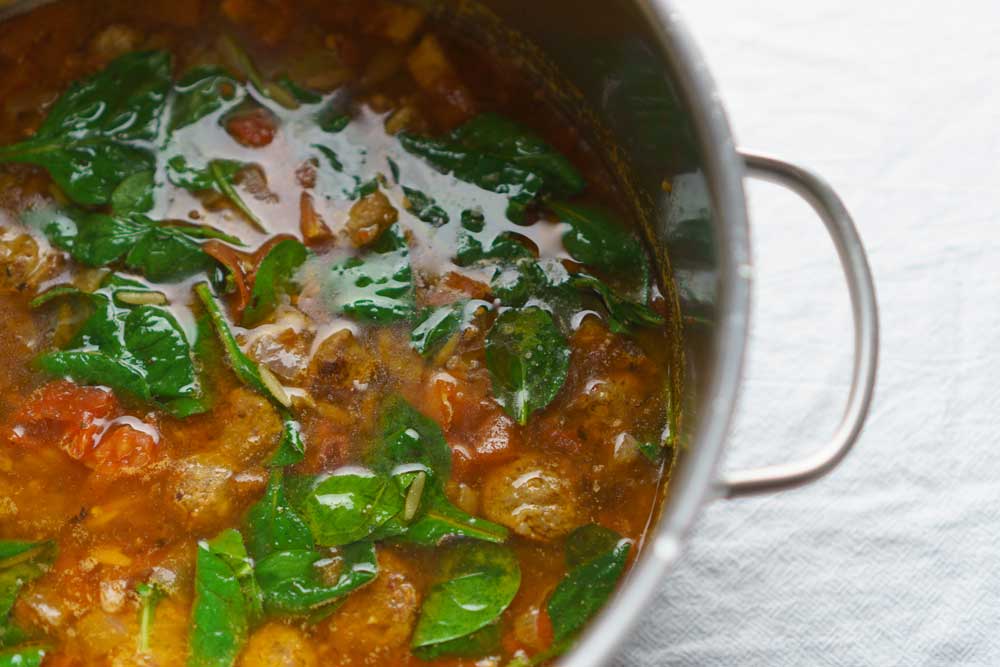
Italian Sausage Soup (ZReboot Version)
Plan Z Phase: This is a Z3 (ZReboot) recipe.
Servings: Serves 2
This simple Italian Soup is packed with flavor and convenience. It travels well and heats in the microwave too. Leftovers are a BIG YUM.
Ingredients:
- 2 Aidell’s Italian Sausages
- 1 cup of chopped onion (I use Vidalia)
- 1 red bell pepper, chopped (or your choice of bell pepper)
- 1 clove of minced garlic (Jar garlic will work)
- 1, 15 oz can of beef broth or two cups from a carton
- 1, 14.5 oz can of diced tomatoes (you can choose the ones with Italian seasoning)
- 2 cups of washed baby spinach (I get mine from the salad bar to save on leftovers)
- grated sea salt and pepper to taste
- 1 medium zucchini, cut into small cubes (optional)
- ¼ cup of grated Parmesan cheese to garnish on top (optional)
Instructions:
Spray a small soup pot or Dutch oven with olive oil spray. Cut your sausages into coin-sized pieces and then add them and the onion to the pot. Cook on medium until onions wilt and sausages begin to brown. Add the chopped bell pepper and garlic along with beef broth and diced tomatoes. Cook on medium for about 15 minutes to blend flavors. Stir regularly. Add the zucchini and cook 5 – 7 more minutes until it’s al dente. Season with grated sea salt and pepper. Now add the spinach and cook for 1 minute. Stir often to incorporate.
When serving, put the soup in the bowls and scatter grated Parmesan over the top.
Enjoy!
Cheers,
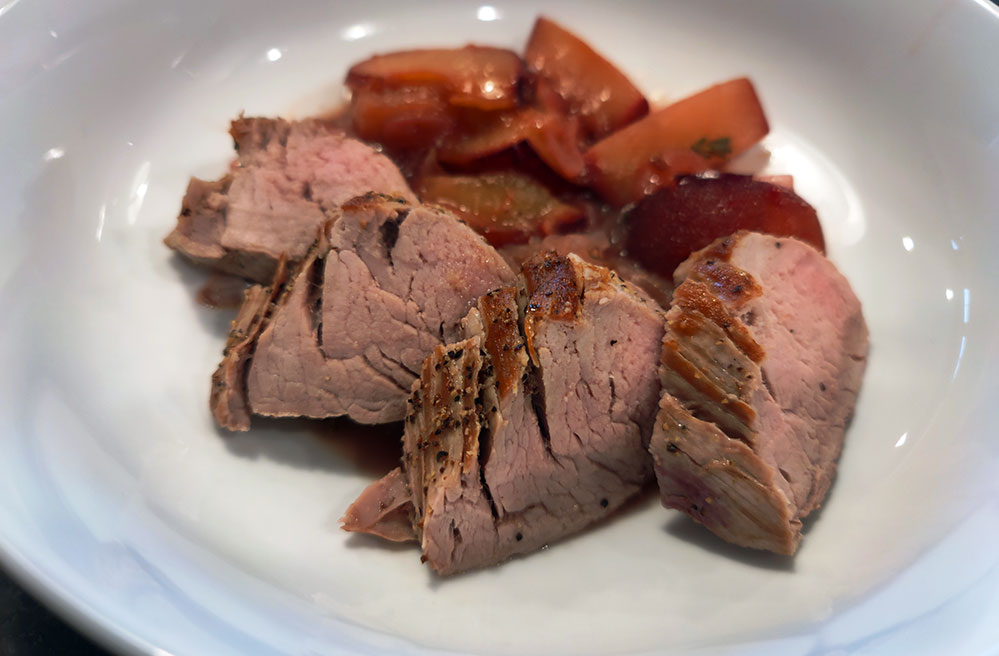
Roasted Pork Tenderloin with Fresh Plum Sauce
Plan Z Phase: This is a Z2 (ZReduction) recipe.
My husband loved this, and I was surprised. Delightfully surprised! This is easy to make for a weekday meal, but you could also serve this to guests, and no one would guess this is diet food.
Servings: Serves 2. Can easily be doubled or even tripled for a dinner party.
Ingredients:
- 1 pork tenderloin (they all run at 1lb). Get a plain one. Not flavored.
- sea salt and pepper to taste
- olive oil spray
- 1 cup of sliced red onion
- 1 cup of other onion. It can be yellow or white onion; even shallots. I used white because that’s what I had in my fridge.
- 3 fresh thyme sprigs (or to taste). Just run your fingers along the spines to remove the leaves. All you want are the leaves. This is about 1 tsp of thyme.
- 3 plums (I used black but red works too). Cut them into quarters and remove the pits. Don’t take off the skin.
- ½ cup of water
- 1 Tbl of balsamic vinegar (or red can work)
Instructions:
Preheat the oven to 400 degrees. While that’s happening you can sear your meat. Heat an ovenproof pan (I use cast iron). Spray your pork tenderloin on all sides with a coating of olive oil. Dust with sea salt and pepper. Put it in the pan and cook for 3 – 4 minutes on one side to sear it and get a brown crust. Transfer the tenderloin to a plate for the time being.
Spray the skillet again (don’t clean it out). Add the onions and a light grating of sea salt. Sauté on medium until the onions loosen up. This will take 5 – 8 minutes.
Stir in the thyme. Add the pork tenderloin and position the plum pieces around the pork.
Now you are ready to roast. Put it in the oven for about 20 minutes. Insert a meat thermometer into the roast to see if it’s done. You want the temperature to be about 160 degrees for medium. Don’t go for rare. Anything under 135 degrees can give you food poisoning! Take the pan out of the oven. Remove the pork tenderloin and place it on a cutting board. Let it rest for 3 – 5 minutes so the juices go back into the meat. Slice into thin pieces. One tenderloin serves two people, so if you and your dinner partner are eating together, you can each eat half of the roast.
While the pork is sitting, add the balsamic vinegar and water to the pan. Heat and stir to incorporate. You want it to bubble for a few minutes, so it starts to thicken. You’ll have lumps of plums. That’s great.
If you want it to look restaurant fancy, you’ll put sauce in the middle of the plate and arrange slices of the pork on top. Any way you serve it works.
For this meal you’ll skip your fruit dessert. You’ve already eaten it! You can have more veggies, though, to round out your one cup. I roasted brussels sprouts for the occasion, and they were a great combo.
Enjoy!
Cheers,
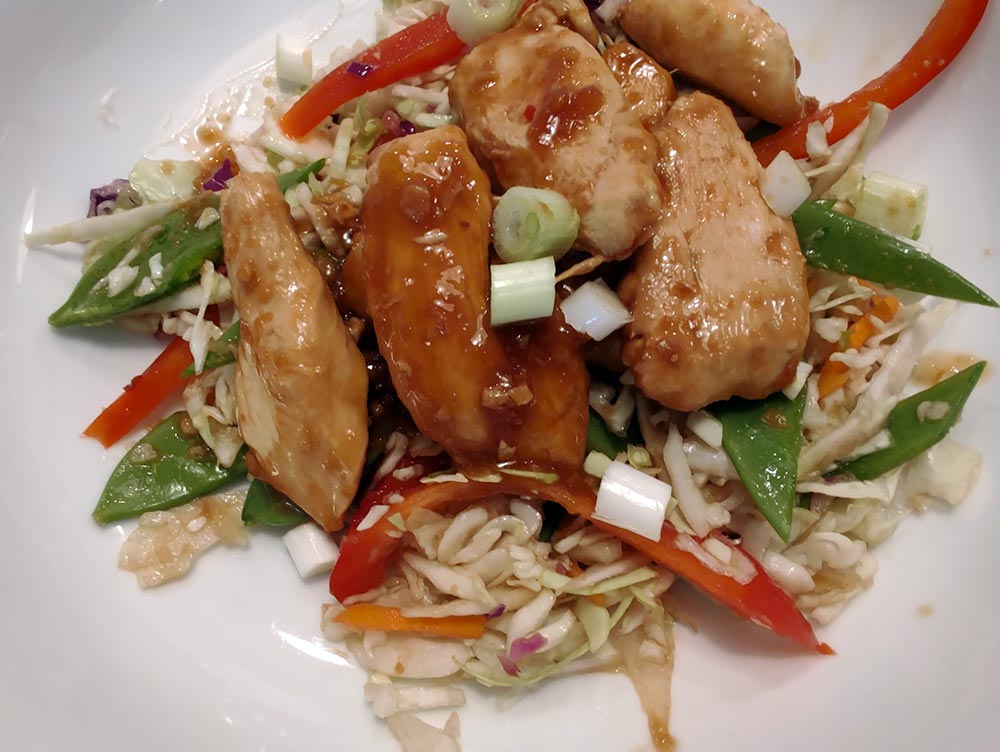
Asian Chicken with Veggie Slaw (ZReduction Version)
Plan Z Phase: This is a Z2 (ZReduction) recipe. This is a fun, easy dish to serve in the summer or when you want something light. The veggies can be varied. I used red bell pepper and pea pods, but you could also use other colors of bell peppers, celery, cucumber, green onion, white onion, or even add a bit of jalapeno. You decide. Just keep the total veggie additions to 2 cups for 2 people. Remember the slaw/cabbage is unlimited so you can have more of that.
This looks like a lot of ingredients, but you’ll see it’s sort of a dump and cook recipe. Not difficult at all. If you love making Asian food you probably have many of these ingredients in the house.
Servings: Serves 2. Can be doubled easily.
Ingredients:
For the Chicken
- 2 boneless, skinless chicken breasts cut crosswise into ¼” thick strips
- 1/3 cup of water
- 2 Tbl (or less) of Truvia. I use it in the sauce, but I'm making this an optional ingredient because when you heat Truvia some people find it has a metallic taste.
- 2 Tbl of orange juice squeezed from a fresh orange
- 1 Tbl of tamari or coconut aminos. Soy sauce can be subbed but the others are better for you.
- 2 tsp of ketchup
- 1 Tbl of rice wine vinegar
- 4 tsp of minced garlic (jar garlic can work)
- ¼ tsp of red pepper flakes (optional or to taste)
- 2 tsp of cornstarch mixed with 2 Tbl of water
- olive oil spray
For the Slaw
- 4 cups of coleslaw mix. Even if it has a few carrot bits in it, that’s okay.
- 1 cup of pea pods (snow peas) cut up into chunks
- 1 cup of red pepper strips or chunks
Instructions:
Spray a large saute pan with olive oil. Let it heat up on medium-high and add the chicken pieces. Spread them out so they can cook without sticking together. Cook 3 – 4 minutes per side or until no pink remains. They will be tinged with a little bit of brown but not much.
While that’s cooking, in a small bowl, whisk the water, Truvia, orange juice, tamari, ketchup, vinegar, garlic, and pepper flakes.
Pour this mixture over the chicken and continue to cook on medium-low (just so it’s bubbling a bit) for 3 minutes more.
While this is happening take out a medium bowl and add your coleslaw, and your chosen veggies. Mix them up.
In another small bowl mix the cornstarch with water. Pour this into the pan and bring it to a low boil. That will thicken the sauce. This won’t take long so keep an eye on the pan. If it starts to get too thick you can pour in a bit more water and thin it out. This will only take a minute or two at most.
Next, take out the chicken and set it aside. Work fast so it doesn’t get cold -- although this dish would taste just fine if it’s totally cold. DO NOT throw out the sauce left in the pan.
Pour the sauce that’s in the bottom of the pan over the slaw mixture in the bowl and toss.
Get out your plates or dinner bowls. Divide the coleslaw mix amongst the bowls.
Add the chicken on top and serve. If you want more red pepper flakes to make it spicier this is the time to add them.
Enjoy!
Cheers,
Asian Chicken with Veggie Slaw (ZReboot Version)
Plan Z Phase: This is a Z3 (ZReboot) recipe. This is a fun, easy dish to serve in the summer or when you want something light. The veggies can be varied. I used red bell pepper and pea pods, but you could also use other colors of bell peppers, celery, cucumber, green onion, white onion, or even add a bit of jalapeno. You decide.
This looks like a lot of ingredients, but you’ll see it’s sort of a dump and cook recipe. Not difficult at all. If you love making Asian food you probably have many of these ingredients in the house.
Servings: Serves 2. Can be doubled easily.
Ingredients:
For the Chicken
- 2 boneless, skinless chicken breasts cut crosswise into ¼” thick strips
- 1/3 cup of water
- ¼ cup (or less) of brown sugar substitute. I use Swerve or ZSweet.
- 2 Tbl of orange juice squeezed from a fresh orange
- 1 Tbl of tamari or coconut aminos. Soy sauce can be subbed but the others are better for you.
- 2 tsp of ketchup
- 1 Tbl of rice wine vinegar
- 4 tsp of minced garlic (jar garlic can work)
- ¼ tsp of red pepper flakes (optional or to taste)
- 2 tsp of cornstarch mixed with 2 Tbl of water
- olive oil spray
For the Slaw
- 4 cups of coleslaw mix. Even if it has a few carrot bits in it, that’s okay.
- 1 cup of pea pods (snow peas) cut up into chunks
- 1 cup of red pepper strips or chunks
Instructions:
Spray a large saute pan with olive oil. Let it heat up on medium-high and add the chicken pieces. Spread them out so they can cook without sticking together. Cook 3 – 4 minutes per side or until no pink remains. They will be tinged with a little bit of brown but not much.
While that’s cooking, in a small bowl, whisk the water, brown sugar substitute, orange juice, tamari, ketchup, vinegar, garlic, and pepper flakes.
Pour this mixture over the chicken and continue to cook on medium-low (just so it’s bubbling a bit) for 3 minutes more.
While this is happening take out a medium bowl and add your coleslaw, and your chosen veggies. Mix them up.
In another small bowl mix the cornstarch with water. Pour this into the pan and bring it to a low boil. That will thicken the sauce. This won’t take long so keep an eye on the pan. If it starts to get too thick you can pour in a bit more water and thin it out. This will only take a minute or two at most.
Next, take out the chicken and set it aside. Work fast so it doesn’t get cold -- although this dish would taste just fine if it’s totally cold. DO NOT throw out the sauce left in the pan.
Pour the sauce that’s in the bottom of the pan over the slaw mixture in the bowl and toss.
Get out your plates or dinner bowls. Divide the coleslaw mix amongst the bowls.
Add the chicken on top and serve. If you want more red pepper flakes to make it spicier this is the time to add them.
Enjoy!
Cheers,
Seared and Roasted Burgers
Plan Z Phase: This is a Z2 (ZReduction) recipe.
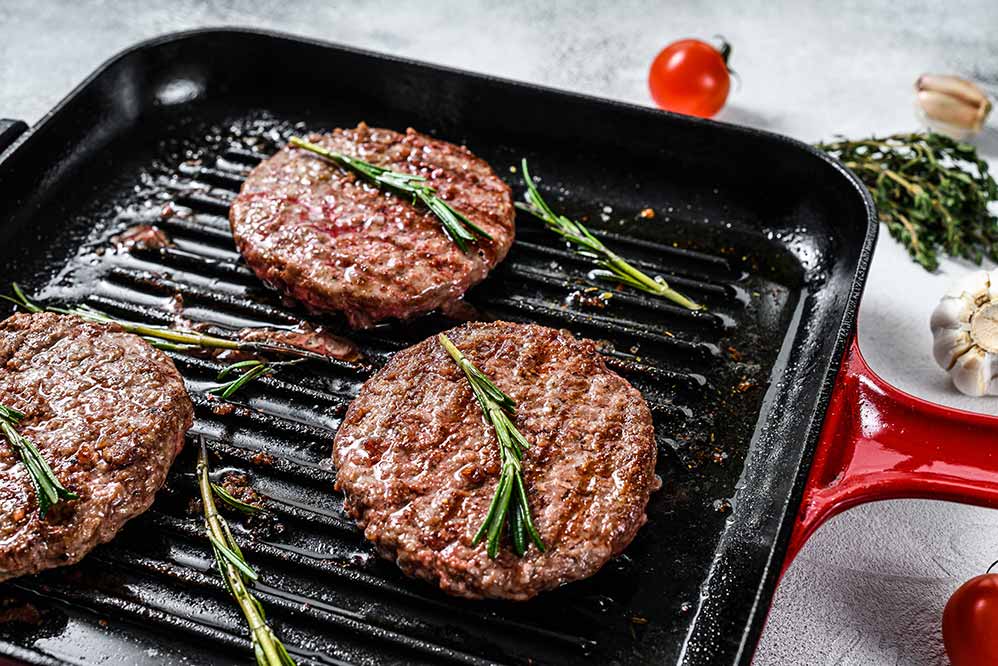
One of the tricks to making good burgers when you’re in ZReduction on Plan Z is to find a way to keep them as moist and juicy as possible. Usually, the secret to a good burger is the fat content. The higher the fat content, the juicier the burger. I’m asking you to use 93% lean ground sirloin, so that makes it challenging to make a juicy burger when most burgers are about 20% fat; not 7% fat like you are using. If you’re not dieting, you can have all the fat you want in your ground beef.
My favorite technique for cooking low-fat burgers is to quickly sear the burger and finish it by roasting it in the oven. Here’s the recipe for seared burgers that are then oven-roasted.
Servings: Serves 2. Can easily be doubled.
Ingredients:
- 16 oz of ground sirloin (93/7% lean). You are allowed up to 8 oz patties but you can make smaller ones if you choose. I like 4 oz or maybe 6 oz. I can’t eat a full 8 oz burger.
- Montreal Steak seasoning or seasoning of your choice that follows Plan Z guidelines
Optional:
- Beefsteak tomato slices
- onion slices or sauteed onions
Equipment:
- I use a cast iron pan for my burgers. That way I can sear them on the stovetop and then just transfer them to the oven. Either way, you are going to need to use a pan that can handle the oven heat.
Instructions:
Preheat your oven to 375 degrees. Spray a cast iron (or ovenproof) pan with olive oil. Form your burger patties. Season the burger patties on top to your liking.
Heat the pan on medium-high until hot. Add the burgers. Spray the tops of the burgers with more olive oil.
Sear for 4 minutes on medium-high. Then flip the burgers.
You are now going to transfer them to the oven.
Here’s the tricky part: How long to cook.
If the patties are 8 oz they are obviously going to take more time than a 4 oz burger.
I cook them for about 5 – 7 minutes and then begin to check them with a meat thermometer. The 4 oz patties might already be done. You are looking for 160 degrees on your thermometer. The 8 oz patties might take about 5 minutes more. 160 degrees will give you a burger with some pink still in the middle but not medium-rare. More medium to medium-well.
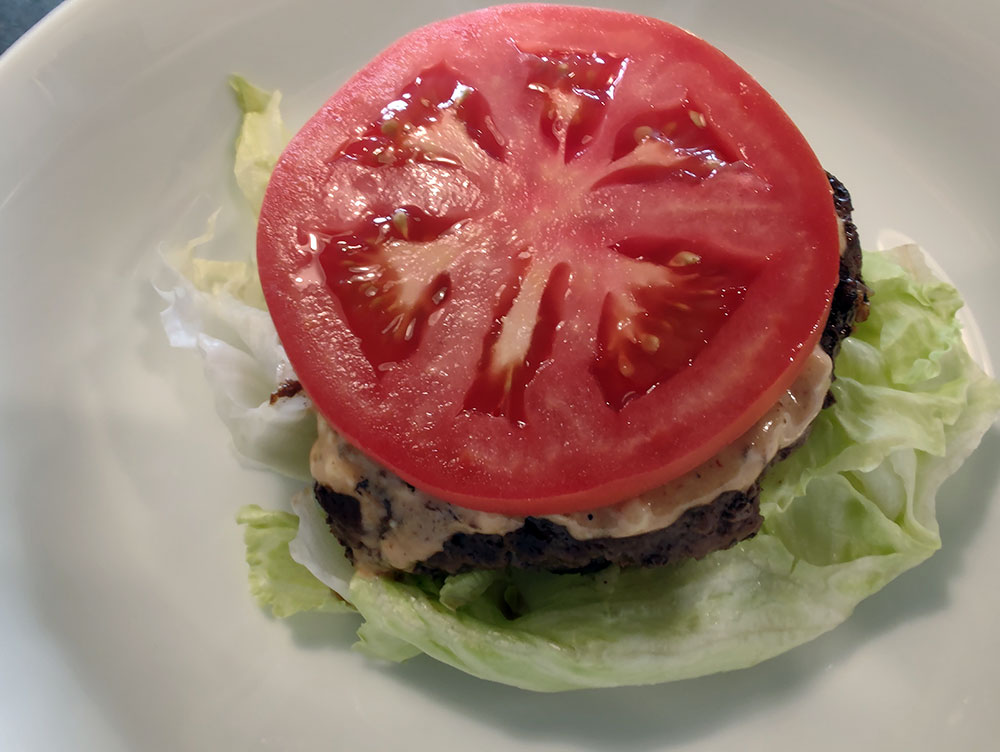
Serve the burger on a big piece of iceberg lettuce, with a thick slice of tomato. Maybe add a slice of onion, too.
If you want to jazz it up a bit more and have BBQ Ranch Burgers, make this sauce and put a smear on the burger before you top it with the tomato and onion.
Enjoy!
Cheers,
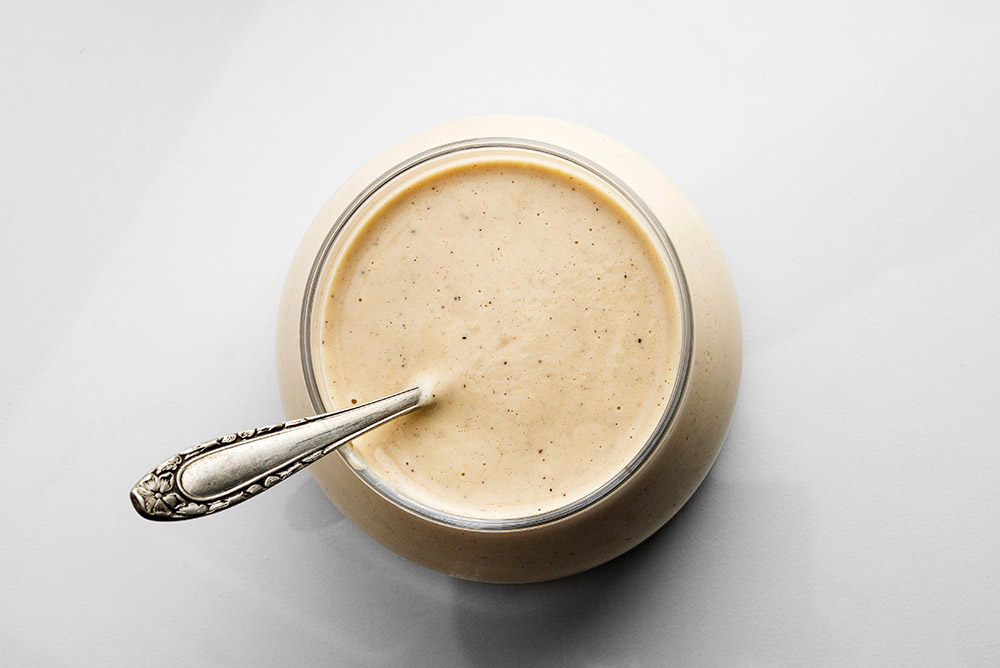
BBQ Ranch Sauce (Smear) for Burgers
Plan Z Phase: This is a Z2 (ZReduction) recipe. This will go well with beef burgers or even ground chicken breast burgers or grilled chicken breasts; even a steak.
Servings: Serves more than 2. A ZReduction serving size is 2 tsp.
Ingredients:
- 1 Tbl of mayonnaise
- 1 Tbl of ranch dressing
- 1-1/2 Tbl of bbq sauce (try to find one with sugar toward the bottom of the ingredient list. Almost all bbq sauces have sugar but you are not eating much of it). You are going for the essence of bbq flavor; not full-on bbq.
Instructions:
Mix all ingredients in a bowl. Spread a smear across the top of your burger. If you are on ZReduction, this is 2 tsp maximum. If you are in ZReboot, you can have as much as you want.
Enjoy!
Cheers,
How to Successfully Make Low Fat Burgers
One of the tricks to making good burgers when you’re in ZReduction on Plan Z is to find a way to keep them as moist and juicy as possible. Usually, the secret to a good burger is the fat content. The higher the fat content, the juicier the burger will be. I’m asking you to use 93% lean ground sirloin, so that makes it challenging to make a juicy burger when most burgers are about 20% fat; not 7% fat like you are using. If you’re not dieting, you can have all the fat you want in your ground beef. We know the fat won’t make you fat.
I found a video online you can review for making a juicy burger by adding ingredients that give off juice. Things like onion and celery will help. You can follow the directives in the video below and still not cheat on Plan Z. Or you can leave your beef plain and just adjust your cooking time a bit more. I’ll explain that in a bit.
https://www.youtube.com/watch?v=P8SY69LYkx0&t=26s
As you can see, adjusting your ingredients in the beef can add juiciness, but he doesn’t talk about cooking methods or times at all.
You have options.
My favorite is to sear the burger and finish it by roasting it in the oven.
The GrillMeisters of the world would say I’m crazy. They’d insist you have to cook it on the grill. That’s an option, too.
I’m going to go into detail on searing and roasting. You can do your thing on the grill. Just remember because of the lower fat content burgers will cook faster and if you leave them on as long as you usually would you’ll have a burger that might taste like wood and be really dry and unpleasant. So be careful. Cook indirect on the grill except for the searing time.
Here’s the recipe for seared burgers that are then oven-roasted.
Seared and Roasted Burgers
Plan Z Phase: This is a Z2 (ZReduction) recipe.
One of the tricks to making good burgers when you’re in ZReduction on Plan Z is to find a way to keep them as moist and juicy as possible. Usually, the secret to a good burger is the fat content. The higher the fat content, the juicier the burger. I’m asking you to use 93% lean ground sirloin, so that makes it challenging to make a juicy burger when most burgers are about 20% fat; not 7% fat like you are using. If you’re not dieting, you can have all the fat you want in your ground beef.
My favorite technique for cooking low-fat burgers is to quickly sear the burger and finish it by roasting it in the oven. Here’s the recipe for seared burgers that are then oven-roasted.
Servings: Serves 2. Can easily be doubled.
Ingredients:
- 16 oz of ground sirloin (93/7% lean). You are allowed up to 8 oz patties but you can make smaller ones if you choose. I like 4 oz or maybe 6 oz. I can’t eat a full 8 oz burger.
- Montreal Steak seasoning or seasoning of your choice that follows Plan Z guidelines
Optional:
- Beefsteak tomato slices
- onion slices or sauteed onions
Equipment:
- I use a cast iron pan for my burgers. That way I can sear them on the stovetop and then just transfer them to the oven. Either way, you are going to need to use a pan that can handle the oven heat.
Instructions:
Preheat your oven to 375 degrees. Spray a cast iron (or ovenproof) pan with olive oil. Form your burger patties. Season the burger patties on top to your liking.
Heat the pan on medium-high until hot. Add the burgers. Spray the tops of the burgers with more olive oil.
Sear for 4 minutes on medium-high. Then flip the burgers.
You are now going to transfer them to the oven.
Here’s the tricky part: How long to cook.
If the patties are 8 oz they are obviously going to take more time than a 4 oz burger.
I cook them for about 5 – 7 minutes and then begin to check them with a meat thermometer. The 4 oz patties might already be done. You are looking for 160 degrees on your thermometer. The 8 oz patties might take about 5 minutes more. 160 degrees will give you a burger with some pink still in the middle but not medium-rare. More medium to medium-well.
Serve the burger on a big piece of iceberg lettuce, with a thick slice of tomato. Maybe add a slice of onion, too.
If you want to jazz it up a bit more and have BBQ Ranch Burgers, make the sauce below and put a smear on the burger before you top it with the tomato and onion.
BBQ Ranch Sauce (Smear) for Burgers
Plan Z Phase: This is a Z2 (ZReduction) recipe. This will go well with beef burgers or even ground chicken breast burgers or grilled chicken breasts; even a steak.
Servings: Serves more than 2. A ZReduction serving size is 2 tsp.
Ingredients:
- 1 Tbl of mayonnaise
- 1 Tbl of ranch dressing
- 1-1/2 Tbl of bbq sauce (try to find one with sugar toward the bottom of the ingredient list. Almost all bbq sauces have sugar but you are not eating much of it). You are going for the essence of bbq flavor; not full-on bbq.
Instructions:
Mix all ingredients in a bowl. Spread a smear across the top of your burger. If you are on ZReduction, this is 2 tsp maximum. If you are in ZReboot, you can have as much as you want.
Enjoy!
Cheers,

Chicken with Creamy Sundried Tomato Sauce
Plan Z Phase: This is a Z2 (ZReduction) recipe. This is one dish I never thought I could pull off for ZReduction. But here it is! And it's delicious. Remember you’re allowed 2 Tbl of cream per day. You’ll have to subtract 1 Tbl of cream for one portion of the sauce with this dish.
Servings: Serves 4
Ingredients:
- 4 boneless chicken breasts (approx 2 lbs). I buy cutlets so I don’t have to pound them down to cook them. In most cases that will mean you can have 2 cutlet pieces per person. Remember to limit yourself to a maximum of 8 oz per person.
- 3 Tbl of finely chopped shallots. You can use onion if you need to, but shallots just taste fancier.
- 3 Tbl of minced garlic (jar garlic will work fine)
- 1 and 1/3 cups of chicken broth. I use low sodium and add my own sea salt. It's healthier that way.
- 2 tsp of corn starch
- ½ cup of sundried tomatoes, finely chopped. A few options. You can buy dry sundried tomatoes and soak them in water before chopping them up. That’s ideal. Or you can buy the ones in oil but be sure to do a real good job of rinsing them off and pat with paper towels to get off the oil. If you want to make your own, check out my recipe for slow-baked "sun dried" tomatoes made in the oven.
- ¼ cup of whipping cream
- 3 Tbl of chopped fresh basil
- a handful of fresh baby spinach (optional)
- Olive oil spray
- Grated sea salt and pepper to taste
Instructions:
Spray a large saute pan with olive oil. Season your chicken with sea salt and pepper. When the pan is hot add the chicken. Saute on medium-high until the chicken is done. No pink remains. If you check with a meat thermometer you are looking for 165 degrees. Wrap in aluminum foil and set aside. Or if your oven is on for something else you can cook them slightly less and put them in the oven in an oven-proof pan.
Use the same skillet. Spray it with olive oil again. Add the shallot and saute until nearly soft. Only takes a couple of minutes. Add the garlic and stir it around for 1 minute or less.
Pour in the chicken broth and scrape up the browned bits in the pan.
In a small bowl, whisk 1 Tbl of the broth with the corn starch until combined and no lumps remain.
Add the main portion of the broth to the pan and add the cornstarch mixture. Stir in the sundried tomatoes. Season the sauce with sea salt and pepper. Lightly boil and allow to simmer for a minute; stirring constantly. Add the cream. Cook a couple more minutes until the cream begins to thicken. Toss in the spinach and let it wilt into the sauce.
Remove from heat. Add the chicken and spoon the sauce over the chicken to coat it.
Serve on your plates. Spoon ¼ of the sauce over each portion and garnish with the basil bits.
Serve immediately.
Serve with roasted asparagus or roasted green beans. Suitable for company!
Enjoy!
Cheers,

What I Did On My Summer Vacation
When you were in grade school did you have to write a paper each year about your summer vacation?
I always dreaded the “What I Did on My Summer Vacation” report. It was not that I hated to write. I liked that part. I just felt like my summer vacations were a bit dull. I didn’t do a very good job of highlighting what happened at the City Rec Center/playground. That was all fun. Everyday. We’d play sports, games, and make lanyards out of the silly plastic roping. They kept us busy for sure. When I was six years old, I was even voted Queen of the Playground. I still carry pride from that. No idea why, really. I guess it set me up to have an achievement mindset.
Most of the time the only thing I could think to write about was our annual trip to Waukegan, IL to see my grandmother. My parents would pack us all in the big Cadillac my dad drove, and we’d head 4 hours south to see Grandma and the cousins.
Other kids in the class wrote about their trips to Paris or the Grand Canyon.
I guess I was jealous.
This year on my “adult” vacation I decided to do something different. I had not been on a vacation in 18 months due to COVID restrictions. I didn’t want to relax by reading novels. I wanted a new experience.
My husband and I decided to book a cabin in the Blue Ridge mountains for a little getaway. Before the trip, I saw an article outlining what was going on in the area the week we were going to be there. I could visit an apple orchard or a vineyard. I could even go see llamas! I picked a craft class.
I have never taken a craft class on vacation. I’m more likely the one to teach the craft class when I’m not on vacation; or the cooking class.
This was going to be different.
And you should have seen the look on my husband’s face when I told him I signed him up too!
The article featured a woman who teaches people how to make owl sculptures/wall hangings with natural materials from the forest.
On the day of the class, we headed north from our cabin and drove about half an hour to her studio. It was buried in the woods alright!
After a quick tour of her hand-built house (renovated by the craft artist herself), we settled in at her workshop to begin our project.
She did a marvelous job of prepping for us in advance. She had already completed some of the more difficult elements for us. The first thing we had to do was pick a body made from tree bark. Then we had to decide if we wanted to paint it.
Two hours later we finished our project. Here’s how it went:
- First, we chose a wood-bark body.
- Then we decided on the color of eyes we wanted to have. (This was one of the only elements that did not come from the forest along with fishing wire and super glue).
- We picked eyebrows, ears, a beak, wings, legs and selected a few other options. I wanted mine to have a feather feature on the top to sort of look like hair, or a hat.
- The crafting artist taught us how to use a crafting drill. And how to wire the pieces together to make the final product.
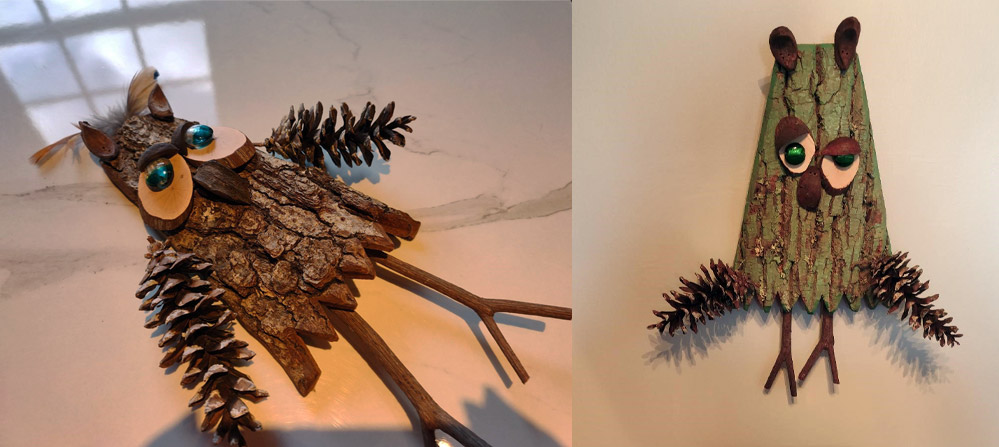
It was really fun to choose the pieces because those put the personality into the final character. Lots of laughing took place. I was amazed at how talented my husband turned out to be in making his creation. This is a guy who normally only changes lightbulbs!
The green guy is my husband’s piece. I actually like his best! I went the natural route. I still have to figure out where mine is going to hang. My husband's creation is featured in his office. Neither one of our woodland buddies have names yet.
We found our way out of the woods with big smiles on our faces. That was time well spent. Something different. Something with a memory attached and a whole lot easier this year than wearing a mask on a flight to Paris.
Cheers,
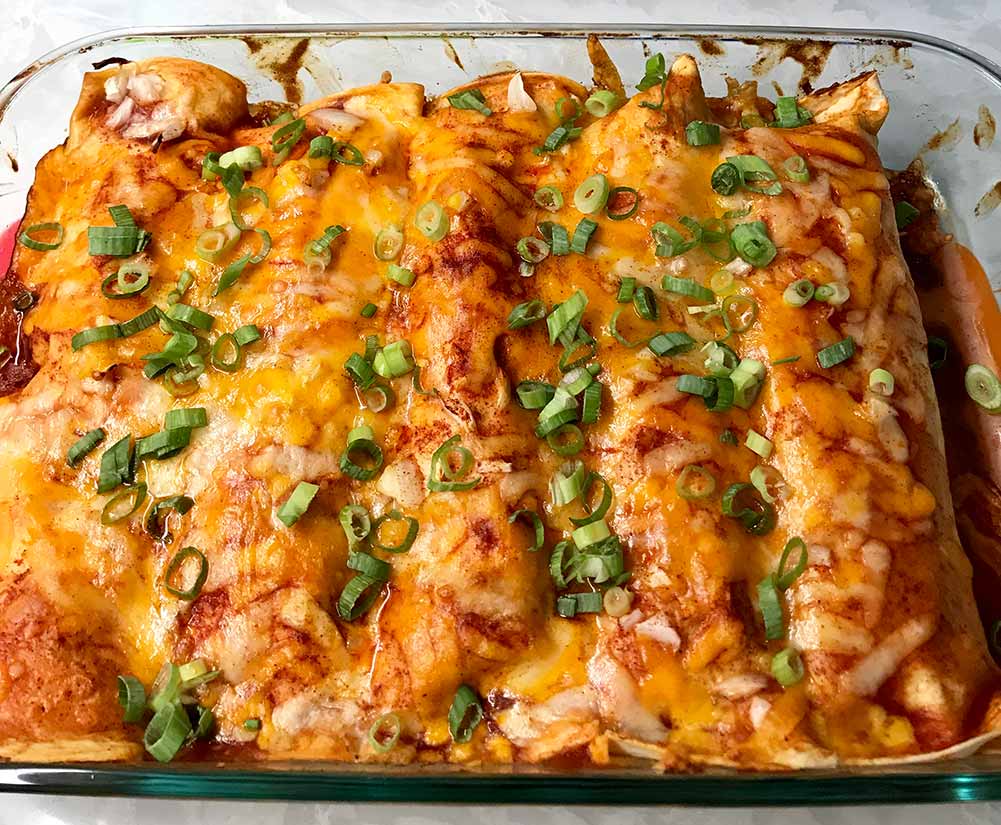
Easy Enchiladas
Plan Z Phase: This is a Z3.5 (ZReboot 3.5) recipe.
This dish comes together in a flash. If you are doing beef enchiladas, I recommend red sauce. If you are doing chicken, I recommend you go wild and use a green sauce. I’ll give directions for the beef version but you can convert it to chicken easily. If you are doing chicken, you can cut up and cook chicken tenders or even pull apart a rotisserie chicken.
Servings: Serves 4 – 6 (Depends on how much filling you put in your tortilla)
Ingredients:
- 1 Tbl of olive oil
- 1 lb of ground beef
- ¾ cup of diced onion
- 3 Tbl of taco seasoning (or to taste). This is one time I went with convenience. There might be some sugar in the seasoning but not really all that much.
- 1-½ cups of shredded mozzarella
- 1-½ cups of shredded Monterey jack cheese
- ½ cup of sour cream
- 4 – 6 10” tortillas (I buy the low carb version)
- 10 oz of enchilada sauce (red or green)
- sliced green onion for garnish
Instructions:
In a medium saute pan add the olive oil and the ground beef. Break it up continually while it cooks on medium so you get bite-sized pieces. If you want cooked onion in your filling add it when the beef is half done. If you want the onion to have a sharper flavor you can add the raw diced onion to the filling without cooking it.
Cook until beef no longer has any pink in the middle.
In a large bowl add the ground beef and onion along with half of both kinds of cheese, sour cream, and taco seasoning. Mix until well incorporated.
Hold a tortilla in your open palm. Add about ¾ of a cup of filling in the middle. Then set it on the counter or on a plate and roll it up snugly. Put in a 9” x 9” oven-proof pan. Do this with all of the tortillas. My batch made 5 tortillas because I like them a little on the fatter side. More filling. Less tortilla. Top with the enchilada sauce and then sprinkle on the remaining cheese.
Bake for 25 – 30 minutes at 375 degrees. The cheese will be bubbling. Let the dish rest on the counter for 5 – 10 minutes so it cools down a bit. Carefully remove the enchiladas from the baking dish and put them on a plate. Garnish with green onion.
The serving size is 1 per person. You can always add some heated pinto beans as a side. Guacamole and a few chips would be good too.
Enjoy!
Cheers,

Stimulus Strategies
Since the second set of stimulus checks went out, I have been trying to be observant of how that money is being spent.
Sure seems like a whole lot of people have decided they need to get away. Vacation travel is way up. I have even heard of some hotels that are getting difficult to book. My husband and I had a similar experience. We decided to go visit the north Georgia towns of Ellijay and Blue Ridge. We only drove 70 miles and rented a secluded, little cabin in the mountains, but it was difficult to find an opening on either Airbnb or Vrbo. My doctor suggested I needed to get away and just chill. Chill I did. Those towns are really cute. It’s amazing how you can drive 70 miles and be in a whole different world.
Then there’s the great furniture buying spree. Tons of people moved during the pandemic and other people have gotten new furniture for their current place. When you stay home for a year, buying new furniture gives you a little bit of happiness. I found myself needing a couple of new cushions for our patio chairs. They are a really odd shape, so they have to be done by an upholsterer. They last for several years, so I didn’t mind investing a bit to get them. I have been waiting for them for about two months now. Turns out foam for building cushions is in short supply all over the country!
My colleague and I were in a conversation the other day and it seems like the stimulus checks fall into families or individuals in three different categories.
There are those folks who were not really affected by the pandemic. They make decent money and didn’t need those second stimulus checks to make ends meet.
There are those who the checks really helped in maybe being able to splurge a bit, but they are still closely watching their budget.
And there are those for whom the stimulus checks aren’t nearly enough. They are scraping along the best they can with everything going on around them. My heart goes out to those folks.
What people are doing with that money is all over the park. As a small business owner, I didn’t qualify for any stimulus checks, but I did apply and received PPP money. Believe me, that HELPED. My stress level was manageable with those funds on board to get us through last summer and into the winter.
Considering the majority of Americans gained weight during the pandemic I can certainly see some people who have decided to use that money for a long-term health benefit. We are more than grateful for those folks who decided it was time to invest in themselves and get on board with Plan Z. Those folks are losing the weight and learning how to keep it off. They are very happy and reach out to us every day to tell us.
My husband would say, “There is no going back to normal. There is only going forward to a new normal.”
I’m still getting used to not wearing a mask everywhere. My hope is we don’t ever have to go back to that kind of normal ever again.
I hope you and yours are healthy and safe.
Cheers,

Cubmaster Loses Over 80 Pounds
Dieter Neil from Laurel, Mississippi lost 81 pounds with Plan Z. His motivating factor was wanting to be a better role model for his family and the Scouts he leads.
I retired from the Air Force in Sept 2012 after 24yrs. I allowed myself to indulge in all things as a reward for all those years of PT and keeping myself healthy for duty and uniform.
Well as you can see, it got out of hand and I was unable to knock the weight off on my own. I would lose 15 or 20lbs on my own and then plateau and get frustrated and stop trying which would lead to gaining it all back. I've been a Cubmaster for Pack 33 in Laurel, MS since 2014 and am now the District Commissioner for our Scouting District as well for the Pine Burr Area Council. I was not setting a good example for my Scouts or my son Tyson, who is 11 and the last child in our household. I knew I had to get healthy again for my son, wife, [the] Scouts, and myself.
Plan Z gave me the power to shed the weight and get healthy. I lost 81.1 lbs. and have [kept] it off since May of 2017.
I feel 15 years younger. My blood work even proves how much healthier I am now with all of my levels at normal or below normal limits whereas before, when I was fat, they were WAAAY over the danger levels.
Thank You Plan Z for literally giving me my life back!
Dieter Neil