
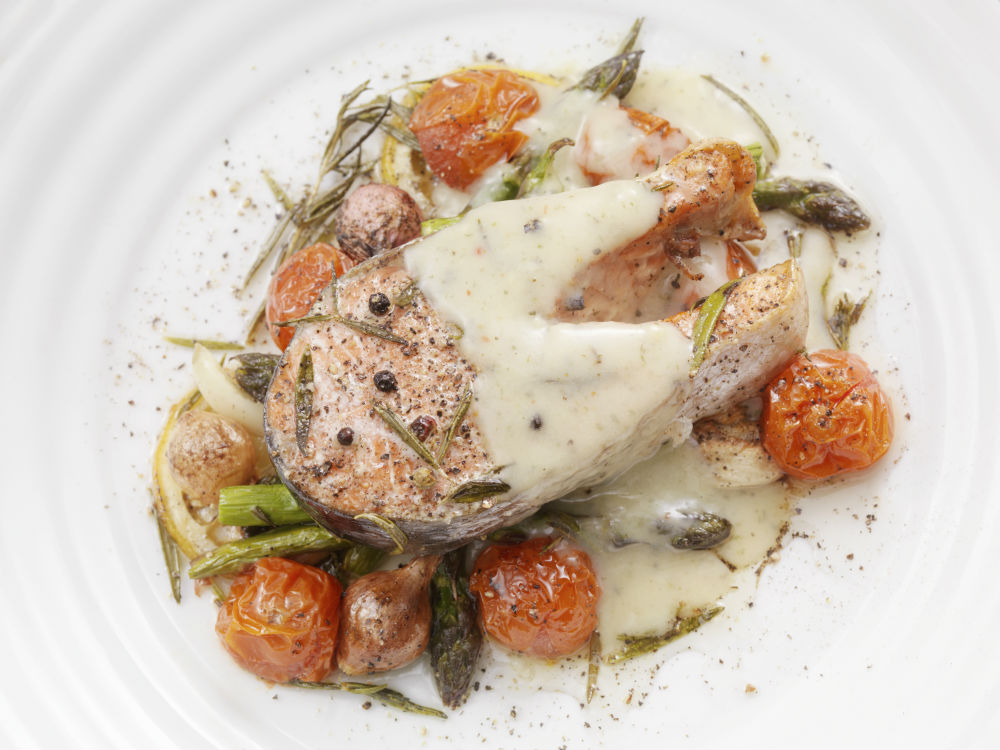
Louisiana Cream Sauce
Plan Z Phase: This is a Z2 (ZReduction) recipe. The sauce will make you feel so gourmet and it’s very easy to make. You don’t have to spend a lot of time in the kitchen either. It pairs perfectly with my Baked Salmon with Louisiana Cream Sauce or my Crabcakes II recipe.
Serves: 4
Ingredients:
- ½ cup of whipping cream
- 1/3 cup of Creole mustard or any grainy mustard will work (no sugar)
- 4 tsp of Worcestershire sauce
- 1 Tbl of Dijon mustard
- ¼ tsp of ground pepper
- ½ tsp of dried basil or Italian seasoning
- ¼ tsp of cayenne (optional. Or to taste)
- ¼ cup of sour cream (Z3 ONLY)
Instructions:
In a small sauté pan add all of the ingredients for the sauce. Bring to a bubble and cook, stirring often on medium til it starts to thicken. This will only be maybe five minutes maximum. Turn off.
If you are making this in Z3 (ZReboot) you can add 1/4 of sour cream to the sauce, stir and reheat to serve.
This sauce tastes great either way. The one with the sour cream in it is just fluffier.
Enjoy!
Cheers,

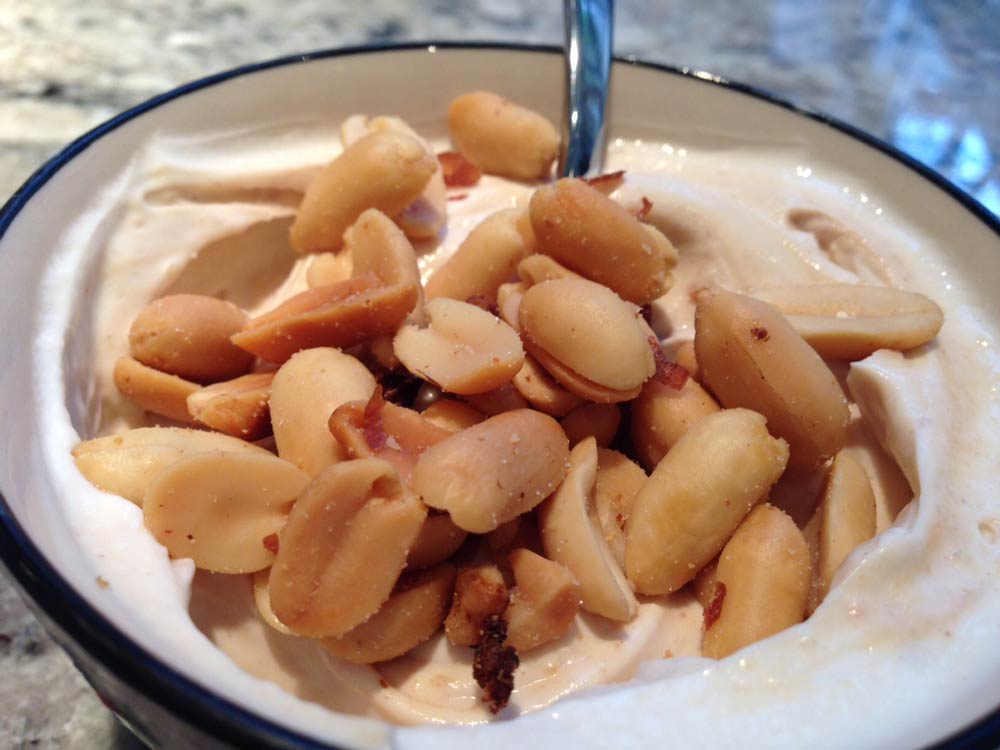
Peanut Butter Yogurt Swirl
Plan Z Phase: This is a Z3 (ZReboot) recipe.
This recipe works for breakfast or for dessert. Really satisfying! A great treat and super fast!
Serving Size: 1/2 cup
Ingredients:
- ½ cup of full fat plain yogurt*
- 1 tsp of Truvia
- ½ tsp of vanilla
- 1 – 2 Tbl of unsweetened peanut butter (smooth or crunchy)
- 2 – 3 Tbl of cocktail peanuts or your nut of choice
*If you cannot find full fat plain yogurt at your store, buy the fattiest one you can find. Probably 2%. Then go to the service counter at your grocery store and ask them to order it. You promise to buy it regularly and they will stock it. Be insistent. Get good food!
Instructions:
I invented this on the fly. Here’s all I did.
Grab a small bowl. Add the yogurt, Truvia, vanilla and peanut butter. Stir.
Top with peanuts and eat.
Enjoy!
Cheers,
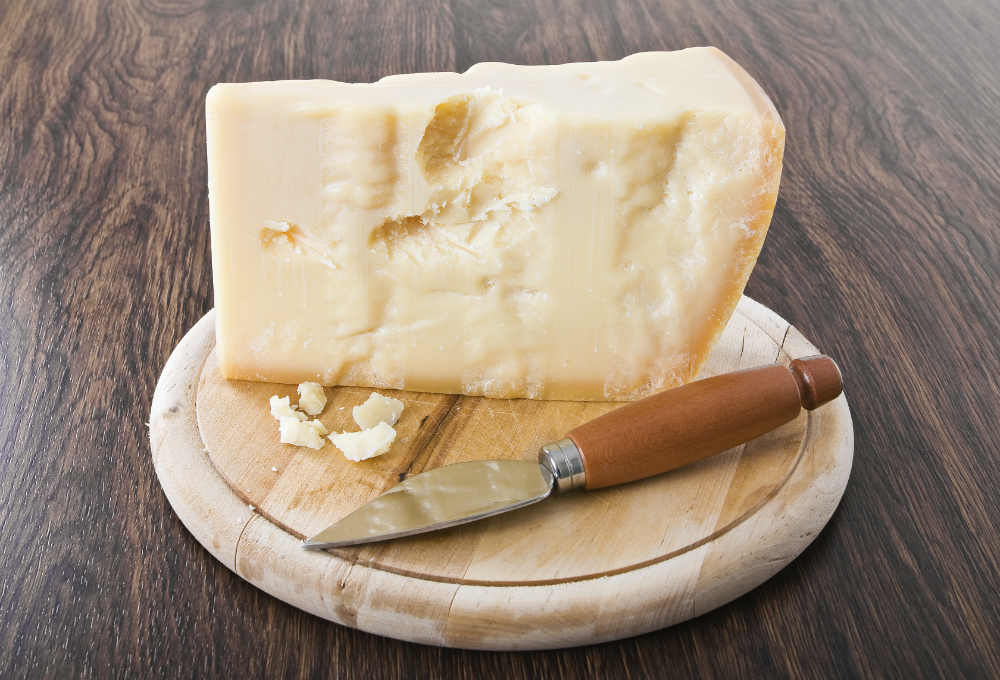
Say Cheese!
Getting your information from the internet can give you scary results. What do I mean by ‘scary’? I mean false. There are things published on the internet that are patently wrong. Reader beware.
On the other hand, the internet is the biggest source of information on the planet. I remember the days when that shelf that held up the encyclopedia set in the hallway outside my bedroom was my biggest source of information; that and our local library.
So much has changed.
The science has changed and so has the delivery mechanism. The entire world of libraries now sits on my desk. The internet can be just as much your friend as your foe. I, for one, cannot figure out how I ever lived without it.
In designing Plan Z, I spent countless hours on the internet doing research. I spent 18 months just researching homeopathy to design the ZR50 Reduction formula that helps dieters diet comfortably. Some things require countless hours because they are complicated; like homeopathy. Others take countless hours because you have to keep finding more and more references that support an idea you are considering. I give a ton of credit to Chris, VP Anger Management for doing so much research on the things in our Plan Z coaching. He’s a lifelong learner and possesses endless curiosity.
As part of Plan Z we launched an effort to unwind over 50 years of dieting misinformation and get you proper information backed up by today’s science. Some of the things we learned about dieting are so ingrained in us after so many years, it’s hard to believe they could not be true. We all believed things like:
"Fat makes you fat."
No it doesn’t. Carbohydrates do.
"A calorie is a calorie; whether you get them from carrots or cookies, they're all the same."
No again. Check out Dr. Lustig, a major contributor to the science that proves our bodies process calories differently. It depends on what we're eating.
"Calories in and Calories out. Eat less than you burn and you’ll lose weight."
Tell that to any post-menopausal woman and you’ll see flames coming out the top of her head from her frustration of trying to lose weight as she ages. It’s not how much you eat. More so, it’s what you eat.
So, I get to my question of the week. One of our dieters astutely asked that if I am suggesting adults should not drink cow milk, then why do I suggest cheese and yogurt are okay. They are all forms of dairy. It was a GREAT question, and if I didn’t have this little piece of information in my back pocket, I would have started to second guess myself and go do more research. I think you’ll find this interesting. I’m from Wisconsin, The Dairy State, and I found it fascinating.
So there you have it.
I liken this piece to an entertaining delivery of good, hard science. I’m sure the American Dairy Association doesn’t agree with a word of it, and my heart goes out to dairy farmers across the nation. I’m sure they could all send me to information that would refute this presentation. Then again, it’s like the guy in the video said…it’s all lobbying.
My husband often quotes Socrates in his speeches. Socrates once said, “I cannot teach a man anything. I can only get him to think.”
This whole cheese thing might need more research, but five years ago I gave up my gallon a day milk habit of cow milk and switched to coconut milk or almond milk, yet I still eat my share of cheese and yogurt. Pretty much daily. And I still think cows are cute.
Cheers,
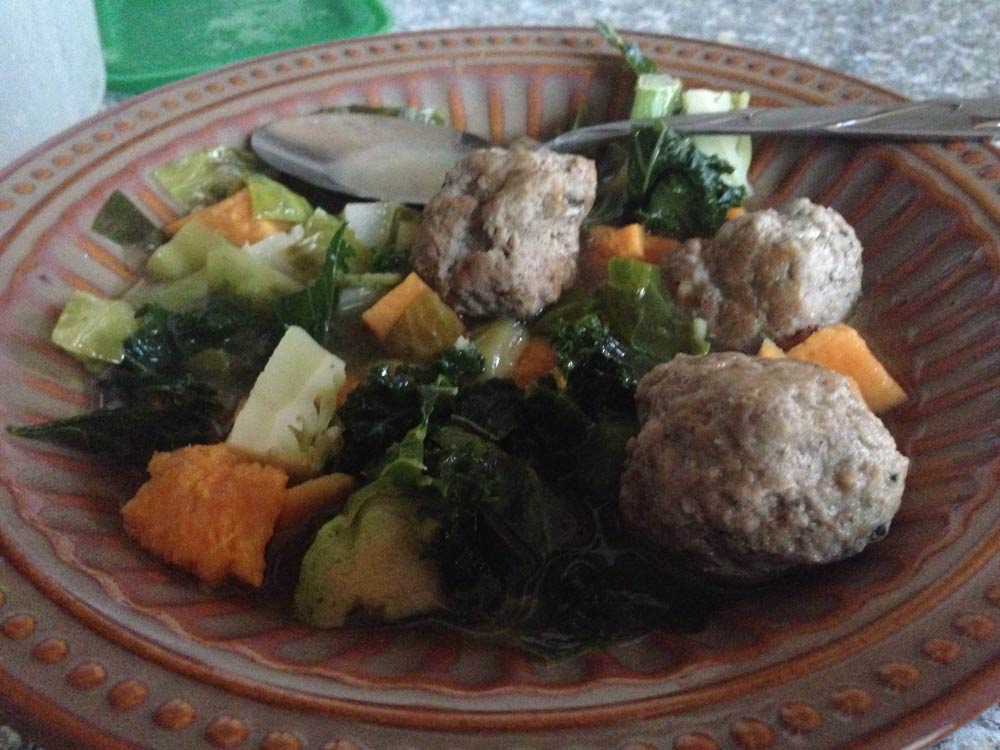
Turkey Meatball, Sweet Potato, and Kale Soup
Plan Z Phase: This is a Z3 (ZReboot) recipe. With the winter months peeking over our shoulder this hearty soup will shake off the chill. ZTeam coach Grace made this at home and enjoyed it so much she wanted to share it with the Plan Z community!
Servings: Serves 4. Each serving is 1.5 cups
Ingredients:
- 1 lb package of ground turkey
- 1 cup of kale, torn (You can shred the kale into any size that you'd like. I like my pieces larger.)
- 1/2 a sweet potato, diced
- 1/2 cup of Brussels sprouts, halved
- 2 cloves of garlic, minced
- 32 oz of chicken stock
- 1 tsp cumin
- 2 tsp Italian seasoning
- Olive oil
- Splash of white wine
- salt and pepper
Instructions:
The first step will be to make the meatballs. Place the ground turkey in a bowl with the cumin, Italian seasoning, salt and pepper. Roll up your sleeves and mix everything together.
Pro kitchen tip:
To see if your meatball seasoning is right take a tiny piece and cook it in a pan on high heat. It'll only take about a minute for the little meatball to cook. Taste the test piece and adjust your seasoning as needed. For example: my meatballs where lacking salt when I tested it in the pan, so I added more to my ground turkey mixture.
Take out a sheet pan and line with parchment paper. Once you have your ground turkey seasoned, form balls with your hands and place on the baking sheet.
Heat a big pot to medium-high. Add your oil. Working in batches brown the outside of the meatballs. You're not looking to cook the meatballs all the way through, that will happen when you drop them in the soup. Right now, you just want to form a nice golden brown crust. Let each side of the meatballs touch the surface of the pan. Be careful not to burn anything or you'll create a burnt flavor in your soup. If you need to, take your pan off the heat briefly. You can continue to brown the meatballs in the indirect heat, placing the pot back on the burner as needed.
Once your meatballs are browned remove them from the pot and return them to the baking sheet. Set the meatballs aside to cool. In the same pot add your Brussels sprouts, sweet potatoes and garlic. Cook for 1-2 minutes. Splash a little bit of white wine in the pan. This is called de-glazing. The liquid will soak up all the browned bits left over from your meatballs and infuse the flavor into your vegetables.
Cook the veggies over medium heat for an additional 2-3 minutes. Now, add your chicken stock. Bring everything up to a boil. Add your meatballs back in and set the heat on low so your soup can simmer and your meatballs can cook all the way through. Cover for 10-15 minutes. After 10-15 minutes carefully taste the broth and season with salt and pepper as needed. Drop your kale in and cook for another 2 minutes. Just until the kale is wilted.
Enjoy!
Grace
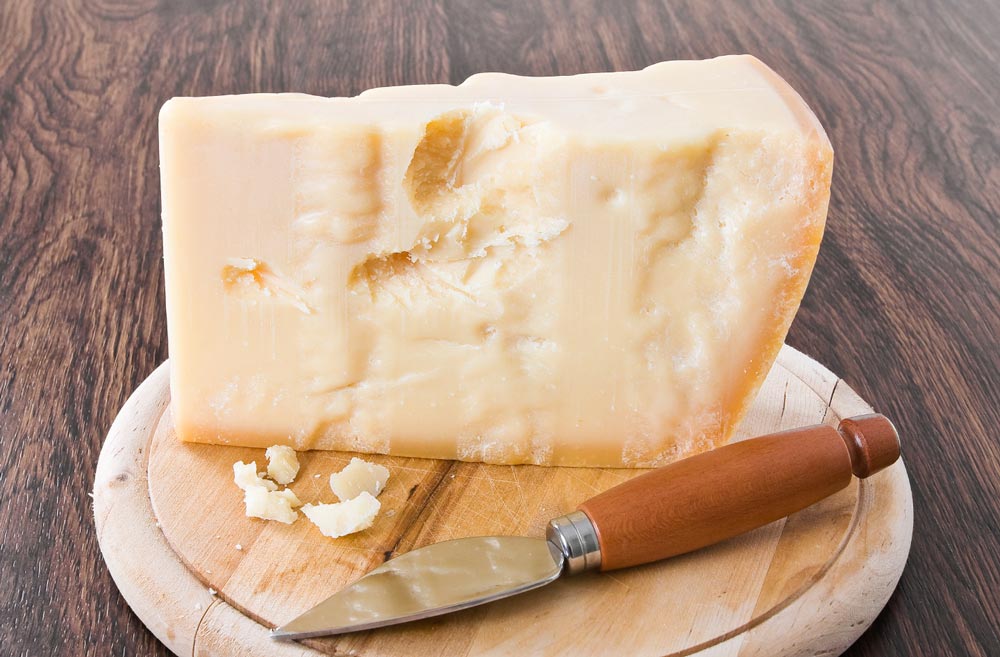
Parmesan Crust
Plan Z Phase: This is a Z3 (ZReboot) recipe.
This crust can be used with any kind of a savory dish. My first recipe using this crust was the mushroom spinach quiche. But I can see using it so many ways! Any savory casserole your family traditionally serves with a crust on the bottom can work with this. Things like pot pie come to mind. Then I also can see putting the ingredients for pizza in this crust and literally have pizza pie! Or vary what you put into the quiche and it will work great. This is going to be a super-popular recipe.
If have anyone in your family who is gluten sensitive this crust will work for them. And of course it’s super low carb. So you can have your savory pie and not gain!
Serves: Lines one deep 9” pie crust or can be used in a 10” pie or even a springform tart pan or a removable bottom tart pan.
Ingredients:
- 1 cup of super fine ground almond flour (almond meal)
- 1 cup of parmesan cheese (grated will work best)
- Pinch of salt
- 2 egg whites
Instructions:
Preheat oven to 375 degrees.
Put all ingredients in a medium bowl and stir to combine.
Grease your pan. I just used butter spray. Turn the mixture in the bowl into your greased pan. Then begin pushing the crust into the bottom and up the sides of the pan. If your fingers get sticky, just moisten them with a little bit of water and keep working until the mixture is pressed pretty evenly all around your pan. Bake the crust for 10 minutes. This will give you a partially baked crust. When you use this in a recipe that will go back in the oven, it’s set to go. Just set it aside while you make your filling and then fill it and bake. I baked my quiche for 50 minutes and the crust was a golden, crispy brown. It was startlingly good. Not soggy like other low carb crusts.
P.S. Keep in mind you could flavor this crust, too. You could add a bit of cayenne to make it spicy. You could add garlic powder. Or you could use herbs. A ½ tsp of Italian seasoning and you’d add another dimension. Use your imagination in your spice cabinet. Cajun? Tarragon for French flavor? Have at it. I can’t wait to make it again.
Enjoy!
Cheers,
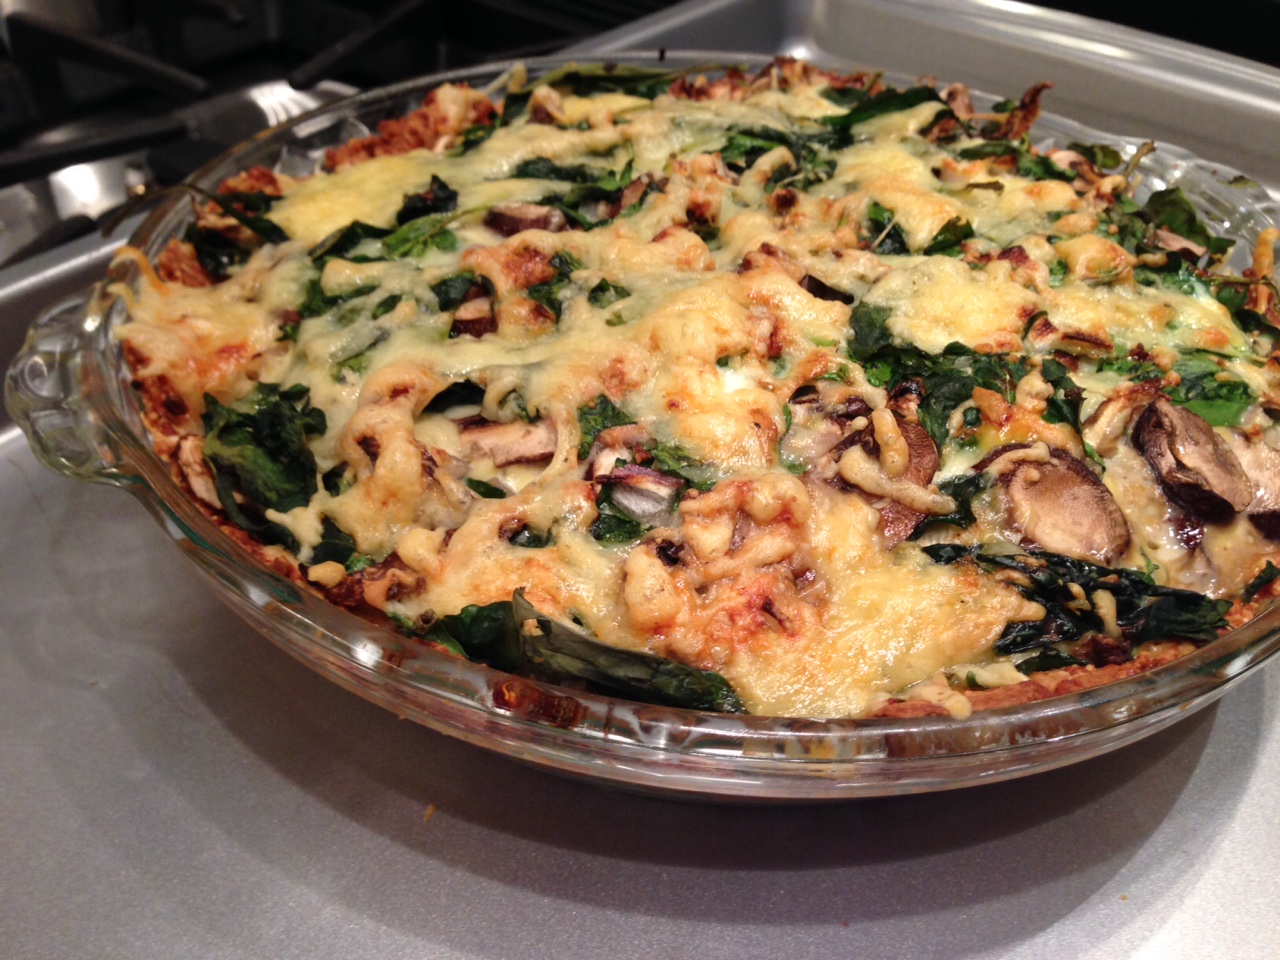
Mushroom Spinach Quiche
Plan Z Phase: This is a Z3 (ZReboot) recipe.
We had this quiche as a vegetarian entrée for a light dinner. My husband loved it so much he had it again the next morning for breakfast. You could add meat to this dish but it’s so good with the mushrooms it tastes meaty already. Be sure to use the crust recipe we recommend. The cheese lends an amazing crust crunch. You’ll never miss a wheat crust.
Servings: Serves 6
Ingredients:
- One Parmesan crust par-baked according to directions
- 4 eggs
- ¾ cup of half and half
- 1 tsp of minced garlic (jar garlic or powdered will both work)
- grated sea salt and pepper to taste
- 1/8 tsp of nutmeg
- 4 -5 ounces of baby spinach (fresh)
- 8 oz of mushrooms. I used a mix of shitake and cremini. Button will work too or any other earthy mushroom. Depends on how fancy you want to be.
- ½ cup of minced shallots
- 2 cups of shredded Swiss cheese. I went all out and bought a good Jarlsberg Swiss and grated it myself. Swiss is traditional in a quiche but you can also use Gruyere and be very French, or even mix it up and use cheddar. Pepper jack would make it a spicy quiche. Your choice.
Instructions:
Preheat your oven to 400 degrees
Whisk eggs, ½ n 1/2, garlic, sea salt, pepper and nutmeg in a bowl.
In another bowl put in the spinach, ½ of the Swiss cheese, the shallots and the mushrooms. Gently mix it up with your hands.
Now mound it on top of the crust in the pan. It will stick up above the edges. Just try to balance it in the pan so things don’t drop over the sides. Carefully pour the egg mixture over the filling. Drizzle it all around so it’s evenly distributed. Sprinkle on the remaining cheese. Place the quiche on a baking sheet in case it drizzles over.
Bake in your preheated oven until the quiche is lightly puffed and browned. 45-55 minutes at regular bake should do it. I used convection at 375 and checked the quiche at 30 minutes and put it back in for another five minutes.
You can make sure it’s done by poking in a toothpick. If it comes out clean, it’s done.
 IMPORTANT: Let the quiche sit in the pan on the counter for another 10 minutes for it to firm up. The French like their quiche runnier but I like mine to cut evenly like it is in the picture but still be very moist. You can bake it to your liking.
ALSO IMPORTANT: Before you cut it, take a very sharp knife (like a paring knife) and cut along the edge. The cheese will have hardened to a crunch factor so you need to work it away from the edge so it will cut cleanly.
OTHER ADVICE: Depending on what kind of pan you use (especially metal) you might have to cover the crust toward the end so it doesn’t get too brown. That’s part of why I check it 10-15 minutes ahead of when I think it will be completely cooked. Just in case I need to drape some foil over the top.
Enjoy!
Cheers,
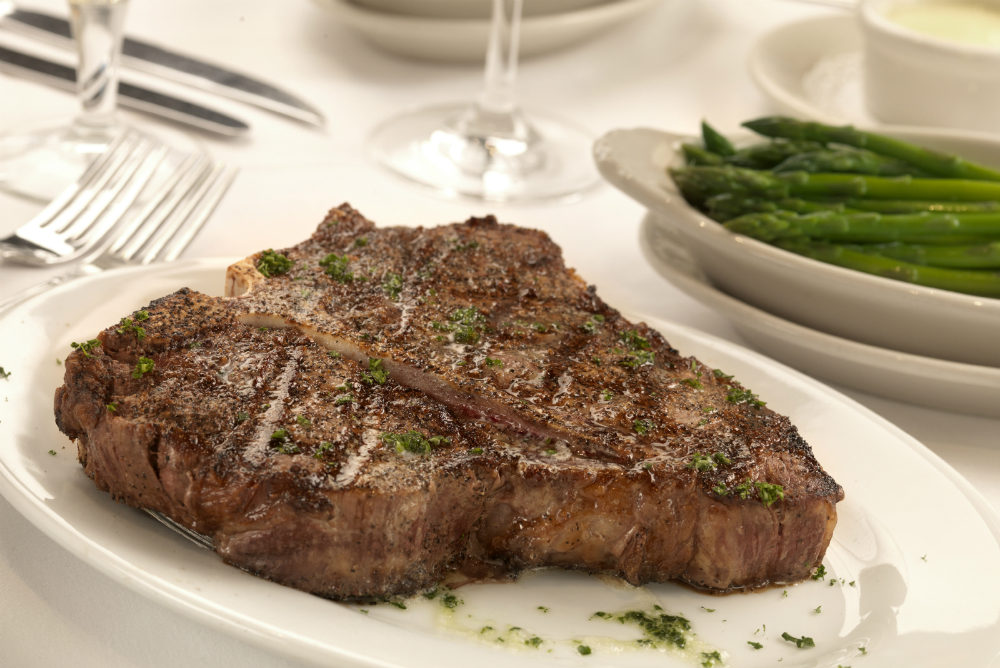
Porterhouse Primer
As one of 7 children, I didn’t eat a lot of steak as a child. There were just too many mouths to feed and we couldn’t afford it.
I do remember when most of the older kids had left home, my parents took to serving fondue on Sunday evenings. There were just 2 of us kids of steak-eating-age at the time, so we were allowed little bits of steak that we could cook in the boiling oil of the fondue pot. Truth be told, we had more chicken bits to put in the pot than we did beef cuts, but we were allowed a little bit. We knew it was a fancy deal.
Fast forward to my young adulthood. I went on a trip to New York City where I saw my first dry aged meats hanging in the famous Gallagher Steak House. That was about 40 years ago, but Gallagher’s still exists. In this picture you can see the dry aging room.

That evening I had my first T-Bone Steak. BIG YUM. I was hooked.
I have grown more fond of eating beef tenderloin now, rather than any other cut. I really think it’s because I find the tenderloin of a manageable size. If you want a hint of what tenderloin to order from your butcher, ask the butcher for 6-8 oz size and “center cut”. That’s the important bit. A center cut steak won’t have any of those strings holding wobbly bits together. A center cut steak is the most prized and comes in one piece.
Whenever I start to gain a few pounds I do a modified version of a steak day that is offered as part of Plan Z. What that means is, I eat lightly through the daytime; maybe just a salad. Then when dinner comes I have an 8 oz beef tenderloin with sides of veggies. Honestly, I wake up two pounds lighter each time I do it.
Tonight I’m cooking up my modified steak day plan and I’m going to be inventing a new porcini mushroom sauce to go with it. Truly decadent. I ate very lightly today and I’m starving so I’m ready for my steak. So very ready!
I thought you’d enjoy this little lesson on the Porterhouse steak. A porterhouse includes the tenderloin section.
There are informational pieces in this Porterhouse Primer that I didn’t even know and I’m a pretty big student of the steak. So I hope you take a look, a listen and pass it onto other steak lovers.
http://www.eater.com/2015/6/19/8813249/everything-you-need-to-know-about-americas-most-iconic-steak
Enjoy!
Cheers,
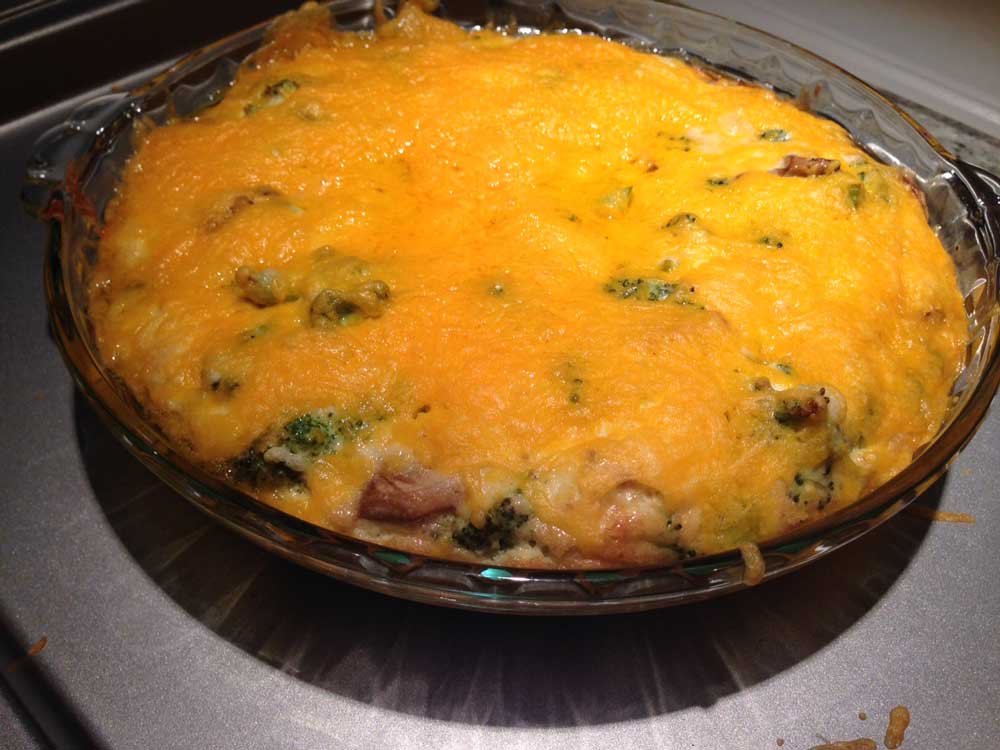
Broccoli Cheese Brunch Pie
Plan Z Phase: This is a Z3 (ZReboot) recipe.
Breakfast. Lunch. Brunch or even a light dinner. I’m calling it Brunch Pie. You can even serve this as a side dish at a family event. Even the kids who don’t like veggies will like this one. This will travel well for a pot luck item or you can take leftovers in Tupperware for your lunch.
Servings: Serves 4 as an entrée, 6 as a side dish
Ingredients:
- 2 cups of broccoli. Cut the florets into small, bite-sized pieces. You can even have some bits of the tender part of the stalk if you like. Throw away the tough parts or put into compost.
- ¼ cup of butter
- 4 ounces of sliced mushrooms chopped into bite-sized chunks
- 3 Tbl of gravy flour
- 1 cup of ½ n ½
- 3 eggs, beaten
- 2/3 cup of mayonnaise
- 3 Tbl of minced shallot
- Grated sea salt and black pepper to taste
- A whisper of nutmeg
- ½ cup of shredded cheddar cheese (This will make for a very cheesy pie. You can cut this in half if you'd like.)
Instructions:
Preheat oven to 350 degrees.
Steam the broccoli for 4 – 6 minutes until done. While that’s steaming you can saute your mushrooms in one tsp of the allotted butter. Cook until they just begin to brown. Set aside.
In a sauce pan add the rest of the butter and the flour. Melt butter and stir in the flour until you have a thick paste. Then begin to drizzle in the half n half while you are stirring with a whisk. You don’t want lumps so keep stirring while you slowly add the half n half. Cook the sauce on medium, stirring often until it thickens. Turn off heat.
In a large bowl, add the beaten eggs with the mushrooms, broccoli, shallots and the seasonings. Stir to combine.
In a high-sided pie plate (or a 9” x 9” ovenproof dish) spray in some olive oil. Then add the mixture from the bowl. Top that with the white sauce from the sauce pan. Mix it up a bit to get the sauce down in between some of the broccoli bits.
Bake at 350 for 30 minutes. Then remove the dish and top with the grated cheese. Put it back in the oven for another 10-15 minutes. Serve warm or room temperature.
Enjoy!
Cheers,
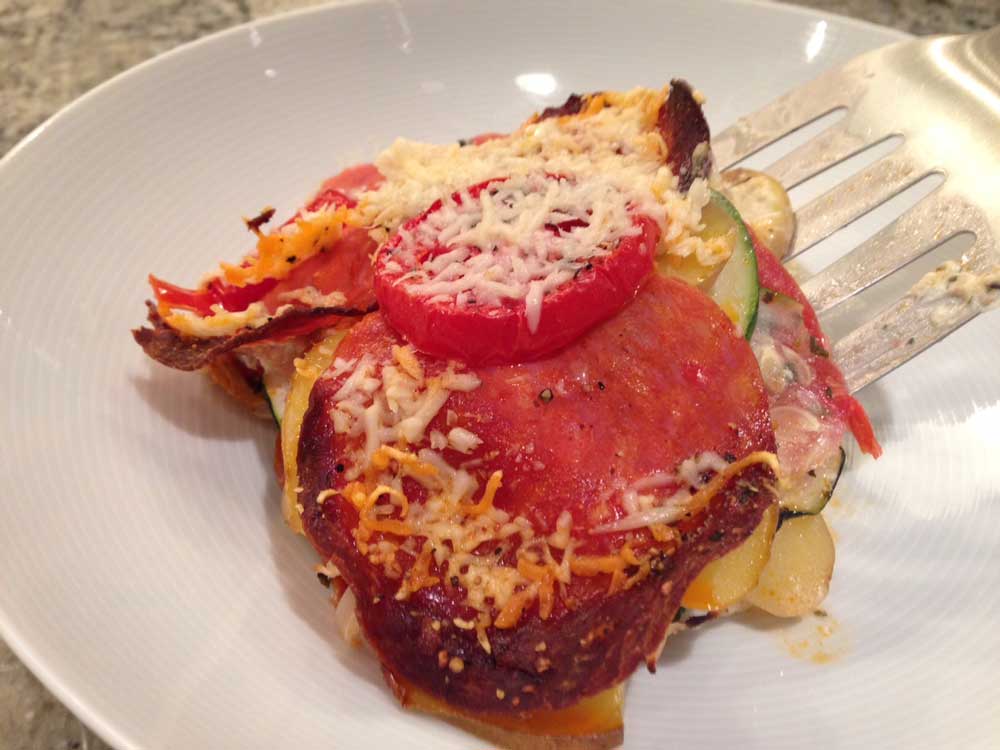
Summer Veggie Casserole with Pepperoni
Plan Z Phase: This is a Z3.5 (ZReboot 3.5) recipe.
Sometimes you get a hankering for a casserole even though it’s summer. This dish is easy to put together. The spouse or the kids can help chop and it comes together fast. You can be doing other things while your dinner bakes in the oven. Makes great leftovers, too.
I graded this a Z3.5 because it includes some potatoes. If you want to make it with no potatoes you can incorporate bell pepper strips (red, yellow and orange) and have it be extra Italian. That would make it a Z3.
Serves: 4 as an entree. 6 as a side dish.
Ingredients:
- 1-½ cups of Yukon gold potatoes cut into narrow pieces. (I used Yukon gold baby potatoes because you can usually buy them in small quantities; even by the potato. You won’t need many. Maybe 6 or 8. Fingerlings will work fine, too. That will give you 40 grams of carbs in the potatoes divided by 4 people. Not bad.)
- 1 medium zucchini (maybe 10” long)
- 4 ripe, plum tomatoes
- 1 small onion (Vidalia) or to taste. I don’t like too much onion in this dish.
- 1/3 tsp of Italian seasoning blend
- 1 package of pepperoni. You can use small pieces or the larger ones. My deli-sized pack was just perfect. It was about 20 slices. I try to get uncured pepperoni if I can.
- ½ cup of garlic and herb Allouette soft cheese. This is half of the container.
- Grated pepper to taste. This dish doesn’t need salt because of the pepperoni.
- ½ cup of grated Parmesan (or shredded)
Instructions:
Preheat oven to 400 degrees.
Get out an ovenproof pan that’s 9” x 9”. Spray the base with olive oil.
Cut all of your veggies into narrow slices. Shoot for 1/8” wide. That way they will cook evenly.
Then begin your layering. I put ½ of the slices of zucchini on the bottom. Top with a layer of potatoes. Dab half of your Alouette cheese in teaspoon blobs across the potatoes. Then top with pepperoni. You can press on the pepperoni to spread the cheese underneath. Then put on the onions and the tomato slices. Sprinkle on half of your Italian seasoning and a grate of black pepper.
Repeat the layering process with the second half of those ingredients.
Cover with aluminum foil and put in your oven. Bake, covered for 45 minutes. Then check to see if it’s done. All you need to do is poke a sharp knife in see if the potatoes are soft and the zucchini is cooked. It might need to go back in the oven for up to 15 minutes more depending on how thickly you sliced your veggies.
To finish up, remove the foil. Sprinkle on the Parmesan. Turn your broiler on and put the casserole back in to melt the cheese on top and get a bit of a brown crust. Keep an eye on your broiler so you don’t over broil the cheese.
Remove from oven. You can let it rest for a few minutes so you don’t burn your tongue when you eat it.
Enjoy!
Cheers,
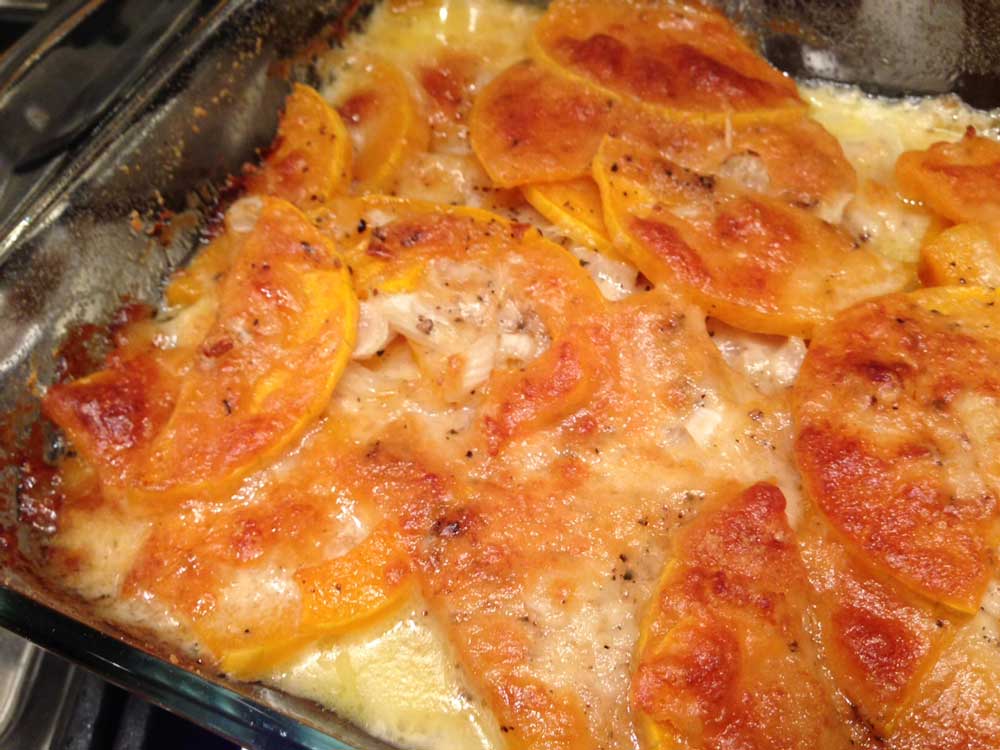
Butternut Squash Casserole
Plan Z Phase: This is a Z3 (ZReboot) recipe.
Serve this at your next family event instead of potatoes and you’ll save 30% of the carbs. This can be a vegetarian entrée or a side dish. It's SUPER yummy because as the squash bakes, it becomes sweet.
Servings: Serves 4 as an entrée or 8 as a side dish.
Ingredients:
- 2 lb. butternut squash. I try to find one about a foot long that’s fairly narrow. That will mean fewer seeds. Peel it and scoop out seeds and toss. Then slice the balance into ¼” thick slices. They don’t have to be even in size. Smallish chunks will work.
- ¾ cup of chopped onion. I use Vidalia or yellow.
- 1 – 2 Tbl of gravy flour (This flour is lighter than regular flour. This way I use less.)
- 1-1/2 cups of shredded Gruyere
- Grated sea salt and pepper to taste
- 3 Tbl of butter cut into slices less than 1/4 “ thick
- 1 cup of cream
- ¼ cup of grated Parmesan
Instructions:
Note: for step by step instructions with pictures included on how to prep the squash take a peek at the video below from our 2nd Tuesday LIVE podcast.
Here are pics of how I cut the squash:

Get out your 9" x 13" pan. Spray with cooking spray. Put in a layer of the butternut squash slices. Then sprinkle on a portion of the onion and a dusting of the flour. Add a layer of grated Gruyere. Grate on sea salt and pepper. Then do another layer the same way. You’ll probably end up with three layers total.
Dot on the butter bits. The pour the cream over the squash and top it all off with the parmesan cheese.
Cover the casserole with aluminum foil. Bake at 350 for 30 minutes. Then take off the foil and bake 60 minutes more until the squash is cooked and the cheese on top is browning. The casserole will be bubbling. It’s a good idea to let it rest 10 – 15 minutes before serving so you don’t burn your mouth.
Enjoy!
Cheers,
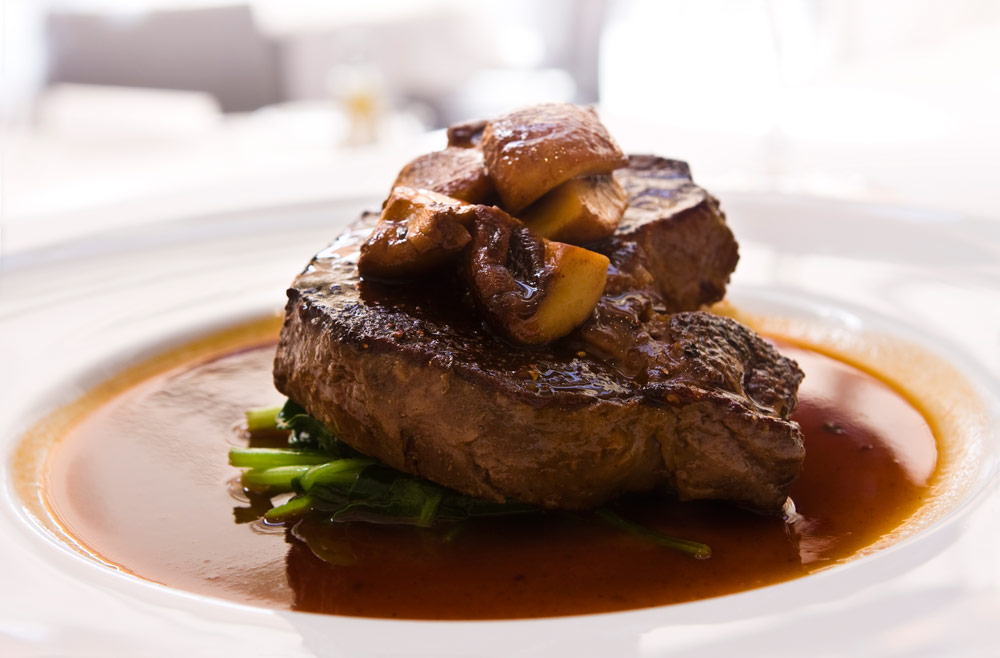
Porcini Mushroom Sauce
Plan Z Phase: This is a Z3 (ZReboot) recipe.
Porcini mushrooms are not often available fresh outside of Italy. So you’re likely to buy dried ones. Don’t worry. They will work great. Demi-glace is one of those things that usually only foodies know about, but it’s super easy to use and makes a deep-flavored sauce in a flash. They do all the work for you. You just melt it and maybe add some water. Stir and voila.
This sauce can be served on steak, chicken, roast beef or even a full-flavored fish like sea bass or halibut. A splurge for sure. Plan Z offers you comfort food and even luscious gourmet offerings.
Servings: Serves 4
Ingredients:
- 1 cup of porcini mushrooms
- ¼ cup of ruby port
- ½ cup of water
- 1 Tbl of olive oil
- 1 Tbl of butter
- 3 Tbl of finely diced shallots
- ½ cup of prepared beef or beef/veal demi-glace
- sea salt and ground black pepper (to taste)
- 2 Tbl of butter
- Whisper of cayenne (optional)
Instructions:
First thing is to prep the mushrooms. I do this early in the day. In a small bowl, just add the mushrooms with the water and port. Let them soak. If you can’t do this early in the day, you’ll need a good 30 minutes. They need to soften.
Drain the mushrooms and coarsely chop them.
In a saute pan add the olive oil and the butter. Put in your mushrooms and your shallots. Saute on medium until the shallots are loosened and the liquid begins to dissipate from the mushrooms. Stir often. Add the prepared demi-glace and stir. Mine comes as a gel so I scoop out what I need and just add water to the pan. Keep stirring til it melts. Sometimes it comes frozen with the water already in it and you might just have to thaw it. All brands are different. Just follow the instructions on the container.
Season with salt and pepper. Taste to make sure the mushrooms are done to your liking. The sauce will be glossy and fairly thick. Then turn OFF the heat. Add the rest of the butter to give it even more richness. Stir to incorporate. Decide if you want to add a whisper of cayenne. I do it just to give the flavor a bit of brightness. Not spicy heat.
Serve over your protein.
Enjoy!
Cheers,
You can also make this sauce with a variety of mushrooms. You can use shiitake, cremini, morels, portabella or any other woodsy mushroom. Even button mushrooms will work well. Or a combo.
Gobble Gobble
The avian flu outbreak across the country has already taken a toll. The price of eggs has jumped a minimum of 13% but in some places has risen as much as 50%. That’s a lot of yuk to the yoke of your budget.
The price of eggs on the wholesale level has risen, too. That affects other things you buy in the grocery story like mayonnaise or even the price of a cake mix. Anything that has eggs in it.
But it’s not likely to end there. Some expert prognosticators are looking ahead to Thanksgiving.
The early data says we will have enough turkeys. That’s step one. The next issue is what will that turkey cost? Some say that as long as gas prices and other production factors stay low, the price of a turkey won’t rise much as the holiday approaches.
Others are not so positive. Some are recommending you buy your frozen turkey now and make room for it in your freezer. Those same people are saying that the retailers are likely to take advantage of the situation and cause a media frenzy which always drives prices up - to the retailer’s advantage.
I’m not a big fan of buying a frozen turkey. I prefer a fresh one, but this whole issue got me to thinking.
I know turkey is a staple at most Thanksgiving feasts, but if we were forced to think outside the turkey barn, what might we come up with?
Besides, the whole purpose of Thanksgiving is to get together with friends and family and feast. Combine that with making an effort to be thankful for what we have, as well as those we have around us, and we have the makings for the Thanksgiving holiday.
I don’t see the word turkey in that whole last paragraph. Do you?
I’m always open to trying new things; especially when they involve food.
So if you decide to go turkey-less this year, what else might you do?
First thing I thought of was standing rib roast. My mother used to save up the budget to get a rib roast for Christmas. We didn’t have turkey. We didn’t have turkey at Easter, either. We had ham. So even a bargain-priced roast beef might be in order. Go red meat.
My next thought was to have a chili cook-off for the feast. Each family segment could bring their favorite chili recipe. You could to blind taste tests. You could have prizes. You could have a garnish-making exercise with the whole group chopping tomato, onion bits, jalapenos and more. What would you put on your chili? This might be a whole lot easier to clean up than the traditional turkey fixins.
On Christmas Day my mother often made up a big batch of sloppy Joe’s for lunchtime. We called them Spanish hamburgers. That kind of meal would be just as much fun to eat while you watch football. A change of course. Speaking of change of course, how about breakfast for dinner? So many people tell me how much they love brunch and they’d rather eat that than any other style of meal.
I’m just trying to get you to think creatively. Maybe this year you’ll do something else different for the big turkey holiday and if the clean-up is fast and easy, those of you that want to get to the mall can get there faster.
Whether you have this for your holiday meal or just a Saturday lunch, this freshly made sloppy joe is a big hit. I even eat it with no bun.
Enjoy!
Cheers,

Milk: Does It Really Do A Body Good?
Add it to the list of things that are bad for you… milk! Turns out this staple of western diets, is not something humans aren’t really designed to consume. And all those health claims on TV? Not really true! Trace explains how we’ve been duped into drinking this stuff.
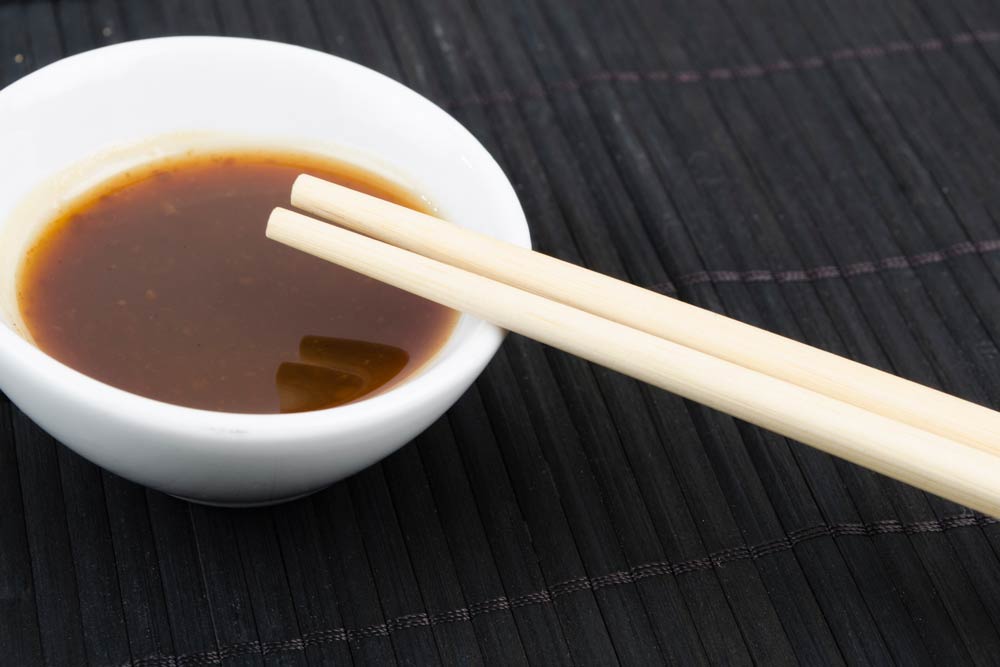
Korean BBQ Sauce
Plan Z Phase: This is a Z2 (ZReduction) recipe.
This sauce is amazing. You can use it on beef, chicken or even a steak-like fish. Swordfish comes to mind. Or Tuna. Or a pork loin chop.
Over the years I have come to a new realization in how I barbecue. I don’t put sauce on early. Instead of putting it on while grilling, I spoon it on as a drizzle when I plate the meat. By doing this I don’t gum up my grill and have a baked-on gooey mess I have to scrape off later. I don’t burn the sauce, and I can keep better control over the cooking temp on my meat. No flare ups, either!
Serving Size: 1 Tablespoon
Ingredients:
- ¾ cup of Tamari or Bragg’s Aminos
- ½ cup of Swerve or ZSweet granular (this is a sugar substitute you can buy on line or watch for it to come to your store)
- 2 Tbl minced garlic (jar garlic is fine)
- 1 Tbl of rice wine vinegar
- 1 Tbl of Sriracha sauce (or to taste)
- 1 tsp of grated fresh ginger
- 1 tsp of Asian sesame oil
- 2 tsp of corn starch
- 2 Tbl of water
Instructions:
Put all of the ingredients except the cornstarch and water in a medium sauce pan and bring it up to a low boil. Stir regularly to get the sweetener to dissolve and the sauce will be a medium thickness and a deep brown. This will only take about 5 minutes. You’ll see the bits of garlic floating around. In a small container, stir the cornstarch and water together and get the corn starch to dissolve. Then pour it into the barbecue sauce and bring to a low boil. In about 2-3 minutes the sauce will be thick and shiny. Turn off the heat. Set aside to stay warm.
Grill your meat/poultry or fish. Brush the sauce on at the end of the cooking time or do what I did and drizzle it over the meat when you serve it.
This will make about a cup of sauce so you’ll have plenty to serve on the side for a dipping sauce. In Z2, you are limited to 1 Tbl of the sauce. That will be plenty to give you the flavor profile.
Enjoy!
Cheers,
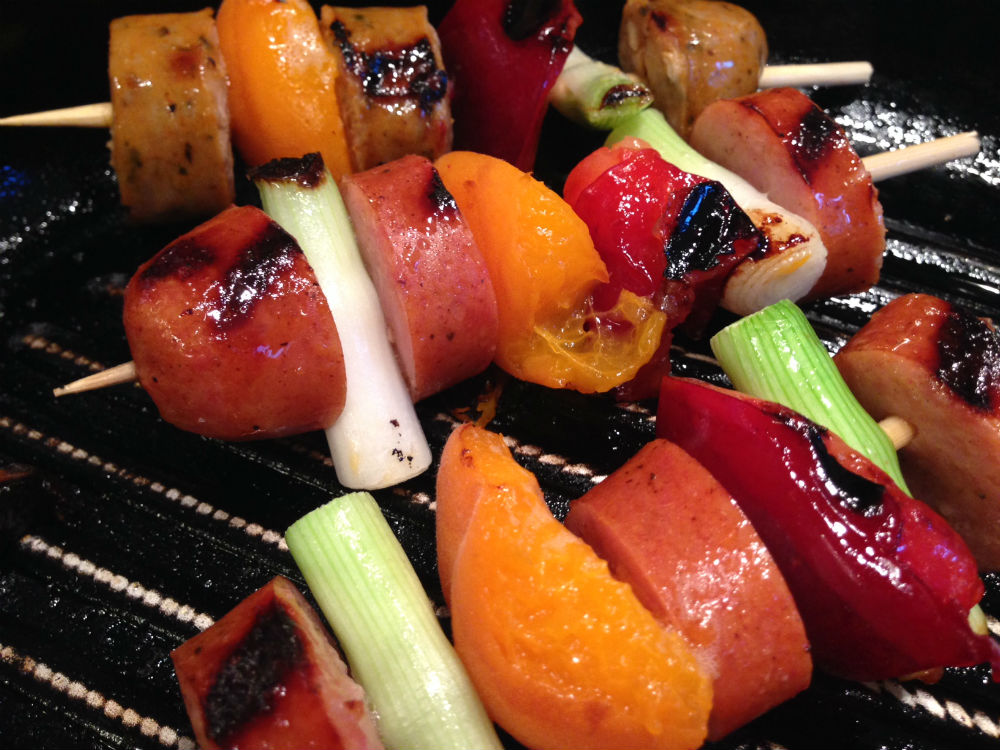
Grilled Sausage and Summer Fruit Kebabs
Plan Z Phase: This is a Z3 (ZReboot) recipe.
This meal makes for a perfect summer barbecue. The sweetness of the apricot and plums melds nicely with the delicious meatiness of the sausage. Don't be afraid! Although it sounds strange these two ingredients compliment each other wonderfully.
Servings: Serves 4 as an entrée or several more as an appetizer*
Ingredients:
- 1 foot long precooked kielbasa, cut into bite-sized chunks
- 2 other precooked sausages. I used a spicy one. Cut these into bite-sized chunks.
- 3 apricots. Remove pits and cut into bites.
- 2 ripe plums. Remove pits and cut into large cubes or chunks.
- 2 green onions cleaned and cut into bite-sized pieces
- 1 Tbl of your meat rub of choice. I used a Cajun one.
- 2 Tbl of Simply Fruit jam. I used apricot. This is a natural jam with no artificial sweetener or flavorings.
Instructions:
Preheat your grill. Soak your wooden kebab skewers so they don’t burn on the grill. 15 minutes is enough.
Alternately thread kielbasa, sausage chunks, onions, apricots, and plums onto 4 to 6 skewers. Spray with olive oil spray and then dust with your rub of choice.
Place skewers on hot grill rack. Heat for 5 minutes or until kielbasa browns and fruit chars slightly, turning skewers occasionally. All you really need to do is get them hot and get some grill markings on them. Place on a platter. Brush Simply Fruit over kielbasa and fruit. Serve
*Note. I cut skewers in half or even in thirds if I want to do appetizer-sized portions.
Enjoy!
Cheers,
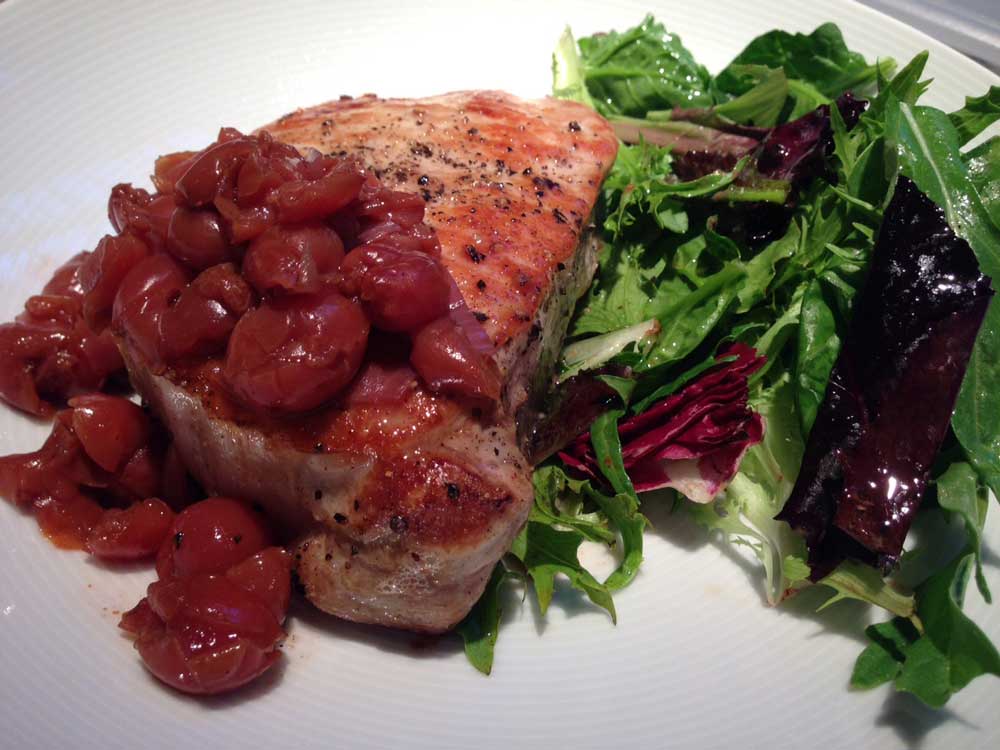
Pork Loin Chops with Sizzlin' Cherry Sauce
Plan Z Phase: This is a Z2 (ZReduction) recipe.
This dish comes together quickly. Two pans and voila. If you don’t like spicy food you can leave the cayenne out. It does give a nice little zip to the sweet cherries though so you might consider leaving it in or just cutting it back.
Servings: Serves 4
Ingredients:
- 4 pork LOIN chops. 6 – 8 oz each. Trim the fat off the sides.
- 5 Tbl of shallots, minced
- ½ cup of chicken broth (no sugar)
- 1 can (15 oz) of tart cherries packed in water. If you cannot get the ones packed in water be sure to rinse them very well, drain, and then add a ¼ cup of water to the pan to make up for the juices missing.
- A pinch of cinnamon (or to taste)
- A pinch or two of cayenne (or to taste)
- 2 tsp of balsamic vinegar
- ¼ tsp of Truvia. You can add a bit more of you like, but once you are used to less sugar in your food you won’t need it.
Instructions:
Preheat oven to 400 degrees.
For the sauce:
Spray a medium sauce pan and put in the shallots. Cook on medium just to loosen them. Add the rest of the ingredients and keep cooking on medium to meld the flavors. Toward the end I used my wooden spoon to break up some of the cherries so they made a mushier sauce. I left most of them whole though. I cooked this about 10 minutes.
For the chops:
In an ovenproof pan* (like a cast iron one), spray and set the heat on medium high. Put your chops in. Spray the tops of the chops and sprinkle on grated sea salt and pepper. Saute the one side for 3 minutes. Flip them over and season the other side. Then put them in your 400 degree oven to roast for about 15 minutes more or until your meat thermometer registers 160 degrees. That will leave them lightly pink in the middle and juicy. If you want to cook them more well-done, I’ll leave that up to you.
*If you don’t have cast iron you’ll have to take the chops out of your saute pan and put them in another oven–proof container; like Pyrex. If you don’t, you’ll ruin your pan by melting it in a very hot oven. I highly suggest you buy a cast iron saute pan. They are inexpensive, last forever and work great for dishes like this. I use mine almost every day.
Your Z2 serving of sauce is ¼ cup. This will give you a ½ size serving left for your dessert. I actually skipped dessert the first time I made this. I felt quite satisfied.
Enjoy!
Cheers,
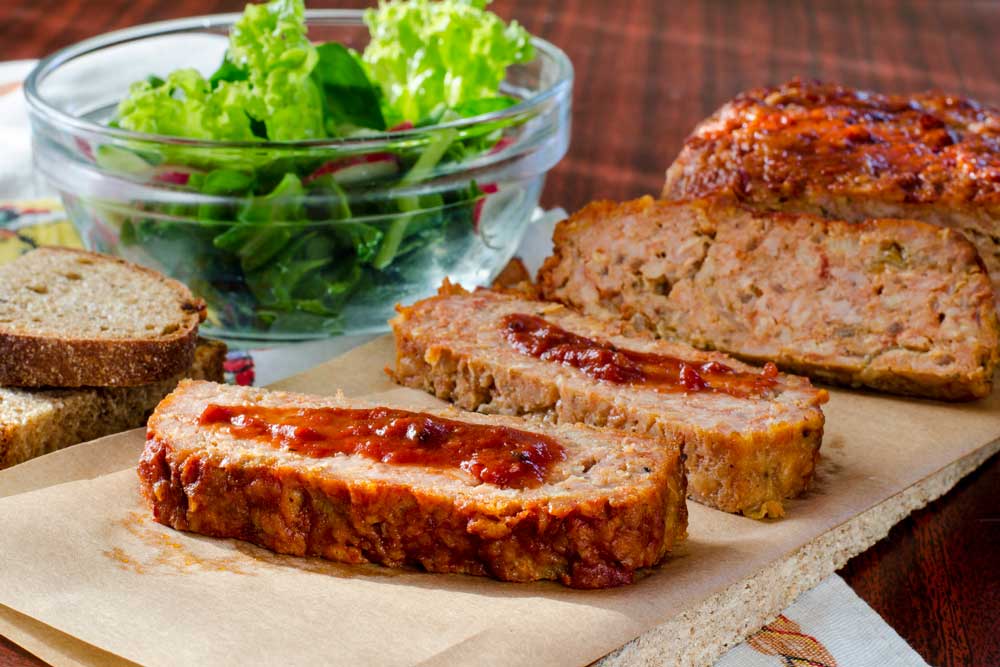
Turkey or Chicken Meatloaf
Plan Z Phase: This is a Z2 (ZReduction) recipe.
For a change of pace you can try a unique meatloaf. This one comes with an optional extra sauce in case you want to really ramp up the flavor.
The meatloaf itself was flavorful enough for me. My husband loved the spicy sauce.
You can use ground chicken breast or ground turkey breast. Most stores do not sell ground BREAST ONLY. You will have to ask the butcher to grind some for you. Whole Foods is the only store I know of that has ground chicken breast every day. Most ground chicken includes dark meat so be careful not to get that or you’ll be in “caution” because you might get too much fat and end up stalling.
Servings: Serves 4-6
Ingredients:
For the meatloaf
- 1-½ lb of ground chicken breast or turkey breast
- ¾ cup of breadcrumbs (this is half of your crunch portion so keep that in mind)
- 1 egg
- 1 small onion, diced (or you can use shallots) ½ cup total
- 1/3 cup of tomato sauce (Canned is fine. Use the rest for something else)
- 1 tsp of garlic powder
- 3 tsp of Worcestershire
- 1 tsp of celery salt
- ½ tsp of grated pepper
For the optional sauce
- 1 cup of pico de gallo
- 3 Tbl of adobo sauce (from a can of chipotle peppers in adobo sauce. Use the rest for something else. These are quite spicy).
Instructions:
Preheat oven to 350.
For the meatloaf:
Spray a loaf pan with olive oil. Mix all of the ingredients for the meatloaf in a bowl. Get in there with your hands and really mix it up. Be sure the crumbs and the egg are well incorporated. Chicken breast is gooey, for sure.
Turn the mound into the pan and form the loaf shape.
Bake at 350 degrees for 1-½ hours.
Depending on how hungry you are, one slice might be enough to satisfy you. 1” thick. My husband had two. Just don’t go over 8 ounces.
For the sauce:
Mix the ingredients together and top your meatloaf slice with it. This sauce is served cold; sort of like a salsa on top of your meatloaf portion. Whatever amount you choose to take should be subtracted from your veggie portion.
Enjoy!
Cheers,

The Party Report
I think you all know we had a big party here at Plan Z HQ. It was a Saturday night blow out. For those of you who could not make it, or would just like the live vicariously, I’m going to lay out a few of the highlights of how it all came together and how it went during the night.
I knew I was going to have about 90 people in attendance, so I started prepping for the party early. This was probably the earliest I have ever done that. On Wednesday I rearranged the furniture in the area where the buffet was going to be set up. I decided I could tolerate having that room look a bit disorganized for a few days instead of doing it at the last minute. I got out all the platters the food would be served on and placed them where they would sit during the party. I even put little notes on each platter of what was going to be served on that dish so I could visualize how the colors and textures of the food would look that night. That way anyone helping me could just put the food on the designated plate, and in that place, without having to ask me, “Where does this go?” That’s an idea I will take forward. It worked great.
I got the bar setup that night, too. My menus were all prepared in advance and I got my grocery list together 2 days ahead. I always print off any recipes I’m going to use and keep them in a folder so I have them handy or I can hand one to someone helping me cook, and they can go to town without having to handle an awkward cookbook.
Friday morning I bought all of the food and Friday afternoon my colleague Grace helped me start cooking. Grace is a culinary school graduate so that sure came in handy. I gave her two of the more complicated dishes to cook. She was able to follow the recipes and hardly had to ask me anything. I was able to concentrate and get a few other things prepped and off to the refrigerator in the garage. Because this was a summer party, almost everything we cooked was going to be served cold. I wanted to be more hostess than caterer so if the food is set out ahead I can spend more time with guests than in my kitchen.
We cooked until about 6PM Friday and took a break. We were being so efficient I didn’t need to worry. My Saturday prep list was ready to go. Saturday morning, two friends volunteered to come over and help. One was a cooking kind of guy and the other one was more of a cleaner/handyman. My husband teamed up with him and they got the front porch spotless and did all kinds of tidying up in the garden and around the house.
Allen was helping me in the kitchen. He and I knocked out the rest of the cooking along with Jennifer, and we were all done by noon. I HAD to be done by noon because that’s when the video crew and the band showed up. The band was there to set up their equipment and test their sound system. The video crew was setting up to tape 3 of our dieting celebrities. We spent the afternoon interviewing them and recording their responses. They did an amazing job. Someday I’m sure you’ll get to see some of the production. I have never had to sandwich a video production in between pre-party prep. It was a very tricky thing to try to pull off, but whew! That worked, too!
At 7PM, guests started to arrive. I hired my favorite bartender to take drink orders and my cleaning lady Coco was ready with her sister to help in the kitchen. They do a great job of walking around a party doing what we call ‘groom the room.’ They pick up empty drink glasses and dirty napkins. They keep everything tidy on the party floor. If anyone spills anything they are right there to clean it up. In the kitchen they help with any last minute food prep and they wash and dry dishes that come off of the buffet table as they are finished. There was one warm dish that had to be baked during the party so Coco and I teamed up to prep that, but otherwise I was able to circulate amongst the guests all night long.
The band started playing at 8:30. Our living area floors are poured concrete. Very industrial. I actually took sidewalk chalk and drew a dance floor border on the floor and wrote the word “DANCE” in the middle.
The serious blues fans were able to listen to the Will Tilson band at little club-style tables, and the dancers could cut loose on the floor. Those that just wanted to chat outside in the garden could still hear the band but it was quiet enough that they could carry a solid conversation.
The band was amazing. The food was delicious (even if I do say so myself!). I didn’t get to eat any of it, but the compliments kept rolling in so I think my guests liked it. If I could put sound and smell-a-vision in this column I’d give you samples of both.

I know the food was a success because we cooked enough for 110 people, we had 90 in attendance, and the food was wiped out in two hours! All I had left at the end of the night was a pile of sliced red onions that were a garnish for a little beef slider sandwich. Everything including the Peanut Butter Dream "shots" was gone. PBD is a great teeny dessert for a buffet. Buy those little plastic shot glasses at the party store. Make enough Peanut Butter Dream for the crowd and then use a little ice cream scoop to serve it in the shot glasses. I even found teeny tiny spoons that were very inexpensive at the same party store, so everyone could spoon their mini-dessert. There were also baby cupcakes, dark chocolate peanut clusters and more to have as sweet treats.
One highlight for me was the introductions time. I didn’t want to do a big Plan Z commercial or anything, but I wanted to introduce the three special people we had brought in for the party. Harry O came in from Mason City, Iowa. Biggie came from North Carolina and Alyssa came from Wisconsin. Harry has lost and kept off 175 pounds. Biggie has lost over 120 pounds and little Alyssa has lost over 255 pounds. The crowd cheered louder and louder as I introduced them.

I expected people to politely clap but I did not expect people to be jumping to their feet from where they were sitting. It was all very exciting.
I directed the audience to be able to go over to a TV where we had prepared a video show that displayed before and after pictures of dieters from all over the US and beyond. Everyone marveled at the transformations these dieters have gone through. There was no sound. It just played on a loop and the band played in the background. People were gathered around all night and smiling as they watched the show. They were genuinely happy for all involved.
The record-setting driving distance came from the Wilkinson’s. They drove all the way from North Carolina to meet me, dance at the party and generally celebrate their achievements. They have both lost considerable weight and are very proud of their accomplishment. And they should be proud. They were so happy, they did this really cute thing where they pinned “before” pictures on their outfits so everyone could see their personal transformations, too. Besides that, these folks were a hoot! I was so happy to meet them.

I think everyone had a good time. The last guests left at 2:30 AM. Another sign of a good party.
Cheers,
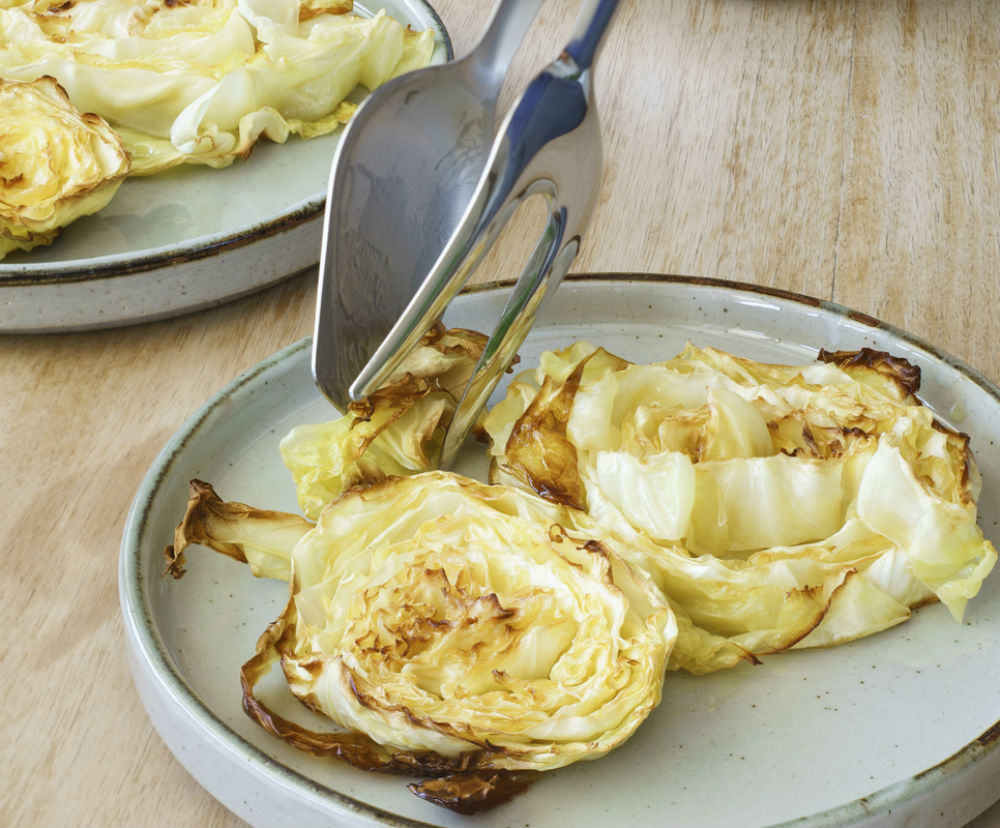
Garlic Rubbed Roasted Cabbage Steaks
Plan Z Phase: This is a Z2 (ZReduction) recipe.
If you love cabbage, you are going to freak out about how good this is. Dieter Gene found this recipe from Jana Church's Facebook Group Getting Healthy with Jana. He made these "steaks" in ZReduction and loved them so much he wanted us to share the recipe with everyone. All we can say is that if you hate cabbage this meal might convert you!
Ingredients:
- 1 (approx 2lb) head of organic green cabbage, cut into 1″ thick slices
- 1.5 tablespoons olive oil
- 2 to 3 large garlic cloves, smashed
- kosher salt
- freshly ground black pepper
- spray olive oil
Instructions:
Preheat oven to 400F and spray a baking sheet with your olive oil.
Pull outer leaf off of the cabbage (it's usually dirty and gritty) and cut the cabbage from the root to the top into 1" thick slices.
Rub both sides of the cabbage with smashed garlic.
Using a pastry brush (if you don't have a pastry brush you can use a spatula or other spreading utensil), evenly spread the olive oil over both sides of the cabbage slices.
Finally, sprinkle each side with a bit of kosher salt and freshly cracked black pepper.
Roast the cabbage slices on the middle rack of the oven for 30 minutes. Carefully flip the cabbage steaks and roast for an additional 30 minutes until the edges are brown and crispy.
Serve hot and enjoy! These make a great side dish at a dinner party or you can eat them on their own.
Cheers,
Thanks to Dieter Gene for finding this recipe!
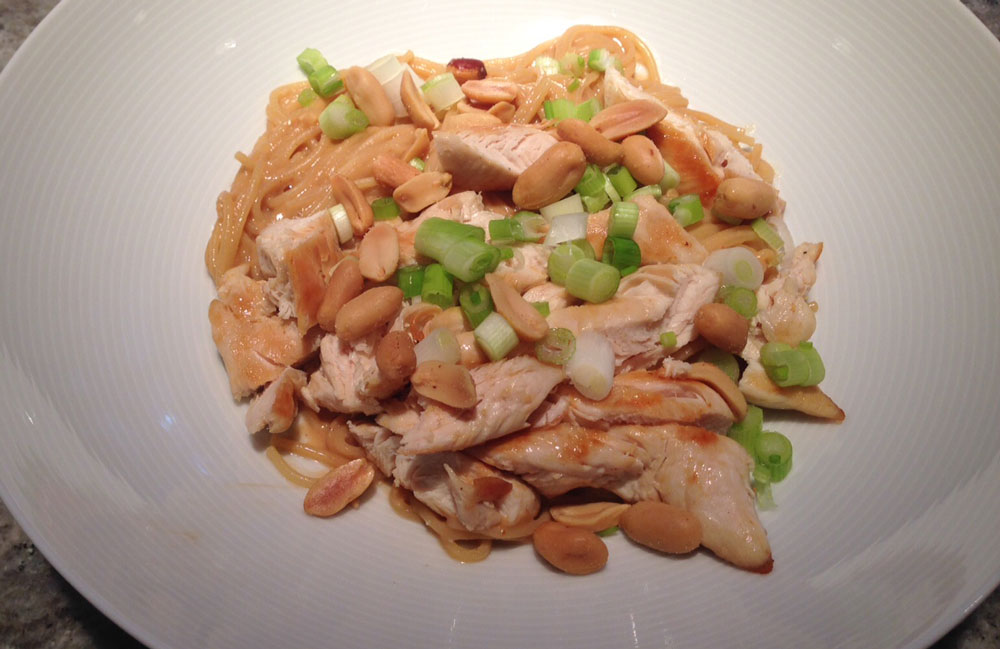
Thai Noodles with Chicken
Plan Z Phase: This is a Z3 (ZReboot) recipe.
This is one of my favorite summer dishes. I love Thai with peanut butter. Tastes so evil and yet it isn’t. You can eat this hot or cold. You can use angel hair/spaghetti as noodles. Or if you want to keep it really low carb make some zucchini noodle strings. This dish is Z3.5 with pasta and Z3 with zucchini noodles*.
Remember not to eat pasta very often and don’t eat much. I eat it about 4 times a year and my portion for this dish was only ½ cup cooked. 1 cup cooked is your max.
Servings: Serves 3 and can be easily doubled.
Ingredients:
For the Pasta:
- Angel hair, spaghetti or zucchini noodles, cooked and drained.
For the Sauce:
- 3 Tbl of Bragg’s aminos or coconut aminos
- 2 Tbl of fresh lime juice
- 4 tsp of minced garlic (jar will work fine)
- 1 tsp of ground ginger
- ¾ cup of peanut butter. Try to use the best you can find with no sugar. I use Whole Foods unsweetened peanut butter but in a pinch I have used Skippy Natural. It does have some sugar in it.
- ¼ - ½ tsp of cracked pepper flakes (or to taste)
- 1 cup of organic chicken broth
- Chicken and toppings:
- Chicken tenders. 1 package
Optional:
- Green onions, chopped and cocktail peanuts
Instructions:
Put all of the ingredients except the chicken in a medium sauce pan. Heat on medium and stir often as it melts. Use a whisk to make sure it gets all incorporated and smooth.
While that’s going on you can cook your chicken. I used my grill pan but you can use an outside grill or even just saute them on the stove. Spray your pan and put in tenders. Cook, turning every few minutes until no pink remains and they are done. Then just cut them into bite-sized bits.
When the sauce is smooth, combine it with the pasta or zucchini. Stir gently to incorporate.
Put pasta or noodles in the bottom of your bowl. Add the cooked chicken on top and garnish with green onions for color and peanuts for crunch.
Enjoy!
Cheers,

*All you have to do to get zucchini noodles is cut a zucchini with a spiral cutter and then cook them in a bit of liquid (chicken broth) to loosen them. 3 – 5 minutes, stirring often will do it. Then just cook the rest of the dish following this recipe.